Love this? Save it for later!
Share the inspiration with your friends
The holiday bake sale was in twelve hours and I’d completely forgotten. Like, completely. I was scrolling through my phone at 10 PM, pajama-clad, panic rising, staring at pictures of elaborate gingerbread houses and perfectly iced sugar cookies that other parents had probably spent all weekend on. I had a box of brownie mix in the pantry, a bag of pretzels, and a very stubborn hope that I could pull something off before the school drop-off line the next morning. Honestly, the pressure was on, and not in a fun way.
I started rummaging through cabinets, muttering to myself about time management, when my eyes landed on a bag of candy eyes leftover from Halloween. And then it hit me—those little pretzel antlers. I mean, it wasn’t a grand plan, but it was a plan. I threw the brownies together in under fifteen minutes, baked them while I prepped the decorations, and by midnight, I had a tray of the goofiest, most charming little reindeer faces staring back at me. I half-laughed, half-sighed with relief.
The next day at the bake sale, guess what sold out first? Not the fancy cookies. Not the gourmet fudge. My silly little reindeer brownie bites. A mom actually asked me for the recipe, and I had to admit it came from a moment of pure, panicked creativity. Maybe you’ve been there—scrambling for a last-minute contribution that doesn’t look like you scrambled. These Easy Reindeer Brownie Bites became my secret weapon for every holiday event after that. They’re proof that sometimes the best recipes come from the most chaotic moments.
Why You’ll Love This Recipe
Let me tell you why these little guys have become a staple in my holiday rotation. First off, they are genuinely easy. We’re talking a boxed brownie mix, people. No shame in that game. I’ve tested this with homemade brownie recipes too, and honestly, the box mix gives you that perfect fudgy texture that holds up to the toppings without crumbling apart. It’s a win for busy parents and last-minute planners alike.
- Quick & Easy: From start to finish, you’re looking at about 30 minutes. The brownies bake in 15-18 minutes, and assembly takes maybe ten. Perfect for those weeknights when you need a classroom treat or a dessert for a holiday party.
- Simple Ingredients: You probably have most of these in your pantry right now. Brownie mix, eggs, oil, pretzels, candy eyes, and red M&Ms. No special trips to a fancy baking supply store required.
- Perfect for Holiday Gatherings: These are a hit at cookie swaps, school parties, office potlucks, and family dinners. Kids love making them, and adults love eating them.
- Crowd-Pleaser: I’ve yet to meet a person who can resist a chocolate brownie with a cute face. They disappear fast, and you’ll get asked for the recipe every single time.
- Unbelievably Adorable: Let’s be honest—the visual payoff is huge for the minimal effort. They look like you spent hours, but you didn’t. That’s the kind of magic we all need during the holiday rush.
What sets these apart from other reindeer treats is the texture combo. You get the fudgy brownie, the salty crunch from the pretzels, and the sweet pop of the candy. It’s a perfect little bite. Plus, they’re kid-friendly to make. My niece helped me assemble a batch last year, and she had more fun placing the eyes than I’ve seen her have with any store-bought kit. It’s a memory-maker, not just a dessert.
What Ingredients You Will Need
This recipe uses simple, wholesome ingredients to deliver maximum cuteness and flavor without the fuss. Most of these are pantry staples, especially if you do any holiday baking. Let me walk you through what you need and why each ingredient matters.
- 1 box (18 oz) fudge brownie mix: I prefer the Ghirardelli or Duncan Hines fudge varieties. The fudge mix gives a denser, richer brownie that holds the pretzel antlers better than a cake-like mix. You want that chewy, fudgy texture.
- Eggs, oil, and water (as called for on the box): Usually 2 eggs, ⅓ cup oil, and ¼ cup water. Follow the box instructions for the fudgy option if it offers one. I always add an extra egg yolk for a slightly richer brownie that’s still firm enough to handle.
- Mini pretzel twists (about 48): These become the antlers. Look for the classic mini pretzel twists, not the sticks or the snaps. The twist shape gives that perfect antler look. I break them in half gently right at the curve to create two antler pieces per reindeer.
- Candy eyes (about 24 pairs): You can find these at any craft store or in the baking aisle at the grocery store. I use the standard 6mm or 7mm size. They stick best if you press them into the frosting while it’s still soft.
- Red M&Ms (about 24): These are the noses. The red ones are essential for the Rudolph look. If you can’t find a bag with enough reds, you can buy the holiday red and green mix and just pick out the red ones. I’ve also used red Sixlets in a pinch.
- Chocolate frosting (about ½ cup): Store-bought is fine, but I like the creamy texture of a homemade buttercream if I have time. It acts as the glue for the eyes and nose. I warm it slightly in the microwave for 10 seconds so it’s spreadable but not runny.
- Optional: Powdered sugar for dusting: This gives a snowy effect if you’re feeling fancy. Totally optional, but it photographs beautifully.
Ingredient Selection Tip: For the pretzels, go with the mini twists from Snyder’s or the store brand. They’re sturdy enough to stay intact when you break them. Avoid the thin, delicate pretzels that shatter easily. You want a clean break at the curve.
Substitution Guidance: If you need a gluten-free option, use a gluten-free brownie mix and gluten-free pretzels. They work just as well. For a dairy-free version, check that your brownie mix and frosting are dairy-free, and use dairy-free chocolate chips instead of M&Ms for the noses. The candy eyes are typically dairy-free, but always check the label.
Equipment Needed
You don’t need a fancy kitchen to pull these off. Here’s what you’ll need, along with a few tips from my own trial and error.
- Muffin tin (24-cup mini muffin tin): This is essential for getting the right size. I’ve made them in a regular muffin tin, and they’re too big—the proportions get weird, and the antlers look off. A mini muffin tin gives you that perfect two-bite size.
- Mini muffin liners (optional but recommended): I use the foil liners because they peel off easily and look festive. Paper liners work too, but they can stick. A quick spray of non-stick cooking spray inside the liners solves that problem.
- Mixing bowl and whisk: For the brownie batter. Nothing fancy.
- Small cookie scoop or tablespoon: To portion the batter evenly. I use a #60 scoop, which gives about 1 tablespoon of batter per cup. It makes the brownies uniform so they bake at the same rate.
- Piping bag or zip-top bag: For the frosting. A zip-top bag with a tiny corner snipped off works perfectly. No need to buy a piping set.
- Cooling rack: Essential for letting the brownies cool completely before frosting. If you frost them while they’re warm, the frosting melts into a mess.
- Small knife or spatula: For spreading frosting if you prefer that method over piping.
Budget-Friendly Tip: If you don’t have a mini muffin tin, you can use a regular muffin tin and just make larger reindeer. Adjust the baking time to 20-22 minutes. They’ll be more like reindeer brownie cakes, but equally adorable.
Preparation Method
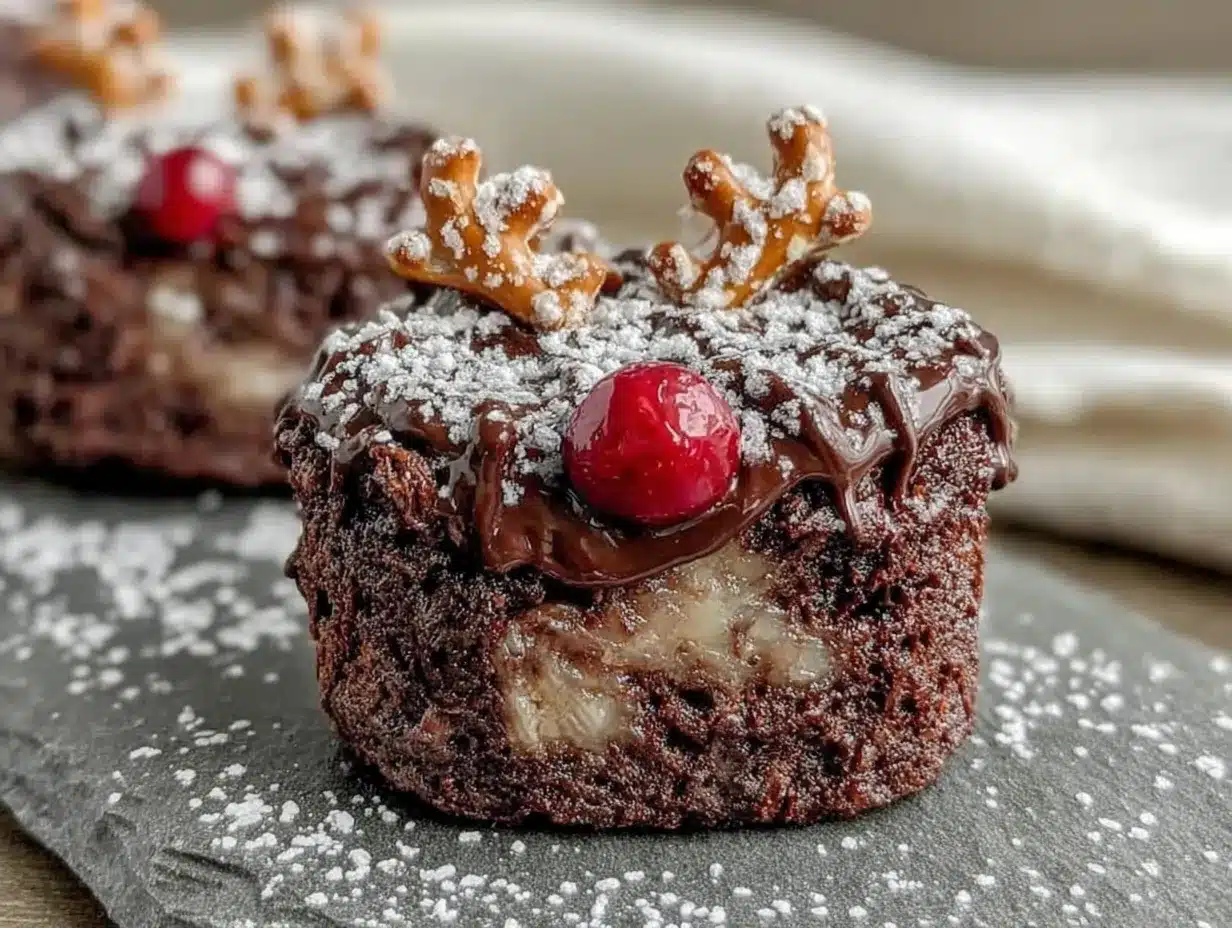
Alright, let’s get to the fun part. I’ve made these so many times that I’ve got the process down to a science. Follow these steps, and you’ll have a tray of adorable reindeer in no time.
- Preheat your oven to 350°F (175°C). Line your mini muffin tin with liners. If you’re using foil liners, you can skip the spray. If using paper, give them a quick spritz of non-stick spray.
- Prepare the brownie batter according to the box instructions for fudgy brownies. I mix mine in a large bowl—eggs, oil, water, and the mix. Stir until just combined. Overmixing can make them cakey, and you want them dense and fudgy. Let the batter rest for 2 minutes while you get your scoop ready.
- Portion the batter into the mini muffin cups. Use your cookie scoop or a tablespoon to fill each cup about ¾ full. Don’t overfill—they’ll puff up and overflow. I’ve learned this the hard way, scraping burnt brownie off the bottom of my oven. About 1 tablespoon per cup is perfect.
- Bake for 15-18 minutes. Start checking at 15 minutes. The edges should be set, and a toothpick inserted in the center should come out with a few moist crumbs. Not wet batter, but not clean either. You want them slightly underbaked for that fudgy texture. Let them cool in the pan for 5 minutes, then transfer to a cooling rack. They need to be completely cool before you decorate. Patience here—warm brownies will turn your frosting into a puddle.
- While the brownies cool, prepare your decorations. Break the mini pretzels in half at the curve. You’ll get two antler pieces from each pretzel. Set them aside. Sort out your red M&Ms and candy eyes. I like to have everything in little bowls so I can work assembly-line style.
- Once the brownies are completely cool, spoon your frosting into a piping bag or a zip-top bag. Snip a tiny corner off the bag. Pipe a small dot of frosting in the center of each brownie for the nose. Press a red M&M into the frosting, nose-side up. The frosting acts as glue.
- Pipe two small dots of frosting above the nose for the eyes. Press a candy eye into each dot. Make sure the pupils are facing forward for maximum cuteness. If they’re crooked, it just adds to the charm—they look like silly reindeer.
- For the antlers, pipe a small line of frosting on the back of each pretzel half. Press one pretzel piece into the top left side of the brownie and one into the top right side. Angle them outward like antlers. Hold each for a few seconds to make sure they stick. The frosting needs to be thick enough to hold them up.
- Repeat for all 24 brownies. If the frosting starts to get too soft, pop the piping bag in the fridge for 5 minutes. I usually work in batches of 6 to keep things manageable.
- Let the frosting set for about 10 minutes before serving or storing. If you’re dusting with powdered sugar for a snowy effect, do that right before serving so it doesn’t dissolve into the frosting.
Sensory Cue: When the brownies are done, your kitchen will smell like a bakery. The edges should be slightly crispy, and the tops will look set but still soft. If you gently press the center, it should spring back slightly.
Troubleshooting Tip: If your pretzels keep falling off, your frosting might be too thin. Whip in a bit more powdered sugar to stiffen it up. Also, make sure the brownie surface is completely dry—any moisture from steam can loosen the frosting grip.
Cooking Tips & Techniques
Over the years, I’ve made every mistake you can imagine with these. Let me save you the trouble with some hard-earned wisdom.
Don’t overbake the brownies. This is the number one mistake. Dry brownies don’t hold the decorations well, and they lose that fudgy magic. I pull them out when a toothpick comes out with a few moist crumbs. They’ll continue to cook slightly in the hot pan as they cool.
Let them cool completely. I know, I know—you’re excited. But warm brownies are a disaster for frosting. I’ve watched my carefully placed antlers slide right off because the frosting melted into a greasy puddle. Give them a full 30 minutes on the cooling rack. If you’re in a hurry, pop them in the fridge for 10 minutes after they’ve cooled to room temperature.
Work in an assembly line. Pipe all the noses first, then all the eyes, then all the antlers. It’s faster and more efficient than doing one brownie at a time. Your frosting stays fresher, and you get into a rhythm.
Use the right pretzel. I once used those thin, delicate pretzel sticks thinking they’d look like antler spikes. They snapped in half the second anyone touched them. The mini twists are sturdy and have that organic, branch-like shape that screams “reindeer.”
Store them properly. These are best eaten the day they’re made, but they’ll keep for up to 3 days in an airtight container at room temperature. Don’t refrigerate them—the brownies get hard, and the pretzels lose their crunch. If you must make them ahead, store the undecorated brownies in an airtight container and decorate the morning of your event.
Multitasking Strategy: While the brownies bake, prep your decorations. While they cool, clean up your kitchen. This way, you’re not standing around waiting, and you have a clean workspace for the fun assembly part.
Variations & Adaptations
One of the best things about this recipe is how easy it is to customize. Here are a few variations I’ve tried and loved.
Gluten-Free Version: Use a gluten-free brownie mix and gluten-free mini pretzels. I’ve tested this with King Arthur’s gluten-free mix, and the texture is spot-on. Just be gentle with the pretzels—they tend to be a bit more fragile.
Peanut Butter Reindeer: Swap the chocolate frosting for peanut butter frosting. The salty-sweet combo with the pretzels is incredible. I use a simple peanut butter buttercream: ½ cup peanut butter, ¼ cup softened butter, 1 cup powdered sugar, and 2 tablespoons milk. Pipe it on and proceed as usual.
White Chocolate Reindeer: Use white chocolate chips for the noses instead of red M&Ms. This gives them a snowy, winter-wonderland vibe. I also drizzle a little melted white chocolate over the top for a fancy finish.
Vegan Version: Use a vegan brownie mix, vegan frosting, and dairy-free chocolate chips for the noses. The candy eyes are typically vegan, but double-check. I’ve made these for a vegan potluck, and they were a hit. No one missed the dairy.
Mini Reindeer Bites: If you want an even smaller, poppable version, use a 48-cup mini muffin tin. Bake for 10-12 minutes. You’ll need smaller pretzel pieces and mini M&Ms, but the concept is the same. Perfect for kids’ parties.
My Personal Favorite Variation: Last Christmas, I made a batch with a caramel center. I pressed a soft caramel candy into the center of each brownie before baking. The caramel got all gooey and melty, and it paired beautifully with the salty pretzels. It was a happy accident—I’d run out of chocolate chips and improvised. Now I do it on purpose.
Serving & Storage Suggestions
These reindeer brownie bites are best served at room temperature. The brownies are fudgy, the pretzels are crunchy, and the frosting is perfectly soft. If you’ve refrigerated them, let them sit out for 15 minutes before serving to bring back that texture.
Presentation Ideas: Arrange them on a festive platter in a circle, with the reindeer facing outward. It looks like a herd of cute faces staring up at your guests. I like to dust the platter with a little powdered sugar to look like snow. For a holiday party, I’ve also placed them on a bed of fresh rosemary sprigs—it adds a nice green contrast and a subtle pine scent.
Complementary Dishes: These pair beautifully with a cup of hot cocoa or a peppermint mocha. For a dessert table, serve them alongside classic sugar cookies, gingerbread men, and a bowl of peppermint bark. They’re also great with a scoop of vanilla ice cream for a more indulgent dessert.
Storage Instructions: Store in an airtight container at room temperature for up to 3 days. Layer them between sheets of wax paper to prevent the pretzels from sticking together. Do not stack them more than two layers deep, or the bottom ones might get crushed.
Freezer Instructions: You can freeze the undecorated brownies for up to 3 months. Wrap them individually in plastic wrap, then place them in a freezer bag. Thaw at room temperature, then decorate as directed. The pretzels and candy don’t freeze well, so always decorate after thawing.
How Flavors Develop: Honestly, these are best fresh. The pretzels stay crunchy, and the brownie is at its fudgiest. By day two, the pretzels start to soften slightly from the moisture in the brownie. They’re still delicious, but that initial crunch is gone. If you want the best texture, make them the day you plan to serve them.
Nutritional Information & Benefits
Let’s be real—these are a treat, not a health food. But here’s the breakdown per brownie bite (based on 24 servings):
- Calories: Approximately 150-180 calories per bite
- Total Fat: 7-9g
- Saturated Fat: 2-3g
- Carbohydrates: 22-25g
- Sugar: 15-18g
- Protein: 2-3g
- Sodium: 150-200mg
Health Benefits of Key Ingredients: The dark chocolate in the brownie mix contains antioxidants called flavonoids, which are good for heart health. The pretzels provide a small amount of iron and B vitamins. And hey, the laughter and joy these bring? That’s good for the soul. Everything in moderation, right?
Dietary Considerations: This recipe contains gluten, dairy, eggs, and soy (from the brownie mix). It is nut-free if you use a nut-free brownie mix and frosting. For those with peanut allergies, be careful with the peanut butter variation. Always check labels on candy eyes and M&Ms for potential cross-contamination warnings.
Personal Wellness Perspective: I believe in balance. These are a holiday indulgence, not an everyday snack. They’re perfect for special occasions when you want something fun and festive. I don’t stress about the sugar content during the holidays—I focus on the memories and the joy of sharing food with people I love.
Conclusion
These Easy Reindeer Brownie Bites have saved me more times than I can count. From last-minute school events to holiday parties where I needed a showstopper, they’ve never let me down. They’re proof that you don’t need fancy skills or hours of time to create something that brings people joy. Honestly, the slightly imperfect ones are the best—the ones with the crooked eyes and the lopsided antlers. They have character.
I hope you give these a try, whether you’re in a panic like I was or just looking for a fun project to do with the kids. Don’t be afraid to make them your own. Swap the colors, try different candies, make them vegan or gluten-free. The basic idea is so forgiving. And when you bring them to your next gathering, watch how fast they disappear. There’s something magical about a dessert that makes people smile before they even take a bite.
I’d love to hear how yours turn out! Drop a comment below and tell me about your decorating adventures. Did your kids help? Did you invent a new variation? Share a photo on Pinterest and tag me—I’m always looking for inspiration. And if you’re in a rush next holiday season, remember: brownie mix, pretzels, and a little creativity can save the day. Happy baking, friends!
Frequently Asked Questions
Can I use homemade brownie mix instead of boxed?
Absolutely! I’ve done it both ways. If you use a homemade recipe, just make sure it’s a fudgy brownie, not a cakey one. The fudgy texture holds the decorations better. My go-to homemade version uses melted butter and cocoa powder for that dense, rich texture.
How far in advance can I make these?
You can bake the brownies up to 3 days in advance and store them in an airtight container at room temperature. Decorate them the day you plan to serve them for the best texture. The pretzels will soften over time, so fresh decoration is key.
My pretzels keep falling off. What am I doing wrong?
This usually happens for two reasons: your frosting is too thin, or the brownie surface is still warm/moist. Make sure the brownies are completely cool. Whip a bit more powdered sugar into your frosting to thicken it. You want it stiff enough to hold the pretzel upright.
Can I use other candies for the noses?
Of course! Red Sixlets, cinnamon imperials, or even a dab of red frosting work great. I’ve used raspberry-flavored chocolate candies before, and they added a nice fruity note. Just make sure whatever you use is roughly the same size as an M&M for proportion.
How do I transport these without messing them up?
I place them in a single layer in a shallow, lidded container. If I’m stacking, I put a sheet of wax paper between layers and only go two layers deep. For extra security, I’ve used a mini muffin tin with a lid—the cups keep each brownie in place. Avoid using a deep container where they might slide around.
Pin This Recipe!
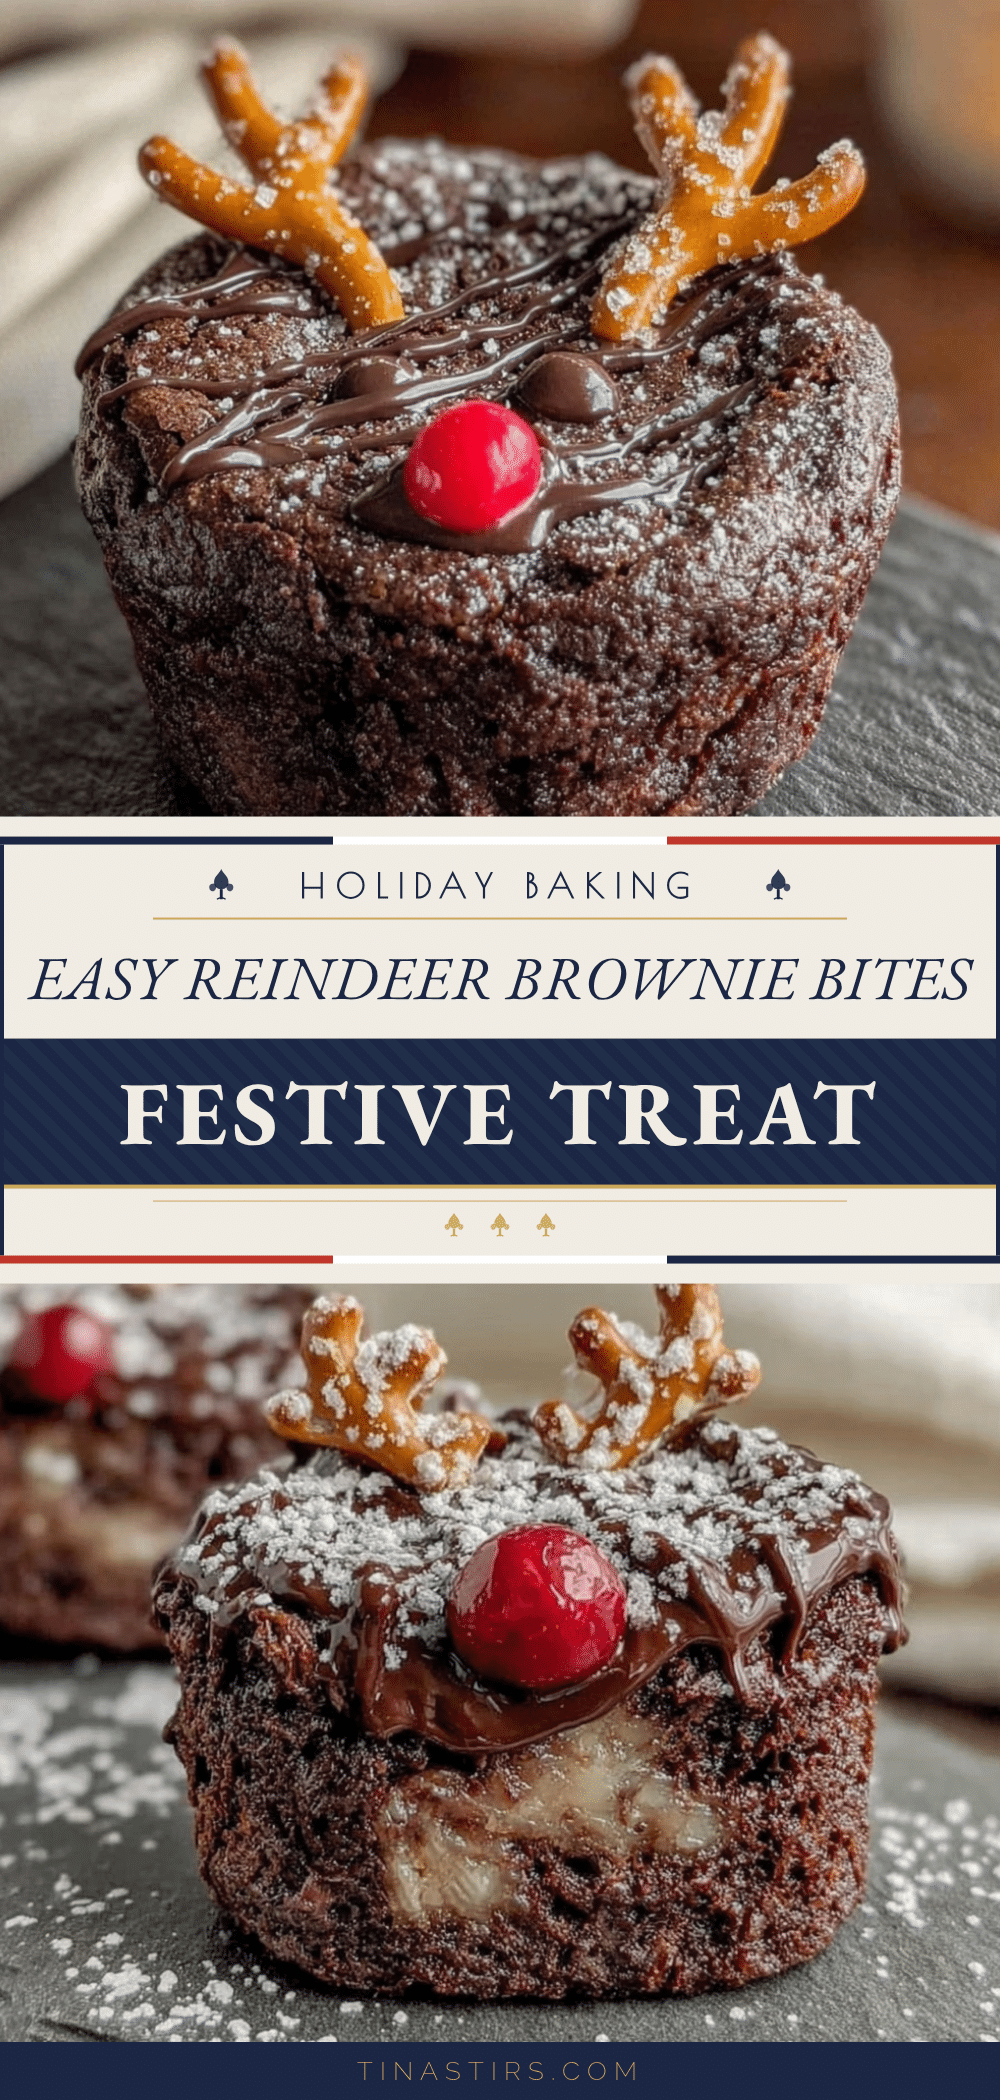
Easy Reindeer Brownie Bites: The Best Festive Treat
These Easy Reindeer Brownie Bites are the perfect last-minute holiday treat made with a boxed brownie mix, pretzel antlers, candy eyes, and red M&M noses. They’re quick, adorable, and always a hit at parties and bake sales.
- Prep Time: 15 minutes
- Cook Time: 18 minutes
- Total Time: 33 minutes
- Yield: 24 servings 1x
- Category: Dessert
- Cuisine: American
Ingredients
- 1 box (18 oz) fudge brownie mix
- Eggs, oil, and water (as called for on the box, typically 2 eggs, 1/3 cup oil, 1/4 cup water)
- 1 extra egg yolk (optional, for richer brownies)
- 48 mini pretzel twists
- 24 pairs candy eyes (6mm or 7mm)
- 24 red M&Ms
- 1/2 cup chocolate frosting (store-bought or homemade)
- Powdered sugar for dusting (optional)
Instructions
- Preheat oven to 350°F (175°C). Line a 24-cup mini muffin tin with liners (foil recommended; spray paper liners with non-stick spray).
- Prepare brownie batter according to box instructions for fudgy brownies, adding the extra egg yolk if desired. Mix until just combined; do not overmix. Let batter rest for 2 minutes.
- Portion batter into muffin cups using a small cookie scoop or tablespoon, filling each cup about 3/4 full (about 1 tablespoon per cup).
- Bake for 15-18 minutes, until edges are set and a toothpick inserted in center comes out with a few moist crumbs. Cool in pan for 5 minutes, then transfer to a cooling rack. Cool completely before decorating.
- While brownies cool, prepare decorations: break mini pretzels in half at the curve to create antler pieces. Sort red M&Ms and candy eyes into small bowls.
- Once brownies are completely cool, spoon frosting into a piping bag or zip-top bag. Snip a tiny corner off the bag.
- Pipe a small dot of frosting in the center of each brownie for the nose. Press a red M&M into the frosting, nose-side up.
- Pipe two small dots of frosting above the nose for the eyes. Press a candy eye into each dot, pupils facing forward.
- For antlers, pipe a small line of frosting on the back of each pretzel half. Press one pretzel piece into the top left side of the brownie and one into the top right side, angling outward. Hold for a few seconds to secure.
- Repeat for all 24 brownies. If frosting becomes too soft, refrigerate piping bag for 5 minutes.
- Let frosting set for about 10 minutes before serving. Dust with powdered sugar for a snowy effect just before serving, if desired.
Notes
For best results, use fudge brownie mix for a dense texture that holds decorations well. Ensure brownies are completely cool before frosting to prevent melting. Work in an assembly line for efficiency. Store in an airtight container at room temperature for up to 3 days; best eaten the day they’re made. For gluten-free, use gluten-free brownie mix and pretzels. For dairy-free, use dairy-free brownie mix, frosting, and chocolate chips instead of M&Ms.
Nutrition
- Serving Size: 1 brownie bite
- Calories: 165
- Sugar: 16
- Sodium: 175
- Fat: 8
- Saturated Fat: 2.5
- Carbohydrates: 23
- Fiber: 1
- Protein: 2.5
Keywords: reindeer brownie bites, holiday treats, easy Christmas dessert, last-minute holiday recipe, kid-friendly dessert, brownie bites, reindeer dessert


