Love this? Save it for later!
Share the inspiration with your friends
My aunt claimed she hated cream cheese desserts. For years, that was just a fact of family life—like how Uncle Joe always fell asleep during football games or how my cousin refused to eat anything green. Cream cheese cheesecake? No thanks. Cream cheese frosting? She’d scrape it off and leave it on the plate like some kind of culinary crime scene. Then last December, I caught her standing in front of my open refrigerator at 11 PM, eating this cherry cream cheese dessert straight from the dish with a soup spoon. She didn’t even bother pretending when I walked in. Just looked at me with those guilty eyes and said, “Well, this is different.”
Honestly, I wasn’t even surprised. This recipe has that effect on people. I’d spent the afternoon layering sweet cherry filling with that tangy, velvety cream cheese mixture, thinking about how winter nights call for something that feels both indulgent and comforting. The snow was piling up outside my kitchen window, and I wanted a dessert that matched that quiet, cozy feeling—something you could eat while curled up under a blanket, watching the snow fall. Maybe you’ve been there, standing in your own kitchen, wondering what to make that feels special but doesn’t require hours of fussing.
The thing about this dessert is that it doesn’t try too hard. It’s not pretending to be fancy or complicated. It’s just honest, simple ingredients that somehow come together to create something you’ll think about for days. I’ve made it for holiday dinners, random Tuesday nights, and everything in between. Every single time, someone asks for the recipe. And every single time, I watch someone who thought they knew what they liked discover something new. That’s the magic of this cozy cherry cream cheese dessert—it changes minds without even trying.
Why You’ll Love This Recipe
Let me tell you why this recipe has earned a permanent spot in my winter rotation. I’ve tested it more times than I can count, tweaked the ratios, tried different cherry fillings, and even brought it to a nutritionist friend who gave it her stamp of approval. This is the version that works every single time.
- Quick & Easy : Comes together in about 20 minutes of active prep time. The hardest part is waiting for it to chill. Perfect for those evenings when you want something special but don’t have hours to spend in the kitchen.
- Simple Ingredients : You probably have most of these in your kitchen right now. No fancy grocery trips or specialty stores required. Just basic baking staples and a can of cherry pie filling.
- Perfect for Winter Nights : This is the dessert you want when it’s freezing outside and all you want to do is stay warm. It’s cozy, comforting, and feels like a hug in a bowl.
- Crowd-Pleaser : I’ve served this at family gatherings, potlucks, and casual dinners. It disappears fast. Kids love the sweet cherry layer, and adults appreciate that it’s not overly sugary.
- Unbelievably Delicious : The contrast between the tangy cream cheese layer and the sweet cherry topping is absolutely perfect. It’s creamy, fruity, and completely satisfying.
What makes this cherry cream cheese dessert different from other no-bake recipes is the texture. I spent weeks perfecting the cream cheese mixture so it’s smooth and luscious without being too heavy. The secret is letting the cream cheese come to room temperature and beating it until it’s truly fluffy—not just mixed. That extra minute of beating makes all the difference.
This isn’t just another layered dessert. It’s the kind that makes you close your eyes after the first bite. It’s comfort food reimagined—simpler, faster, but with the same soul-soothing satisfaction. Perfect for impressing guests without stress, or turning a quiet winter evening into something memorable.
What Ingredients You Will Need
This recipe uses simple, wholesome ingredients to deliver bold flavor and satisfying texture without the fuss. Most of these are pantry staples, which makes this dessert perfect for spontaneous cravings.
- Graham cracker crumbs – 2 cups (about 16 full sheets, crushed). I prefer Honey Maid brand for consistent texture. You can also use digestive biscuits or vanilla wafers for a different flavor profile.
- Unsalted butter – ½ cup (1 stick), melted. Using unsalted butter lets you control the salt level. If you only have salted butter, reduce the added salt by half.
- Granulated sugar – ¼ cup, for the crust. This adds just enough sweetness to balance the buttery graham crackers.
- Cream cheese – 16 ounces (two 8-ounce blocks), softened to room temperature. Philadelphia cream cheese gives the best results—it’s consistently creamy and blends smoothly. Let it sit on the counter for at least 30 minutes before starting.
- Powdered sugar – 1 cup, sifted if lumpy. This sweetens the cream cheese layer without making it grainy. Sifting prevents those annoying little lumps that won’t beat out.
- Vanilla extract – 1 teaspoon. Pure vanilla extract adds warmth and depth. I use Nielsen-Massey Madagascar vanilla for its rich flavor.
- Heavy whipping cream – 1 cup, cold. This makes the cream cheese layer light and fluffy instead of dense. Keep it refrigerated until you’re ready to whip it.
- Cherry pie filling – 1 can (21 ounces). I recommend Lucky Leaf or Comstock brands. They have a good balance of cherries to syrup without being too runny. For a fresher taste, you can use homemade cherry compote.
- Optional toppings – Chocolate shavings, chopped nuts, or fresh mint leaves for garnish. These add visual appeal and extra flavor dimensions.
Ingredient tips: For the best texture, make sure your cream cheese is truly at room temperature. Cold cream cheese will leave lumps that never fully disappear. If you’re in a hurry, cut the cream cheese into small cubes and let it sit for 15 minutes. For a lighter version, you can use reduced-fat cream cheese, but the texture won’t be quite as rich. The cherry pie filling can be swapped with blueberry, strawberry, or apple pie filling depending on the season or what you have on hand.
Substitution guidance: For a gluten-free option, use gluten-free graham crackers or crushed gluten-free cookies. For a dairy-free version, use dairy-free cream cheese and coconut cream instead of heavy whipping cream. The flavor will change slightly, but it’s still delicious. If you don’t have graham crackers, crushed shortbread cookies or vanilla wafers work beautifully.
Equipment Needed
You don’t need a fancy kitchen to make this cherry cream cheese dessert. Here’s what you’ll need:
- 9×13-inch baking dish – This is the perfect size for this recipe. I use a glass dish because it lets me see the beautiful layers. A metal pan works too, just make sure it’s at least 2 inches deep.
- Mixing bowls – You’ll need a medium bowl for the crust and a large bowl for the cream cheese mixture. I prefer stainless steel bowls because they stay cool, which helps when whipping cream.
- Electric hand mixer or stand mixer – While you could mix by hand, an electric mixer makes the cream cheese layer much smoother and fluffier. I’ve made this with both, and the stand mixer gives the best texture.
- Plastic wrap or foil – For covering the dish while it chills. Make sure it’s tight so the dessert doesn’t absorb any fridge odors.
- Measuring cups and spoons – Precise measurements matter for the crust and cream cheese layer. I recommend using dry measuring cups for the graham cracker crumbs.
- Rolling pin or food processor – For crushing graham crackers. A food processor gives the most consistent crumbs, but a rolling pin and a zip-top bag work just fine. There’s something satisfying about smashing them yourself.
Budget-friendly tip: If you don’t have a food processor, place the graham crackers in a large zip-top bag, seal it, and crush them with a rolling pin or even a heavy skillet. It takes a few minutes longer, but it’s free and honestly kind of therapeutic.
Preparation Method
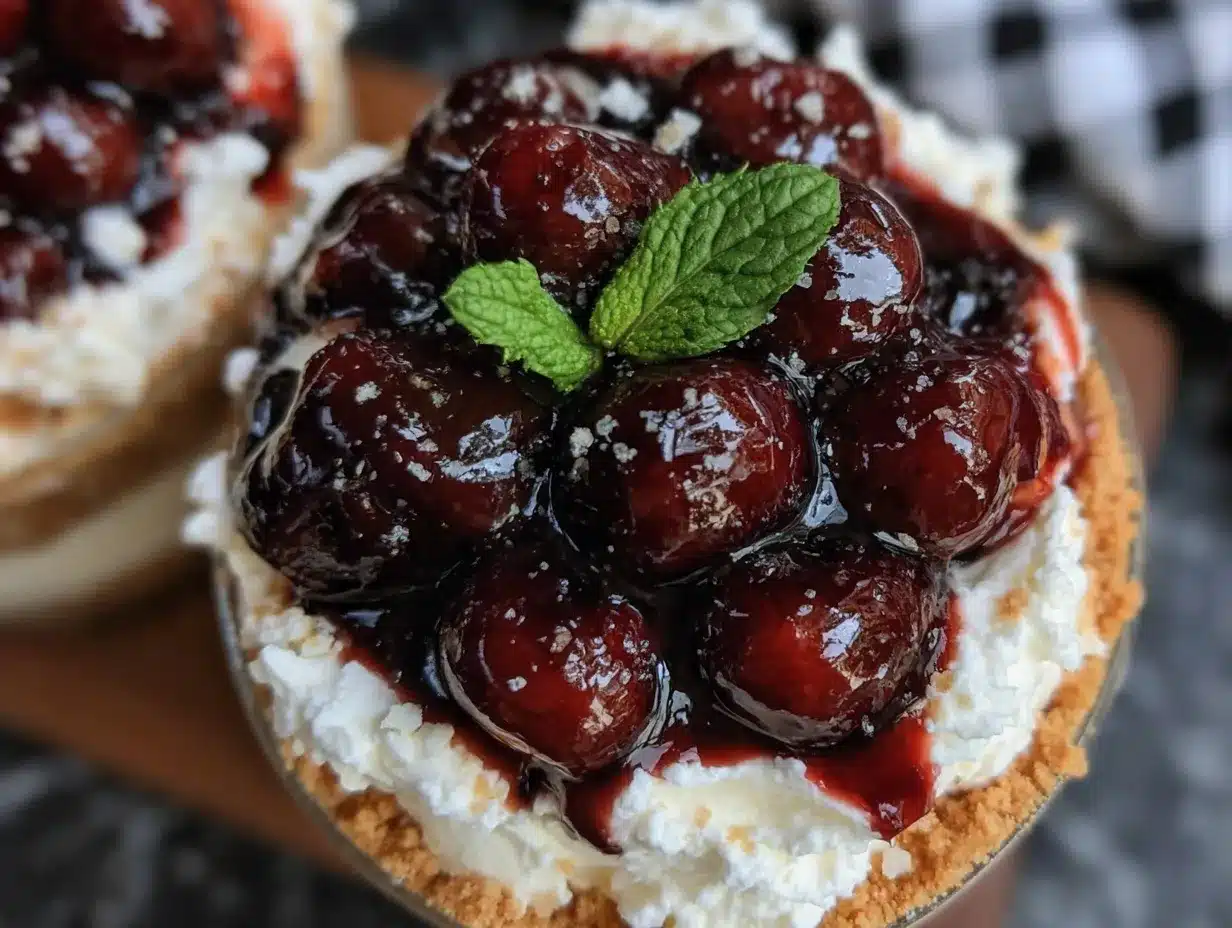
Let me walk you through this step by step. I’ve made this cherry cream cheese dessert more times than I can count, so I know exactly where things can go wrong and how to fix them.
Step 1: Make the crust. In a medium bowl, combine 2 cups graham cracker crumbs, ¼ cup granulated sugar, and ½ cup melted unsalted butter. Stir until the mixture looks like wet sand and holds together when you squeeze it. If it’s too dry, add another tablespoon of melted butter. If it’s too wet, add a few more cracker crumbs. Press the mixture firmly into the bottom of your 9×13-inch baking dish. I use the bottom of a measuring cup to press it down evenly. Pop it in the refrigerator while you make the filling. (About 10 minutes)
Step 2: Whip the cream. In a large mixing bowl, pour 1 cup cold heavy whipping cream. Using an electric mixer on medium-high speed, whip the cream until stiff peaks form. This takes about 3-4 minutes. You’ll know it’s ready when you lift the beaters and the cream stands up in peaks that don’t flop over. Be careful not to overwhip, or you’ll end up with butter. Set the whipped cream aside in the refrigerator.
Step 3: Beat the cream cheese. In another large bowl, beat 16 ounces softened cream cheese with an electric mixer on medium speed until it’s completely smooth and fluffy. This takes about 2-3 minutes. Scrape down the sides of the bowl halfway through. If you see any lumps, keep beating. This step is crucial for a silky texture.
Step 4: Add the sugar and vanilla. With the mixer on low speed, gradually add 1 cup powdered sugar and 1 teaspoon vanilla extract. Beat until everything is combined and smooth. Scrape the bowl again to make sure there are no hidden sugar pockets. The mixture should be thick and creamy at this point.
Step 5: Fold in the whipped cream. Take the whipped cream out of the refrigerator. Using a rubber spatula, gently fold the whipped cream into the cream cheese mixture. Start with about a third of the whipped cream, folding until just combined, then add the rest. Fold gently—you want to keep as much air in the mixture as possible. This is what makes the filling light and mousse-like. Stop when you can’t see any white streaks.
Step 6: Assemble the layers. Spread the cream cheese mixture evenly over the chilled crust. Use an offset spatula or the back of a spoon to smooth it out. Make sure it reaches all the corners. Then, carefully spoon the cherry pie filling over the top. Spread it gently so it doesn’t mix into the cream cheese layer. You want distinct layers for the prettiest presentation.
Step 7: Chill and set. Cover the dish with plastic wrap or foil and refrigerate for at least 4 hours, but overnight is better. I know it’s hard to wait, but this step is non-negotiable. The dessert needs time to firm up so you can cut clean slices. I’ve made the mistake of rushing it, and the slices just fall apart.
Step 8: Serve and enjoy. When you’re ready to serve, cut the dessert into squares. Use a sharp knife and wipe it clean between cuts for neat edges. Serve cold, straight from the refrigerator. The contrast between the cold, creamy filling and the sweet cherry topping is absolutely perfect.
Cooking Tips & Techniques
After making this cherry cream cheese dessert more times than I care to admit, I’ve collected some tips that will save you from my mistakes.
Room temperature cream cheese is non-negotiable. I learned this the hard way. Cold cream cheese doesn’t blend smoothly, and you’ll end up with little lumps in your filling that never go away. Take it out of the refrigerator at least 30 minutes before you start. If you forget, cut it into small cubes and microwave it for 10 seconds at a time until it’s soft but not warm.
Don’t skip the crust pressing step. Press the graham cracker mixture firmly into the pan. If it’s too loose, it will crumble when you try to serve the dessert. I use the bottom of a measuring cup to press it down evenly. Take your time with this step—it’s worth it.
Whip the cream to stiff peaks. Soft peaks won’t hold up in the filling, and your dessert will be runny. When you lift the beaters, the cream should stand up straight without drooping. If you’re unsure, err on the side of slightly stiffer rather than softer.
Fold, don’t stir. When combining the whipped cream with the cream cheese mixture, use a gentle folding motion. Stirring vigorously will deflate the whipped cream and make the filling dense. Think of it like handling a cloud—be gentle.
Chill time matters. Four hours is the minimum, but overnight is ideal. The dessert needs time to set properly so you can cut clean slices. I usually make it the day before I plan to serve it. The flavors also meld together beautifully overnight.
One mistake I made: The first time I made this, I used warm cherry pie filling straight from the stove. It melted the cream cheese layer and created a pink, swirly mess. Always let the cherry filling cool completely before spreading it over the cream cheese layer. If you’re using canned filling straight from the pantry, it’s already room temperature, so you’re good.
Variations & Adaptations
One of the best things about this cherry cream cheese dessert is how easy it is to customize. Here are some variations I’ve tried and loved:
Chocolate cherry version: Add ¼ cup cocoa powder to the graham cracker crust for a chocolate twist. You can also drizzle melted chocolate over the top before serving. The combination of chocolate and cherry is a classic for a reason.
Nutty crunch: Mix ½ cup chopped pecans or walnuts into the crust mixture before pressing it into the pan. The nuts add a wonderful crunch and earthy flavor that complements the sweet cherry topping. I made this for Thanksgiving one year, and it was a hit.
Lighter version: Use reduced-fat cream cheese and light whipped topping instead of heavy cream. The texture will be slightly less rich, but it’s still delicious. I’ve made this for friends who are watching their calories, and they didn’t even notice the difference.
Seasonal fruit swaps: In the summer, try using fresh strawberry or blueberry topping instead of cherry. In the fall, apple or pumpkin pie filling works beautifully. The cream cheese layer is versatile enough to pair with almost any fruit.
Individual servings: Instead of making one large dessert, layer the crust, cream cheese filling, and cherry topping in small mason jars or dessert cups. These are perfect for parties or portion control. Plus, they look adorable.
Gluten-free adaptation: Use gluten-free graham crackers or crushed gluten-free cookies for the crust. I’ve tested this with Schär brand graham crackers, and the texture is almost identical to the original.
Serving & Storage Suggestions
This cherry cream cheese dessert is best served cold, straight from the refrigerator. The contrast between the chilled, creamy filling and the sweet cherry topping is what makes it so satisfying. I like to let it sit out for about 5 minutes before serving—just enough to take the chill off without losing its structure.
Presentation tips: Cut the dessert into clean squares using a sharp knife. Wipe the knife clean between cuts for the neatest edges. For an extra touch, garnish each serving with a dollop of whipped cream, a few fresh cherries, or a sprinkle of chocolate shavings. A sprig of fresh mint adds a pop of color that looks beautiful on a winter table.
What to serve with it: This dessert is rich enough to stand on its own, but it pairs beautifully with a cup of hot coffee or a glass of cold milk. For a special occasion, serve it alongside a scoop of vanilla ice cream or a drizzle of warm chocolate sauce. The combination of cold and warm is absolutely heavenly.
Storage instructions: Cover the dish tightly with plastic wrap or foil and store it in the refrigerator for up to 5 days. The flavors actually improve after a day or two as they meld together. I don’t recommend freezing this dessert—the texture of the cream cheese layer changes when thawed and becomes grainy.
Reheating: This dessert is meant to be served cold, so no reheating is needed. If you’ve stored it in the refrigerator, just take it out and cut it into slices. It’s ready to go.
How flavors develop: The first day, the dessert is light and fresh. By day two, the cherry flavor has seeped slightly into the cream cheese layer, creating a beautiful marbled effect. Day three is my favorite—everything has settled, and the texture is perfectly creamy. It rarely lasts that long in my house, though.
Nutritional Information & Benefits
Here’s a rough estimate of the nutritional values per serving (based on 12 servings):
| Nutrient | Amount Per Serving |
|---|---|
| Calories | 380 |
| Total Fat | 24g |
| Saturated Fat | 14g |
| Cholesterol | 75mg |
| Sodium | 280mg |
| Total Carbohydrates | 38g |
| Dietary Fiber | 1g |
| Sugars | 28g |
| Protein | 5g |
Health benefits: While this is definitely a treat, it does have some redeeming qualities. Cherries are packed with antioxidants and anti-inflammatory compounds. They’re also a good source of vitamin C and fiber. The cream cheese provides calcium and protein, which help keep you full and satisfied. And let’s be honest—sometimes you just need a dessert that feels indulgent, and that’s okay.
Dietary considerations: This recipe contains dairy, gluten (from the graham crackers), and eggs (in the cream cheese). For a gluten-free version, use gluten-free graham crackers. For a dairy-free version, use dairy-free cream cheese and coconut cream. This dessert is not suitable for vegans unless you use plant-based alternatives.
My wellness perspective: I believe in balance. This dessert is rich and indulgent, but it’s made with real ingredients that you can feel good about. It’s not something you eat every day, but it’s perfect for special occasions, holiday gatherings, or those cozy winter nights when you just need something comforting. Life is too short to skip dessert.
Conclusion
This cozy cherry cream cheese dessert has become my go-to winter recipe for good reason. It’s simple enough for a Tuesday night but special enough for a holiday dinner. It’s the kind of dessert that makes people close their eyes and smile after the first bite. And honestly, it’s the recipe that proved my aunt wrong about cream cheese desserts—which is no small feat.
I hope you give this recipe a try and make it your own. Add your favorite toppings, swap in different fruits, or serve it in individual jars for a party. The beauty of this dessert is that it’s forgiving and adaptable. It doesn’t demand perfection—it just asks you to enjoy the process and the result.
When you make this, I’d love to hear how it turns out. Leave a comment below and tell me about your experience. Did you try a variation? Did your family love it? Did you catch someone eating it straight from the dish at midnight? Share your stories—they’re my favorite part of this whole blogging thing.
Until next time, stay warm, stay cozy, and keep making delicious things. You deserve it.
Frequently Asked Questions
Can I use fresh cherries instead of canned pie filling?
Absolutely! To make a fresh cherry topping, cook 3 cups of pitted fresh or frozen cherries with ½ cup sugar, 2 tablespoons cornstarch, and 1 tablespoon lemon juice over medium heat until thickened. Let it cool completely before spreading over the cream cheese layer.
How long does this dessert need to chill?
At least 4 hours, but overnight is ideal. The chilling time allows the cream cheese layer to firm up so you can cut clean slices. If you’re in a hurry, you can pop it in the freezer for 1-2 hours, but don’t forget about it—frozen cream cheese doesn’t have the same texture.
Can I make this dessert ahead of time?
Yes! This is actually one of those desserts that tastes better the next day. You can make it up to 2 days in advance and keep it covered in the refrigerator. The flavors meld together beautifully over time.
Why did my cream cheese layer turn out lumpy?
This usually happens when the cream cheese is too cold. Make sure it’s at room temperature before you start beating it. If you still see lumps, try beating it for another minute on medium-high speed. If that doesn’t work, strain the mixture through a fine-mesh sieve before folding in the whipped cream.
Can I freeze this cherry cream cheese dessert?
I don’t recommend freezing it. The cream cheese layer can become grainy and watery when thawed. If you have leftovers, they’ll keep in the refrigerator for up to 5 days. Trust me, it won’t last that long anyway.
Pin This Recipe!
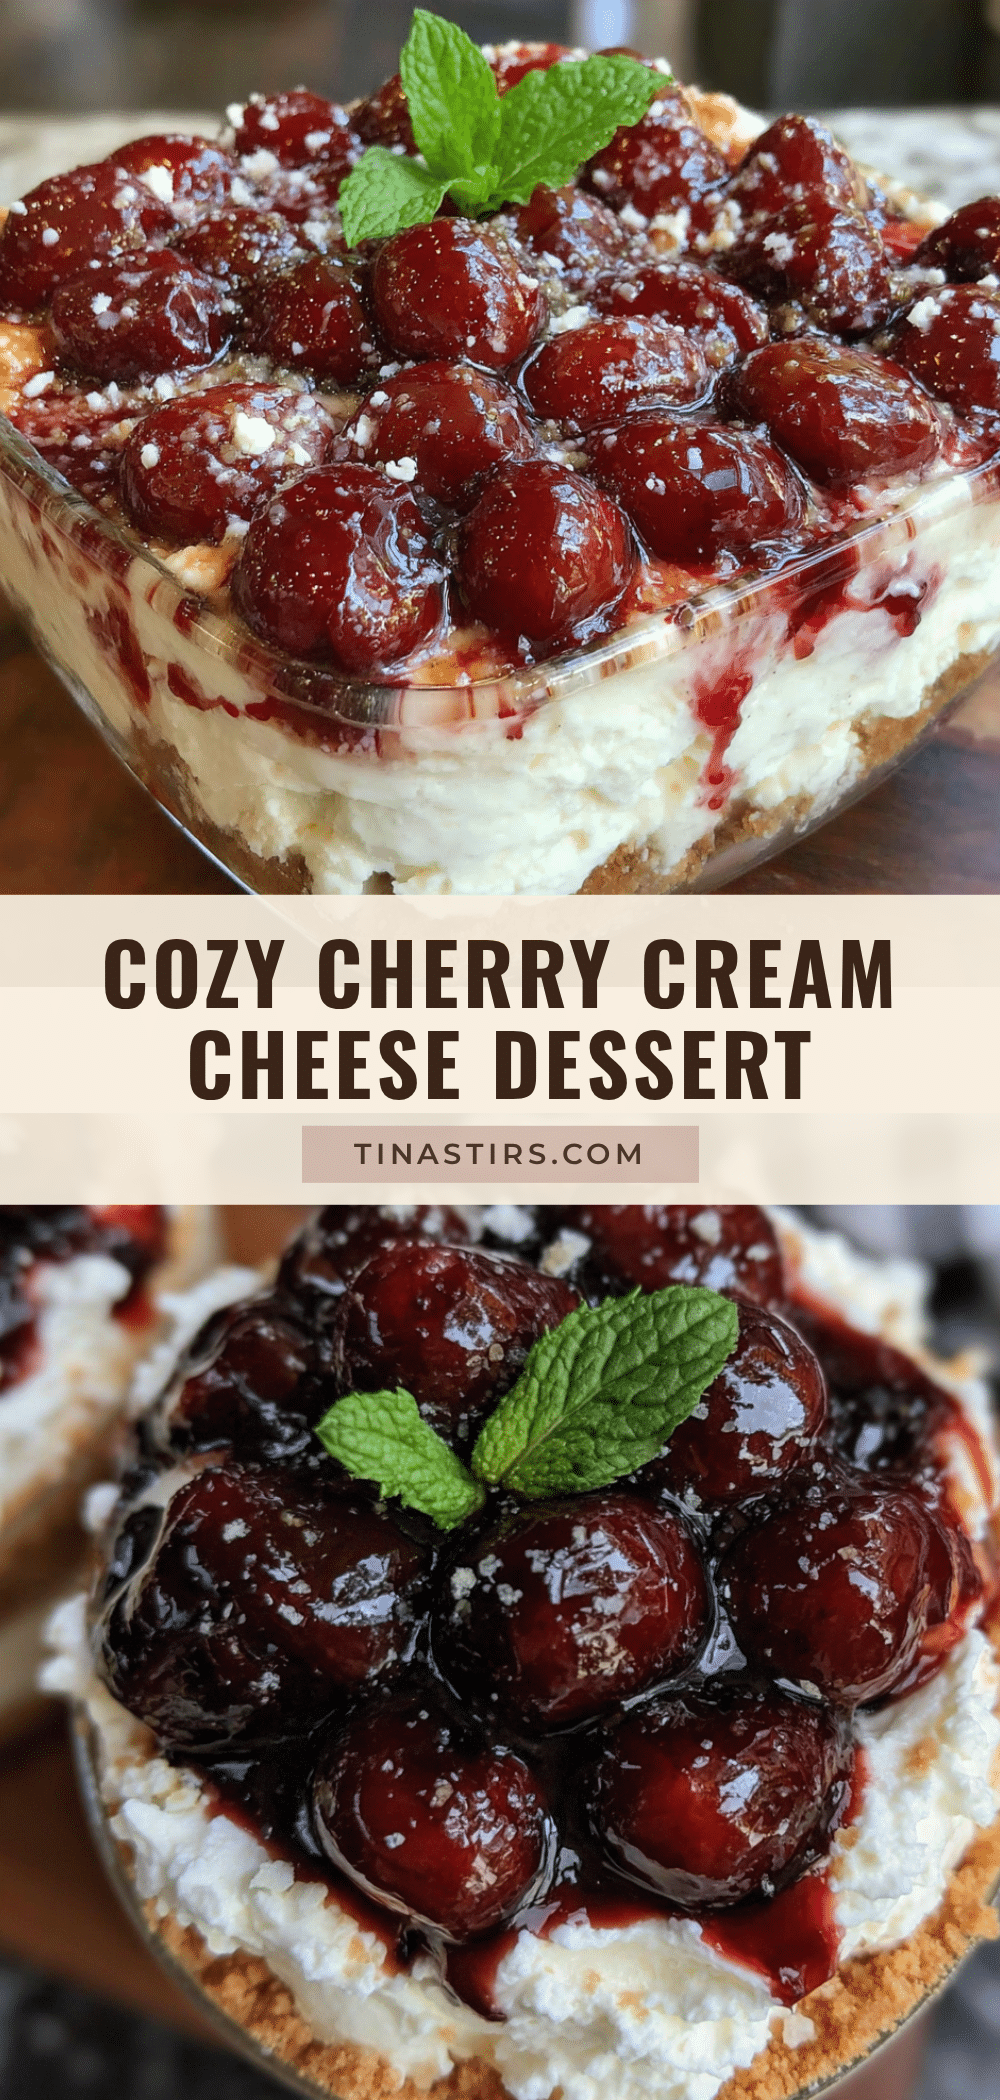
Cozy Cherry Cream Cheese Dessert – Easy Winter Recipe

A no-bake layered dessert with a buttery graham cracker crust, tangy cream cheese filling, and sweet cherry topping. Perfect for cozy winter nights and holiday gatherings.
- Prep Time: 20 minutes
- Cook Time: 0 minutes
- Total Time: 4 hours 20 minutes (includes chilling)
- Yield: 12 servings 1x
- Category: Dessert
- Cuisine: American
Ingredients
- 2 cups graham cracker crumbs (about 16 full sheets, crushed)
- ½ cup unsalted butter, melted
- ¼ cup granulated sugar
- 16 ounces cream cheese, softened to room temperature
- 1 cup powdered sugar, sifted if lumpy
- 1 teaspoon vanilla extract
- 1 cup heavy whipping cream, cold
- 1 can (21 ounces) cherry pie filling
- Optional: chocolate shavings, chopped nuts, or fresh mint leaves for garnish
Instructions
- In a medium bowl, combine graham cracker crumbs, granulated sugar, and melted unsalted butter. Stir until the mixture looks like wet sand and holds together when squeezed. Press firmly into the bottom of a 9×13-inch baking dish. Refrigerate while making the filling.
- In a large mixing bowl, pour cold heavy whipping cream. Using an electric mixer on medium-high speed, whip until stiff peaks form, about 3-4 minutes. Set aside in the refrigerator.
- In another large bowl, beat softened cream cheese with an electric mixer on medium speed until completely smooth and fluffy, about 2-3 minutes. Scrape down the sides halfway through.
- With the mixer on low speed, gradually add powdered sugar and vanilla extract. Beat until combined and smooth. Scrape the bowl again.
- Gently fold the whipped cream into the cream cheese mixture using a rubber spatula. Fold until no white streaks remain, being careful not to deflate the mixture.
- Spread the cream cheese mixture evenly over the chilled crust. Carefully spoon cherry pie filling over the top, spreading gently to keep distinct layers.
- Cover the dish with plastic wrap or foil and refrigerate for at least 4 hours, preferably overnight.
- When ready to serve, cut into squares using a sharp knife, wiping clean between cuts. Serve cold.
Notes
For best texture, ensure cream cheese is at room temperature. Chill overnight for clean slices. Can be made up to 2 days in advance. Not recommended for freezing.
Nutrition
- Serving Size: 1 square
- Calories: 380
- Sugar: 28
- Sodium: 280
- Fat: 24
- Saturated Fat: 14
- Carbohydrates: 38
- Fiber: 1
- Protein: 5
Keywords: cherry cream cheese dessert, no-bake dessert, winter dessert, cherry dessert, cream cheese dessert, easy dessert, holiday dessert


