Love this? Save it for later!
Share the inspiration with your friends
There used to be a little diner off Highway 29 called The Rusty Spoon that made a corn casserole I still dream about. When they closed—just packed up one Tuesday, no warning—I actually called around to see if anyone had the recipe. No luck. The owner moved to Florida, the cook went who-knows-where, and that golden, buttery, almost pudding-like dish was gone. After twelve tries—twelve!—I finally got it. And honestly, this version is better than the original. I mean, I loved that diner, but their crust could get a little soggy if you waited too long to eat it. Mine stays perfectly crisp thanks to the honey butter trick I stumbled on one rainy Sunday afternoon.
Let me tell you, recreating a recipe from taste memory is no joke. You take a bite of something, close your eyes, and think, “I can figure this out.” Then you get home and realize you have no idea what that subtle sweetness was or how they got that velvety texture. It took me three tries just to get the corn-to-cream ratio right. But the honey butter crust? That was a happy accident. I was trying to make a regular topping and accidentally doubled the honey. My kids went absolutely wild for it, and I knew I had something worth sharing. Maybe you’ve been there—chasing a dish from a restaurant that just vanished. Well, this is your win too.
Why You’ll Love This Recipe
This creamy corn casserole with honey butter crust isn’t just another side dish. It is the kind of recipe that solves real dinner problems for families on a budget. Here is why it works so hard for you:
- Budget-Friendly Ingredients: You probably already have most of what you need in your pantry and fridge. No fancy trips to specialty stores required.
- Kid-Approved: My own three kids fought over the last piece last week. The sweetness of the honey butter crust makes it irresistible to little ones.
- Weeknight Easy: It comes together in about 15 minutes of active prep time. The oven does the rest of the work while you handle the rest of dinner.
- Leftovers That Reheat Beautifully: This is not one of those dishes that gets weird the next day. The flavors actually meld together even better overnight.
- Picky Eater Friendly: The creamy texture and sweet, buttery topping make it approachable for even the most skeptical eaters at your table.
What makes this recipe different from every other corn casserole out there is the honey butter crust. Most versions use a standard breadcrumb or cracker topping that gets soft and sad. My method uses a simple mixture of melted butter, honey, and crushed cornflakes that bakes into a shatteringly crisp, caramelized layer. It adds texture, sweetness, and that diner-quality finish without any complicated techniques.
This recipe is the kind that makes you close your eyes after the first bite. It is comfort food reimagined—faster and more affordable than the original, but with the same soul-soothing satisfaction. Perfect for impressing guests without stress, or turning a simple Tuesday dinner into something your family will talk about for days.
What Ingredients You Will Need
This recipe uses simple, wholesome ingredients to deliver bold flavor and satisfying texture without the fuss. Most of these are pantry staples or easy-to-find items at any grocery store.
For the Casserole Base
- 2 cans (15.25 oz each) whole kernel corn, drained (I prefer Del Monte or Green Giant for consistent sweetness)
- 1 can (14.75 oz) cream-style corn (this is non-negotiable—it gives the casserole its creamy texture)
- 1 cup sour cream (full-fat works best, but light sour cream is fine in a pinch)
- 1/2 cup unsalted butter, melted (I use Kerrygold for richer flavor, but any brand works)
- 2 large eggs, lightly beaten (room temperature eggs incorporate more smoothly)
- 1 box (8.5 oz) Jiffy corn muffin mix (this is the secret to the perfect texture—don’t substitute with a different brand)
- 1/2 teaspoon salt (fine sea salt is best)
- 1/4 teaspoon black pepper (freshly ground adds more flavor)
For the Honey Butter Crust
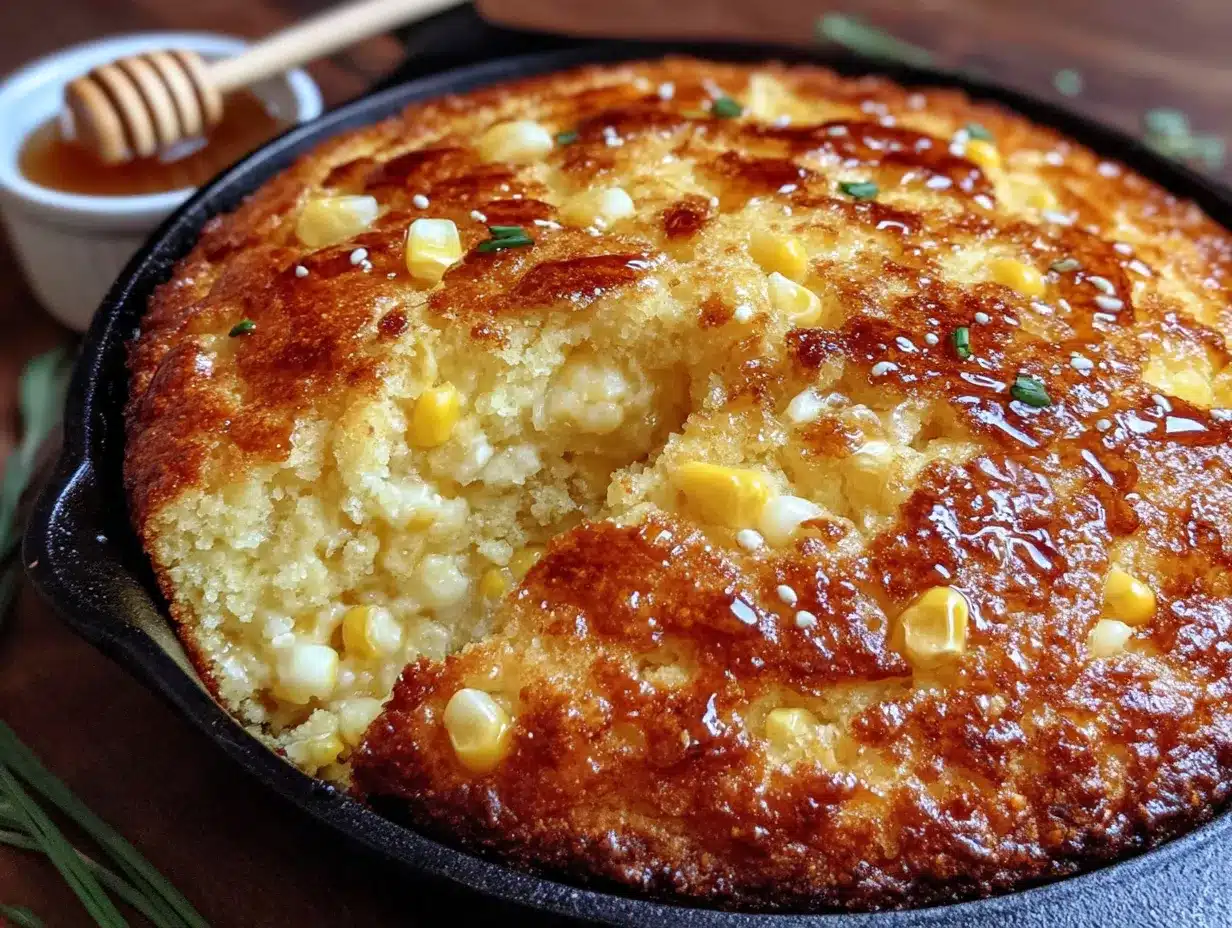
- 1/2 cup crushed cornflakes (about 1 1/2 cups whole cornflakes before crushing—Kellogg’s works great)
- 3 tablespoons unsalted butter, melted
- 2 tablespoons honey (local honey adds a lovely floral note, but any pure honey works)
- Pinch of salt (optional, but it balances the sweetness beautifully)
Ingredient Tips: Look for cream-style corn that is smooth and not too watery. If you can only find the generic brand, drain off any excess liquid before adding it to the mixture. For the cornflakes, crush them gently in a zip-top bag with a rolling pin—you want some small pieces and a few slightly larger ones for texture. And please, do not skip the sour cream. It adds tanginess that cuts through the sweetness and keeps the casserole from being one-note.
Substitution Guidance: If you need a dairy-free version, use plant-based sour cream and a dairy-free butter substitute. The texture will be slightly less rich, but still delicious. For a gluten-free option, use a gluten-free corn muffin mix and certified gluten-free cornflakes. I have tested both substitutions, and they work well enough that my gluten-sensitive neighbor asks for this dish every potluck.
Equipment Needed
You do not need any fancy equipment for this recipe, which is part of its charm. Here is what you will need:
- 9×13-inch baking dish (glass or ceramic works best for even baking—I use a Pyrex dish I have had for years)
- Large mixing bowl (any medium-to-large bowl will do)
- Whisk (for beating the eggs and mixing the wet ingredients)
- Rubber spatula (for scraping every last bit of batter into the dish)
- Small bowl (for mixing the honey butter crust topping)
- Zip-top bag and rolling pin (or your hands—for crushing the cornflakes)
- Measuring cups and spoons (standard set is fine)
- Cooling rack (optional but helps the casserole set evenly)
If you do not have a 9×13 dish, you can use a 10-inch cast iron skillet or a 2-quart casserole dish. Just adjust the baking time slightly—cast iron conducts heat faster, so start checking at 40 minutes. I have also made this in disposable aluminum pans for potlucks, and it works perfectly.
Preparation Method
This creamy corn casserole comes together quickly, but the details matter. Follow these steps carefully for the best results.
- Preheat your oven to 350°F (175°C). Grease your 9×13 baking dish with butter or non-stick spray. I like to use a little butter because it adds flavor to the edges as the casserole bakes.
- Crush the cornflakes for the topping. Place 1 1/2 cups of whole cornflakes in a zip-top bag. Seal it, then crush them gently with a rolling pin or your hands. You want a mix of fine crumbs and slightly larger pieces for texture. Set this aside for later.
- In your large mixing bowl, combine the wet ingredients. Add the drained whole kernel corn, cream-style corn, sour cream, melted butter, and beaten eggs. Whisk everything together until smooth and well combined. The mixture should look creamy and pale yellow. If you see any streaks of egg, keep whisking until it is uniform.
- Add the corn muffin mix and seasonings. Sprinkle the entire box of Jiffy mix over the wet ingredients. Add the salt and pepper. Stir gently with a rubber spatula until just combined. Do not overmix—a few small lumps are fine. Overmixing can make the casserole tough instead of tender.
- Pour the batter into the prepared dish. Use your spatula to scrape every bit of batter into the dish. Spread it evenly with the back of the spatula. The batter will be thick but pourable—that is exactly what you want.
- Make the honey butter crust. In your small bowl, combine the crushed cornflakes, melted butter, honey, and a pinch of salt. Stir until every crumb is coated. The mixture should look like wet sand—clumpy and golden.
- Top the casserole evenly. Sprinkle the honey butter cornflake mixture over the batter in an even layer. Do not press it down—let it sit loosely on top so it can crisp up as it bakes.
- Bake for 45 to 55 minutes. Place the dish on the middle rack of your preheated oven. Bake until the edges are bubbly and golden brown, and the center is set but still slightly jiggly. A toothpick inserted in the center should come out clean or with just a few moist crumbs attached. The topping should be deep golden brown and crispy.
- Cool for 10 to 15 minutes before serving. Place the dish on a cooling rack. This resting time is crucial—it allows the casserole to set so you can slice clean squares. If you cut into it too soon, it will be runny. Trust me, I learned this the hard way on Thanksgiving one year.
- Serve warm. Scoop out portions with a large spoon or slice into squares with a spatula. The contrast between the creamy, tender interior and the crispy, sweet crust is pure magic.
Pro Tip: If the top is browning too quickly but the center is still jiggly, tent the dish loosely with aluminum foil for the last 10 to 15 minutes of baking. This protects the crust while allowing the center to finish cooking.
Cooking Tips & Techniques
After twelve attempts at recreating this dish, I have learned a few things the hard way. Here are my best tips to help you nail it on your first try.
Do not skip draining the canned corn. I know it seems like an extra step, but that extra liquid can make your casserole watery. I once forgot to drain one can, and the result was a soupy mess that never set properly. Just dump the cans in a colander and give them a shake.
Room temperature eggs matter. Cold eggs can seize up the melted butter when you mix them, creating little lumps of hardened fat. Let your eggs sit on the counter for 15 minutes before you start, or place them in a bowl of warm water for 5 minutes.
Crush the cornflakes fresh. Pre-crushed cornflakes from a box lose their crunch. Crush them right before you use them for the best texture. And do not crush them too fine—you want some texture contrast against the creamy casserole.
Watch your oven like a hawk. Every oven runs a little differently. My ancient oven runs hot, so I start checking at 40 minutes. Yours might need the full 55. The visual cues are your best friend: golden brown edges, a set center, and a bubbling crust.
Let it rest. I cannot stress this enough. The casserole needs that 10 to 15 minute rest to firm up. If you serve it immediately, it will collapse into a puddle. Use this time to finish the rest of your meal—set the table, pour drinks, call the kids to wash their hands.
Make it ahead. You can assemble the entire casserole (without the topping) up to 24 hours in advance. Cover it and refrigerate. When you are ready to bake, add the honey butter crust and add 10 minutes to the baking time since you are starting from cold. This is a lifesaver for holidays or busy weeknights.
Variations & Adaptations
This creamy corn casserole is wonderfully adaptable. Here are some variations I have tried and loved.
Cheesy Corn Casserole: Stir in 1 cup of shredded cheddar cheese into the batter before baking. The cheese adds a savory note that balances the sweetness of the honey butter crust. I tried this when I had extra cheddar in the fridge, and my kids actually asked for it again the next week.
Spicy Southwest Version: Add one diced jalapeño (seeds removed for less heat) and 1/2 cup of diced green chiles to the batter. Top with a sprinkle of smoked paprika mixed into the honey butter crust. This version is fantastic alongside tacos or grilled chicken.
Bacon Lover’s Twist: Cook 4 slices of bacon until crispy, crumble them, and mix half into the batter. Sprinkle the remaining bacon over the honey butter crust before baking. The salty, smoky bacon against the sweet corn and honey is a combination that will make your taste buds sing.
Gluten-Free Adaptation: Use a gluten-free corn muffin mix (I like Bob’s Red Mill) and certified gluten-free cornflakes. The texture is slightly more crumbly, but the flavor is still spot on. My friend with celiac disease requests this version every time she comes over.
Lighter Version: Swap the sour cream for Greek yogurt and use light butter. The casserole will be slightly less rich but still creamy and satisfying. I have made this version for my own waistline more times than I care to admit.
Serving & Storage Suggestions
This creamy corn casserole is incredibly versatile in how you serve and store it. Here is everything you need to know.
Serving Temperature: Serve this casserole warm, straight from the oven. The contrast between the hot, creamy interior and the crispy, caramelized crust is at its peak within the first 30 minutes out of the oven. If it cools down too much, pop individual servings in the microwave for 20 seconds.
Presentation: For a family dinner, I scoop it out with a large spoon right at the table. For holidays or potlucks, let it cool for the full 15 minutes and slice it into neat squares. A sprinkle of fresh parsley or chives on top adds a pop of color that looks gorgeous in photos.
Complementary Dishes: This casserole pairs beautifully with roasted chicken, grilled pork chops, or a simple green salad. It is also a staple at our Thanksgiving table alongside turkey and mashed potatoes. For a complete budget-friendly meal, serve it with crispy garlic chicken and steamed green beans.
Storage Instructions: Store leftovers in an airtight container in the refrigerator for up to 4 days. The crust will soften slightly, but the flavor only gets better as the ingredients meld together. I actually love the leftovers cold, straight from the fridge—it is like a corn pudding that way.
Reheating Methods: For the best results, reheat individual portions in the microwave for 30 to 45 seconds. For larger portions, reheat in a 350°F oven for 10 to 15 minutes, covered with foil to prevent the crust from burning. If you want to restore some crunch to the topping, pop it under the broiler for 1 to 2 minutes at the end.
Freezer Notes: This casserole freezes beautifully. Bake it completely, let it cool, then wrap it tightly in plastic wrap and aluminum foil. Freeze for up to 3 months. To serve, thaw overnight in the refrigerator and reheat in a 350°F oven until warmed through. The crust will be softer after freezing, but the flavor is still fantastic.
Nutritional Information & Benefits
Here is the estimated nutritional breakdown for one serving of this creamy corn casserole (based on 12 servings):
| Nutrient | Amount Per Serving |
|---|---|
| Calories | 285 |
| Total Fat | 16g |
| Saturated Fat | 9g |
| Cholesterol | 65mg |
| Sodium | 420mg |
| Total Carbohydrates | 32g |
| Dietary Fiber | 2g |
| Sugars | 10g |
| Protein | 5g |
Health Benefits: Corn is a good source of fiber, which supports digestive health, and provides essential vitamins like B vitamins and vitamin C. The eggs add high-quality protein, while the sour cream offers calcium for strong bones. The honey in the crust provides natural sweetness with a lower glycemic impact than refined sugar.
Dietary Considerations: This recipe contains dairy, eggs, and gluten. For a dairy-free version, use plant-based substitutes as noted in the variations section. For gluten-free, use certified gluten-free ingredients. This casserole is naturally vegetarian and can be made vegan with appropriate substitutions, though the texture will change slightly.
My Personal Perspective: I do not pretend this is a health food. But as a mom feeding a family on a budget, I love that this dish uses real, recognizable ingredients. There is nothing processed or mysterious in here. It is comfort food made from scratch, and that counts for something in my book.
Conclusion
This creamy corn casserole with honey butter crust is more than a recipe—it is a solution. It solves the problem of what to serve that everyone will actually eat. It solves the problem of feeding a family without breaking the bank. And it solves the problem of recreating a beloved dish from a restaurant that no longer exists.
I have made this casserole for weeknight dinners, holiday feasts, and neighborhood potlucks. Every single time, someone asks for the recipe. And every single time, I smile and think about that little diner off Highway 29. They may be gone, but their legacy lives on in my kitchen—and now in yours too.
I would love to hear how this turns out for you. Did you add any of the variations? Did your kids love it as much as mine do? Drop a comment below and share your experience. And if you have a recipe you are trying to recreate from a closed restaurant, tell me about it—I might just tackle it next.
Until then, happy cooking, and may your honey butter crust always be perfectly crisp.
Frequently Asked Questions
Can I use fresh or frozen corn instead of canned?
Absolutely! If using fresh corn, cut the kernels from about 4 ears of corn. For frozen corn, thaw and drain it well before using. The texture will be slightly different—fresh corn has more crunch—but the flavor is fantastic. Just note that fresh corn may release more liquid, so you might need to add 5 minutes to the baking time.
Why did my casserole turn out runny?
This usually happens for one of two reasons: either you did not drain the canned corn well enough, or you did not let the casserole rest after baking. Make sure to drain the whole kernel corn thoroughly in a colander. And do not skip that 10 to 15 minute rest after baking—it is essential for the casserole to set properly.
Can I make this casserole ahead of time for a holiday?
Yes! This is one of my favorite make-ahead dishes. Assemble the casserole completely (including the honey butter crust) up to 24 hours in advance. Cover it tightly and refrigerate. When you are ready to bake, add about 10 minutes to the baking time since you are starting from cold. The flavor actually improves as the ingredients meld together overnight.
What can I use instead of Jiffy corn muffin mix?
If you cannot find Jiffy mix, you can use any brand of corn muffin mix. The key is to use a mix that includes both cornmeal and flour, plus a leavening agent. Homemade corn muffin mix works too—combine 1/2 cup cornmeal, 1/2 cup all-purpose flour, 1/4 cup sugar, 1 teaspoon baking powder, and 1/4 teaspoon salt. The texture will be slightly different, but still delicious.
How do I get the honey butter crust to stay crispy?
The key to a crispy crust is not pressing it into the batter and not covering the dish while it cools. Sprinkle the topping loosely over the batter and let it bake undisturbed. After baking, let the casserole cool uncovered on a rack. If you need to store leftovers, place a paper towel in the container to absorb excess moisture. For reheating, use the oven or toaster oven rather than the microwave to restore some crunch.
Pin This Recipe!
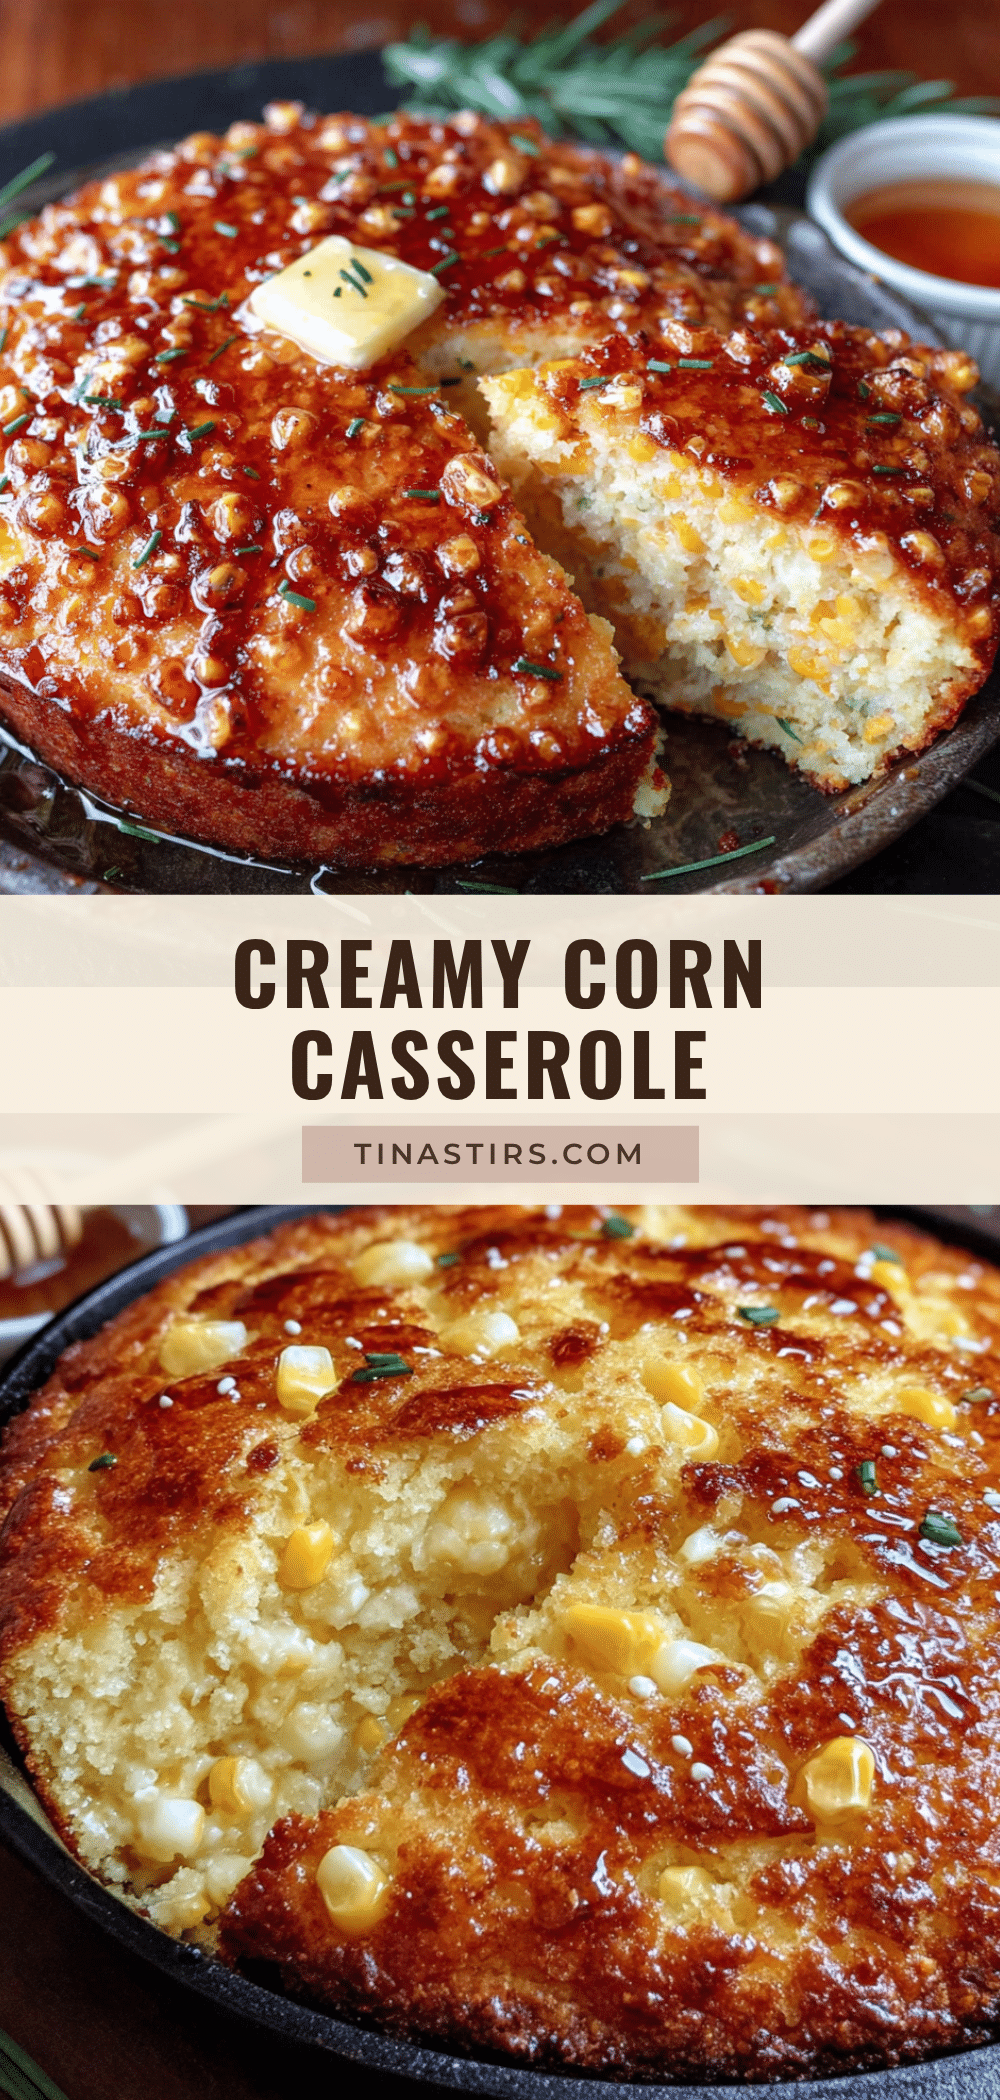
Easy Creamy Corn Casserole with Honey Butter Crust

A creamy, comforting corn casserole topped with a crispy honey butter cornflake crust. This budget-friendly, kid-approved dish is perfect for weeknight dinners or holiday feasts.
- Prep Time: 15 minutes
- Cook Time: 50 minutes
- Total Time: 1 hour 5 minutes
- Yield: 12 servings 1x
- Category: Side Dish
- Cuisine: American
Ingredients
- 2 cans (15.25 oz each) whole kernel corn, drained
- 1 can (14.75 oz) cream-style corn
- 1 cup sour cream
- 1/2 cup unsalted butter, melted
- 2 large eggs, lightly beaten
- 1 box (8.5 oz) Jiffy corn muffin mix
- 1/2 teaspoon salt
- 1/4 teaspoon black pepper
- 1/2 cup crushed cornflakes (about 1 1/2 cups whole cornflakes before crushing)
- 3 tablespoons unsalted butter, melted
- 2 tablespoons honey
- Pinch of salt (optional)
Instructions
- Preheat your oven to 350°F (175°C). Grease a 9×13-inch baking dish with butter or non-stick spray.
- Crush the cornflakes for the topping: Place 1 1/2 cups of whole cornflakes in a zip-top bag, seal, and crush gently with a rolling pin or your hands until you have a mix of fine crumbs and slightly larger pieces. Set aside.
- In a large mixing bowl, combine the drained whole kernel corn, cream-style corn, sour cream, melted butter, and beaten eggs. Whisk until smooth and well combined.
- Sprinkle the entire box of Jiffy corn muffin mix over the wet ingredients, then add the salt and pepper. Stir gently with a rubber spatula until just combined (a few small lumps are fine). Do not overmix.
- Pour the batter into the prepared dish and spread it evenly with the back of the spatula.
- In a small bowl, combine the crushed cornflakes, melted butter, honey, and a pinch of salt. Stir until every crumb is coated and the mixture looks like wet sand.
- Sprinkle the honey butter cornflake mixture evenly over the batter. Do not press it down.
- Bake on the middle rack for 45 to 55 minutes, until the edges are bubbly and golden brown, the center is set but still slightly jiggly, and a toothpick inserted in the center comes out clean or with a few moist crumbs.
- Cool for 10 to 15 minutes on a cooling rack before serving. This allows the casserole to set.
- Serve warm. Scoop out portions with a large spoon or slice into squares.
Notes
For a dairy-free version, use plant-based sour cream and dairy-free butter. For gluten-free, use a gluten-free corn muffin mix and certified gluten-free cornflakes. If the top browns too quickly, tent loosely with foil for the last 10-15 minutes. Let the casserole rest after baking to set properly.
Nutrition
- Serving Size: 1 serving
- Calories: 285
- Sugar: 10
- Sodium: 420
- Fat: 16
- Saturated Fat: 9
- Carbohydrates: 32
- Fiber: 2
- Protein: 5
Keywords: corn casserole, honey butter crust, creamy corn casserole, side dish, holiday side dish, comfort food, easy corn casserole


