Love this? Save it for later!
Share the inspiration with your friends
My nephew asked why I couldn’t just shred the potatoes the night before and keep them in water in the fridge. I started to explain why that wouldn’t work—something about oxidation and texture loss—then stopped. I had never actually tried it. I mean, I’d been making potato latkes for years, and I just assumed you had to do everything at the last minute like my grandmother did. But here was this kid, maybe twelve years old, looking at me like I was making things harder than they needed to be. And honestly? He was right.
That night, I tested his theory. I shredded five pounds of potatoes, dropped them into a big bowl of cold water, covered it with plastic wrap, and went to bed. The next evening, I drained them, squeezed them dry, and made the crispiest batch of potato latkes I’d ever produced. The texture was perfect. The color was golden. And I had saved myself about forty-five minutes of frantic shredding while hungry people circled the kitchen. It was one of those moments where you realize you’ve been doing something a certain way just because that’s how you were taught, not because it’s actually the best way.
These quick crispy potato latkes have become my go-to for weeknight dinners when I want something that feels special but doesn’t require a whole production. The make-ahead method changed everything for me, and maybe you’ve been in that same spot—standing over a grater at 6 PM, wondering why you didn’t start earlier. This approach gives you back that time without sacrificing any of the crunch. It’s the kind of recipe that makes you wonder what else you’ve been overcomplicating.
Why You’ll Love This Recipe
Let me tell you why these quick crispy potato latkes are different from every other recipe you’ve tried. I’ve tested this method at least a dozen times, tweaking the water-to-potato ratio and the squeeze-dry technique until I got it exactly right. Here’s what makes it stand out:
- Make-Ahead Friendly: Shred the potatoes up to 24 hours in advance. No more last-minute grating chaos when you’re already tired from work.
- Actually Crispy: The cold water soak overnight removes excess starch, which means you get that shatteringly crisp exterior without the gummy middle.
- Simple Ingredients: Potatoes, onion, egg, flour, salt, and oil. That’s it. Nothing fancy, nothing you don’t already have.
- Weeknight Fast: Once the prep work is done, these cook in under 4 minutes per batch. You can have dinner on the table in 20 minutes flat.
- Crowd-Pleaser: I’ve served these to picky kids, kosher-keeping relatives, and gluten-free friends (just swap the flour), and they disappear every single time.
The real magic here is the texture. Most latke recipes end up dense or greasy because the starch hasn’t been properly rinsed. This method gives you that light, lacy edge that makes people think you spent hours in the kitchen. And the best part? You can make a double batch, freeze half, and have crispy latkes ready to go whenever the craving hits. It’s comfort food that actually fits into a busy life.
What Ingredients You Will Need
This recipe uses straightforward ingredients that work together to create that perfect balance of crispy outside and tender inside. Here’s what you’ll need and why each one matters:
For the Latkes
- 2 pounds russet potatoes (about 4 medium) — Russets have the right starch content for crispy latkes. Yukon Golds work too, but they’re slightly waxier and won’t get quite as crunchy.
- 1 medium yellow onion — Grated right along with the potatoes. The onion adds moisture and flavor, and it helps prevent the potatoes from browning too quickly.
- 2 large eggs, lightly beaten — These bind everything together. Use room temperature eggs if you remember, but cold works fine in a pinch.
- 3 tablespoons all-purpose flour — You can substitute matzo meal for a more traditional texture, or use almond flour for a gluten-free version. I’ve tried both, and they work beautifully.
- 1 teaspoon kosher salt — Plus more for finishing. Don’t skimp here—salt is what makes the potato flavor sing.
- ½ teaspoon black pepper — Freshly ground if you have it.
- ½ cup neutral oil for frying — I use avocado oil because it has a high smoke point and neutral flavor. Vegetable or canola oil work great too. Avoid olive oil—it burns at high heat.
For Serving (Optional but Recommended)
- Sour cream or Greek yogurt — The tang cuts through the richness perfectly.
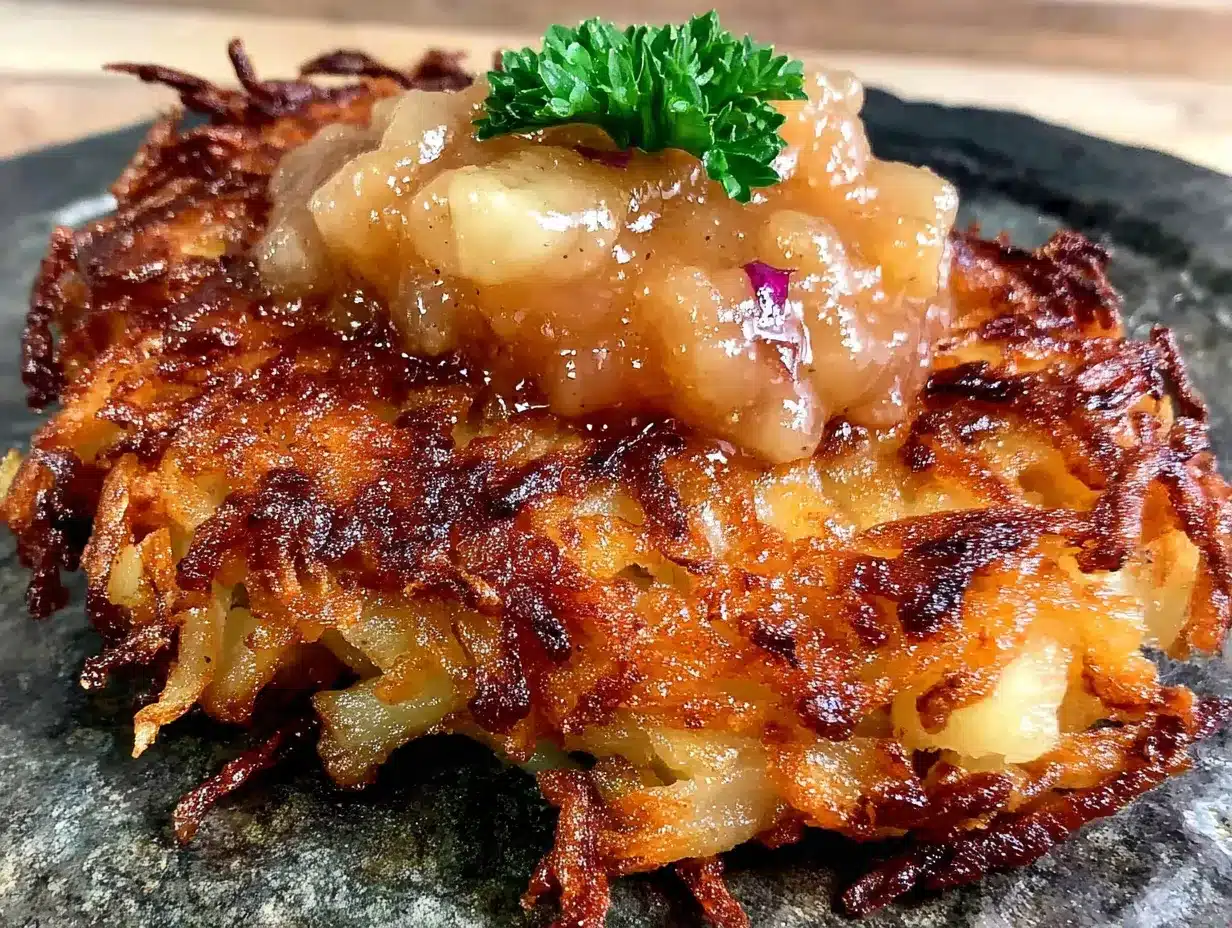
- Applesauce — Classic pairing. If you’re feeling fancy, warm it up slightly with a pinch of cinnamon.
- Fresh chives or dill — A sprinkle on top makes them look restaurant-worthy.
A few ingredient notes I’ve learned the hard way: Don’t use red potatoes or new potatoes—they’re too waxy and won’t crisp up properly. And if you’re making these for a crowd, buy an extra potato or two. Sometimes you’ll need more than you think once you squeeze out all that water. I learned that one Thanksgiving when I came up short and had to send my husband to the corner store at 7 PM.
Equipment Needed
You don’t need much for these quick crispy potato latkes, but having the right tools makes the job easier:
- Box grater or food processor with grating disc — A box grater gives you more control over texture, but a food processor saves time. I use my Cuisinart when I’m making a double batch. Just be careful not to over-process—you want shreds, not mush.
- Large mixing bowls — One for soaking the shredded potatoes, one for the finished batter.
- Clean kitchen towel or cheesecloth — For squeezing out the liquid. A thin dish towel works better than paper towels, which tend to tear and stick to the potatoes.
- Large skillet or cast iron pan — Cast iron holds heat best for even browning. A non-stick skillet works too, but you won’t get quite the same crust.
- Spatula — A thin metal spatula is ideal for flipping without breaking the latkes.
- Paper towels or wire rack — For draining excess oil after frying.
If you don’t have a food processor, don’t worry. Grating by hand takes about 10 minutes and is actually kind of meditative once you get into a rhythm. I’ve done it both ways, and honestly, the hand-grated version has a slightly better texture—more irregular edges that get extra crispy.
Preparation Method
- Shred the potatoes and onion (10 minutes). Peel the potatoes if you want a smoother texture, or leave the skins on for extra fiber and a rustic look. I leave them on about half the time. Grate the potatoes and onion using the large holes of a box grater or the grating disc of your food processor. Work quickly—potatoes start to discolor once exposed to air.
- Soak the shreds in cold water (overnight or at least 2 hours). Place the shredded potatoes and onion in a large bowl and cover completely with cold water. Swish them around with your hand to release the starch, then let them sit. The water will turn cloudy—that’s the starch you’re removing. If you’re doing the make-ahead method, cover the bowl with plastic wrap and refrigerate for up to 24 hours. This is the step that changed everything for me.
- Drain and squeeze dry (5 minutes). Pour the potato-onion mixture into a colander and rinse with fresh cold water. Then transfer handfuls to your kitchen towel and twist tightly to squeeze out as much liquid as possible. You’ll be shocked at how much water comes out. This is the most important step—wet potatoes = soggy latkes. I squeeze until my hands hurt, and it’s always worth it.
- Mix the batter (3 minutes). Transfer the squeezed potatoes and onion to a clean bowl. Add the beaten eggs, flour, salt, and pepper. Mix with a fork until everything is evenly combined. The mixture should hold together when pressed but still look loose—if it’s too wet, add another tablespoon of flour.
- Heat the oil (2 minutes). Add about ¼ inch of oil to your skillet and heat over medium-high heat until shimmering. You want it hot enough that a tiny piece of potato sizzles immediately when dropped in, but not smoking. If it smokes, turn the heat down slightly.
- Form and fry the latkes (3-4 minutes per batch). Scoop about 2 tablespoons of the mixture and gently press it into a patty shape in your palm—don’t pack it too tight. Carefully place it in the hot oil and flatten slightly with your spatula. Cook for 2-3 minutes until the edges are deep golden brown, then flip and cook another 2 minutes. The second side usually cooks faster. Transfer to a paper towel-lined plate or wire rack.
- Keep warm while finishing. If you’re making multiple batches, keep the finished latkes on a baking sheet in a 200°F oven. They’ll stay crispy for up to 30 minutes this way. Don’t stack them on top of each other or they’ll steam and get soft.
- Season immediately. Sprinkle with a little extra salt while they’re still hot. This makes a huge difference—the salt sticks to the hot oil and gives you that perfect salty-crunchy bite.
Cooking Tips & Techniques
I’ve made more mediocre latkes than I care to admit, so let me save you the trouble. Here are the things I wish someone had told me years ago:
Don’t skip the water soak. I know it seems like an extra step, but that overnight soak is what gives you the crispy texture. Without it, the starch makes the latkes gluey and dense. I once skipped it because I was in a hurry, and the results were so disappointing I threw the whole batch away.
Dry the potatoes like your life depends on it. This cannot be overstated. After you squeeze the potatoes in the towel, squeeze them again. Then squeeze one more time. Any remaining water turns to steam in the oil, which makes the latkes greasy instead of crispy. I’ve started squeezing the mixture in batches and then pressing it between two towels for maximum dryness.
Keep the oil at the right temperature. If the oil is too cool, the latkes absorb it like sponges. Too hot, and they burn on the outside before cooking through. Medium-high heat is your sweet spot. Test with a tiny piece of potato first—it should sizzle immediately and brown in about 60 seconds.
Don’t overcrowd the pan. Each latke needs space to crisp up. I usually cook 3-4 at a time in a 12-inch skillet. If you crowd them, the temperature drops and you end up with greasy, pale latkes. Be patient—it’s worth the extra few minutes.
Use a splatter screen. Latkes spit oil like nobody’s business. I learned this the hard way when I got a burn on my forearm that took weeks to heal. A splatter screen keeps your stovetop clean and your skin safe.
Variations & Adaptations
One of the best things about this recipe is how flexible it is. Here are some variations I’ve tested and loved:
Sweet Potato Latkes: Swap half the russet potatoes for sweet potatoes. The flavor is slightly sweeter and the color is gorgeous—like little golden coins. Just note that sweet potatoes have more moisture, so squeeze them extra well.
Zucchini Potato Latkes: Grate one medium zucchini along with the potatoes. Salt the zucchini shreds and let them sit for 10 minutes, then squeeze out the liquid before adding to the potato mixture. This adds moisture and a subtle freshness that’s perfect for summer.
Gluten-Free Version: Replace the all-purpose flour with almond flour or chickpea flour. I’ve tried both and prefer chickpea flour for its neutral flavor. The texture is slightly different—a bit more delicate—but still delicious.
Cheesy Latkes: Add ¼ cup of shredded cheddar or parmesan to the batter. The cheese melts and creates these amazing crispy edges. My kids go crazy for this version.
Baked Latkes: If you want to skip the frying, you can bake these at 400°F for about 15 minutes per side. They won’t be quite as crispy, but they’re still good and much lower in fat. I do this when I’m feeling virtuous.
I once tried a version with grated carrot and a pinch of cumin, thinking I was being clever. It was fine—edible, even—but it didn’t really taste like a latke anymore. Sometimes the classic version is classic for a reason.
Serving & Storage Suggestions
These quick crispy potato latkes are best served hot, straight from the pan. But here’s how to handle them when you’re cooking for a crowd or making them ahead:
Serving: Arrange the latkes on a platter and serve immediately with sour cream and applesauce on the side. For a fancy presentation, drizzle the sour cream with a little olive oil and sprinkle with fresh dill or chives. I also love serving them alongside a simple green salad with lemon vinaigrette—the acidity cuts through the richness.
Make-Ahead: You can fry the latkes up to 2 hours ahead and keep them warm in a 200°F oven on a wire rack. They’ll stay crispy for about an hour before starting to soften. If you’re making them for a party, this is a lifesaver.
Refrigerating: Store leftover latkes in an airtight container in the fridge for up to 4 days. Layer them between sheets of parchment paper so they don’t stick together. They won’t be as crispy as fresh, but they’re still tasty.
Freezing: Flash freeze the cooked latkes on a baking sheet for 30 minutes, then transfer to a freezer bag. They’ll keep for up to 3 months. To reheat, pop them straight from the freezer into a 400°F oven for 8-10 minutes, or until hot and crispy. Don’t microwave them—they’ll turn into sad, rubbery discs.
Reheating: The best way to revive leftover latkes is in a skillet with a tiny bit of oil over medium heat. About 2 minutes per side will bring back most of the crunch. I’ve also had good luck with an air fryer at 375°F for 3-4 minutes.
Nutritional Information & Benefits
Here’s the nutritional breakdown for one latke (based on a recipe that makes about 12 latkes, fried in avocado oil):
| Nutrient | Amount per Latke |
|---|---|
| Calories | 95 |
| Total Fat | 5g |
| Saturated Fat | 0.5g |
| Carbohydrates | 11g |
| Fiber | 1g |
| Protein | 2g |
| Sodium | 200mg |
These latkes are naturally gluten-free if you use almond flour, and they’re a good source of vitamin C and potassium from the potatoes. The onion adds quercetin, a powerful antioxidant. Frying in avocado oil gives you healthy monounsaturated fats instead of the inflammatory oils found in many processed foods.
I’m not a nutritionist, but I’ve learned that balance matters more than perfection. These latkes aren’t health food—they’re comfort food made with real ingredients. And honestly, a few crispy potato pancakes made with love are better for your soul than any sad, soggy diet version.
Conclusion
These quick crispy potato latkes have become a staple in my kitchen because they solve the biggest problem with homemade comfort food: the time it takes to make it. That overnight soak method my nephew suggested—the one I almost dismissed—turned out to be the best thing that ever happened to my latke game. Now I can have crispy, golden latkes on the table in 20 minutes, even on a Tuesday night when I’m exhausted and hungry.
I hope you give this method a try, especially if you’ve been intimidated by latkes in the past. They’re actually one of the easiest things to make once you know the tricks. And if you come up with your own variation—maybe adding some shredded carrot or a pinch of smoked paprika—I’d love to hear about it. Drop a comment below and tell me how yours turned out.
Happy cooking, friends. May your latkes be crispy, your oil be hot, and your kitchen smell like something wonderful.
Frequently Asked Questions
Can I use a food processor instead of a box grater?
Absolutely. A food processor with a grating disc saves time and gives consistent results. Just be careful not to over-process—you want shreds, not puree. Pulse in short bursts and check frequently.
Why are my latkes falling apart in the pan?
This usually means there’s too much moisture in the mixture. Make sure you’ve squeezed out as much liquid as possible. Also, let the batter sit for 5 minutes after mixing—the flour needs time to absorb excess moisture and bind everything together.
Can I make these latkes dairy-free?
Yes, this recipe is naturally dairy-free as written. Just use a dairy-free yogurt or skip the sour cream topping. The latkes themselves contain no dairy.
How do I keep latkes crispy for a party?
Keep them on a wire rack set over a baking sheet in a 200°F oven. The wire rack allows air to circulate, preventing steam from softening the crust. They’ll stay crispy for about an hour this way.
Can I use frozen shredded potatoes?
You can, but the texture won’t be as good. Frozen shredded potatoes have a lot of excess moisture and tend to break down more. If you’re in a pinch, thaw them completely and squeeze out as much liquid as possible before using.
Pin This Recipe!

Quick Crispy Potato Latkes: Easy Make-Ahead Method

These quick crispy potato latkes are made with a make-ahead method that saves time without sacrificing crunch. Shred the potatoes up to 24 hours in advance for the crispiest, most golden latkes you’ve ever made.
- Prep Time: 15 minutes
- Cook Time: 20 minutes
- Total Time: 35 minutes (plus 2 hours soaking or overnight)
- Yield: 12 latkes 1x
- Category: Side Dish
- Cuisine: Jewish
Ingredients
- 2 pounds russet potatoes (about 4 medium)
- 1 medium yellow onion
- 2 large eggs, lightly beaten
- 3 tablespoons all-purpose flour
- 1 teaspoon kosher salt, plus more for finishing
- ½ teaspoon black pepper, freshly ground
- ½ cup neutral oil for frying (avocado, vegetable, or canola)
- Sour cream or Greek yogurt for serving (optional)
- Applesauce for serving (optional)
- Fresh chives or dill for garnish (optional)
Instructions
- Shred the potatoes and onion using the large holes of a box grater or the grating disc of a food processor. Work quickly to prevent discoloration.
- Place the shredded potatoes and onion in a large bowl and cover completely with cold water. Swish to release starch. Let soak for at least 2 hours or overnight in the refrigerator for up to 24 hours.
- Drain the potato-onion mixture in a colander and rinse with fresh cold water. Transfer handfuls to a clean kitchen towel and twist tightly to squeeze out as much liquid as possible. Repeat until very dry.
- Transfer the squeezed potatoes and onion to a clean bowl. Add beaten eggs, flour, salt, and pepper. Mix with a fork until evenly combined. The mixture should hold together when pressed.
- Heat about ¼ inch of oil in a large skillet over medium-high heat until shimmering. Test with a tiny piece of potato—it should sizzle immediately.
- Scoop about 2 tablespoons of the mixture and gently press into a patty shape. Carefully place in hot oil and flatten slightly with a spatula. Cook 3-4 latkes at a time without overcrowding.
- Cook for 2-3 minutes until edges are deep golden brown, then flip and cook another 2 minutes. Transfer to a paper towel-lined plate or wire rack.
- Keep finished latkes warm on a baking sheet in a 200°F oven for up to 30 minutes. Do not stack.
- Sprinkle with extra salt while still hot. Serve immediately with sour cream and applesauce.
Notes
Don’t skip the water soak—it removes excess starch for crispy latkes. Squeeze the potatoes very dry to avoid soggy latkes. Keep oil at medium-high heat; test with a potato piece first. Use a splatter screen to prevent oil burns.
Nutrition
- Serving Size: 1 latke
- Calories: 95
- Sugar: 1
- Sodium: 200
- Fat: 5
- Saturated Fat: 0.5
- Carbohydrates: 11
- Fiber: 1
- Protein: 2
Keywords: potato latkes, crispy latkes, make-ahead latkes, easy latkes, potato pancakes, Hanukkah recipe


