Love this? Save it for later!
Share the inspiration with your friends
I wasn’t expecting to learn a new holiday trick from my accountant, but there I was, knee-deep in spreadsheets last November, listening to him describe exactly how to dry orange slices in the oven. Honestly, I’d gone in expecting to talk about quarterly taxes and maybe get some advice on deductions. Instead, I walked out with a recipe for the most beautiful, fragrant holiday decoration I’d ever imagined. My accountant, Mr. Henderson—a man in his sixties who wears cardigans and drinks black coffee from a thermos—told me his wife had been making these for years. “She hangs them on the tree with twine,” he said, not looking up from my tax forms. “Smells better than any candle you’ll buy.”
I’ll admit, I was skeptical. Drying fruit in the oven seemed like something that could go very wrong—burnt edges, a smoky kitchen, a wasted bag of oranges. But Mr. Henderson was insistent, and honestly, he’d never steered me wrong on deductions. So that weekend, I bought a bag of navel oranges, preheated my oven, and gave it a shot. The result? Let me tell you, my house smelled like a winter wonderland for two straight days. The slices turned out perfectly—translucent in the center, deep orange at the rims, and studded with tiny seed stars that looked like they belonged on a vintage Christmas card.
Now, I make these cozy oven-dried orange slices every year, usually the day after Thanksgiving when the turkey leftovers are still calling my name. I string them into garlands for the mantel, tuck a few into gift bags for friends, and hang a single slice on a ribbon from the kitchen window. You know that feeling when you discover something so simple, so beautiful, and so ridiculously easy that you can’t believe you didn’t know about it sooner? That’s this recipe. It’s not just a garnish—it’s a whole mood. And it all started with a tax appointment.
Why You’ll Love This Recipe
Let’s face it—the holidays are hectic. Between the gift shopping, the meal planning, and the endless to-do lists, the last thing you need is a complicated craft project that requires a glue gun and a degree in Pinterest. These oven-dried orange slices are the opposite of complicated. They’re almost laughably simple, but the payoff is huge. Here’s why this recipe has become a staple in my holiday routine:
- Incredibly Easy: You need exactly one ingredient—oranges—and about three hours of low-and-slow oven time. That’s it. No special equipment, no fancy techniques.
- Budget-Friendly: A bag of oranges costs a few dollars. Compare that to a store-bought garland or a fancy candle, and you’re saving serious cash.
- Zero Waste: You can use the leftover orange pulp in smoothies or compost it. The dried slices last for months, so nothing goes to waste.
- Natural Holiday Decor: These slices bring a rustic, cozy vibe to any space. They smell amazing, look beautiful, and feel so much more personal than plastic ornaments.
- Perfect for Gifting: String a few slices on twine, wrap them in cellophane, and you’ve got a handmade gift that looks like it came from a boutique.
- Crowd-Pleaser: Every single person who walks into my house during the holidays asks where I bought these. They’re genuinely surprised when I say I made them in my oven.
What makes this version different from other drying methods? It’s the technique. I’ve tried air-drying (takes forever, risks mold) and using a dehydrator (too much counter space). The oven method is reliable, fast, and gives you total control over the texture. Plus, the low heat fills your kitchen with the most incredible citrusy aroma—better than any essential oil diffuser I’ve ever owned.
This recipe isn’t just good—it’s the kind that makes you close your eyes and breathe in deep after you pull the baking sheet from the oven. It’s comfort for the senses, a little pocket of calm in the middle of the holiday chaos. Perfect for decorating your tree, dressing up a cocktail, or just making your kitchen feel like a cozy cabin in the woods.
What Ingredients You Will Need
This recipe uses the simplest ingredient list imaginable. Honestly, you might already have everything you need in your kitchen right now. The beauty of these oven-dried orange slices is that the ingredient does all the work—you just have to pick the right ones.
- Fresh Oranges (3–4 medium): This is the star of the show. You want oranges that are firm, heavy for their size, and free of soft spots. Navel oranges are my go-to because they’re sweet, seedless, and slice evenly. Blood oranges add a dramatic red hue, and cara cara oranges give a beautiful pinkish tone. For a classic look, stick with navel. (Look for organic oranges if you can—the peel is edible and won’t have pesticide residue.)
- Optional: Cinnamon Sticks (2–3): Not for the drying process, but for the garland assembly. Threading a cinnamon stick between orange slices adds warmth and a subtle spicy scent. I love this combo for a more complex holiday aroma.
- Optional: Whole Cloves (about 20): Stud a few cloves into the orange slices before drying for a clove-studded look that’s so charming. They also add a gentle clove scent as they dry.
- Optional: Twine or Jute String (3–4 feet per garland): For stringing your slices into a garland. Natural twine looks rustic and beautiful. Avoid synthetic strings—they don’t hold knots as well.
- Optional: Dried Cranberries or Rosemary Sprigs: For extra color and texture in your garland. I’ll thread a few dried cranberries between orange slices for a pop of red. Rosemary adds a piney scent that pairs beautifully with citrus.
Ingredient Selection Tips: The most important thing is choosing the right oranges. You want slices that are uniform in thickness—about 1/4 inch (6 mm) is perfect. Too thin, and they’ll burn. Too thick, and they won’t dry all the way through. I recommend using a sharp chef’s knife or a mandoline slicer for consistent results. A mandoline makes the job so much faster, but a steady hand and a good knife work just fine.
Substitution Guidance: If you don’t have oranges, you can use lemons, limes, or grapefruits. Each citrus fruit gives a slightly different look and scent. Lemon slices are more delicate and pale, while grapefruit slices are larger and more dramatic. You can mix them together for a colorful garland. Just keep in mind that thinner-skinned fruits like lemons may dry faster, so check them at the two-hour mark.
Equipment Needed
You don’t need a lot of fancy tools for this recipe, which is part of why I love it. Here’s what you’ll need:
- Oven: Any standard oven works. A convection oven will dry the slices faster, so keep an eye on them.
- Baking Sheet: A rimmed baking sheet is best. The rim catches any juice that might drip.
- Parchment Paper or Silicone Baking Mat: This prevents sticking and makes cleanup a breeze. I’ve forgotten parchment before, and it’s not the end of the world—just a little more scrubbing.
- Sharp Chef’s Knife or Mandoline Slicer: For even slices. I prefer a mandoline for speed and consistency, but a good knife works perfectly.
- Cutting Board: A sturdy one that won’t slip.
- Paper Towels: For patting the slices dry before baking. This step is crucial—excess moisture leads to steaming instead of drying.
- Cooling Rack: Optional, but helpful for cooling the slices evenly after they come out of the oven.
- Needle and Thread or Twine: For stringing the garland. A large-eyed needle makes threading easier.
Budget-Friendly Options: If you don’t have a mandoline, just use a sharp knife. If you don’t have parchment paper, you can lightly grease the baking sheet with a little oil. Honestly, I’ve made these slices with just a knife, a baking sheet, and a prayer, and they turned out beautiful. Don’t let a lack of fancy equipment stop you.
Preparation Method
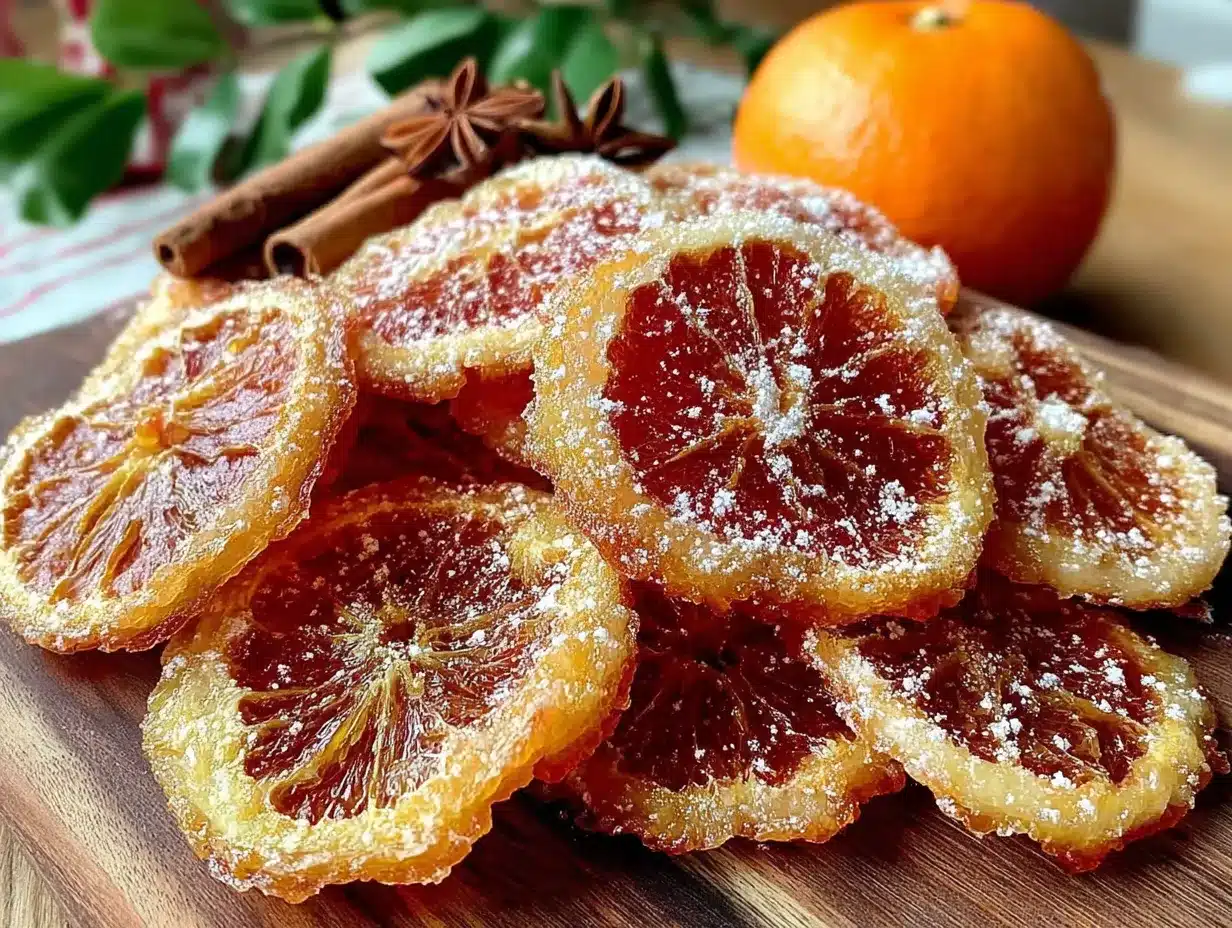
Making these oven-dried orange slices is almost meditative. There’s something so satisfying about watching the fruit transform in the oven, the edges curling up and the color deepening. Here’s how I do it:
- Preheat the oven to 200°F (93°C). This is the sweet spot—low enough to dry the fruit without cooking it, high enough to get the job done in a few hours. If your oven runs hot, go down to 180°F (82°C). Patience is key here.
- Wash and dry the oranges thoroughly. Even if you’re using organic oranges, give them a good scrub. You’ll be eating the peel, so you want it clean. Pat them completely dry with a clean towel.
- Slice the oranges into 1/4-inch (6 mm) rounds. Use a sharp knife or a mandoline. Try to keep the slices as even as possible—this ensures they dry at the same rate. If you get a few uneven slices, don’t stress. They’ll just need a little extra time.
- Blot the slices with paper towels. Place the slices in a single layer on a paper towel, then lay another paper towel on top and press gently. This removes excess surface moisture. It’s a small step, but it makes a big difference in how evenly they dry.
- Arrange the slices on a parchment-lined baking sheet. Make sure they’re in a single layer with a little space between each slice. Overcrowding traps steam and slows down the drying process. If you have more slices than fit on one sheet, use two sheets or bake in batches.
- Bake for 2.5 to 3 hours. Flip the slices halfway through—at the 1.5-hour mark—using a spatula. This ensures even drying. The slices are ready when they feel dry to the touch, slightly leathery, and the centers are no longer sticky. They should still have a little give, like dried fruit, not crispy like chips.
- Let them cool completely on a cooling rack. This takes about 30 minutes. As they cool, they’ll firm up a little more. Don’t skip this step—they’re still fragile when hot.
- String into a garland (optional): Once cool, thread a needle with twine and push it through the peel of each slice, about 1/4 inch from the edge. Space them evenly, about 2 inches apart. Add cinnamon sticks, dried cranberries, or rosemary sprigs between slices for extra flair. Tie a loop at each end for hanging.
Troubleshooting Tips: If your slices are browning too quickly, your oven might be too hot. Turn it down by 10–15 degrees. If they’re still sticky after 3 hours, give them another 30 minutes. Every oven is different, so trust your senses—they should smell fragrant and look translucent, with no visible moisture.
Sensory Cues: At the 1-hour mark, your kitchen will start smelling incredible—like a citrus orchard in winter. By 2 hours, the slices will have shrunk a little and the edges will be curling up. The color deepens from bright orange to a warm, caramelized amber. The seeds in the center will look like tiny stars. That’s when you know you’re on the right track.
Cooking Tips & Techniques
I’ve made these slices a dozen times now, and I’ve learned a few things the hard way. Here are my best tips for perfect results every time:
- Don’t rush the temperature: I once tried to speed things up by setting the oven to 250°F. The edges burned before the centers dried. Low and slow is the only way. 200°F is non-negotiable.
- Flip them halfway: This is the most common mistake I made early on. If you don’t flip the slices, the bottom side stays damp while the top dries out. A simple flip at the 1.5-hour mark makes all the difference.
- Check for moisture pockets: Sometimes a slice will have a stubborn wet spot in the center. If you notice this, just give that slice an extra 15–20 minutes in the oven. No big deal.
- Use a mandoline for uniform thickness: I know I mentioned this, but it bears repeating. Uneven slices dry unevenly. A mandoline gives you perfect 1/4-inch slices every time. Just watch your fingers—those blades are sharp!
- Let them cool completely before handling: I learned this one the hard way when I tried to string a garland with warm slices. They tore and crumbled. Patience, my friend.
- Store in an airtight container: Once they’re completely cool, store them in a glass jar or a zip-top bag. They’ll last for months if kept away from moisture. I keep mine in a mason jar on the counter, and they’re still beautiful after three months.
- Double up for a fuller garland: If you want a lush, dense garland, use 6–8 oranges instead of 3–4. The more slices, the more dramatic the effect.
Variations & Adaptations
One of the best things about this recipe is how customizable it is. Here are a few ways I’ve adapted it over the years:
- Spiced Orange Slices: Before baking, sprinkle the slices with a pinch of cinnamon, nutmeg, and allspice. The spices toast gently in the oven and add a warm, chai-like scent. I did this last year for a holiday party, and guests kept asking what my “secret spice blend” was.
- Citrus Medley Garland: Use a mix of oranges, lemons, limes, and grapefruits. The different colors and sizes create a beautiful, eclectic garland. Lemon slices dry faster, so check them at the 2-hour mark. Grapefruit slices take a little longer—up to 3.5 hours.
- Herb-Infused Garland: Thread fresh rosemary or thyme sprigs between the orange slices. The herbs dry along with the fruit and add a wonderful savory note. I love this for a more rustic, farmhouse-style garland.
- Gluten-Free & Vegan: This recipe is naturally gluten-free and vegan. No modifications needed. It’s one of those rare recipes that works for almost everyone.
- Low-Sugar Option: If you’re watching your sugar intake, don’t worry—the natural sugars in the oranges concentrate as they dry, but there’s no added sugar. These slices are sweet enough on their own.
- Dried Fruit Gift Jars: Instead of a garland, pack the dried slices into a glass jar with a ribbon. Add a cinnamon stick and a few cloves for a beautiful, edible gift. I gave these to my neighbors last year, and they were a hit.
Serving & Storage Suggestions
These oven-dried orange slices are incredibly versatile. Here’s how I use and store them:
- Holiday Garland: String them on twine and drape them over your mantel, along a staircase railing, or across a window. They look stunning against a dark wall or a white fireplace. The scent fills the room naturally.
- Tree Ornaments: Tie a single slice with a ribbon and hang it on your Christmas tree. They catch the light beautifully and add a warm, organic touch to a tree full of glass ornaments.
- Cocktail Garnish: Drop a dried slice into a mug of hot cider, mulled wine, or a wintery bourbon cocktail. It rehydrates slightly and releases a burst of citrus flavor. Plus, it looks gorgeous floating in the drink.
- Gift Toppers: Tie a dried orange slice onto a gift box with twine. It’s a simple, elegant touch that makes any present feel extra special.
- Potpourri: Add the slices to a bowl with cinnamon sticks, star anise, and pine cones. It’s a natural, chemical-free air freshener that lasts for weeks.
- Storage: Keep the dried slices in an airtight container at room temperature. They’ll last for 3–6 months. If they start to soften (which can happen in humid climates), pop them back in the oven at 200°F for 15–20 minutes to re-crisp them.
- Reheating Tip: If you’re using them as a garnish in a hot drink, just drop them in—they’ll soften naturally. For garlands, handle them gently, as they can be fragile after months of storage.
Nutritional Information & Benefits
While these slices are more about decoration than nutrition, they’re still a healthy addition to your holiday kitchen. Here’s a quick breakdown:
- Per slice (approx.): 15 calories, 0g fat, 4g carbs, 3g sugar, 0g protein. These are estimates and vary based on slice size.
- Vitamin C Boost: Oranges are packed with vitamin C, which supports your immune system during cold and flu season. Even dried, they retain some of this goodness.
- Fiber: The peel contains fiber, which is good for digestion. Eating a dried slice (peel and all) gives you a little fiber boost.
- No Added Sugar: Unlike many store-bought dried fruits, these slices have no added sugar or preservatives. They’re naturally sweet from the fruit itself.
- Dietary Considerations: This recipe is naturally gluten-free, vegan, dairy-free, and paleo-friendly. It’s also nut-free and soy-free, making it safe for most allergies.
- Potential Allergens: None, unless you have a citrus allergy (which is rare). Always check with guests if you’re serving them as part of a dish.
Conclusion
These cozy oven-dried orange slices have become my favorite holiday tradition, all thanks to an unexpected conversation with my accountant. They’re simple, beautiful, and so incredibly satisfying to make. Every time I string a new garland or tuck a slice into a gift bag, I think about that November afternoon and the cardigan-wearing man who changed my holiday decor game forever.
I hope you give them a try—and I hope they bring as much warmth and joy to your home as they have to mine. Don’t be afraid to experiment with different citrus fruits, spices, or herbs. That’s the beauty of this recipe: it’s a blank canvas for your holiday creativity.
Have you made these before? Or do you have your own twist on dried citrus decor? I’d love to hear about it! Drop a comment below and share your favorite way to use these slices. And if you try this recipe, tag me in your photos—I can’t wait to see your beautiful garlands. Happy holidays, friends!
Frequently Asked Questions
Can I use a dehydrator instead of an oven?
Absolutely! A dehydrator works great for this recipe. Set it to 135°F (57°C) and dry for 6–8 hours, or until the slices are leathery and dry. The process is slower, but it’s even more energy-efficient.
How do I know when the slices are fully dried?
The slices should feel dry to the touch, slightly leathery, and the centers should no longer be sticky or tacky. They should bend slightly without cracking. If they’re still soft or moist, give them more time.
Can I use these slices in cooking or baking?
Yes! They’re great for adding citrus flavor to teas, mulled wine, or baked goods. You can grind them into a powder for a citrus seasoning, or rehydrate them in water for a citrus-infused syrup. Just be aware that the flavor is more concentrated than fresh orange.
Why did my slices burn on the edges?
This usually happens when the oven temperature is too high or the slices are too thin. Stick to 200°F (93°C) and slice at 1/4-inch thickness. If your oven runs hot, use an oven thermometer to check the actual temperature.
How long will the garland last?
If stored properly in an airtight container away from moisture, the slices will last 3–6 months. Displayed as a garland, they’ll last about 1–2 months before starting to fade or soften. You can refresh them by baking at 200°F for 10–15 minutes.
Pin This Recipe!
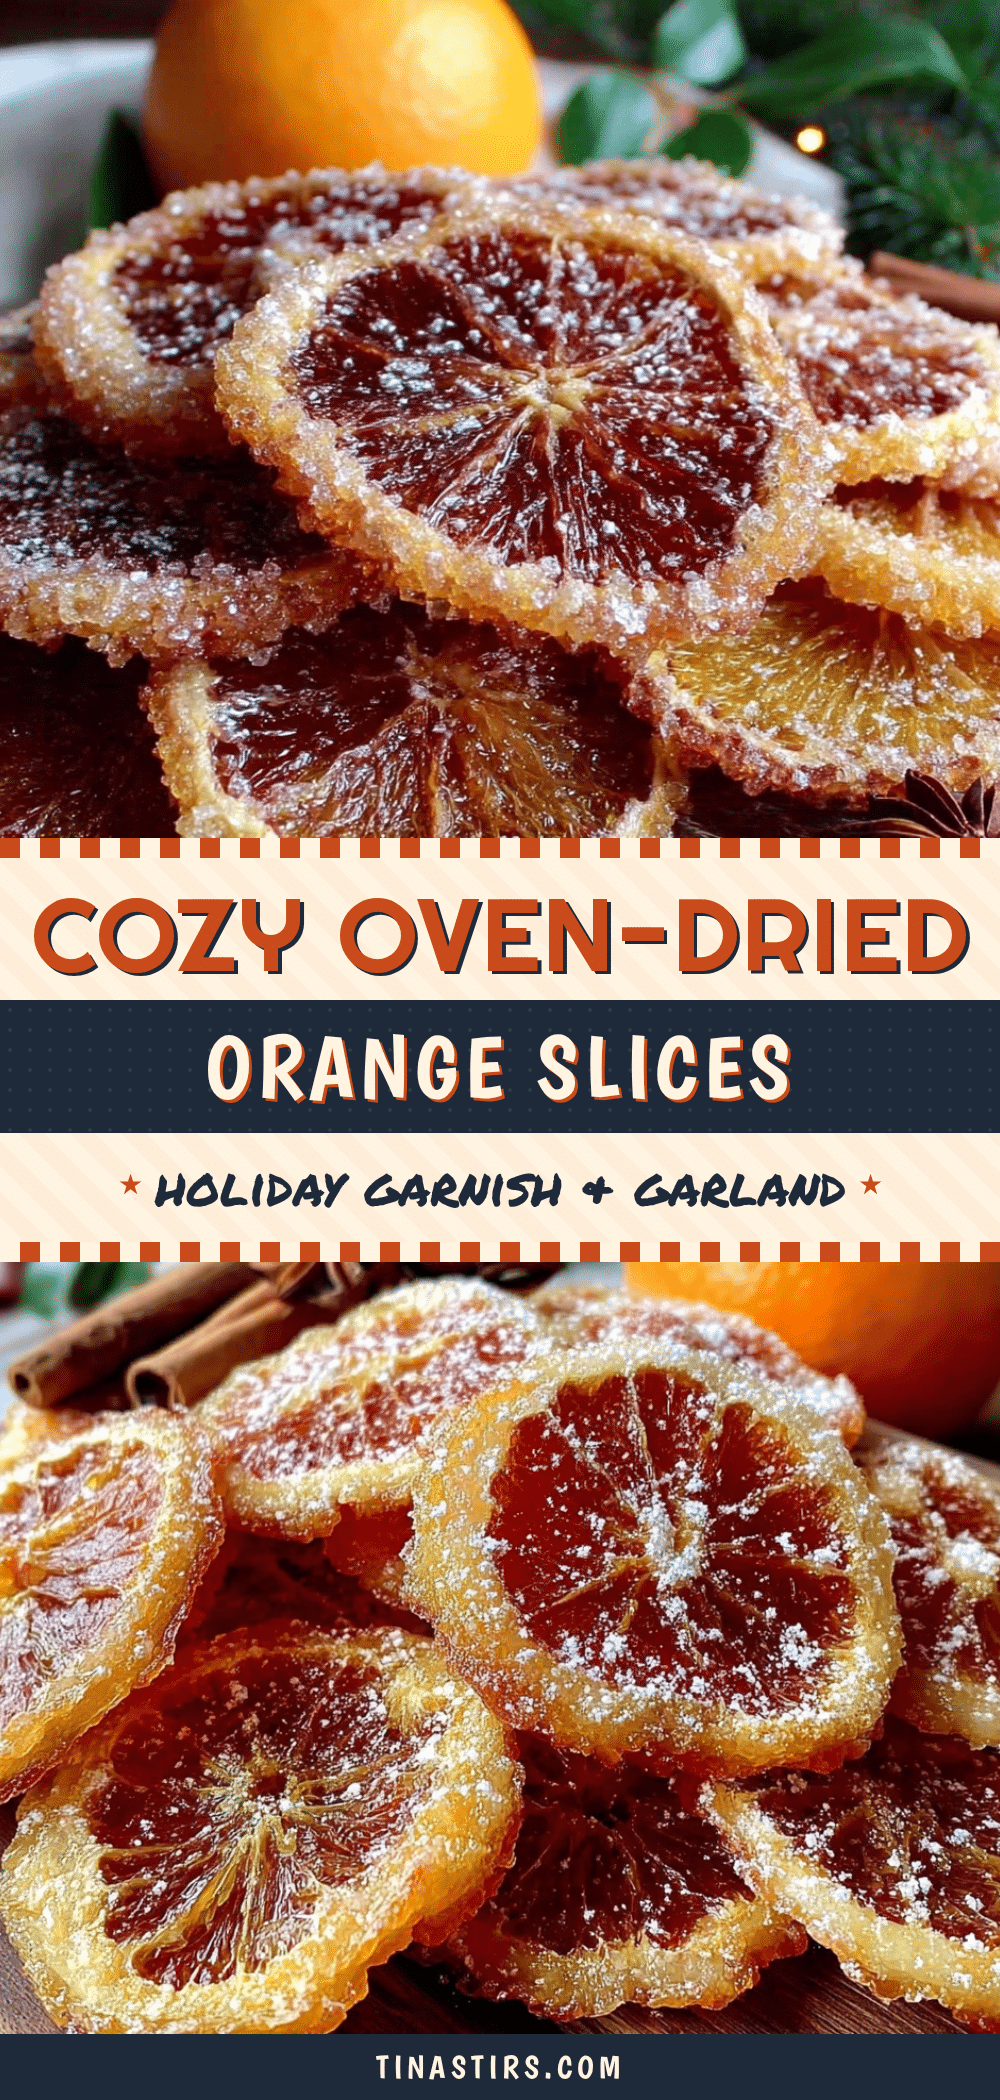
Cozy Oven-Dried Orange Slices: Easy Holiday Garland
Learn how to make beautiful, fragrant oven-dried orange slices for holiday garlands, decorations, and gifts. This simple, budget-friendly recipe fills your home with a warm citrus aroma and creates stunning natural decor.
- Prep Time: 15 minutes
- Cook Time: 3 hours
- Total Time: 3 hours 15 minutes
- Yield: 4 servings 1x
- Category: Dessert
- Cuisine: American
Ingredients
- 3–4 medium fresh oranges (navel, blood, or cara cara)
- 2–3 cinnamon sticks (optional, for garland assembly)
- 20 whole cloves (optional, for studding slices)
- 3–4 feet twine or jute string (optional, for garland)
- Dried cranberries or rosemary sprigs (optional, for garland)
Instructions
- Preheat the oven to 200°F (93°C).
- Wash and dry the oranges thoroughly. Pat them completely dry with a clean towel.
- Slice the oranges into 1/4-inch (6 mm) rounds using a sharp knife or mandoline slicer.
- Blot the slices with paper towels to remove excess surface moisture.
- Arrange the slices in a single layer on a parchment-lined baking sheet, leaving a little space between each slice.
- Bake for 2.5 to 3 hours, flipping the slices halfway through at the 1.5-hour mark.
- Let the slices cool completely on a cooling rack for about 30 minutes.
- Optional: Thread a needle with twine and string the slices into a garland, adding cinnamon sticks, dried cranberries, or rosemary sprigs between slices.
Notes
Don’t rush the temperature—200°F is key to avoid burning. Flip slices halfway through for even drying. Let slices cool completely before handling to prevent tearing. Store in an airtight container for 3-6 months. If slices soften in humid climates, re-crisp in oven at 200°F for 15-20 minutes.
Nutrition
- Serving Size: 1 slice
- Calories: 15
- Sugar: 3
- Carbohydrates: 4
Keywords: dried orange slices, oven-dried oranges, holiday garland, citrus decor, homemade ornaments, natural holiday decorations, orange garland, dried fruit garland


