Love this? Save it for later!
Share the inspiration with your friends
My neighbor, a retired baker named Mrs. Kowalski, watched me struggle with a batch of sticky, rock-hard regular Rice Krispie treats one Tuesday afternoon. She didn’t say anything at first. Then she just shook her head, opened her screen door, and handed me a piece of wax paper with a perfect, soft square on it. “You’re trying too hard,” she said. “And you’re using too much butter.” That was it. No formal lesson, no recipe card. Just a neighborly rescue mission.
Honestly, I felt a little silly. Here I was, someone who spends way too much time in the kitchen, and I couldn’t even get a basic no-bake treat right. But that little square she gave me was a revelation. It was soft, chewy, and had this delicate, almost cake-like crumb. It wasn’t the gooey, butter-logged version I was used to. A few weeks later, I started playing around with the idea of making a frosted version that felt a little more special, but without turning it into a total sugar bomb. You know that feeling when you want a treat that actually tastes like a treat but doesn’t leave you feeling heavy and sluggish?
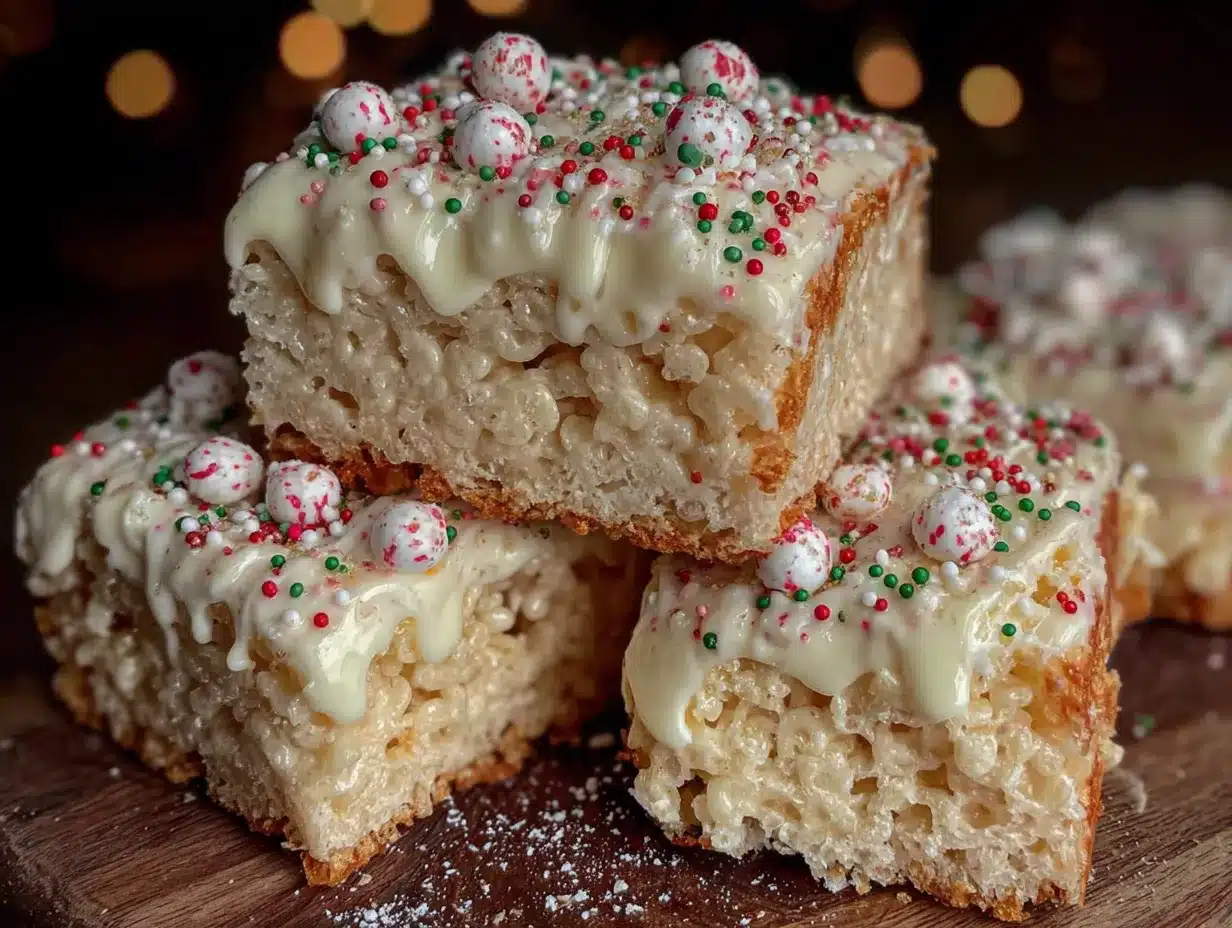
These Lighter Frosted Sugar Cookie Rice Krispie Treats are the result of that little experiment. They take the classic, nostalgic crunch of a Rice Krispie treat and marry it with the sweet, buttery flavor of a soft sugar cookie. The frosting is a lighter, fluffier take on the classic, using less powdered sugar and a secret ingredient to keep it creamy without being cloying. They’ve become my go-to for everything from afternoon pick-me-ups to potlucks where I want to bring something that disappears fast. They are proof that you can have a little indulgence without needing a nap afterwards.
Why You’ll Love This Recipe
Let’s be real for a second. There are a million Rice Krispie treat recipes out there. What makes these worth your time? I’ve tested this version about six times (my family is a willing test group, trust me), and here’s what I’ve found makes them stand out from the pack.
- Quick & Easy: From start to finish, you’re about 20 minutes of active work away from a pan of these beauties. They set in the fridge in about an hour, so you can whip them up while dinner is cooking and have dessert ready to go.
- Simple Ingredients: No weird, hard-to-find stuff. You probably have almost everything in your pantry right now. The “lighter” part comes from smart swaps, not a trip to a specialty grocery store.
- Perfect for Any Occasion: Birthday parties? Yes. Book club? Absolutely. A random Tuesday when you just need a little joy? You bet. They’re fancy enough to impress but simple enough for a weeknight.
- Crowd-Pleaser: I brought these to a family BBQ last summer, and they were gone in fifteen minutes. A cousin who “doesn’t do sweets” had two. The texture and flavor combo is just that good.
- Unbelievably Delicious: The magic is in the sugar cookie flavor. A splash of almond extract and a touch of vanilla in the marshmallow mixture makes them taste like you baked a batch of sugar cookies, but without the rolling and cutting. The frosting is the perfect finishing touch—creamy, sweet, but not a sugar rush.
This isn’t just another version of a classic. It’s the version that makes you close your eyes after the first bite. It’s comfort food reimagined—lighter, faster, but with the same soul-soothing satisfaction. Perfect for impressing guests without stress, or turning a simple snack into something memorable.
What Ingredients You Will Need
This recipe uses simple, wholesome-ish ingredients to deliver that nostalgic flavor without the heavy feeling. I’ve tested a few different brands and combos to get the texture just right, so here’s what I recommend.
For the Treats
- 4 tablespoons unsalted butter (I use Land O’Lakes for its consistent creaminess. You can use salted, just skip the added salt later.)
- 1 (10-ounce) bag mini marshmallows (Jet-Puffed is my go-to. They melt evenly and create a smooth base. Don’t use the jumbo ones; they take too long to melt and can lead to clumps.)
- 1/4 teaspoon salt (This balances the sweetness and enhances the buttery sugar cookie flavor. Trust me on this one.)
- 1 teaspoon vanilla extract (Pure, not imitation, for the best flavor.)
- 1/2 teaspoon almond extract (This is the secret to the “sugar cookie” taste. It adds a subtle, nutty, almost cherry-like note that is pure magic. Don’t skip it!)
- 6 cups crispy rice cereal (I use Kellogg’s Rice Krispies for that signature snap. A generic brand will work, but they can sometimes be a little denser and less crunchy.)
For the Lighter Frosting
- 4 tablespoons unsalted butter, softened (Let it sit out for about 30 minutes. You want it soft but not melted.)
- 1 1/2 cups powdered sugar (We’re using less than a traditional buttercream to keep it lighter.)
- 1/4 cup plain non-fat Greek yogurt (This is my secret swap! It replaces some of the butter and heavy cream, adding creaminess and a subtle tang that cuts the sweetness. Use full-fat if you want it even richer, but non-fat works perfectly.)
- 1/2 teaspoon vanilla extract
- 2-3 tablespoons milk of your choice (I use 2% cow’s milk, but oat or almond milk work great too. You just need it to thin the frosting to a spreadable consistency.)
- Sprinkles, for topping (Because what’s a frosted sugar cookie treat without sprinkles? Use your favorite rainbow jimmies or nonpareils.)
Equipment Needed
You don’t need a fancy bakery setup for these. Here’s what you’ll need to grab from the cupboard.
- Large pot (4-quart or larger): You need room to melt the marshmallows and stir in the cereal without it spilling everywhere. A Dutch oven works great.
- Rubber spatula or wooden spoon: A sturdy silicone spatula is best for scraping the marshmallow mixture out of the pot. A wooden spoon works, but it can be a little harder to get every last bit of sticky goodness.
- 9×13-inch baking pan: This is the standard size for a good thick treat. If you want them thicker, use an 8×8 pan, but you’ll need to adjust the baking time (they’ll just need to set a little longer).
- Parchment paper: This is non-negotiable for easy removal. Leave an overhang on two sides to create “handles” to lift the whole block out.
- Small bowl and electric mixer (or whisk): A hand mixer makes quick work of the frosting, but a strong arm and a whisk will do the job. You just want to get it smooth and fluffy.
- Offset spatula or butter knife: For spreading that beautiful frosting evenly.
If you don’t have a 9×13 pan, you can use a large rimmed baking sheet. The treats will be thinner, so keep an eye on the set time. I’ve also used a silicone baking mat in the past—it works, but the parchment paper method is just easier for lifting out and cutting clean squares.
Preparation Method
Alright, let’s get to the fun part. This is a straightforward process, but a few small details make a big difference. I’ve learned these through a few sticky mistakes, so pay attention to the little notes.
- Prep your pan. Line your 9×13-inch baking pan with parchment paper, leaving a 2-inch overhang on the long sides. Lightly spray the parchment with non-stick cooking spray. This is your insurance policy against sticking.
- Melt the butter. In your large pot, melt the 4 tablespoons of butter over medium-low heat. You don’t want it to sizzle or brown; just melt it gently. I once got distracted and let it brown a little, and it gave the treats a weird, nutty flavor that clashed with the sugar cookie vibe. Keep it gentle.
- Add the marshmallows. Pour in the entire bag of mini marshmallows and the 1/4 teaspoon of salt. Stir constantly with your rubber spatula until the marshmallows are completely melted and the mixture is smooth. This should take about 5-7 minutes. Don’t walk away! If the heat is too high, the marshmallows can scorch and get grainy.
- Flavor it up. Remove the pot from the heat. Immediately stir in the 1 teaspoon of vanilla extract and the 1/2 teaspoon of almond extract. The smell at this point is incredible—like a bakery in your kitchen. Stir until it’s all combined.
- Add the cereal. Pour in the 6 cups of crispy rice cereal. Fold it into the marshmallow mixture gently but firmly. You want to coat every piece of cereal without crushing it. If you stir too hard, you’ll end up with a dense, chewy block. Use a folding motion—lift from the bottom and turn it over. It should take about 30 seconds to a minute.
- Press into the pan. Scrape the mixture into your prepared pan. Here’s the trick: don’t press it down hard. You want them to be tender, not compacted. Use a piece of wax paper or another sheet of parchment to gently press the mixture into an even layer. If you use your hands, they’ll get super sticky (ask me how I know). Just a gentle, even press is all you need.
- Let them set. Set the pan aside to cool at room temperature for about 30 minutes, or pop it in the fridge for 15-20 minutes if you’re in a hurry. You want them to be firm enough to hold their shape when you cut them, but not rock hard.
- Make the frosting. While the treats are setting, make the frosting. In a small bowl, beat the 4 tablespoons of softened butter with an electric mixer until it’s smooth and fluffy, about 1 minute. Add the 1 1/2 cups of powdered sugar, the 1/4 cup of Greek yogurt, and the 1/2 teaspoon of vanilla. Beat on low speed until combined, then increase to medium speed and beat for 2 minutes, until light and creamy. Add the milk, one tablespoon at a time, until you reach a spreadable consistency. You want it thick enough to hold its shape but soft enough to spread easily.
- Frost and decorate. Once the treats are set, spread the frosting evenly over the top using your offset spatula. Immediately add your sprinkles. If you wait too long, the frosting will set and the sprinkles won’t stick. Be generous with them!
- Cut and serve. Let the frosting set for about 15 minutes at room temperature, or pop it in the fridge for 10 minutes. Then, using the parchment overhang, lift the entire block out of the pan. Place it on a cutting board and use a sharp knife to cut into squares. For clean cuts, wipe the knife clean between each slice.
Cooking Tips & Techniques
Over the years, I’ve made a few batches of these that were less than perfect. Here are the lessons I’ve learned so you can skip the mistakes.
- The Marshmallow Melt is Everything: The biggest mistake people make is rushing this step. Low and slow is the way. If the marshmallows get too hot too fast, they can separate and become grainy. You want a smooth, glossy, homogeneous mixture. If you see any lumps, keep stirring over the low heat until they disappear.
- Don’t Overmix the Cereal: I know it’s tempting to stir until everything is perfectly coated, but overmixing will crush the cereal and make your treats dense and tough. Fold just until you can’t see any dry cereal. A few stray pieces are fine; they’ll get incorporated when you press them into the pan.
- The Pressing Technique: This is where a lot of people go wrong. You don’t need to smash the mixture into the pan. A gentle, even press is all you need. If you press too hard, you’ll squeeze all the air out, and you’ll end up with a brick. Use a sheet of wax paper to press down evenly without sticking.
- Room Temperature vs. Fridge: I prefer to let the treats set at room temperature. The fridge can sometimes make them a little too firm and slightly dry. Room temperature setting gives them that perfect, soft, chewy texture. If you’re in a rush, 15 minutes in the fridge is fine, but let them sit out for 5 minutes before cutting.
- Frosting Consistency: The Greek yogurt makes this frosting lighter, but it can also make it a little looser than a traditional buttercream. If your frosting seems too thin, add another tablespoon of powdered sugar. If it’s too thick, add a splash more milk. You want it to be spreadable but not runny.
Variations & Adaptations
This recipe is a fantastic base to play with. Here are a few ways I’ve tweaked it depending on my mood or what I have in the pantry.
- Gluten-Free Version: The standard Rice Krispies cereal contains malt flavoring, which is made from barley and contains gluten. To make this gluten-free, simply use a certified gluten-free crispy rice cereal. I’ve used the Nature’s Path brand and it works beautifully. Everything else in the recipe is naturally gluten-free.
- Dairy-Free/Lighter Swap: To make this dairy-free, use a plant-based butter (like Miyoko’s or Earth Balance) and a dairy-free yogurt (like Kite Hill or Silk). The texture will be slightly different, but still delicious. I tried this once for a friend, and the only change I noticed was a slightly less creamy frosting, so I added an extra tablespoon of dairy-free milk to compensate.
- Lemon Sugar Cookie Version: This is my personal favorite summer variation. Replace the almond extract with 1 teaspoon of lemon zest and 1/2 teaspoon of lemon extract. In the frosting, add 1 teaspoon of lemon zest and a squeeze of lemon juice instead of the vanilla. The bright, citrusy flavor is incredible with the sweet cereal base.
- Chocolate-Dipped Treats: For an extra decadent touch, after cutting the treats, dip half of each square into melted dark chocolate. Let the excess drip off, then place them on a parchment-lined baking sheet to set. The combination of the sweet, creamy treat with the slightly bitter dark chocolate is a match made in heaven.
- Funfetti Style: Add 2 tablespoons of rainbow sprinkles to the marshmallow mixture right before you add the cereal. Fold them in gently so they don’t bleed their color. It makes them look like a party in a pan.
Serving & Storage Suggestions
These treats are best enjoyed at room temperature. The texture is soft, chewy, and just perfect. Here’s how to serve and store them to keep them at their best.
- Serving: I like to serve them on a pretty platter, cut into neat squares. They’re fantastic on their own, but they also pair beautifully with a cold glass of milk or a hot cup of coffee. The sweetness of the treat balances the bitterness of coffee perfectly. For a fun dessert board, arrange them alongside fresh berries, some dark chocolate pieces, and a few dollops of whipped cream.
- Storage at Room Temperature: Store them in an airtight container at room temperature for up to 4 days. Place a piece of wax paper or parchment between layers to prevent them from sticking together. They will stay soft and chewy. Do not refrigerate them unless you absolutely have to, as the fridge can dry them out.
- Storage in the Fridge: If you live in a very warm climate or need them to last longer, you can store them in the fridge for up to a week. Just let them sit at room temperature for about 15 minutes before serving to soften up again.
- Freezing: These freeze surprisingly well! Wrap individual squares tightly in plastic wrap, then place them in a freezer-safe bag. They will keep for up to 3 months. To thaw, just let them sit at room temperature for about 30 minutes. The frosting might be a little softer after freezing, but the flavor is still fantastic.
- Flavor Development: Honestly, these are even better the next day. The flavors meld together and the texture becomes even more tender. So if you can resist eating them all on day one, you’re in for a real treat on day two.
Nutritional Information & Benefits
I’m not a nutritionist, but I do try to be mindful of what I’m eating. These are a treat, not a health food, but they are a lighter take on a classic indulgence.
One square (based on 16 servings) contains approximately:
- Calories: 185
- Fat: 7g
- Saturated Fat: 4g
- Carbohydrates: 30g
- Sugar: 18g
- Protein: 2g
The Greek yogurt in the frosting adds a small amount of protein and calcium, and it helps reduce the overall fat and sugar compared to a traditional buttercream. The crispy rice cereal is a source of iron and B vitamins. The main benefit, honestly, is the portion control. Because they are lighter and not overly sweet, a single square feels satisfying. You don’t get that sugar crash or the urge to eat the whole pan. They fit perfectly into a balanced diet where you enjoy treats in moderation. They are a great option for a party where you want something sweet but don’t want to feel weighed down.
Dietary Considerations: As written, this recipe contains gluten (from the cereal), dairy (butter, yogurt, milk), and is vegetarian. For gluten-free, dairy-free, or vegan options, please see the Variations & Adaptations section above.
Conclusion
These Lighter Frosted Sugar Cookie Rice Krispie Treats are the perfect example of how a small tweak can transform a classic. They take everything you love about the original—that nostalgic crunch, that buttery sweetness—and make it feel a little more special and a lot more balanced. They are the kind of treat that makes you feel good about eating them, not guilty.
I hope you give them a try. Don’t be afraid to play around with the variations or to make them your own. Maybe you’ll add a little more almond extract, or skip the frosting altogether for a simpler snack. The beauty of this recipe is its flexibility. I would honestly love to hear how they turn out for you. Did you try the lemon version? Did you dip them in chocolate? Drop a comment below and let me know. Your feedback helps me and other readers discover new ways to enjoy these little squares of joy.
Happy baking, friends. And remember, the best recipes are the ones you share with the people you love.
Frequently Asked Questions
Can I use salted butter instead of unsalted?
Yes, you can. Just skip the 1/4 teaspoon of salt that is added with the marshmallows. The salted butter will provide enough salt to balance the sweetness. If you use salted butter and add the extra salt, the treats might come out a little too salty.
My treats turned out hard and dense. What went wrong?
This usually happens from either overmixing the cereal or pressing it too firmly into the pan. When you stir the cereal into the marshmallow mixture, fold it gently just until it’s combined. When you press it into the pan, use a light, even touch. You want to encourage the mixture to fill the pan, not compact it into a brick.
Can I make these vegan?
Absolutely! Use a vegan butter alternative (like Miyoko’s or Earth Balance) and a vegan marshmallow brand (like Dandies). For the frosting, use a plant-based yogurt (like Kite Hill or Silk) and a plant-based milk. The texture will be slightly different, but the flavor is still fantastic.
How do I get clean cuts without the treats crumbling?
Use a sharp knife and wipe it clean with a damp paper towel between each slice. If the treats are sticking to your knife, you can spray the knife lightly with non-stick cooking spray before cutting. Letting the treats set completely before cutting is also crucial—if they are still warm, they will crumble.
Can I use a different type of cereal?
You can experiment, but the texture will change. A generic crispy rice cereal will work, but it might be a little denser. You could also try using a puffed rice cereal for a lighter, airier treat. Avoid using a flake-type cereal, as it won’t hold its shape and will become soggy.
Pin This Recipe!
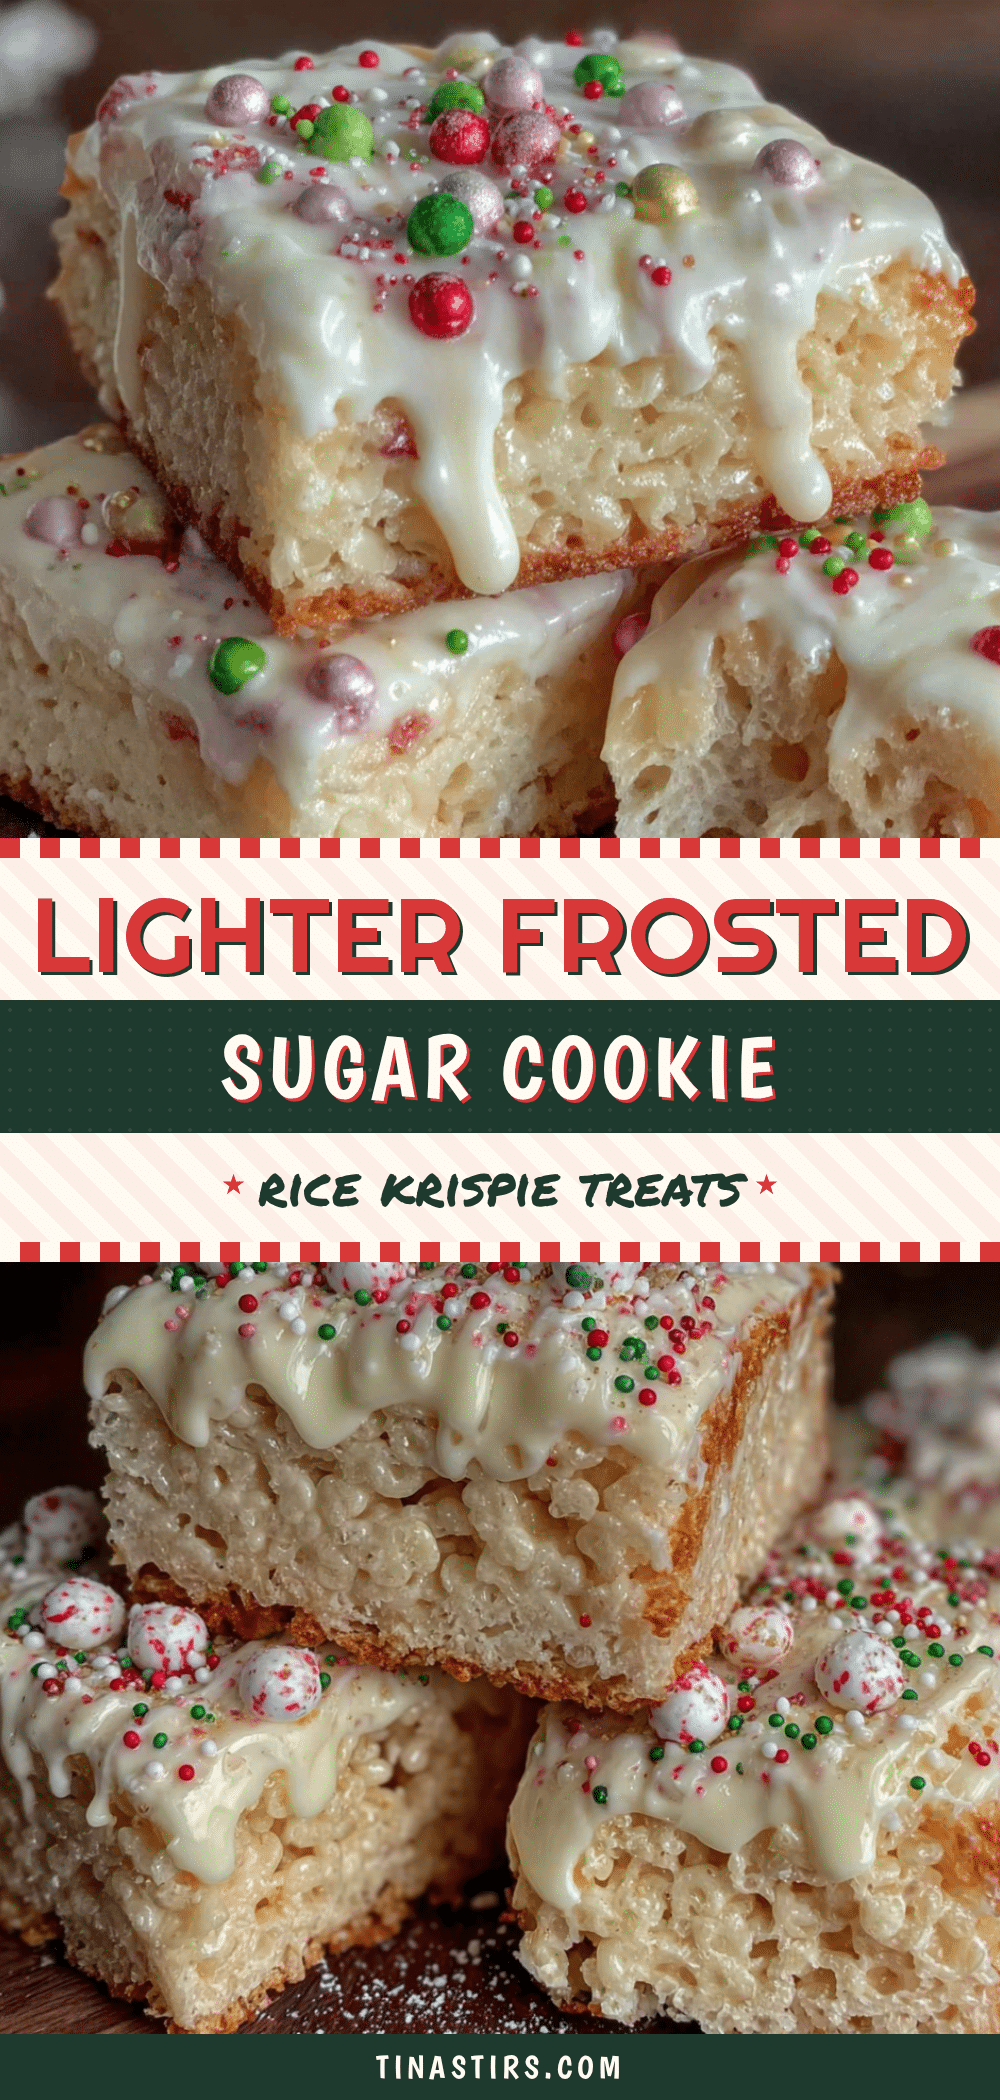
Lighter Frosted Sugar Cookie Rice Krispie Treats
These Lighter Frosted Sugar Cookie Rice Krispie Treats combine the nostalgic crunch of a classic Rice Krispie treat with the sweet, buttery flavor of a soft sugar cookie. The frosting is a lighter, fluffier take on the classic, using less powdered sugar and Greek yogurt for creaminess without being cloying.
- Prep Time: 20 minutes
- Cook Time: 10 minutes
- Total Time: 1 hour 30 minutes
- Yield: 16 servings 1x
- Category: Dessert
- Cuisine: American
Ingredients
- 4 tablespoons unsalted butter
- 1 (10-ounce) bag mini marshmallows
- 1/4 teaspoon salt
- 1 teaspoon vanilla extract
- 1/2 teaspoon almond extract
- 6 cups crispy rice cereal
- 4 tablespoons unsalted butter, softened
- 1 1/2 cups powdered sugar
- 1/4 cup plain non-fat Greek yogurt
- 1/2 teaspoon vanilla extract
- 2–3 tablespoons milk of your choice
- Sprinkles, for topping
Instructions
- Prep your pan. Line your 9×13-inch baking pan with parchment paper, leaving a 2-inch overhang on the long sides. Lightly spray the parchment with non-stick cooking spray.
- Melt the butter. In your large pot, melt the 4 tablespoons of butter over medium-low heat. You don’t want it to sizzle or brown; just melt it gently.
- Add the marshmallows. Pour in the entire bag of mini marshmallows and the 1/4 teaspoon of salt. Stir constantly with your rubber spatula until the marshmallows are completely melted and the mixture is smooth. This should take about 5-7 minutes.
- Flavor it up. Remove the pot from the heat. Immediately stir in the 1 teaspoon of vanilla extract and the 1/2 teaspoon of almond extract. Stir until it’s all combined.
- Add the cereal. Pour in the 6 cups of crispy rice cereal. Fold it into the marshmallow mixture gently but firmly. You want to coat every piece of cereal without crushing it. Use a folding motion—lift from the bottom and turn it over. It should take about 30 seconds to a minute.
- Press into the pan. Scrape the mixture into your prepared pan. Use a piece of wax paper or another sheet of parchment to gently press the mixture into an even layer. Don’t press it down hard.
- Let them set. Set the pan aside to cool at room temperature for about 30 minutes, or pop it in the fridge for 15-20 minutes if you’re in a hurry.
- Make the frosting. While the treats are setting, make the frosting. In a small bowl, beat the 4 tablespoons of softened butter with an electric mixer until it’s smooth and fluffy, about 1 minute. Add the 1 1/2 cups of powdered sugar, the 1/4 cup of Greek yogurt, and the 1/2 teaspoon of vanilla. Beat on low speed until combined, then increase to medium speed and beat for 2 minutes, until light and creamy. Add the milk, one tablespoon at a time, until you reach a spreadable consistency.
- Frost and decorate. Once the treats are set, spread the frosting evenly over the top using your offset spatula. Immediately add your sprinkles.
- Cut and serve. Let the frosting set for about 15 minutes at room temperature, or pop it in the fridge for 10 minutes. Then, using the parchment overhang, lift the entire block out of the pan. Place it on a cutting board and use a sharp knife to cut into squares. For clean cuts, wipe the knife clean between each slice.
Notes
The marshmallow melt is everything: low and slow is the way. Don’t overmix the cereal; fold just until combined. Press gently into the pan to avoid dense treats. The Greek yogurt in the frosting makes it lighter; adjust consistency with milk or powdered sugar as needed. These are even better the next day.
Nutrition
- Serving Size: 1 square
- Calories: 185
- Sugar: 18
- Sodium: 120
- Fat: 7
- Saturated Fat: 4
- Carbohydrates: 30
- Protein: 2
Keywords: Rice Krispie treats, sugar cookie, frosted, lighter, easy, no-bake, dessert, potluck, birthday