Love this? Save it for later!
Share the inspiration with your friends
“I wasn’t planning on baking anything complicated that Saturday morning,” I confessed to my friend Jamie while rummaging through my kitchen drawers for parchment paper. The plan was simple: quick breakfast and a lazy day. But then, I spotted a faded recipe card tucked between my cookbooks—a recipe for a red velvet cake roll my neighbor, Mrs. Delgado, had once mentioned in passing during a brief chat over the fence.
She described it as her “flag cake,” a playful nod to the way the red velvet and cream cheese filling swirl like a waving banner. Honestly, I was skeptical at first, thinking, “A cake roll? Isn’t that a bit tricky?” But curiosity got the best of me, and I decided to give it a shot. (Spoiler alert: my kitchen looked like a flour storm hit it, and I almost forgot the baking soda, but the result was worth every messy moment.)
That first bite was something else—the moist, tender red velvet cake paired with the tangy, creamy filling was like a cozy celebration in my mouth. Maybe you’ve been there, craving something impressive but easy enough for a weekend treat. This Perfect Red Velvet Flag Cake Roll with Cream Cheese Filling quickly became my go-to for impressing guests without the fuss. Let me tell you, once you try making this, you’ll wonder why you ever shied away from cake rolls before!
Why You’ll Love This Recipe
After several trials (and a few hilarious missteps), I can confidently say this Perfect Red Velvet Flag Cake Roll with Cream Cheese Filling is a winner for so many reasons. Here’s why it deserves a spot in your baking rotation:
- Quick & Easy: The whole process takes under an hour from start to finish, making it perfect for last-minute celebrations or weekday dessert cravings.
- Simple Ingredients: No need for special trips to the store—most of these are pantry staples you probably already have.
- Perfect for Parties: Whether it’s a Fourth of July BBQ or a cozy family gathering, this cake roll steals the show with its striking red hue and creamy filling.
- Crowd-Pleaser: Kids and adults alike rave about the soft cake texture and luscious cream cheese swirl.
- Unbelievably Delicious: The balance of the mildly chocolatey red velvet cake and tangy, smooth cream cheese filling hits all the right comfort-food notes.
What sets this recipe apart? Well, I’ve tweaked the classic red velvet batter to be ultra-moist without being heavy, and the cream cheese filling is whipped just right—not too sweet, never dense. Plus, the rolling technique ensures a clean, beautiful flag-like swirl every time. Honestly, it’s the kind of dessert that makes you close your eyes and savor every bite.
What Ingredients You Will Need
This recipe uses simple, wholesome ingredients to deliver bold flavor and that soft, melt-in-your-mouth texture without any fuss. Most items are pantry staples, with a few fresh touches for the filling.
- For the Red Velvet Cake:
- All-purpose flour – 1 cup (125g), sifted
- Cocoa powder – 1 tablespoon (unsweetened, for subtle chocolate flavor)
- Baking powder – 1 teaspoon
- Baking soda – ½ teaspoon
- Salt – ¼ teaspoon
- Granulated sugar – ¾ cup (150g)
- Large eggs – 3, room temperature
- Buttermilk – ⅔ cup (160ml), preferably low-fat
- Vegetable oil – ⅓ cup (80ml)
- White vinegar – 1 teaspoon (helps brighten the cake’s flavor)
- Vanilla extract – 1 teaspoon
- Red food coloring – 2 tablespoons (gel-based for vivid color)
- For the Cream Cheese Filling:
- Cream cheese – 8 oz (225g), softened (I swear by Philadelphia brand for smoothness)
- Unsalted butter – ¼ cup (60g), softened
- Powdered sugar – 1 cup (120g), sifted
- Vanilla extract – 1 teaspoon
- Heavy cream – 2 tablespoons (optional, for a lighter, fluffier texture)
If you’re out of buttermilk, mix ⅔ cup milk with 1 teaspoon lemon juice and let it sit for 5 minutes. For a dairy-free twist, substitute coconut yogurt in the filling and use almond milk for the buttermilk mix.
Equipment Needed
- 9×13-inch (23×33 cm) jelly roll pan – essential for the cake’s thin layer and easy rolling
- Parchment paper – to line the pan and prevent sticking
- Electric mixer (handheld or stand mixer) – for whipping the cream cheese filling until silky smooth
- Spatula – flexible silicone is best for folding batter and spreading filling evenly
- Cooling rack – to cool the cake completely before rolling
- Kitchen towel – slightly damp, used to help roll the cake without cracking
If you don’t have a jelly roll pan, a rimmed baking sheet around 10×15 inches works, but keep an eye on baking time. I’ve also made the filling by hand with a whisk when in a pinch—just expect a bit more elbow grease!
Preparation Method
- Preheat your oven to 350°F (175°C). Line your jelly roll pan with parchment paper, making sure the edges hang over for easy removal.
- Mix dry ingredients: In a medium bowl, sift together the flour, cocoa powder, baking powder, baking soda, and salt. Set aside.
- Combine wet ingredients: In a large mixing bowl, beat the sugar and eggs until pale and fluffy, about 3 minutes. Add the vegetable oil, buttermilk, vinegar, vanilla extract, and red food coloring. Mix until smooth.
- Incorporate dry ingredients: Gradually add the dry mix to the wet ingredients, folding gently until just combined. Don’t overmix—this keeps the cake tender.
- Pour batter: Spread the batter evenly in the prepared pan, smoothing the top with a spatula. Tap the pan lightly on the counter to release air bubbles.
- Bake: Place in the oven and bake for 15-18 minutes, or until the cake springs back when lightly touched and a toothpick inserted in the center comes out clean.
- Prepare for rolling: While the cake is baking, lay a clean kitchen towel on your counter and dust it generously with powdered sugar to prevent sticking.
- Roll the cake: Once the cake is out of the oven, immediately loosen the edges with a knife and invert it onto the prepared towel. Carefully peel off the parchment paper. Starting at the short edge, roll the cake and towel together into a tight spiral. Let it cool completely—this step prevents cracking later.
- Make the filling: Beat the softened cream cheese and butter until smooth and creamy. Gradually add powdered sugar and vanilla, beating until fluffy. If desired, add heavy cream to lighten the texture.
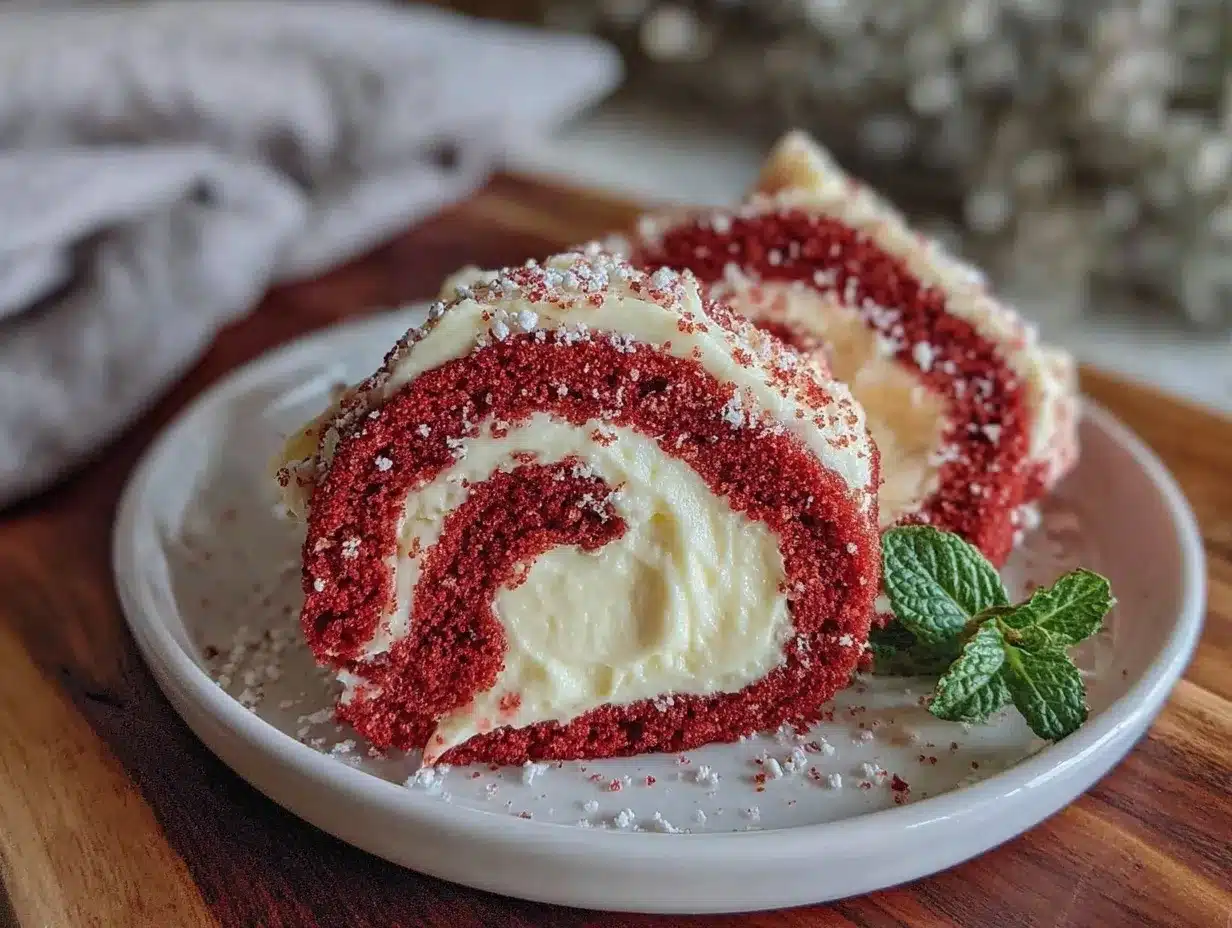
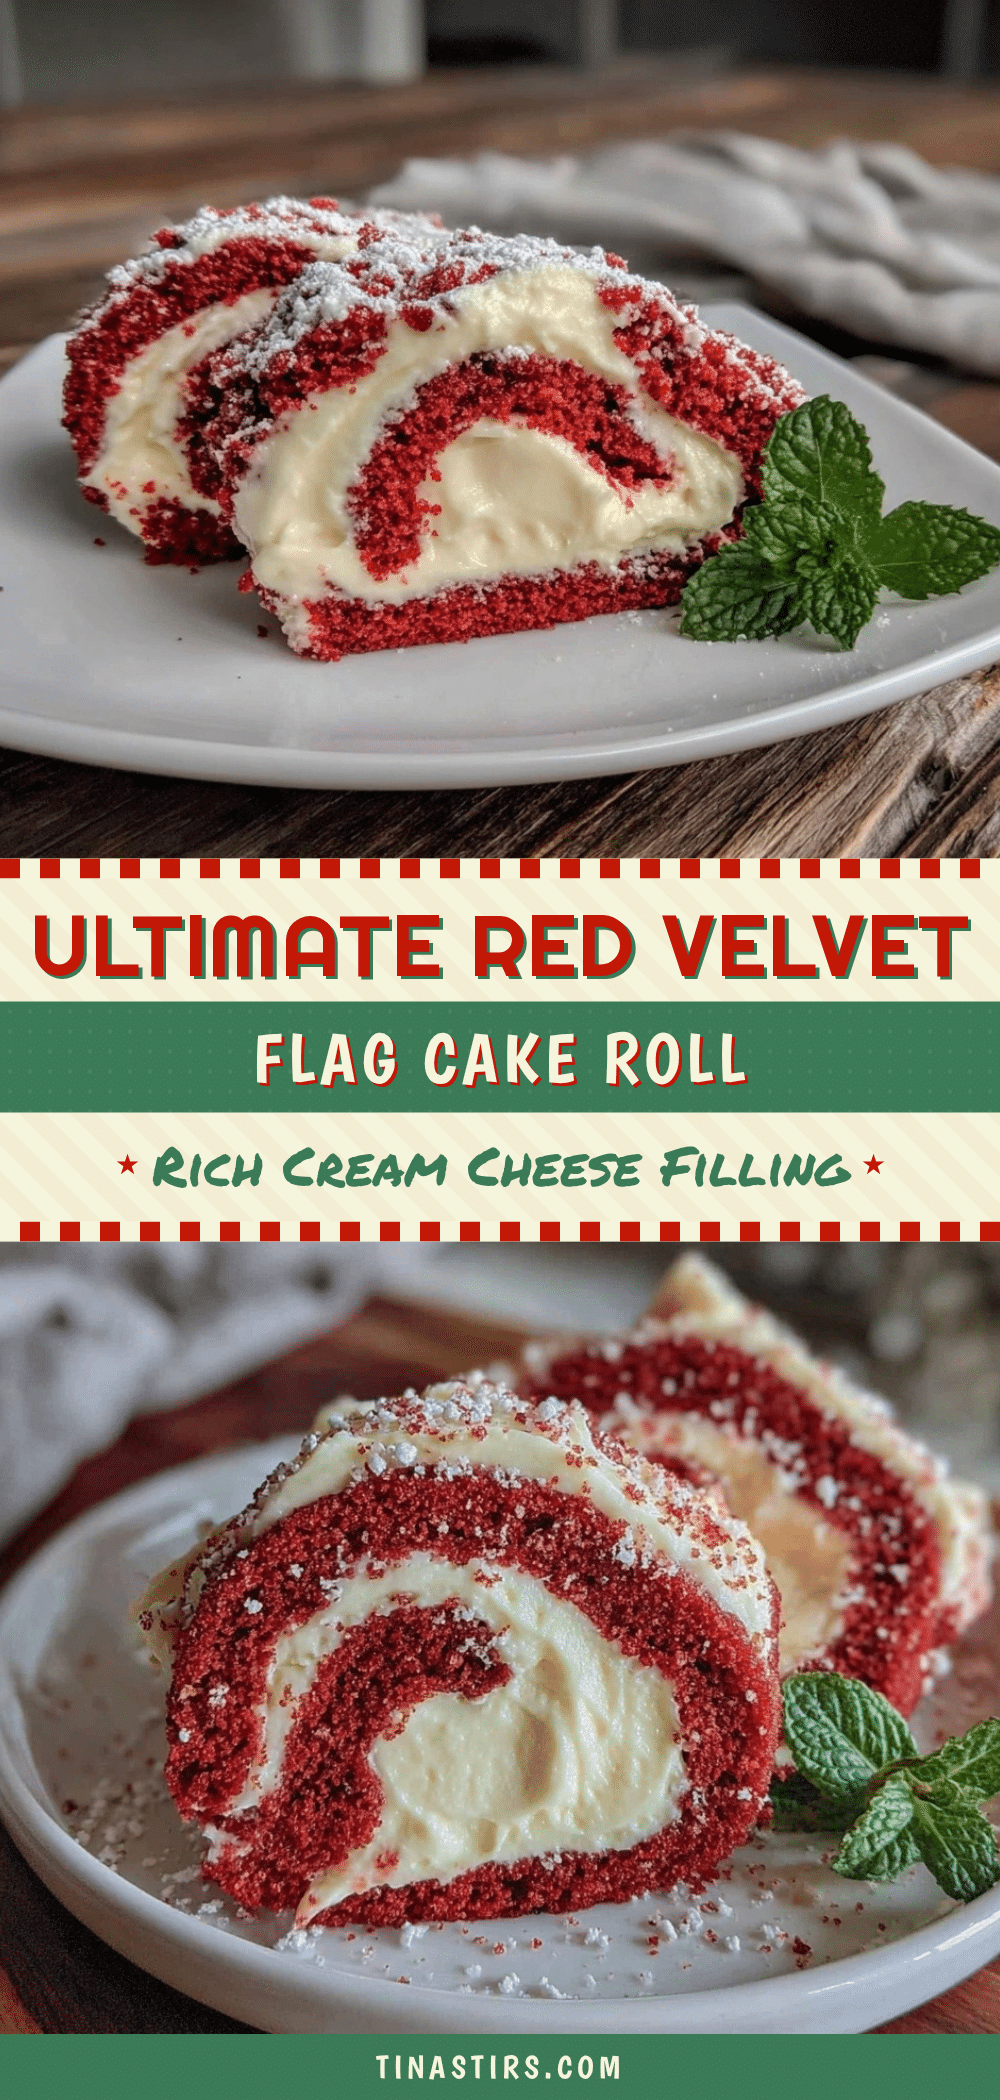
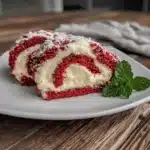
- Unroll and fill: Gently unroll the cooled cake and spread the cream cheese filling evenly over the surface, leaving a small border around the edges.
- Re-roll and chill: Roll the cake back up without the towel. Wrap it tightly in plastic wrap and refrigerate for at least 2 hours to set.
- Serve: Slice with a sharp knife (wipe the blade between cuts) and enjoy your beautifully swirled red velvet flag cake roll!
Cooking Tips & Techniques
Let me share a few tricks I’ve picked up to make this cake roll foolproof. First, timing is everything—don’t wait for the cake to cool before rolling it the first time. Rolling it warm helps shape the cake without cracks.
When mixing the batter, be gentle. Overmixing develops gluten and makes the cake dense instead of tender. Folding in the dry ingredients carefully keeps the texture light.
For the cream cheese filling, make sure your ingredients are at room temperature. Cold cream cheese can leave lumps, and softened butter blends better for a smooth finish.
Don’t skip the kitchen towel dusted with powdered sugar—the cake sticks without it and can tear during rolling. Trust me, that’s a mistake I made once, and I still have the scar on my favorite towel!
If your cream cheese filling is too thick, add a tablespoon of heavy cream or milk to loosen it slightly. Conversely, if it’s too runny, a little more powdered sugar helps thicken it up.
Variations & Adaptations
- Chocolate Lovers’ Twist: Add mini chocolate chips to the cream cheese filling for an extra surprise bite.
- Berry Flag Cake: Spread a thin layer of raspberry jam under the cream cheese filling for a fruity zing that complements the red velvet perfectly.
- Gluten-Free Version: Substitute all-purpose flour with a 1:1 gluten-free baking flour blend. Add ½ teaspoon xanthan gum if your blend doesn’t already contain it to maintain cake structure.
I once experimented with swapping the cream cheese filling for mascarpone mixed with honey and lemon zest—delicious but less tangy. It’s fun to tweak and make this recipe your own, depending on your mood or occasion.
Serving & Storage Suggestions
This cake roll is best served chilled or at room temperature. The cream cheese filling firms up beautifully after refrigeration, making slicing neat and easy. I like to serve it on a simple white plate to let those red swirls pop.
Pair it with a cup of strong coffee or a glass of cold milk—both bring out the cake’s rich flavors. For a festive touch, add fresh raspberries or a dusting of powdered sugar on top.
Store leftovers wrapped tightly in plastic wrap in the refrigerator for up to 4 days. You can freeze slices individually, wrapped in parchment and foil, for up to a month. To reheat, let frozen slices thaw in the fridge overnight; serve chilled or warm gently in the microwave for 15 seconds.
Flavors actually deepen after a day, so if you can wait, the next-day slice might just be your favorite!
Nutritional Information & Benefits
Each slice of this Perfect Red Velvet Flag Cake Roll with Cream Cheese Filling contains roughly 280 calories, with a balanced amount of fats and sugars that satisfy without overwhelming. The cream cheese provides a small boost of protein and calcium, while the buttermilk adds a subtle tang and moisture without extra fat.
This recipe can be adapted for gluten-free or dairy-free diets, making it accessible to more people. While it’s an indulgence, the portion-controlled slices help keep treats reasonable.
Personally, I appreciate that this recipe uses real ingredients and avoids overly processed shortcuts, so it feels like a homemade celebration—not just another sugary dessert.
Conclusion
If you’re looking for a show-stopping dessert that’s surprisingly simple to make, this Perfect Red Velvet Flag Cake Roll with Cream Cheese Filling is the answer. It’s a recipe that’s stayed with me through many weekends, potlucks, and cozy nights at home.
Feel free to tailor the filling or add your favorite flavors to make it truly yours. Honestly, there’s something magical about rolling up that beautiful red velvet and cream cheese combo—the kind of magic that makes baking feel like a little celebration every time.
Give it a try, share your results, and maybe even surprise a loved one with this colorful, delicious cake roll. I’d love to hear how your version turns out!
Frequently Asked Questions
Can I make the red velvet cake roll ahead of time?
Absolutely! You can bake and roll the cake a day ahead, then fill and chill it when ready to serve. Just keep it tightly wrapped in plastic wrap to maintain moisture.
What if I don’t have buttermilk?
No worries—mix ⅔ cup milk with 1 teaspoon lemon juice or white vinegar and let it sit for 5 minutes. This homemade buttermilk works perfectly in the recipe.
How do I prevent the cake from cracking when rolling?
Roll the cake while it’s still warm, using a powdered sugar-dusted kitchen towel to help it hold its shape. Cooling the cake rolled up helps “set” it and prevents cracks when you add the filling.
Can I freeze the cake roll?
Yes! Wrap slices tightly in parchment and foil before freezing. Thaw in the fridge overnight for best texture and flavor.
Is there a substitute for red food coloring?
You could try natural alternatives like beet juice or powder, but the color may be less vibrant. Gel-based food coloring gives the best classic red velvet look.
Pin This Recipe!
Perfect Red Velvet Flag Cake Roll Recipe with Cream Cheese Filling
A moist and tender red velvet cake roll with a tangy cream cheese filling, perfect for impressing guests with its striking red hue and creamy swirl.
- Prep Time: 15 minutes
- Cook Time: 18 minutes
- Total Time: 1 hour 15 minutes
- Yield: 12 servings
- Category: Dessert
- Cuisine: American
Ingredients
- All-purpose flour – 1 cup (125g), sifted
- Cocoa powder – 1 tablespoon (unsweetened)
- Baking powder – 1 teaspoon
- Baking soda – ½ teaspoon
- Salt – ¼ teaspoon
- Granulated sugar – ¾ cup (150g)
- Large eggs – 3, room temperature
- Buttermilk – ⅔ cup (160ml), preferably low-fat
- Vegetable oil – ⅓ cup (80ml)
- White vinegar – 1 teaspoon
- Vanilla extract – 1 teaspoon
- Red food coloring – 2 tablespoons (gel-based)
- Cream cheese – 8 oz (225g), softened
- Unsalted butter – ¼ cup (60g), softened
- Powdered sugar – 1 cup (120g), sifted
- Vanilla extract – 1 teaspoon
- Heavy cream – 2 tablespoons (optional)
Instructions
- Preheat your oven to 350°F (175°C). Line your 9×13-inch jelly roll pan with parchment paper, making sure the edges hang over for easy removal.
- In a medium bowl, sift together the flour, cocoa powder, baking powder, baking soda, and salt. Set aside.
- In a large mixing bowl, beat the sugar and eggs until pale and fluffy, about 3 minutes. Add the vegetable oil, buttermilk, vinegar, vanilla extract, and red food coloring. Mix until smooth.
- Gradually add the dry mix to the wet ingredients, folding gently until just combined. Do not overmix.
- Spread the batter evenly in the prepared pan, smoothing the top with a spatula. Tap the pan lightly on the counter to release air bubbles.
- Bake for 15-18 minutes, or until the cake springs back when lightly touched and a toothpick inserted in the center comes out clean.
- While the cake is baking, lay a clean kitchen towel on your counter and dust it generously with powdered sugar.
- Once the cake is out of the oven, immediately loosen the edges with a knife and invert it onto the prepared towel. Carefully peel off the parchment paper. Starting at the short edge, roll the cake and towel together into a tight spiral. Let it cool completely.
- Beat the softened cream cheese and butter until smooth and creamy. Gradually add powdered sugar and vanilla, beating until fluffy. Add heavy cream if desired to lighten the texture.
- Gently unroll the cooled cake and spread the cream cheese filling evenly over the surface, leaving a small border around the edges.
- Roll the cake back up without the towel. Wrap it tightly in plastic wrap and refrigerate for at least 2 hours to set.
- Slice with a sharp knife (wipe the blade between cuts) and serve.
Notes
Roll the cake while it is still warm using a powdered sugar-dusted kitchen towel to prevent cracking. Use room temperature ingredients for the cream cheese filling to avoid lumps. If the filling is too thick, add a tablespoon of heavy cream or milk; if too runny, add more powdered sugar. You can substitute buttermilk by mixing ⅔ cup milk with 1 teaspoon lemon juice or vinegar and letting it sit for 5 minutes. For gluten-free, use a 1:1 gluten-free baking flour blend and add ½ teaspoon xanthan gum if needed.
Nutrition
- Serving Size: 1 slice (1/12th of t
- Calories: 280
- Sugar: 20
- Sodium: 210
- Fat: 18
- Saturated Fat: 7
- Carbohydrates: 28
- Fiber: 1
- Protein: 4
Keywords: red velvet cake roll, cream cheese filling, flag cake, easy dessert, party dessert, cake roll recipe