Love this? Save it for later!
Share the inspiration with your friends
I wasn’t supposed to be there, honestly. My neighbor Dave had mentioned, almost as an afterthought, that he was “throwing some stuff on the grill” before the big game. I’d stopped by to borrow a torque wrench—a whole other story involving a stubborn lawnmower—and the smell of caramelizing onions and sizzling sausage hit me before I even got to his garage. It was nine in the morning, and the man was already smoking out the whole block. He wasn’t trying to impress anyone; he was just feeding his crew.
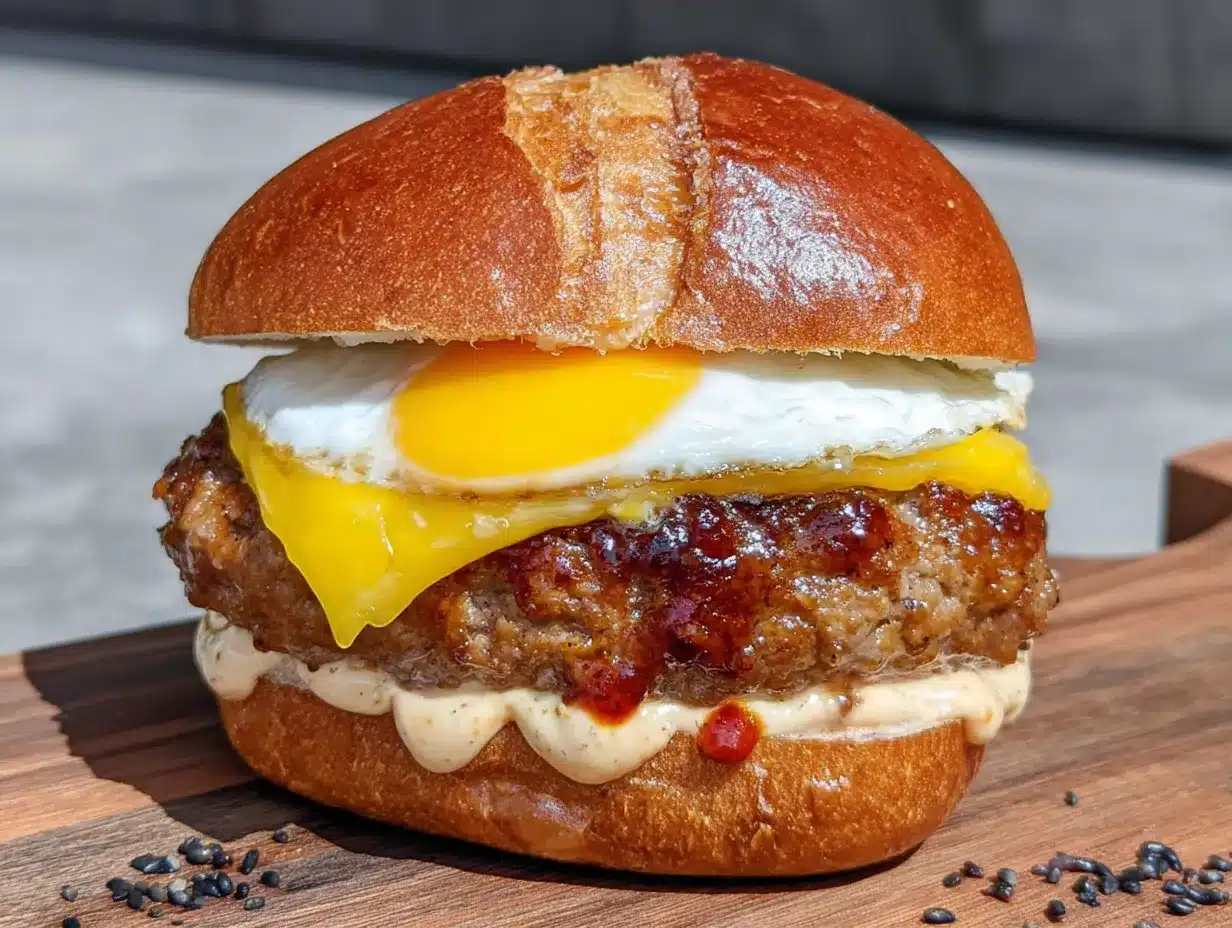
I walked around back, and there he was, flipping these little buns on the griddle. He had a sheet pan full of scrambled eggs, a pile of crispy sausage patties, and a jar of something that looked suspiciously like spicy mayo. “Grab a plate,” he said, not even looking up. I grabbed one, and let me tell you, that first bite of those Ultimate Breakfast Tailgate Sliders with Egg and Sausage was a revelation. The yolk was still a little jammy, the sausage was perfectly seasoned, and the bun had that buttery, toasted crunch. I mean, it was a whole breakfast sandwich, but better. It was portable, messy in the best way, and utterly perfect for standing in the cold.
Maybe you’ve been there—stuck with a sad, cold breakfast sandwich from a gas station while you’re trying to hold a coffee and set up a lawn chair. These sliders are the exact opposite of that. They are the kind of food that makes you the hero of the parking lot. Dave didn’t make a big deal about it, but I knew I had to recreate that moment in my own kitchen. After about five attempts (and one batch of seriously dry eggs), I cracked the code. This is that recipe—the one that turns a simple tailgate into a legendary event. It’s the recipe that stayed with me because it proved that the best food often comes from the most casual moments.
Why You’ll Love These Ultimate Breakfast Tailgate Sliders with Egg and Sausage
Look, I’ve tested a lot of breakfast sandwiches in my time. Some are too dry, some fall apart, and some just don’t have enough flavor to justify the calories. These sliders are different. They are the result of about a dozen trial runs, tweaking the egg to sausage ratio until it was just right. Let’s break down why this version is the one you need in your life.
- Quick & Easy: From start to finish, you are looking at about 30 minutes. That’s less time than it takes to find a parking spot at the stadium. Perfect for that last-minute tailgate or a lazy Sunday morning.
- Simple Ingredients: No fancy grocery trips needed. You likely have butter, eggs, and rolls in your kitchen right now. I add a few secret weapons (like a splash of heavy cream for the eggs), but nothing that requires a special store run.
- Perfect for Tailgating & Brunch: These aren’t just for the parking lot. They are a massive hit at brunch, potlucks, or even a quick dinner. They hold their heat beautifully, making them the ultimate crowd-pleaser.
- Crowd-Pleaser: My kids, who usually pick at scrambled eggs, devour these. The adults at the party always ask for the recipe. It is a universal win.
- Unbelievably Delicious: The texture is the star here. You get a soft, buttery bun, a savory sausage patty, and a fluffy egg that isn’t rubbery. The secret is cooking the eggs low and slow so they stay creamy, even when baked.
What really makes this recipe stand out is the “slider method.” Instead of making individual sandwiches, you layer everything on a sheet pan of rolls, brush the tops with garlic butter, and bake it all together. The flavors meld, the cheese gets perfectly gooey, and the tops get that golden, crispy edge. It’s not just another breakfast sandwich—it’s the best version. This is the kind of food that makes you close your eyes after the first bite. It’s comfort food reimagined—heartier, faster, and with the same soul-soothing satisfaction. Perfect for impressing your tailgate crew without breaking a sweat.
What Ingredients You Will Need
This recipe uses simple, wholesome ingredients to deliver big flavor. Most of these are pantry staples, but a few specific choices really make the difference between a good slider and a great one. Here is what you will need to gather.
For the Sausage Patties
- 1 lb ground breakfast sausage (I prefer Jimmy Dean’s hot variety for a little kick, but mild works great too)
- 1/2 teaspoon fennel seeds (optional, but adds that “breakfast link” flavor profile)
- 1/4 teaspoon red pepper flakes (if using mild sausage, to add warmth)
For the Scrambled Eggs
- 8 large eggs (room temperature is best for fluffiness)
- 1/4 cup whole milk or heavy cream (heavy cream makes them richer—use dairy-free milk if needed)
- 1/2 teaspoon salt
- 1/4 teaspoon black pepper
- 2 tablespoons unsalted butter (for cooking the eggs, adds richness)
For the Sliders
- 12 slider rolls (like King’s Hawaiian or a soft brioche roll—do not use crusty rolls here)
- 6 slices American cheese or cheddar (I use deli-sliced cheddar for better melt; avoid pre-shredded)
- 3 tablespoons salted butter, melted
- 1 teaspoon garlic powder
- 1 tablespoon everything bagel seasoning or sesame seeds (for the top)
- 1 tablespoon Dijon mustard (optional, for a tangy spread on the buns)
Ingredient Selection Tips: For the sausage, look for a high-fat content (around 20-25%) because it keeps the patties juicy. If you want a leaner option, use ground turkey sausage, but add a tablespoon of olive oil to the pan to prevent dryness. For the eggs, I recommend using pasture-raised eggs if you can—they have a richer yolk color and a better flavor. Avoid using liquid eggs from a carton; they tend to be watery and won’t set up as nicely on the sheet pan.
Substitution Guidance: Need a gluten-free option? Use gluten-free slider rolls and check your sausage brand for fillers. For a dairy-free version, swap the butter for vegan butter or olive oil, and use a dairy-free cheese that melts well (like Violife cheddar). You can also skip the cheese entirely and add a smear of avocado for creaminess.
Equipment Needed
You don’t need a professional kitchen to pull these off, but having the right tools makes the process smoother. Here is what you will need.
- Large non-stick skillet or griddle: For cooking the sausage patties and the scrambled eggs. A cast-iron skillet also works great for even heat.
- 9×13-inch baking dish or sheet pan: For assembling and baking the sliders. A rimmed sheet pan is ideal because it catches any buttery drips.
- Sharp knife or bench scraper: For slicing the rolls in half horizontally without squishing them.
- Pastry brush: For brushing the garlic butter over the tops of the rolls. A silicone brush is best for even coverage.
- Mixing bowls: For whisking the eggs and mixing the sausage.
- Meat chopper or spatula: For breaking up the sausage while it cooks.
Budget-Friendly Alternatives: If you don’t have a pastry brush, just use a spoon to drizzle the butter over the buns. No 9×13 pan? Use a regular baking sheet and line it with foil for easy cleanup. A meat chopper isn’t essential—a wooden spoon works perfectly to break up the sausage.
Personal Note: I used to use a glass baking dish, but I found the sliders didn’t get as crispy on the bottom. Switching to a metal sheet pan changed everything—the heat distribution is much better, and you get that satisfying crunch on the bottom roll.
Preparation Method
Follow these steps carefully, and you will have a tray of perfect sliders that will make you the MVP of any tailgate. I’ve included time estimates and sensory cues so you know exactly what to look for at each stage.
Step 1: Prepare the Sausage Patties (10 minutes)
In a bowl, combine the ground sausage with the fennel seeds and red pepper flakes (if using). Mix gently with your hands—do not overwork the meat, or the patties will be tough. Divide the mixture into 12 equal portions. Roll each into a ball, then flatten into a patty about 3 inches wide (slightly smaller than your rolls, as they will shrink a little).
Heat your skillet over medium-high heat. Add the patties in a single layer (you may need to do this in two batches). Cook for 3-4 minutes per side, until golden brown and cooked through. The internal temperature should reach 160°F. Sensory cue: You should hear a nice sizzle when the patties hit the pan. The smell of browning sausage is your cue that you are on the right track. Transfer to a paper towel-lined plate to drain excess grease.
Step 2: Scramble the Eggs (8 minutes)
While the sausage is resting, crack the eggs into a medium bowl. Add the milk or cream, salt, and pepper. Whisk vigorously for about 30 seconds until the mixture is uniform and slightly frothy. Pro tip: Don’t over-whisk; you want some streaks of white and yolk for a marbled look in the final dish.
Reduce the heat under the skillet to low. Add the 2 tablespoons of butter and let it melt slowly. Pour in the egg mixture. Using a rubber spatula, gently push the eggs from the edges toward the center every 30 seconds. Do not stir constantly—let the eggs set in large, soft curds. This should take about 5-6 minutes. Sensory cue: The eggs should look creamy and slightly underdone when you take them off the heat—they will continue cooking in the oven. If they look dry in the pan, they will be rubbery later. Remove from heat and set aside.
Step 3: Assemble the Sliders (5 minutes)
Preheat your oven to 350°F (175°C). Place the slider rolls on a cutting board. Using a sharp knife, carefully slice the entire block of rolls in half horizontally, keeping the tops and bottoms connected as a single piece. Place the bottom half in your greased 9×13 baking dish.
If using Dijon mustard, spread a thin layer on the bottom rolls. Layer the scrambled eggs evenly over the bottom buns. Place the sausage patties on top of the eggs—one patty per slider. Lay the cheese slices over the sausage, tearing them to fit if necessary. Place the top half of the rolls over the cheese.
Step 4: The Butter Bath (5 minutes + 15 minutes baking)
In a small bowl, combine the melted salted butter with the garlic powder. Brush this mixture generously over the tops of the rolls. Make sure you get the edges, too—that is where the crunch comes from. Sprinkle the everything bagel seasoning or sesame seeds over the top.
Cover the dish loosely with aluminum foil and bake for 10 minutes. Remove the foil and bake for another 5-7 minutes, until the tops are golden brown and the cheese is melted. Sensory cue: You will smell the garlic butter and toasted bread filling your kitchen. The tops should look deeply golden, not pale.
Step 5: Slice and Serve (2 minutes)
Let the sliders rest in the pan for 2 minutes—this allows the cheese to set slightly so it doesn’t all slide off when you cut them. Using a sharp knife, cut along the seams of the rolls to separate the sliders. Serve warm.
Cooking Tips & Techniques
I’ve made this recipe more times than I care to count, and I’ve learned a few things the hard way. Let me save you the trouble.
Don’t Overcook the Eggs: This is the number one mistake people make. Scrambled eggs for sliders should be slightly undercooked when they go into the oven. If they are fully set in the pan, they will turn into rubbery hockey pucks after baking. Trust the process—the residual heat from the oven will finish cooking them perfectly.
Use a Meat Thermometer: I know it feels fussy, but sausage patties are easy to undercook or burn. I use a cheap instant-read thermometer, and it has saved me from serving dry, gray patties more than once. Aim for 160°F, and pull them off the heat immediately.
Toast the Buns (If You Have Time): For an extra layer of texture, you can toast the cut sides of the rolls under the broiler for 1 minute before assembling. This creates a barrier that prevents the eggs from making the bread soggy. I skip this step if I am in a rush, but when I do it, the difference is noticeable.
Multitasking Strategy: While the sausage is cooking, whisk the eggs. While the eggs are cooking, slice the rolls and preheat the oven. This recipe is all about overlapping tasks. You can even cook the sausage and eggs the night before, refrigerate them, and assemble the sliders cold the next morning. Just add 5 minutes to the covered baking time.
My Biggest Failure: The first time I made these, I used a high heat for the eggs. I ended up with brown, crispy bits mixed into the eggs, and the texture was awful. Low and slow is the only way to go for fluffy eggs. I also forgot to season the eggs once—never again. A pinch of salt makes all the difference.
Variations & Adaptations
This recipe is a fantastic base, but it loves to be customized. Here are a few ways I’ve adapted it for different occasions and dietary needs.
- Spicy Southwest Sliders: Add 1/4 cup diced green chiles to the scrambled eggs. Use pepper jack cheese instead of cheddar. Top with a drizzle of chipotle mayo before serving. This version is a hit with my spice-loving friends.
- Vegetarian “Sausage” Sliders: Swap the pork sausage for plant-based breakfast patties (I like the Impossible brand). Cook them according to the package directions. The rest of the recipe stays the same—the eggs and cheese provide plenty of protein and richness.
- Maple Bacon Variation: Replace the sausage patties with thick-cut bacon. Cook the bacon until crispy, then crumble it. Sprinkle the crumbled bacon over the eggs before adding the cheese. Drizzle a little maple syrup over the bacon for a sweet-savory combo that is absolutely addictive.
- Keto-Friendly Version: Use a low-carb cloud bread or cheese wraps instead of the slider rolls. Skip the milk in the eggs and use heavy cream. The filling itself is already low-carb, so this is an easy swap.
Personal Variation: I once tried adding a layer of crispy hash browns to the bottom of the sliders. It was delicious, but the sliders became too tall and unstable for tailgating. Now I serve the hash browns on the side as a dipper. Lesson learned—sometimes less is more when it comes to portability.
Serving & Storage Suggestions
These sliders are designed to be served warm, but they are surprisingly forgiving if you need to make them ahead. Here is how to handle them.
Serving Temperature: Serve these sliders straight from the oven, while the cheese is still stretchy and the tops are crisp. If you are tailgating, you can wrap the entire baking dish in heavy-duty foil and a kitchen towel—they will stay hot for about 30-40 minutes. For a party, set them out on a platter with extra napkins. They are meant to be eaten with your hands, so keep it casual.
Complementary Dishes: These sliders pair beautifully with a simple fruit salad to cut the richness. For drinks, a cold Bloody Mary or a hot mug of spiced apple cider is perfect. If you want to go all out, serve them alongside a batch of crispy smashed potatoes for the ultimate tailgate spread.
Storage Instructions: Leftover sliders can be stored in an airtight container in the refrigerator for up to 3 days. To reheat, place them on a baking sheet in a 350°F oven for 8-10 minutes. Avoid the microwave—it makes the buns soggy and the eggs rubbery. If you are freezing them, assemble the sliders but do not bake them. Wrap the entire dish tightly in plastic wrap, then foil. Freeze for up to 2 months. Bake from frozen, covered, at 350°F for 25 minutes, then uncovered for 10 minutes.
Flavor Development Note: Honestly, these sliders taste even better the next day. The flavors meld together overnight, and the sausage seasoning infuses the eggs. I often make a double batch just so I have leftovers for breakfast the next morning. Cold, straight from the fridge, they are still fantastic.
Nutritional Information & Benefits
While these sliders are definitely a treat, they also pack some surprising nutritional benefits. Here is the estimated breakdown for one slider (based on using standard ingredients).
| Nutrient | Amount Per Slider |
|---|---|
| Calories | 385 |
| Protein | 22g |
| Fat | 24g |
| Saturated Fat | 10g |
| Carbohydrates | 22g |
| Fiber | 1g |
| Sugar | 5g |
| Sodium | 780mg |
Health Benefits: The eggs provide high-quality protein and choline, which is great for brain health. The sausage offers iron and B vitamins. If you use whole wheat rolls, you will get an extra dose of fiber. I like to think of these sliders as a balanced meal in a handheld form—protein, fat, and carbs to fuel a long day of tailgating.
Dietary Considerations: This recipe is naturally nut-free and can be made gluten-free with the right rolls. It is not suitable for a vegan diet, but the vegetarian variation using plant-based sausage works well. If you are watching your sodium, use low-sodium sausage and omit the salt in the eggs.
Personal Wellness Perspective: I don’t believe in “bad” foods. These sliders are a celebration food—perfect for game day or a special brunch. Pair them with a big green salad or some fresh fruit, and you have a meal that feels indulgent but also nourishing.
Conclusion
These Ultimate Breakfast Tailgate Sliders with Egg and Sausage are more than just a recipe—they are a memory in the making. They remind me of that crisp morning in Dave’s backyard, standing in the cold, holding a warm, messy sandwich that tasted like pure joy. That is the power of good food. It doesn’t need to be fancy or complicated. It just needs to be made with care and shared with people you like.
I encourage you to make this recipe your own. Add hot sauce if you like heat. Use different cheese. Throw in some caramelized onions. The base is solid, but the possibilities are endless. I would love to hear how yours turn out. Did you try the spicy southwest version? Did you add bacon? Drop a comment below and tell me all about it. And if you take a photo, tag me—I love seeing these sliders in the wild.
So go ahead. Fire up the oven, grab your favorite rolls, and make a batch of these sliders. Your tailgate crew will thank you. And who knows—you might just become the neighbor everyone wants to borrow a torque wrench from.
Frequently Asked Questions
Can I make these sliders ahead of time for a party?
Absolutely! Assemble the sliders completely (without the butter wash) up to 24 hours in advance. Cover and refrigerate. When you are ready to bake, brush with the garlic butter and bake as directed, adding 5 minutes to the covered baking time. This is my go-to method for brunch parties.
Why are my eggs turning out dry?
Dry eggs are almost always a result of high heat or over-stirring. Cook the eggs on low heat and remove them from the pan while they still look slightly wet. They will finish cooking in the oven. Also, make sure you are using enough fat—butter is your friend here.
Can I use pre-cooked sausage patties?
You can, but I don’t recommend it. Pre-cooked patties tend to be drier and have a different texture. If you are in a pinch, thaw them and brown them in a skillet to rehydrate them slightly. Fresh sausage always yields a juicier result.
What is the best way to reheat leftover sliders?
The oven is your best bet. Place the sliders on a baking sheet and warm them at 350°F for 8-10 minutes. The air fryer also works well—3 minutes at 350°F will crisp up the buns nicely. Avoid the microwave unless you are desperate; it makes the bread soggy.
Can I freeze the unbaked sliders?
Yes! Assemble the sliders completely but do not brush with butter or bake. Wrap the dish tightly in plastic wrap and foil. Freeze for up to 2 months. To bake, remove the plastic wrap, cover with foil, and bake at 350°F for 25 minutes. Then brush with the butter, sprinkle seasoning, and bake uncovered for 10 more minutes.
Pin This Recipe!
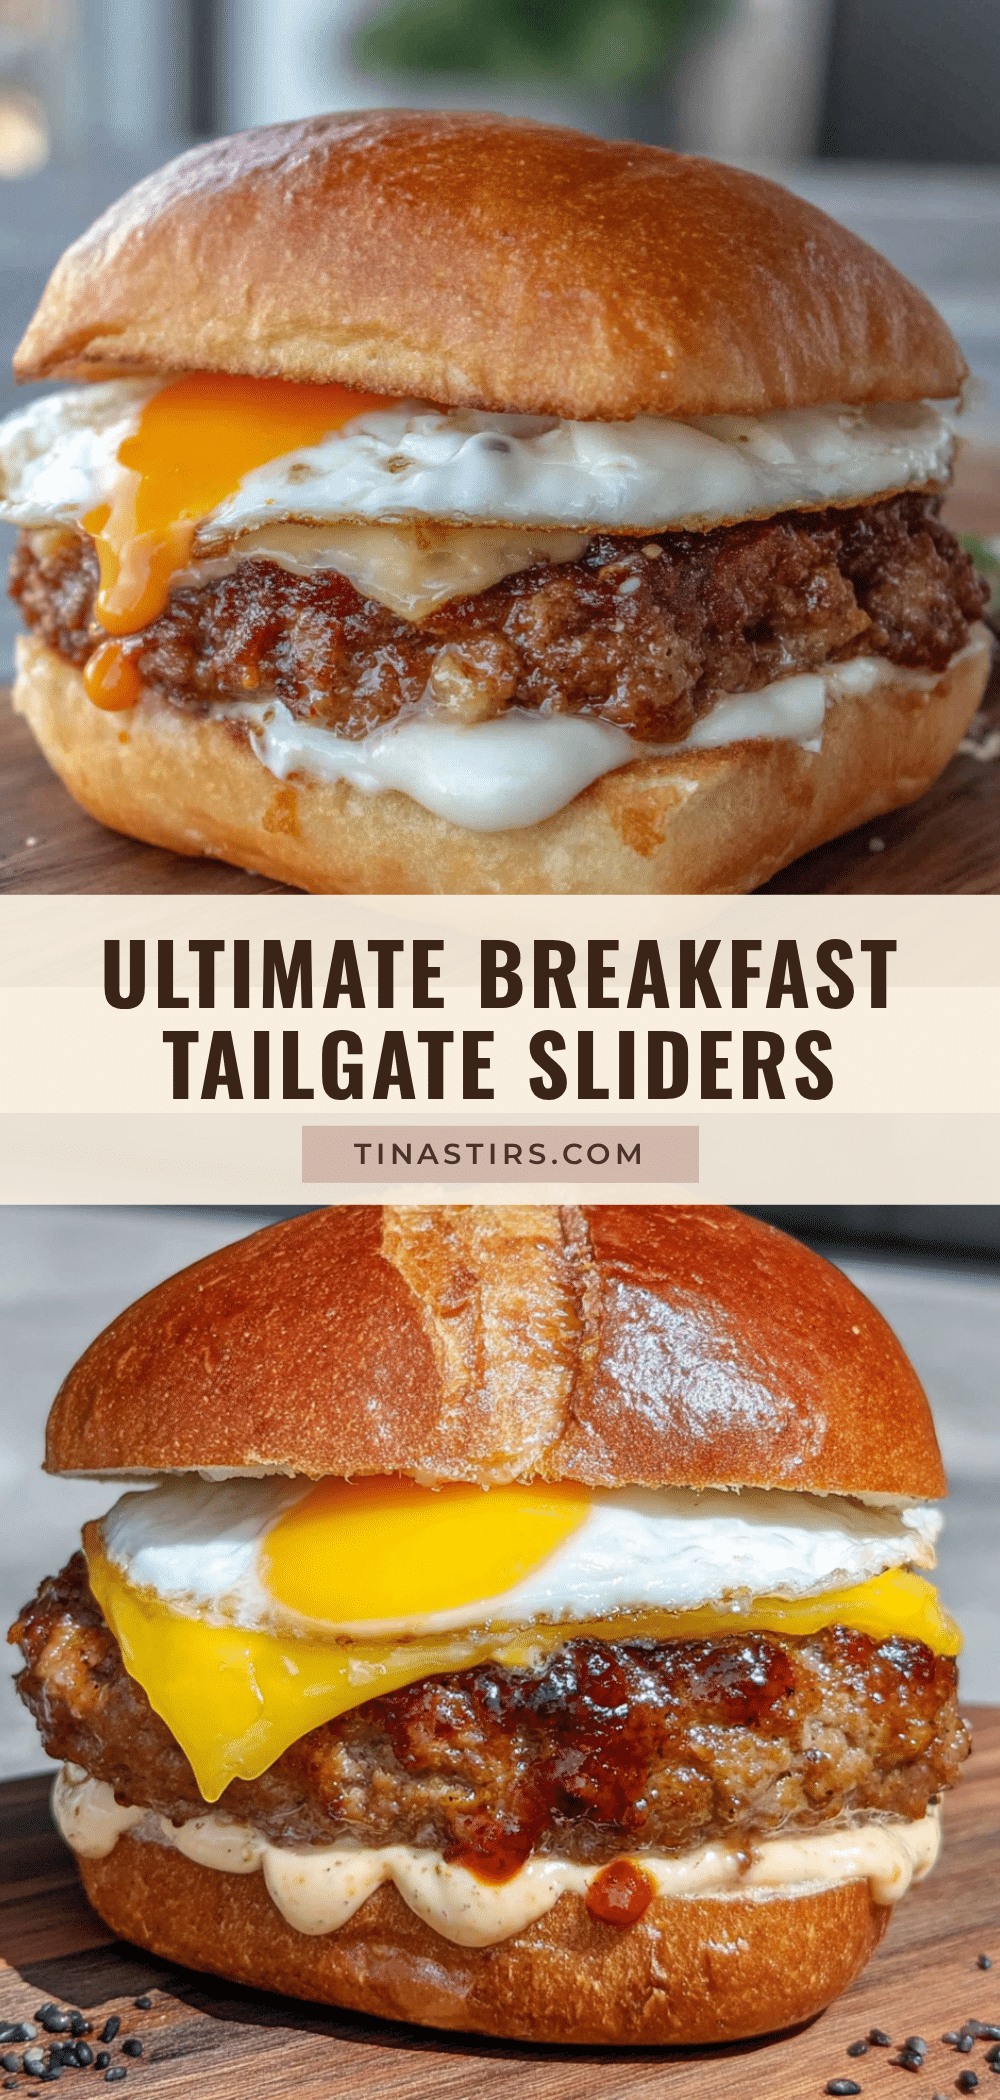
Ultimate Breakfast Tailgate Sliders with Egg and Sausage
These Ultimate Breakfast Tailgate Sliders with Egg and Sausage are the perfect portable breakfast sandwich for game day or brunch. Soft slider rolls are layered with fluffy scrambled eggs, savory sausage patties, and melted cheese, then baked with a garlic butter topping until golden and crispy.
- Prep Time: 15 minutes
- Cook Time: 30 minutes
- Total Time: 45 minutes
- Yield: 12 sliders 1x
- Category: Main Course
- Cuisine: American
Ingredients
- 1 lb ground breakfast sausage (preferably Jimmy Dean’s hot variety)
- 1/2 teaspoon fennel seeds (optional)
- 1/4 teaspoon red pepper flakes (if using mild sausage)
- 8 large eggs (room temperature)
- 1/4 cup whole milk or heavy cream
- 1/2 teaspoon salt
- 1/4 teaspoon black pepper
- 2 tablespoons unsalted butter (for cooking eggs)
- 12 slider rolls (like King’s Hawaiian or soft brioche rolls)
- 6 slices American cheese or cheddar (deli-sliced cheddar recommended)
- 3 tablespoons salted butter, melted
- 1 teaspoon garlic powder
- 1 tablespoon everything bagel seasoning or sesame seeds
- 1 tablespoon Dijon mustard (optional)
Instructions
- Prepare the sausage patties: In a bowl, combine ground sausage with fennel seeds and red pepper flakes (if using). Mix gently with your hands. Divide into 12 equal portions, roll into balls, then flatten into patties about 3 inches wide. Heat a large non-stick skillet over medium-high heat. Cook patties in a single layer for 3-4 minutes per side until golden brown and cooked through (internal temperature 160°F). Transfer to a paper towel-lined plate.
- Scramble the eggs: In a medium bowl, whisk together eggs, milk or cream, salt, and pepper until uniform and slightly frothy. Reduce heat under the skillet to low. Add 2 tablespoons butter and let melt slowly. Pour in egg mixture. Using a rubber spatula, gently push eggs from edges toward center every 30 seconds, letting them set in large soft curds, about 5-6 minutes. Remove from heat while still creamy and slightly underdone.
- Assemble the sliders: Preheat oven to 350°F (175°C). Place slider rolls on a cutting board and slice the entire block in half horizontally, keeping tops and bottoms connected. Place bottom half in a greased 9×13 baking dish. If using Dijon mustard, spread a thin layer on bottom rolls. Layer scrambled eggs evenly over bottom buns. Place one sausage patty on each slider. Lay cheese slices over sausage, tearing to fit if necessary. Place top half of rolls over cheese.
- Apply the butter bath: In a small bowl, combine melted salted butter with garlic powder. Brush generously over tops of rolls, including edges. Sprinkle everything bagel seasoning or sesame seeds over the top.
- Bake: Cover dish loosely with aluminum foil and bake for 10 minutes. Remove foil and bake for another 5-7 minutes until tops are golden brown and cheese is melted.
- Slice and serve: Let sliders rest in pan for 2 minutes. Cut along seams of rolls to separate sliders. Serve warm.
Notes
Don’t overcook the eggs; they should be slightly underdone when going into the oven. Use a meat thermometer for the sausage patties to ensure they reach 160°F. For extra texture, toast the cut sides of the rolls under the broiler for 1 minute before assembling. Leftover sliders can be stored in an airtight container in the refrigerator for up to 3 days. Reheat in a 350°F oven for 8-10 minutes. Unbaked sliders can be frozen for up to 2 months.
Nutrition
- Serving Size: 1 slider
- Calories: 385
- Sugar: 5
- Sodium: 780
- Fat: 24
- Saturated Fat: 10
- Carbohydrates: 22
- Fiber: 1
- Protein: 22
Keywords: breakfast sliders, tailgate food, egg and sausage sliders, game day breakfast, brunch sliders


