Love this? Save it for later!
Share the inspiration with your friends
I had refused to participate in my neighborhood’s annual Halloween block party for three years. Not because I’m a Grinch—honestly, I love seeing little kids in their costumes—but because I always felt this pressure to bring something impressive. Something Pinterest-worthy. Something that didn’t look like I’d thrown it together ten minutes before running out the door. Then last October, my across-the-street neighbor Carol texted me at 4:30 PM: “Party starts at 6, bring a treat if you want!” And I had nothing. Not a single cupcake. Not even a bag of candy corn.
I stood in my kitchen, staring into my pantry like it owed me money. Butter, marshmallows, Rice Krispies cereal. That’s it. That’s all I had. I mean, come on. I almost just grabbed a bag of chips and called it a day. But then I remembered a trick my mom used to pull when I was a kid—shaping regular Rice Krispie treats into little ghost shapes and dusting them with powdered sugar. It was so simple it almost felt like cheating. But you know what? It worked. I whipped up a batch in under ten minutes, shaped them while they were still warm (and slightly burning my fingertips, let’s be honest), and walked over to Carol’s house feeling like I’d put in way more effort than I actually had.
The kids went absolutely nuts for them. Like, full-on squealing. One little vampire asked if the ghosts were real. I told him yes, obviously, and that they only come out once a year. His eyes got so wide. That moment—that tiny, ridiculous moment—is why I keep making these every single October now. These Easy Halloween Rice Krispie Ghosts aren’t fancy. They’re not complicated. But they have this weird little magic to them that store-bought treats just can’t touch. Maybe you’ve been there, standing in your kitchen with zero plan and a ticking clock. This recipe is for you.
Why You’ll Love This Recipe
Let me tell you something I’ve learned from about a dozen Halloween parties and two very chaotic classroom celebrations: nobody cares how long something took to make. They care how it tastes and how cute it looks. These Easy Halloween Rice Krispie Ghosts deliver on both fronts without making you break a sweat.
- 10-Minute Prep : From pantry to plate in the time it takes to find your kid’s costume. Seriously, you can make these while waiting for the pizza delivery.
- 3 Main Ingredients : Butter, marshmallows, and Rice Krispies cereal. That’s it. No special trips to a craft store or fancy baking aisle required.
- Perfect for Last-Minute Plans : Got a surprise classroom party? Neighbor dropping by? These save you every single time.
- Kid-Friendly Activity : My niece helped me shape these last year, and she only ate half the marshmallows. It’s that easy.
- Always a Crowd-Pleaser : I’ve watched grown adults argue over the last ghost on the plate. They disappear faster than candy on November 1st.
What makes these different from every other Halloween treat out there? It’s the texture, honestly. Most spooky desserts are either too complicated or too dry. These have that perfect chewy-crisp bite that regular Rice Krispie treats are famous for, but shaped into something that actually looks festive. No fondant. No food coloring staining your hands for three days. Just pure, simple nostalgia with a ghostly twist.
This recipe is the kind that makes you feel like a hero with almost zero effort. It’s comfort food dressed up for Halloween—faster than baking cookies, but with the same soul-soothing satisfaction. Perfect for impressing other parents without the stress, or turning a regular Tuesday into something a little bit magical.
What Ingredients You Will Need
This recipe uses the simplest pantry staples to create something that looks way more impressive than it has any right to be. Here’s what you’ll need to grab:
- 3 tablespoons unsalted butter (salted works too, just skip the extra salt—I use Land O’Lakes because it melts evenly)
- 1 package (10 oz) regular marshmallows (mini marshmallows melt faster, but standard size works fine—Jet-Puffed is my go-to)
- 6 cups Rice Krispies cereal (the original brand gives the best crunch, but generic crispy rice cereal works in a pinch)
- 1/4 teaspoon vanilla extract (optional, but adds a lovely warmth—I never skip it)
- Pinch of salt (balances the sweetness beautifully)
- 2 tablespoons powdered sugar (for dusting—this is what makes them look ghostly)
- Mini chocolate chips (for eyes—about 24-30 chips depending on how many ghosts you make)
A few notes from my kitchen to yours: The butter matters more than you think. I’ve tried margarine before when I ran out, and the texture just wasn’t the same—they turned out greasier and didn’t hold their shape as well. Stick with real butter if you can. For the marshmallows, freshness is key. Stale marshmallows don’t melt as smoothly and can leave you with lumpy ghosts nobody wants to eat.
If you’re making these for a classroom with allergy concerns, the Rice Krispies brand cereal is generally gluten-free, but always check the label because formulations can change. For a dairy-free version, swap the butter with a plant-based alternative like Miyoko’s—it melts beautifully and nobody will notice the difference.
I recommend buying an extra bag of marshmallows because, let’s be honest, you’re going to eat some while you work. Don’t pretend you won’t. I always do.
Equipment Needed
You don’t need a professional pastry kitchen for these. Here’s what you’ll actually use:
- Large saucepan (at least 4-quart capacity—you need room to stir everything without making a mess)
- Wooden spoon or silicone spatula (metal utensils can scratch your pan and don’t fold the cereal as gently)
- 9×13-inch baking dish (lightly greased—this is for pressing the mixture flat before cutting)
- Parchment paper or wax paper (absolute lifesaver for handling sticky mixture without losing your mind)
- Ghost-shaped cookie cutter (about 3 inches tall—Wilton makes a great one, but a simple knife works too)
- Small fine-mesh sieve (for dusting powdered sugar evenly—a tea strainer works in a pinch)
- Sharp knife (if you’re freehanding the shapes instead of using a cutter)
No ghost cookie cutter? No problem. I’ve made these for years just cutting them into rectangles and rounding the tops with a knife. They look like little ghost blobs, which honestly adds to the charm. Store-bought cutters are nice, but I’ve also used a small glass to cut rounds and then pinched the bottoms to create a ghost shape. Get creative with what you have.
One tip: grease your hands with a little butter or cooking spray before shaping. It saves your skin from the sticky marshmallow situation that inevitably happens. Learned that one the hard way.
Preparation Method
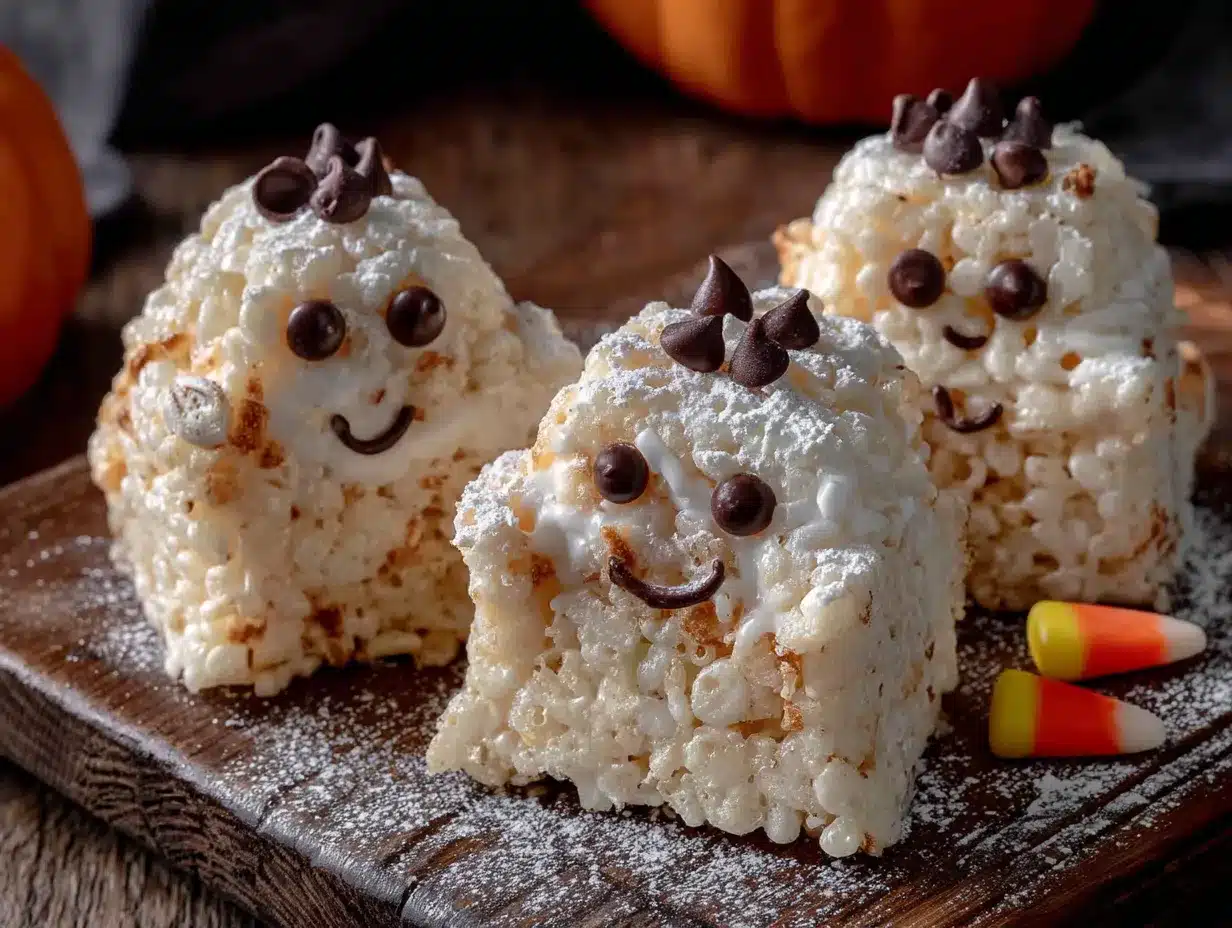
Alright, let’s make some ghosts. Set a timer because these come together fast.
- Grease your baking dish and set aside. Spray a 9×13-inch pan with nonstick cooking spray or rub it with butter. Do the same to your spatula—trust me, it makes cleanup so much easier.
- Melt the butter over medium-low heat. Place your large saucepan on the stove and add 3 tablespoons of unsalted butter. Let it melt slowly, swirling the pan occasionally. You want it fully liquid but not bubbling aggressively—medium-low heat is your friend here. If the butter browns slightly, that’s actually delicious, but try to keep it gentle.
- Add the marshmallows and stir constantly. Dump in the entire 10-ounce bag of marshmallows. Stir them into the melted butter with your wooden spoon or silicone spatula. Keep stirring as they melt—this takes about 3-4 minutes. The mixture will look like a gooey, stretchy cloud. Don’t walk away at this stage; marshmallows can scorch quickly if you ignore them.
- Remove from heat and add vanilla and salt. Once the marshmallows are completely smooth (no lumps!), take the pan off the burner. Stir in 1/4 teaspoon vanilla extract and a pinch of salt. The vanilla will sizzle a little when it hits the hot mixture—that’s normal and smells amazing.
- Fold in the Rice Krispies cereal. Pour 6 cups of cereal into the marshmallow mixture. Fold gently with your spatula, scraping from the bottom up. Don’t stir aggressively or you’ll crush the cereal into dust. You want every piece coated but still intact. This should take about 1-2 minutes of gentle folding.
- Transfer to the prepared dish. Scrape the mixture into your greased 9×13-inch pan. Use your greased spatula (or buttered hands) to press it into an even layer. Work quickly—the mixture sets as it cools. Press firmly but don’t compact it too much, or the treats will be hard instead of tender.
- Let cool for 10-15 minutes. Set the pan aside at room temperature. Don’t rush this step. If you try to cut too early, the treats will fall apart. If you wait too long, they’ll be too hard to cut cleanly. Ten minutes is the sweet spot—the mixture should be firm but still slightly warm.
- Cut out ghost shapes. Press your ghost-shaped cookie cutter firmly into the treats and lift straight up. If the cutter sticks, dip it in a little powdered sugar first. For freehand ghosts, use a sharp knife to cut rectangles and round the tops. You should get about 12-15 ghosts from one batch, depending on your cutter size.
- Add the eyes. While the ghosts are still slightly tacky, press two mini chocolate chips into each one for eyes. Position them about 1/3 of the way down from the top. Press gently so they stay put but don’t sink through.
- Dust with powdered sugar. Place the ghosts on a serving platter. Using a fine-mesh sieve, dust them lightly with powdered sugar. This gives them that spooky, ghostly appearance. Don’t go overboard—a light snowfall effect is what you’re after.
Your kitchen will look like a marshmallow factory exploded. That’s normal. Lick the spatula. You earned it.
Cooking Tips & Techniques
I’ve made these Easy Halloween Rice Krispie Ghosts probably twenty times now, and I’ve messed up in almost every way possible. Let me save you the trouble.
Low and slow wins the marshmallow race. I used to crank the heat thinking it would speed things up. Big mistake. High heat scorches the marshmallows and leaves you with a grainy, burnt-tasting mess. Keep your burner on medium-low and be patient. The marshmallows will melt—they always do.
Wet your hands before shaping. This is the single best tip I can give you. Run your hands under cold water, shake off the excess, and then press the mixture. The water creates a barrier between your skin and the sticky marshmallow. I learned this after spending ten minutes picking Rice Krispie bits off my fingers during my first attempt. You’re welcome.
Don’t overmix the cereal. I see people stir and stir and stir, thinking they need to fully incorporate everything. You don’t. Once you see no dry cereal left, stop. Overmixing crushes the cereal into tiny pieces and gives you dense, sad ghosts instead of light, crispy ones.
Work in batches if making a double batch. Your saucepan can only handle so much. If you try to double the recipe in one pot, the mixture becomes impossible to stir evenly, and you’ll end up with half-melted marshmallows and burnt bits. Make two separate batches. It takes the same amount of time.
Timing is everything. These ghosts are best eaten within 24 hours. After that, they start getting stale. If you’re making them for a party, do it the morning of or the night before. Don’t make them three days ahead unless you want hard, sad ghosts that nobody reaches for.
Variations & Adaptations
One of the best things about this recipe is how flexible it is. Here are some ways I’ve adapted it over the years:
Chocolate Ghosts: Melt 1/2 cup of semi-sweet chocolate chips with the butter and marshmallows. It turns the treats a dark gray color that looks even spookier. My nephew called them “haunted ghosts” and I’ve never corrected him.
Gluten-Free Version: Use a certified gluten-free crispy rice cereal. Most brands are naturally gluten-free, but cross-contamination can be an issue. Check the label if you’re serving someone with celiac disease.
Pumpkin Spice Ghosts: Add 1 teaspoon of pumpkin pie spice along with the vanilla. It gives them a warm, fall flavor that pairs beautifully with the marshmallow sweetness. I made these for a Friendsgiving and they disappeared in minutes.
Vegan Option: Use vegan butter (like Earth Balance) and vegan marshmallows (Dandies brand works perfectly). The texture is slightly different—a bit softer—but the taste is still fantastic. I’ve served these alongside regular ones and nobody could tell the difference.
No-Cutter Method: If you don’t have a ghost cookie cutter, shape the mixture into small balls while it’s still warm, then pinch one end to form a tail. Flatten slightly and add eyes. They look like little ghost blobs—imperfect but charming. My toddler calls them “squishy ghosts” and they’re his favorite.
I once tried adding green food coloring to make Frankenstein ghosts. It looked like swamp monster vomit. Stick with the classic white, honestly.
Serving & Storage Suggestions
These Easy Halloween Rice Krispie Ghosts look best when served at room temperature on a dark platter or black serving tray. The contrast makes the powdered sugar pop, and the chocolate chip eyes stand out better. I use a flat black cake board from the craft store—costs about a dollar and makes the ghosts look like they’re floating.
For a party, arrange them on a platter with some fake spiderwebs stretched underneath. It takes five seconds and looks incredibly festive. I’ve also stuck them on lollipop sticks for a “ghost on a stick” effect that kids absolutely lose their minds over.
Storage: Keep leftovers in an airtight container at room temperature for up to 3 days. Layer them with parchment paper between each ghost so they don’t stick together. Do NOT refrigerate them—the fridge makes them hard and ruins the texture. Trust me on this one.
Freezing: You can freeze these for up to 2 months. Wrap each ghost individually in plastic wrap, then place them in a freezer bag. Thaw at room temperature for about 30 minutes before serving. They’ll be slightly softer than fresh, but still delicious. I’ve done this for pre-Halloween prep and it works like a charm.
Reheating: If your ghosts have gone a little stale, pop them in the microwave for 5-7 seconds. It softens them right up. Don’t go longer than that or you’ll have a marshmallow puddle.
The flavors actually mellow out after a day. Fresh ghosts are super sweet and fluffy. Day-old ghosts are chewier and the marshmallow sweetness settles down. Both versions are excellent, just different.
Nutritional Information & Benefits
Let’s be real—these are a treat, not a health food. But here’s what you’re looking at per ghost (based on 12 ghosts per batch):
- Calories: Approximately 180-200 per ghost
- Total Fat: 4g
- Carbohydrates: 38g
- Sugar: 22g
- Protein: 1g
- Sodium: 120mg
On the bright side, Rice Krispies cereal is fortified with iron and B vitamins, so you’re getting a tiny nutritional boost. The butter provides a small amount of vitamin A. And the powdered sugar? Well, it makes you happy. That counts for something.
For dietary considerations: these contain dairy (butter) and gluten (cereal—check brand for gluten-free certification). They are nut-free if you use standard ingredients, making them a safer option for school parties where nut allergies are a concern. Always check labels if you’re serving someone with specific dietary needs.
My personal take? These are a once-a-year treat that brings joy with minimal effort. I don’t stress about the sugar content on Halloween. Life is short. Eat the ghost.
Conclusion
These Easy Halloween Rice Krispie Ghosts have saved me more times than I can count. From last-minute party invites to lazy Sunday afternoons when the kids are bouncing off the walls, they deliver every single time. They’re simple enough that a five-year-old can help shape them, but cute enough that adults fight over the last one on the plate.
I love that this recipe doesn’t pretend to be something it’s not. It’s not fancy. It’s not complicated. It’s just good, honest, nostalgic fun that happens to look like a ghost. And honestly? That’s exactly what Halloween should be about. No stress, no pressure, just a little bit of magic in under ten minutes.
I’d love to hear how yours turn out. Did you add your own twist? Did the kids help? Did you eat half the marshmallows before they made it into the saucepan? (No judgment here.) Drop a comment below and let me know. And if you share these on Pinterest, tag me so I can see your spooky creations. Happy haunting!
Frequently Asked Questions
Can I use mini marshmallows instead of regular ones?
Absolutely. Mini marshmallows actually melt faster and more evenly, which can save you a minute or two. Use about 6 cups of mini marshmallows in place of the 10-ounce bag of regular ones. The end result is the same—delicious and ghostly.
Why did my Rice Krispie treats turn out hard?
This usually happens when you press the mixture too firmly into the pan or when you overcook the marshmallows. Press gently—just enough to create an even layer—and remove the marshmallows from heat as soon as they’re fully melted. Overcooking evaporates moisture and leaves you with rock-hard treats.
Can I make these ahead of time for a party?
Yes, but not too far ahead. Make them the day before your party for best results. Store them in an airtight container at room temperature with parchment paper between layers. If you need to make them further in advance, freeze them (wrapped individually) for up to 2 months.
How do I keep the chocolate chip eyes from falling off?
Press the chocolate chips into the ghosts while the mixture is still slightly warm and tacky. If the treats have cooled completely, the chips won’t stick. You can also use a tiny dab of frosting or melted chocolate as “glue” if needed.
Can I use a different cereal instead of Rice Krispies?
You can, but the texture will change. Cocoa Pebbles make chocolate ghosts that taste amazing. Fruity Pebbles create colorful ghosts that are fun for kids. Avoid anything with large pieces or heavy coatings (like granola)—they won’t hold together well.
Pin This Recipe!
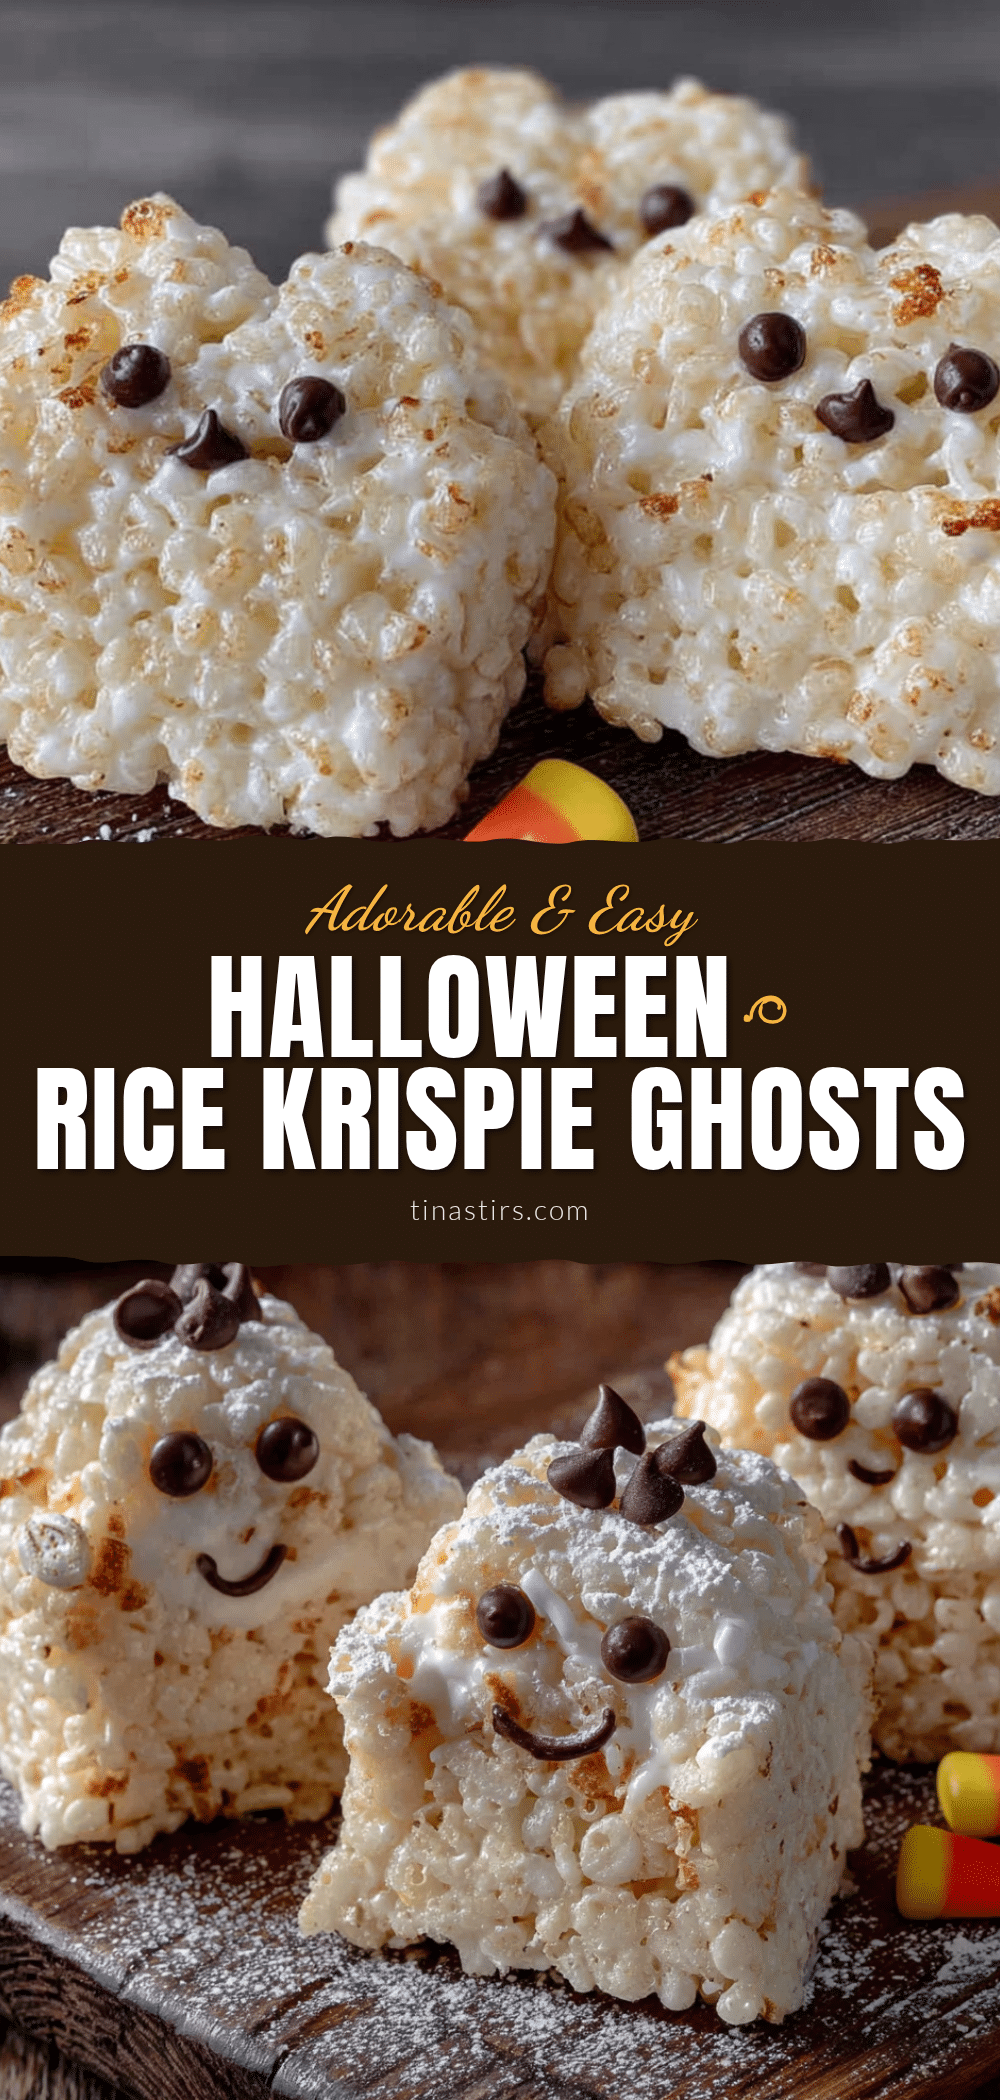
Easy Halloween Rice Krispie Ghosts: Best 10-Minute Treat
These Easy Halloween Rice Krispie Ghosts are a quick, no-fuss treat made with just 3 main ingredients. Perfect for last-minute parties, they’re shaped like ghosts, dusted with powdered sugar, and always a crowd-pleaser.
- Prep Time: 10 minutes
- Cook Time: 5 minutes
- Total Time: 15 minutes
- Yield: 12-15 ghosts 1x
- Category: Dessert
- Cuisine: American
Ingredients
- 3 tablespoons unsalted butter
- 1 package (10 oz) regular marshmallows
- 6 cups Rice Krispies cereal
- 1/4 teaspoon vanilla extract (optional)
- Pinch of salt
- 2 tablespoons powdered sugar
- Mini chocolate chips (about 24-30 chips)
Instructions
- Grease a 9×13-inch baking dish and set aside. Also grease your spatula.
- Melt 3 tablespoons unsalted butter in a large saucepan over medium-low heat.
- Add the entire 10-ounce bag of marshmallows and stir constantly until completely melted and smooth, about 3-4 minutes.
- Remove from heat and stir in 1/4 teaspoon vanilla extract and a pinch of salt.
- Pour in 6 cups Rice Krispies cereal and fold gently until all cereal is coated, about 1-2 minutes.
- Transfer mixture to the prepared dish and press into an even layer using a greased spatula or buttered hands.
- Let cool for 10-15 minutes until firm but still slightly warm.
- Cut out ghost shapes using a ghost-shaped cookie cutter or freehand with a knife.
- Press two mini chocolate chips into each ghost for eyes while still tacky.
- Dust ghosts lightly with powdered sugar using a fine-mesh sieve.
Notes
For best results, use fresh marshmallows and real butter. Grease your hands with butter or cooking spray before shaping to prevent sticking. These are best eaten within 24 hours. Do not refrigerate. For gluten-free, use certified gluten-free crispy rice cereal. For dairy-free, use vegan butter and vegan marshmallows.
Nutrition
- Serving Size: 1 ghost
- Calories: 190
- Sugar: 22
- Sodium: 120
- Fat: 4
- Saturated Fat: 2
- Carbohydrates: 38
- Protein: 1
Keywords: Halloween, Rice Krispie treats, ghosts, easy, 10-minute, no-bake, kid-friendly, last-minute


