Love this? Save it for later!
Share the inspiration with your friends
It was 11:17 PM on a random Wednesday, and I had this ridiculous, unshakeable urge for a slice of Neapolitan ice cream. You know that feeling? The one that hits you out of nowhere and refuses to be ignored? The problem was, I didn’t have any ice cream in the freezer—just a half-pint of heavy cream, some strawberries that were about to turn, and a block of cream cheese I’d bought for a recipe I never got around to making. Honestly, I stood there with the fridge door open for a solid minute, letting the cold air wash over me, and then it hit me: why not make a cake instead? Not just any cake, but one that captures that perfect trio of chocolate, vanilla, and strawberry in every single bite.
Now, I’m not going to pretend this was some kind of divine inspiration. It was more like a desperate, late-night experiment born from a craving and a lack of options. I grabbed my mixing bowls, cracked a few eggs, and started throwing things together with the kind of reckless confidence that only strikes after 10 PM. The first attempt was a mess—the strawberry buttercream was too runny, and I somehow managed to get chocolate batter on the ceiling (don’t ask). But the second time? That was the one. The cake layers came out perfectly tender, the buttercream was silky and packed with real strawberry flavor, and when I stacked those three layers—chocolate, vanilla, and strawberry—I knew I had something special.
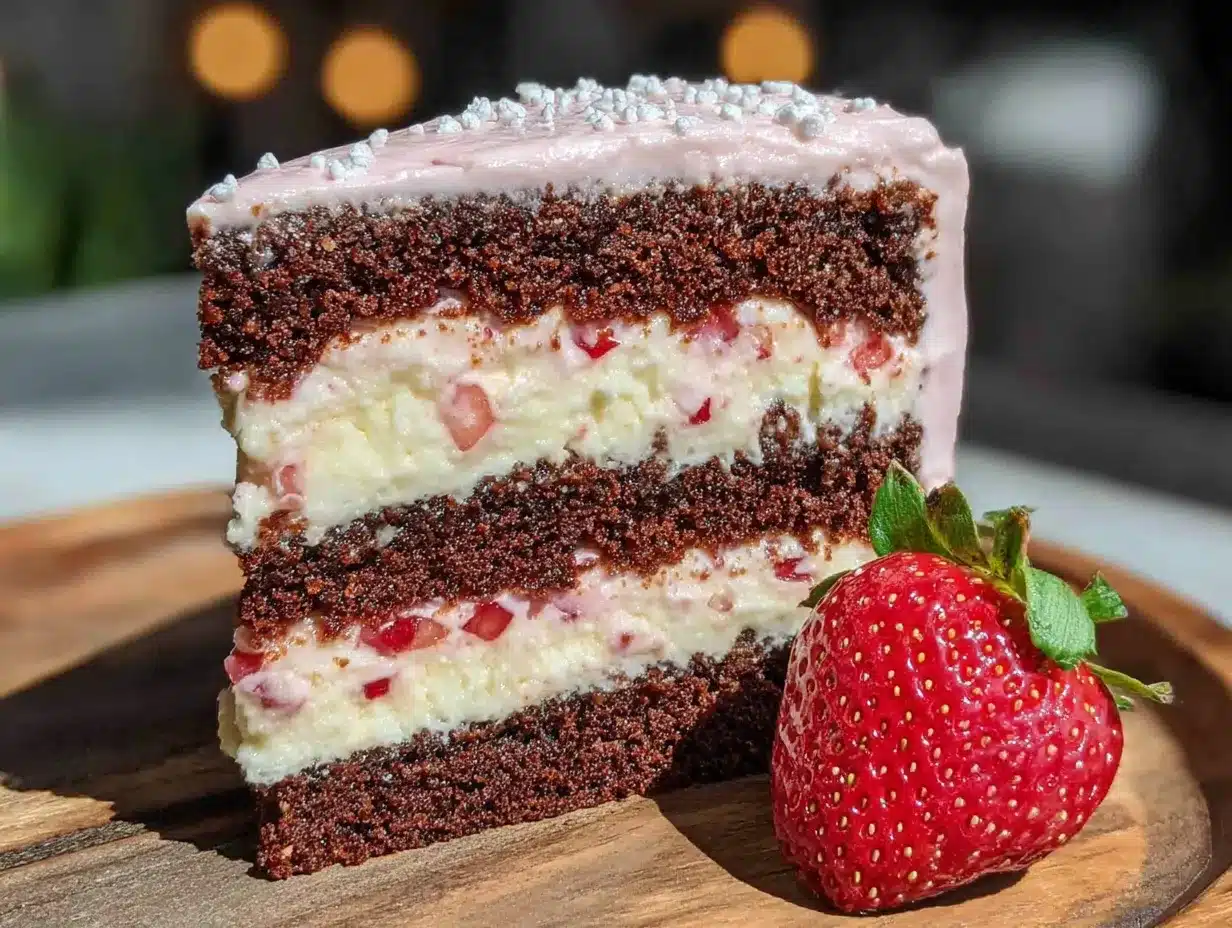
Maybe you’ve been there, staring into your pantry at 11 PM, wondering what culinary magic you can conjure from odds and ends. This cake is for those moments. It’s the kind of dessert that looks like you spent hours fussing over it, but honestly, it comes together with surprising ease. I’ve made this Perfect Neapolitan Layer Cake for birthdays, potlucks, and random Tuesday nights when I just needed something beautiful to look at. And every single time, people’s eyes light up when they see those three distinct layers. Let me tell you, there’s something deeply satisfying about cutting into a cake and revealing that perfect striped cross-section. This recipe stayed with me because it turned a late-night whim into a genuine crowd-pleaser, and I keep coming back to it because it never fails to make people smile.
Why You’ll Love This Recipe
This isn’t just another layer cake recipe—it’s a showstopper that practically bakes itself. After testing this recipe at least a dozen times (and having my fair share of lopsided layers and melted buttercream disasters), I can confidently say this version is foolproof. Here’s why you’re going to fall head over heels for it:
- Three Flavors, One Cake: You get chocolate, vanilla, and strawberry in every single slice. No more fighting over which flavor to pick—everyone wins.
- Real Strawberry Buttercream: We’re not using artificial flavoring here. This buttercream gets its gorgeous pink color and fresh taste from actual strawberries. Trust me, it makes all the difference.
- Simple Ingredients: Nothing fancy required. You probably have most of these in your pantry right now. No special trips to gourmet stores.
- Perfect for Any Occasion: Birthdays, anniversaries, holidays, or just because it’s Tuesday. This cake fits every celebration.
- Make-Ahead Friendly: The cake layers freeze beautifully, and the buttercream keeps well in the fridge. You can spread the work over a few days.
- Crowd-Pleaser Guaranteed: I’ve served this to everyone from picky kids to dessert snobs, and it disappears every single time.
What makes this recipe different from all the other Neapolitan cakes out there? It’s the technique. Instead of using cake mix or shortcuts, we’re building flavor from scratch with real ingredients. The strawberry buttercream uses reduced strawberry puree, which concentrates the flavor without making the frosting watery. The chocolate layer gets a hit of coffee that deepens the cocoa without tasting like coffee. And the vanilla layer? It’s anything but plain—it’s light, fluffy, and perfectly balanced.
This is the kind of cake that makes you close your eyes after the first bite. It’s nostalgic comfort food reimagined—familiar flavors, but done better than you remember. Perfect for impressing guests without the stress, or turning an ordinary weekend into something memorable.
What Ingredients You Will Need
This recipe uses simple, wholesome ingredients to deliver those three distinct flavors without any complicated techniques. Most of these are pantry staples, and I’ve included notes on where you can make swaps if needed.
For the Chocolate Layer
- 1 ½ cups (190g) all-purpose flour
- ¾ cup (65g) unsweetened cocoa powder (I prefer Dutch-processed for a richer flavor)
- 1 ½ teaspoons baking powder
- ½ teaspoon baking soda
- ½ teaspoon salt
- ½ cup (120ml) buttermilk, room temperature
- ½ cup (120ml) strong brewed coffee, cooled (this deepens the chocolate flavor without making it taste like coffee)
- 2 teaspoons vanilla extract
- ½ cup (115g) unsalted butter, softened
- 1 cup (200g) granulated sugar
- 2 large eggs, room temperature
For the Vanilla Layer
- 1 ½ cups (190g) all-purpose flour
- 1 ½ teaspoons baking powder
- ½ teaspoon salt
- ½ cup (120ml) whole milk, room temperature
- 2 teaspoons vanilla extract (use the good stuff here—it makes a difference)
- ½ cup (115g) unsalted butter, softened
- 1 cup (200g) granulated sugar
- 2 large eggs, room temperature
For the Strawberry Layer
- 1 ½ cups (190g) all-purpose flour
- 1 ½ teaspoons baking powder
- ½ teaspoon salt
- ½ cup (120ml) strawberry puree (about 1 cup fresh or frozen strawberries, blended and strained)
- ¼ cup (60ml) whole milk, room temperature
- 1 teaspoon vanilla extract
- ½ cup (115g) unsalted butter, softened
- 1 cup (200g) granulated sugar
- 2 large eggs, room temperature
- Pink or red food coloring (optional, for a more vibrant color)
For the Strawberry Buttercream
- 1 cup (240ml) strawberry puree (about 2 cups strawberries, blended and reduced)
- 1 ½ cups (340g) unsalted butter, softened
- 5 cups (600g) powdered sugar, sifted
- 2 teaspoons vanilla extract
- Pinch of salt
Ingredient Tips: For the strawberry puree, I recommend using frozen strawberries when fresh aren’t in season—they’re often sweeter and more flavorful. Look for strawberries that are deep red all the way through for the best color. If you’re using buttermilk substitutes, add 1 tablespoon of lemon juice to regular milk and let it sit for 5 minutes. And please, please use room temperature eggs and butter—it makes a huge difference in how the batter comes together.
Equipment Needed
You don’t need a professional bakery setup to pull off this cake, but having the right tools makes the process smoother. Here’s what you’ll need:
- Three 8-inch round cake pans: If you only have two, you can bake the layers in batches. Just make sure to clean and cool the pans between batches.
- Stand mixer or hand mixer: Creaming butter and sugar by hand is possible, but your arm will thank you for using a mixer.
- Parchment paper: Cut circles for the bottom of your pans to prevent sticking.
- Cooling racks: Essential for cooling layers evenly without getting soggy bottoms.
- Offset spatula: Makes frosting so much easier and gives you that smooth finish.
- Cake turntable: Not strictly necessary, but it makes frosting and decorating infinitely easier. A lazy Susan works in a pinch.
- Fine-mesh strainer: For straining the strawberry seeds out of your puree (trust me on this one).
- Small saucepan: For reducing the strawberry puree.
Budget-Friendly Alternatives: If you don’t have three cake pans, use disposable aluminum pans from the grocery store—they work fine. No cooling racks? Invert your pans and use them as makeshift racks. And if you’re short on time, a large serrated knife works just as well as a cake leveler for trimming domed tops.
Preparation Method
Step 1: Make the Strawberry Puree (Do This First)
In a small saucepan, combine 2 cups of chopped strawberries (fresh or frozen) with 1 tablespoon of sugar. Cook over medium heat, stirring occasionally, until the strawberries break down and release their juices—about 8-10 minutes. Reduce the heat to low and let it simmer until the mixture thickens and reduces to about 1 cup. This usually takes another 10-15 minutes. Strain through a fine-mesh strainer into a bowl, pressing on the solids to extract all the liquid. Discard the seeds and pulp. Let the puree cool completely before using. You’ll need ½ cup for the cake layer and 1 cup for the buttercream.
Step 2: Prepare Your Pans and Preheat
Preheat your oven to 350°F (175°C). Grease three 8-inch round cake pans with butter or non-stick spray. Cut parchment paper circles to fit the bottoms and place them in the pans. Lightly flour the sides of the pans and tap out any excess. This extra step guarantees your layers will release cleanly.
Step 3: Make the Chocolate Cake Layer
In a medium bowl, whisk together the flour, cocoa powder, baking powder, baking soda, and salt. In a separate small bowl or measuring cup, combine the buttermilk, coffee, and vanilla extract. In a large bowl, beat the butter and sugar together until light and fluffy—about 3 minutes. Add the eggs one at a time, beating well after each addition. Gradually add the dry ingredients in three additions, alternating with the buttermilk mixture, starting and ending with the dry ingredients. Mix until just combined—overmixing will make the cake tough. Pour the batter into one prepared pan and spread it evenly.
Step 4: Make the Vanilla Cake Layer
In a medium bowl, whisk together the flour, baking powder, and salt. In a small bowl, combine the milk and vanilla extract. In a large bowl, beat the butter and sugar until light and fluffy, about 3 minutes. Add the eggs one at a time, beating well after each. Add the dry ingredients in three additions, alternating with the milk mixture, starting and ending with the dry ingredients. Mix until just combined. Pour into a second prepared pan.
Step 5: Make the Strawberry Cake Layer
In a medium bowl, whisk together the flour, baking powder, and salt. In a small bowl, combine the ½ cup strawberry puree, milk, and vanilla extract. In a large bowl, beat the butter and sugar until light and fluffy, about 3 minutes. Add the eggs one at a time, beating well after each. Add the dry ingredients in three additions, alternating with the strawberry mixture, starting and ending with the dry ingredients. If you want a more vibrant pink color, add a drop or two of pink food coloring. Mix until just combined. Pour into the third prepared pan.
Step 6: Bake the Layers
Place all three pans in the oven, spacing them evenly. Bake for 22-28 minutes, or until a toothpick inserted into the center of each layer comes out clean or with a few moist crumbs. The chocolate layer might take a minute or two less than the others—check it first. Let the cakes cool in their pans for 10 minutes, then turn them out onto cooling racks. Remove the parchment paper and let them cool completely. This is crucial—warm cake will melt your buttercream into a sad puddle.
Step 7: Make the Strawberry Buttercream
While the cakes are cooling, make the frosting. In a small saucepan, simmer the remaining 1 cup of strawberry puree over medium heat until it reduces to about ¼ cup. This concentrates the flavor and removes excess water that would make your buttercream runny. Let it cool completely. In a large bowl, beat the butter until smooth and creamy—about 2 minutes. Gradually add the powdered sugar, one cup at a time, beating on low speed until incorporated. Add the reduced strawberry puree, vanilla extract, and salt. Increase the speed to medium-high and beat for 3-4 minutes until the buttercream is light, fluffy, and spreadable. If it’s too thick, add a teaspoon of milk. If it’s too thin, add more powdered sugar.
Step 8: Assemble the Cake
Place one cake layer on your serving plate or cake board. I usually put the chocolate layer on the bottom because it’s the sturdiest. Spread about ¾ cup of buttercream evenly over the top. Place the vanilla layer on top, pressing gently to level it. Add another ¾ cup of buttercream. Place the strawberry layer on top (flat side up). Apply a thin layer of buttercream all over the cake—this is the crumb coat. It doesn’t have to be perfect; it just traps the crumbs. Refrigerate for 20 minutes to set the crumb coat.
Step 9: Final Frosting and Decoration
After the crumb coat is set, apply the remaining buttercream all over the cake. Use your offset spatula to create smooth sides or decorative swirls—whatever feels right. I like to leave the top slightly rustic with some swoops and peaks. If you want, you can pipe a border around the top edge using a star tip. Refrigerate the finished cake for at least 30 minutes before slicing to let the buttercream firm up.
Cooking Tips & Techniques
After making this cake more times than I can count, I’ve picked up a few tricks that make a real difference. Let me share them with you so you can avoid the same mistakes I made.
Room Temperature Ingredients Are Non-Negotiable: I know, I know—every recipe says this, but it really matters here. Cold butter doesn’t cream properly, cold eggs can curdle your batter, and cold milk won’t emulsify correctly. Take everything out of the fridge at least an hour before you start baking. If you forget (and I have, many times), you can warm eggs in a bowl of warm water for 5 minutes and microwave your butter in 5-second bursts until it’s soft but not melted.
Don’t Overmix the Batter: This is probably the most common mistake I see. Once you add the flour, mix just until you can’t see any more streaks. Overmixing develops gluten, which makes your cake layers tough and dense instead of tender and fluffy. I’ve ruined a few batches by getting distracted and overmixing—learn from my mistakes.
Weigh Your Ingredients: If you really want consistent results, invest in a kitchen scale. Flour can vary wildly in volume depending on how it’s packed. One cup of flour can weigh anywhere from 120 to 150 grams depending on how you scoop it. Weighing eliminates that guesswork. For this recipe, I’ve given you both volume and weight measurements, so you can choose your method.
Level Your Layers: Even if you bake perfectly, your layers will likely have a slight dome on top. Use a serrated knife to level them off before assembling. This gives you a flat, stable base and prevents the cake from leaning. Save the scraps for snacking or making cake truffles.
Chill Between Coats: That 20-minute chill after the crumb coat isn’t optional—it’s the secret to a clean, crumb-free finish. If you’re impatient like me and skip this step, you’ll end up with crumbs in your final frosting layer. Trust the process.
Variations & Adaptations
One of the best things about this cake is how easily you can adapt it to different tastes and dietary needs. Here are some variations I’ve tried and loved:
Gluten-Free Version: Substitute the all-purpose flour with a high-quality gluten-free flour blend that contains xanthan gum. I’ve had great results with Cup4Cup and King Arthur’s gluten-free flour. The texture will be slightly more tender, but the flavor is spot on. Make sure to check that your cocoa powder and baking powder are certified gluten-free as well.
Dairy-Free Adaptation: Replace the butter with a high-quality vegan butter stick (not the spreadable kind in a tub). Use almond milk or oat milk mixed with 1 teaspoon of lemon juice as a buttermilk substitute. For the buttercream, vegan butter works surprisingly well—just make sure it’s softened properly. The texture will be slightly less creamy, but still delicious.
Mini Cake Version: Want individual servings? Bake the batter in three 6-inch cake pans instead of 8-inch. Reduce the baking time to 18-22 minutes. You’ll get a taller, more dramatic cake that’s perfect for smaller gatherings. Plus, mini cakes are just adorable.
Chocolate Lovers’ Twist: Add ½ cup of mini chocolate chips to the chocolate layer for extra texture. You can also stir ¼ cup of melted dark chocolate into the buttercream for a chocolate-strawberry version that’s absolutely decadent.
Seasonal Fruit Swap: While strawberry is classic, you can swap the strawberry puree for raspberry, cherry, or even mango puree in the buttercream and cake layer. Each fruit gives a different color and flavor profile, and they all work beautifully with the chocolate and vanilla layers.
Serving & Storage Suggestions
This cake is at its absolute best when served at room temperature. Take it out of the refrigerator about 30-45 minutes before you plan to serve it. The buttercream softens slightly and becomes silky, and the cake layers regain their tender texture. Cold cake from the fridge is fine, but room temperature is where the magic happens.
For presentation, I love to garnish each slice with a fresh strawberry and a small mint leaf. It adds a pop of color and freshness that complements the rich cake. If you’re feeling fancy, drizzle a little chocolate sauce on the plate before placing the slice—it looks gorgeous and tastes incredible.
Storage Instructions: This cake keeps beautifully in the refrigerator for up to 5 days. Store it in a cake carrier or wrap it loosely in plastic wrap (don’t seal it too tightly, or condensation will form). The flavors actually meld together and improve after a day or two in the fridge—the strawberry flavor becomes more pronounced, and the cake stays incredibly moist.
Freezing Instructions: You can freeze the entire assembled cake (without garnishes) for up to 3 months. Place it in the freezer unwrapped for an hour until the buttercream is firm, then wrap it tightly in several layers of plastic wrap and a layer of foil. To thaw, transfer it to the refrigerator overnight. The texture remains remarkably good after freezing—I’ve done this many times for holiday prep.
Reheating Leftovers: If you’re eating leftovers straight from the fridge, let the slice sit at room temperature for 15 minutes. For a warm treat, microwave individual slices for 10-15 seconds—just enough to take the chill off without melting the buttercream.
Nutritional Information & Benefits
Let’s be real—this is a celebration cake, not a health food. But that doesn’t mean it can’t have some redeeming qualities. Here’s a rough estimate of what you’re looking at per slice (based on 14 servings):
Estimated Nutrition Per Slice:
- Calories: 520
- Total Fat: 28g
- Saturated Fat: 17g
- Cholesterol: 110mg
- Sodium: 280mg
- Total Carbohydrates: 68g
- Dietary Fiber: 2g
- Sugars: 50g
- Protein: 5g
Health Highlights: The strawberries in the buttercream and cake layer provide a good dose of vitamin C and antioxidants. Cocoa powder is rich in flavonoids, which have been linked to heart health benefits. And hey, this cake is made from scratch with real ingredients—no artificial preservatives, hydrogenated oils, or mystery additives. Everything is recognizable, and that counts for something.
Dietary Considerations: This recipe contains gluten, dairy, and eggs. For gluten-free or dairy-free options, check the variations section above. The cake is nut-free as written, making it safe for most school and event settings.
FAQs
Can I use cake flour instead of all-purpose flour?
Absolutely! Cake flour has lower protein content, which gives you an even more tender, delicate crumb. Use the same amount by weight, but if you’re measuring by volume, use 1 ¾ cups of cake flour for every 1 ½ cups of all-purpose flour. Your cake will be lighter and fluffier.
Why did my buttercream turn out runny?
This usually happens when the strawberry puree hasn’t been reduced enough. The excess water in the puree breaks down the butter, creating a soupy mess. Make sure you reduce your puree to about ¼ cup—it should be thick and syrupy, not watery. Also, make sure your butter is properly softened but not melted. If your buttercream is already runny, pop it in the fridge for 15 minutes, then re-whip it.
Can I use boxed cake mix for this recipe?
You can, but I wouldn’t recommend it if you want the best results. The homemade layers have a depth of flavor and tender texture that boxed mixes just can’t replicate. If you’re short on time, you can use a white cake mix for the vanilla layer, a chocolate cake mix for the chocolate layer, and add strawberry puree to another white cake mix for the strawberry layer. The buttercream from scratch is non-negotiable though—it makes the cake.
How do I get clean, even slices?
Use a long, sharp serrated knife. Run it under hot water, dry it off, then make your cut in one smooth motion. Wipe the blade clean between cuts. I also recommend refrigerating the cake for at least an hour before slicing—the buttercream firms up and gives you much cleaner edges. For the first slice, cut a small wedge out first to give yourself room to work.
Can I make this cake ahead of time for a party?
Yes, and I actually recommend it! You can bake the cake layers up to 2 days in advance. Wrap each cooled layer tightly in plastic wrap and store them at room temperature. The buttercream can be made up to 5 days ahead and stored in the refrigerator—just bring it back to room temperature and re-whip it before using. Assemble and frost the cake the day before your event, and keep it refrigerated. The flavors meld beautifully overnight.
Conclusion
This Perfect Neapolitan Layer Cake with Strawberry Buttercream is more than just a dessert—it’s a conversation starter, a celebration centerpiece, and honestly, a little bit of edible nostalgia. Every time I make it, I’m reminded of that late-night kitchen experiment that turned into something genuinely beautiful. The way the chocolate, vanilla, and strawberry layers come together in perfect harmony never gets old.
I hope you give this recipe a try and make it your own. Maybe you’ll add extra strawberries on top, or swap the buttercream for a cream cheese frosting, or turn it into cupcakes. The beauty of baking from scratch is that you have the freedom to adapt and experiment. Don’t be afraid to make mistakes—I’ve made plenty, and they’ve all taught me something valuable.
When you make this cake—and I hope you do—I’d love to hear about it. Drop a comment below and tell me how it turned out, what variations you tried, or just share your favorite baking memory. And if you loved this recipe, please share it with a friend who needs a little sweetness in their life. Happy baking, friends—you’ve got this!
Pin This Recipe!
Best Perfect Neapolitan Layer Cake with Strawberry Buttercream
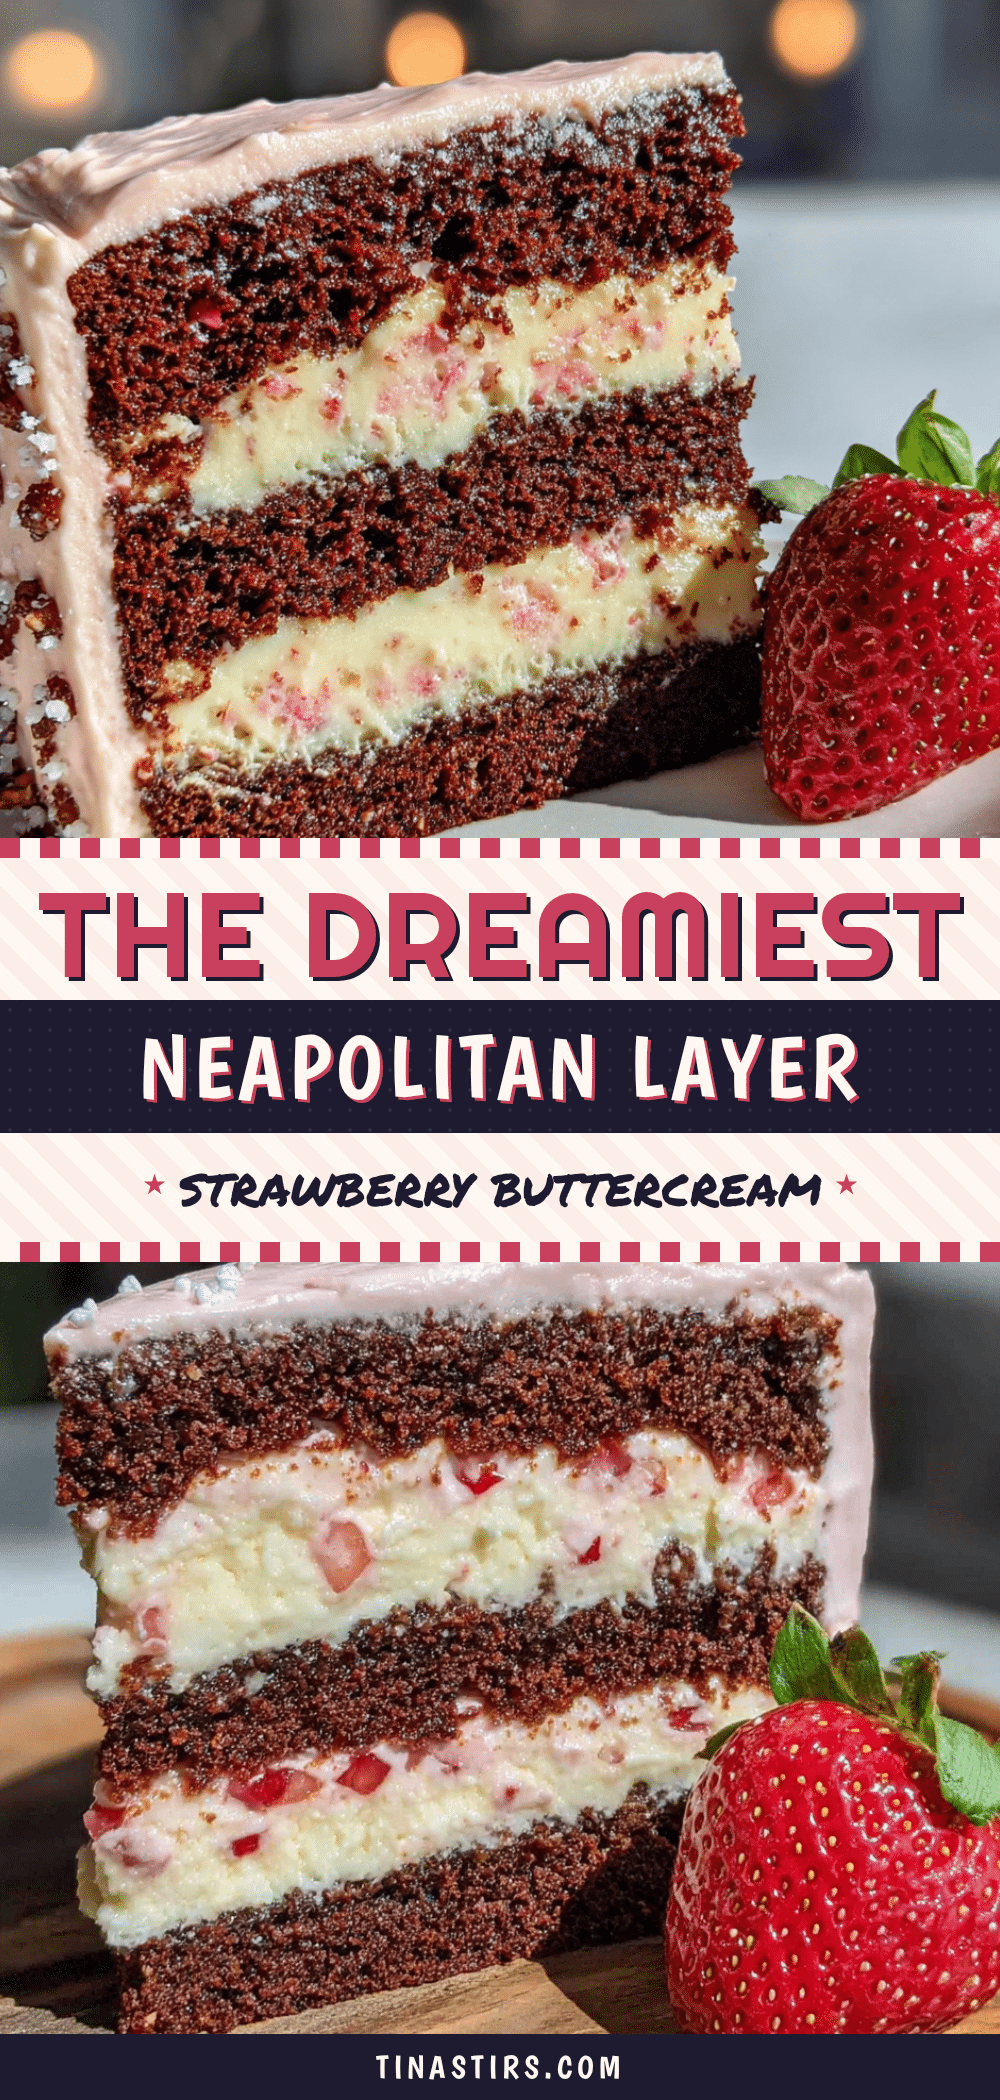
A stunning three-layer cake featuring chocolate, vanilla, and strawberry cake layers with a real strawberry buttercream. This showstopper dessert captures the classic Neapolitan ice cream flavors in every slice, perfect for birthdays, celebrations, or any occasion.
- Prep Time: 45 minutes
- Cook Time: 28 minutes
- Total Time: 1 hour 13 minutes
- Yield: 14 servings 1x
- Category: Dessert
- Cuisine: American
Ingredients
- 1 ½ cups (190g) all-purpose flour
- ¾ cup (65g) unsweetened cocoa powder (preferably Dutch-processed)
- 1 ½ teaspoons baking powder
- ½ teaspoon baking soda
- ½ teaspoon salt
- ½ cup (120ml) buttermilk, room temperature
- ½ cup (120ml) strong brewed coffee, cooled
- 2 teaspoons vanilla extract
- ½ cup (115g) unsalted butter, softened
- 1 cup (200g) granulated sugar
- 2 large eggs, room temperature
- 1 ½ cups (190g) all-purpose flour
- 1 ½ teaspoons baking powder
- ½ teaspoon salt
- ½ cup (120ml) whole milk, room temperature
- 2 teaspoons vanilla extract
- ½ cup (115g) unsalted butter, softened
- 1 cup (200g) granulated sugar
- 2 large eggs, room temperature
- 1 ½ cups (190g) all-purpose flour
- 1 ½ teaspoons baking powder
- ½ teaspoon salt
- ½ cup (120ml) strawberry puree (about 1 cup fresh or frozen strawberries, blended and strained)
- ¼ cup (60ml) whole milk, room temperature
- 1 teaspoon vanilla extract
- ½ cup (115g) unsalted butter, softened
- 1 cup (200g) granulated sugar
- 2 large eggs, room temperature
- Pink or red food coloring (optional)
- 1 cup (240ml) strawberry puree (about 2 cups strawberries, blended and reduced)
- 1 ½ cups (340g) unsalted butter, softened
- 5 cups (600g) powdered sugar, sifted
- 2 teaspoons vanilla extract
- Pinch of salt
Instructions
- Make the strawberry puree: In a small saucepan, combine 2 cups chopped strawberries with 1 tablespoon sugar. Cook over medium heat, stirring occasionally, until strawberries break down (8-10 minutes). Reduce heat to low and simmer until thickened and reduced to about 1 cup (10-15 minutes). Strain through a fine-mesh strainer, discarding seeds and pulp. Cool completely. Reserve ½ cup for cake layer and 1 cup for buttercream.
- Preheat oven to 350°F (175°C). Grease three 8-inch round cake pans, line bottoms with parchment paper, and lightly flour sides.
- Make chocolate layer: Whisk together flour, cocoa powder, baking powder, baking soda, and salt. Combine buttermilk, coffee, and vanilla. Beat butter and sugar until light and fluffy (3 minutes). Add eggs one at a time. Add dry ingredients in three additions alternating with buttermilk mixture, starting and ending with dry. Pour into one prepared pan.
- Make vanilla layer: Whisk together flour, baking powder, and salt. Combine milk and vanilla. Beat butter and sugar until light and fluffy (3 minutes). Add eggs one at a time. Add dry ingredients in three additions alternating with milk mixture. Pour into second prepared pan.
- Make strawberry layer: Whisk together flour, baking powder, and salt. Combine ½ cup strawberry puree, milk, and vanilla. Beat butter and sugar until light and fluffy (3 minutes). Add eggs one at a time. Add dry ingredients in three additions alternating with strawberry mixture. Add food coloring if desired. Pour into third prepared pan.
- Bake all three layers for 22-28 minutes, until toothpick inserted in center comes out clean. Cool in pans 10 minutes, then turn out onto cooling racks. Remove parchment and cool completely.
- Make strawberry buttercream: Simmer remaining 1 cup strawberry puree until reduced to about ¼ cup. Cool completely. Beat butter until smooth (2 minutes). Gradually add powdered sugar, one cup at a time. Add reduced strawberry puree, vanilla, and salt. Beat on medium-high 3-4 minutes until light and fluffy.
- Assemble cake: Place chocolate layer on serving plate. Spread ¾ cup buttercream on top. Add vanilla layer, then ¾ cup buttercream. Add strawberry layer. Apply thin crumb coat of buttercream all over. Refrigerate 20 minutes.
- After crumb coat is set, apply remaining buttercream all over cake. Smooth sides or create decorative swirls. Refrigerate at least 30 minutes before slicing.
Notes
Room temperature ingredients are crucial for best results. Don’t overmix the batter. Level cake layers with a serrated knife if domed. Chill between crumb coat and final frosting for clean finish. Cake keeps refrigerated up to 5 days or frozen up to 3 months. Serve at room temperature for best flavor and texture.
Nutrition
- Serving Size: 1 slice
- Calories: 520
- Sugar: 50
- Sodium: 280
- Fat: 28
- Saturated Fat: 17
- Carbohydrates: 68
- Fiber: 2
- Protein: 5
Keywords: Neapolitan cake, layer cake, strawberry buttercream, chocolate cake, vanilla cake, birthday cake, celebration cake, homemade cake


