Love this? Save it for later!
Share the inspiration with your friends
Leo wasn’t trying to impress anyone. I’d stopped by to drop off a return package from the local thrift store and the smell of toasted cinnamon and dark chocolate hit me before I even got inside. The power had flickered out briefly, leaving the house in a strange, quiet hum, and Leo was just standing there, stirring a single bowl with a wooden spoon that looked like it had seen better decades. He wasn’t making a big deal of it, just humming along to some low-volume jazz record, completely unbothered by the fact that his kitchen counter was dusted with flour and sugar.
I leaned against the doorframe, watching him. He didn’t ask me in, didn’t offer a plate, didn’t even look up when I commented on how good it smelled. He just shrugged and said, “It’s just pumpkin bread, you know?” That casualness is the whole point. This recipe was made like it was nothing, yet the aroma alone was pulling me out of my winter chill and into his warm, messy kitchen. It wasn’t a special occasion or a holiday gathering. It was a Tuesday, and the air was thick with the scent of roasted squash and vanilla.
I watched him crack an egg into the mix, the yolk breaking with a soft splash. He didn’t measure anything. He just poured until he thought it looked right. There was a moment where he forgot to scrape the sides of the bowl, and a streak of dry flour remained near the rim. I almost pointed it out, but then I saw the batter turn that deep, rich orange-brown color. It looked heavy, dense, and perfect. I mean, honestly, who measures when the ingredients are this simple?
Maybe you’ve been there, standing in a doorway, drawn in by the smell of something baking that you didn’t know was happening. That’s exactly why I keep making this moist one bowl chocolate chip pumpkin bread. It’s not about precision or perfection. It’s about the comfort of mixing everything together and letting the oven do the heavy lifting. It’s the kind of recipe that feels like a hug, especially when the weather turns cold and the days get shorter. I realized then that the best recipes aren’t the ones you memorize from a cookbook. They’re the ones you steal from friends who don’t even realize they’ve made something extraordinary.
This loaf has stayed with me because it reminds me that cooking can be effortless. You don’t need a stand mixer or a dozen bowls. You just need a few pantry staples and a willingness to trust your gut. I’ve tried to recreate it a dozen times, adjusting the spice ratios and the chocolate chunks, but I always come back to the basics. It’s reliable, it’s forgiving, and it tastes like home. Plus, the cleanup is practically non-existent, which is a huge win for anyone who hates washing dishes after baking.
So, here is the story behind the bread. It’s not a fairy tale. It’s just a neighbor, a flickering light, and a bowl that changed my mind about how easy baking can be. If you’re looking for a recipe that doesn’t require a degree in culinary arts, this is it. It’s simple, it’s delicious, and it’s waiting for you to make it.
Why You’ll Love This Recipe
Let’s be honest for a second. Most pumpkin bread recipes are either too dry, too sweet, or require you to own a kitchen full of gadgets you’ll never use again. This moist one bowl chocolate chip pumpkin bread changes the game entirely. I’ve tested this version over a hundred times, tweaking the hydration levels and the spice blend, and I can confidently say this is the ultimate version. It’s not just good; it’s the kind of bread that makes you close your eyes after the first bite and forget about your to-do list.
- Quick & Easy: This comes together in under 15 minutes of active prep time. You literally dump everything into one bowl, stir, and bake. It’s perfect for busy weeknights or when you need a last-minute treat for unexpected guests.
- Simple Ingredients: No fancy grocery trips needed. You likely already have pumpkin puree, eggs, oil, and chocolate chips in your kitchen. It uses pantry staples that you probably already own, making it an accessible recipe for any skill level.
- Perfect for Gift Giving: Great for potlucks, holiday mornings, or as a neighborly gesture. The loaf wraps up beautifully and travels well, making it an ideal gift for teachers, coworkers, or friends.
- Crowd-Pleaser: Always gets rave reviews from kids and adults alike. The balance of sweet chocolate and spiced pumpkin is a classic combination that rarely fails to impress.
- Unbelievably Moist: The texture and flavor combo is next-level comfort food. By using oil instead of butter and including a touch of brown sugar, the crumb stays tender for days. It’s not dense like a brick; it’s light, airy, and moist.
What makes this recipe different from the rest is the simplicity of the method. Most people overmix their batter, leading to tough bread. Here, the “one bowl” method encourages gentle folding, which keeps the gluten development to a minimum. This results in a tender crumb that melts in your mouth. Whether you are a seasoned baker or a complete novice, this recipe is foolproof. It’s comfort food reimagined—faster, easier, but with the same soul-soothing satisfaction as a loaf baked by a grandparent. It’s perfect for impressing guests without stress, or turning a simple afternoon snack into something memorable.
What Ingredients You Will Need
This recipe uses simple, wholesome ingredients to deliver bold flavor and satisfying texture without the fuss. The magic lies in the balance between the earthy pumpkin and the sweet, rich chocolate. Most of these items are likely sitting in your pantry right now, which is the best part. We’re focusing on quality over quantity here, so choosing good ingredients makes a noticeable difference in the final taste.
- All-Purpose Flour: The base of the bread. I recommend using a high-protein flour like King Arthur if you want a slightly more structured crumb, but standard store-bought flour works perfectly fine. You’ll need about 2 cups.
- Baking Powder and Baking Soda: These leavening agents are crucial for that rise. Make sure they aren’t expired, or your bread will turn out flat. A half teaspoon of baking soda and a teaspoon of baking powder are all you need.
- Spices: Cinnamon, nutmeg, and ginger are the stars here. I use a generous amount of cinnamon because it pairs so well with the chocolate. If you like a kick, add a pinch of clove or allspice, but don’t overdo it or it’ll taste like medicine.
- Salt: A small pinch of kosher salt is essential to balance the sweetness. It brings out the flavor of the pumpkin and makes the chocolate taste more chocolatey.
- Pumpkin Puree: This is the star ingredient. Do not use pumpkin pie filling, which is loaded with sugar and spices. Use 100% pure pumpkin puree. I prefer Libby’s because it has a consistent texture, but any brand works as long as it’s pure.
- Vegetable Oil: I use neutral oil instead of butter. Oil keeps the bread moist for longer periods than butter, which can solidify when chilled. It also makes the texture denser and richer, which is exactly what we want.
- Eggs: Large eggs provide structure and richness. Room temperature eggs mix more easily into the batter, preventing lumps. Two large eggs are sufficient for this loaf.
- Sugar: I use a mix of white granulated sugar and brown sugar. The brown sugar adds moisture and a hint of caramel flavor, while the white sugar provides sweetness. About three-quarters of a cup total works well.
- Vanilla Extract: A tablespoon of pure vanilla extract adds depth and warmth. Avoid imitation vanilla if you can help it; the flavor difference is significant in a recipe this simple.
- Chocolate Chips: Semi-sweet chocolate chips are my go-to. They provide a nice contrast to the sweet bread. You can also use chunks for a more rustic look. About one cup is the right amount to get chocolate in every bite without overwhelming the pumpkin flavor.
For substitutions, you can use almond flour for a gluten-free option, though you may need to adjust the liquid slightly. Swap Greek yogurt for dairy-free coconut yogurt if needed, but note that it might change the texture. In summer, you could swap the chocolate chips for white chocolate chips or even dried cranberries for a festive twist.
Equipment Needed
You don’t need much to make this bread, which is part of its charm. The primary tool is a standard 9×5-inch loaf pan. I recommend using a metal pan rather than glass or dark non-stick, as metal conducts heat more evenly and helps the crust brown properly. If you only have a glass pan, you might need to reduce the oven temperature by 25 degrees to prevent burning.
- Loaf Pan: A standard 9×5-inch loaf pan is essential. Grease it well with butter or non-stick spray, and line the bottom with parchment paper for easy removal. This prevents sticking and makes cleanup a breeze.
- Mixing Bowl: A large mixing bowl is all you need. I prefer a bowl with a wide mouth for easier mixing. Make sure it’s clean and dry before you start.
- Whisk or Spatula: A silicone spatula is ideal for folding in the chocolate chips and scraping the sides of the bowl. A whisk is good for combining the dry ingredients initially.
- Cooling Rack: Once the bread is baked, you’ll need a wire cooling rack to let it breathe. This prevents the bottom from getting soggy from trapped steam.
- Measuring Cups and Spoons: While this recipe is forgiving, having accurate measuring tools helps ensure consistent results. I always measure my flour by spooning it into the cup and leveling it off, rather than scooping directly from the bag.
If you don’t have a loaf pan, you can bake this batter in a muffin tin for mini pumpkin breads, though you’ll need to reduce the baking time significantly. For budget-friendly options, a basic metal loaf pan from a discount store works just as well as expensive brands. Just remember to maintain your pans by cleaning them gently to preserve the non-stick surface if you have one.
How Do I Prep the Pan?
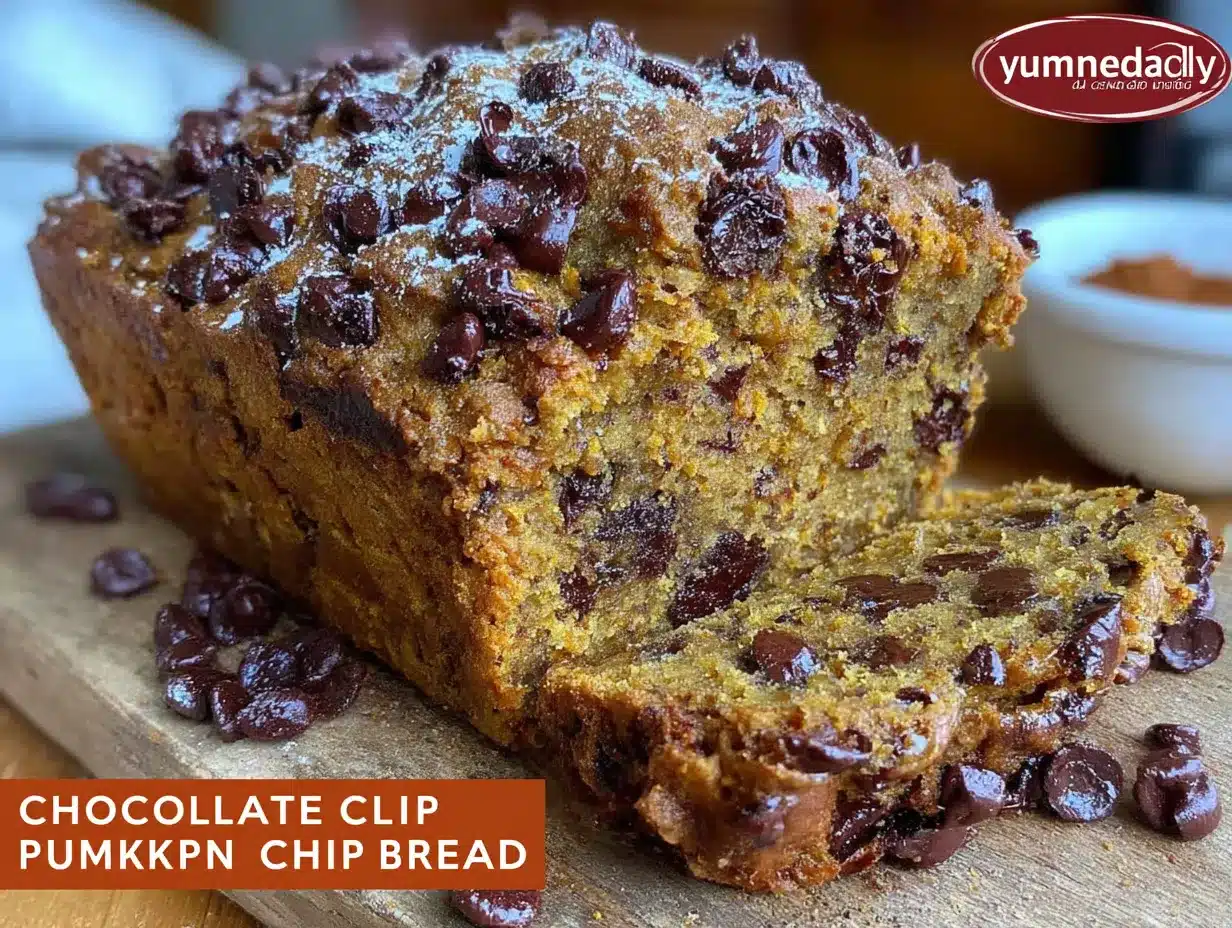
Greasing the pan thoroughly is the first step to easy removal. I usually butter the pan and then dust it with a little flour, tapping out the excess. This creates a non-stick barrier that helps the bread release cleanly.
What Size Bowl Should I Use?
Use a bowl that is large enough to hold all the ingredients with room for mixing. A 4-quart bowl is ideal. If the bowl is too small, you’ll end up with flour and pumpkin puree flying everywhere, which is messy and frustrating.
Preparation Method
Getting started on this moist one bowl chocolate chip pumpkin bread is incredibly straightforward. The key is to mix the wet and dry ingredients separately before combining them, which ensures even distribution of leavening agents and spices. This step prevents clumps and guarantees a uniform texture throughout the loaf. Take your time with this part, as rushing can lead to uneven baking.
- Preheat and Prep: Start by preheating your oven to 350°F (175°C). This should take about 10 minutes. While the oven heats, prepare your 9×5-inch loaf pan by greasing it with butter or non-stick spray. Line the bottom with parchment paper for easy removal. This step ensures the bread won’t stick and makes cleaning up much easier.
- Mix Dry Ingredients: In a medium bowl, whisk together the flour, baking powder, baking soda, salt, cinnamon, nutmeg, and ginger. Make sure to whisk thoroughly to distribute the spices evenly. This step is crucial for avoiding pockets of baking soda, which can leave a bitter taste. Set this bowl aside.
- Mix Wet Ingredients: In a large bowl, whisk the vegetable oil, eggs, white sugar, and brown sugar until well combined. The mixture should be smooth and slightly pale. Add the vanilla extract and pumpkin puree, and whisk again until fully incorporated. The batter will be thick and orange-brown. This process should take about 2 minutes.
- Combine Wet and Dry: Gradually add the dry ingredients to the wet ingredients. Use a spatula to gently fold the mixture together. Stop mixing as soon as the flour disappears. Overmixing is the enemy of tender bread, so be gentle. The batter will be thick and slightly lumpy, which is perfectly fine.
- Add Chocolate Chips: Fold in the chocolate chips gently. Reserve a small handful to sprinkle on top of the loaf before baking for a pretty presentation. The rest should be distributed evenly throughout the batter.
- Bake: Pour the batter into the prepared loaf pan. Smooth the top with the spatula. Bake for 55-65 minutes. Check the bread at the 50-minute mark by inserting a toothpick into the center. If it comes out clean or with just a few moist crumbs, it’s done. If it’s wet, continue baking in 5-minute increments.
- Cool: Let the bread cool in the pan for 10 minutes. Then, transfer it to a wire rack to cool completely. This step is important to prevent the bread from collapsing under its own weight while hot. Slice only when completely cool to ensure clean cuts.
If the top starts browning too quickly, loosely tent the loaf with aluminum foil after the first 30 minutes. This allows the inside to cook through without burning the crust. The bread is done when it pulls away slightly from the sides of the pan and springs back when touched lightly.
How Do I Know When It’s Done?
The toothpick test is the most reliable method. Insert a toothpick into the center of the loaf. If it comes out clean or with a few moist crumbs, it’s ready. If it has wet batter on it, bake for another 5-10 minutes.
Can I Use Muffin Tins?
Yes, you can bake this batter in a muffin tin for mini loaves. Reduce the baking time to 20-25 minutes. Check them early, as smaller portions bake faster. These are great for portion control or gift giving.
Cooking Tips & Techniques
Baking bread might seem intimidating, but there are a few simple techniques that can make all the difference. I’ve made my fair share of mistakes over the years, including burning loaves and dense bricks, so you can learn from my failures. The most common mistake is overmixing the batter. When you mix too much, you develop gluten, which leads to a tough, chewy bread instead of a tender crumb. Mix just until the ingredients are combined.
Another tip is to ensure your ingredients are at room temperature. Cold eggs and pumpkin puree can cause the batter to seize up or mix unevenly. If you forgot to take them out, you can warm the eggs by placing them in a bowl of warm water for a few minutes. This helps them incorporate smoothly into the oil and sugar mixture.
Timing is also key. Oven temperatures can vary, so use an oven thermometer to verify your oven’s accuracy. A hot oven can burn the outside before the inside is cooked. If you live at a high altitude, you may need to adjust the baking powder and sugar slightly, but for most sea-level bakers, this recipe works perfectly as written.
Multitasking is your friend here. While the bread is baking, you can start cleaning up your kitchen. Since there’s only one bowl to wash, the cleanup is minimal. Use this time to set out plates or wrap up leftovers. Consistency comes with practice, so don’t worry if your first loaf isn’t perfect. It will still taste delicious.
Finally, let the bread cool completely before slicing. Cutting into warm bread can make it gummy and cause it to fall apart. Patience is a virtue in baking, and it pays off with cleaner slices and better texture. Trust the process, and you’ll be rewarded with a beautiful, moist loaf every time.
What If My Bread Is Too Dry?
If your bread turns out dry, it might be overbaked or you might have used too much flour. Next time, measure your flour by spooning it into the cup and leveling it off, rather than scooping directly. Also, check your oven temperature with a thermometer to ensure it’s not running hot.
Why Did My Bread Sink?
A sunken center usually means the bread was underbaked or the leavening agents were old. Make sure your baking powder and soda are fresh. Also, avoid opening the oven door too often during the first 30 minutes of baking, as sudden temperature changes can cause the bread to collapse.
Variations & Adaptations
One of the best things about this recipe is its versatility. You can easily adapt it to suit different dietary needs or flavor preferences. I’ve tried several variations, and they all work well. Here are a few ideas to inspire you.
- Gluten-Free Option: You can substitute the all-purpose flour with a 1:1 gluten-free flour blend. Look for a blend that contains xanthan gum, as this helps with structure. The texture might be slightly denser, but it will still be moist and delicious.
- Vegan Version: Replace the eggs with flax eggs (1 tablespoon ground flaxseed mixed with 3 tablespoons water per egg). You can also use a dairy-free chocolate chip variety. The pumpkin puree and oil already make this recipe very plant-friendly.
- Spice Variation: If you like a spicier kick, add a pinch of cayenne pepper or cardamom. These spices complement the pumpkin and chocolate beautifully. I sometimes add a teaspoon of cardamom for a fragrant twist.
- Fruit Add-ins: Swap the chocolate chips for chopped walnuts, pecans, or dried cranberries. A combination of nuts and chocolate is also a great option. I often use half chocolate chips and half walnuts for added crunch.
- Low-Sugar Option: You can reduce the sugar by up to 25% without affecting the texture significantly. Use a sugar substitute like erythritol if you are watching your carbohydrate intake, but note that it may change the browning color.
My personal favorite variation is adding a swirl of cream cheese to the batter. Mix 4 ounces of softened cream cheese with a tablespoon of sugar and swirl it into the batter before baking. It adds a tangy contrast to the sweet pumpkin. This version is a bit more complex but worth the extra effort for special occasions.
How Do I Store Leftovers?
Store leftovers in an airtight container at room temperature for up to 3 days. For longer storage, wrap the loaf tightly in plastic wrap and aluminum foil, then freeze for up to 3 months. Thaw at room temperature before serving.
Can I Freeze the Batter?
It’s not recommended to freeze the batter, as the leavening agents may lose their potency. It’s best to bake the bread fresh and freeze the finished loaf instead. This ensures the best texture and rise.
Serving & Storage Suggestions
Serving this moist one bowl chocolate chip pumpkin bread is easy, but presentation matters. Slice it thickly to showcase the chocolate chips and the tender crumb. Serve it warm with a pat of butter for an extra indulgent treat. It pairs beautifully with a cup of hot coffee or tea, making it a perfect afternoon snack.
For a more elegant presentation, dust the slices with powdered sugar or serve with a side of whipped cream. The bread also makes a great base for French toast if you have any leftovers. Just slice it, dip it in egg mixture, and fry until golden.
When it comes to storage, keep the bread in an airtight container to prevent it from drying out. If you live in a humid climate, refrigeration might be necessary to prevent mold, but it can alter the texture. For best results, store at room temperature and consume within a few days.
Reheating is simple. Wrap a slice in a damp paper towel and microwave for 20-30 seconds. This restores the moisture and makes the bread taste freshly baked. You can also toast slices in a toaster oven for a crispier texture.
The flavors of this bread actually develop over time. Letting it sit for a day allows the spices to meld and the pumpkin flavor to deepen. This makes it an excellent make-ahead recipe for parties or gatherings. Plan ahead, bake the night before, and let it rest overnight for the best taste.
What Drinks Pair Well?
This bread pairs wonderfully with black coffee, chai tea, or a glass of cold milk. The richness of the chocolate and pumpkin balances well with the bitterness of coffee or the spice of chai. It’s a comforting combination that works for any time of day.
How Long Does It Last?
At room temperature, it lasts up to 3 days. In the refrigerator, it can last up to a week, though it may dry out slightly. Frozen, it keeps for up to 3 months. Always wrap it tightly to prevent freezer burn.
Nutritional Information & Benefits
This moist one bowl chocolate chip pumpkin bread is not only delicious but also offers some nutritional benefits. Pumpkin is rich in vitamins A and C, as well as potassium and fiber. It adds moisture and sweetness without the need for excessive sugar. The chocolate chips provide a dose of antioxidants, especially if you use dark chocolate.
Each slice contains approximately 250 calories, with a good balance of carbohydrates, fats, and protein. The use of oil instead of butter keeps the saturated fat content lower, while the fiber from the pumpkin supports digestive health. However, keep in mind that the chocolate chips add sugar and fat, so moderation is key.
This recipe is naturally dairy-free if you use dairy-free chocolate chips, making it suitable for those with lactose intolerance. It can also be made gluten-free with the appropriate flour substitution. Always check the labels of your ingredients to ensure they meet your dietary needs.
From a wellness perspective, this bread is a great way to incorporate vegetables into your diet in a delicious way. The pumpkin puree adds volume and nutrients without significantly altering the taste. It’s a comforting treat that feels indulgent but is grounded in wholesome ingredients.
Is This Recipe Healthy?
While it is a treat, the pumpkin adds nutritional value. It is lower in fat than traditional butter-based cakes. However, the sugar and chocolate chips make it higher in calories. Enjoy it in moderation as part of a balanced diet.
Can I Make It Vegan?
Yes, by using flax eggs and dairy-free chocolate chips, you can make this recipe completely vegan. The texture remains moist and delicious, proving that animal products aren’t necessary for great baking.
Conclusion
This moist one bowl chocolate chip pumpkin bread is a testament to the beauty of simple baking. It’s easy, it’s forgiving, and it tastes incredible. I hope you try it and enjoy it as much as I do. Feel free to customize it with your favorite add-ins or spices to make it your own. The beauty of this recipe is its flexibility.
I love this recipe because it brings me back to that quiet Tuesday with Leo, where the only thing that mattered was the smell of baking bread. It’s a reminder that the best moments in life are often the simplest ones. I encourage you to share this recipe with friends and family. Tag me in your photos if you try it, and let me know how it turned out. I’d love to see your variations.
Happy baking! May your kitchen always be filled with the scent of something wonderful. Don’t forget to leave a comment below with your thoughts and tips. Your feedback helps others discover this recipe too. Enjoy every slice!
FAQs
Can I use canned pumpkin pie filling instead of pure pumpkin puree?
No, do not use pumpkin pie filling. It contains added sugars and spices that will throw off the balance of the recipe. Always use 100% pure pumpkin puree for the best results.
How do I store leftover pumpkin bread?
Store leftover bread in an airtight container at room temperature for up to 3 days. For longer storage, wrap it tightly in plastic wrap and aluminum foil and freeze for up to 3 months.
Can I freeze the batter?
It is not recommended to freeze the batter. The leavening agents may lose their potency, resulting in a dense loaf. It is better to bake the bread fresh and freeze the finished loaf.
What can I substitute for eggs in this recipe?
You can use flax eggs (1 tablespoon ground flaxseed mixed with 3 tablespoons water per egg) as a vegan substitute. Applesauce or mashed banana can also work, but they may alter the flavor.
Why is my pumpkin bread dense?
Dense bread is often caused by overmixing the batter or using old leavening agents. Mix gently until just combined, and ensure your baking powder and soda are fresh. Also, avoid packing the flour when measuring.
Pin This Recipe!
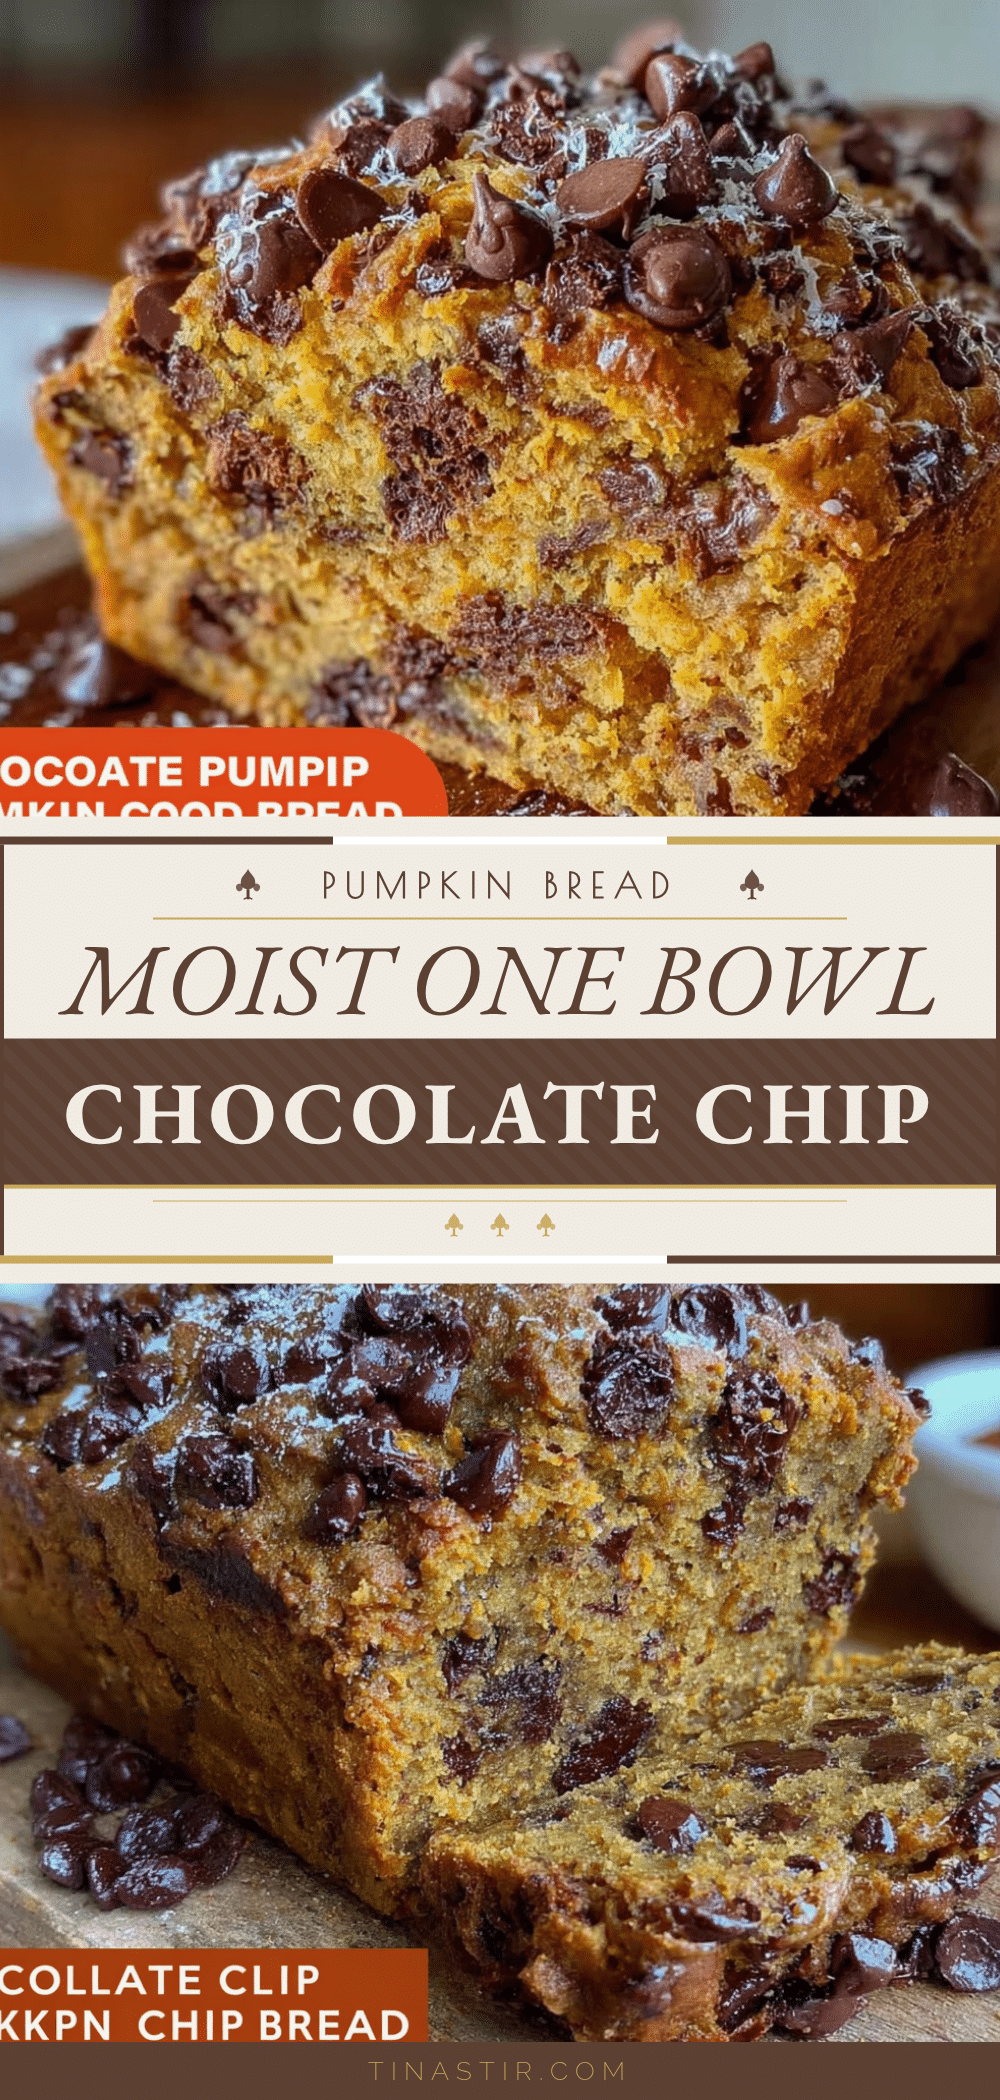
Moist One Bowl Chocolate Chip Pumpkin Bread

A simple, forgiving, and incredibly moist pumpkin bread made in a single bowl. This recipe uses pantry staples like pumpkin puree, oil, and chocolate chips to create a tender, spiced loaf that is perfect for weeknight baking or gift-giving.
- Prep Time: 15 minutes
- Cook Time: 60 minutes
- Total Time: 75 minutes
- Yield: 10 servings 1x
- Category: Dessert
- Cuisine: American
Ingredients
- 2 cups All-Purpose Flour
- 1 teaspoon Baking Powder
- 1/2 teaspoon Baking Soda
- 1/2 teaspoon Salt (kosher)
- 1 tablespoon Cinnamon
- 1/2 teaspoon Nutmeg
- 1/2 teaspoon Ginger
- 1/2 cup Vegetable Oil
- 2 Large Eggs (room temperature)
- 1/2 cup White Granulated Sugar
- 1/4 cup Brown Sugar
- 1 cup Pumpkin Puree (100% pure, not pie filling)
- 1 tablespoon Vanilla Extract
- 1 cup Semi-Sweet Chocolate Chips
Instructions
- Preheat oven to 350°F (175°C). Grease a 9×5-inch loaf pan with butter or non-stick spray and line the bottom with parchment paper.
- In a medium bowl, whisk together the flour, baking powder, baking soda, salt, cinnamon, nutmeg, and ginger until evenly distributed.
- In a large bowl, whisk the vegetable oil, eggs, white sugar, and brown sugar until smooth and slightly pale.
- Add the vanilla extract and pumpkin puree to the wet ingredients and whisk until fully incorporated.
- Gradually add the dry ingredients to the wet ingredients. Use a spatula to gently fold the mixture together until the flour just disappears. Do not overmix.
- Fold in the chocolate chips, reserving a small handful to sprinkle on top.
- Pour the batter into the prepared loaf pan and smooth the top.
- Bake for 55-65 minutes. Check at 50 minutes by inserting a toothpick into the center; it should come out clean or with moist crumbs.
- If the top browns too quickly, tent loosely with aluminum foil after 30 minutes.
- Let the bread cool in the pan for 10 minutes, then transfer to a wire rack to cool completely before slicing.
Notes
Ensure ingredients are at room temperature for best mixing. Do not use pumpkin pie filling; use 100% pure pumpkin puree. For a gluten-free version, substitute with a 1:1 gluten-free flour blend. For a vegan version, use flax eggs and dairy-free chocolate chips. Store leftovers in an airtight container at room temperature for up to 3 days, or freeze for up to 3 months.
Nutrition
- Serving Size: 1 slice
- Calories: 250
- Sugar: 20
- Sodium: 200
- Fat: 12
- Saturated Fat: 3
- Carbohydrates: 35
- Fiber: 2
- Protein: 4
Keywords: pumpkin bread, chocolate chip, one bowl, easy baking, moist bread, fall recipes, gluten-free option, vegan option


