Love this? Save it for later!
Share the inspiration with your friends
I was standing in the fluorescent-lit aisle of a grocery store last November when the scent of toasted nuts hit me. It wasn’t actually nuts, but the air itself seemed to carry the heavy, sweet perfume of caramelized sugar and browned fat. Suddenly, I was eight years old, sitting on a sticky vinyl stool at my Aunt Clara’s kitchen table. The house was always too warm in November, heated by a radiator that clanked like a dying engine. Aunt Clara didn’t say much when she cooked. She just moved with a quiet, rhythmic precision, her hands dusted with flour and maple syrup.
She would roast these small, green-hulled squash until they were tender enough to scoop out with a spoon. The skin would blister and brown, releasing a flavor that tasted like autumn in a bowl. I remember watching the butter foam in the pan, turning from yellow to a deep, amber brown. It smelled like safety. It smelled like home.
Aunt Clara passed away ten years ago, but that specific combination of earthy squash and rich, nutty butter has never left my memory. I’ve spent years trying to recreate that exact moment. Not just the taste, but the feeling of sitting in that kitchen while snow piled up against the window. Most recipes for roasted squash are too simple, or they get bogged down with too many spices. This version is different. It’s about letting the ingredients speak for themselves.
The key is patience. You have to wait for the butter to brown properly. You have to wait for the maple syrup to bubble and thicken. It’s a slow process in a fast world. But honestly, that’s the point. This creamy maple roasted acorn squash with brown butter is an attempt to hold onto a memory that is slipping away. It’s for anyone who has lost someone they love, or who just misses the comfort of a simpler time. Maybe you’ve been there, staring into a recipe box, looking for a taste of the past. I know I have.
This dish is creamy without any cream. It’s sweet without being cloying. It’s the kind of side dish that makes people stop talking and just eat. And every time I make it, I feel a little closer to that kitchen table, even if just for a moment. Let me tell you, it’s worth the wait.
Why You’ll Love This Recipe
This recipe isn’t just another fall side dish; it’s a testament to the power of simplicity and technique. I’ve tested this version dozens of times, tweaking the ratio of butter to maple syrup until it felt just right. The result is a dish that is deeply comforting yet sophisticated enough for a holiday table. Here is why this specific preparation stands out from the crowd:
- Quick & Easy: Despite the slow roasting time, the active prep work is minimal. You can have this ready for a busy weeknight dinner with very little effort. It’s perfect for those nights when you want something special but don’t have hours to spare.
- Simple Ingredients: You likely already have everything you need in your pantry. This recipe relies on just five core ingredients, so there’s no need for a fancy grocery run. It’s wholesome, unprocessed, and straightforward.
- Perfect for Holidays: Whether it’s Thanksgiving, Christmas, or a cozy winter dinner party, this dish fits right in. It pairs beautifully with roasted meats and adds a necessary touch of sweetness to a savory meal.
- Crowd-Pleaser: Kids usually love the sweetness, while adults appreciate the nutty depth of the brown butter. It’s a rare dish that satisfies both palates without compromise.
- Unbelievably Delicious: The texture is the star here. The squash becomes incredibly tender, almost custard-like, while the brown butter adds a complex, toasted flavor that elevates the entire dish. It’s comfort food reimagined.
What makes this recipe different is the technique of browning the butter. Most people just melt butter, but browning it changes everything. It adds a nutty, almost hazelnut-like depth that complements the earthiness of the acorn squash perfectly. I also recommend using pure maple syrup instead of artificial pancake syrup. The difference is night and day. This isn’t just another recipe; it’s the best way to enjoy acorn squash. It’s the kind of dish that makes you close your eyes after the first bite. It’s soul-soothing and satisfying, proving that sometimes, the simplest ingredients yield the most profound results.
What Ingredients You Will Need
This recipe uses simple, wholesome ingredients to deliver bold flavor and satisfying texture without the fuss. The beauty of creamy maple roasted acorn squash with brown butter lies in how these few components interact. Each one plays a crucial role in creating that rich, creamy mouthfeel and balanced sweetness. Here is what you’ll need to gather:
- Acorn Squash: You will need two medium-sized acorn squash. Look for ones that feel heavy for their size, as this indicates moisture and freshness. The skin should be deep green with some orange patches, and firm to the touch. Avoid squash with soft spots or cracks.
- Unsalted Butter: Use one-half cup of high-quality unsalted butter. I personally prefer European-style butter because it has a higher fat content, which helps create a richer brown butter flavor. Salted butter can be used, but you’ll need to reduce any added salt in the recipe.
- Pure Maple Syrup: One-quarter cup of real maple syrup is essential. Make sure it says “100% Pure Maple Syrup” on the bottle. Artificial syrups are mostly corn syrup and will taste flat and overly sweet. This is the sweetener that defines the dish.
- Extra Virgin Olive Oil: Two tablespoons of olive oil are used to help the squash roast evenly and prevent sticking. It adds a subtle fruity note that balances the sweetness of the maple. Use a mild olive oil so it doesn’t overpower the squash.
- Kosher Salt and Black Pepper: Seasoning is key. Use one teaspoon of kosher salt and half a teaspoon of freshly cracked black pepper. The salt enhances the natural sweetness of the squash, while the pepper adds a tiny bit of heat to balance the richness.
- Optional Garnish: For added texture, you can sprinkle toasted pecans or pumpkin seeds on top before serving. This is not required, but it adds a nice crunch that contrasts with the soft squash.
If you can’t find acorn squash, butternut squash can be substituted, though the cooking time may vary slightly. Acorn squash has a unique nutty flavor that butternut lacks, so the result will be different but still delicious. For a dairy-free option, you can swap the butter for a high-quality vegan butter alternative, though the browning process will be slightly different. Remember, the quality of your maple syrup matters greatly here. Don’t skimp on it.
Equipment Needed
You don’t need a lot of fancy gadgets to make this dish, but having the right tools makes the process much smoother. Here is what you’ll need to have on hand:
- Large Baking Sheet: A standard half-sheet pan is ideal. Make sure it’s large enough to hold the squash halves in a single layer. Crowding the pan will cause the squash to steam instead of roast, which prevents that desirable caramelization.
- Sharp Chef’s Knife: Cutting through raw acorn squash can be tough. A sharp, sturdy chef’s knife is necessary for safety and ease. If your knife is dull, you might slip, so please be careful. A serrated bread knife can also work if you struggle with the hard skin.
- Small Saucepan: You’ll need a small saucepan to brown the butter. A light-colored pan is helpful because it allows you to see the color change of the butter more clearly. Dark pans can hide the browning process, leading to burnt butter.
- Wooden Spoon or Spatula: Use this to stir the butter as it browns. Constant stirring is important to prevent hot spots from burning the milk solids.
- Measuring Cups and Spoons: Accurate measurements are important for balancing the sweet and savory elements. Use standard measuring tools for the butter and maple syrup.
- Papaya Brush (Optional): If you want an even coating of the butter mixture, a pastry brush can help. It’s not strictly necessary, but it ensures every bite is flavorful.
If you don’t have a large baking sheet, you can use two smaller ones, but you’ll need to rotate them in the oven halfway through cooking. For the saucepan, a non-stick pan works well too, but be careful not to use metal utensils that might scratch the surface. Proper maintenance of your knife is also key; keep it sharp to make cutting the squash safer and easier.
Preparation Method
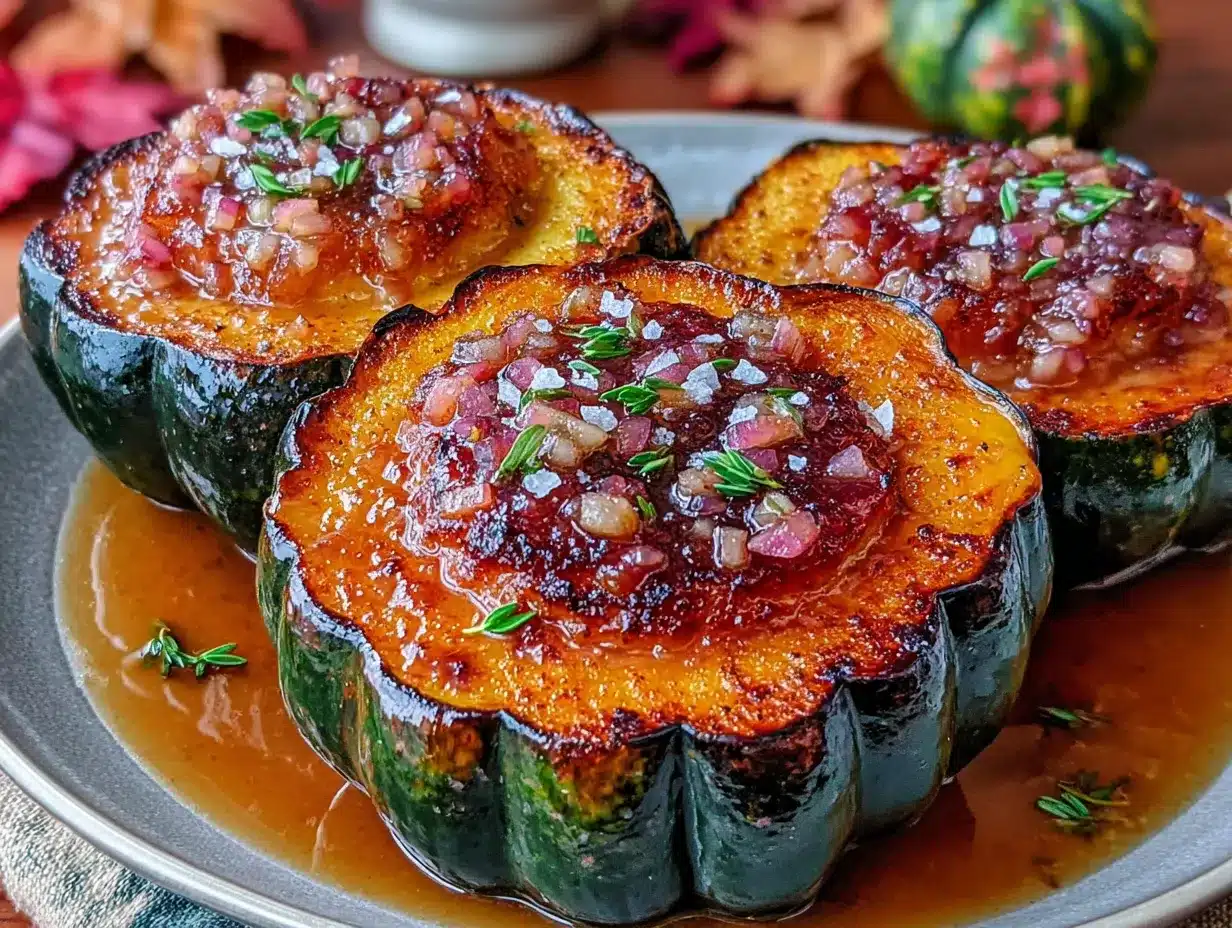
Getting this creamy maple roasted acorn squash with brown butter right requires a few specific steps. Follow these instructions closely for the best results.
- Preheat the Oven: Start by preheating your oven to 400°F (200°C). Line your large baking sheet with parchment paper for easy cleanup. This step takes about five minutes.
- Prepare the Squash: Wash the acorn squash thoroughly. Carefully cut each squash in half lengthwise, from stem to base. Use a sturdy spoon to scoop out the seeds and stringy pulp. You can save the seeds to roast later if you like, but for now, just discard them or compost them.
- Season the Squash: Drizzle the cut sides of the squash with the olive oil. Sprinkle evenly with the kosher salt and black pepper. Rub the oil and seasoning into the flesh with your fingers to ensure it’s well coated. This step takes about two minutes.
- Roast the Squash: Place the squash halves cut-side down on the prepared baking sheet. Put them in the preheated oven and roast for 30-35 minutes. You’ll know they are done when a fork can easily pierce the thickest part of the flesh. The edges should be slightly browned and caramelized.
- Brown the Butter: While the squash is roasting, place the butter in the small saucepan over medium heat. Watch it closely. It will melt, then foam, and then the foam will start to subside. You will see brown specks form at the bottom. Smell it—it will smell nutty. This takes about 5-7 minutes. Remove from heat immediately once it reaches a deep amber color to prevent burning.
- Mix the Sauce: In a small bowl, whisk together the browned butter and maple syrup. Be careful, as the butter will still be hot. The mixture might seize up slightly at first, but keep whisking until it becomes smooth and glossy.
- Combine and Finish: Remove the squash from the oven. Carefully flip the halves over so they are cut-side up. Pour the brown butter and maple syrup mixture generously over each half. Use a spoon to pool some of the sauce into the center of each squash. Return to the oven for 5 minutes to let the flavors meld.
- Serve: Remove from the oven and let cool for a minute. Serve immediately while warm. Garnish with toasted nuts if desired.
The total time from start to finish is about 45 minutes. The roasting time may vary slightly depending on the size of your squash, so always check for tenderness with a fork.
Cooking Tips & Techniques
There are a few tricks I’ve learned along the way that make this recipe foolproof. First, cutting the squash can be intimidating. If you’re worried about it slipping, microwave it for one minute before cutting. This softens the skin slightly and makes it much easier to slice through safely.
Second, don’t skip the step of flipping the squash after roasting. Putting the cut side up allows the butter mixture to soak into the flesh rather than just sitting on top. It creates that creamy texture you’re looking for. I remember the first time I made this, I forgot to flip them. The squash was dry on the inside, and the butter just ran off. Lesson learned!
Third, pay attention to the butter. It goes from perfect to burnt very quickly. If you smell acrid smoke, start over. Burnt butter cannot be saved and will ruin the dish. The nutty aroma is your cue. It should smell like hazelnuts or toasted almonds.
Also, if you find the squash too sweet, add a pinch of red pepper flakes or a dash of cinnamon. These spices can balance the maple syrup. I usually add a tiny pinch of cinnamon because it complements the fall flavors perfectly.
Finally, let the squash rest for a few minutes after taking it out of the oven. This allows the juices to redistribute and the flavors to settle. It’s tempting to dig in right away, but patience pays off. The texture will be much creamier if you wait.
Variations & Adaptations
While the classic version is my favorite, there are many ways to adapt this recipe to suit different tastes or dietary needs. Here are a few ideas:
- Gluten-Free and Dairy-Free: This recipe is naturally gluten-free. For a dairy-free version, use a high-quality vegan butter that browns well. Coconut oil can also be used, though it will impart a slight coconut flavor. Use agave nectar instead of maple syrup if you want to avoid tree nuts, though the flavor will be different.
- Spicy Kick: Add a pinch of cayenne pepper or red pepper flakes to the brown butter mixture. This adds a nice heat that contrasts with the sweetness. It’s great if you like a bit of spice in your sides.
- Herbal Twist: Stir fresh thyme or sage into the brown butter before pouring it over the squash. These herbs pair beautifully with both squash and butter. It adds a savory, earthy note that balances the maple.
- Nutty Crunch: Toasted pecans or walnuts added on top provide a great texture contrast. I often make extra nuts because they are delicious on their own. They also add a healthy dose of healthy fats.
- Cheese Crumble: For a richer option, sprinkle crumbled goat cheese or feta on top after roasting. The tangy cheese cuts through the sweetness of the maple syrup perfectly.
I once tried this recipe with pumpkin instead of acorn squash. It worked well, but pumpkin is sweeter and softer, so I reduced the maple syrup slightly. It’s a good option if acorn squash is out of season. Each variation offers a unique twist on the base recipe, allowing you to customize it to your preference.
Serving & Storage Suggestions
This dish is best served warm, straight from the oven. The squash should be tender and the butter sauce should be slightly thickened. It pairs wonderfully with roasted chicken, turkey, or pork chops. It’s also a great addition to a vegetarian meal, especially when served alongside quinoa or wild rice.
For leftovers, store the squash in an airtight container in the refrigerator for up to three days. The flavors will continue to meld and deepen in the fridge, which is actually quite nice. To reheat, you can warm them in the oven at 350°F (175°C) for about 10 minutes, or microwave them for 1-2 minutes. The texture may soften further, but it remains delicious.
You can also freeze the roasted squash, though the texture may become slightly watery upon thawing. It’s best used in soups or smoothies if frozen. I usually don’t have leftovers because it’s so good, but if you do, it’s a versatile ingredient for future meals.
Nutritional Information & Benefits
Acorn squash is a nutritional powerhouse. It is low in calories but high in fiber, which aids in digestion and keeps you feeling full. It is also rich in vitamins A and C, which support immune health and skin health. The brown butter adds healthy fats, which help absorb the fat-soluble vitamins in the squash.
Each serving provides a good balance of carbohydrates, fats, and proteins. The maple syrup adds natural sugars, but in moderation, it fits well into a balanced diet. For those watching their sugar intake, you can reduce the maple syrup by half or use a sugar-free alternative, though the flavor will be less authentic.
This dish is also naturally gluten-free and can be made dairy-free, making it suitable for various dietary restrictions. It’s a wholesome, nutrient-dense side dish that doesn’t compromise on taste. I love that it makes me feel good about what I’m eating, even though it feels like a treat.
Conclusion
This creamy maple roasted acorn squash with brown butter is more than just a recipe; it’s a way to connect with memories and create new ones. It’s simple, elegant, and deeply satisfying. I hope you try it and find your own moments of comfort in the kitchen. Don’t be afraid to experiment with the variations and make it your own.
If you make this recipe, I’d love to hear how it turns out. Please leave a comment below with your thoughts. Did you add any extra spices? Did your family love it? Share your experiences and variations. And if you enjoyed this post, consider sharing it with friends who might appreciate a cozy fall meal.
Thank you for reading. Happy cooking, and remember to take your time. The best meals are made with love and patience.
Frequently Asked Questions
Can I use butter from a stick instead of buying it in a tub?
Yes, absolutely. Just make sure to measure out the correct amount. Unsalted butter is preferred so you can control the saltiness of the dish.
What if I don’t have acorn squash?
Butternut squash or delicata squash are good substitutes. Just adjust the roasting time as needed, as smaller squash may cook faster.
Can I make this recipe ahead of time?
You can roast the squash ahead of time and reheat it when ready to serve. However, it’s best to brown the butter and pour it over the squash just before serving to maintain the best texture and flavor.
Is maple syrup necessary, or can I use honey?
Maple syrup provides a distinct flavor that pairs well with the nutty butter. Honey can be used, but it is sweeter and has a different flavor profile. You may need to use less honey.
How do I know when the butter is browned?
Watch for the foam to subside and the milk solids at the bottom to turn brown. It should smell nutty. If it smells burnt, it’s overdone.
Pin This Recipe!
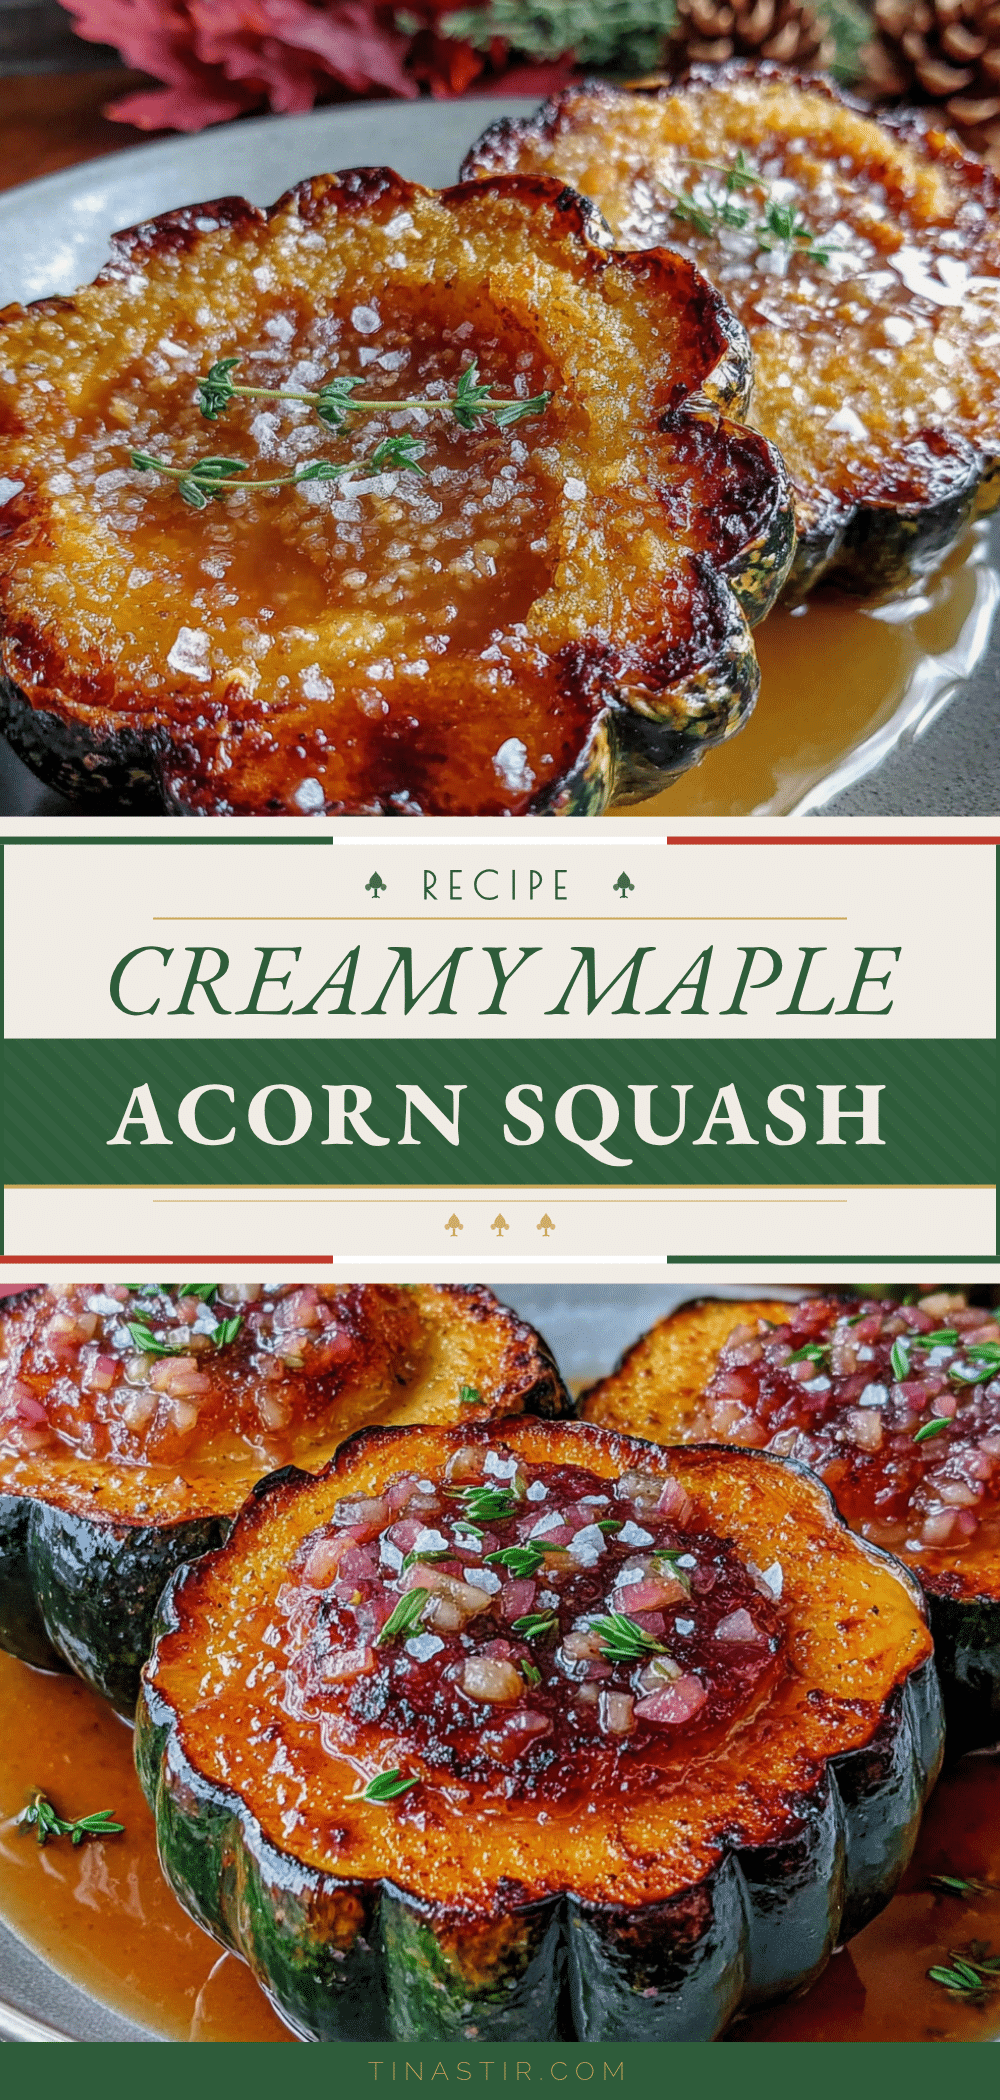
Creamy Maple Roasted Acorn Squash with Brown Butter
A comforting, five-ingredient side dish featuring tender roasted acorn squash drizzled with a rich, nutty brown butter and pure maple syrup sauce.
- Prep Time: 10 minutes
- Cook Time: 40 minutes
- Total Time: 50 minutes
- Yield: 4 servings 1x
- Category: Side Dish
- Cuisine: American
Ingredients
- 2 medium acorn squash
- 1/2 cup unsalted butter
- 1/4 cup pure maple syrup
- 2 tablespoons extra virgin olive oil
- 1 teaspoon kosher salt
- 1/2 teaspoon freshly cracked black pepper
- Optional: Toasted pecans or pumpkin seeds for garnish
Instructions
- Preheat oven to 400°F (200°C). Line a large baking sheet with parchment paper.
- Wash the acorn squash and cut each in half lengthwise. Scoop out seeds and pulp with a spoon.
- Drizzle cut sides with olive oil and sprinkle with kosher salt and black pepper. Rub to coat evenly.
- Place squash halves cut-side down on the baking sheet. Roast for 30-35 minutes until tender when pierced with a fork.
- While squash roasts, melt butter in a small saucepan over medium heat. Cook until foam subsides and milk solids turn amber and smell nutty (5-7 minutes). Remove from heat immediately.
- Whisk browned butter and maple syrup together in a small bowl until smooth.
- Remove squash from oven and flip halves cut-side up. Pour the brown butter mixture over the squash, pooling some in the center.
- Return to oven for 5 minutes to meld flavors.
- Let cool for a minute and serve warm, garnished with toasted nuts if desired.
Notes
Microwave squash for 1 minute before cutting to soften the skin for easier slicing. Do not skip flipping the squash after initial roasting to allow the sauce to soak in. Watch butter closely as it burns quickly; it should smell like hazelnuts. For dairy-free, use vegan butter or coconut oil.
Nutrition
- Serving Size: 1 squash half
- Calories: 280
- Sugar: 16
- Sodium: 450
- Fat: 22
- Saturated Fat: 12
- Carbohydrates: 24
- Fiber: 4
- Protein: 2
Keywords: acorn squash, brown butter, maple syrup, roasted vegetables, fall recipes, holiday side dish, gluten-free, vegetarian


