Love this? Save it for later!
Share the inspiration with your friends
Last Tuesday, the power flickered and died right as I was trying to temper chocolate for a sophisticated dessert party. I was hosting friends who expected elegance, not a disaster. I grabbed the wrong bowl, one that still had faint traces of old batter in the cracks. The oven was cold because the breaker had tripped, and I was already stressed about being late. What came out was nothing like the plan — and better.
I mean, honestly, you know that feeling when you just want to give up on the kitchen entirely? I stared at the melted mess in my lap. It looked like a mudslide. A thick, glossy, dark mudslide. Instead of throwing it away, I scooped it onto a plate. It was dense, fudgy, and utterly irresistible.
That moment of panic led to the creation of these spooky fudgy Halloween brownie graveyard bites. I didn’t have time to bake proper brownies. So I microwaved small portions in coffee mugs. They came out looking like little mounds of fresh dirt. I added white chocolate lines for headstones and candy eyeballs for fun.
My friends didn’t even notice the tart was missing. They just grabbed the brownies. They loved the texture. It was warm and gooey in the center. The “graveyard” theme just fit the chaotic energy of the evening.
I kept making them because they are easy. You don’t need a fancy oven. You don’t need perfect lighting. You just need chocolate and a sense of humor. These bites are perfect for when life gets messy. And let’s face it, life gets messy.
Maybe you’ve been there, standing in the dark with a bowl of chocolate. This recipe stayed with me because it proves that the best treats come from mistakes. It is a reminder to embrace the chaos. Now, I make them every October. They bring joy to kids and adults alike.
Why You’ll Love This Recipe
Quick & Easy
This recipe comes together in under 15 minutes. It is perfect for busy weeknights or last-minute Halloween cravings. You do not need to preheat an oven or wait hours for batter to chill. Just mix, microwave, and decorate. It is the fastest way to satisfy a sweet tooth.
Simple Ingredients
No fancy grocery trips are needed. You likely already have everything in your kitchen. Flour, sugar, cocoa powder, and butter are pantry staples. The decorations use common candy store items. This makes it accessible for anyone, regardless of their baking skills.
Perfect for Halloween Parties
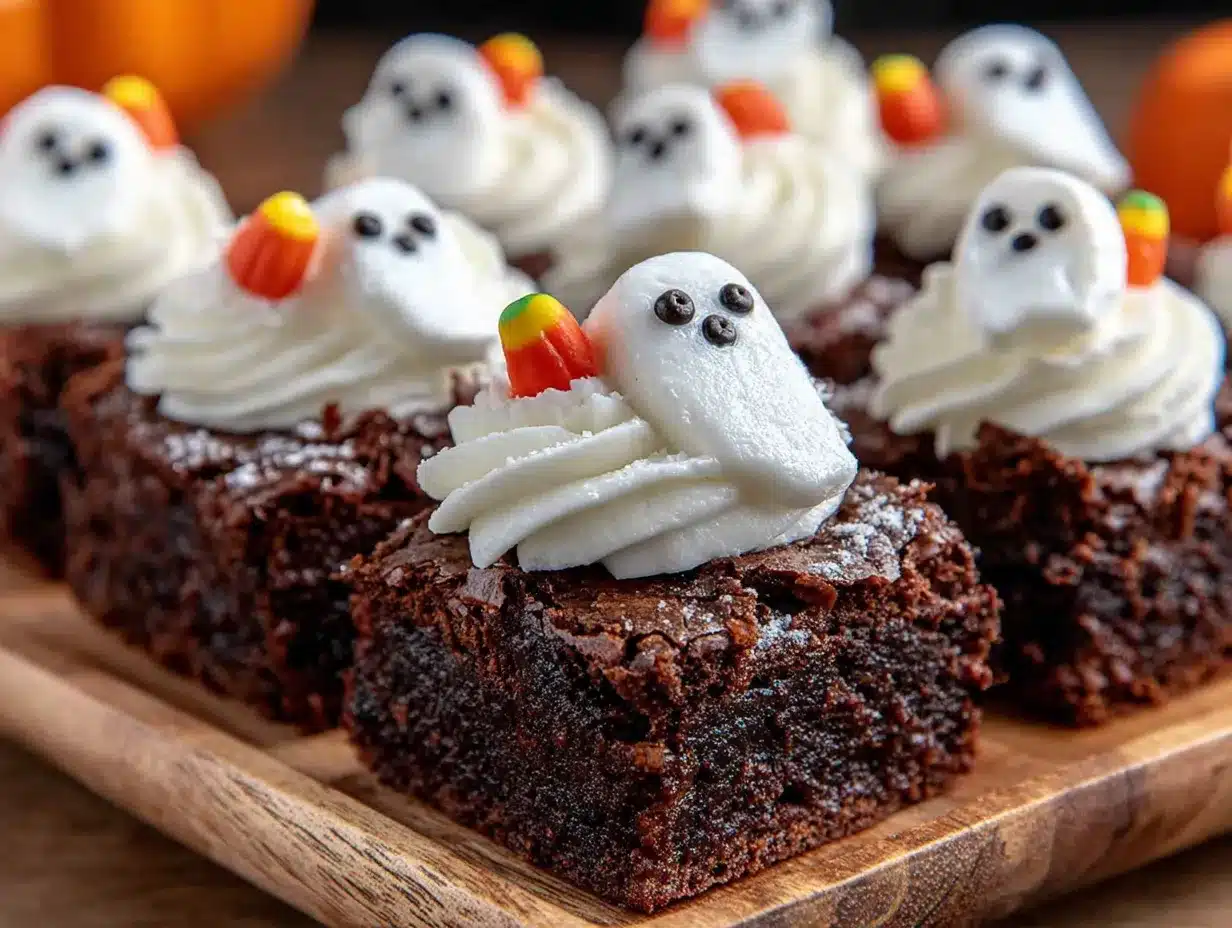
These are great for trick-or-treaters, classroom parties, or cozy dinners. The graveyard theme is festive without being too scary for little ones. They are a hit at potlucks where people want something unique. The visual appeal is high, but the effort is low.
Crowd-Pleaser
They always get rave reviews from kids and adults alike. Children love the spooky look. Adults love the rich chocolate flavor. It bridges the gap between fun and fancy. You can make them in bulk and serve them on a platter.
Unbelievably Delicious
The texture and flavor combo is next-level comfort food. These are not cakey brownies. They are dense, fudgy, and moist. The contrast of the soft brownie with the crunchy candy decorations is satisfying. It is chocolate heaven in a bite-sized form.
What Makes It Different
Whether it is the special microwave technique for instant gratification, or the creative graveyard twist, this isn’t just another version. It is your best version for a quick treat. Most brownie recipes require patience. This one requires only imagination.
Emotional Connection
This recipe isn’t just good. It is the kind that makes you close your eyes after the first bite. It is comfort food reimagined. It brings the same soul-soothing satisfaction as a warm cookie. It is perfect for impressing guests without stress. It turns a simple meal into something memorable.
What Ingredients You Will Need
This recipe uses simple, wholesome ingredients to deliver bold flavor and satisfying texture without the fuss. The base relies on classic baking staples that you probably already have. The decorations allow for creativity and personal expression.
- Unsalted butter: 1/2 cup (113g), melted. This provides the rich fat content for a fudgy texture. Use high-quality butter for better flavor.
- Granulated sugar: 1 cup (200g). This adds sweetness and helps create the shiny crust on top of the brownies.
- Eggs: 2 large eggs, room temperature. These bind the ingredients together and provide structure. Room temperature eggs mix more easily.
- Vanilla extract: 1 teaspoon. This enhances the chocolate flavor and adds depth. Use pure vanilla, not imitation.
- All-purpose flour: 1/2 cup (65g). This gives the brownies their body. Do not overmeasure, or they will be dry.
- Cocoa powder: 1/4 cup (20g), unsweetened. This is the main flavor source. Use natural cocoa for a lighter taste or Dutch-process for a darker, richer flavor.
- Salt: 1/4 teaspoon. This balances the sweetness and makes the chocolate taste more intense.
- White chocolate chips: 1/4 cup. These are used to draw the headstones and crosses. They melt easily in the microwave.
- Candy eyeballs: A small bag. These add the spooky graveyard effect. They are edible and add a fun visual element.
- Oreo cookies: Optional, for “dirt.” Crushed Oreos can be used to simulate soil around the base of the headstones.
I recommend Ghirardelli for the chocolate chips for best texture. They melt smoothly without seizing. For the cocoa powder, Dutch-processed varieties like Raineri give a deeper color. Look for firm, small-curd cottage cheese if you want to substitute butter for a healthier option, though the texture will change. In summer, you might skip the heavy butter and use applesauce, but for Halloween, go rich.
Equipment Needed
You will need four large microwave-safe mugs or ramekins. Ceramic mugs work best because they retain heat and give a nice texture. Glass ramekins are also good but cool down faster. A small mixing bowl is needed for the batter. A whisk or fork for mixing. A microwave for cooking. A piping bag or a small ziplock bag with a corner cut off for drawing with white chocolate. A spoon for crushing cookies if using dirt.
I personally prefer thick ceramic mugs. They feel more substantial and look better on a plate. Plastic containers should never be used in the microwave. If you do not have a piping bag, a small ziplock bag works fine. Just cut a tiny hole in the corner. For budget-friendly options, use old mugs from a thrift store. Clean them thoroughly. Do not use chipped mugs as they can break.
Preparation Method
- Melt the butter: Place the butter in a microwave-safe bowl. Microwave on high for 30 seconds. Stir until fully melted. Let it cool for a minute so it does not cook the eggs. (2 minutes)
- Mix sugar and butter: Whisk the melted butter and sugar together vigorously. The mixture should look glossy and slightly thick. This step is crucial for the shiny crust. (1 minute)
- Add eggs and vanilla: Crack the eggs into the bowl. Add the vanilla extract. Whisk until the mixture is smooth and uniform. Do not worry if it looks separated at first. Keep whisking. (1 minute)
- Incorporate dry ingredients: Sift the flour, cocoa powder, and salt into the wet mixture. Fold them in gently with a spatula. Stop as soon as no dry streaks remain. Overmixing makes tough brownies. (2 minutes)
- Divide batter: Spoon the batter evenly into four prepared mugs. Fill each mug about halfway. The brownies will rise slightly. Leave room for expansion. (1 minute)
- Microwave: Place one mug in the microwave. Cook on high for 60 to 90 seconds. The edges should be set, but the center should still look slightly soft. Do not overcook. They will continue to cook from residual heat. (1-2 minutes per batch)
- Cool slightly: Let the mugs sit for 2 minutes. This allows the brownies to set. They are very hot inside. Use caution when handling. (2 minutes)
- Melt white chocolate: Place white chocolate chips in a small bowl. Microwave in 15-second intervals. Stir between each interval until smooth. Be careful not to burn it. (2 minutes)
- Decorate: Pipe white chocolate lines onto the brownies to look like headstones. Add candy eyeballs immediately before the chocolate sets. If using crushed Oreos, sprinkle them around the base. (3 minutes)
If the brownies look too wet, add 10 more seconds. If they look dry, they are overcooked. Trust your eyes. The center should jiggle slightly. It will firm up as it cools. Personal tip: make the batter while the butter melts. It saves time.
Cooking Tips & Techniques
Professional bakers know that microwave cooking varies by power. Always start with less time. You can always add more, but you cannot take away. If your microwave is strong, start with 45 seconds. If it is weak, try 90 seconds. The key is the jiggle test. The center should move slightly but not slosh.
Common mistakes include overmixing the batter. This develops gluten and makes the brownies cakey. Fold gently. Another mistake is using cold eggs. They do not emulsify well with melted butter. Let them sit out for 15 minutes. I once forgot this step and had a lumpy batter. It tasted fine, but the texture was uneven.
Timing is everything. Watch the first batch closely. Use that as your benchmark. Multitask by preparing the white chocolate while the brownies cool. This keeps the process smooth. For consistency, use a kitchen scale for the butter and sugar. Volume measurements can be inaccurate. A little salt goes a long way. Do not skip it. It makes the chocolate pop.
Variations & Adaptations
You can make these gluten-free by using a 1-to-1 gluten-free flour blend. The texture will be slightly more tender. For a vegan version, use flax eggs and vegan butter. The flavor will still be rich. Add crushed nuts like pecans or walnuts for crunch. This adds a nice contrast to the soft brownie.
For a minty variation, add a drop of peppermint extract. Use green food coloring for the batter. Top with white chocolate “bones.” For a pumpkin spice twist, add a teaspoon of pumpkin pie spice. This is great for autumn. You can also add a layer of peanut butter in the center before cooking. It creates a swirl effect.
I once tried adding red food coloring to make them look like bloody mud. It was too much. Stick to classic chocolate. If you have nut allergies, use sunflower seed butter instead of peanut butter. These variations allow you to customize for different taste preferences. They also help with seasonal changes. Use fresh berries in summer instead of candy.
Serving & Storage Suggestions
Serve these warm for the best experience. The center should be gooey. Present them on a black plate to make the white chocolate stand out. Add a dusting of powdered sugar for “snow” or crushed cookies for “dirt.” Pair with a glass of cold milk or a cup of coffee. The bitterness of coffee balances the sweetness.
Store leftovers in an airtight container at room temperature for up to 2 days. They will stay moist. Do not refrigerate them, as the cold makes the chocolate hard. If you need to store them longer, freeze the unbaked batter in the mugs. Thaw in the fridge and cook as normal. The flavors develop over time, becoming more intense.
To reheat, microwave for 15 seconds. This restores the soft texture. Do not overheat or they will become rubbery. These bites travel well for parties. Just keep them cool until serving. They are a hit at Halloween events. Guests love the interactive decoration aspect.
Nutritional Information & Benefits
Each bite contains approximately 350 calories. They are high in sugar and fat due to the butter and chocolate. However, they provide a quick energy boost. Cocoa contains antioxidants that are good for heart health. Eggs provide protein. This recipe is not for daily consumption. Enjoy it as a special treat.
For dietary considerations, they contain gluten, dairy, and eggs. They are not suitable for vegans or those with allergies unless modified. The sugar content is high. Use this knowledge to balance your meal. Pair with a protein-rich snack to stabilize blood sugar. I view this as a mindful indulgence. It is about enjoyment, not nutrition.
Conclusion
These spooky fudgy Halloween brownie graveyard bites are worth trying. They are easy, fun, and delicious. You can customize them to fit your style. Add different candies or change the decorations. I love this recipe because it turns a simple moment into a memory. It brings laughter to the kitchen.
Please share your creations with me. Post photos on social media and tag me. I love seeing your unique designs. Leave a comment below with your favorite variation. Did you add nuts? Did you make them vegan? Let me know. Thank you for cooking with me. Happy Halloween!
FAQs
Can I make these brownies ahead of time?
Yes, you can prepare the batter and refrigerate it for up to 24 hours. Cook them when you are ready to serve. This is great for party prep. Just remember to cook them individually.
Why are my brownies cakey instead of fudgy?
This usually happens from overmixing or too much flour. Measure the flour carefully. Do not pack it into the cup. Also, do not overcook them. Remove them when the center is still soft.
Can I use a regular oven instead of a microwave?
Yes, but you will need to bake them in a brownie pan. Reduce the temperature to 350°F (175°C). Bake for 20-25 minutes. The texture will be more traditional, less gooey.
What can I use instead of white chocolate for decoration?
You can use colored candy melts or melted chocolate chips. White chocolate is best for visibility against the dark brownie. If you are allergic, use coconut oil and powdered sugar for a glaze.
How do I store the decorated brownies?
Store them in a single layer in an airtight container. The decorations may stick if stacked. Keep them at room temperature. Do not freeze decorated brownies as the candy may sweat.
Pin This Recipe!
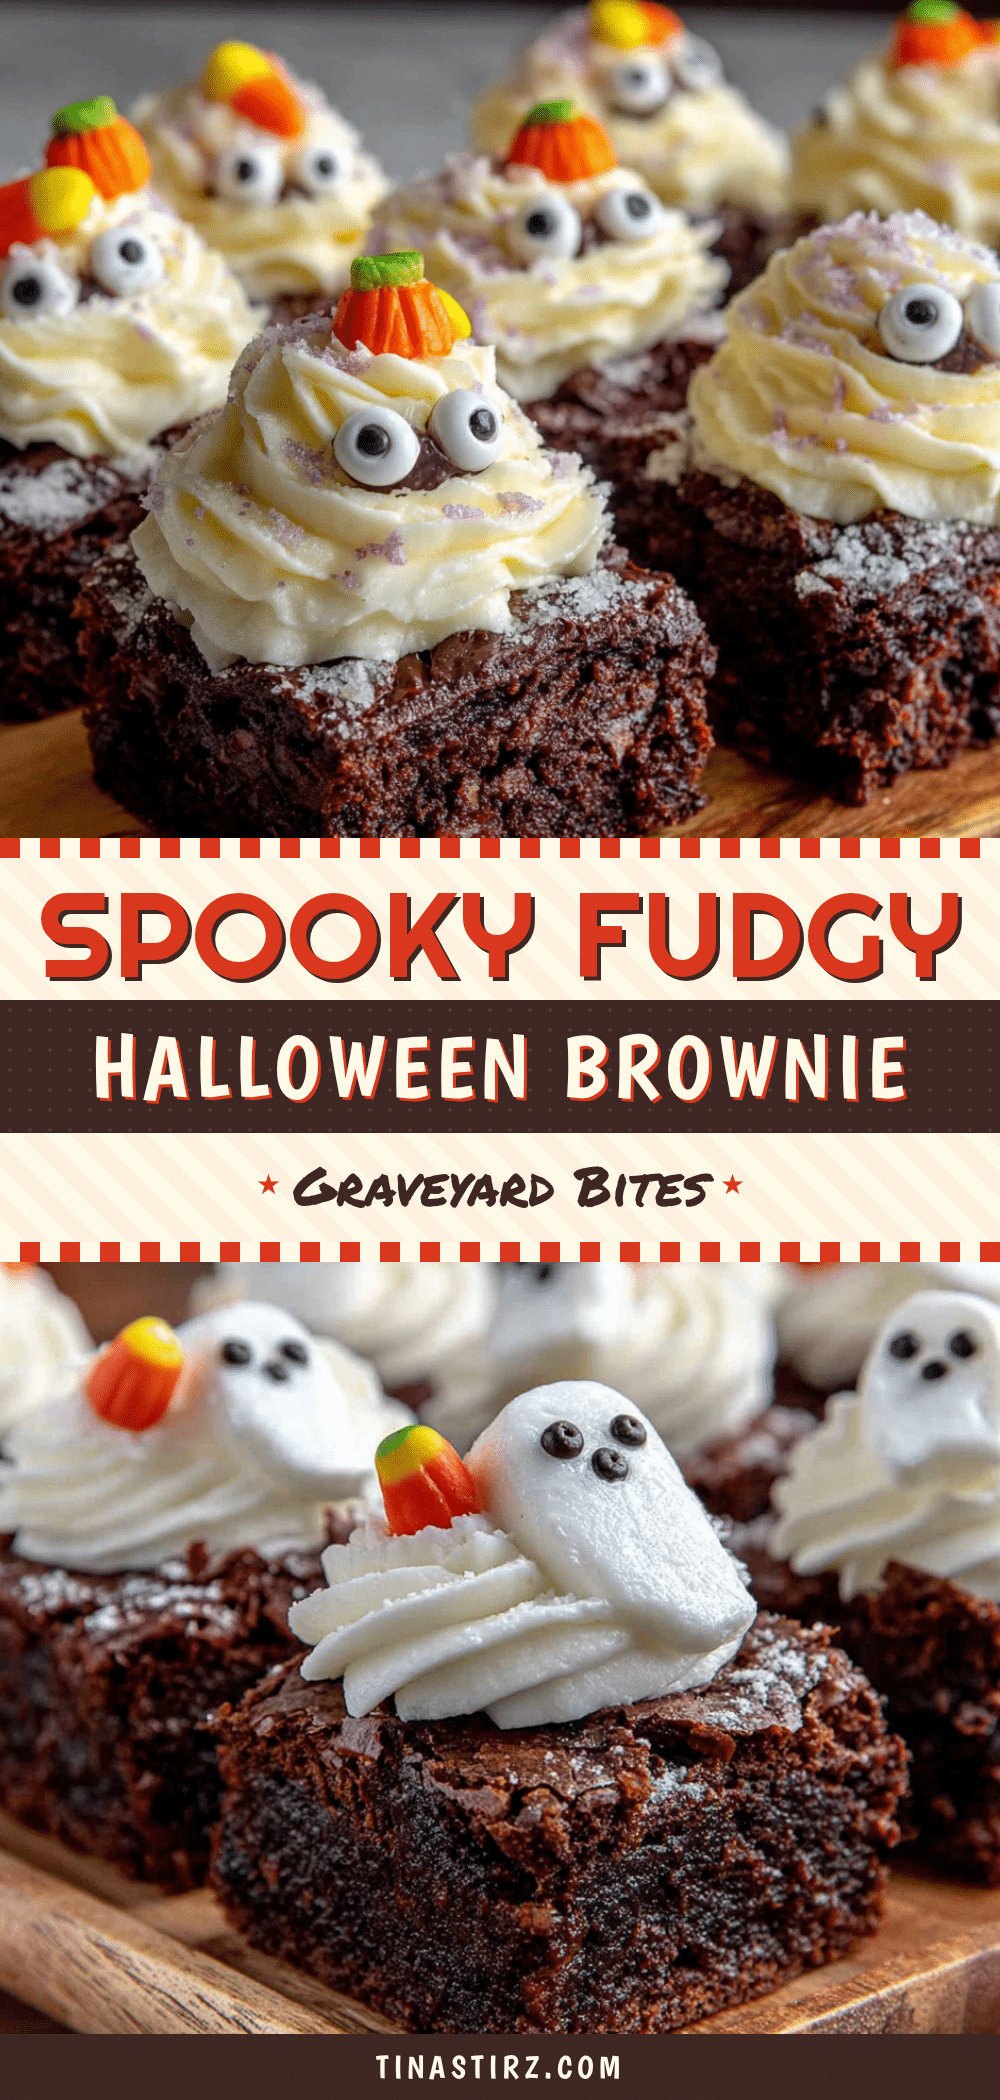
Spooky Fudgy Halloween Brownie Graveyard Bites
A quick, fudgy microwave brownie recipe that creates a spooky graveyard effect with white chocolate headstones and candy eyeballs, perfect for Halloween parties.
- Prep Time: 10 minutes
- Cook Time: 5 minutes
- Total Time: 15 minutes
- Yield: 4 servings 1x
- Category: Dessert
- Cuisine: American
Ingredients
- 1/2 cup (113g) unsalted butter, melted
- 1 cup (200g) granulated sugar
- 2 large eggs, room temperature
- 1 teaspoon vanilla extract
- 1/2 cup (65g) all-purpose flour
- 1/4 cup (20g) unsweetened cocoa powder
- 1/4 teaspoon salt
- 1/4 cup white chocolate chips
- Candy eyeballs
- Crushed Oreo cookies (optional, for dirt)
Instructions
- Melt the butter in a microwave-safe bowl for 30 seconds and let cool for a minute.
- Whisk the melted butter and sugar together vigorously until glossy and slightly thick.
- Add eggs and vanilla extract, whisking until smooth and uniform.
- Sift in flour, cocoa powder, and salt, then fold gently with a spatula until no dry streaks remain.
- Divide the batter evenly into four prepared microwave-safe mugs, filling each halfway.
- Microwave one mug on high for 60 to 90 seconds until edges are set but the center is still soft.
- Let the mugs sit for 2 minutes to allow the brownies to set.
- Melt white chocolate chips in 15-second intervals, stirring until smooth.
- Pipe white chocolate lines onto the brownies to create headstones and add candy eyeballs before the chocolate sets.
- Sprinkle crushed Oreos around the base if using for a dirt effect.
Notes
Do not overmix the batter to avoid tough brownies. Ensure eggs are at room temperature for better emulsification. The center should jiggle slightly; it will firm up as it cools. Store leftovers in an airtight container at room temperature for up to 2 days. Do not refrigerate as it hardens the chocolate.
Nutrition
- Serving Size: 1 mug (approx. 1 bro
- Calories: 350
- Sugar: 35
- Sodium: 150
- Fat: 18
- Saturated Fat: 11
- Carbohydrates: 45
- Fiber: 2
- Protein: 5
Keywords: Halloween, brownies, microwave dessert, fudgy brownies, graveyard theme, easy recipe, spooky treats


