Love this? Save it for later!
Share the inspiration with your friends
The woman at the farm stand watched me eyeing her apple cider jugs like they held liquid gold. I was standing there, probably looking a little lost, trying to figure out how many I could reasonably carry home without dropping one. She didn’t say anything at first, just wiped her hands on her apron and waited. Then she pointed at the smaller jug and said, “That one’s for drinking. But the cloudy one, the unfiltered stuff — that’s for baking. That’s where the real flavor lives.”
I bought both, obviously. And I spent the whole drive home thinking about what I could make that would actually do justice to that cider. Not a pie, not a cake — I wanted something you could hold in your hand and eat while standing at the counter. Something that tasted like fall but didn’t require a rolling pin or a pie dish. That’s how these Easy Chewy Apple Cider Cookies with Cinnamon Sugar were born. Honestly, they came out even better than I imagined. The first batch barely made it through the afternoon, and I’m not even a little embarrassed about that.
Let me tell you, these cookies are the real deal. They’ve got that soft, chewy center that makes you close your eyes for a second, and the cinnamon sugar coating gives them this little crunch on the outside. Plus, they’re so simple you could probably make them with your eyes half-closed on a Tuesday night. And maybe you’ve been there — standing in your kitchen at 8 PM, craving something sweet but absolutely not wanting to deal with a complicated recipe. I get it. These cookies are for those nights.
Why You’ll Love This Recipe
I’ve tested this recipe more times than I care to admit, and each batch taught me something new. The first time, the cookies spread too much. The second time, they were too cakey. But the third time? That was the sweet spot, and I’ve been making them that way ever since. Here’s why these cookies deserve a permanent spot in your baking rotation:
- Quick & Easy: From start to finish, these cookies take about 25 minutes. No chilling time required, no complicated techniques. Just mix, scoop, and bake.
- Simple Ingredients: You probably have most of these in your pantry right now. No weird extracts or specialty flours — just good old-fashioned baking staples plus some apple cider.
- Perfect for Fall Baking: Whether it’s a cozy weekend afternoon or a last-minute treat for a school event, these cookies scream autumn without being fussy.
- Crowd-Pleaser: I brought these to a potluck last month, and someone actually asked for the recipe before they’d even finished their first cookie. Kids love them, adults love them — they’re just good cookies.
- Unbelievably Delicious: The apple cider flavor is subtle but unmistakable, and the cinnamon sugar coating adds that perfect touch of warmth. It’s the kind of cookie that makes you reach for another one before you’ve finished the first.
What makes these different from other apple cider cookies you might have tried? It’s the texture. Most recipes use apple cider as a liquid, which can make cookies cakey or flat. I figured out a way to concentrate the cider flavor without messing with the texture — by reducing it down first. It’s a small extra step, but it makes all the difference. These cookies are chewy, soft, and just the right amount of dense. They’re everything you want in a fall cookie, minus the fuss.
What Ingredients You Will Need
This recipe uses simple, wholesome ingredients to deliver bold apple cider flavor and that perfect chewy texture without any complicated steps. Most of these are pantry staples, which makes these cookies perfect for spontaneous baking sessions.
- Apple Cider (1 cup / 240 ml): Use unfiltered apple cider if you can find it — it has a deeper, more concentrated apple flavor. I’ve tested this with regular apple juice too, and while it works, the cider gives you that authentic fall taste. You’ll be reducing this on the stove, so don’t worry if it seems like a lot.
- Unsalted Butter (1/2 cup / 1 stick / 113 grams), softened: Make sure your butter is at room temperature — cold butter won’t cream properly with the sugar, and melted butter will change the texture. I like using unsalted so I can control the salt level.
- Granulated Sugar (3/4 cup / 150 grams): Regular white sugar works beautifully here. It helps create that slightly crispy edge while keeping the centers soft.
- Brown Sugar (1/4 cup / 50 grams), packed: This adds moisture and a hint of molasses flavor that pairs perfectly with the apple cider. Light or dark brown sugar both work, but dark will give you a richer flavor.
- Large Egg (1): Room temperature is best — it incorporates more evenly into the butter mixture. If you forgot to take it out of the fridge, just place it in a bowl of warm water for 5 minutes.
- Vanilla Extract (1 teaspoon): Pure vanilla extract adds warmth and depth. I use Nielsen-Massey because it’s consistently good, but any brand will work.
- All-Purpose Flour (2 cups / 240 grams): Spoon and level your flour — don’t scoop directly from the bag, or you’ll end up with too much flour and dry cookies. I’ve tested this with a 1:1 gluten-free flour blend, and it worked well.
- Baking Soda (1 teaspoon): This helps the cookies spread just enough and gives them that chewy texture. Make sure your baking soda is fresh — test it by dropping a bit into vinegar; if it fizzes, it’s good.
- Salt (1/2 teaspoon): Don’t skip this! Salt balances the sweetness and enhances the apple flavor. I use fine sea salt for baking.
- Cinnamon (1 teaspoon): This goes into the cookie dough itself, adding warmth throughout. I prefer Saigon cinnamon for its bold flavor, but regular cinnamon works great too.
- For the Cinnamon Sugar Coating:
- Granulated Sugar (1/4 cup / 50 grams): Mixed with cinnamon for rolling the dough balls before baking.
- Cinnamon (1 tablespoon): This creates that beautiful, crunchy coating on the outside of each cookie.
Equipment Needed
You don’t need any fancy equipment for these cookies, which is part of why I love them so much. Here’s what you’ll need:
- Small Saucepan: For reducing the apple cider. Any small pot will do — just make sure it has a heavy bottom to prevent scorching.
- Mixing Bowls: You’ll need one large bowl for the wet ingredients and another for the dry ingredients. I use my trusty Pyrex glass bowls, but any set works.
- Electric Mixer or Whisk: A hand mixer makes creaming the butter and sugar easier, but you can absolutely do it by hand with a wooden spoon if you don’t mind a little arm workout.
- Baking Sheets: Two standard baking sheets work well. Line them with parchment paper for easy cleanup — I like the pre-cut sheets from Reynolds because they fit perfectly.
- Cookie Scoop: A 1.5-tablespoon scoop makes uniform cookies that bake evenly. If you don’t have one, just use two spoons to portion the dough.
- Wire Cooling Rack: This helps the cookies cool properly without getting soggy on the bottom. If you don’t have one, you can cool them on the baking sheet, but they’ll continue cooking a bit from the residual heat.
Preparation Method
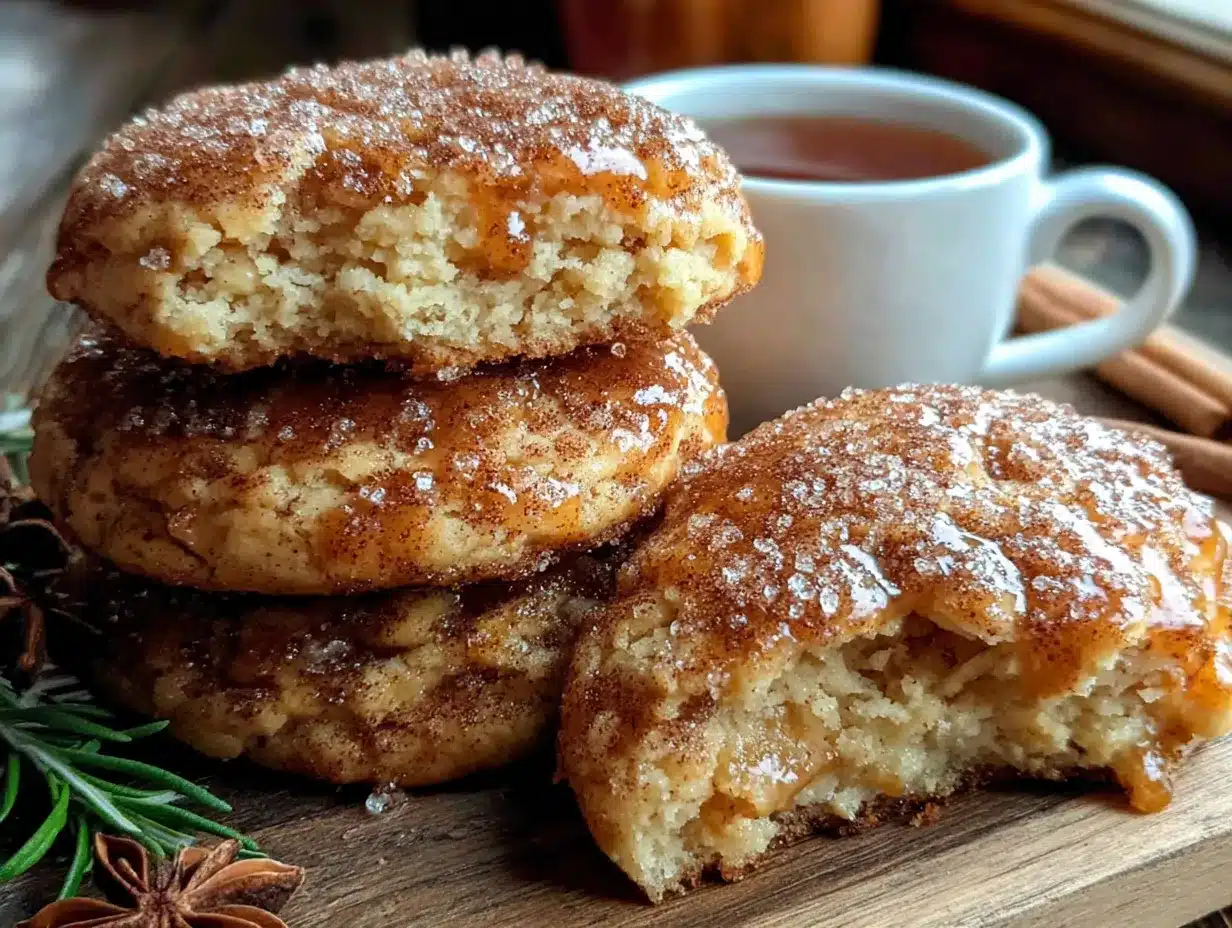
Let me walk you through this step by step. I promise it’s easier than it looks, and once you’ve done it once, you’ll memorize it.
- Reduce the Apple Cider: Pour 1 cup of apple cider into a small saucepan and bring it to a boil over medium-high heat. Once it’s boiling, reduce the heat to medium-low and let it simmer, stirring occasionally, until it reduces to about 1/4 cup. This takes about 12-15 minutes. You’ll know it’s ready when it’s thick, syrupy, and smells intensely of apples. Set it aside to cool completely — you don’t want it hot when you add it to the butter mixture, or you’ll melt the butter. Pro tip: Watch it closely toward the end because it can burn quickly.
- Preheat the Oven: Set your oven to 350°F (175°C). Line two baking sheets with parchment paper. I like to do this step while the cider is cooling so everything’s ready to go.
- Cream the Butter and Sugars: In a large mixing bowl, beat the softened butter, granulated sugar, and brown sugar together until light and fluffy, about 2-3 minutes with an electric mixer on medium speed. You’re looking for a pale, creamy texture — it should look like a thick paste. Scrape down the sides of the bowl halfway through.
- Add the Wet Ingredients: Beat in the egg, vanilla extract, and the cooled reduced apple cider. Mix until just combined — don’t overmix here. The mixture might look slightly curdled at this point, but that’s totally normal. It’ll come together when you add the flour.
- Combine the Dry Ingredients: In a separate bowl, whisk together the all-purpose flour, baking soda, salt, and cinnamon. Whisking ensures everything is evenly distributed — you don’t want a pocket of baking soda in one cookie.
- Mix Wet and Dry: Gradually add the dry ingredients to the wet mixture, mixing on low speed or folding with a spatula until just combined. You should see a few streaks of flour remaining — stop mixing as soon as the flour disappears. Overmixing will make the cookies tough.
- Make the Cinnamon Sugar Coating: In a small bowl, stir together the 1/4 cup granulated sugar and 1 tablespoon cinnamon. Set aside.
- Scoop and Roll: Using a cookie scoop or two spoons, portion the dough into 1.5-tablespoon balls. Roll each ball between your palms to make it round, then roll it in the cinnamon sugar mixture until fully coated. Place the coated dough balls on the prepared baking sheets, spacing them about 2 inches apart. They will spread a little, so give them room.
- Bake: Bake for 9-11 minutes, or until the edges are set and lightly golden. The centers will look slightly underdone and puffy — that’s exactly what you want. They’ll continue to set as they cool. I usually bake one sheet at a time on the middle rack for the most even results.
- Cool: Let the cookies cool on the baking sheet for 5 minutes. This step is crucial — they’re too fragile to move right away. After 5 minutes, transfer them to a wire cooling rack to cool completely. If you try to move them too soon, they’ll fall apart. Trust me on this one.
Cooking Tips & Techniques
I’ve made these cookies at least a dozen times, and I’ve learned a few things along the way. Here are my best tips for perfect results every time:
Don’t skip reducing the cider. I know it’s an extra step, but it’s what makes these cookies taste so intensely apple-y without making the dough too wet. The first time I made these, I tried using full-strength cider, and the cookies spread into flat, sad discs. The reduced cider gives you that concentrated flavor and the right texture.
Watch the cider carefully as it reduces. It goes from perfect to burnt really fast. Keep an eye on it, and stir it every couple of minutes. When it starts to look syrupy and coats the back of a spoon, it’s done. Take it off the heat immediately.
Room temperature ingredients matter. I know it’s tempting to use cold butter straight from the fridge, but it won’t cream properly with the sugar, and you’ll end up with dense, flat cookies. Let your butter and egg sit out for about 30 minutes before you start baking.
Don’t overbake. This is the most common mistake people make with these cookies. They look underdone when you take them out of the oven, but that’s exactly how they should look. The residual heat from the baking sheet finishes cooking them as they cool. If you wait until they look fully set in the oven, they’ll be dry and crumbly.
Use a cookie scoop for even sizing. Uniform cookies bake evenly — some won’t be done while others are burnt. A cookie scoop also makes the process faster and less messy. I love my OXO cookie scoop for this.
Chill the dough if you have time. While this recipe doesn’t require chilling, letting the dough rest in the fridge for 30 minutes will give you thicker, chewier cookies. The flavor also develops a bit more as the dough rests. I’ve done it both ways, and both are delicious — it just depends on how much time you have.
Variations & Adaptations
One of the best things about this recipe is how flexible it is. Here are some variations I’ve tried and loved:
Gluten-Free Version: I swapped the all-purpose flour with a 1:1 gluten-free baking flour blend (I used Bob’s Red Mill), and the cookies turned out great. They were slightly more delicate, so be extra gentle when transferring them to the cooling rack. The texture was still chewy and delicious.
Vegan Adaptation: Replace the butter with vegan butter (I like Earth Balance) and use a flax egg (1 tablespoon ground flaxseed mixed with 3 tablespoons water, let sit for 5 minutes). The cookies will be slightly less tender but still very good. Make sure your sugar is vegan-friendly too.
Add-Ins: Fold in 1/2 cup of chopped pecans or walnuts for some crunch. Dried cranberries also work beautifully — they add a tart pop that balances the sweetness. I made a batch with white chocolate chips once, and honestly, it was incredible. Just fold them in after the flour is incorporated.
Spice It Up: Add 1/4 teaspoon of nutmeg or cardamom to the dough for a more complex spice profile. A pinch of cloves also works well. I’ve done a chai-spiced version with cinnamon, cardamom, ginger, and cloves, and it was perfect for a cozy winter afternoon.
Apple Cider Glaze: If you want to take these over the top, make a simple glaze with 1 cup powdered sugar and 2-3 tablespoons of the reduced apple cider (reserve a little extra when you reduce it). Drizzle it over the cooled cookies for an extra layer of apple flavor.
Serving & Storage Suggestions
These cookies are best served slightly warm — that’s when the centers are at their softest and the cinnamon sugar coating is still a little crunchy. I like to serve them with a glass of cold milk or a hot cup of apple cider for the full fall experience. They’re also fantastic with coffee or tea in the afternoon.
For storage, keep the cookies in an airtight container at room temperature. They’ll stay fresh for up to 5 days, though honestly, they never last that long in my house. Layer them with parchment paper if you’re stacking them to prevent the cinnamon sugar from rubbing off.
You can also freeze these cookies for up to 3 months. Place the baked and cooled cookies in a single layer in a freezer-safe container or bag. To thaw, just leave them at room temperature for about 30 minutes. If you want to freeze the dough instead, scoop it into balls, roll them in the cinnamon sugar, and place them on a baking sheet in the freezer. Once frozen solid, transfer the dough balls to a freezer bag. You can bake them straight from frozen — just add 2-3 minutes to the baking time.
One thing I love about these cookies is that the flavor actually improves after a day or two. The apple cider flavor deepens and the spices meld together beautifully. So if you can resist eating them all on day one, you’re in for a treat on day two.
Nutritional Information & Benefits
Here’s the approximate nutritional breakdown for one cookie (based on 24 cookies):
- Calories: 135
- Total Fat: 5g
- Saturated Fat: 3g
- Cholesterol: 20mg
- Sodium: 95mg
- Total Carbohydrates: 21g
- Dietary Fiber: 0.5g
- Sugars: 13g
- Protein: 1.5g
While these are definitely a treat, the apple cider does offer some benefits. Apples are rich in antioxidants, particularly quercetin, which supports immune health. The cinnamon adds anti-inflammatory properties and may help regulate blood sugar levels. Plus, using real apple cider instead of artificial flavorings means you’re getting actual fruit in your cookies.
If you’re watching your sugar intake, you can reduce the sugar in the coating slightly, but keep in mind that it affects the texture. These are meant to be an occasional indulgence, not an everyday snack. And honestly, there’s something to be said for enjoying a homemade cookie made with real ingredients — it’s good for the soul, even if it’s not a health food.
Conclusion
These Easy Chewy Apple Cider Cookies with Cinnamon Sugar have become my go-to fall recipe for a reason. They’re simple enough for a Tuesday night baking session but impressive enough to bring to any gathering. The combination of concentrated apple cider flavor and that crunchy cinnamon sugar coating is just unbeatable.
I love that this recipe came from a random conversation at a farm stand — it’s a reminder that the best recipes often come from unexpected places. The woman who pointed me toward that cloudy cider jug probably had no idea she was starting a cookie tradition in my kitchen. But that’s how food works, isn’t it? A small moment, a shared tip, and suddenly you have something new to love.
I’d love to hear how these turn out for you. Did you try any of the variations? Did you add something unexpected that worked? Drop a comment below and let me know — your ideas might inspire someone else. And if you loved these cookies, share this recipe with a friend who could use a little fall sweetness in their life. Happy baking!
Frequently Asked Questions
Can I use apple juice instead of apple cider?
Yes, you can, but the flavor won’t be as rich or deep. Apple cider has a more concentrated, authentic apple taste because it’s less filtered. If you use apple juice, the cookies will still be good, just a bit milder in flavor. You might want to add an extra 1/4 teaspoon of cinnamon to compensate.
Why did my cookies spread too much?
This usually happens for one of three reasons: the butter was too soft or melted, the dough wasn’t chilled, or the flour was measured incorrectly. Make sure your butter is just softened, not greasy, and spoon and level your flour rather than scooping directly from the bag. If your kitchen is warm, chilling the dough for 20-30 minutes before baking can help.
Can I make these cookies ahead of time?
Absolutely! You can make the dough up to 2 days ahead and keep it covered in the refrigerator. Let it sit at room temperature for about 10 minutes before scooping and baking. You can also freeze the baked cookies or the unbaked dough balls for up to 3 months — both methods work great.
How do I know when the apple cider is reduced enough?
The reduced cider should be thick and syrupy, similar to maple syrup in consistency. It should coat the back of a spoon and smell intensely of apples. You’ll have about 1/4 cup left from the original 1 cup. If it starts to look dark and smell caramelized, you’ve gone too far — start over with fresh cider.
Can I double this recipe?
Yes, this recipe doubles beautifully. Just make sure you have enough baking sheets and space in your oven. If you’re doubling, you might need to reduce the cider in two batches or use a larger saucepan. The baking time stays the same, but you may need to rotate the baking sheets halfway through for even baking.
Pin This Recipe!

Easy Chewy Apple Cider Cookies with Cinnamon Sugar

These soft, chewy apple cider cookies are coated in cinnamon sugar and packed with concentrated apple flavor. Perfect for fall baking, they come together in about 25 minutes with no chilling required.
- Prep Time: 15 minutes
- Cook Time: 10 minutes
- Total Time: 25 minutes
- Yield: 24 cookies 1x
- Category: Dessert
- Cuisine: American
Ingredients
- 1 cup (240 ml) apple cider (unfiltered preferred)
- 1/2 cup (1 stick / 113 g) unsalted butter, softened
- 3/4 cup (150 g) granulated sugar
- 1/4 cup (50 g) brown sugar, packed
- 1 large egg, room temperature
- 1 teaspoon vanilla extract
- 2 cups (240 g) all-purpose flour
- 1 teaspoon baking soda
- 1/2 teaspoon salt
- 1 teaspoon cinnamon
- For the cinnamon sugar coating:
- 1/4 cup (50 g) granulated sugar
- 1 tablespoon cinnamon
Instructions
- Reduce the apple cider: Pour 1 cup of apple cider into a small saucepan and bring to a boil over medium-high heat. Reduce heat to medium-low and simmer, stirring occasionally, until reduced to about 1/4 cup (12-15 minutes). Set aside to cool completely.
- Preheat the oven to 350°F (175°C). Line two baking sheets with parchment paper.
- In a large mixing bowl, beat the softened butter, granulated sugar, and brown sugar together until light and fluffy, about 2-3 minutes with an electric mixer on medium speed.
- Beat in the egg, vanilla extract, and cooled reduced apple cider until just combined.
- In a separate bowl, whisk together the flour, baking soda, salt, and cinnamon.
- Gradually add the dry ingredients to the wet mixture, mixing on low speed or folding with a spatula until just combined. Do not overmix.
- In a small bowl, stir together the 1/4 cup granulated sugar and 1 tablespoon cinnamon for the coating.
- Using a cookie scoop or two spoons, portion the dough into 1.5-tablespoon balls. Roll each ball between your palms to make it round, then roll in the cinnamon sugar mixture until fully coated. Place on prepared baking sheets, spacing about 2 inches apart.
- Bake for 9-11 minutes, until edges are set and lightly golden. Centers will look slightly underdone.
- Let cookies cool on the baking sheet for 5 minutes, then transfer to a wire cooling rack to cool completely.
Notes
Don’t skip reducing the cider—it concentrates the flavor and prevents spreading. Watch the cider carefully as it reduces to avoid burning. Room temperature ingredients are important for proper creaming. Do not overbake; cookies will continue to set as they cool. For thicker, chewier cookies, chill the dough for 30 minutes before baking. Store in an airtight container at room temperature for up to 5 days. Freeze baked cookies or unbaked dough balls for up to 3 months.
Nutrition
- Serving Size: 1 cookie
- Calories: 135
- Sugar: 13
- Sodium: 95
- Fat: 5
- Saturated Fat: 3
- Carbohydrates: 21
- Fiber: 0.5
- Protein: 1.5
Keywords: apple cider cookies, chewy cookies, fall baking, cinnamon sugar cookies, easy cookie recipe


