Love this? Save it for later!
Share the inspiration with your friends
There used to be a tiny diner called The Witching Hour on the edge of my hometown, a place that was half-diner, half-Halloween-year-round curiosity shop. When they closed after forty years, I felt a genuine pang of loss—not just for the black-and-orange tiled floors, but for their signature appetizer: deviled eggs topped with black olive spiders. After twelve tries—and one particularly disastrous batch where the spiders looked more like sad beetles—I finally got it. Let me tell you, getting that perfect balance of creamy filling and creepy-crawly garnish took more patience than I thought I had. But honestly, the first time I bit into one and tasted that familiar, comforting tang mixed with the briny pop of olive, I nearly cried. It was like bringing a piece of that magical little diner back to life in my own kitchen. Maybe you’ve been there—chasing a flavor from a place that only exists in memory now. This is that recipe for me.
These aren’t just any deviled eggs. They’re the kind you bring to a Halloween party and watch people’s faces light up with a mix of delight and “ew, that’s awesome.” The olive spiders are surprisingly simple to make, but they look so convincing that guests will do a double-take. And underneath that spooky exterior? It’s the classic deviled egg we all grew up loving—creamy, tangy, and just a little bit indulgent. I’ve perfected the filling so it’s not too runny and not too stiff, just the right texture to hold its own under the olive topper. Whether you’re hosting a cozy Halloween gathering or just want to surprise your family with something fun, these eggs are the perfect blend of nostalgic comfort and festive creepiness.
The best part? They come together in about thirty minutes, which leaves you plenty of time to focus on the rest of your spread or, you know, just enjoy a glass of wine while the kids carve pumpkins. I’ve made these for three Halloweens now, and they’ve become the first thing to disappear from the snack table. There’s something about that combination of familiar flavors and unexpected presentation that just works. So grab your eggs and olives, and let’s make some magic—or should I say, mayhem.
Why You’ll Love This Recipe
I’ve tested this recipe more times than I care to admit, tweaking the filling ratios and the olive placement until everything was just right. Here’s why I think you’ll fall for it too:
- Quick & Easy: From start to finish, you’re looking at about 30 minutes of active time. The eggs do most of the work while they boil and chill.
- Simple Ingredients: You probably have everything except the olives already in your fridge and pantry. No fancy trips to specialty stores needed.
- Perfect for Halloween: These are the star of any spooky spread—whether it’s a kid-friendly party or an adult gathering with creepy cocktails.
- Crowd-Pleaser: I’ve served these to picky kids and skeptical adults, and they always get devoured. The olive spiders are more fun than frightening once people try them.
- Unbelievably Delicious: The combination of creamy, tangy yolk filling with the briny, slightly smoky olive is surprisingly addictive. You’ll find yourself reaching for “just one more.”
What makes this version different from the dozens of other Halloween deviled egg recipes out there? It’s the texture of the filling. I use a trick my grandmother taught me—adding a tiny splash of pickle brine to the yolk mixture. It cuts through the richness and adds this subtle tang that makes the olives pop even more. Plus, I’ve figured out the perfect way to slice the olives so the spiders look genuinely creepy, not just like sad little blobs on top of an egg. Trust me, I learned that lesson the hard way after my first attempt looked like a science experiment gone wrong.
This recipe isn’t just good—it’s the kind that makes you close your eyes after the first bite. It’s comfort food with a spooky twist, perfect for turning a simple snack into something memorable. And honestly, watching someone’s face go from “what is that?” to “oh my god, that’s delicious” never gets old.
What Ingredients You Will Need
This recipe uses simple, everyday ingredients to create something that looks far more complicated than it actually is. Most of these are pantry staples, so you might not even need a grocery run.
- Large eggs (12 eggs, hard-boiled and peeled) – The foundation of the whole thing. I prefer large eggs because they have the perfect yolk-to-white ratio for stuffing. Farm-fresh eggs work beautifully here, but any good-quality store brand will do.
- Mayonnaise (1/3 cup, plus a little extra if needed) – This gives the filling its creamy richness. I’m partial to Hellmann’s or Duke’s for their tangy flavor, but any brand you like will work. For a lighter option, you can use half mayo and half plain Greek yogurt.
- Yellow mustard (1 tablespoon) – Adds that classic deviled egg tang and a beautiful golden color. You can substitute Dijon for a sharper flavor if that’s what you have on hand.
- Pickle brine (1 teaspoon, from your jar of dill pickles) – This is my secret ingredient. It brightens the whole filling and balances the richness of the yolks and mayo. Don’t skip it—it makes a real difference.
- Salt (1/4 teaspoon, or to taste) – I use fine sea salt for even seasoning.
- Black pepper (1/8 teaspoon, freshly ground) – A little goes a long way. Freshly ground has more flavor than pre-ground.
- Paprika (1/4 teaspoon, plus more for garnish) – Adds a subtle smokiness and a beautiful color on top. Smoked paprika is amazing here if you have it.
- Large black olives (1 can, about 12-15 olives) – These become your spiders. Look for pitted jumbo black olives—they’re easier to slice and create bigger, more dramatic spiders. I prefer the California ripe olives for their mild flavor and firm texture.
For the olive spiders:
- Whole black olives (12 olives, pitted) – These form the spider bodies. Choose ones that are uniform in size for consistency.
- Black olive slices (from the same can, use about 24 slices) – These become the legs. You’ll need two slices per spider, cut in half to create four leg pieces on each side.
Optional garnishes:
- Fresh chives (a few, snipped into small pieces) – For a pop of green that contrasts nicely with the black olives.
- Extra paprika – For dusting the finished eggs.
I always recommend buying a few extra olives than you think you’ll need. Sometimes the slices break when you’re cutting them, and it’s good to have backups. Also, if you’re using a different brand of olives, check the size—some are much smaller and will look less spider-like. The jumbo ones are definitely the way to go.
Equipment Needed
You don’t need any fancy gadgets for this recipe, which is part of what makes it so approachable. Here’s what you’ll want to have on hand:
- Large saucepan (3-4 quart) – For boiling the eggs. Make sure it’s big enough that the eggs have room to move around without cracking into each other.
- Mixing bowls (one medium, one small) – For the filling and for holding olive pieces.
- Fork or potato masher – For mashing the yolks. A fork works perfectly fine, but a potato masher makes quicker work of it.
- Piping bag or zip-top bag – For filling the egg whites neatly. A zip-top bag with the corner snipped off works like a charm and costs nothing.
- Sharp paring knife – For slicing the olives into legs. A dull knife will squish them, so use your sharpest small knife.
- Cutting board – A small one is fine, just something stable to work on.
- Serving platter – A flat, wide plate or platter that shows off the spiders. I like a dark-colored plate for contrast, but white works too.
If you don’t have a piping bag, honestly, don’t worry about it. I’ve used a zip-top bag for years and it works just as well. Just be careful not to overfill it, or the filling might squirt out the top when you’re squeezing. Ask me how I know.
Preparation Method
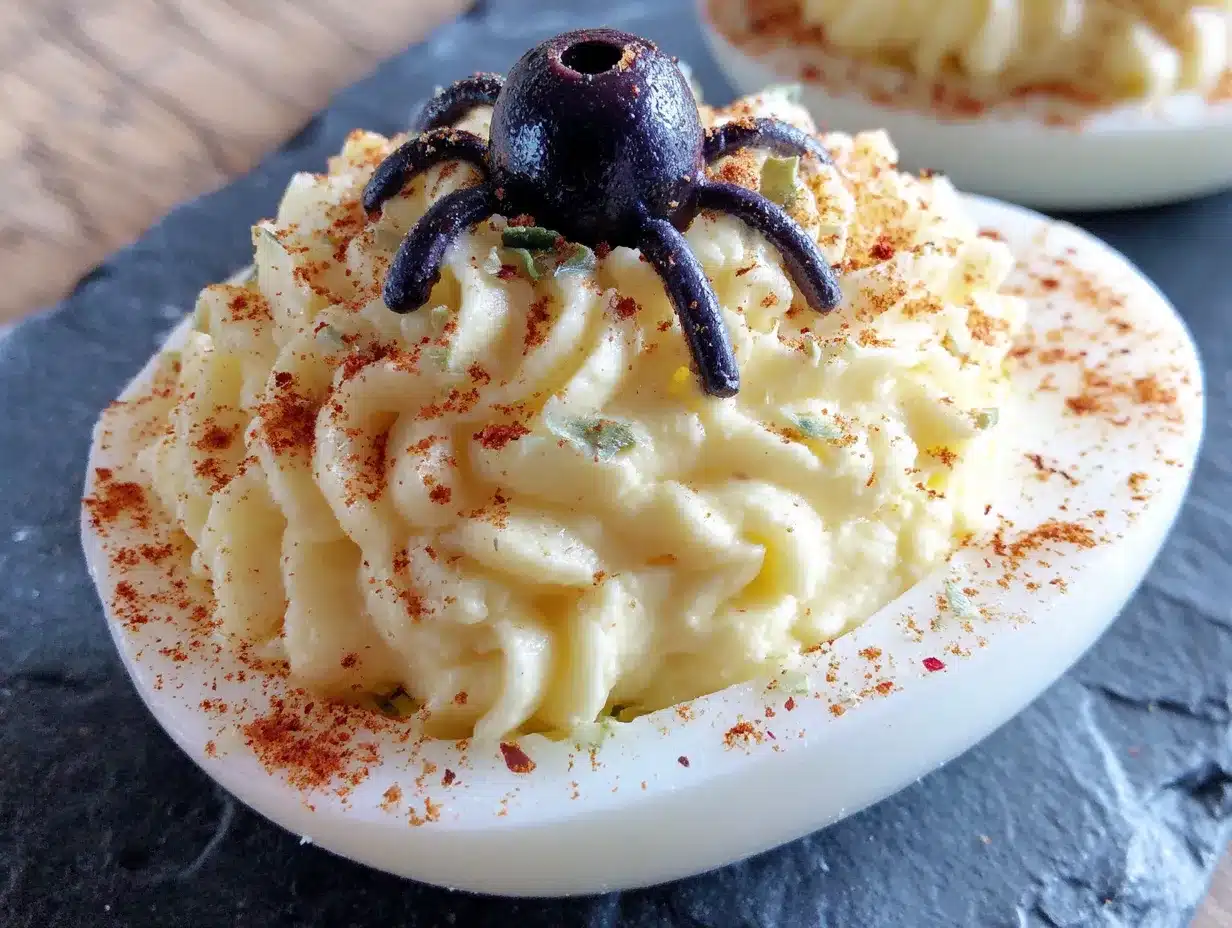
- Hard-boil the eggs. Place your 12 eggs in a single layer in your saucepan and cover them with cold water by about an inch. Bring the water to a rolling boil over high heat, then immediately turn off the heat, cover the pan, and let it sit for exactly 12 minutes. While the eggs are resting, prepare an ice bath in a large bowl. After 12 minutes, transfer the eggs to the ice bath and let them cool for at least 10 minutes. This method gives you perfectly cooked yolks with no green ring around them.
- Peel the eggs carefully. Gently tap each egg on the counter to crack the shell all over, then roll it between your palms to loosen the shell. Start peeling from the wider end where the air pocket is—it’s usually easier. Rinse any shell fragments off under cool water. Pat the eggs dry with a paper towel. If you have any eggs that peel imperfectly, don’t stress—they’ll still taste great, and the olive spider will cover any flaws.
- Slice the eggs in half lengthwise. Using a sharp knife, cut each egg in half from top to bottom. Wipe the knife clean between cuts for neat edges. Gently pop out the yolks into your medium mixing bowl. Arrange the egg white halves on your serving platter, cut side up.
- Make the filling. Add the mayonnaise, yellow mustard, pickle brine, salt, pepper, and paprika to the bowl with the yolks. Mash everything together with a fork until the mixture is smooth and creamy. You want it to be spreadable but not runny. If it seems too thick, add a tiny splash more pickle brine or mayo. If it’s too thin, add a bit more crumbled yolk if you have any leftover.
- Prepare the olive spiders. This is the fun part. Drain your can of black olives and pat them dry with a paper towel. Set aside 12 whole olives for the spider bodies. Take the remaining olives and slice them into rounds about 1/4-inch thick. You’ll need 24 slices total (two per spider). Cut each round in half to create two half-moon shapes—these will be the leg segments. For each spider, you’ll use four half-moon pieces on each side of the body, arranged to look like eight legs.
- Fill the egg whites. Transfer the yolk mixture to your piping bag or zip-top bag. If using a zip-top bag, snip off about 1/2 inch from one corner. Pipe the filling into each egg white half, mounding it slightly in the center. Don’t overfill—you want room to place the spider on top without the filling squishing out the sides.
- Assemble the spiders. Place one whole olive in the center of each filled egg half. Then, on each side of the olive, arrange four half-moon olive slices to look like spider legs. Press them gently into the filling so they stay in place. The legs should curve slightly outward and forward for a more realistic look.
- Garnish and serve. Sprinkle a light dusting of paprika over the eggs, avoiding the olives if you want them to stay pure black. If using chives, scatter a few pieces around the platter for a creepy “grass” effect. Serve immediately or refrigerate until ready to serve.
One thing I learned the hard way: don’t assemble the spiders too far in advance. The olive legs can dry out or start to slide off if they sit too long. I recommend assembling them no more than an hour before serving.
Cooking Tips & Techniques
After making these eggs more times than I can count, I’ve picked up a few tricks that make the process smoother and the results more impressive.
Perfect hard-boiled eggs every time. The 12-minute rest method I mentioned is foolproof, but here’s the key: don’t skip the ice bath. It stops the cooking immediately and makes peeling infinitely easier. I once tried to rush this step and ended up with eggs that looked like they’d been through a war zone. Not cute.
Getting the filling consistency right. The biggest mistake I see is adding too much mayo, which makes the filling runny and hard to pipe. Start with the smaller amount and add more if needed. You want the filling to hold its shape when piped but still be creamy and spreadable. Think thick peanut butter, not yogurt.
Making the spiders look real. The key is in the leg placement. Don’t just stick the olive slices on randomly—arrange them so they curve slightly, like a real spider’s legs. Also, make sure the whole olive body is centered and not lopsided. I’ve had a few spiders that looked like they were about to fall over, which is more comical than creepy.
Timing is everything. Boil your eggs and make the filling a day ahead if you want to save time. Store the peeled egg whites and the filling separately in the fridge. Then, on the day of your party, just pipe the filling, assemble the spiders, and you’re done. It makes hosting so much less stressful.
Don’t overthink the leg count. Real spiders have eight legs, but honestly, if you can only fit six on each side because the egg is small, it still looks great. The overall effect is what matters, not entomological accuracy.
Variations & Adaptations
One of the best things about this recipe is how easy it is to adapt. Here are a few ways I’ve changed it up over the years:
Spicy version. Add a dash of hot sauce or a pinch of cayenne pepper to the yolk mixture. The heat pairs surprisingly well with the briny olives. I tried this for a Halloween party with a “fiery” theme, and it was a hit with the adults.
Veggie spider legs. If you’re not a fan of olives (gasp!), you can use thin strips of roasted red pepper or even carrot sticks for the legs. The visual effect is different but still creepy. I did this once for a friend who hates olives, and it worked surprisingly well.
Smoky twist. Use smoked paprika in the filling and add a tiny drop of liquid smoke. It gives the eggs a subtle campfire flavor that’s perfect for a cozy fall evening. I love this version when I’m serving them alongside a warm bowl of soup.
Gluten-free note. This recipe is naturally gluten-free, so no adaptations needed there. Just double-check your mustard and mayo labels if you’re serving someone with celiac disease.
Make it a meal. I’ve turned these into a full Halloween spread by serving them with creepy crudités platter and a batch of pumpkin soup shots. It’s a fun, savory alternative to all the candy that’s inevitably around.
Serving & Storage Suggestions
These deviled eggs are best served chilled or at room temperature. I usually take them out of the fridge about 15 minutes before serving to take the chill off, which lets the flavors shine more.
Presentation ideas. Arrange the eggs on a dark-colored platter for maximum spooky effect. I like to scatter a few fake spiderwebs around the edges or add a plastic spider or two for extra ambiance. For a more elegant look, serve them on a slate board with fresh herbs scattered around.
What to serve with them. These eggs pair beautifully with other Halloween-themed snacks. I love serving them alongside mummy pigs in a blanket and a bowl of witch’s brew punch. For a full meal, add a simple green salad and some crusty bread.
Storage instructions. Store leftover deviled eggs in an airtight container in the refrigerator for up to two days. The olive spiders will stay intact, but the eggs may release a bit of moisture. I recommend placing a paper towel at the bottom of the container to absorb any excess liquid.
Reheating? Don’t. These are meant to be served cold or at room temperature. If you’ve refrigerated them, just let them sit out for a few minutes before serving.
Flavor development. Honestly, these eggs taste even better the next day. The flavors meld together overnight, and the filling becomes even creamier. Just don’t add the olive spiders until right before serving, or they might get soggy.
Nutritional Information & Benefits
Per serving (1 deviled egg with spider):
- Calories: 85
- Protein: 6g
- Fat: 6g
- Carbohydrates: 1g
- Fiber: 0g
- Sugar: 0g
These numbers are estimates and will vary based on the exact brands and amounts you use.
Health benefits. Eggs are a fantastic source of high-quality protein and contain important nutrients like choline, which supports brain health. The olives provide healthy monounsaturated fats and antioxidants. This recipe is also low in carbs, making it suitable for keto and low-carb diets.
Dietary considerations. This recipe is naturally gluten-free and low-carb. It contains eggs and mayonnaise (which typically contains eggs), so it’s not suitable for those with egg allergies. For a dairy-free version, just use a vegan mayo—the rest of the ingredients are naturally dairy-free.
My take. I love that this recipe feels indulgent without being over-the-top. It’s a treat, sure, but it’s also packed with protein and healthy fats that actually keep you satisfied. Perfect for a Halloween party where you want to enjoy yourself without going overboard on sugar.
Conclusion
If you’re looking for a Halloween recipe that’s equal parts fun and delicious, these Cozy Halloween Deviled Eggs with Olive Spiders are it. They bring back that nostalgic diner feeling for me every single time, and I hope they become a tradition in your home too. Don’t be afraid to customize them—swap the pickle brine for hot sauce, use different colored olives, or experiment with the leg shapes. The beauty of this recipe is that it’s forgiving and endlessly adaptable.
I’d love to hear how yours turn out. Drop a comment below and let me know if your guests screamed (in a good way) or if you came up with a creative variation I haven’t tried. And if you’re looking for more cozy Halloween inspiration, be sure to check out our spooky snack roundup for more ideas. Happy Halloween, and happy cooking!
Frequently Asked Questions
Can I make these deviled eggs ahead of time?
Absolutely. You can boil and peel the eggs up to two days in advance and store them in the fridge. Make the filling a day ahead too, but keep it separate from the egg whites. Assemble the spiders no more than an hour before serving for the best appearance.
My olive legs keep falling off. What am I doing wrong?
This usually happens if the filling isn’t thick enough to hold them. Make sure your filling is on the stiffer side, and press the olive pieces gently into it. You can also use a tiny dab of cream cheese or mayo as “glue” to help them stick.
Can I use a different type of olive?
You can, but the look will change. Kalamata olives are too soft and will fall apart. Green olives would work visually but have a much stronger, brinier flavor that might overpower the filling. Stick with large black olives for the classic spider look.
How do I get perfectly peeled hard-boiled eggs every time?
The ice bath is non-negotiable. Also, use eggs that are at least a week old—fresh eggs are harder to peel. Rolling the egg gently on the counter to crack the shell all over before peeling also helps the shell come off in bigger pieces.
Can I freeze these deviled eggs?
I don’t recommend it. The texture of the filling changes once frozen and thawed, becoming grainy and watery. These are best enjoyed fresh or within a day or two of making them. If you have leftovers, just keep them in the fridge and eat them within 48 hours.
Pin This Recipe!
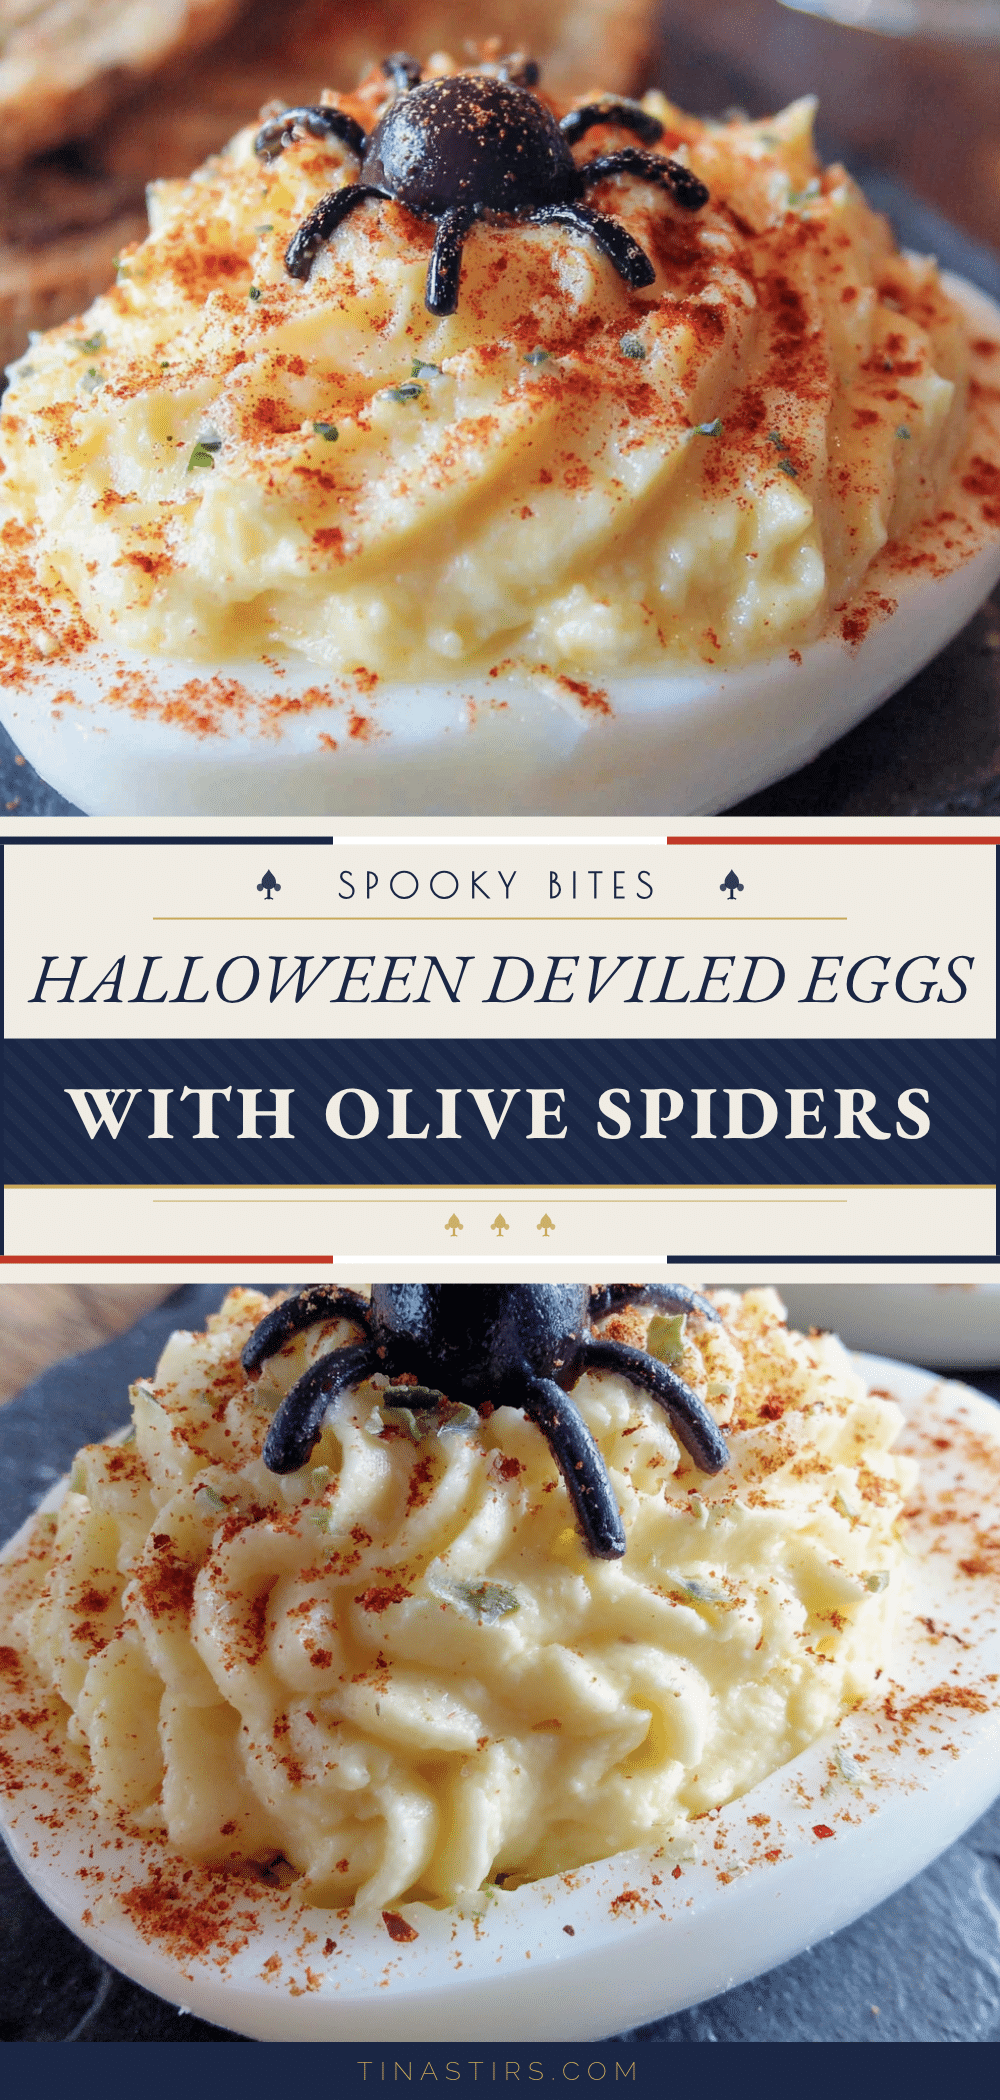
Cozy Halloween Deviled Eggs with Olive Spiders: Easy & Creepy
These aren’t just any deviled eggs. They’re the kind you bring to a Halloween party and watch people’s faces light up with a mix of delight and ‘ew, that’s awesome.’ The olive spiders are surprisingly simple to make, but they look so convincing that guests will do a double-take. And underneath that spooky exterior? It’s the classic deviled egg we all grew up loving—creamy, tangy, and just a little bit indulgent.
- Prep Time: 15 minutes
- Cook Time: 12 minutes (plus cooling time)
- Total Time: 30 minutes (active time)
- Yield: 24 deviled eggs (12 servings of 2 eggs each) 1x
- Category: Appetizer
- Cuisine: American
Ingredients
- 12 large eggs, hard-boiled and peeled
- 1/3 cup mayonnaise (plus a little extra if needed)
- 1 tablespoon yellow mustard
- 1 teaspoon pickle brine (from dill pickles)
- 1/4 teaspoon fine sea salt (or to taste)
- 1/8 teaspoon freshly ground black pepper
- 1/4 teaspoon paprika (plus more for garnish)
- 1 can (about 12–15) large black olives, pitted
- 12 whole black olives (for spider bodies)
- 24 black olive slices (for spider legs, from the same can)
- Fresh chives (optional, for garnish)
- Extra paprika (optional, for dusting)
Instructions
- Hard-boil the eggs: Place 12 eggs in a single layer in a large saucepan and cover with cold water by about an inch. Bring to a rolling boil over high heat, then immediately turn off the heat, cover the pan, and let sit for exactly 12 minutes. Meanwhile, prepare an ice bath in a large bowl. After 12 minutes, transfer the eggs to the ice bath and let cool for at least 10 minutes.
- Peel the eggs carefully: Gently tap each egg on the counter to crack the shell all over, then roll between your palms to loosen the shell. Start peeling from the wider end. Rinse off any shell fragments under cool water and pat dry with a paper towel.
- Slice the eggs in half lengthwise: Using a sharp knife, cut each egg in half from top to bottom. Wipe the knife clean between cuts. Gently pop out the yolks into a medium mixing bowl. Arrange the egg white halves on a serving platter, cut side up.
- Make the filling: Add the mayonnaise, yellow mustard, pickle brine, salt, pepper, and paprika to the bowl with the yolks. Mash together with a fork until smooth and creamy. The mixture should be spreadable but not runny. Adjust consistency with a splash more pickle brine or mayo if needed.
- Prepare the olive spiders: Drain the can of black olives and pat dry with a paper towel. Set aside 12 whole olives for spider bodies. Slice the remaining olives into rounds about 1/4-inch thick (you’ll need 24 slices total). Cut each round in half to create two half-moon shapes for leg segments.
- Fill the egg whites: Transfer the yolk mixture to a piping bag or zip-top bag. If using a zip-top bag, snip off about 1/2 inch from one corner. Pipe the filling into each egg white half, mounding slightly in the center. Do not overfill.
- Assemble the spiders: Place one whole olive in the center of each filled egg half. On each side of the olive, arrange four half-moon olive slices to look like spider legs. Press them gently into the filling so they stay in place. The legs should curve slightly outward and forward.
- Garnish and serve: Sprinkle a light dusting of paprika over the eggs (avoiding the olives if desired). If using chives, scatter a few pieces around the platter for a creepy ‘grass’ effect. Serve immediately or refrigerate until ready to serve.
Notes
Don’t assemble the spiders too far in advance—the olive legs can dry out or slide off. Assemble no more than an hour before serving. For perfect hard-boiled eggs, use the 12-minute rest method and don’t skip the ice bath. The filling can be made a day ahead and stored separately. Use jumbo black olives for the best spider appearance.
Nutrition
- Serving Size: 1 deviled egg with s
- Calories: 85
- Sodium: 180
- Fat: 6
- Saturated Fat: 1.5
- Carbohydrates: 1
- Protein: 6
Keywords: Halloween deviled eggs, olive spiders, spooky appetizer, creepy snacks, Halloween party food, deviled eggs recipe, easy Halloween recipe


