Love this? Save it for later!
Share the inspiration with your friends
My husband claimed he hated Halloween candy boards for years. “Too messy,” he’d say, shaking his head every time I mentioned making one for our annual neighborhood get-together. “Just put out the candy bowls like normal people.” Honestly, I think he was picturing some sad, scattered pile of wrappers on a cutting board—which, okay, fair enough. But then last October, I put together this Spooky Easy Halloween Candy Board “just for the kids” about twenty minutes before our friends were supposed to arrive. I found him standing at the kitchen island, caught red-handed, holding a pretzel rod dipped in melted chocolate with one hand and a piece of caramel apple bark in the other. “I’m just taste-testing,” he mumbled through a mouthful. Sure you were, honey. That board didn’t make it to the party—we had to build a second one because the first one mysteriously “disappeared.” Three years later, this candy board is the first thing he asks about when October rolls around. Maybe you’ve been there, thinking a candy board sounds like more work than it’s worth. Let me tell you, this Spooky Easy Halloween Candy Board takes 30 minutes flat, and it might just convert the skeptics in your house too.
Why You’ll Love This Recipe
I’ve tested this board at three different Halloween parties, two family movie nights, and one very chaotic trunk-or-treat event. It passed every single time with flying colors—and zero leftovers. Here is what makes this the best version you will find:
- 30-Minute Assembly : From fridge to table in half an hour, no baking required. Perfect for those last-minute Halloween gatherings when you realize you forgot to plan anything.
- Simple Ingredients : Everything comes from the regular grocery store. No specialty candy shops, no obscure brands—just your favorite Halloween treats arranged beautifully.
- Perfect for Parties : Whether it’s a spooky movie night, Halloween potluck, or just a Tuesday in October, this board fits every occasion.
- Customizable for All Ages : Skip the super spicy candies for kids, add extra dark chocolate for the adults—everyone finds something they love.
- Unbelievably Impressive : The visual impact makes people think you spent hours on it. I let them think that. Our secret stays between us.
This isn’t just another candy board thrown together on a random platter. I’ve learned through trial and error—and trust me, there were some sad-looking boards in the early days—that the trick is all in the layering and color contrast. The deep oranges, rich browns, and pops of purple and green create that Halloween magic without any food coloring or artificial nonsense. Plus, the mix of textures from crunchy pretzels to chewy caramels to silky chocolate keeps every bite interesting. It’s the kind of board that makes people close their eyes after the first bite—even if that first bite is just a really well-placed Reese’s cup.
What Ingredients You Will Need
This Spooky Easy Halloween Candy Board uses simple, store-bought ingredients that come together to create something that feels way more special than the sum of its parts. I’ve organized everything by category so you can shop and assemble with zero stress.
For the Candy Base
- Assorted mini chocolate bars (Snickers, Milky Way, Twix—whatever your favorites are, about 2 cups total)
- Mini peanut butter cups (I prefer Reese’s, but any brand works; about 1 cup)
- Caramel candies (individually wrapped, unwrapped, about 1 cup)
- Gummy worms or spiders (2 cups—these add that creepy-crawly Halloween vibe)
- Candy corn (1 cup—love it or hate it, it belongs on a Halloween board)
- Mellowcreme pumpkins (1 cup—basically fancy candy corn, but cuter)
For the Salty & Crunchy Elements
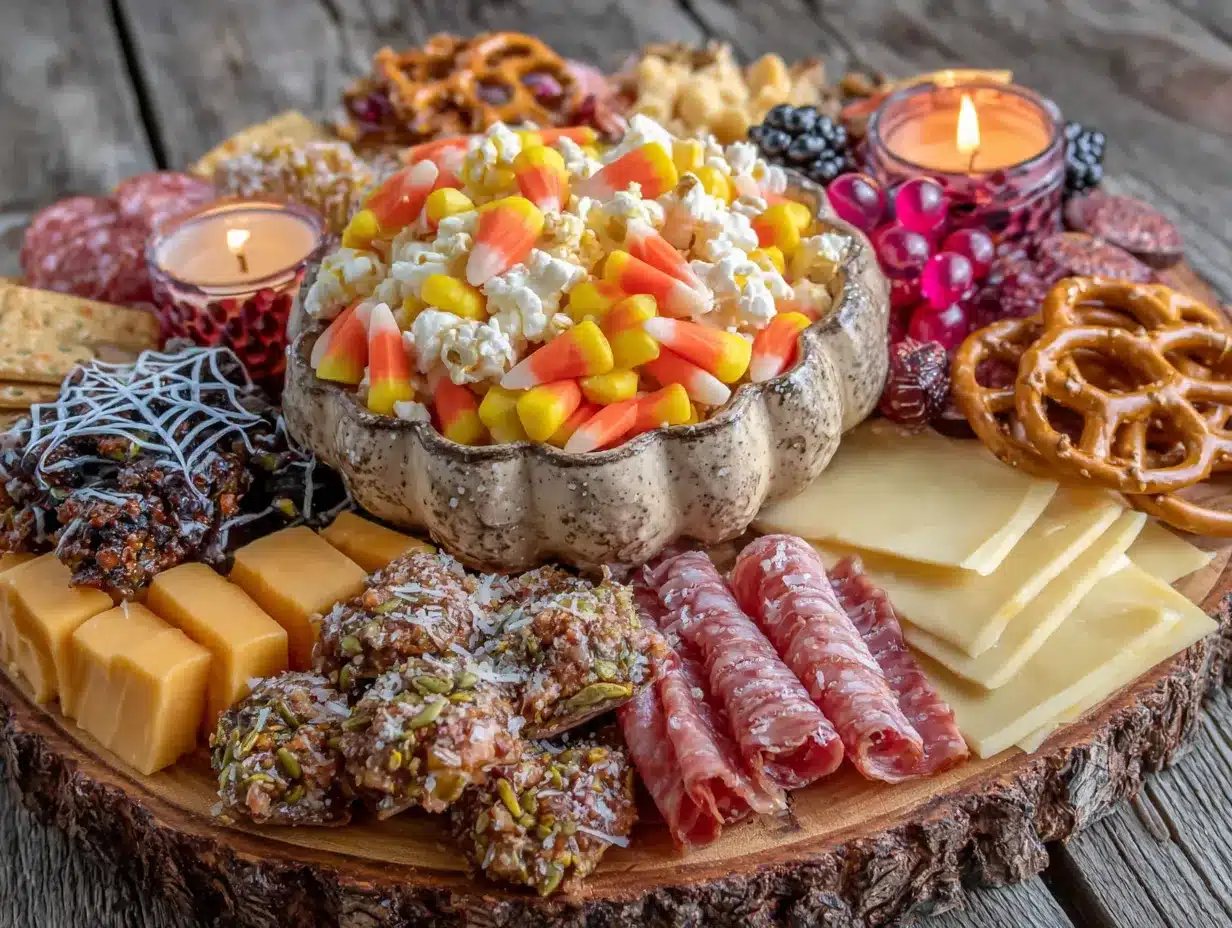
- Mini pretzel twists (2 cups—the salt balances the sweetness perfectly)
- Roasted and salted peanuts (1 cup—optional, but adds great texture)
- Pumpkin seeds (pepitas, ½ cup—toasted if you have time, but raw works fine)
For the Chocolate Drizzle & Decorations
- Dark chocolate melting wafers (½ cup—I like Ghirardelli for smooth melting)
- White chocolate melting wafers (½ cup—for that spooky spiderweb effect)
- Orange and black sprinkles (2 tablespoons each—fun, not mandatory)
- Optional: candy eyes (the little edible ones—these make everything instantly spooky)
For Serving & Presentation
- Large wooden cutting board or serving platter (at least 12×18 inches)
- Small bowls or ramekins (3-4, for grouping loose candies)
- Tongs or mini spoons (for serving)
Ingredient Tips from My Kitchen: When I’m making this for a party, I always buy an extra bag of whatever candy is on sale—because honestly, I snack on it while assembling. Don’t judge, we all do it. For the chocolate wafers, I’ve tried a dozen brands and Ghirardelli consistently melts the smoothest without seizing up. If you can’t find melting wafers, regular chocolate chips work in a pinch—just add a teaspoon of coconut oil to help them melt smoothly. And here’s a pro tip: if candy corn isn’t your thing (I get it, I really do), substitute with dried apricots or mango slices for a chewy, naturally sweet option that still fits the orange color scheme.
Equipment Needed
You don’t need fancy equipment for this Spooky Easy Halloween Candy Board, which is honestly half the appeal. Here is what actually matters:
- Large cutting board or serving platter (at least 12×18 inches—the bigger the better for that wow factor)
- Small bowls or ramekins (3-4, for holding loose candies like candy corn and gummy worms)
- Parchment paper (for drizzling chocolate—saves your board from sticky messes)
- Microwave-safe bowl (for melting chocolate wafers)
- Spatula or spoon (for drizzling—I use a small offset spatula, but a regular spoon works fine)
- Tongs or mini serving spoons (2-3 pairs, so guests don’t use their hands—unless it’s family, then all bets are off)
If you don’t have a large wooden board, a baking sheet lined with parchment paper works perfectly. I’ve used my grandmother’s old cookie sheet in a pinch, and honestly, the contrast of the silver tray with the colorful candy looked kind of cool. For the chocolate melting, skip the double boiler if you’re short on time—microwave in 30-second bursts, stirring between each, and you’ll be done in under two minutes. Just don’t overheat it, or you’ll end up with grainy chocolate that makes you want to cry. Ask me how I know.
Preparation Method
This Spooky Easy Halloween Candy Board comes together in exactly 30 minutes. I’ve timed it. Multiple times. Because that’s the kind of commitment I bring to Halloween snacking.
- Prepare your board (2 minutes) : Start with your largest cutting board or platter. If you are using a wooden board, give it a quick wipe with a damp cloth—candy picks up dust like crazy. Place your small bowls or ramekins in strategic spots around the board. I like to put one in the center and two near the corners for visual balance. These will hold the loose, small candies that would otherwise roll everywhere.
- Melt the chocolate (3 minutes) : Place your dark chocolate melting wafers in a microwave-safe bowl. Microwave in 30-second bursts, stirring well after each interval. After about 90 seconds total, the chocolate should be completely smooth and glossy. Repeat with the white chocolate wafers in a separate bowl. Set both aside while you assemble the board—the chocolate needs to cool just slightly so it doesn’t melt the candy when you drizzle it.
- Arrange the large items first (5 minutes) : Start with your biggest candy pieces—the full-size chocolate bars, the peanut butter cups, the caramel candies. Place them in clusters around the board, leaving space between groups. I usually create 4-5 clusters of big items, spreading them evenly so every section of the board has something substantial. Think of these as the anchor points of your board.
- Fill in with medium candies (5 minutes) : Now add your medium-sized items—the mini pretzels, the gummy worms, the mellowcreme pumpkins. Tuck them around and between your large candy clusters. For the gummy worms, I like to arrange a few so they look like they are crawling off the board—it adds that spooky touch without any effort. The pretzels should be scattered loosely so guests can grab them easily.
- Add the loose candies to bowls (3 minutes) : Pour your candy corn into one of the small bowls, and your pumpkin seeds into another. Place these bowls back onto the board in the spots you reserved earlier. This keeps the tiny pieces contained and prevents them from mixing with everything else—because nobody wants a candy corn-flavored peanut, trust me.
- Drizzle with chocolate (5 minutes) : This is where the magic happens. Using a spoon or small spatula, drizzle the melted dark chocolate back and forth over the pretzels and some of the larger candy pieces. Don’t cover everything—just create a few dramatic zigzags. Repeat with the white chocolate, but aim for different areas. The contrast of dark and white chocolate against the colorful candies is what makes this board look professionally done. If you have candy eyes, press a few into the chocolate while it is still wet—they stick better that way.
- Sprinkle and finish (2 minutes) : While the chocolate drizzle is still tacky (not completely set, but not runny), sprinkle your orange and black sprinkles over the drizzled areas. If you wait too long, the sprinkles will just bounce off. I learned this the hard way when my sprinkles rolled off like tiny, disappointed marbles.
- Final touches (3 minutes) : Step back and look at your board. Fill any empty gaps with extra pretzels or peanuts. Adjust any pieces that look crowded. Add your serving tongs and spoons. Take a photo—you earned it. Then set it out and watch it disappear.
- Serve immediately : This board is best enjoyed within an hour of assembly. The chocolate drizzle stays glossy, the pretzels stay crunchy, and everything looks its best. If you are making it ahead, assemble everything except the chocolate drizzle and add that just before serving.
Cooking Tips & Techniques
After making this Spooky Easy Halloween Candy Board more times than I care to count, I have collected some hard-won wisdom. Here are the things I wish someone had told me before my first attempt:
Don’t skip the parchment trick. The first time I made this, I drizzled chocolate directly onto my favorite wooden board. It looked amazing for about twelve minutes. Then the chocolate set, and I spent an hour scrubbing it off with hot water and a lot of regret. Now I lay a sheet of parchment paper over the board before arranging anything. The chocolate drips onto the paper, not the wood, and when the board is empty, I just peel the parchment off and toss it. Game changer.
Temperature matters more than you think. If your kitchen is warm, the chocolate drizzle will stay soft and might slide off the candy. If it’s cold, the chocolate will set before you finish drizzling. I aim for a room-temperature kitchen—around 70°F—and I keep the candy at room temperature too. Cold candy straight from the fridge makes the chocolate seize up and look dull. Let everything sit out for 15 minutes before you start.
Balance sweet with salty. This is the number one mistake I see with candy boards. Too much sugar and people tap out after two bites. The salted pretzels, the peanuts, and the pumpkin seeds are not optional—they are the backbone that keeps people coming back for more. I actually add extra salt flakes to the pretzels before drizzling because I am that person.
Watch the gummy worm placement. I once arranged gummy worms so they looked like they were crawling over the chocolate bars. Cute, right? Until a guest thought they were actually crawling and screamed. Now I give people a heads-up: “The gummy worms are fake-crawling, not real-crawling.” It saves everyone the embarrassment.
Make extra chocolate drizzle. You will want more than you think. The drizzle is what makes the board look fancy, and running out halfway through is frustrating. I always melt an extra ¼ cup of each chocolate type. Worst case, you have leftover melted chocolate to dip pretzels in while you clean up. Best case, you look like a pro.
Variations & Adaptations
This Spooky Easy Halloween Candy Board is endlessly adaptable, which is why I keep coming back to it year after year. Here are a few ways I’ve twisted it up depending on the crowd and the occasion:
Nut-Free Version : Skip the peanuts and peanut butter cups entirely. Replace them with extra pretzels, sunflower seeds, and nut-free chocolate bars like Skittles or Starburst. I made this for a school Halloween party and nobody missed the nuts—the kids went straight for the gummy worms anyway.
Dark Chocolate Lover’s Board : Swap all milk chocolate for dark chocolate varieties. Use dark chocolate-covered pretzels, dark chocolate bars, and dark chocolate melting wafers for the drizzle. Add dried cherries or figs for a sophisticated twist. This version is my go-to for adult Halloween parties where people actually want to taste the chocolate instead of just the sugar.
Healthy-ish Halloween Board : Replace half the candy with fresh fruit that fits the color scheme—mandarin oranges, blackberries, and green apple slices. Add dark chocolate-covered almonds and air-popped popcorn tossed with cinnamon. The kids will still grab the candy, but the adults will appreciate having options. I tried this one year and was surprised by how fast the fruit disappeared.
Spicy Halloween Board : Add chili-lime seasoning to the peanuts and pumpkin seeds. Include a few dark chocolate bars with sea salt and chili flakes. The sweet-spicy combo is addictive and unexpected. I discovered this variation by accident when I dropped a chili-lime peanut into my chocolate bowl—and it was so good I did it on purpose from then on.
Mini Individual Boards : Instead of one large board, make mini boards on small plates or even in mason jar lids. Perfect for parties where guests are standing or for Halloween movie nights where everyone wants their own snack stash. I did this for a family gathering and the kids loved having their own personal candy board to guard.
Serving & Storage Suggestions
This Spooky Easy Halloween Candy Board is best served at room temperature, right after assembly. The chocolate drizzle should still be slightly glossy, the pretzels should be crunchy, and everything should look vibrant and inviting. I like to set it out about 15 minutes before guests arrive so it warms up slightly—cold candy loses some of its appeal.
What to serve alongside : This board pairs beautifully with hot apple cider, pumpkin spice lattes, or even a cold glass of milk for the kids. For an adults-only gathering, a dark stout beer or a bourbon cider complements the chocolate and caramel perfectly. I also like to set out small cups of popcorn or roasted pumpkin seeds nearby for extra snacking options.
Storage : If you have leftovers (which, let’s be honest, is rare), separate the chocolate-drizzled items from the plain candy. Store the plain candy in an airtight container at room temperature for up to a week. The chocolate-drizzled pieces should be stored in a single layer in an airtight container, separated by parchment paper, and kept in a cool, dry place. Do not refrigerate—the chocolate will bloom and look unappetizing.
Reheating : You don’t really reheat a candy board, but if the chocolate drizzle has set and you want it to look fresh again, you can add a new drizzle of melted chocolate right before serving again. The old drizzle will be hidden underneath, and nobody will know the difference. I’ve done this multiple times and it works like a charm.
Flavor development : Honestly, candy boards are best fresh. The flavors don’t really develop or improve over time—candy is candy. But the visual impact is strongest within the first hour, so plan to serve it soon after assembly. If you are making it for a party, assemble everything except the chocolate drizzle up to 4 hours ahead, then add the drizzle right before guests arrive.
Nutritional Information & Benefits
Let’s be real—this is a candy board. It’s not health food, and I’m not going to pretend it is. But here is what I can tell you: the dark chocolate contains antioxidants and flavonoids that are actually good for your heart in moderation. The peanuts and pumpkin seeds provide protein and healthy fats, which help balance out the sugar rush. And the pretzels offer a bit of sodium to keep your electrolytes in check while you indulge.
Estimated per serving (based on 12 servings):
- Calories: 280-350 (depends heavily on candy choices)
- Fat: 14-18g
- Carbohydrates: 38-45g
- Sugar: 28-35g
- Protein: 4-6g
- Sodium: 200-300mg
Dietary considerations : This board is vegetarian as written. For a vegan version, choose dark chocolate that is labeled vegan and skip any milk chocolate or caramel candies that contain dairy. For gluten-free, check your pretzels—many brands offer gluten-free options now, and most candies are naturally gluten-free. Always read labels if you are serving someone with allergies.
My personal take : I believe in balance. This board is for celebrations and special moments, not everyday snacking. Enjoy it, share it, and don’t stress about the numbers. Halloween comes once a year—let yourself have fun with it.
Conclusion
This Spooky Easy Halloween Candy Board has become a tradition in our house, and I have a feeling it will become one in yours too. It takes 30 minutes, uses ingredients you can find at any grocery store, and creates that moment of pure delight when people walk in and see it. The best part? You can customize it endlessly based on what your family loves. My husband, the former skeptic, now asks for it by name starting in September. He even helps me arrange the gummy worms in “scary” positions, which is honestly adorable.
I would love to hear how your board turns out! Leave a comment below and tell me what candies you used, or tag me in your photos if you share them online. Did you try a variation I didn’t mention? Did your kids fight over the candy eyes? I want to know all of it. And if you are looking for more easy Halloween recipes, check out our spooky Halloween popcorn mix and easy pumpkin dip recipe for a complete Halloween snack spread. Happy haunting, and happy snacking!
Frequently Asked Questions
How far in advance can I make this Halloween candy board?
You can arrange all the candy on the board up to 4 hours ahead of time. Just cover it loosely with plastic wrap and keep it at room temperature. Add the chocolate drizzle and sprinkles right before serving for the best visual effect. If you drizzle too early, the chocolate will set and lose that glossy, fresh look.
Can I use homemade candy or treats on this board?
Absolutely! Homemade caramel corn, chocolate bark, or even homemade marshmallows would be fantastic additions. Just make sure any homemade items are fully cooled and set before arranging them on the board. I’ve added homemade salted caramel popcorn to this board before and it was a huge hit.
What is the best way to arrange the candy so it looks professional?
Start with your largest pieces first as anchor points, then fill in with medium items, and finish with small loose candies in bowls. Create visual balance by spreading colors evenly across the board. The chocolate drizzle is the secret weapon—it ties everything together visually and makes even a simple arrangement look intentional and polished.
How do I keep the chocolate drizzle from making a mess on my board?
Line your board with parchment paper before arranging anything. The parchment catches all the chocolate drips, and when the board is empty, you can just peel it off and toss it. No scrubbing required. If you don’t have parchment, wax paper works in a pinch, but parchment is better because it doesn’t stick to the chocolate.
Can I make this board dairy-free or vegan?
Yes, easily! Choose dark chocolate that is labeled vegan for your candy and drizzle. Skip milk chocolate candies and caramels that contain dairy. Add extra pretzels, nuts, seeds, and fruit-based candies like Skittles or sour gummies (check labels, as some contain gelatin). Most gummy candies are not vegan, but there are vegan gummy options available at natural food stores.
Pin This Recipe!
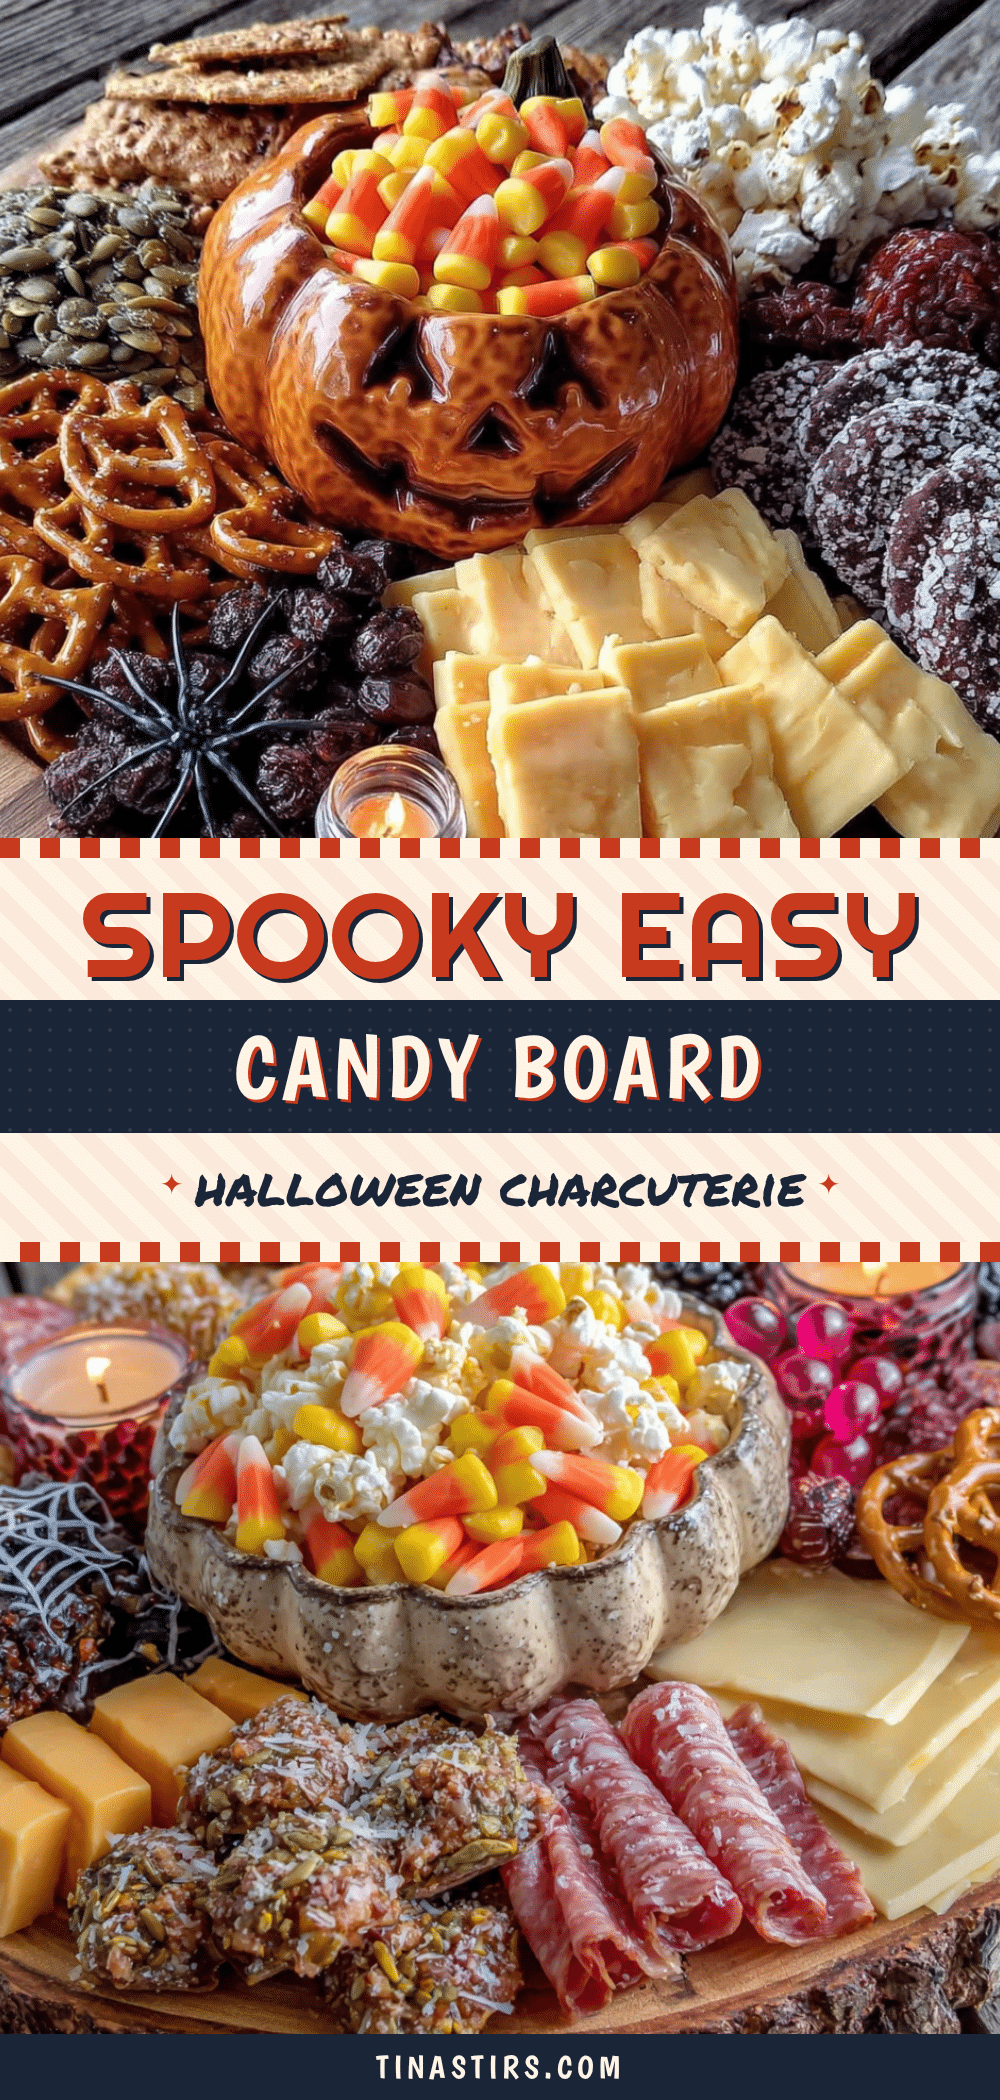
Spooky Easy Halloween Candy Board: 30-Minute Perfect Treat
This Spooky Easy Halloween Candy Board takes 30 minutes flat and uses simple, store-bought ingredients to create an impressive, customizable treat that converts even the skeptics. Perfect for Halloween parties, movie nights, or any October gathering.
- Prep Time: 15 minutes
- Cook Time: 0 minutes
- Total Time: 30 minutes
- Yield: 12 servings
- Category: Appetizer
- Cuisine: American
Ingredients
- Assorted mini chocolate bars (Snickers, Milky Way, Twix, about 2 cups)
- Mini peanut butter cups (about 1 cup)
- Caramel candies (individually wrapped, about 1 cup)
- Gummy worms or spiders (2 cups)
- Candy corn (1 cup)
- Mellowcreme pumpkins (1 cup)
- Mini pretzel twists (2 cups)
- Roasted and salted peanuts (1 cup, optional)
- Pumpkin seeds (pepitas, ½ cup)
- Dark chocolate melting wafers (½ cup)
- White chocolate melting wafers (½ cup)
- Orange and black sprinkles (2 tablespoons each)
- Optional: candy eyes
- Large wooden cutting board or serving platter (at least 12×18 inches)
- Small bowls or ramekins (3-4)
- Tongs or mini spoons (for serving)
Instructions
- Prepare your board (2 minutes): Start with your largest cutting board or platter. Wipe wooden board with a damp cloth. Place small bowls or ramekins in strategic spots around the board (one in center, two near corners).
- Melt the chocolate (3 minutes): Place dark chocolate melting wafers in a microwave-safe bowl. Microwave in 30-second bursts, stirring well after each interval, until smooth (about 90 seconds total). Repeat with white chocolate wafers in a separate bowl. Set aside to cool slightly.
- Arrange the large items first (5 minutes): Place biggest candy pieces (full-size chocolate bars, peanut butter cups, caramel candies) in clusters around the board, leaving space between groups. Create 4-5 clusters evenly spaced.
- Fill in with medium candies (5 minutes): Add mini pretzels, gummy worms, and mellowcreme pumpkins around and between large clusters. Arrange some gummy worms to look like they are crawling off the board. Scatter pretzels loosely.
- Add the loose candies to bowls (3 minutes): Pour candy corn into one small bowl and pumpkin seeds into another. Place bowls back onto the board in reserved spots.
- Drizzle with chocolate (5 minutes): Using a spoon or small spatula, drizzle melted dark chocolate back and forth over pretzels and some larger candy pieces. Repeat with white chocolate in different areas. If using candy eyes, press them into wet chocolate.
- Sprinkle and finish (2 minutes): While chocolate drizzle is still tacky, sprinkle orange and black sprinkles over drizzled areas.
- Final touches (3 minutes): Fill any empty gaps with extra pretzels or peanuts. Adjust crowded pieces. Add serving tongs and spoons.
- Serve immediately: Best enjoyed within an hour of assembly. If making ahead, assemble everything except chocolate drizzle and add just before serving.
Notes
Line board with parchment paper before arranging to avoid chocolate mess. Keep candy at room temperature for best chocolate drizzle. Balance sweet with salty elements. Make extra chocolate drizzle. For nut-free version, skip peanuts and peanut butter cups. For vegan, use vegan dark chocolate and skip dairy candies. For gluten-free, use gluten-free pretzels.
Nutrition
- Serving Size: 1 serving (based on
- Calories: 315
- Sugar: 31
- Sodium: 250
- Fat: 16
- Saturated Fat: 6
- Carbohydrates: 41
- Fiber: 2
- Protein: 5
Keywords: Halloween candy board, easy Halloween treat, 30-minute recipe, candy board, spooky snack, party appetizer, no-bake dessert


