Love this? Save it for later!
Share the inspiration with your friends
I was standing in line at the post office, sweating under a package that weighed more than my carry-on luggage, when the woman behind the counter started talking about Rice Krispie treats. Not just any Rice Krispie treats—Halloween Rice Krispie Treats with candy eyes that she claimed “stole the show” at every party she’d ever thrown. This was a postal worker in her late fifties, wearing a witch hat in October, and she was telling me, a complete stranger, exactly how to make them. She said, “The secret isn’t the marshmallow, honey. It’s the eyes.” I wasn’t expecting cooking advice from a postal worker in a witch hat, but there I was, holding a package I’d probably never see again, listening to her describe how to make these little monsters come to life. I mean, honestly, you can’t make that up. She scribbled the basic idea on the back of a shipping label, and I stuffed it in my pocket, half-convinced I’d lose it. But I didn’t. And now, every Halloween, I’m the one people ask to bring the treats. Maybe you’ve been there—standing in some random place, getting the best recipe of your life from the most unexpected person. That’s how this story starts.
These Halloween Rice Krispie Treats with candy eyes aren’t just a dessert. They’re a conversation starter. They’re the thing that makes kids (and let’s be honest, adults) stop and grin before they even take a bite. The marshmallow base is perfectly chewy, the candy eyes give them that goofy, spooky personality, and the whole thing comes together faster than you can say “trick or treat.” I’ve made them for Halloween parties, potlucks, and even a few non-holiday get-togethers where people just wanted something fun. And every single time, they disappear. The postal worker was right—the eyes are the secret. But the real magic is how easy they are to make, especially when you’re hosting and need something that looks like you spent hours on it but actually took twenty minutes.
Why You’ll Love This Recipe
Let me tell you why these Halloween Rice Krispie Treats are the ultimate party trick. I’ve tested this recipe more times than I care to admit, tweaking the marshmallow-to-butter ratio, testing different candy eyes, and even trying to get them to hold their shape in warm weather. This version is the winner. It’s the one I bring to every gathering, and it never fails.
- Quick & Easy: From start to finish, you’re looking at about 25 minutes. That’s it. No baking, no complicated steps—just melting, mixing, and pressing. Perfect when you’re running around getting ready for guests.
- Simple Ingredients: You probably have most of this in your pantry right now. Rice Krispies cereal, marshmallows, butter, and candy eyes. No weird specialty items that cost a fortune.
- Perfect for Halloween Hosting: These are made for a crowd. You can double or triple the batch without any issues, and they look incredible on a dessert table. They’re the kind of thing guests pick up and immediately take a picture of.
- Crowd-Pleaser: I’ve seen kids grab three at once and adults sneak one when they think nobody’s watching. The combination of crunchy, chewy, and sweet is basically irresistible.
- Unbelievably Delicious: The texture is spot-on—crispy on the outside, soft and chewy on the inside. And the candy eyes add a little pop of sweetness that makes them feel special.
What makes this recipe different from the dozens of others out there? It’s the technique. I figured out that using a slightly higher ratio of marshmallow to butter gives you a treat that stays soft for days, not hours. And pressing them into the pan with a buttered spatula (not your hands) keeps them from getting too dense. This isn’t just another version of Rice Krispie treats—it’s the one you’ll come back to year after year.
Honestly, there’s something about making these that feels like a little act of joy. You’re creating something that makes people smile before they even taste it. And when they do taste it, they close their eyes for a second. That’s the kind of recipe worth holding onto.
What Ingredients You Will Need
This recipe uses simple, everyday ingredients to create something that feels anything but ordinary. Each one plays a specific role, from the buttery richness to the satisfying crunch. Here’s what you’ll need to gather before you start.
For the Treat Base
- 6 tablespoons unsalted butter (I prefer Kerrygold for its rich flavor, but any good-quality butter works. Cut it into cubes so it melts evenly.)
- 1 package (10 ounces) marshmallows (Standard size, not mini. Jet-Puffed is my go-to brand because they melt into a smooth, silky consistency without clumping.)
- 6 cups Rice Krispies cereal (Make sure it’s fresh—stale cereal will give you a less crispy texture. You can use the generic version, but the name-brand stuff holds up better.)
- 1/4 teaspoon salt (A pinch of flaky sea salt at the end is optional, but it really balances the sweetness.)
For the Decoration
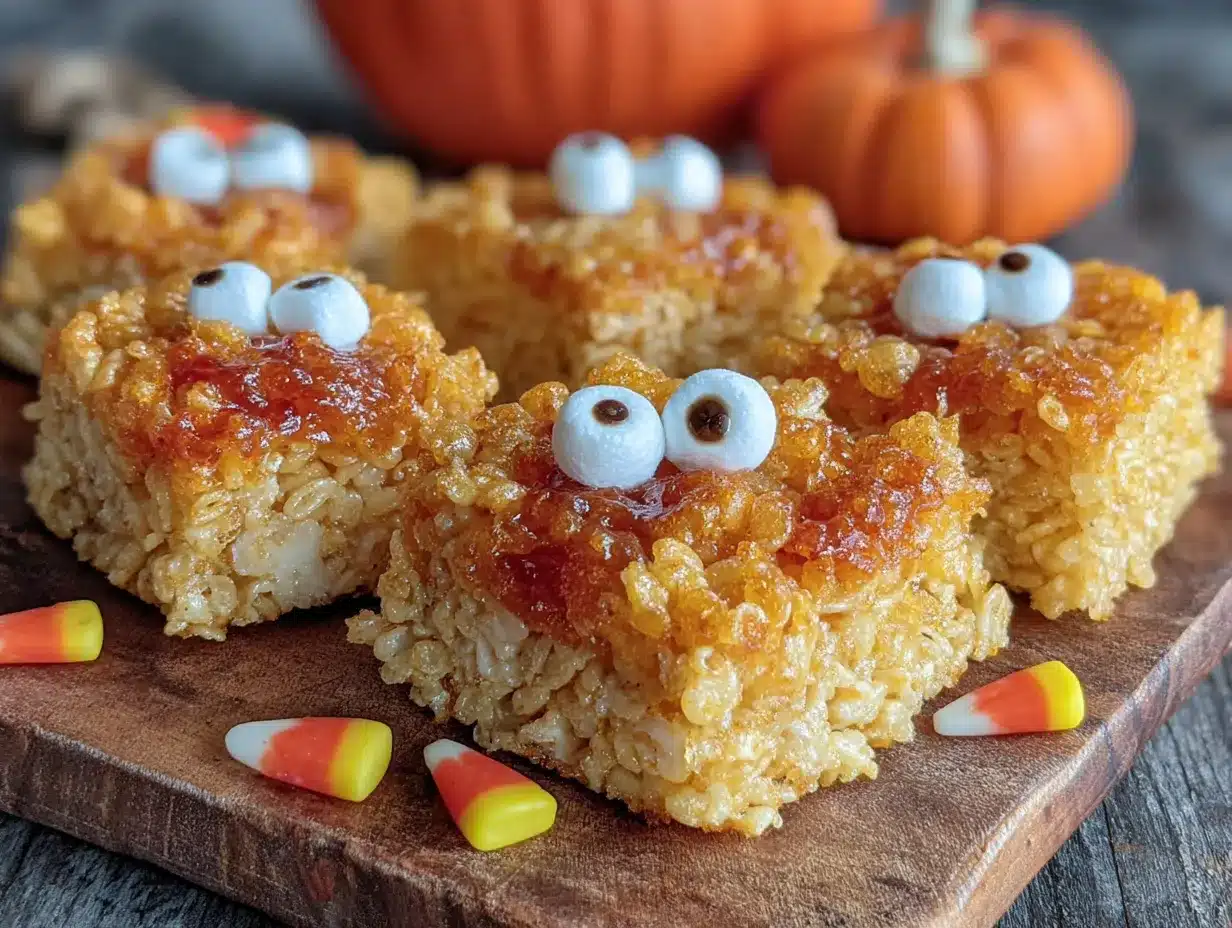
- 1/2 cup candy eyes (You can find these at craft stores or online. I like the Wilton brand because they stick well and come in different sizes. Go for the ones with black pupils—they look spookier.)
- 1/4 cup white chocolate chips (Optional, for “gluing” the eyes on. If you press them in while the treats are still warm, they’ll stick on their own. But if you want them to stay put for transport, melted white chocolate works like a charm.)
- Orange and black sprinkles (Optional, for extra Halloween flair. I sometimes add a few for color, but the eyes are really the star.)
Ingredient Tips from My Kitchen
I’ve learned a few things the hard way. First, don’t use low-fat butter. It has more water, which makes the treats soggy. Second, if you’re making these ahead of time, add the candy eyes right before serving. They can soften if left on overnight, especially in humid weather. And third, if you want to make them gluten-free, check your marshmallow brand—most are gluten-free, but Dandies is a reliable option. The Rice Krispies cereal is gluten-free, but the generic versions sometimes aren’t, so read the label.
For a fun twist, try using strawberry-flavored marshmallows for a pinkish tint. It gives the treats a slightly different vibe, but the kids love it. Or, if you’re feeling brave, add a drop of black food coloring to the marshmallow mixture for a truly spooky look. Just be careful—it stains everything.
Equipment Needed
You don’t need a fancy kitchen to make these Halloween Rice Krispie Treats. Most of this stuff you probably already own. Here’s what I use and what you can substitute if needed.
- Large pot (A 4-quart pot works perfectly. Non-stick is ideal because the marshmallow mixture slides right off. If you don’t have non-stick, just spray it well with cooking spray.)
- 9×13-inch baking pan (This gives you the perfect thickness—about 1 inch. You can use an 8×8 pan for thicker treats, but you’ll need to adjust the cooking time slightly.)
- Spatula (A silicone spatula is my best friend here. It doesn’t scratch the pot, and it’s easy to scrape every last bit of marshmallow. Butter it lightly to prevent sticking.)
- Parchment paper (Line your pan with this, leaving some overhang. It makes lifting the treats out so much easier. Trust me, I’ve tried without it, and it’s a mess.)
- Sharp knife (A chef’s knife or a large serrated knife works best. Spray it with cooking spray between cuts for clean edges.)
- Cutting board (Any flat surface will do, but a large cutting board gives you room to work.)
If you’re on a budget, skip the silicone spatula and use a wooden spoon. Just spray it with cooking spray first. And if you don’t have parchment paper, butter the pan generously—like, really generously. It’ll still work, but you might have to wrestle the treats out a little.
Preparation Method
Here’s the step-by-step process for making these Halloween Rice Krispie Treats. I’ve included every detail I’ve learned from years of making them, so you don’t have to guess.
- Prep your pan: Line a 9×13-inch baking pan with parchment paper, leaving about 2 inches of overhang on two sides. Lightly spray the parchment with cooking spray. This will make lifting the treats out a breeze later.
- Melt the butter: In a large pot over medium-low heat, melt the 6 tablespoons of unsalted butter. Swirl the pot occasionally so it melts evenly. Don’t rush this—if the butter burns, it’ll give the treats a bitter taste. I’ve done it, and it’s not fun.
- Add the marshmallows: Once the butter is fully melted, add the entire bag of marshmallows. Stir constantly with your spatula until the marshmallows are completely melted and the mixture is smooth. This takes about 5 minutes. The mixture will look glossy and stretchy when it’s ready.
- Season the mixture: Sprinkle in the 1/4 teaspoon of salt and stir to combine. The salt cuts through the sweetness and makes the flavor more complex. Don’t skip this—it’s a game-changer.
- Add the cereal: Remove the pot from the heat. Pour in the 6 cups of Rice Krispies cereal. Fold everything together gently but thoroughly. You want every piece of cereal coated in marshmallow without crushing it. I use a folding motion, like I’m making a soufflé, to keep the cereal intact.
- Press into the pan: Transfer the mixture to your prepared pan. Using a buttered spatula (or your hands, lightly buttered), press the mixture into an even layer. Don’t press too hard—you want it compact but not dense. If you press too firmly, the treats will be rock-hard. I learned this the hard way when I made a batch that could’ve doubled as a doorstop.
- Add the candy eyes: While the treats are still warm (but not hot), press the candy eyes into the surface. Space them out evenly, about 6 to 8 per row. You can arrange them in a pattern or just scatter them randomly—both look great. If you’re using white chocolate to glue them, melt the chips in the microwave in 20-second intervals, then dab a tiny bit on the back of each eye before pressing it in.
- Let them set: Allow the treats to cool completely at room temperature. This takes about 30 minutes. Don’t put them in the fridge—it can make them too hard. Once they’re cool, use the parchment overhang to lift the whole block out of the pan.
- Cut and serve: Place the block on a cutting board. Using a sharp knife sprayed with cooking spray, cut into squares. I usually go for 12 to 16 pieces, depending on how big I want them. For Halloween parties, I cut them smaller so people can grab more than one.
One more thing—if the mixture starts to harden while you’re pressing it into the pan, don’t panic. Just work quickly. It’s still salvageable. And if you get marshmallow stuck to your spatula, spray it with more cooking spray. Problem solved.
Cooking Tips & Techniques
Over the years, I’ve made plenty of mistakes with Rice Krispie treats. I’ve burned the marshmallows, used stale cereal, and ended up with treats that were either too hard or too sticky. Here’s what I’ve learned so you don’t have to repeat my errors.
Don’t overheat the marshmallows. This is the number one mistake. When you melt marshmallows over high heat, they get rubbery and lose that silky texture. Keep the heat on medium-low and stir constantly. The moment they’re smooth, take the pot off the heat. I once walked away for 30 seconds, and the marshmallows turned into a sticky, unworkable mess. Learn from my failure.
Use fresh cereal. If your Rice Krispies have been sitting in the pantry for months, they’ll be stale. Stale cereal doesn’t hold its crunch, and your treats will end up chewy in a bad way. I always buy a fresh box for these Halloween Rice Krispie Treats. It makes a noticeable difference.
Butter your tools. Everything that touches the marshmallow mixture should be buttered or sprayed with cooking spray. The spatula, the pan, your hands—everything. It’s the only way to avoid a sticky disaster. I keep a small bowl of melted butter nearby and dip my spatula in it as I work.
Plan your timing. If you’re hosting a party, make these the morning of or the day before. They stay fresh for about 2 days at room temperature in an airtight container. But add the candy eyes right before serving if you can. They look best when they’re fresh and bright.
Multitask smartly. While the marshmallows are melting, measure out your cereal and line your pan. That way, when the mixture is ready, you can work fast. I’ve had moments where the marshmallow started to set while I was still fumbling with the cereal box. Don’t be me.
Variations & Adaptations
These Halloween Rice Krispie Treats are incredibly versatile. Here are some ways to switch them up depending on your crowd or occasion.
Spider Web Design: Instead of scattering the candy eyes randomly, arrange them in a spider web pattern. Melt some dark chocolate and drizzle it in concentric circles, then drag a toothpick through it to create the web effect. It looks amazing on a dessert table.
Monster Mash: Use green food coloring to tint the marshmallow mixture, then add candy eyes and small pretzel sticks for arms. They look like little monsters. Kids go absolutely crazy for these.
Ghostly White: Skip the food coloring and use white chocolate chips mixed into the marshmallow base. Press the candy eyes in, then dust with powdered sugar for a ghostly effect. They’re spooky and elegant at the same time.
Gluten-Free Option: This recipe is naturally gluten-free if you use certified gluten-free Rice Krispies and marshmallows. I’ve served these to friends with celiac disease, and they’ve never had an issue. Just double-check your labels.
Vegan Adaptation: Use vegan butter (like Earth Balance) and vegan marshmallows (Dandies is my favorite). The texture is slightly different—a bit softer—but they still taste fantastic. I made a batch for a vegan potluck, and they were gone in minutes.
Peanut Butter Twist: Add 1/4 cup of creamy peanut butter to the marshmallow mixture after it’s melted. Stir until smooth, then add the cereal. The peanut butter adds a savory note that balances the sweetness. I tried this on a whim, and now it’s my secret weapon for adult parties.
Serving & Storage Suggestions
These Halloween Rice Krispie Treats are best served at room temperature. The texture is perfect—crispy on the outside, soft and chewy on the inside. If you serve them straight from the fridge, they’ll be too hard. Let them sit out for about 10 minutes before serving.
For presentation, I like to arrange them on a large platter lined with black or orange napkins. The contrast makes the candy eyes pop. You can also stack them in a pyramid shape for a dramatic effect. If you’re serving them alongside other desserts, place them in the center of the table. They’re the showstopper.
As for drinks, these treats pair beautifully with a cold glass of milk or a warm apple cider. For adult gatherings, a dark stout or a pumpkin ale complements the sweetness nicely. I’ve also served them with a side of vanilla ice cream for an extra decadent treat.
Storage Tips: Store the treats in an airtight container at room temperature for up to 3 days. Separate layers with parchment paper to prevent sticking. Do not refrigerate—it dries them out. If you need to make them ahead, prepare the base and add the candy eyes the day of serving. They’ll stay fresh and spooky.
If you’re transporting them to a party, let them cool completely before stacking. I use a baking sheet with a lid, or I wrap them individually in plastic wrap. The candy eyes might shift a little, but you can press them back in place when you arrive.
Nutritional Information & Benefits
Let’s be honest—these Halloween Rice Krispie Treats are a treat, not a health food. But here’s the nutritional breakdown for one square (based on 12 servings):
| Nutrient | Amount per Serving |
|---|---|
| Calories | 210 |
| Total Fat | 8g |
| Saturated Fat | 5g |
| Carbohydrates | 34g |
| Sugar | 18g |
| Protein | 2g |
| Sodium | 180mg |
On the plus side, Rice Krispies are fortified with iron and B vitamins, so there’s a tiny nutritional silver lining. And if you’re serving these at a party, they’re a great option for kids with nut allergies, as long as you use certified nut-free ingredients. I always make a note of this when I bring them to school events.
From a wellness perspective, I believe in balance. These treats are for celebrations, for joy, for making memories. They’re not an everyday food, and that’s okay. Sometimes, the best thing you can eat is something that makes you smile.
Conclusion
These Halloween Rice Krispie Treats with candy eyes are more than just a recipe—they’re a little piece of Halloween magic. They’re easy enough for a beginner, impressive enough for a party, and fun enough to make anyone grin. I’ve made them for costume parties, family gatherings, and even just a quiet night in, and they’ve never let me down.
I hope you give them a try and make them your own. Maybe you’ll add extra eyes, or tint them green, or drizzle them with chocolate. That’s the beauty of this recipe—it’s a canvas for your creativity. And if you do make them, I’d love to hear about it. Drop a comment below, share a photo, or tell me how they turned out. Did you try a variation? Did the kids go wild? Let me know.
Until next time, happy Halloween—and may your treats always be spooky, sweet, and full of eyes.
Frequently Asked Questions
Can I use mini marshmallows instead of regular ones?
Yes, you can. If you use mini marshmallows, you’ll need about 4 cups to replace the 10-ounce bag. They melt faster, so keep a close eye on them to avoid burning.
How do I keep the candy eyes from falling off?
Press them in while the treats are still warm but not hot. If you’re transporting them, use a tiny dab of melted white chocolate on the back of each eye. It acts like glue and keeps them secure.
Can I freeze these treats?
I don’t recommend freezing them. The texture changes, and they can become soggy when thawed. It’s better to make them fresh or store them at room temperature for up to 3 days.
What if I don’t have a 9×13 pan?
You can use an 8×8 pan for thicker treats. Just increase the pressing time slightly to make sure they’re evenly distributed. Or use a 9×9 pan for a middle-ground thickness.
Can I add other decorations besides candy eyes?
Absolutely. Try orange sprinkles, black frosting, or even small candy pumpkins. The base recipe is very forgiving, so feel free to get creative with your Halloween theme.
Pin This Recipe!
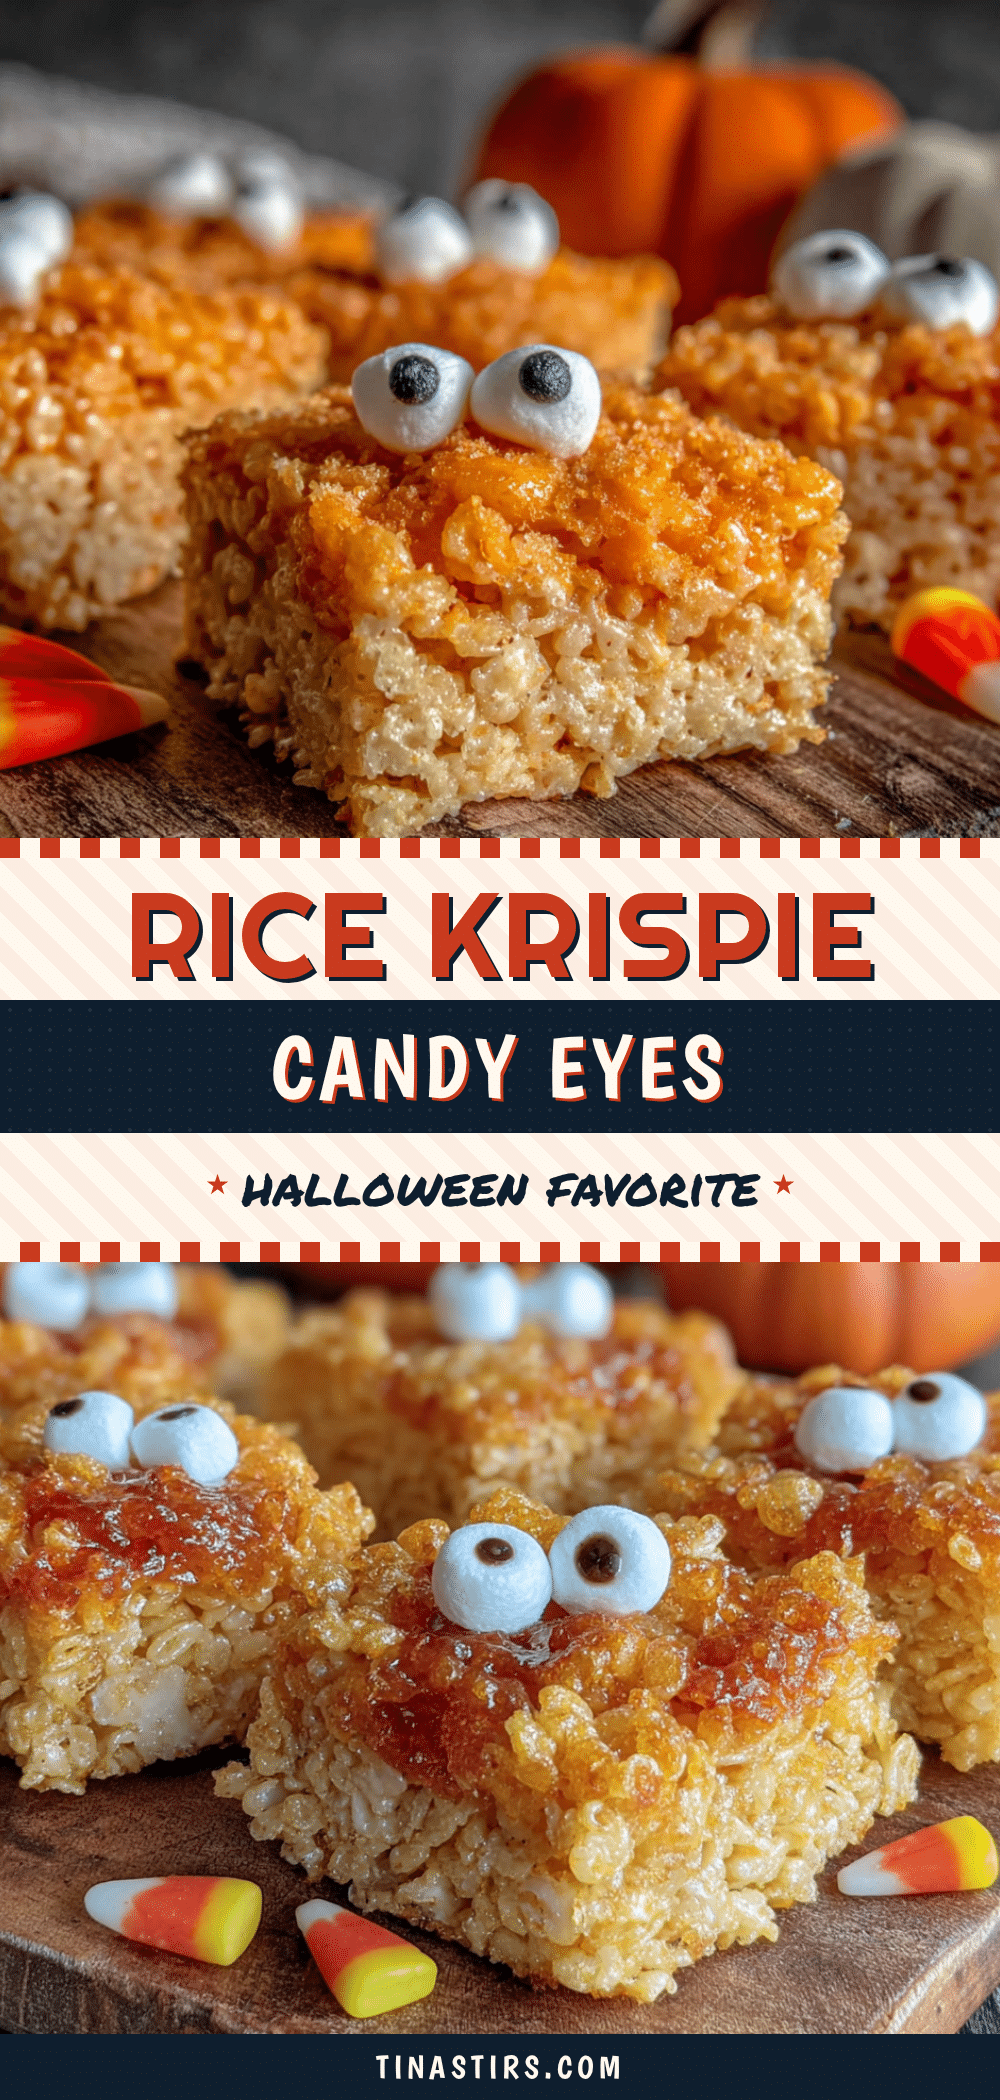
Halloween Rice Krispie Treats Recipe with Candy Eyes
These spooky Halloween Rice Krispie Treats with candy eyes are a quick and easy no-bake dessert that’s perfect for parties. The marshmallow base is perfectly chewy, and the candy eyes give them a goofy, spooky personality that kids and adults love.
- Prep Time: 10 minutes
- Cook Time: 15 minutes
- Total Time: 25 minutes
- Yield: 12 servings 1x
- Category: Dessert
- Cuisine: American
Ingredients
- 6 tablespoons unsalted butter
- 1 package (10 ounces) marshmallows
- 6 cups Rice Krispies cereal
- 1/4 teaspoon salt
- 1/2 cup candy eyes
- 1/4 cup white chocolate chips (optional)
- Orange and black sprinkles (optional)
Instructions
- Prep your pan: Line a 9×13-inch baking pan with parchment paper, leaving about 2 inches of overhang on two sides. Lightly spray the parchment with cooking spray.
- Melt the butter: In a large pot over medium-low heat, melt the 6 tablespoons of unsalted butter. Swirl the pot occasionally so it melts evenly.
- Add the marshmallows: Once the butter is fully melted, add the entire bag of marshmallows. Stir constantly with your spatula until the marshmallows are completely melted and the mixture is smooth, about 5 minutes.
- Season the mixture: Sprinkle in the 1/4 teaspoon of salt and stir to combine.
- Add the cereal: Remove the pot from the heat. Pour in the 6 cups of Rice Krispies cereal. Fold everything together gently but thoroughly.
- Press into the pan: Transfer the mixture to your prepared pan. Using a buttered spatula (or your hands, lightly buttered), press the mixture into an even layer.
- Add the candy eyes: While the treats are still warm (but not hot), press the candy eyes into the surface. Space them out evenly, about 6 to 8 per row. If using white chocolate to glue them, melt the chips in the microwave in 20-second intervals, then dab a tiny bit on the back of each eye before pressing it in.
- Let them set: Allow the treats to cool completely at room temperature, about 30 minutes.
- Cut and serve: Once cool, use the parchment overhang to lift the whole block out of the pan. Place on a cutting board and cut into squares using a sharp knife sprayed with cooking spray.
Notes
Don’t overheat the marshmallows; keep heat on medium-low and stir constantly. Use fresh cereal for best crunch. Butter all tools to prevent sticking. Add candy eyes right before serving for best appearance. Store in an airtight container at room temperature for up to 3 days. Do not refrigerate.
Nutrition
- Serving Size: 1 square
- Calories: 210
- Sugar: 18
- Sodium: 180
- Fat: 8
- Saturated Fat: 5
- Carbohydrates: 34
- Protein: 2
Keywords: Halloween Rice Krispie treats, candy eyes, no-bake dessert, Halloween dessert, easy treat, spooky treats


