Love this? Save it for later!
Share the inspiration with your friends
My brother-in-law, Mark, had claimed for years that he hated decorated sugar cookies. “Too sweet,” he’d say, waving a dismissive hand at the platter I’d set out for Thanksgiving. “All that frosting just covers up a dry, bland cookie.” He was very passionate about this opinion. For a solid decade, he was the designated sugar-cookie-skipper at every family gathering. Then, last October, I was testing this specific batch of Halloween cookies—just a small test run, honestly, mostly for the kids—and I caught him. It was a Tuesday afternoon, and I’d left the cooling rack on the counter while I ran to answer the phone. When I came back, Mark was standing there, mid-bite, with a ghost-shaped cookie in his hand and a guilty look on his face. He didn’t even try to deny it. He just mumbled, “Okay, these are different.” That was the moment I knew this recipe was a keeper. It’s the one that finally proved him wrong.
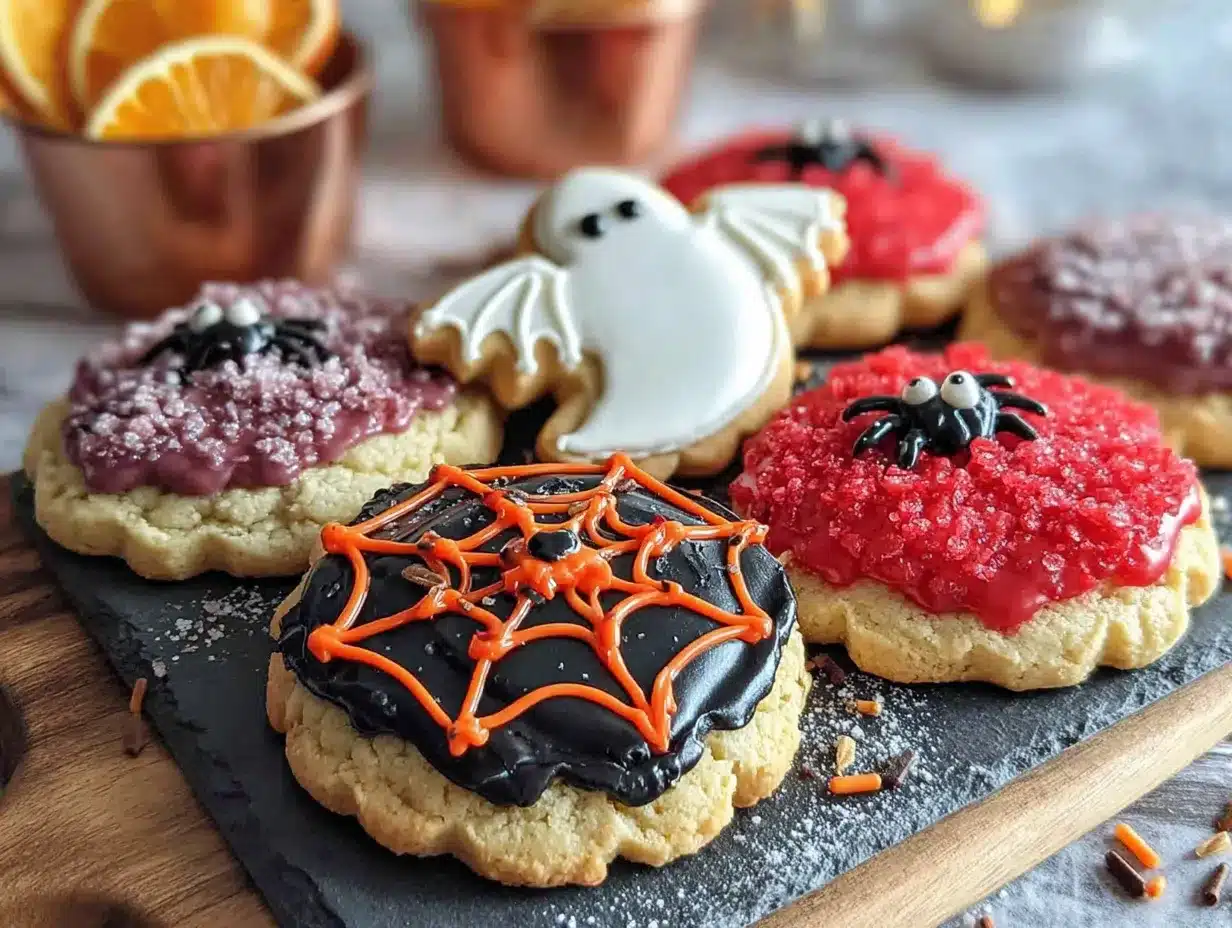
This isn’t just another sugar cookie. The secret is a whisper of almond extract that gives the dough a sophisticated edge, and a cream cheese tang that keeps the royal icing from being cloying. It’s the cookie that turns skeptics into believers, and honestly, it’s the perfect centerpiece for any Halloween gathering. Whether you’re hosting a spooky soiree or just want to impress your family with something a little extra, these cookies deliver. They have that perfect, slightly crisp edge with a soft, tender center that just melts. And the royal icing? It dries to a flawless, glossy finish that’s almost too pretty to eat. Almost.
Why You’ll Love This Recipe
Let me tell you, after years of testing and tweaking, this has become my go-to for holiday baking. It’s the recipe I pull out when I need something that looks like it took hours of professional work but actually comes together without a ton of stress. Here’s why it’s earned a permanent spot in my kitchen:
- Foolproof Royal Icing: No more runny, sticky messes. This recipe gives you a perfectly smooth, glossy icing that hardens beautifully for stacking and decorating.
- Soft, Not Cakey: The cream cheese in the dough creates an incredibly tender crumb without making the cookies puffy. They hold their shape perfectly, even with intricate cut-outs.
- Crowd-Pleasing Flavor: The combination of vanilla and almond extract is subtle but unforgettable. It’s “just sweet enough” without being overwhelming.
- Perfect for Hosting: You can make the dough and bake the cookies days ahead. The royal icing also stores beautifully, allowing you to decorate at your own pace before the big party.
- Unbelievably Beautiful: The glossy royal icing sets to a hard, shiny finish that looks like it belongs in a bakery window. It’s the kind of detail that makes your guests say, “Wait, you made these?”
This recipe isn’t just good—it’s the kind that makes you close your eyes after the first bite. It’s comfort food reimagined for the spookiest season of the year. Perfect for impressing guests without the last-minute panic, or turning a simple Halloween treat into something truly memorable.
What Ingredients You Will Need
This recipe uses simple, wholesome ingredients to deliver bold flavor and satisfying texture without the fuss. Most of these are pantry staples, which is a huge bonus when you’re planning for a crowd.
For the Sugar Cookies
- Unsalted butter, softened (1 cup / 226g) – I prefer Kerrygold for its rich flavor, but any good-quality unsalted butter works. Make sure it’s truly softened to room temperature for the creaming method to work properly.
- Cream cheese, softened (4 oz / 113g) – This is my secret weapon. It adds a subtle tang and keeps the cookies incredibly tender. Use full-fat for the best texture.
- Granulated sugar (1 ½ cups / 300g) – Standard white sugar. Don’t substitute with a liquid sweetener here, as it will change the cookie structure.
- Large egg (1) – Room temperature, please. A cold egg can seize the butter mixture.
- Vanilla extract (2 teaspoons) – Pure vanilla, not imitation, makes a difference in the final flavor depth.
- Almond extract (½ teaspoon) – This is optional, but I strongly recommend it. It gives the cookies a classic, almost marzipan-like flavor that pairs perfectly with royal icing.
- All-purpose flour (3 cups / 375g) – Spoon and level your flour for the most accurate measurement. Too much flour makes tough cookies.
- Baking powder (1 teaspoon) – Make sure it’s fresh for the best rise.
- Salt (½ teaspoon) – Fine sea salt is my go-to. It balances the sweetness.
For the Royal Icing
- Powdered sugar (4 cups / 480g) – Sift it! I know it’s a pain, but sifting prevents lumpy icing. I recommend C&H or Domino.
- Meringue powder (3 tablespoons) – This is the key to a stable, glossy icing that dries hard. You can find it at most craft stores or online.
- Warm water (6-7 tablespoons / 90-105ml) – The temperature matters. Warm water helps the meringue powder dissolve more easily.
- Vanilla extract (½ teaspoon) – Adds a hint of flavor to the icing.
- Food coloring – Gel or paste food coloring is best. Liquid drops can thin the icing too much. I use Americolor gels for vibrant, true colors.
Equipment Needed
You don’t need a professional bakery setup for these cookies, but a few key tools will make your life a whole lot easier. Trust me, I’ve tried making royal icing with just a whisk, and it was a sticky disaster.
- Stand mixer or hand mixer: A stand mixer is ideal for creaming the butter and making the royal icing, but a sturdy hand mixer works perfectly too.
- Rolling pin: I prefer a French rolling pin (without handles) for better control, but any rolling pin will do. If you have a rolling pin with adjustable thickness rings, it’s a game-changer for even cookies.
- Halloween cookie cutters: Ghosts, pumpkins, bats, and cats are my favorites. You can find inexpensive sets online or at craft stores.
- Parchment paper or silicone baking mats: Silicone mats are non-stick and reusable. Parchment paper is also great and easy to clean up.
- Piping bags and tips: I use disposable piping bags and a small round tip (like Wilton #2 or #3) for outlining and flooding. You can also use a snipped corner of a ziplock bag in a pinch.
- Cooling rack: Essential for letting the cookies cool completely before icing. A wire rack allows air to circulate and prevents soggy bottoms.
Preparation Method
Alright, let’s get to the good part. This method is broken down into two main stages: the cookies and the icing. I’ve included all my little tricks to make sure you get perfect results every time.
Making the Cookie Dough
- Cream the butter and cream cheese: In the bowl of your stand mixer fitted with the paddle attachment, beat the softened butter and cream cheese together on medium speed until light, fluffy, and completely combined—about 2 minutes. It should look pale and smooth. Don’t rush this step; it’s the foundation of your cookie’s texture.
- Add the sugar: Add the granulated sugar and beat on medium-high for another 2-3 minutes until the mixture is light and airy. You’ll see it get noticeably paler in color. Scrape down the sides of the bowl with a spatula.
- Incorporate the wet ingredients: Add the egg, vanilla extract, and almond extract. Beat on medium speed until just combined. The mixture might look a little curdled at this point—that’s totally normal, don’t panic.
- Mix the dry ingredients: In a separate bowl, whisk together the flour, baking powder, and salt. With the mixer on low speed, gradually add the dry ingredients to the wet mixture. Mix until just combined. You want a soft, cohesive dough that pulls away from the sides of the bowl. Overmixing will develop the gluten and make your cookies tough.
- Chill the dough: Divide the dough into two discs, wrap each tightly in plastic wrap, and refrigerate for at least 2 hours, or overnight. This step is non-negotiable. Chilled dough is much easier to roll out and helps the cookies hold their shape while baking. I often make the dough the night before a party.
Baking the Cookies
- Preheat and prep: Preheat your oven to 350°F (175°C). Line your baking sheets with parchment paper or silicone mats.
- Roll and cut: On a lightly floured surface, roll out one disc of dough to about ¼-inch (6mm) thickness. Use your Halloween cookie cutters to cut out shapes. Re-roll the scraps and cut out more cookies. Pro tip: Dip your cutters in a little flour to prevent sticking.
- Bake: Place the cookies about 1 inch apart on the prepared baking sheets. Bake for 8-10 minutes, or until the edges are just barely starting to turn a light golden brown. The centers should look set but not brown. They will continue to cook on the hot sheet after you take them out.
- Cool completely: Let the cookies cool on the baking sheet for 5 minutes before transferring them to a wire rack to cool completely. Do not even think about icing them until they are 100% cool. Warm cookies will melt the royal icing into a puddle.
Making and Using the Royal Icing
- Combine dry ingredients: In the bowl of your stand mixer (or a large bowl if using a hand mixer), whisk together the sifted powdered sugar and meringue powder.
- Add water and flavor: Add 6 tablespoons of warm water and the vanilla extract. Using the paddle attachment, beat on low speed until the sugar is moistened. Then, increase the speed to medium-high and beat for 5-7 minutes. The icing should become thick, glossy, and form stiff peaks. It should look like marshmallow fluff.
- Adjust the consistency: This is the most important part. For outlining, you want a stiff consistency (it holds its shape). For flooding (filling in the cookie), you need to thin it down. Add water, one teaspoon at a time, until the icing flows like honey. A good test: lift your spatula and drizzle the icing back into the bowl. The ribbon should disappear back into the surface within 10-15 seconds. If it’s too runny, add a little more sifted powdered sugar.
- Color and bag: Divide the icing into small bowls and add your gel food coloring. Stir until evenly colored. Transfer each color to a piping bag fitted with a small round tip (Wilton #2 or #3 is perfect).
- Decorate: Outline each cookie with the stiff icing. Then, use the flood consistency icing to fill in the outline. Use a toothpick to pop any air bubbles and spread the icing into the corners. Let the base layer dry for at least 4-6 hours (or overnight) before adding any details like faces or stripes.
Cooking Tips & Techniques
I’ve made more mistakes with sugar cookies than I care to admit. Here are the lessons I’ve learned the hard way so you don’t have to.
The Dough Must Be Cold: I cannot stress this enough. If your dough gets too warm while you’re rolling and cutting, it will spread in the oven and you’ll end up with puffy, blobby ghosts. If the dough starts to feel sticky, pop it back in the fridge for 15 minutes.
The “Barely Brown” Rule: Sugar cookies should be pale. The moment you see the edges turn golden, they are overbaked. Pull them out when the edges are just set and the centers look dry. They will firm up as they cool.
Royal Icing Timing: Royal icing dries quickly. Always keep a damp paper towel over the top of your piping bags when you’re not using them to prevent a crust from forming. If your icing gets too thick, just add a drop of water and stir.
Multitasking is Key: While your first batch of cookies is baking, roll out your next batch of dough. While the cookies are cooling, make your icing. This keeps the workflow smooth and prevents that frantic, “everything-is-happening-at-once” feeling. I always bake a day before I plan to decorate, which takes all the pressure off.
Variations & Adaptations
One of the best things about this recipe is how flexible it is. Here are a few ways I’ve changed it up over the years.
- Gluten-Free Version: Swap the all-purpose flour for a 1:1 gluten-free baking flour blend (like Bob’s Red Mill). The texture will be slightly more tender, but the flavor is still spot on. Make sure to chill the dough a little longer.
- Spiced Halloween Cookies: For a fall twist, add 1 teaspoon of pumpkin pie spice and ½ teaspoon of ground ginger to the dry ingredients. It gives the cookies a warm, cozy flavor that’s perfect for a chilly October evening.
- Chocolate Base: Replace ¼ cup of the flour with ¼ cup of unsweetened cocoa powder. This creates a dark, chocolatey cookie that looks amazing with bright orange and green royal icing. It’s like a brownie-cookie hybrid.
- Lemon Royal Icing: For a citrusy kick, replace the vanilla extract in the royal icing with 1 teaspoon of fresh lemon juice and a pinch of lemon zest. The acidity cuts through the sweetness beautifully.
Serving & Storage Suggestions
These cookies are best served at room temperature. The royal icing will be hard and glossy, and the cookie will be perfectly tender. They make a stunning centerpiece for a Halloween dessert table.
What to Serve Alongside: Pair these cookies with a warm mug of spiced apple cider, a pumpkin spice latte, or a glass of cold milk for the kids. For an adult gathering, a dark stout or a bourbon cocktail complements the vanilla-almond flavor wonderfully.
Storage: Store the decorated cookies in an airtight container at room temperature. Place them in a single layer, or separate layers with a sheet of parchment paper. They will stay fresh for up to 1 week. In fact, the flavor actually improves after a day or two as the cookie softens slightly from the icing’s moisture.
Freezing: You can freeze the undecorated, baked cookies for up to 3 months. Just wrap them tightly in plastic wrap and then foil. Thaw them at room temperature before icing. I do not recommend freezing decorated cookies, as the icing can get sticky when thawed.
Nutritional Information & Benefits
Let’s be real—these are a treat, not a health food. But there are a few silver linings! The cream cheese adds a small amount of protein and calcium. The almond extract provides a rich flavor without any extra sugar or fat.
Here is an estimated nutritional breakdown per cookie (based on a 3-inch ghost shape, with icing):
| Nutrient | Amount per cookie |
|---|---|
| Calories | 180 |
| Total Fat | 8g |
| Saturated Fat | 5g |
| Cholesterol | 25mg |
| Sodium | 85mg |
| Total Carbohydrates | 26g |
| Sugars | 18g |
| Protein | 2g |
Dietary Considerations: This recipe contains dairy (butter, cream cheese), eggs, and gluten (wheat flour). It can be made gluten-free with a 1:1 flour blend. It is not suitable for vegan diets without significant substitutions.
Conclusion
These Halloween sugar cookies are more than just a recipe—they are a tradition in the making. They are the cookie that converts the skeptics, the one that makes your party table look like a professional bakery display, and the one that brings a little bit of magic to the spooky season. I love this recipe because it’s reliable. I know that every time I pull out my ghost cutter and whip up a batch of royal icing, I’m going to get beautiful, delicious results that make people smile.
So go ahead, give them a try. Don’t be afraid to get creative with your decorations—maybe a zombie pumpkin or a vampire bat? I’d love to see what you come up with. Share your photos in the comments below, or tag me on social media. Happy Halloween baking, friend!
Frequently Asked Questions
Can I skip the chilling time for the dough?
Honestly, no. Chilling the dough is the single most important step for preventing spread. Without it, your cookies will turn into flat, shapeless blobs. If you’re in a rush, you can chill the dough for just 30 minutes, but 2 hours is much better.
Why is my royal icing not hardening?
This usually happens if the icing is too thin. You need a good balance of water and powdered sugar. If your icing is runny, add more sifted powdered sugar, one tablespoon at a time, until it holds a stiff peak. Also, make sure your cookies are completely cool before icing them.
Can I use liquid food coloring?
You can, but I don’t recommend it. Liquid food coloring will thin out your royal icing and can make it too runny. Gel or paste food coloring is much more concentrated and won’t affect the consistency. It also gives you much more vibrant colors.
How far in advance can I make these cookies?
You have a lot of options here. You can make the dough up to 3 days ahead and keep it refrigerated. You can bake the cookies up to a week ahead and store them in an airtight container. And you can decorate them up to 3 days before your event. The cookies actually taste better after a day or two!
My cookies spread in the oven. What went wrong?
This is usually a sign that the dough was too warm, or your butter was too soft. Make sure your butter is just softened, not melted. Also, double-check that you used the correct amount of flour. Too little flour will cause spreading. Next time, try chilling the cut-out cookies on the baking sheet for 10 minutes before putting them in the oven.
Pin This Recipe!
Perfect Halloween Sugar Cookies Recipe – Easy Royal Icing

These Halloween sugar cookies have a whisper of almond extract and a cream cheese tang that keeps the royal icing from being cloying. They are the perfect centerpiece for any Halloween gathering, with a slightly crisp edge and a soft, tender center.
- Prep Time: 30 minutes
- Cook Time: 10 minutes
- Total Time: 2 hours 40 minutes (includes chilling)
- Yield: 24 servings 1x
- Category: Dessert
- Cuisine: American
Ingredients
- 1 cup (226g) unsalted butter, softened
- 4 oz (113g) cream cheese, softened
- 1 ½ cups (300g) granulated sugar
- 1 large egg, room temperature
- 2 teaspoons vanilla extract
- ½ teaspoon almond extract
- 3 cups (375g) all-purpose flour
- 1 teaspoon baking powder
- ½ teaspoon fine sea salt
- 4 cups (480g) powdered sugar, sifted
- 3 tablespoons meringue powder
- 6–7 tablespoons (90-105ml) warm water
- ½ teaspoon vanilla extract
- Gel food coloring (optional)
Instructions
- Cream the butter and cream cheese: In the bowl of a stand mixer fitted with the paddle attachment, beat the softened butter and cream cheese together on medium speed until light, fluffy, and completely combined—about 2 minutes.
- Add the sugar: Add the granulated sugar and beat on medium-high for another 2-3 minutes until the mixture is light and airy. Scrape down the sides of the bowl.
- Incorporate the wet ingredients: Add the egg, vanilla extract, and almond extract. Beat on medium speed until just combined.
- Mix the dry ingredients: In a separate bowl, whisk together the flour, baking powder, and salt. With the mixer on low speed, gradually add the dry ingredients to the wet mixture. Mix until just combined.
- Chill the dough: Divide the dough into two discs, wrap each tightly in plastic wrap, and refrigerate for at least 2 hours, or overnight.
- Preheat and prep: Preheat your oven to 350°F (175°C). Line your baking sheets with parchment paper or silicone mats.
- Roll and cut: On a lightly floured surface, roll out one disc of dough to about ¼-inch (6mm) thickness. Use Halloween cookie cutters to cut out shapes. Re-roll the scraps and cut out more cookies.
- Bake: Place the cookies about 1 inch apart on the prepared baking sheets. Bake for 8-10 minutes, or until the edges are just barely starting to turn a light golden brown.
- Cool completely: Let the cookies cool on the baking sheet for 5 minutes before transferring them to a wire rack to cool completely.
- Combine dry ingredients: In the bowl of a stand mixer, whisk together the sifted powdered sugar and meringue powder.
- Add water and flavor: Add 6 tablespoons of warm water and the vanilla extract. Beat on low speed until the sugar is moistened, then increase speed to medium-high and beat for 5-7 minutes until thick, glossy, and forms stiff peaks.
- Adjust the consistency: For outlining, keep icing stiff. For flooding, add water one teaspoon at a time until the icing flows like honey (ribbon disappears into surface within 10-15 seconds).
- Color and bag: Divide the icing into small bowls and add gel food coloring. Transfer each color to a piping bag fitted with a small round tip (Wilton #2 or #3).
- Decorate: Outline each cookie with stiff icing, then flood with thinned icing. Use a toothpick to pop air bubbles. Let base layer dry for 4-6 hours or overnight before adding details.
Notes
Chilling the dough is non-negotiable to prevent spreading. For best results, bake cookies a day before decorating. Royal icing dries quickly; keep piping bags covered with a damp paper towel. Use gel food coloring for vibrant colors without thinning the icing.
Nutrition
- Serving Size: 1 cookie (3-inch gho
- Calories: 180
- Sugar: 18
- Sodium: 85
- Fat: 8
- Saturated Fat: 5
- Carbohydrates: 26
- Protein: 2
Keywords: Halloween sugar cookies, royal icing, decorated cookies, ghost cookies, pumpkin cookies, easy sugar cookies