Love this? Save it for later!
Share the inspiration with your friends
It was 11:47 PM on a random Wednesday in October, and I had a ridiculous, very specific craving for something cute. Like, aggressively cute. Not a brownie, not a cookie — I wanted something that would make people actually gasp when they saw it. The problem? I was out of butter (tragic), out of chocolate chips (also tragic), and frankly too tired to drive to the store. But I had egg whites. I had sugar. And I had this wild idea floating around in my tired brain — what if I made meringues that looked like tiny ghosts? Honestly, it felt a little unhinged at that hour. I mean, piping meringue at nearly midnight? That’s the kind of thing you do when nobody’s watching and you’ve got nothing to lose. I grabbed my hand mixer, cracked three eggs, and just went for it. The kitchen was quiet except for the whir of the mixer and my own little laugh at how ridiculous this whole situation was. Twenty minutes later, I had a baking sheet full of the most adorable little ghosts I’d ever seen — puffy, white, and absolutely perfect. I almost woke up my roommate just to show her. That night, something clicked. These weren’t just cookies. They were the kind of thing you bring to a party and watch people lose their minds over. And let me tell you — I’ve been making them for every Halloween gathering since.
Maybe you’ve been there — standing in your kitchen at an unreasonable hour, chasing a craving that makes no sense but feels absolutely necessary. That’s exactly where these ghost meringue cookies were born. And honestly? I think the weird, late-night energy is what made them so good. There were no rules. No one to impress. Just me, a piping bag, and a vision.
These aren’t your average meringue cookies. They’re light, they’re crisp, they melt in your mouth, and they’re stupidly cute. Like, Instagram-worthy, guest-impressing, conversation-starting cute. And the best part? They only need three ingredients. Three. If you can separate an egg and whip it into stiff peaks, you can make these adorable Halloween ghost meringue cookies. I promise.
Why You’ll Love This Recipe
Look, I’ve tested a lot of Halloween recipes over the years. Some are complicated. Some are messy. Some just don’t deliver on the “wow” factor. These ghost meringue cookies? They hit every single note. Here’s why I keep coming back to them, and why you will too:
- Only 3 Ingredients: Egg whites, sugar, and vanilla extract. That’s it. No butter, no flour, no weird specialty items. You probably have everything right now.
- Naturally Gluten-Free & Low-Fat: These cookies are basically air and sugar. If you’re hosting guests with dietary restrictions, these are a lifesaver. Nobody has to miss out on the Halloween fun.
- Prep in 15 Minutes: The mixing and piping takes almost no time. The oven does the heavy lifting. You can whip these up while your guests are on their way.
- Perfect for Parties: They’re light, not filling, and absolutely adorable. People pick them up, smile, and then reach for another one. They’re the perfect bite-sized treat that doesn’t weigh anyone down.
- Make-Ahead Friendly: These store beautifully in an airtight container for up to two weeks. You can prep them days before your party and not stress about last-minute baking.
- Unbelievably Cute: I’m not exaggerating — every single time I bring these to a gathering, someone says “Wait, you MADE these?” They look like they came from a fancy bakery. But they didn’t. They came from your kitchen at 11 PM on a whim.
What makes these different from every other meringue recipe out there? It’s the technique. I’ve tested the ratios, the temperatures, and the timing so you don’t have to. These ghosts hold their shape perfectly, stay bright white (no browning!), and have that signature crisp exterior with a slightly chewy center. They’re not just another version of a meringue cookie — they’re the best version.
And honestly? There’s something deeply satisfying about making something this cute from scratch. It feels like a little magic trick. You take three humble ingredients, whip them into a cloud, and bake them into little ghosts that make everyone smile. That’s the kind of cooking I live for.
What Ingredients You Will Need
This recipe uses the simplest ingredients to create something truly special. No fancy shopping trips, no obscure extracts — just pantry staples that come together like magic. Let me walk you through each one and why it matters.
- Large Egg Whites (3, at room temperature): This is the backbone of your meringue. Room temperature egg whites whip up higher and hold more air than cold ones. I always separate my eggs while they’re cold (it’s easier), then let the whites sit on the counter for about 30 minutes before whipping. If you’re in a rush, place the bowl of egg whites in a warm water bath for 5 minutes. Pro tip: make sure absolutely NO yolk gets in there. Even a tiny speck of fat can ruin your meringue. I separate each egg into a small bowl first, then add the white to my mixing bowl. Better safe than sorry.
- Granulated Sugar (3/4 cup / 150g): Regular white sugar is perfect here. Don’t use powdered sugar or superfine sugar — granulated sugar dissolves beautifully when whipped properly and gives meringues their signature structure. The key is adding it slowly, a tablespoon at a time, so it dissolves completely between additions. If you rush this step, you’ll end up with gritty meringue, and nobody wants that. I’ve tested this with organic cane sugar too, and it works great — just make sure it’s finely granulated.
- Vanilla Extract (1 teaspoon): Pure vanilla extract adds warmth and depth to the flavor. I recommend Nielsen-Massey or Simply Organic for the best flavor. You can also use vanilla bean paste for those little specks of vanilla bean, which look gorgeous against the white meringue. If you’re making these for a party, the vanilla really shines through — it’s subtle but noticeable.
- Cream of Tartar (1/4 teaspoon, optional but recommended): This is my secret weapon. Cream of tartar stabilizes the egg whites, making them less likely to deflate and helping them hold their shape better. It also gives the meringue a slightly firmer texture. If you don’t have it, you can skip it — but your meringues might be a little more fragile. A squeeze of lemon juice (about 1/2 teaspoon) can also work in a pinch.
- Mini Chocolate Chips (for eyes, about 1/4 cup): These are what bring your ghosts to life! You’ll press two mini chocolate chips into each ghost before baking to create eyes. I use Enjoy Life mini chocolate chips (they’re dairy-free and allergy-friendly), but any brand works. Just make sure they’re mini — regular-sized chips will look too big and might sink into the meringue. If you don’t have mini chips, you can use a toothpick dipped in melted chocolate to draw eyes after baking.
A quick note on ingredient selection: I’ve tested this recipe with both fresh and pasteurized egg whites. Fresh egg whites from the carton actually work surprisingly well — just make sure they’re 100% egg whites with no added stabilizers. I’ve also tried this with aquafaba (the liquid from canned chickpeas) for a vegan version, and while it works, the texture is slightly different. For the classic, foolproof version, stick with real egg whites.
And here’s a little secret I learned the hard way: don’t make these on a humid day. Meringue is basically a sugar sponge, and humidity is its enemy. If it’s raining or super humid outside, your meringues might turn out sticky or chewy instead of crisp. Save this recipe for a dry day, or crank up your air conditioning. Trust me on this one.
Equipment Needed
You don’t need a professional bakery setup for these ghost meringue cookies. Here’s what I use and what you can substitute if you’re improvising:
- Electric Hand Mixer or Stand Mixer: Whipping egg whites by hand is possible, but it’ll take you about 15 minutes of vigorous whisking. I use my KitchenAid stand mixer with the whisk attachment for hands-free convenience. If you’re using a hand mixer, just make sure you have a deep, narrow bowl to prevent splatter.
- Large Mixing Bowl: Glass or metal works best. Plastic bowls can sometimes hold onto grease, which will sabotage your meringue. I use a stainless steel bowl because it’s easy to keep completely clean.
- Piping Bag with Round Tip: A piping bag gives you control over the shape. I use a Wilton #12 round tip. No piping bag? No problem. A sturdy zip-top bag with the corner snipped off works perfectly. Just don’t use the cheap sandwich bags — they’ll burst under pressure.
- Baking Sheets (2): Line them with parchment paper or silicone baking mats. Do NOT use wax paper or greased sheets — the meringue needs something non-stick to release cleanly.
- Kitchen Scale (optional but helpful): Measuring sugar by weight is more accurate than volume, especially for meringue. If you have one, use it. If not, spoon your sugar into the measuring cup and level it off — don’t scoop directly from the bag.
- Small Offset Spatula: Great for smoothing the meringue in the piping bag and for any last-minute shaping. A butter knife works in a pinch.
I bought my piping bag set for about $10 on Amazon, and it’s lasted me years. If you’re just starting out, don’t overthink the equipment. A zip-top bag and a pair of scissors will get the job done.
Preparation Method
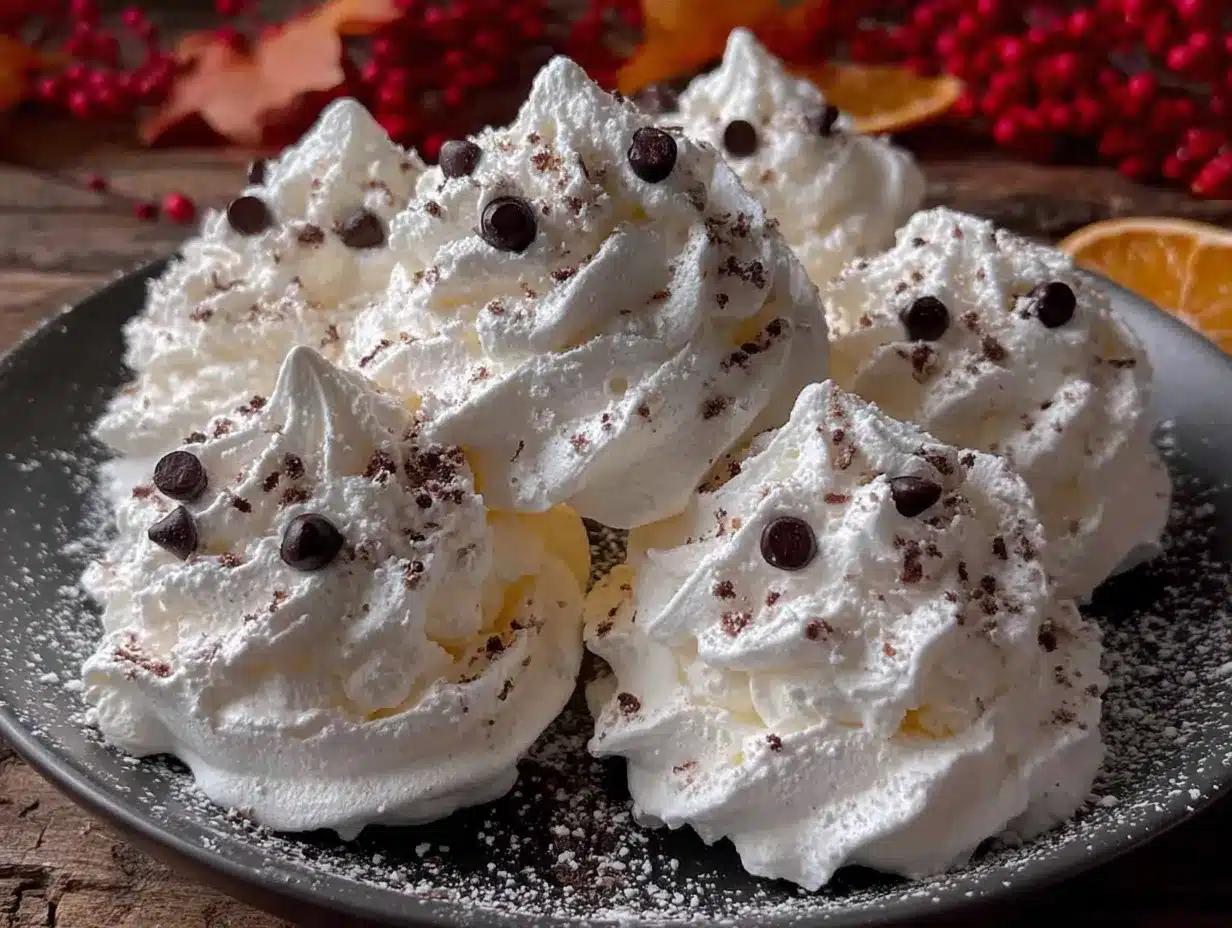
Alright, let’s make some ghosts. I’ve broken this down into clear steps with all the little details I’ve learned from making these about fifty times. Take your time with the first step — it’s the most important one.
- Preheat your oven to 200°F (93°C). Yes, that’s low. We’re not baking these — we’re drying them out. Line two baking sheets with parchment paper or silicone mats. Set them aside.
- Prepare your egg whites. Separate three large eggs while cold, placing the whites in your clean, dry mixing bowl. Let them sit at room temperature for 20-30 minutes. Cold egg whites don’t whip as high, and we want maximum volume here.
- Add cream of tartar. If you’re using it, sprinkle 1/4 teaspoon cream of tartar over the egg whites. This stabilizes everything and helps your ghosts hold their shape.
- Start whipping. Begin mixing on medium speed. After about 30 seconds, the egg whites will become foamy and bubbly. This is good. Keep going until soft peaks form — when you lift the whisk, the peaks should droop slightly.
- Add sugar slowly. Here’s where patience pays off. With the mixer running on medium-high, add the granulated sugar one tablespoon at a time. I know it feels tedious, but this is what gives you a silky, stable meringue. Each addition should be fully incorporated before you add the next. This takes about 5-7 minutes total.
- Add vanilla. Once all the sugar is in, drizzle in the vanilla extract. Mix on high speed for another 2-3 minutes.
- Check for stiff peaks. This is the moment of truth. Stop the mixer and lift the whisk. The meringue should stand up in stiff, glossy peaks that don’t droop. Rub a tiny bit between your fingers — it should feel smooth, not gritty. If it’s gritty, keep whipping. If it’s still soft, keep whipping. Don’t stop until it’s stiff and glossy.
- Fill your piping bag. Fit your piping bag with the round tip. Fold the top of the bag over your hand to create a cuff, then spoon the meringue in. Don’t overfill — about halfway is perfect. Twist the top of the bag closed and squeeze a tiny bit out to release any air bubbles.
- Pipe the ghosts. Hold the piping bag straight up and down, about 1/2 inch above the baking sheet. Squeeze gently to create a round base, then pull straight up while squeezing to create a tall, teardrop shape. Release pressure and pull away quickly to create a little point on top. Each ghost should be about 1.5 inches tall. Leave about 1 inch between them — they don’t spread much, but they need airflow.
- Add the eyes. Here’s the fun part. While the meringue is still wet, gently press two mini chocolate chips into each ghost for eyes. Don’t push too deep — you want them to stay visible. I usually place them about 1/3 of the way down from the top.
- Bake low and slow. Place both baking sheets in the oven. Bake at 200°F (93°C) for 1 hour and 30 minutes. After 90 minutes, turn off the oven but leave the ghosts inside. Let them cool completely in the oven with the door closed — this takes about 1-2 hours. This gradual cooling prevents cracking.
- Check for doneness. Your ghosts are ready when they lift easily off the parchment paper. They should be dry on the outside and light as air. If they stick, they need more time. Return them to the turned-off oven for another 30 minutes.
A few things I’ve learned the hard way: Don’t open the oven during baking. The temperature fluctuation can cause your ghosts to crack or deflate. And if your kitchen is humid, expect the baking time to be longer. One time I made these on a rainy day and they took almost 3 hours to dry out. Patience is key here.
Cooking Tips & Techniques
I’ve made enough batches of these ghost meringue cookies to fill a small cemetery. Here are the tips I wish someone had told me before my first attempt:
Cleanliness is non-negotiable. Any trace of grease or yolk will ruin your meringue. Wash your bowl and whisk with hot, soapy water, then wipe them down with a little white vinegar on a paper towel. This removes any lingering fat. I learned this after one particularly disastrous batch that refused to whip — turns out my bowl had a tiny smear of butter residue.
Don’t rush the sugar. I know it’s tempting to dump it all in at once, but trust me — slow and steady wins this race. Adding sugar too quickly deflates the egg whites and leaves you with a grainy texture. Set a timer if you have to. Each tablespoon needs about 15-20 seconds to incorporate.
Watch for over-whipping. Yes, that’s a thing. If you whip too long, the meringue will become dry and grainy, and it’ll start to separate. You’ll see liquid pooling at the bottom of the bowl — that’s a sign you’ve gone too far. Stop as soon as you have stiff, glossy peaks.
Pipe with confidence. Your first ghost might look a little wonky. That’s okay! I always pipe a few practice ones on the edge of the sheet. The key is a steady hand and consistent pressure. If you squeeze too hard, the ghost will spread out like a pancake. Too soft, and it’ll be tiny. Find your rhythm.
Humidity is the enemy. I cannot stress this enough. Meringue absorbs moisture from the air, which makes it sticky and soft. If you live in a humid climate, bake these on the driest day possible. You can also run a dehumidifier in your kitchen while they’re cooling.
Store them right. Once cooled, transfer your ghosts to an airtight container immediately. If you leave them out, they’ll absorb moisture from the air and lose their crunch. I store mine with a silica gel packet (the kind that comes in shoe boxes) to keep them perfectly crisp. Layer them between sheets of parchment paper so the chocolate eyes don’t get smudged.
One of my biggest failures? I once tried to double the batch and made the meringue in a bowl that was too small. It overflowed, got all over my counter, and I ended up with a sticky mess. Lesson learned — always use a bowl that looks too big for the job. Meringue expands a lot.
Variations & Adaptations
These ghost meringue cookies are endlessly adaptable. Here are some of my favorite variations:
Chocolate Ghosts: Sift 2 tablespoons of unsweetened cocoa powder into the sugar before adding it to the egg whites. You’ll get pale brown ghosts with a subtle chocolate flavor. They look like little chocolate marshmallows — equally adorable.
Peppermint Ghosts: Swap the vanilla extract for 1/2 teaspoon peppermint extract. Add a drop of red food coloring to create a pale pink tint if you want. These are perfect for Christmas parties or winter gatherings. Just don’t use too much extract — peppermint is potent.
Lemon Ghosts: Replace the vanilla with 1 teaspoon lemon extract and add 1 teaspoon of finely grated lemon zest. The citrus flavor cuts through the sweetness beautifully. These are bright, fresh, and perfect for spring or summer parties.
Vegan Version: Use aquafaba (the liquid from a can of chickpeas) instead of egg whites. 3 tablespoons of aquafaba replaces 1 egg white. Whip it the same way — it takes a little longer to reach stiff peaks, but it works. The texture is slightly less crisp, but still delicious.
Colorful Ghosts: Add a few drops of gel food coloring to the meringue before piping. Swirl it in gently for a marbled effect, or mix it fully for solid colors. Orange ghosts for Halloween, pink for Valentine’s Day, green for St. Patrick’s Day — the possibilities are endless.
Filled Ghosts: Pipe a small dollop of jam, Nutella, or lemon curd onto the baking sheet, then pipe the meringue over it. The filling gets hidden inside the ghost — a fun surprise for guests. Just make sure the filling isn’t too runny, or it’ll leak out during baking.
I tried a lavender version once by adding dried culinary lavender buds to the sugar. It looked beautiful but tasted like soap. So maybe skip that one unless you’re really into floral flavors. Stick with the classics — they’re classic for a reason.
Serving & Storage Suggestions
These ghost meringue cookies are best served at room temperature, straight from the container. They’re light, airy, and practically melt on your tongue. Here’s how to make them the star of your party:
Presentation Tips: Arrange your ghosts on a white platter or cake stand for maximum visual impact. Sprinkle a few mini chocolate chips around the base like “ghost droppings” — it’s a cute detail that guests always notice. For Halloween, I like to add a few fake spiderwebs and plastic spiders around the platter for a spooky vibe.
What to Serve Alongside: These pair beautifully with hot chocolate, coffee, or a warm apple cider. The sweetness of the meringue balances the bitterness of coffee perfectly. If you’re hosting a party, set up a hot chocolate bar with these ghosts as the edible decoration. Guests can grab a cookie and dip it in their drink if they want.
Storage Instructions: Store your ghosts in an airtight container at room temperature for up to 2 weeks. Do NOT refrigerate them — the moisture will ruin the texture. If you’re making them ahead for a party, bake them 2-3 days in advance and store them immediately after cooling. They actually get better after a day or two as the texture stabilizes.
Freezer Tips: Yes, you can freeze these! Place them in a single layer in a freezer-safe container with parchment paper between layers. Freeze for up to 3 months. Thaw at room temperature for about 30 minutes before serving. Don’t open the container while they’re thawing, or condensation will form and make them sticky.
Flavor Development: Freshly baked meringues are crisp and light. After a day or two, they develop a slightly chewy center while staying crisp on the outside. I actually prefer them after 24 hours — the texture is more complex. If you like yours extra crispy, bake them for an additional 15 minutes.
One thing I’ve noticed: these ghosts are surprisingly sturdy for something so delicate. I’ve transported them in a tin container with paper towels between layers, and they arrived at parties completely intact. Just don’t stack them too high — about three layers max.
Nutritional Information & Benefits
Let’s be real — these are cookies, not health food. But compared to most Halloween treats, they’re actually pretty light. Here’s the breakdown per ghost (based on the recipe making about 24 ghosts):
- Calories: Approximately 35-40 calories per ghost
- Fat: Less than 0.5g (mostly from the chocolate chips)
- Carbohydrates: 8-9g (mostly sugar)
- Protein: 1g
- Sugar: 7-8g
Health Benefits: Egg whites are a good source of protein without the fat and cholesterol of the yolk. They also contain riboflavin and selenium. The sugar provides quick energy — perfect for a little pick-me-up during a long party. These cookies are naturally gluten-free, dairy-free (if you use dairy-free chocolate chips), and nut-free, making them safe for most allergy-friendly gatherings.
Dietary Considerations: If you’re watching your sugar intake, these are definitely a treat, not an everyday snack. But compared to a typical Halloween cookie loaded with butter and chocolate, these are significantly lighter. One ghost satisfies that sweet craving without derailing your whole day.
Allergen Information: Contains eggs. The chocolate chips may contain dairy or soy depending on the brand. Use certified dairy-free chocolate chips if needed. These are naturally free of gluten, nuts, and soy (check your chocolate chip label).
I personally love that I can offer these at parties without worrying about most common allergens. It’s a small thing, but it means nobody feels left out. And honestly, when you’re hosting, that’s the best feeling.
Conclusion
These adorable Halloween ghost meringue cookies are proof that the best recipes often come from late-night kitchen experiments. They’re simple, they’re stunning, and they never fail to make people smile. Whether you’re hosting a Halloween party, bringing a treat to a potluck, or just want to make something fun for your family, these ghosts deliver every single time.
What I love most about this recipe is how it brings people together. I’ve watched kids light up when they see the little chocolate eyes. I’ve seen adults argue over who gets the last one. I’ve had friends text me weeks after a party asking for the recipe. That’s the kind of impact a simple cookie can have.
So go ahead — grab those egg whites, channel your inner midnight kitchen energy, and make some ghosts. Don’t worry if your first few look a little lopsided. Mine did too. That’s part of the charm. Each ghost has its own personality, just like the people who’ll be eating them.
I’d love to hear how yours turn out! Drop a comment below and tell me about your ghost-making adventures. Did you try a variation? Did your guests love them? Share your photos and tag me — I want to see your adorable ghost army. And if you have questions, ask away. I’m always here to help.
Happy haunting, and happy baking!
Frequently Asked Questions
Why did my meringue turn out sticky or chewy?
This usually happens because of humidity. Meringue absorbs moisture from the air, making it sticky instead of crisp. Try baking on a dry day, and make sure your ghosts cool completely in the turned-off oven with the door closed. Storing them immediately in an airtight container also helps.
Can I use liquid egg whites from a carton?
Yes, you can! Just make sure the carton says 100% egg whites with no added stabilizers or flavors. Measure out 6 tablespoons (about 90ml) to replace 3 large egg whites. Let them come to room temperature before whipping. I’ve tested this and it works perfectly.
How do I know when my meringue is whipped enough?
Lift the whisk attachment straight up. The meringue should form stiff peaks that stand up without drooping. Rub a tiny bit between your fingers — it should feel smooth, not gritty. If it’s gritty, keep whipping until the sugar dissolves completely. This usually takes 7-10 minutes total.
Can I make these without a piping bag?
Absolutely! Fill a sturdy zip-top bag with the meringue, snip off a small corner (about 1/4 inch), and pipe away. You can also use a spoon to drop rounded mounds onto the baking sheet — they’ll look more like little clouds than ghosts, but they’ll still be delicious. The chocolate eyes work on any shape.
How far in advance can I make these for a party?
You can bake these up to 2 weeks in advance! Store them in an airtight container at room temperature immediately after they cool. I usually make mine 2-3 days before a party — they actually taste better after a day or two as the texture stabilizes. Just keep them away from humidity and direct sunlight.
Pin This Recipe!
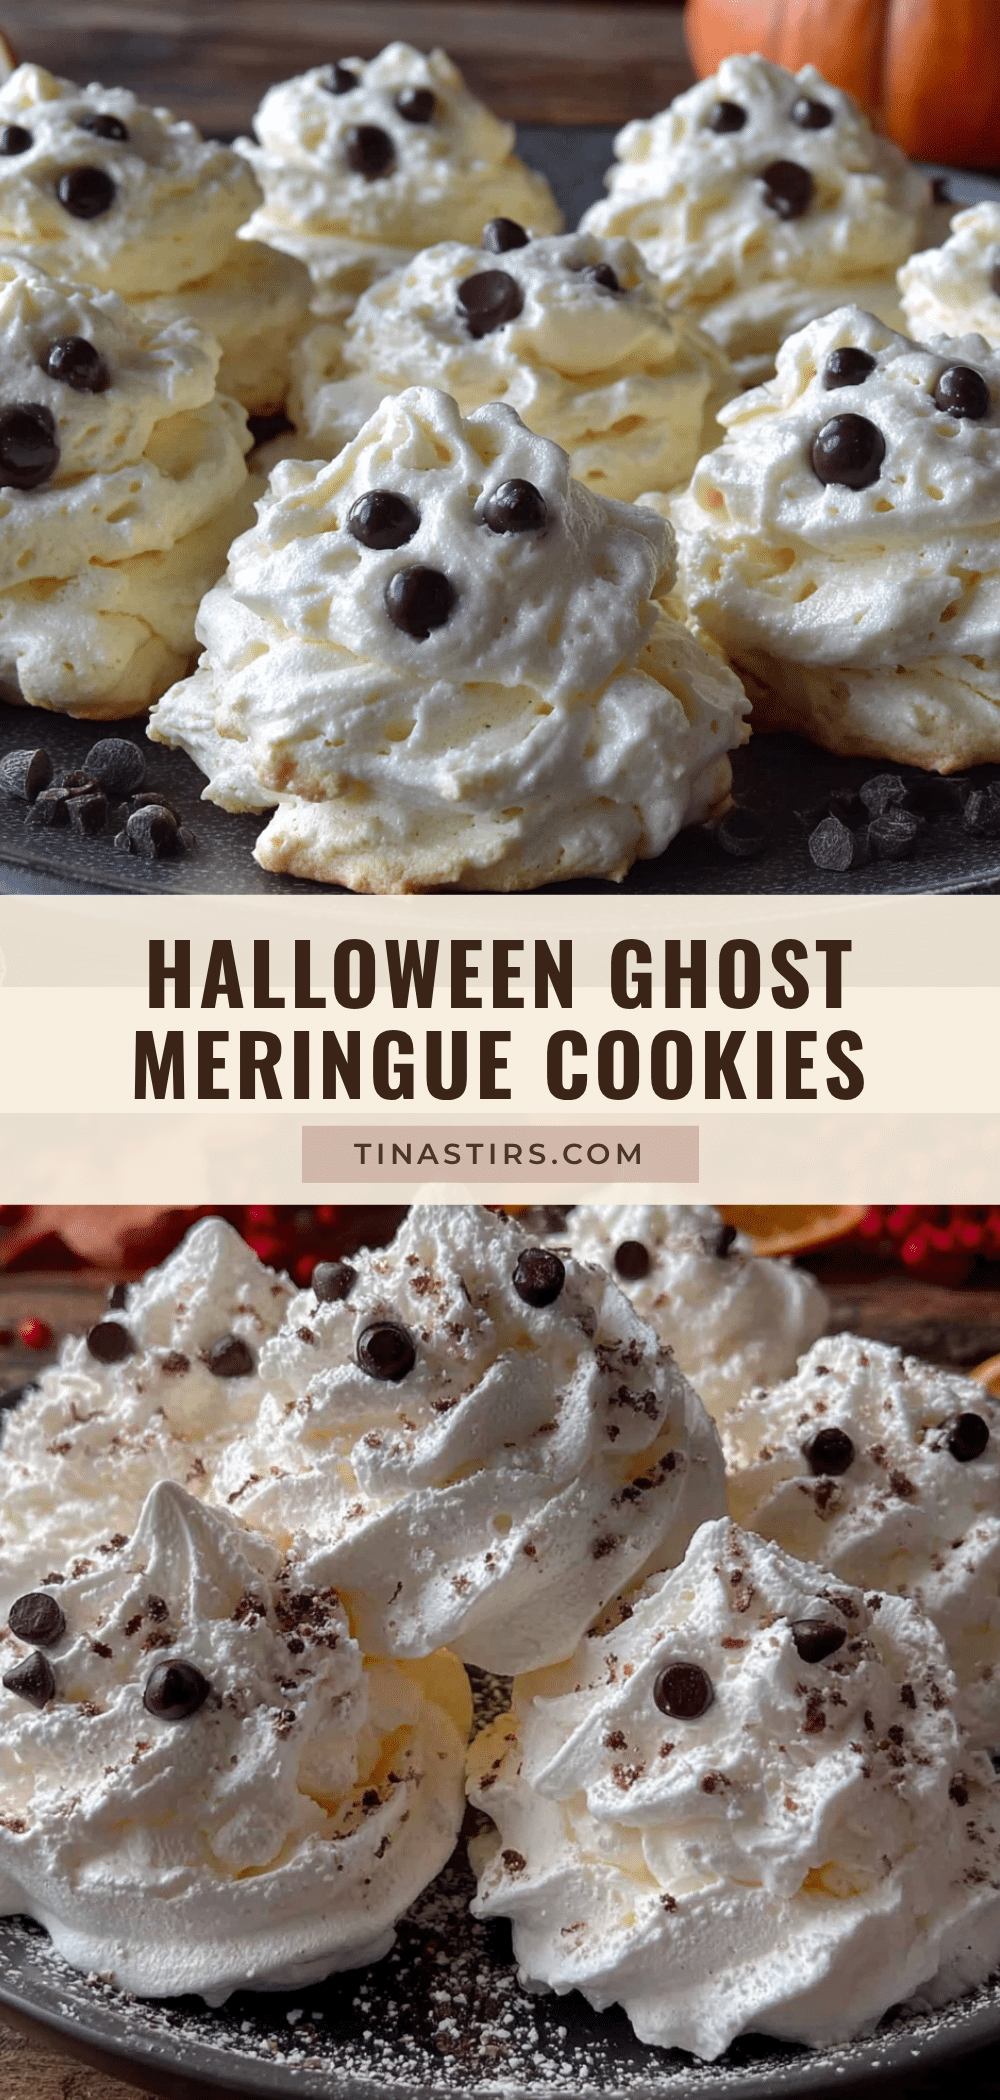
Adorable Halloween Ghost Meringue Cookies: Easy & Cute Party Treat
These light, crisp, and adorable ghost-shaped meringue cookies are made with just three ingredients and are perfect for Halloween parties. They are naturally gluten-free, low-fat, and guaranteed to impress guests.
- Prep Time: 15 minutes
- Cook Time: 1 hour 30 minutes
- Total Time: 2 hours 45 minutes (including cooling)
- Yield: 24 servings 1x
- Category: Dessert
- Cuisine: American
Ingredients
- 3 large egg whites, at room temperature
- 3/4 cup (150g) granulated sugar
- 1 teaspoon vanilla extract
- 1/4 teaspoon cream of tartar (optional but recommended)
- 1/4 cup mini chocolate chips (for eyes)
Instructions
- Preheat your oven to 200°F (93°C). Line two baking sheets with parchment paper or silicone mats.
- Separate three large eggs while cold, placing the whites in a clean, dry mixing bowl. Let them sit at room temperature for 20-30 minutes.
- If using, sprinkle 1/4 teaspoon cream of tartar over the egg whites.
- Begin mixing on medium speed until foamy, then continue until soft peaks form.
- With the mixer running on medium-high, add the granulated sugar one tablespoon at a time, fully incorporating each addition before adding the next (about 5-7 minutes total).
- Drizzle in the vanilla extract and mix on high speed for another 2-3 minutes until stiff, glossy peaks form.
- Fit a piping bag with a round tip. Fold the top of the bag over your hand, spoon the meringue in, and twist the top closed.
- Pipe ghosts onto the prepared baking sheets: hold the piping bag straight up, squeeze to create a round base, then pull straight up while squeezing to form a tall teardrop shape. Release pressure and pull away quickly to create a point on top. Leave about 1 inch between ghosts.
- While the meringue is still wet, gently press two mini chocolate chips into each ghost for eyes, about 1/3 of the way down from the top.
- Bake at 200°F (93°C) for 1 hour and 30 minutes. Turn off the oven and let the ghosts cool completely inside with the door closed (about 1-2 hours).
- Check for doneness: ghosts should lift easily off the parchment. If they stick, return to the turned-off oven for another 30 minutes.
Notes
Do not make on a humid day; humidity can cause sticky meringue. Ensure all equipment is completely grease-free. Add sugar slowly to avoid grainy texture. Do not open the oven during baking. Store in an airtight container at room temperature for up to 2 weeks. Can be frozen for up to 3 months.
Nutrition
- Serving Size: 1 ghost
- Calories: 3540
- Sugar: 78
- Sodium: 15
- Fat: 0.5
- Carbohydrates: 89
- Protein: 1
Keywords: Halloween, ghost, meringue, cookies, easy, gluten-free, party treat, three ingredients


