Love this? Save it for later!
Share the inspiration with your friends
I was digging through a dusty box of old cookbooks at a garage sale last fall—honestly, I was just looking for a vintage Pyrex dish to add to my collection—when the woman running the sale, a retired schoolteacher named Mrs. Kowalski, started talking about the jello salads she used to make for the church potlucks. “But my grandkids,” she said, wiping dust off a stained recipe card, “they only ever wanted the one that looked like candy corn.” I almost laughed. Jello that looked like candy corn? It sounded like something you’d see on a Pinterest fail board. But she was so earnest, describing the way the three layers set up, the way the kids’ faces lit up when they saw it on the dessert table. I bought the card for a quarter. Let me tell you, I was skeptical. I mean, I’ve made a lot of jello in my day, but layered jello is a whole different beast. It took me three tries to get the layers right—I almost gave up after the first one turned into a cloudy, orange mess. But now? These Perfect Candy Corn Jello Cups are my go-to for every fall gathering. They’re the kind of dessert that makes people stop, tilt their heads, and say, “Wait, how did you do that?” And honestly, the surprise on their faces? That’s the best part.
Maybe you’ve been to a fall potluck where the dessert table is all pumpkin pie and apple crisp. Don’t get me wrong, I love those too. But sometimes you need something that feels fresh, playful, and just a little bit unexpected. Something that makes the kids (and, let’s be honest, the adults) do a double-take. That’s where these jello cups come in. They’re not just a dessert; they’re a conversation starter. And once you see how easy they are to put together, you’ll be making them for every Halloween party, Friendsgiving, and casual dinner gathering you host.
Why You’ll Love This Recipe
I’ve tested this recipe more times than I care to admit. The first batch I made for a neighbor’s Halloween party was a total fail—the layers bled into each other, and it looked like a muddy sunset. But I learned from every mistake. Now, after countless trials, I can confidently say this version is foolproof. Here’s why you’ll love it:
- Quick & Easy: Despite looking like a fancy bakery creation, these cups come together in about 30 minutes of active prep time. The hardest part is waiting for the layers to set!
- Simple Ingredients: You probably already have jello boxes in your pantry. No fancy gelatin sheets or specialty molds here.
- Perfect for Parties: These are the ultimate showstopper for Halloween parties, fall potlucks, or Thanksgiving dessert tables. They’re individually portioned, so no slicing or serving stress.
- Crowd-Pleaser: Kids go wild for the candy corn look, and adults appreciate the nostalgic, creamy texture. I’ve never brought a tray home with leftovers.
- Unbelievably Delicious: The combination of sweet orange and lemon jello with a creamy, vanilla-infused middle layer is pure comfort. It’s like a creamsicle in jello form, but better.
What makes this recipe different from the dozens of other jello cup recipes out there? It’s the technique. I figured out that letting each layer set almost completely before adding the next is non-negotiable. But more importantly, I use a trick with the creamy middle layer—a blend of sweetened condensed milk and unflavored gelatin—that gives it a velvety texture that won’t separate. This isn’t just another version of layered jello. It’s the one that works every single time.
What Ingredients You Will Need
This recipe uses simple, pantry-friendly ingredients to create that iconic candy corn look. The magic is in how they layer together. Here’s what you’ll need, broken down by layer:
For the Orange Layer (Bottom):
- 1 box (3 oz) orange jello (I prefer Jell-O brand for consistent color and set)
- 1 cup boiling water
- 1/2 cup cold water
For the Yellow Layer (Top):
- 1 box (3 oz) lemon jello (or any yellow citrus flavor)
- 1 cup boiling water
- 1/2 cup cold water
For the Creamy White Layer (Middle):
- 1 packet (0.25 oz) unflavored gelatin (like Knox)
- 1/4 cup cold water (to bloom the gelatin)
- 1 can (14 oz) sweetened condensed milk
- 1 cup boiling water
- 1 teaspoon vanilla extract
Notes on Ingredients:
- Jello flavors: I’ve tested this with sugar-free jello, and it works, but the texture is slightly less firm. For the best, most vibrant colors, stick with regular jello. If you can’t find lemon, any yellow jello (like pineapple) works fine.
- Sweetened condensed milk: This is non-negotiable for the creamy layer. Don’t substitute evaporated milk—it won’t set properly and will taste thin. I always use Eagle Brand for the creamiest results.
- Unflavored gelatin: This is what gives the creamy layer structure. Without it, the milk layer would stay liquid and ruin the layers. Make sure you let it bloom in cold water first—this step is crucial.
- Vanilla extract: Use pure vanilla if you have it; it adds a warmth that complements the citrus. Imitation works in a pinch, but you’ll notice the difference.
You’ll also need about 10-12 clear plastic cups (9 oz size works perfectly) or small glass cups. Clear cups are key—you want to see those pretty layers!
Equipment Needed
You don’t need a fancy kitchen to pull these off. Here’s what I use:
- Small mixing bowls (at least 3) for each jello layer
- A liquid measuring cup for boiling water
- A whisk for mixing the jello and creamy layer
- 10-12 clear plastic cups (9 oz size) or small glass cups
- A small saucepan for boiling water
- A ladle or small measuring cup for pouring layers evenly
- Refrigerator space—you’ll need room for a tray of cups
Personal Tip: I’ve tried using a regular glass measuring cup to pour, but it drips everywhere. A small ladle gives you way more control. Also, if you don’t have clear cups, don’t stress—you can use small mason jars. Just make sure they’re straight-sided so the layers are visible. I picked up a pack of 50 clear plastic cups at the dollar store for under $3. They’re perfect for parties.
Preparation Method
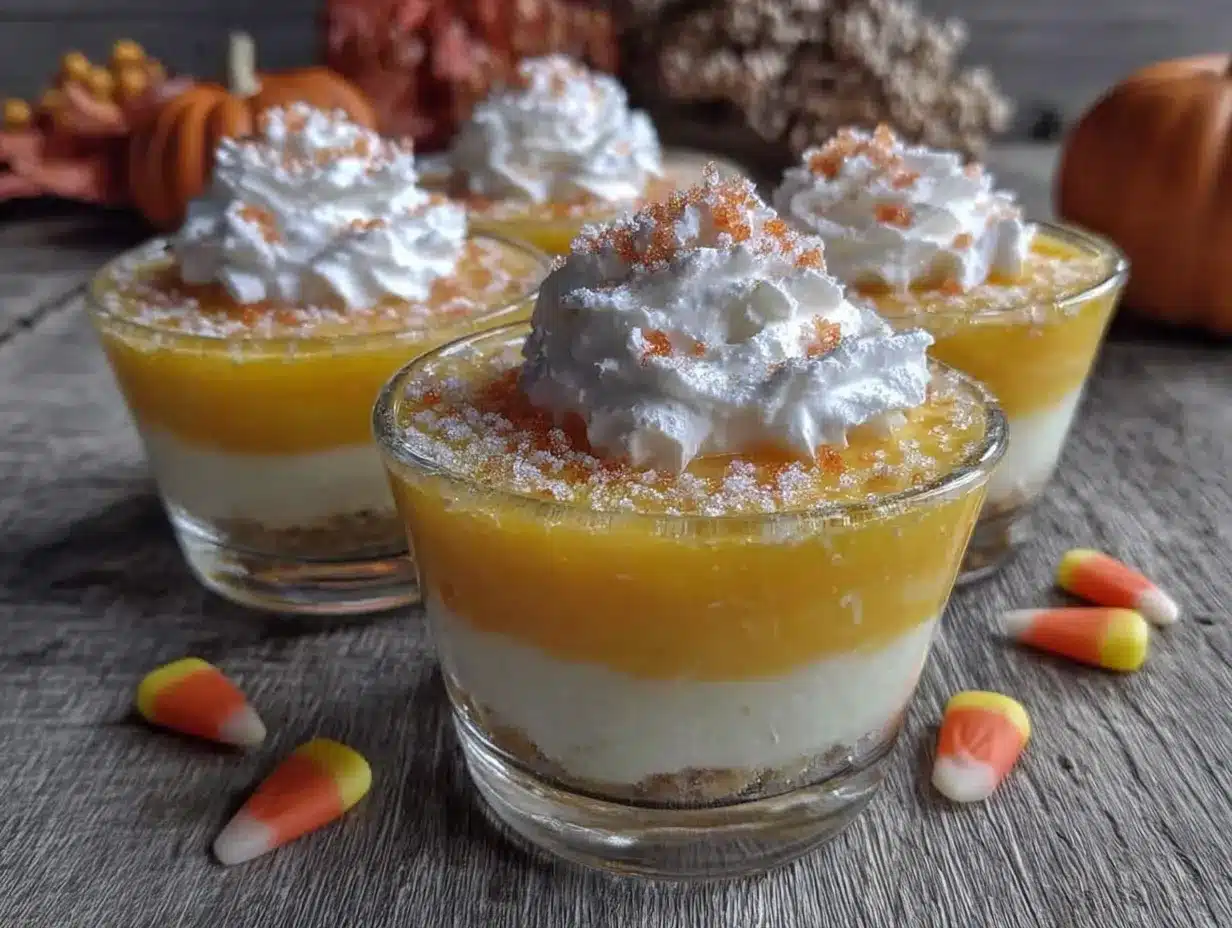
This recipe takes about 30 minutes of active work, plus about 4 hours of chilling time total. The key is patience—each layer needs to set fully before you add the next. Here’s exactly how to do it:
- Prep your cups: Arrange your 10-12 clear cups on a small baking sheet or tray. This makes it easy to move them in and out of the fridge without spilling.
- Make the orange layer (bottom): In a small bowl, empty the orange jello packet. Add 1 cup of boiling water and whisk for 2 minutes until the powder is completely dissolved. Add 1/2 cup of cold water and stir. Evenly divide the liquid among your cups, filling each about 1/3 of the way. Place the tray in the refrigerator and let set for at least 1 hour, or until the jello is firm to the touch. (Sensory cue: The jello should jiggle but not be liquid when you gently tap the cup.)
- Make the creamy white layer (middle): While the orange layer is setting, prepare the creamy layer. In a small bowl, sprinkle the unflavored gelatin over 1/4 cup of cold water. Let it sit for 5 minutes—this is called blooming. It will look like a thick, rubbery paste. In a separate bowl, combine the sweetened condensed milk and 1 cup of boiling water. Whisk until smooth. Add the bloomed gelatin and whisk again until fully dissolved. Stir in the vanilla extract. Let this mixture cool to room temperature—about 15-20 minutes. (Don’t rush this step! If the mixture is too warm, it will melt the orange layer when you pour it.)
- Add the creamy layer: Once the orange layer is fully set and the creamy mixture is cool, gently ladle the creamy mixture over the orange layer. Fill each cup about 2/3 full. Return the tray to the fridge for at least 1.5 hours, or until the creamy layer is firm.
- Make the yellow layer (top): In a small bowl, empty the lemon jello packet. Add 1 cup of boiling water and whisk for 2 minutes until dissolved. Add 1/2 cup of cold water and stir. Let this mixture cool to room temperature—about 15 minutes. (Again, don’t pour it hot over the creamy layer or it will melt and bleed.)
- Add the yellow layer: Once the creamy layer is firm, gently ladle the cooled yellow jello over the top, filling each cup almost to the rim. Return to the fridge for at least 1.5 hours, or until fully set.
- Serve: These are best served cold, straight from the fridge. If you’re making them for a party, you can prepare them a day ahead—they actually hold up beautifully overnight.
Important Tip: I learned the hard way that pouring warm liquid onto a set layer is a recipe for disaster. The heat causes the bottom layer to melt slightly, and you get a muddy mess instead of clean stripes. Always let each new layer cool to room temperature before pouring. Patience is your friend here!
Cooking Tips & Techniques
After making these about a dozen times (including some spectacular failures), I’ve picked up a few tricks that make the process smoother:
- Level your cups: Before you start, make sure your tray is level. I once put my tray on a slightly uneven shelf in the fridge, and all the layers set at an angle. It looked like a funhouse mirror version of candy corn. Not cute.
- Use a turkey baster for precision: If you want perfectly even layers, use a turkey baster to add each layer. It gives you way more control than a ladle, especially for the creamy layer. I started doing this after my third batch, and it’s a game-changer.
- Watch for bubbles: When you pour the creamy layer, you might see small air bubbles form. To get rid of them, gently tap the cup on the counter after pouring. This brings the bubbles to the surface, where you can pop them with a toothpick.
- Don’t skimp on chilling time: I know it’s tempting to rush, but under-set jello is a mess. If the layer still feels sticky or liquid when you touch it gently with a clean finger, it’s not ready. Give it another 30 minutes.
- Make ahead for parties: These are actually better when made the day before. The flavors meld together, and the layers set up perfectly. Just cover the tray with plastic wrap and keep them in the fridge until you’re ready to serve.
Common Mistake: The first time I made these, I tried to speed things up by putting the cups in the freezer. Bad idea. The jello set unevenly, and the texture was grainy. Always use the refrigerator—it’s slower, but it gives you that silky, smooth texture you’re after.
Variations & Adaptations
Once you’ve mastered the basic candy corn look, feel free to play around. Here are some variations I’ve tried:
- Halloween Spooky Version: Swap the orange jello for lime (green) and the yellow for orange, and you’ve got a “monster” theme. Add a few gummy worms to the creamy layer before it sets for a creepy surprise.
- Thanksgiving Harvest: Use cranberry jello for the bottom layer (deep red) and orange for the top. The creamy middle stays the same. It looks like a fall sunset and pairs beautifully with turkey dinner.
- Dairy-Free Option: I tested this for a friend who’s lactose intolerant. Substitute the sweetened condensed milk with a can of full-fat coconut cream (not milk) and use a dairy-free vanilla yogurt in place of the milk. The texture is slightly less firm, but it still works. Use a vegan unflavored gelatin like agar-agar (follow package directions for blooming).
- Boozy Adult Version: For a grown-up party, replace 1/4 cup of the cold water in the yellow layer with vodka or citrus-flavored liquor. Just remember, alcohol can prevent jello from setting fully, so don’t add more than that.
- Mini Shot Cups: Use 2 oz shot glasses instead of 9 oz cups for a party appetizer or dessert shooter. They set faster (about 30 minutes per layer) and are perfect for mingling.
My personal favorite variation? I made a batch with blood orange jello for the bottom layer and vanilla bean paste in the creamy layer. The tiny black vanilla specks against the white cream were gorgeous. It felt fancy without any extra effort.
Serving & Storage Suggestions
These jello cups are best served cold, straight from the fridge. The texture is perfect—firm but silky, with clean layers that hold their shape. Here’s how I like to serve them:
- Presentation: Place the cups on a large wooden board or a white platter to make the colors pop. For a Halloween party, I scatter a few candy corns around the board for a thematic touch. For Thanksgiving, I add a few small autumn leaves.
- Garnish: A small dollop of whipped cream on top with a single candy corn is a classic look. Or, for something different, sprinkle a little cinnamon or pumpkin pie spice on top of the whipped cream.
- What to serve alongside: These are sweet, so they pair well with something savory. I love serving them after a hearty chili or a creamy pumpkin soup. For a dessert table, they’re great alongside pumpkin cheesecake bars or apple cider donuts.
- Storage: Keep the cups covered with plastic wrap in the refrigerator. They’ll stay fresh for up to 5 days. The layers will stay intact, though the creamy layer might soften slightly after day 3.
- Freezing: I don’t recommend freezing these. The jello becomes watery and grainy when thawed. Stick to the fridge.
Flavor Development: Honestly, these taste even better on day two. The creamy layer absorbs a bit of the citrus flavor from the jello layers, and everything melds together beautifully. So don’t stress about making them at the last minute—they’re a perfect make-ahead dessert.
Nutritional Information & Benefits
Let’s be real—these are a treat, not a health food. But here’s the breakdown per cup (based on 12 servings):
- Calories: Approximately 180-200 per cup
- Protein: 4g (thanks to the gelatin and milk)
- Carbohydrates: 38g
- Fat: 3g
- Sugar: 35g
Health Highlights: Gelatin is a good source of collagen, which supports joint and skin health. The sweetened condensed milk provides calcium and protein, though it’s also high in sugar. If you’re watching your sugar intake, you can use sugar-free jello and a sugar-free sweetened condensed milk alternative (though the texture will be slightly different).
Dietary Considerations: This recipe contains dairy and gelatin. It’s not vegan or vegetarian. For a gluten-free option, you’re in luck—jello is naturally gluten-free. Just double-check your jello brand to be safe. If you have a corn allergy, be aware that some jello brands use corn-derived ingredients. Look for organic or kosher brands that use beet sugar instead.
Personally, I think of these as a “sometimes food”—perfect for parties and celebrations, not an everyday snack. But hey, life’s too short to skip dessert at a fall party!
Conclusion
These Perfect Candy Corn Jello Cups are more than just a pretty dessert—they’re a conversation starter, a crowd-pleaser, and honestly, a little bit of magic in a cup. The first time I brought them to a family gathering, my aunt (who never eats dessert) asked for seconds. My cousin’s kids kept asking when I was going to make “the rainbow jello” again. It’s that kind of recipe—the one that makes people smile and ask for the recipe.
I hope you give these a try. Don’t be intimidated by the layers—just take it step by step, and remember that patience is the secret ingredient. And if your first batch isn’t perfect? That’s okay. Mine wasn’t either. The second one will be better, and by the third, you’ll be a pro.
Have you made these? I’d love to hear how they turned out! Drop a comment below and let me know if you tried any fun variations. And if you’re planning a fall party, these are guaranteed to steal the show. Happy cooking, friends!
Frequently Asked Questions
Can I use sugar-free jello for this recipe?
Yes, you can use sugar-free jello, but the texture will be slightly softer and less firm. The layers may also be a bit more prone to bleeding into each other. If you’re using sugar-free, I recommend chilling each layer for an extra 30 minutes to ensure it’s fully set.
Why did my layers bleed into each other?
This usually happens when you pour a warm layer over a set layer. Make sure each new layer is cooled to room temperature before adding it. Also, ensure the bottom layer is fully set—give it the full chilling time, don’t rush it.
Can I make these in a large dish instead of individual cups?
Absolutely! Use a 9×13 inch glass dish. The layers will be thinner, so they’ll set faster (about 45 minutes per layer). Once fully set, you can cut them into squares. Just note that they won’t have the same “candy corn” visual effect as individual cups.
How far in advance can I make these?
You can make them up to 3 days in advance. Store them covered in the refrigerator. They actually taste better on day two! After 5 days, the texture starts to break down slightly, so I don’t recommend making them more than 3 days ahead.
Can I use a different flavor combination?
Of course! The candy corn look relies on a dark bottom layer and a light top layer. Try cherry (bottom) and strawberry (top) for a red-and-pink version, or lime (bottom) and orange (top) for a fall-themed look. Just keep the creamy middle layer the same—it’s the key to the striped effect.
Pin This Recipe!
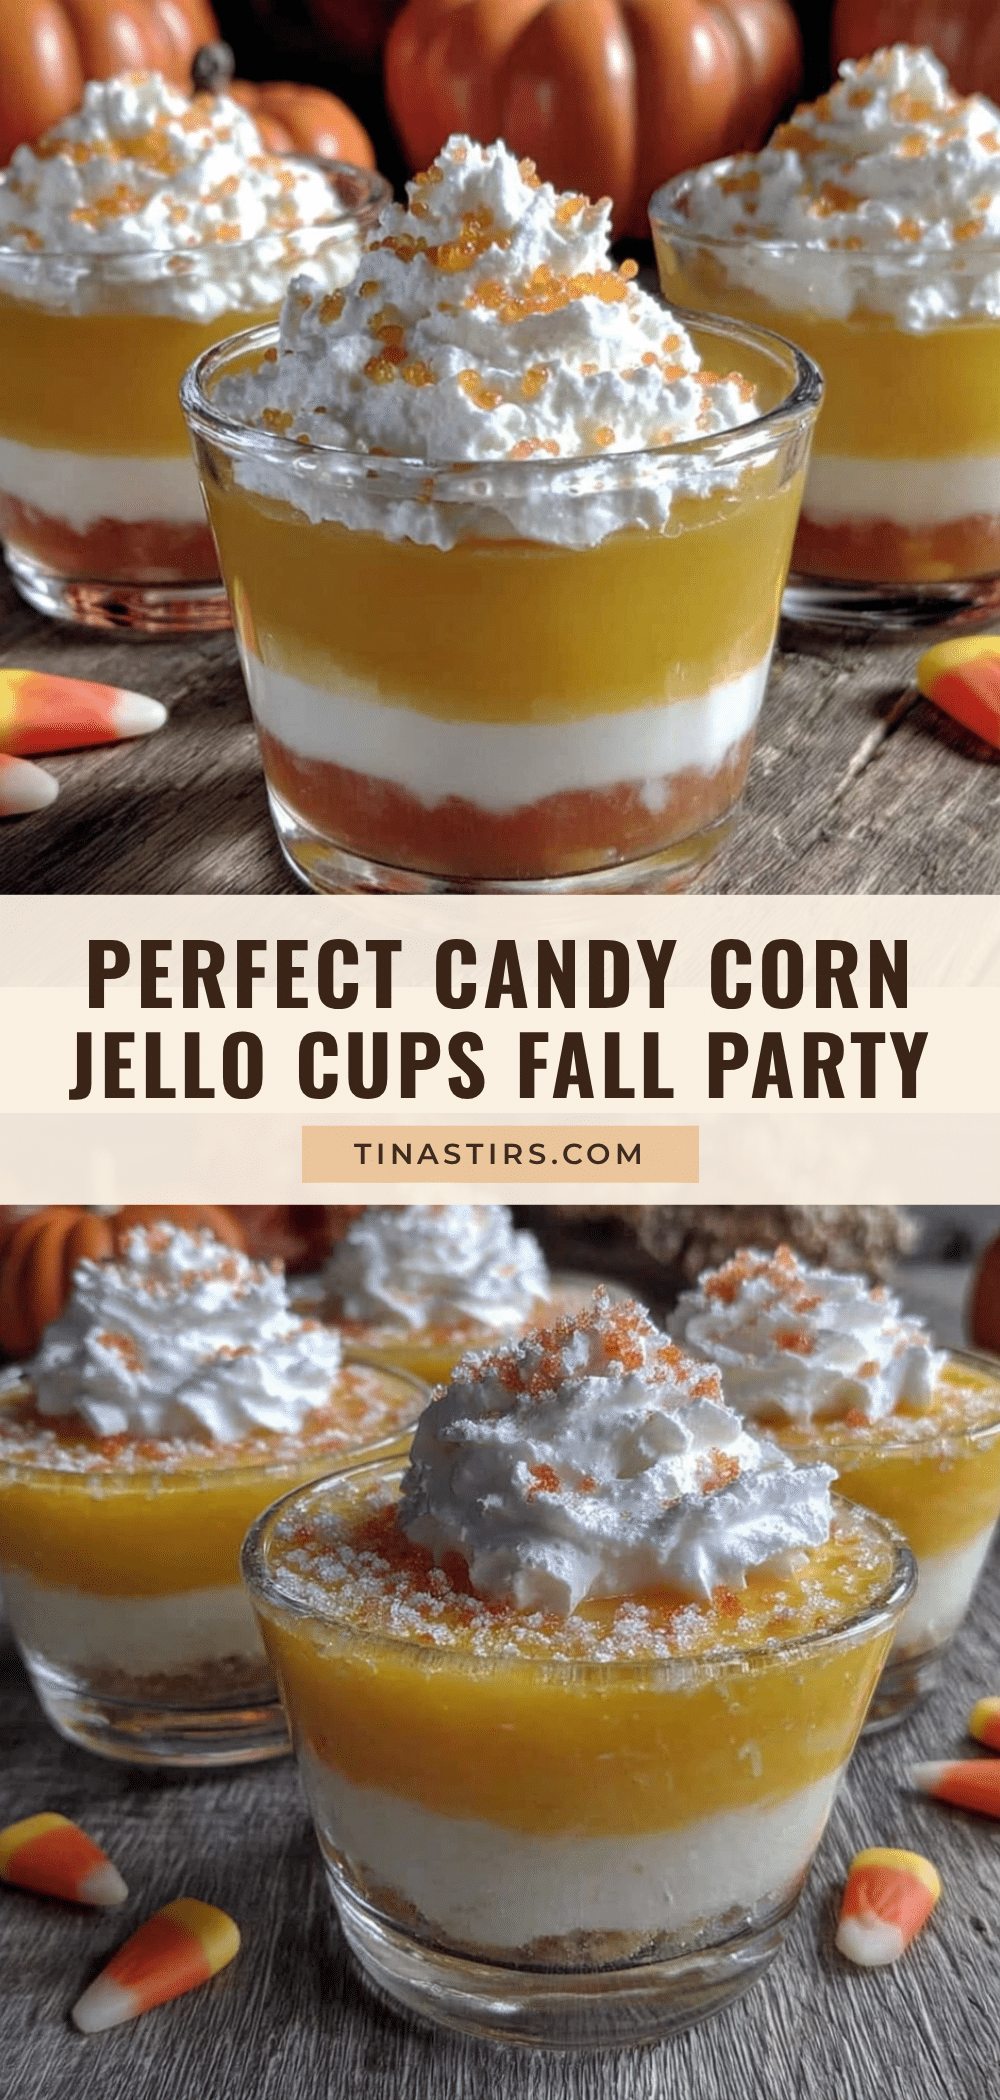
Perfect Candy Corn Jello Cups: Easy Fall Party Dessert
These layered jello cups mimic the iconic candy corn look with orange, creamy white, and yellow layers. They’re a fun, easy, and crowd-pleasing dessert perfect for Halloween parties, fall potlucks, or Thanksgiving dessert tables.
- Prep Time: 30 minutes
- Cook Time: 0 minutes
- Total Time: 4 hours 30 minutes (includes chilling)
- Yield: 10-12 servings 1x
- Category: Dessert
- Cuisine: American
Ingredients
- 1 box (3 oz) orange jello (e.g., Jell-O brand)
- 1 cup boiling water (for orange layer)
- 1/2 cup cold water (for orange layer)
- 1 box (3 oz) lemon jello (or any yellow citrus flavor)
- 1 cup boiling water (for yellow layer)
- 1/2 cup cold water (for yellow layer)
- 1 packet (0.25 oz) unflavored gelatin (e.g., Knox)
- 1/4 cup cold water (to bloom gelatin)
- 1 can (14 oz) sweetened condensed milk
- 1 cup boiling water (for creamy layer)
- 1 teaspoon vanilla extract
Instructions
- Arrange 10-12 clear plastic cups (9 oz size) on a small baking sheet or tray.
- Make the orange layer: In a small bowl, empty the orange jello packet. Add 1 cup boiling water and whisk for 2 minutes until dissolved. Add 1/2 cup cold water and stir. Evenly divide the liquid among the cups, filling each about 1/3 full. Refrigerate for at least 1 hour, or until firm to the touch.
- While the orange layer sets, prepare the creamy white layer: In a small bowl, sprinkle unflavored gelatin over 1/4 cup cold water. Let sit for 5 minutes to bloom. In a separate bowl, combine sweetened condensed milk and 1 cup boiling water; whisk until smooth. Add bloomed gelatin and whisk until fully dissolved. Stir in vanilla extract. Let cool to room temperature (15-20 minutes).
- Once the orange layer is fully set and the creamy mixture is cool, gently ladle the creamy mixture over the orange layer, filling each cup about 2/3 full. Refrigerate for at least 1.5 hours, or until firm.
- Make the yellow layer: In a small bowl, empty the lemon jello packet. Add 1 cup boiling water and whisk for 2 minutes until dissolved. Add 1/2 cup cold water and stir. Let cool to room temperature (about 15 minutes).
- Once the creamy layer is firm, gently ladle the cooled yellow jello over the top, filling each cup almost to the rim. Refrigerate for at least 1.5 hours, or until fully set.
- Serve cold, straight from the fridge. Can be made up to 3 days in advance.
Notes
Patience is key: each layer must set fully before adding the next. Always let new layers cool to room temperature before pouring to prevent bleeding. For best results, use regular (not sugar-free) jello and full-fat sweetened condensed milk. Clear cups are recommended to show the layers. Can be made a day ahead; flavors meld overnight.
Nutrition
- Serving Size: 1 cup
- Calories: 190
- Sugar: 35
- Sodium: 120
- Fat: 3
- Saturated Fat: 2
- Carbohydrates: 38
- Protein: 4
Keywords: candy corn jello cups, fall dessert, Halloween jello, layered jello, easy jello recipe, party dessert, jello cups


