Love this? Save it for later!
Share the inspiration with your friends
It was 11:47 PM on a particularly damp Tuesday in October, and I was absolutely desperate for something warm. Not just warm, but the kind of warmth that seeps into your bones and makes you forget the rain streaking down the kitchen window. I didn’t have the fancy stockpot or the immersion blender I usually reach for, but I had a single, massive butternut squash staring at me from the counter and a wilting bunch of sage from the farmer’s market that was probably past its prime. The idea came to me in a sleepy, slightly unhinged flash: roast everything until it’s almost burnt, then just… figure it out. Honestly, I think the late hour made me brave. I wasn’t following any rules. I just wanted that deep, caramelized flavor, and I was too tired to chop anything perfectly.
So I hacked the squash in half (dangerously, with a dull knife at midnight), scraped out the seeds, and tossed it onto a sheet pan with the sage leaves and a whole head of garlic. No dainty dicing, no fussing. When it came out of the oven, the smell was so good it woke up my neighbor’s cat, who was apparently on my fire escape. I scooped the soft, golden flesh into a pot, squeezed out the roasted garlic, and stirred in some broth I found hiding in the back of the fridge. It was a mess, really. My counter was a disaster zone of squash innards and rogue sage stems. But when I took that first sip, standing over the stove in my pajamas, I knew I had stumbled onto something. It was the coziest, most deeply flavored soup I’d ever made, born from a late-night craving and a total lack of the right tools. Maybe you’ve been there—that moment when the usual rules go out the window and something magical happens. That’s this soup. It’s the one I keep making, every single fall, because it tastes like that perfect, quiet, rainy night.
Why You’ll Love This Recipe
This isn’t just another butternut squash soup. I’ve tested this version a dozen times, tweaking the roasting time and the ratio of sage to garlic, and it’s the one I keep coming back to. It’s the kind of recipe that makes you look like a hero with very little actual effort. Here’s why it works so well:
- Deep, Caramelized Flavor: Roasting the squash whole (or in large chunks) concentrates its natural sugars. It gets sweet, nutty, and almost buttery without any actual butter. The high heat does all the work.
- Simple, Pantry-Friendly Ingredients: You don’t need cream, exotic spices, or a trip to a specialty store. Butternut squash, broth, onion, garlic, and sage are the stars. You probably have most of this right now.
- Perfect for Cozy Fall Evenings: This soup was made for those chilly nights when all you want is a bowl of something comforting. It’s the ultimate weeknight dinner that feels like a special occasion.
- Crowd-Pleaser (Even for Picky Eaters): The texture is incredibly silky and smooth, and the flavor is savory-sweet without being too strong. Kids and adults alike go back for seconds.
- Surprisingly Healthy: It’s naturally vegan, gluten-free, and packed with vitamins. You get all the comfort without any of the guilt. It’s the kind of meal that makes you feel good from the inside out.
What makes this recipe different is the roasting method. By cooking the squash until the edges are deeply browned and almost charred, you unlock a flavor you just can’t get from boiling. It’s a small trick that makes a world of difference. This isn’t just soup—it’s the soup that makes you close your eyes after the first spoonful.
What Ingredients You Will Need
This recipe uses simple, wholesome ingredients to build layers of flavor without any fuss. Most of these are fall staples, making it the perfect dish for the season.
- For the Roasted Vegetables:
- 1 large butternut squash (about 3 lbs / 1.4 kg), halved and seeded — Look for a squash that feels heavy for its size with a firm, matte skin. The neck should be thick for the most flesh.
- 1 medium yellow onion, quartered (skin on is fine) — The skin adds color and a subtle sweetness to the roasting pan. You’ll peel it off later.
- 1 head of garlic, top sliced off to expose the cloves — Roasting the whole head mellows the garlic into a sweet, spreadable paste. I like using garlic from a local farm if I can find it.
- 10-12 fresh sage leaves — Fresh sage is non-negotiable here. Dried just won’t give you the same woodsy, earthy aroma. If your sage is looking a little sad, it’s still fine to use—it will crisp up in the oven.
- 2 tablespoons olive oil — Use a good quality extra virgin olive oil for roasting. It helps everything caramelize beautifully.
- 1/2 teaspoon salt — I prefer kosher salt for its clean flavor and easy pinching.
- 1/4 teaspoon black pepper — Freshly cracked is always best.
- For the Soup Base:
- 4 cups (960 ml) vegetable broth — Use a low-sodium broth so you can control the salt level. I’m partial to the Imagine brand for its rich flavor, but any good-quality broth works.
- 1/2 cup (120 ml) full-fat coconut milk (optional, for creaminess) — This adds a lovely silkiness without any dairy. You can also use heavy cream or skip it entirely for a lighter soup.
- 1 tablespoon maple syrup (optional) — A tiny bit of sweetness balances the savory notes. I only add this if the squash isn’t naturally super sweet.
- Additional salt and pepper to taste — Always taste and adjust at the end.
Ingredient Tips: For the best texture, make sure your butternut squash is ripe. If you’re having trouble cutting it, pop it in a 350°F oven for 10 minutes to soften the skin just a bit. Also, don’t skip the roasted garlic—it’s the secret to that deep, savory flavor that makes this soup so addictive.
Equipment Needed
You don’t need a ton of fancy gear for this recipe, which is part of its charm. Here’s what you’ll want on hand:
- Sharp Chef’s Knife: A good, sharp knife is essential for safely halving a butternut squash. A dull knife is a dangerous one—trust me, I’ve learned that the hard way.
- Large Baking Sheet or Sheet Pan: You need a rimmed sheet pan to catch any juices from the roasting squash. A half-sheet pan is perfect.
- Parchment Paper or Silicone Baking Mat: This makes cleanup a breeze. The caramelized bits will stick to a bare pan, and you want to save those for the soup!
- Large Pot or Dutch Oven: A heavy-bottomed pot like a Dutch oven is ideal for even heating and simmering the soup. A 5-6 quart pot works great.
- Immersion Blender or Standard Blender: An immersion blender lets you blend the soup right in the pot, which is less messy. If you use a standard blender, work in batches and be careful with the hot liquid.
- Wooden Spoon or Spatula: For stirring and scraping up all those delicious browned bits from the bottom of the pot.
- Measuring Cups and Spoons: For accuracy, though this recipe is forgiving.
Budget-Friendly Tip: If you don’t have an immersion blender, a standard blender works just fine. Just make sure to let the soup cool slightly before blending, and never fill the blender more than halfway to avoid splatters.
Preparation Method

This recipe is all about letting the oven do the heavy lifting. The steps are simple, but the results are anything but.
- Preheat and Prep (5 minutes): Preheat your oven to 425°F (220°C). Line a large baking sheet with parchment paper. Carefully halve the butternut squash lengthwise using a sharp knife. Scoop out the seeds and stringy bits with a spoon. (You can save the seeds to roast later—they make a great snack!)
- Roast the Vegetables (45-55 minutes): Place the squash halves cut-side up on the prepared baking sheet. Tuck the quartered onion (skin and all) and the head of garlic (cut-side up) around the squash. Scatter the fresh sage leaves over the baking sheet. Drizzle everything with the olive oil, then use your hands (or a brush) to rub the oil all over the cut surfaces of the squash. Sprinkle with the salt and pepper. Roast for 45-55 minutes, or until the squash is very tender when pierced with a fork and the edges are deeply browned and caramelized. The sage leaves should be crispy and dark.
- Cool and Scoop (10 minutes): Remove the baking sheet from the oven and let everything cool for about 10 minutes. This makes it safe to handle. Once cool enough, use a large spoon to scoop the roasted squash flesh away from the skin. Discard the skin. Squeeze the roasted garlic cloves out of their papery skins into a bowl. Peel the skin off the onion quarters (it should slip right off).
- Build the Soup Base (5 minutes): Transfer the roasted squash, garlic, onion, and crispy sage leaves to a large pot or Dutch oven. (Don’t leave the crispy sage behind—it’s packed with flavor!) Pour in the vegetable broth. If you’re using the coconut milk or maple syrup, add it now.
- Simmer and Blend (10 minutes): Bring the mixture to a gentle simmer over medium heat. Let it cook for 5-7 minutes, stirring occasionally, to allow the flavors to meld. Remove the pot from the heat. Use an immersion blender to puree the soup until it’s completely smooth and silky. If you’re using a standard blender, let the soup cool for a few minutes, then blend it in batches, filling the blender no more than halfway. Be sure to remove the center cap from the blender lid and cover it with a kitchen towel to allow steam to escape.
- Season and Serve (2 minutes): Taste the soup and adjust the seasoning with additional salt and pepper. You might want a pinch more salt to brighten the flavors. If the soup is too thick, stir in a little more broth or water until it reaches your desired consistency. Ladle into bowls and serve hot with your favorite toppings.
Pro Tip: For an extra layer of flavor, don’t wash the baking sheet after roasting. Deglaze it with a splash of broth over medium heat, scraping up all the browned bits, then pour that liquid into the pot. It’s pure gold.
Cooking Tips & Techniques
I’ve made this soup more times than I can count, and I’ve definitely had my share of mishaps. Here’s what I’ve learned to make it perfect every time.
- Don’t Crowd the Pan: Give the squash and garlic enough room on the baking sheet. If they’re piled on top of each other, they’ll steam instead of roast. You want that deep, caramelized color. If your squash is huge, use two baking sheets.
- The Sage Mistake I Made: The first time I made this, I added the sage to the pot before roasting. Big mistake. It turned bitter and muddy. Roasting the sage leaves alongside the squash until they’re crispy is the way to go. They add a toasty, almost nutty flavor that’s incredible. If some leaves get a little too dark, that’s okay—it adds a smoky depth.
- Patience with the Blender: I once blended hot soup in a standard blender with the lid sealed tight. It exploded all over my kitchen. Always, always let the steam escape. An immersion blender is my favorite tool for this reason—it’s safer and means one less dish to wash.
- Timing is Everything: You can roast the vegetables a day ahead of time. Just store them in the fridge, then finish the soup the next day. The flavors actually get better overnight. This is a great trick for a stress-free dinner party.
- Consistency Control: Remember that the soup will thicken as it sits. When you reheat leftovers, you’ll probably need to add a splash of broth or water to loosen it up. I like my soup on the thicker side, but you do you.
Variations & Adaptations
This soup is a fantastic base recipe that’s easy to adapt to your taste or what you have on hand. Here are a few of my favorite twists.
- Spiced-Up Version: Add a 1-inch piece of fresh ginger, peeled and roughly chopped, to the baking sheet with the vegetables. Or, stir in 1/2 teaspoon of smoked paprika and a pinch of cayenne pepper along with the broth for a warming, smoky kick.
- Apple and Squash Combo: For a sweeter, tangier soup, replace one of the onion quarters with a peeled and cored apple (like a Honeycrisp or Granny Smith). Roast it with the squash. The apple breaks down and adds a lovely fruity note.
- Dairy-Free Creamy Version: The coconut milk option is fantastic, but you can also use a splash of unsweetened oat milk or cashew cream for a different kind of richness. For a nutty flavor, stir in a tablespoon of tahini at the end.
- Herb Swaps: Not a fan of sage? No problem. Substitute fresh thyme or rosemary sprigs for the sage. Rosemary gives it a more pine-like, savory flavor that’s equally delicious.
- Make it a Meal: Stir in a can of drained and rinsed white beans (like cannellini or great northern) after blending for added protein and fiber. It turns the soup into a hearty, complete dinner.
My personal favorite variation is the one with roasted ginger. It adds a subtle warmth that feels so good on a cold day. I tried it on a whim when I had a knob of ginger that needed using up, and now I make it that way more often than not.
Serving & Storage Suggestions
This soup is wonderful on its own, but a few toppings and sides can make it a full experience.
- Serving Temperature: Serve the soup piping hot. Ladle it into deep bowls for maximum coziness.
- Toppings: A swirl of coconut milk or heavy cream, a few crispy roasted sage leaves, a sprinkle of toasted pumpkin seeds (pepitas), and a crack of black pepper. For a little crunch, I love adding some crumbled bacon or crispy fried shallots.
- Perfect Pairings: A crusty piece of sourdough bread or a warm, crusty baguette is essential for dipping. A simple green salad with a tangy vinaigrette is a great side to balance the richness of the soup.
- Storage: Store leftover soup in an airtight container in the refrigerator for up to 5 days. The flavors will meld and deepen, making it even better the next day.
- Freezing: This soup freezes beautifully. Let it cool completely, then pour it into freezer-safe containers or zip-top bags. It will keep for up to 3 months. Thaw overnight in the refrigerator before reheating.
- Reheating: Reheat the soup gently on the stovetop over medium-low heat, stirring occasionally. If it’s too thick, add a splash of broth or water. You can also reheat individual portions in the microwave.
Nutritional Information & Benefits
This soup is as good for you as it is delicious. Here’s a rough estimate per serving (based on 4 servings, without optional toppings):
| Nutrient | Amount Per Serving |
|---|---|
| Calories | ~220 |
| Fat | ~9g |
| Carbohydrates | ~35g |
| Fiber | ~7g |
| Sugar | ~8g |
| Protein | ~4g |
| Vitamin A | ~450% DV |
| Vitamin C | ~40% DV |
- Butternut Squash: Is loaded with Vitamin A (from beta-carotene) which is great for your eyes and immune system. It’s also a good source of fiber, which keeps you full.
- Garlic and Sage: Both have anti-inflammatory and antioxidant properties. They’re not just for flavor—they’re little powerhouses of wellness.
- Dietary Considerations: This recipe is naturally gluten-free, dairy-free (if you skip the cream or use coconut milk), and vegan. It’s a fantastic option for almost any diet.
- Potential Allergens: The recipe itself is free of the top allergens. If you add the optional coconut milk, be aware of coconut allergies.
From my perspective, this soup is the perfect example of how comfort food can also be nourishing. It feels indulgent, but it’s made from whole, real ingredients that your body will thank you for.
Conclusion
This cozy roasted butternut squash soup with sage is more than just a recipe—it’s a little moment of peace in a bowl. It’s the kind of soup that makes you want to slow down, wrap your hands around the warm ceramic, and just breathe. The deep, caramelized flavor from the roasting process is something you just can’t get from a stovetop method, and it’s so simple to achieve.
I really hope you give this a try. Feel free to make it your own—swap the herbs, add a pinch of spice, or load it up with your favorite toppings. That’s the beauty of a good base recipe. I’d love to hear how it turns out for you! Drop a comment below and let me know what variations you tried, or share a photo of your soup on Pinterest. Your feedback and creativity are what make this community so special. Happy cooking, and stay warm out there!
Frequently Asked Questions
Can I use frozen butternut squash instead of fresh?
You can, but I don’t recommend it for this recipe. The roasting step is crucial for developing that deep, caramelized flavor. Frozen squash has a much higher water content and will steam rather than roast, leading to a watery, less flavorful soup. If you’re in a pinch, you can thaw and drain the frozen squash, then roast it, but fresh is truly best here.
How do I make this soup vegan?
This soup is naturally vegan as written if you use vegetable broth and skip the optional coconut milk or use a plant-based alternative. The roasted vegetables provide so much creaminess on their own that you might not even miss the dairy!
Can I make this soup in a slow cooker or Instant Pot?
You can adapt it, but you’ll still need to roast the vegetables first. For a slow cooker, add the roasted vegetables and broth to the slow cooker and cook on low for 2-3 hours, then blend. For an Instant Pot, use the sauté function to warm the broth and roasted veggies, then use an immersion blender directly in the pot. The roasting step is non-negotiable for the best flavor.
My soup tastes bland. What did I do wrong?
This is almost always a salt issue. Don’t be shy with the salt—it’s what brings all the other flavors to life. Also, make sure your squash was deeply roasted. If it was pale and undercooked, it won’t have that sweet, nutty flavor. Try adding a pinch of salt and a squeeze of lemon juice to brighten it up.
Can I freeze this soup with coconut milk in it?
Yes, you can! The texture of the coconut milk may separate slightly upon thawing, but a good whisk or a quick re-blend will bring it back together. For the best results, let the soup cool completely before freezing, and leave a little headspace in your container for expansion.
Pin This Recipe!
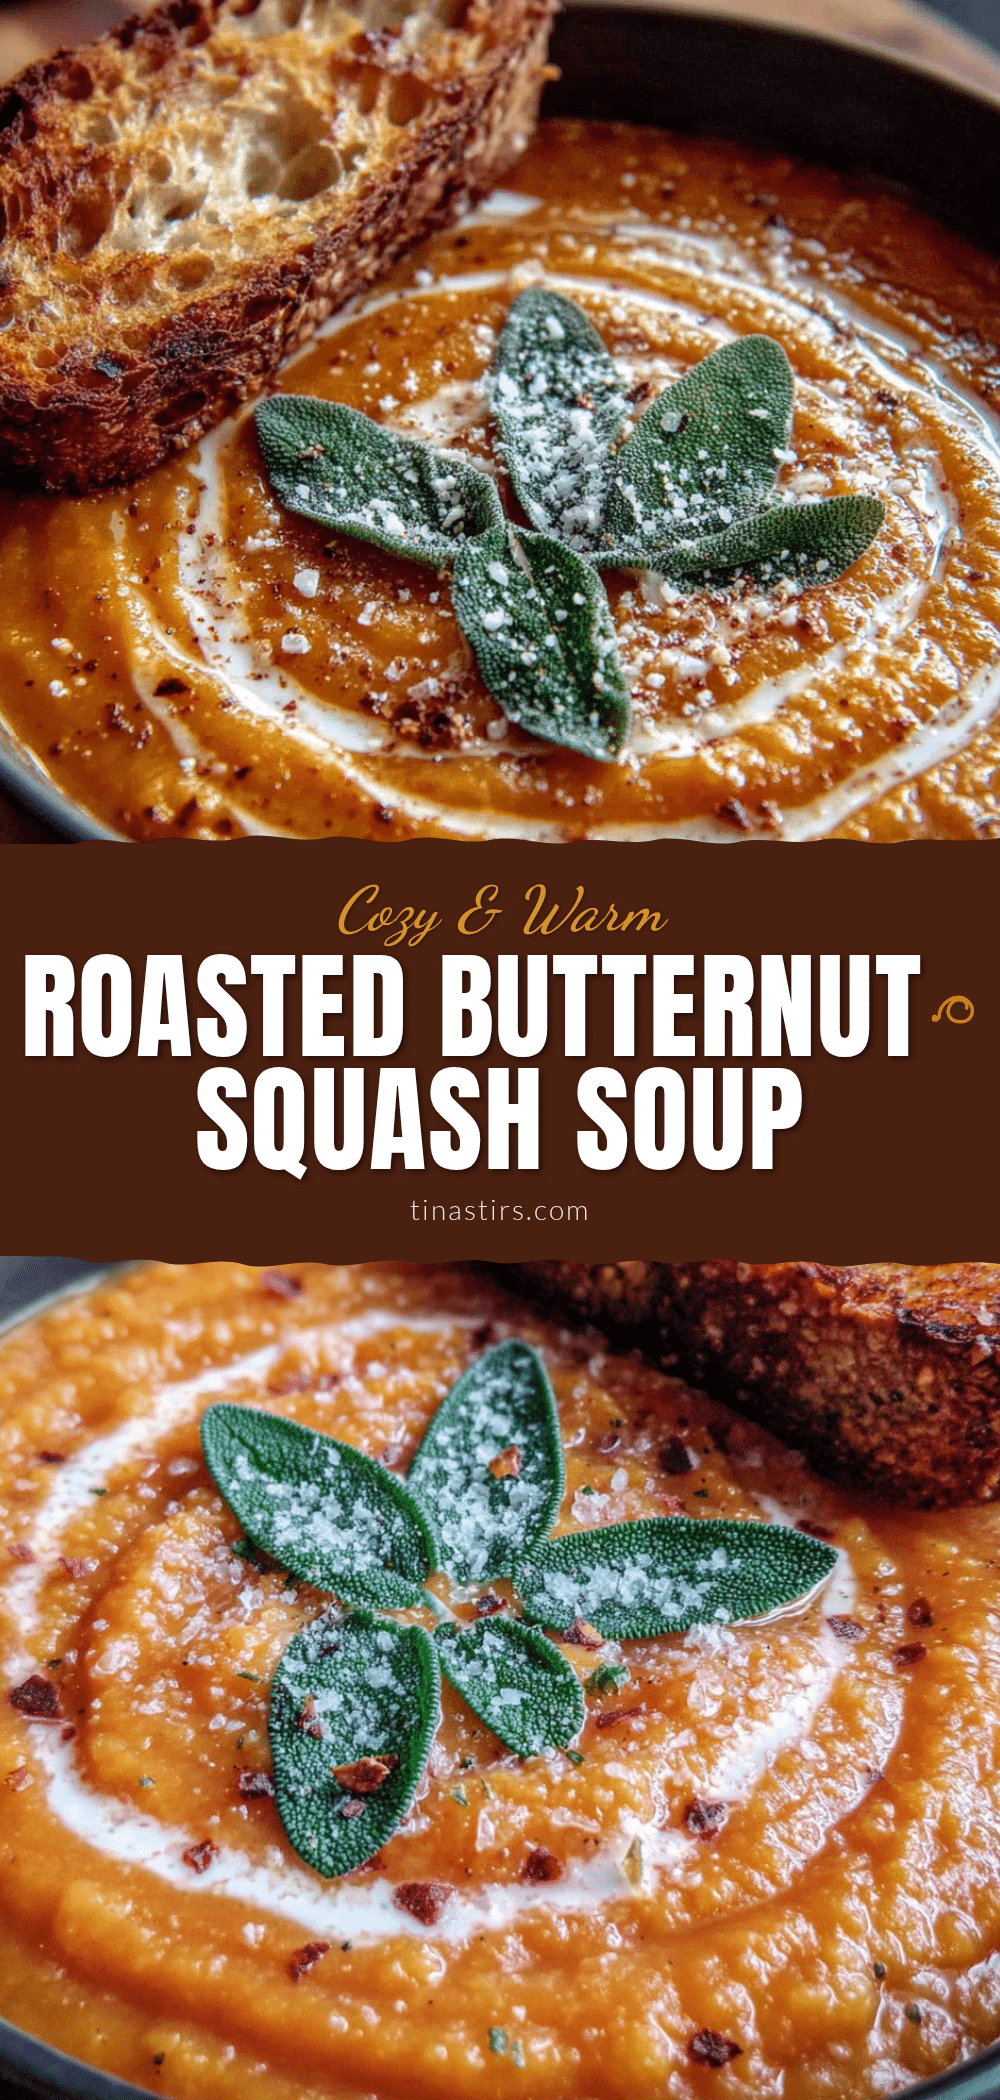
Cozy Roasted Butternut Squash Soup: Easy Homemade Recipe

This deeply flavorful roasted butternut squash soup is made with simple, pantry-friendly ingredients. Roasting the squash until caramelized creates a silky, savory-sweet soup that’s perfect for cozy fall evenings.
- Prep Time: 15 minutes
- Cook Time: 55 minutes
- Total Time: 1 hour 10 minutes
- Yield: 4 servings 1x
- Category: Soup
- Cuisine: American
Ingredients
- 1 large butternut squash (about 3 lbs / 1.4 kg), halved and seeded
- 1 medium yellow onion, quartered (skin on is fine)
- 1 head of garlic, top sliced off to expose the cloves
- 10–12 fresh sage leaves
- 2 tablespoons olive oil
- 1/2 teaspoon salt
- 1/4 teaspoon black pepper
- 4 cups (960 ml) vegetable broth, low-sodium
- 1/2 cup (120 ml) full-fat coconut milk (optional, for creaminess)
- 1 tablespoon maple syrup (optional)
- Additional salt and pepper to taste
Instructions
- Preheat your oven to 425°F (220°C). Line a large baking sheet with parchment paper. Carefully halve the butternut squash lengthwise using a sharp knife. Scoop out the seeds and stringy bits with a spoon.
- Place the squash halves cut-side up on the prepared baking sheet. Tuck the quartered onion (skin and all) and the head of garlic (cut-side up) around the squash. Scatter the fresh sage leaves over the baking sheet. Drizzle everything with the olive oil, then use your hands (or a brush) to rub the oil all over the cut surfaces of the squash. Sprinkle with the salt and pepper. Roast for 45-55 minutes, or until the squash is very tender when pierced with a fork and the edges are deeply browned and …
- Remove the baking sheet from the oven and let everything cool for about 10 minutes. Once cool enough, use a large spoon to scoop the roasted squash flesh away from the skin. Discard the skin. Squeeze the roasted garlic cloves out of their papery skins into a bowl. Peel the skin off the onion quarters (it should slip right off).
- Transfer the roasted squash, garlic, onion, and crispy sage leaves to a large pot or Dutch oven. Pour in the vegetable broth. If you’re using the coconut milk or maple syrup, add it now.
- Bring the mixture to a gentle simmer over medium heat. Let it cook for 5-7 minutes, stirring occasionally, to allow the flavors to meld. Remove the pot from the heat. Use an immersion blender to puree the soup until it’s completely smooth and silky. If you’re using a standard blender, let the soup cool for a few minutes, then blend it in batches, filling the blender no more than halfway. Be sure to remove the center cap from the blender lid and cover it with a kitchen towel to allow steam to esc…
- Taste the soup and adjust the seasoning with additional salt and pepper. If the soup is too thick, stir in a little more broth or water until it reaches your desired consistency. Ladle into bowls and serve hot with your favorite toppings.
Notes
For an extra layer of flavor, deglaze the baking sheet with a splash of broth over medium heat, scraping up all the browned bits, then pour that liquid into the pot. You can roast the vegetables a day ahead of time and store them in the fridge. The soup will thicken as it sits, so add more broth when reheating. If using a standard blender, always let steam escape to avoid splatters.
Nutrition
- Serving Size: 1 bowl (about 1.5 cu
- Calories: 220
- Sugar: 8
- Sodium: 600
- Fat: 9
- Saturated Fat: 2
- Carbohydrates: 35
- Fiber: 7
- Protein: 4
Keywords: butternut squash soup, roasted butternut squash soup, fall soup, cozy soup, vegan soup, gluten-free soup, easy soup recipe


