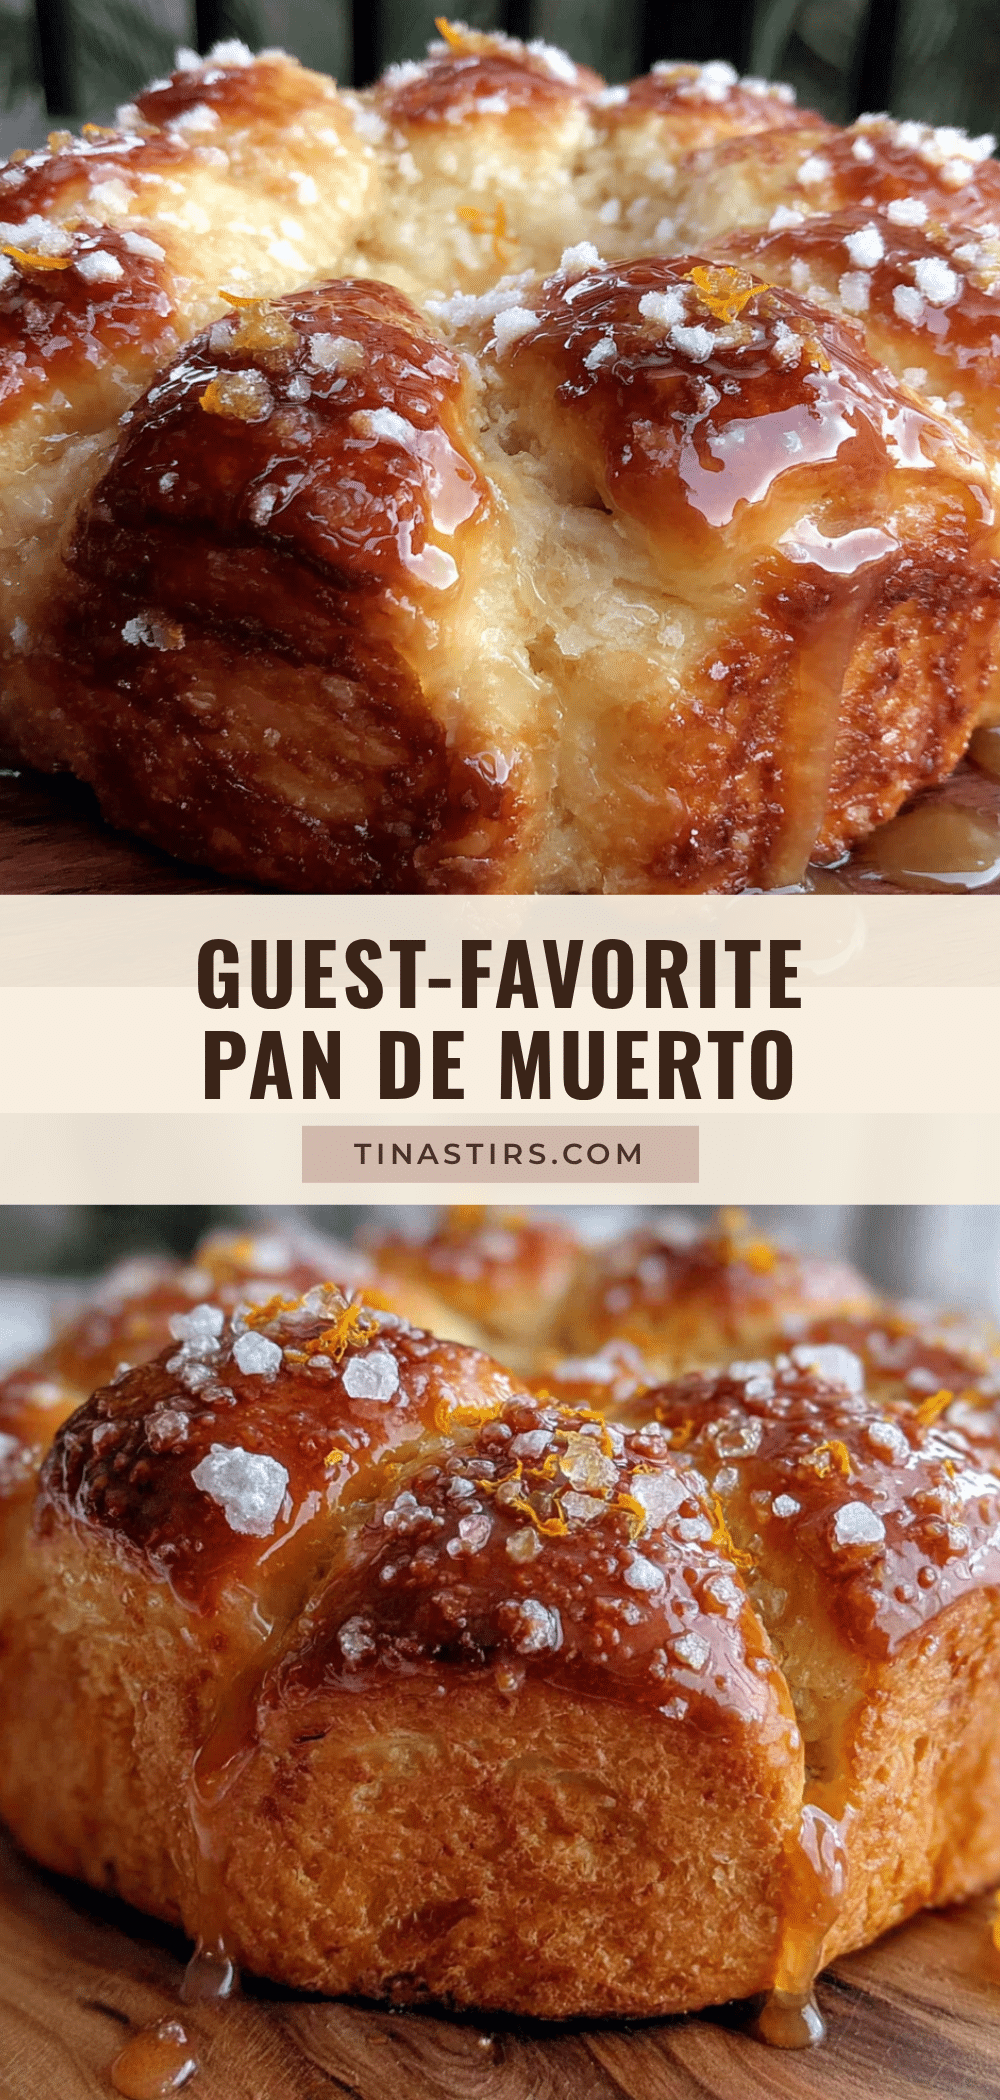
Love this? Save it for later!
Share the inspiration with your friends
There used to be a tiny, unassuming bakery tucked between a laundromat and a bodega in Boyle Heights called “La Estrella.” Every fall, they’d roll out a Pan de Muerto that was nothing short of legendary. The bread was pillowy, fragrant with orange blossom, and dusted with sugar that sparkled like morning frost. When the bakery closed its doors two years ago—the owner finally retired after forty years—I honestly felt a little lost. I mean, where do you even begin to find bread that tastes like a memory?
After nine tries—some so dry they could’ve been doorstops, others so dense they felt like bricks—I finally cracked it. And let me tell you, the moment that orange blossom scent filled my kitchen, I nearly cried. This isn’t just a recipe; it’s a resurrection of something special.
You know that feeling when you take a bite of something and you’re instantly transported? That’s what this Pan de Muerto does. It’s soft, slightly sweet, and that orange blossom glaze? Absolute magic. I’ve served this at every Dia de los Muertos gathering since, and it disappears faster than I can slice it. Honestly, I think the original bakery would approve. Maybe you’ve been there—chasing a flavor from your past, trying to get it just right. This is that recipe.
Why You’ll Love This Recipe
Let’s be real for a second. Making bread from scratch can feel intimidating, especially when you’re trying to impress a house full of guests. But this Pan de Muerto? It’s actually foolproof. I’ve tested it on absolute beginners who walked away looking like pros, and that’s not an exaggeration.
Here’s what makes this recipe a total winner:
- Simple Ingredients : No wild goose chases for obscure stuff. Flour, yeast, butter, eggs, sugar, and orange blossom water—you can find everything at your regular grocery store.
- Perfect for Hosting : This bread is designed to be the star of your Dia de los Muertos spread. It looks stunning on a table with marigolds and candles, and your guests will absolutely think you spent hours more than you actually did.
- Crowd-Pleaser : Kids love the sweet glaze, adults appreciate the subtle floral notes, and everyone goes back for seconds. I’ve never had leftovers. Ever.
- Make-Ahead Friendly : You can prep the dough the night before, which is a lifesaver when you’re juggling a dozen other dishes before guests arrive.
- Unbelievably Delicious : The texture is this perfect balance of fluffy and substantial, and the orange blossom glaze adds a sophisticated touch that feels fancy without being fussy.
What sets this version apart from every other Pan de Muerto recipe is the technique. I spent months tweaking the hydration ratio and the proofing times until I got that bakery-quality crumb. Plus, the glaze isn’t just a drizzle—it’s a full soak that infuses every bite with citrusy sweetness. This isn’t just another bread; it’s the one your friends will text you about the next morning, asking for the recipe.
What Ingredients You Will Need
This recipe uses simple, wholesome ingredients to deliver that signature soft texture and aromatic flavor. Most of these are pantry staples, which makes this perfect for last-minute baking when you realize you forgot to plan ahead for your gathering. Trust me, I’ve been there.
For the Dough:
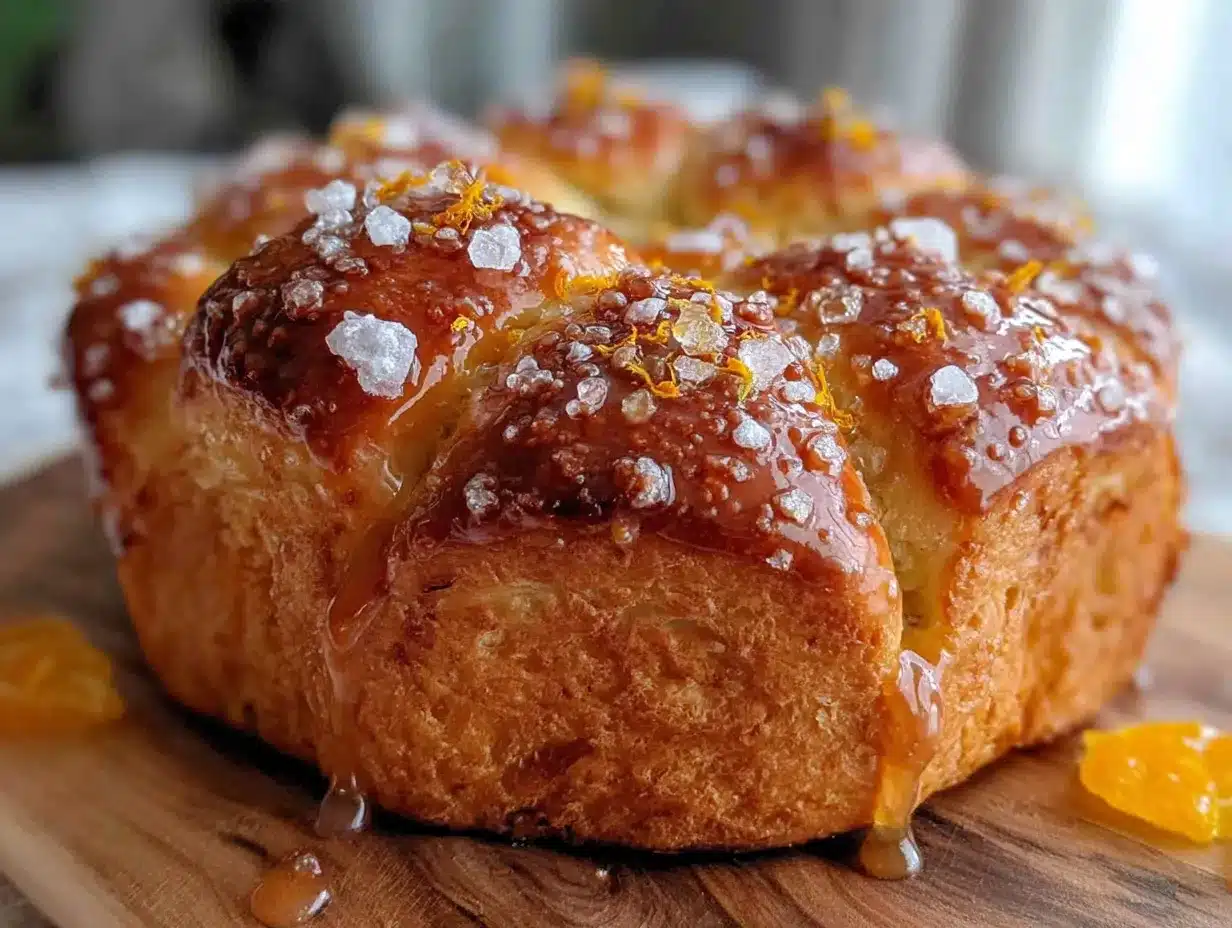
- 4 cups (500g) all-purpose flour – I prefer King Arthur Flour for consistent results, but any good brand works. Spoon and level your flour—don’t scoop straight from the bag or you’ll end up with dry dough.
- 1/2 cup (100g) granulated sugar – This adds just enough sweetness without overwhelming the orange blossom flavor.
- 1 packet (2 1/4 tsp) active dry yeast – I use Red Star or Fleischmann’s. Make sure your yeast isn’t expired, or you’ll be very sad when your bread doesn’t rise.
- 1/2 cup (120ml) whole milk, warm – Warm means around 110°F, not scalding. If it’s too hot, you’ll kill the yeast. Too cold, and it won’t activate properly.
- 1/4 cup (60ml) orange juice, freshly squeezed – Bottled juice works in a pinch, but fresh really does make a difference here. The brightness is unmatched.
- 1/4 cup (60g) unsalted butter, melted – Salted butter works too, just reduce the added salt slightly.
- 3 large eggs, room temperature – Cold eggs will shock your dough. Leave them on the counter for 30 minutes before starting.
- 1 tsp vanilla extract – Pure vanilla, not imitation. Your bread will thank you.
- 1 tbsp orange zest – From about 2 oranges. This is where the serious flavor lives.
- 1/2 tsp salt – Don’t skip this! Salt controls yeast activity and strengthens the gluten structure.
For the Orange Blossom Glaze:
- 1/2 cup (100g) granulated sugar – Dissolves into a simple syrup base for the glaze.
- 1/4 cup (60ml) water – Filtered water is best, but tap works fine.
- 2 tbsp orange blossom water – This is the star ingredient. You can find it at Middle Eastern grocery stores, specialty markets, or online. A little goes a long way.
- 1 tbsp orange juice – Adds extra citrus punch to balance the floral notes.
For Topping:
- 1/4 cup (50g) granulated sugar – For that classic sparkling finish.
- Optional: 2 tbsp melted butter – For brushing before the glaze, if you want extra richness.
Equipment Needed
You don’t need a professional bakery setup for this. Honestly, I’ve made this in a tiny apartment kitchen with minimal gear, and it turned out beautifully. Here’s what you’ll actually need:
- Large mixing bowl – Glass or ceramic works best. Avoid metal bowls if you can, as they can react with the yeast.
- Stand mixer with dough hook – This makes kneading so much easier, but you can absolutely do it by hand. It’s a great arm workout!
- Measuring cups and spoons – Accuracy matters in baking, so use proper measuring tools.
- Kitchen scale (optional but recommended) – Weighing your flour is the secret to consistent results. I use a simple OXO scale that cost about $20.
- Baking sheet – A standard half-sheet pan works perfectly. Line it with parchment paper for easy cleanup.
- Clean kitchen towel – For covering the dough while it rises. A tea towel or even a paper towel works.
- Pastry brush – For applying the glaze. A silicone brush is easier to clean than natural bristles.
- Sharp knife or bench scraper – For scoring the dough and shaping the bone decorations.
- Wire cooling rack – Essential for letting the bread cool properly so the glaze sets right.
Preparation Method
Okay, let’s get to the fun part. I’ve broken this down into clear steps so you don’t feel lost. Take your time, and remember—bread baking is supposed to be relaxing, not stressful. Pour yourself a coffee, put on some music, and enjoy the process.
Step 1: Activate the Yeast
In a small bowl, combine the warm milk, 1 tablespoon of the sugar, and the yeast. Give it a gentle stir and let it sit for 5-10 minutes until it becomes frothy and bubbly. If nothing happens after 10 minutes, your yeast is dead—start over with fresh yeast. This happened to me once on Thanksgiving morning, and I learned my lesson the hard way.
Step 2: Mix the Dough
In your large mixing bowl (or stand mixer bowl), whisk together the flour, remaining sugar, and salt. Make a well in the center and add the activated yeast mixture, orange juice, melted butter, eggs, vanilla extract, and orange zest. Mix until a shaggy dough forms. If using a stand mixer, use the dough hook on low speed for about 2 minutes.
Step 3: Knead the Dough
Turn the dough onto a lightly floured surface and knead for 8-10 minutes (or let your stand mixer do the work on medium-low speed for 6-7 minutes). The dough should be smooth, elastic, and slightly tacky but not sticky. If it’s sticking to everything, add flour one tablespoon at a time. If it’s too dry, add a splash of warm milk. I always err on the side of slightly stickier—it makes for a softer bread.
Step 4: First Rise
Shape the dough into a ball and place it in a lightly greased bowl. Cover with a clean kitchen towel and let it rise in a warm, draft-free spot for 1.5 to 2 hours, or until doubled in size. I usually put mine in the microwave (turned off) with a cup of hot water next to it. The steam and warmth create the perfect environment.
Step 5: Shape the Bread
Punch down the dough gently to release the air. Transfer it to a lightly floured surface and divide it into two pieces—one larger piece (about two-thirds of the dough) for the base, and one smaller piece (one-third) for the bone decorations. Shape the large piece into a round loaf and place it on your parchment-lined baking sheet.
Step 6: Make the Bone Decorations
Divide the smaller piece into 4 equal portions. Roll each portion into a rope about 6 inches long. Cut each rope in half, then roll each half into a smaller rope. Shape each small rope into a bone shape by pinching the ends and rolling them slightly thicker in the middle. Place two bones on top of the loaf in a cross pattern, and two more on the sides. This is the traditional Pan de Muerto look.
Step 7: Second Rise
Cover the shaped loaf loosely with the towel and let it rise for another 45 minutes to 1 hour. It should look puffy and almost doubled. Meanwhile, preheat your oven to 350°F (175°C).
Step 8: Bake the Bread
Bake the Pan de Muerto for 25-30 minutes, or until the top is golden brown and the loaf sounds hollow when tapped on the bottom. If the top is browning too quickly, tent it loosely with aluminum foil after 15 minutes. A toothpick inserted into the center should come out clean.
Step 9: Make the Glaze
While the bread bakes, combine the sugar and water in a small saucepan. Bring to a simmer over medium heat, stirring until the sugar dissolves completely. Remove from heat and stir in the orange blossom water and orange juice. Set aside to cool slightly.
Step 10: Glaze and Serve
Let the bread cool on the baking sheet for 10 minutes, then transfer to a wire rack. While it’s still warm, brush the orange blossom glaze generously all over the top and sides. Sprinkle with the remaining granulated sugar. Let it cool completely before serving—if you can wait that long. The glaze will soak in and create the most incredible flavor.
Cooking Tips & Techniques
I’ve made this bread more times than I can count, and I’ve definitely made my share of mistakes along the way. Here’s what I’ve learned so you don’t have to repeat my errors.
Don’t rush the first rise. I know it’s tempting to cut corners when you’re short on time, but under-proofed dough leads to dense bread. The dough should look noticeably puffy and jiggle slightly when you shake the bowl. If you’re unsure, give it another 15 minutes.
Temperature matters more than you think. Cold ingredients will slow down your yeast, and a hot kitchen can over-proof your dough. Aim for a consistent 75-80°F environment. If your kitchen is cold, try placing the dough in your oven with just the light on—it creates a cozy little greenhouse.
That bone decoration is easier than it looks. I used to stress about getting the shape perfect, but honestly, even imperfect bones look charming. The key is to keep the ropes uniform in thickness so they bake evenly. If your dough is sticking while shaping, dust your hands lightly with flour.
Glaze while warm, but not hot. If the bread is too hot, the glaze will just run off and pool on the pan. Too cold, and it won’t soak in properly. The sweet spot is about 10 minutes out of the oven. You want the bread warm enough that the glaze absorbs, but cool enough that it doesn’t slide right off.
Double the recipe for a crowd. This bread freezes beautifully, so I always make two loaves. One for the party, one to stash in the freezer for unexpected guests. Just wrap it tightly in plastic wrap and foil before freezing.
Variations & Adaptations
One of the best things about this recipe is how flexible it is. I’ve experimented with several variations over the years, and here are my favorites.
Dairy-Free Version
Swap the whole milk for oat milk or almond milk, and use vegan butter instead of regular. The texture will be slightly less tender, but still delicious. I’ve served this to dairy-free guests and they couldn’t tell the difference.
Chocolate Orange Twist
Add 1/4 cup of cocoa powder to the flour mixture and reduce the flour by the same amount. The chocolate pairs beautifully with the orange blossom glaze. My niece calls this “the fancy brownie bread” and requests it for every family gathering.
Spiced Version
Add 1 teaspoon of ground cinnamon, 1/2 teaspoon of ground nutmeg, and 1/4 teaspoon of ground cloves to the flour. This gives the bread a warm, autumnal flavor that’s perfect for fall celebrations. I made this version last November and it was a huge hit at my book club meeting.
Gluten-Free Adaptation
Use a 1:1 gluten-free flour blend that contains xanthan gum. Cup4Cup works really well here. The dough will be stickier, so don’t be alarmed. You may need to add an extra tablespoon of milk to get the right consistency.
Less Sweet Option
Reduce the sugar in the dough to 1/4 cup and skip the glaze entirely. Instead, brush the baked bread with melted butter and sprinkle with a light dusting of powdered sugar. This version is perfect for serving alongside savory dishes.
Serving & Storage Suggestions
This bread is meant to be a centerpiece, so don’t hide it in a corner. Place it on a beautiful platter surrounded by marigolds, candles, and photos of loved ones for Dia de los Muertos. The golden crust and sparkling sugar make it naturally photogenic.
Serving Temperature: Pan de Muerto is best served at room temperature. If you’ve refrigerated it, let it sit out for 30 minutes before serving. The texture softens and the flavors become more pronounced.
What to Serve With It: A cup of Mexican hot chocolate is the classic pairing, but it’s also wonderful with coffee, champurrado, or even a glass of cold milk. For a dessert spread, serve it alongside fresh fruit, whipped cream, or a scoop of vanilla ice cream.
Storage: Store leftover bread in an airtight container at room temperature for up to 3 days. Do not refrigerate—it will dry out the bread. If your kitchen is humid, add a paper towel to the container to absorb excess moisture.
Freezing: Wrap the cooled, unglazed bread tightly in plastic wrap, then in aluminum foil. Freeze for up to 3 months. When ready to serve, thaw at room temperature, then warm in a 300°F oven for 10 minutes before glazing.
Reheating: For that fresh-from-the-oven experience, wrap individual slices in foil and warm them in a 350°F oven for 5-7 minutes. The microwave works in a pinch, but it will make the bread slightly chewy.
The flavors actually deepen overnight, so this is one of those rare breads that tastes even better the next day. The orange blossom scent becomes more subtle and integrated, and the crumb softens beautifully.
Nutritional Information & Benefits
Let’s be honest—this is a treat, not a health food. But that doesn’t mean it’s without its merits. Here’s a rough estimate per slice (assuming 12 slices per loaf):
- Calories: Approximately 280-320
- Carbohydrates: 48g
- Protein: 6g
- Fat: 8g
- Fiber: 1g
- Sugar: 22g
What makes this bread a little better for you: The eggs provide high-quality protein and B vitamins. The orange zest and juice offer a dose of vitamin C and antioxidants. And the orange blossom water? It’s been used in traditional medicine for its calming properties—so maybe that post-bread nap isn’t just the carbs!
Dietary Considerations: This recipe contains gluten, dairy, and eggs. For allergen-friendly options, check the variations section above. If you’re watching your sugar intake, the less-sweet variation is a great alternative.
I always tell my friends that food is about more than just numbers on a nutrition label. This bread is about connection, tradition, and celebrating the people we love. Sometimes that’s the healthiest thing you can consume.
Conclusion
This Pan de Muerto with Orange Blossom Glaze isn’t just a recipe—it’s a way to bring a little piece of tradition into your home. Whether you’re honoring loved ones during Dia de los Muertos, hosting a fall gathering, or just craving something warm and fragrant, this bread delivers every single time.
I’ve made this for dinner parties, holiday brunches, and quiet mornings when I needed a little comfort. It never fails to make people smile. The first time I served it to my neighbors, they asked if I’d secretly become a professional baker. I just laughed and said, “Nope, just a girl who really missed a good bakery.”
Now it’s your turn. Don’t be afraid to make this your own—add extra orange zest, try a different glaze, or shape the bones however you like. The best recipes are the ones that feel personal. So go ahead, preheat that oven, and let your kitchen fill with the scent of orange blossoms and butter. Your guests are going to love you for it.
I’d love to hear how yours turns out! Drop a comment below and let me know if you tried any variations. And if you’re looking for more crowd-pleasing recipes, check out our Conchas Recipe and Tres Leches Cake for your next gathering. Happy baking!
Frequently Asked Questions
Can I make Pan de Muerto without a stand mixer?
Absolutely! Kneading by hand works perfectly. It’ll take about 10-12 minutes of active kneading, but it’s a great way to connect with the dough. Just make sure you’re using a smooth, steady rhythm and not rushing the process.
What if I can’t find orange blossom water?
You can substitute with 1 tablespoon of orange extract mixed with 1 tablespoon of water. The flavor won’t be exactly the same, but it’ll still be delicious. You can also find orange blossom water online if your local stores don’t carry it.
Can I prepare the dough the night before?
Yes! After the first rise, punch down the dough, wrap it tightly in plastic wrap, and refrigerate overnight. The next day, let it sit at room temperature for 30 minutes before shaping and proceeding with the second rise. The slow fermentation actually develops more flavor.
Why did my bread turn out dense?
This usually happens for one of three reasons: the yeast was old or inactive, the dough wasn’t kneaded enough to develop gluten, or it didn’t rise long enough. Make sure your yeast is fresh, knead until the dough passes the windowpane test (stretch a small piece thin enough to see light through without tearing), and be patient with the rising times.
Can I freeze the glazed bread?
It’s better to freeze the bread before glazing. The glaze can make the bread soggy when thawed. If you’ve already glazed it, you can still freeze it, but expect the texture to be a bit softer. Wrap it well and thaw at room temperature.
Pin This Recipe!
Best Easy Pan de Muerto with Orange Blossom Glaze
This Pan de Muerto is a soft, slightly sweet bread infused with orange blossom and topped with a citrusy glaze. It’s a foolproof recipe that brings bakery-quality results to your Dia de los Muertos celebration.
- Prep Time: 30 minutes
- Cook Time: 30 minutes
- Total Time: 3 hours (including rising time)
- Yield: 12 servings 1x
- Category: Bread
- Cuisine: Mexican
Ingredients
- 4 cups (500g) all-purpose flour
- 1/2 cup (100g) granulated sugar
- 1 packet (2 1/4 tsp) active dry yeast
- 1/2 cup (120ml) whole milk, warm
- 1/4 cup (60ml) orange juice, freshly squeezed
- 1/4 cup (60g) unsalted butter, melted
- 3 large eggs, room temperature
- 1 tsp vanilla extract
- 1 tbsp orange zest
- 1/2 tsp salt
- 1/2 cup (100g) granulated sugar (for glaze)
- 1/4 cup (60ml) water (for glaze)
- 2 tbsp orange blossom water (for glaze)
- 1 tbsp orange juice (for glaze)
- 1/4 cup (50g) granulated sugar (for topping)
- 2 tbsp melted butter (optional, for brushing)
Instructions
- Activate the yeast: In a small bowl, combine warm milk, 1 tablespoon sugar, and yeast. Let sit for 5-10 minutes until frothy.
- Mix the dough: In a large bowl, whisk together flour, remaining sugar, and salt. Make a well and add yeast mixture, orange juice, melted butter, eggs, vanilla, and orange zest. Mix until a shaggy dough forms.
- Knead the dough: Turn onto a floured surface and knead for 8-10 minutes (or use a stand mixer with dough hook for 6-7 minutes) until smooth and elastic.
- First rise: Shape dough into a ball, place in a greased bowl, cover, and let rise in a warm spot for 1.5-2 hours until doubled.
- Shape the bread: Punch down dough. Divide into two pieces: two-thirds for the base, one-third for decorations. Shape the large piece into a round loaf on a parchment-lined baking sheet.
- Make bone decorations: Divide the smaller piece into 4 portions. Roll each into a 6-inch rope, cut in half, shape each half into a bone. Place two bones in a cross on top and two on the sides.
- Second rise: Cover and let rise for 45 minutes to 1 hour until puffy. Preheat oven to 350°F (175°C).
- Bake: Bake for 25-30 minutes until golden brown and hollow-sounding when tapped. Tent with foil if browning too quickly.
- Make glaze: In a small saucepan, combine sugar and water. Simmer until sugar dissolves. Remove from heat and stir in orange blossom water and orange juice.
- Glaze and serve: Let bread cool on baking sheet for 10 minutes, then transfer to a wire rack. Brush warm bread with glaze and sprinkle with remaining sugar. Cool completely before serving.
Notes
Don’t rush the first rise; under-proofed dough leads to dense bread. Glaze while warm but not hot (about 10 minutes out of the oven). The bread freezes well; freeze unglazed for best results.
Nutrition
- Serving Size: 1 slice
- Calories: 300
- Sugar: 22
- Sodium: 150
- Fat: 8
- Saturated Fat: 4
- Carbohydrates: 48
- Fiber: 1
- Protein: 6
Keywords: Pan de Muerto, Day of the Dead bread, orange blossom, Mexican bread, Dia de los Muertos, traditional bread


