Love this? Save it for later!
Share the inspiration with your friends
This was supposed to be a simple batch of caramel corn for a Halloween party. I had the brown sugar measured, the butter softening on the counter, and a very specific vision of glossy, golden clusters. But then my toddler decided the butter looked like a perfect snack for the dog, and by the time I rescued the stick, half of it was missing. I was already running late, the kitchen was a disaster zone, and I just grabbed the jar of marshmallows I use for rice cereal treats out of pure desperation. What came out of that chaotic, butter-smeared mess was nothing like the plan—and honestly, so much better.
These Easy Halloween Popcorn Balls with Candy Eyes were born from a moment of pure, panicked improvisation. I swapped the sticky caramel for marshmallow goo, which meant no candy thermometers, no boiling sugar, and zero chance of burning myself (which, let’s face it, was a very real possibility that day). I tossed in some bright orange food coloring because Halloween, and then I remembered the bag of candy eyes I’d bought for a cake that never happened. I pressed it all into balls, and when I stepped back, I had these adorable, slightly lopsided little monsters staring up at me.
They were a hit at the party. People kept asking where I bought them, and I just kept pointing at my messy kitchen and shrugging. That moment—when a recipe goes sideways and somehow lands on its feet—is the one that sticks with you. Maybe you’ve had that kitchen disaster moment too, where you’re one ingredient swap away from giving up. Let me tell you, this is the recipe that proves it’s worth pushing through the mess. These popcorn balls are impossibly easy, ridiculously cute, and they taste like pure childhood nostalgia with a spooky twist.
Why You’ll Love This Recipe
I’ve tested this recipe about seven times now (the sacrifices I make for you), and I can tell you with complete confidence that it is the most forgiving Halloween treat you will ever make. You don’t need to be a pastry chef or even a particularly organized cook to nail these little guys. They are the definition of low-stress, high-reward baking.
- 4-Ingredient Magic : You only need popcorn, marshmallows, butter, and candy eyes. That’s it. No corn syrup, no fancy extracts, no trips to three different stores.
- 10 Minutes of Work : From start to finish, you can have these ready in under fifteen minutes. The stovetop time is literally just melting marshmallows.
- Kid-Approved & Kid-Made : My niece helped me shape the last batch, and she didn’t burn herself once. The marshmallow mixture is warm but not dangerously hot, making it perfect for little hands.
- Customizable Chaos : You can make them orange, green, purple, or leave them plain. You can add sprinkles, chocolate chips, or pretzel pieces. Every batch can be different.
- No Special Equipment : You don’t need a candy thermometer, a stand mixer, or any weird kitchen gadget. A pot, a spatula, and your hands are all you need.
What makes this recipe different from every other popcorn ball out there is the texture. The marshmallow base keeps the popcorn soft and chewy, not rock-hard like traditional caramel versions. I mean, who wants to crack a tooth on a popcorn ball? Not me. These have a gentle give when you bite into them, and the candy eyes add this unexpected little crunch that makes every bite fun. They are the kind of treat that makes you close your eyes after the first bite, not because it’s fancy, but because it tastes exactly like a happy childhood memory.
What Ingredients You Will Need
This recipe is built on simple, humble ingredients that you probably already have in your pantry. The magic happens when they come together, but each one plays a specific role in creating the perfect texture and flavor.
- 8 cups of popped popcorn (about 1/2 cup of unpopped kernels, or one standard bag of microwave popcorn): You want the popcorn to be completely popped and, ideally, a day old. Freshly popped popcorn is too steamy and will make your marshmallow coating soggy. I always pop mine the night before and leave it out uncovered. If you’re in a rush, spread it on a baking sheet and let it sit for an hour. Make sure to pick out any unpopped kernels—they are a dental hazard waiting to happen.
- 4 tablespoons of unsalted butter (plus a little extra for greasing your hands): The butter adds richness and helps the marshmallows melt smoothly. I use unsalted so I can control the salt level, but salted butter works in a pinch—just skip adding any extra salt. I’ve used both, and honestly, the salted version is slightly more savory, which I personally love.
- 1 (10-ounce) bag of mini marshmallows (about 4 cups): Mini marshmallows melt faster and more evenly than the big ones. Do not try to use jumbo marshmallows unless you want to stand over the stove for twenty minutes stirring. Trust me on this one. I learned the hard way on a Tuesday night when I was too lazy to go back to the store.
- Orange gel food coloring (optional, but highly recommended for Halloween): I use gel coloring because it doesn’t thin out the marshmallow mixture like liquid drops do. A little goes a long way. Start with one drop and add more until you get the shade you want. You can also use green or purple for a monster vibe, or leave it plain white for ghost popcorn balls.
- 1/2 cup of candy eyes (the little round ones with black pupils): These are the star of the show. You can find them at any craft store, grocery store baking aisle, or online. I buy the big tub because I use them for everything—cookies, cupcakes, and now popcorn balls. They add a fun crunch and obviously make everything instantly cute.
- Non-stick cooking spray : You will spray everything—the pot, the spatula, your hands, the baking sheet. Marshmallow is sticky, and it will find every surface to cling to. Do not skip this step unless you enjoy crying over a stuck spatula.
Equipment Needed
You don’t need a fancy kitchen to make these, which is honestly my favorite part. Here is exactly what you need and a few alternatives if you’re working with limited tools.
- Large pot or Dutch oven (at least 5 quarts): You need room to stir the popcorn into the marshmallow mixture without it spilling everywhere. I use my enameled cast iron pot because it holds heat well, but any heavy-bottomed pot works.
- Rubber spatula (silicone is best): A wooden spoon will work, but the marshmallow gets stuck in the cracks. Silicone is non-stick and easy to clean. I have three of them because I keep losing them in the drawer.
- Baking sheet lined with parchment paper or a silicone baking mat: This is where your popcorn balls will set. Parchment paper is your best friend here—nothing sticks to it.
- Measuring cups : You need a way to measure your popcorn. I use a standard 8-cup measuring bowl, but you can eyeball it. Eight cups is roughly the amount in one standard bag of microwave popcorn.
- Small bowl of water (optional but helpful): Dip your fingers in water before shaping the balls to prevent sticking. It works better than butter sometimes.
Preparation Method
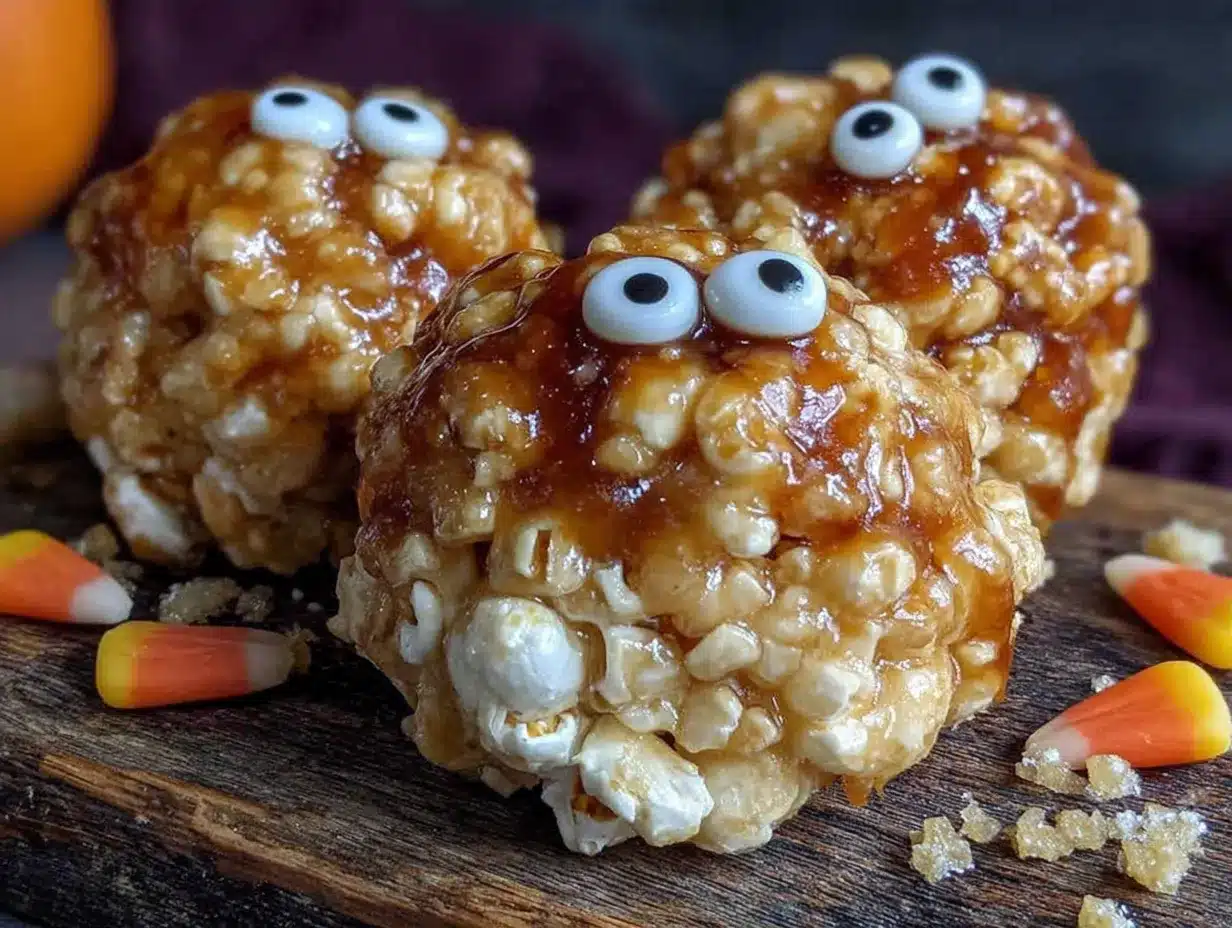
Alright, let’s make some monster popcorn balls. This process is fast, so have everything ready before you start. The marshmallow mixture waits for no one.
- Prepare your popcorn. Pop your popcorn according to package instructions or using your preferred method. Remove any unpopped kernels. Spread the popcorn out on a large baking sheet in a single layer. Let it sit for at least 30 minutes to cool completely and dry out. If you’re using microwave popcorn, let the bag sit unopened for a few minutes after popping to let the steam escape.
- Line your workspace. Line a large baking sheet with parchment paper. Spray a large bowl with non-stick cooking spray. You will dump the finished mixture into this bowl later. Also spray your rubber spatula and your hands. Yes, your hands. Trust me.
- Melt the butter. In your large pot, melt the 4 tablespoons of unsalted butter over medium-low heat. Do not let it brown. You just want it melted and bubbly. Swirl the pot occasionally.
- Add the marshmallows. Pour the entire bag of mini marshmallows into the melted butter. Stir constantly with your sprayed spatula until the marshmallows are completely melted and smooth. This takes about 3-4 minutes. Do not walk away. Marshmallows can burn quickly if you get distracted.
- Color it orange. Remove the pot from the heat. Add one drop of orange gel food coloring and stir. If you want a deeper orange, add another drop. Remember, the color will look slightly lighter once you add the popcorn, so go a shade darker than you think you need.
- Combine with popcorn. Pour the popcorn into the pot with the marshmallow mixture. Use your spatula to gently fold everything together. This is where you need to be patient and gentle. You want every kernel coated, but you don’t want to crush the popcorn into crumbs. Fold, fold, fold. It will look messy at first, but keep going.
- Add the candy eyes. Sprinkle about 1/4 cup of the candy eyes into the mixture and fold them in gently. Reserve the remaining 1/4 cup for pressing onto the outside of the balls later. This ensures every ball has eyes visible on the surface.
- Let it cool slightly. Let the mixture sit in the pot for 2-3 minutes. It needs to be cool enough to handle but still warm enough to shape. If it gets too cold, it will be hard to press together.
- Shape the balls. Spray your hands generously with non-stick cooking spray. Scoop up about 1/2 cup of the mixture and press it firmly into a ball shape. I use a gentle squeezing motion, like I’m making a snowball. Place the ball on the prepared baking sheet. Repeat with the remaining mixture. You should get about 10-12 balls, depending on size.
- Decorate with extra eyes. While the balls are still warm and slightly sticky, press a few extra candy eyes onto the surface of each ball. This is where you can get creative—make them look silly, scary, or just ridiculous. I always give mine three eyes because it looks more alien.
- Let them set. Let the popcorn balls sit at room temperature for about 20-30 minutes. They will firm up as they cool. Do not put them in the fridge—the condensation will make them soggy.
Sensory cue: When you are folding the popcorn into the marshmallow, you should hear a gentle crackling sound as the kernels move against each other. That is the sound of success. If it sounds wet or squishy, your popcorn was too fresh.
Cooking Tips & Techniques
I have made this recipe so many times that I have a mental list of all the things I wish I had known from the beginning. Here are the biggest lessons I learned, some of them the hard way.
Dry popcorn is non-negotiable. The number one mistake people make is using freshly popped popcorn. It is full of steam, and that steam turns your marshmallow coating into a sticky, soggy mess. Pop your popcorn the night before and leave it uncovered on the counter. If you are making it the same day, spread it on a baking sheet and let it sit for at least an hour. I once skipped this step because I was in a hurry, and I ended up with flat, wet popcorn blobs that looked nothing like balls. It was a sad day.
Work fast but don’t panic. The marshmallow mixture starts to set as soon as it leaves the heat. You have about 5 minutes to get everything mixed and shaped before it becomes too stiff to work with. That sounds stressful, but it is actually plenty of time if you have everything prepped. I keep my baking sheet, sprayed hands, and extra candy eyes all within arm’s reach before I even start melting the butter.
Grease everything like your life depends on it. Marshmallow is sticky. It will stick to your pot, your spatula, your hands, your counter, and possibly your cat if he gets too close. I spray my pot with non-stick spray before I even add the butter. I spray my spatula. I spray my hands multiple times during the shaping process. I keep the spray bottle right next to me and reapply after every two or three balls. You cannot over-grease in this situation.
Press firmly but gently. When you shape the balls, you want to apply enough pressure to hold everything together, but not so much that you crush the popcorn into powder. Think of it like making a snowball—you squeeze just enough to compact it, then you ease off. If you see popcorn crumbs falling off your ball, you are squeezing too hard.
Size matters. I make my balls about the size of a tennis ball. They are easy to hold and eat. If you make them too big, they become awkward to bite into. If you make them too small, they dry out faster. Tennis ball size is the sweet spot.
Variations & Adaptations
This recipe is a blank canvas, and I love playing around with different versions. Here are a few variations I have tried and loved.
Monster Mash Popcorn Balls: Instead of orange food coloring, use green. Add 1/4 cup of crushed pretzel sticks to the mixture for some salty crunch. Use a mix of large and small candy eyes. These look like little swamp creatures, and my nephew refused to eat them because he said they were “too real.” I took that as a compliment.
Chocolate Drizzle Popcorn Balls: After the balls have set, melt 1/2 cup of dark chocolate chips with 1 teaspoon of coconut oil. Drizzle the chocolate over the tops of the balls using a fork. Let the chocolate set at room temperature. The combination of sweet marshmallow and rich dark chocolate is absolutely dangerous. I made these for a movie night and ate four before the opening credits finished.
Spicy Sweet Popcorn Balls: Add 1/4 teaspoon of cayenne pepper and 1/2 teaspoon of smoked paprika to the marshmallow mixture along with the food coloring. The heat sneaks up on you after the sweetness fades. It is weirdly addictive. I was skeptical the first time I tried it, but now I make a spicy batch every Halloween for the adults.
Gluten-Free & Vegan Adaptation: Use a vegan marshmallow brand (like Dandies) and substitute the butter with a plant-based butter stick. The texture will be slightly different—vegan marshmallows take a little longer to melt—but the final result is just as good. I tested this for a friend with celiac disease, and she said they were even better than the original. I won’t argue with that.
Nutty Crunch Version: Fold in 1/2 cup of chopped peanuts or almonds along with the candy eyes. The nuts add a savory element that balances the sweetness. I use salted peanuts because I love the salty-sweet thing. Just make sure your guests don’t have nut allergies before you serve these.
Serving & Storage Suggestions
These popcorn balls are best served at room temperature, which makes them perfect for parties and Halloween gatherings. You can arrange them on a large platter, and they look fantastic piled up like a mountain of monster heads. I like to put them on a cake stand for extra height and drama.
For a Halloween party, I serve them alongside a bowl of spicy pumpkin dip and some apple slices for a sweet and savory spread. The contrast between the crunchy popcorn balls and the creamy dip is wonderful. I also love pairing them with a warm mug of creamy hot cocoa for a cozy night in.
Storage: Store the popcorn balls in an airtight container at room temperature. Do not refrigerate them—the moisture will ruin the texture. They will stay fresh for up to 5 days, but honestly, they never last that long in my house. Layer them between sheets of parchment paper to prevent them from sticking together.
Freezing: You can freeze these popcorn balls for up to 3 months. Wrap each ball individually in plastic wrap, then place them in a freezer-safe bag. To thaw, let them sit at room temperature for about 30 minutes. The texture will be slightly less crispy, but they are still delicious. I made a double batch last October and pulled them out for a movie night in December, and they were a hit.
Reheating: If your popcorn balls have gone a little stale (it happens), you can revive them in a 300°F oven for 3-4 minutes. Let them cool completely before serving. Do not use the microwave—it will turn them into a sticky, chewy mess. Trust me, I tried it once, and I regretted it immediately.
Flavor development: These popcorn balls actually taste better the next day. The marshmallow has time to fully set, and the flavors meld together. I always make mine the day before I plan to serve them. It makes party prep so much easier.
Nutritional Information & Benefits
Let’s be real—these are a treat, not a health food. But I believe in balance, and having a couple of these on Halloween night is part of the fun. Here is the estimated nutritional breakdown for one popcorn ball (based on 12 servings).
| Nutrient | Amount per Serving |
|---|---|
| Calories | 185 |
| Total Fat | 6g |
| Saturated Fat | 3.5g |
| Carbohydrates | 32g |
| Sugar | 18g |
| Protein | 2g |
| Sodium | 95mg |
| Fiber | 1g |
Popcorn itself is a whole grain, which means it has more fiber than you might expect. It is also relatively low in calories before you add the marshmallows and butter, so the indulgence comes from the coating, not the base. If you want to lighten these up, you can use a butter substitute and a lower-sugar marshmallow brand. I have tried it, and while the texture is slightly different, it still works.
Allergen note: This recipe contains dairy (butter) and may contain traces of gluten depending on your popcorn brand. The candy eyes are typically made from sugar and cornstarch, but check the label for any allergen warnings. For a nut-free version, skip the optional nut additions.
I personally love that these are portion-controlled treats. You get one satisfying ball instead of mindlessly snacking from a giant bowl. It makes the indulgence feel intentional and special.
Conclusion
These Easy Halloween Popcorn Balls with Candy Eyes are proof that the best recipes often come from the messiest moments. What started as a butter-stealing dog and a frantic kitchen scramble turned into a tradition that my family looks forward to every October. They are simple enough for a Tuesday night, cute enough for a party, and delicious enough that you will find yourself making them long after Halloween is over.
I love that this recipe gives you permission to be imperfect. Your balls don’t have to be perfectly round. Your candy eyes don’t have to be perfectly placed. The slightly lopsided, googly-eyed monsters are the ones that get the most laughs and the most compliments. That is the whole point of Halloween, isn’t it? Embracing the weird and the wonderful.
I would love to see your versions of these popcorn balls. Tag me in your photos, leave a comment telling me how many candy eyes your kids managed to eat before they made it into the bowl, or share your own happy kitchen accident story. Every time I make these, I remember that sometimes the best thing you can do in the kitchen is just let go and see what happens. Happy Halloween, and happy snacking!
Frequently Asked Questions
Can I use microwave popcorn for this recipe?
Absolutely. Just make sure you let it sit and dry out for at least an hour before using it. I use plain buttered microwave popcorn all the time. Avoid the flavored varieties like kettle corn or cheese popcorn, as they will change the taste of the final product.
Why are my popcorn balls falling apart?
This usually happens for one of two reasons. Either your popcorn was too fresh and created too much steam, or you didn’t press the balls firmly enough during shaping. Next time, let your popcorn sit out longer and squeeze the balls a little tighter. You can also try adding an extra tablespoon of butter to the marshmallow mixture for more stickiness.
Can I make these without candy eyes?
Of course! You can use sprinkles, chocolate chips, M&Ms, or crushed cookies instead. The candy eyes are just for the Halloween look. I have made a plain version with rainbow sprinkles for birthday parties, and they were just as popular.
How do I keep the marshmallow from sticking to my hands?
Spray your hands generously with non-stick cooking spray before you start shaping. Reapply after every two or three balls. You can also keep a small bowl of water nearby and dip your fingers in it—the water creates a barrier between the marshmallow and your skin. I use both methods because I am paranoid about stickiness.
Can I double this recipe?
Yes, but you will need to work in batches. Do not try to melt double the marshmallows in the same pot—it will take too long and the mixture will cool before you can shape it. Make one batch, shape the balls, then make the second batch. It takes a little longer, but the results are much better.
Pin This Recipe!
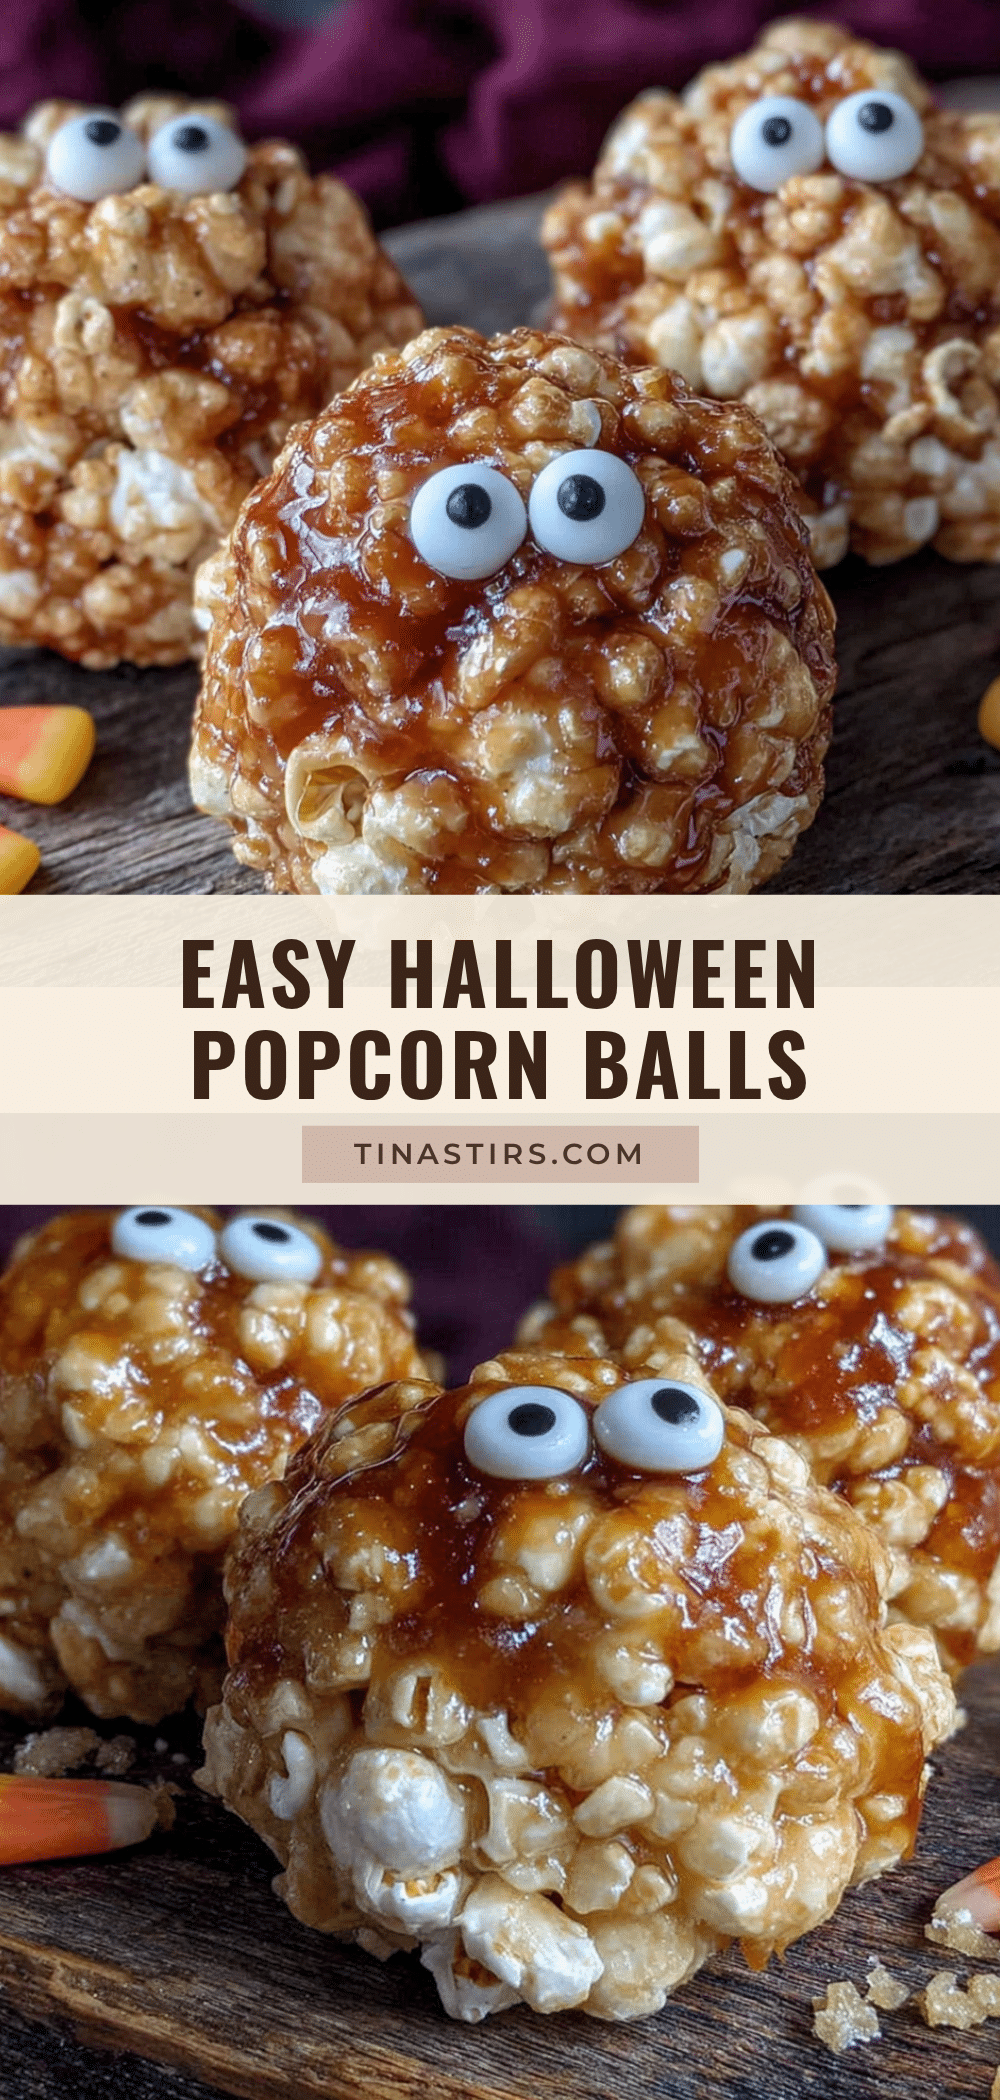
Easy Halloween Popcorn Balls with Candy Eyes (4-Ingredient Treat)
These Easy Halloween Popcorn Balls with Candy Eyes are a quick, no-fuss treat made with just popcorn, marshmallows, butter, and candy eyes. They’re soft, chewy, and perfect for Halloween parties or a fun family activity.
- Prep Time: 10 minutes
- Cook Time: 5 minutes
- Total Time: 15 minutes
- Yield: 10-12 servings 1x
- Category: Dessert
- Cuisine: American
Ingredients
- 8 cups popped popcorn (about 1/2 cup unpopped kernels or one standard bag of microwave popcorn)
- 4 tablespoons unsalted butter (plus extra for greasing hands)
- 1 (10-ounce) bag mini marshmallows (about 4 cups)
- Orange gel food coloring (optional, but highly recommended for Halloween)
- 1/2 cup candy eyes (the little round ones with black pupils)
- Non-stick cooking spray
Instructions
- Prepare your popcorn. Pop your popcorn according to package instructions or using your preferred method. Remove any unpopped kernels. Spread the popcorn out on a large baking sheet in a single layer. Let it sit for at least 30 minutes to cool completely and dry out. If you’re using microwave popcorn, let the bag sit unopened for a few minutes after popping to let the steam escape.
- Line your workspace. Line a large baking sheet with parchment paper. Spray a large bowl with non-stick cooking spray. You will dump the finished mixture into this bowl later. Also spray your rubber spatula and your hands. Yes, your hands. Trust me.
- Melt the butter. In your large pot, melt the 4 tablespoons of unsalted butter over medium-low heat. Do not let it brown. You just want it melted and bubbly. Swirl the pot occasionally.
- Add the marshmallows. Pour the entire bag of mini marshmallows into the melted butter. Stir constantly with your sprayed spatula until the marshmallows are completely melted and smooth. This takes about 3-4 minutes. Do not walk away. Marshmallows can burn quickly if you get distracted.
- Color it orange. Remove the pot from the heat. Add one drop of orange gel food coloring and stir. If you want a deeper orange, add another drop. Remember, the color will look slightly lighter once you add the popcorn, so go a shade darker than you think you need.
- Combine with popcorn. Pour the popcorn into the pot with the marshmallow mixture. Use your spatula to gently fold everything together. This is where you need to be patient and gentle. You want every kernel coated, but you don’t want to crush the popcorn into crumbs. Fold, fold, fold. It will look messy at first, but keep going.
- Add the candy eyes. Sprinkle about 1/4 cup of the candy eyes into the mixture and fold them in gently. Reserve the remaining 1/4 cup for pressing onto the outside of the balls later. This ensures every ball has eyes visible on the surface.
- Let it cool slightly. Let the mixture sit in the pot for 2-3 minutes. It needs to be cool enough to handle but still warm enough to shape. If it gets too cold, it will be hard to press together.
- Shape the balls. Spray your hands generously with non-stick cooking spray. Scoop up about 1/2 cup of the mixture and press it firmly into a ball shape. I use a gentle squeezing motion, like I’m making a snowball. Place the ball on the prepared baking sheet. Repeat with the remaining mixture. You should get about 10-12 balls, depending on size.
- Decorate with extra eyes. While the balls are still warm and slightly sticky, press a few extra candy eyes onto the surface of each ball. This is where you can get creative—make them look silly, scary, or just ridiculous. I always give mine three eyes because it looks more alien.
- Let them set. Let the popcorn balls sit at room temperature for about 20-30 minutes. They will firm up as they cool. Do not put them in the fridge—the condensation will make them soggy.
Notes
Dry popcorn is non-negotiable. Pop your popcorn the night before and leave it uncovered on the counter. If making the same day, spread it on a baking sheet and let it sit for at least an hour. Grease everything with non-stick spray to prevent sticking. Work fast but don’t panic; you have about 5 minutes to mix and shape before the mixture sets. Press firmly but gently when shaping to avoid crushing the popcorn. Store in an airtight container at room temperature for up to 5 days. Do not refrigerate. Can be frozen for up to 3 months.
Nutrition
- Serving Size: 1 popcorn ball
- Calories: 185
- Sugar: 18
- Sodium: 95
- Fat: 6
- Saturated Fat: 3.5
- Carbohydrates: 32
- Fiber: 1
- Protein: 2
Keywords: Halloween popcorn balls, candy eyes, easy Halloween treat, 4-ingredient, marshmallow popcorn balls, no-bake, kid-friendly


