Love this? Save it for later!
Share the inspiration with your friends
My neighbor’s ten-year-old asked me why I couldn’t just use a biscuit cutter instead of hauling out my entire cookie cutter collection for Thanksgiving. I started to explain why that wouldn’t work — then stopped. Honestly, I had no good reason. I was just stuck in my ways, convinced you needed the proper turkey-shaped cutter or the whole thing was a fraud. She watched me pull out three different cutters for wings, bodies, and feathers, and she just said, “That’s a lot of work for a cookie.”
She was right. I mean, completely and annoyingly right. So I tried it her way — a simple round biscuit cutter — and I’ll be darned if those weren’t the best turkey cookies I’ve ever made. You just cut the circle, then snip a little wedge out for the neck and head shape. It’s faster, less fussy, and honestly, the cookies look more charming because they’re not so perfectly stamped out. They look handmade. They look like someone actually touched them.
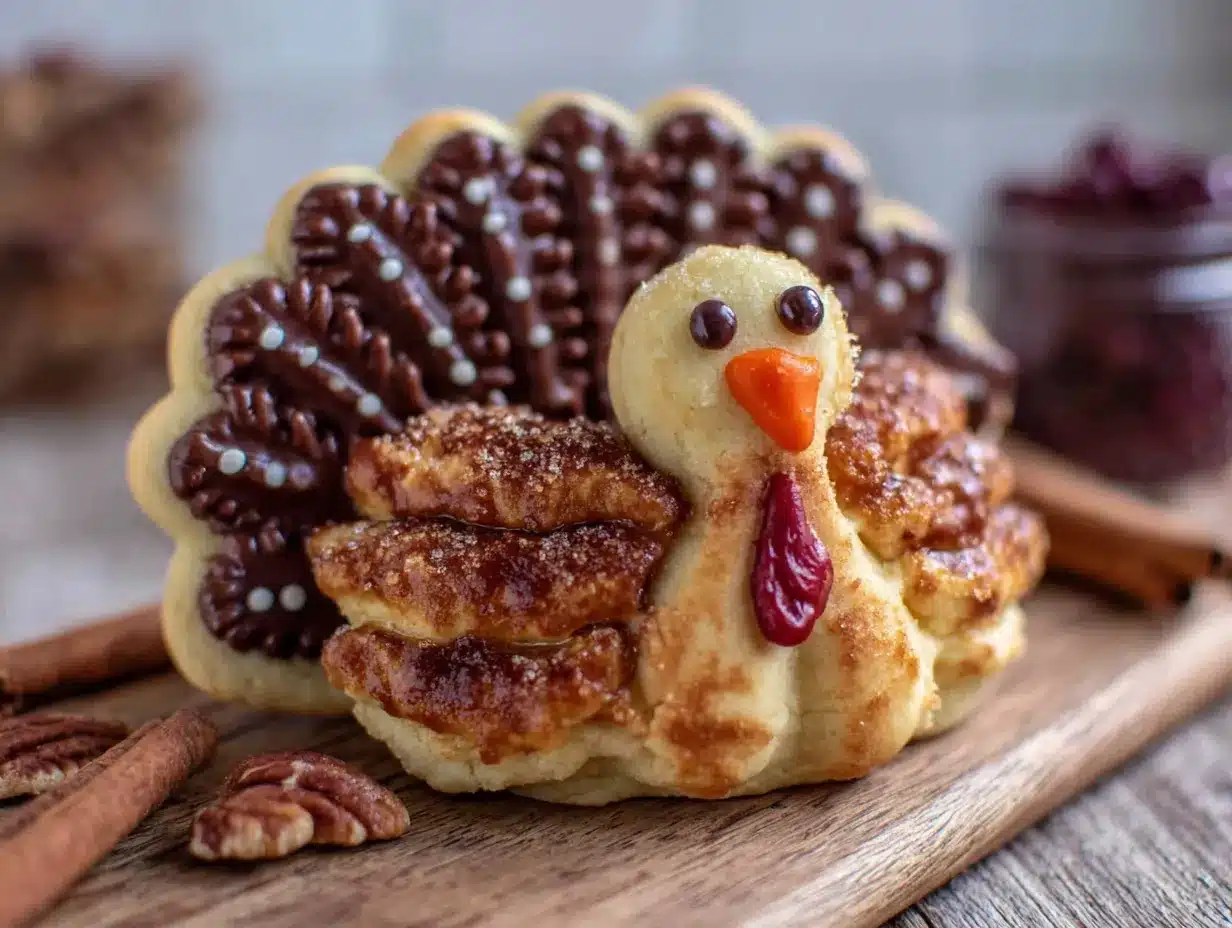
I remember standing there in my kitchen on a rainy Tuesday afternoon, flour dusting my favorite apron, and I just laughed at myself. Here I was, the self-appointed expert, getting schooled by a kid with a biscuit cutter and zero patience for nonsense. The cookies turned out golden, tender, and exactly as buttery as they should be. And when I iced them — little orange feathers, a tiny beak, those googly candy eyes — they were the cutest things on the platter. Maybe you’ve been there, too. Holding onto a “right” way to do something when a simpler way was sitting right in your drawer. That’s why these Favorite Turkey-Shaped Sugar Cookies with Easy Royal Icing are now my go-to. Not because I planned it that way, but because a ten-year-old showed me better.
Why You’ll Love This Recipe
Let’s be honest — holiday baking can feel like a second job. Between the shopping, the prepping, and the endless dishes, sometimes you just want something that works without a headache. These cookies deliver exactly that. They’re the kind of recipe that makes you look like you spent hours when you really just had a good system.
- Quick & Easy: From start to finish, you’re looking at about 45 minutes of active time. The dough comes together in one bowl, and the icing sets while you clean up.
- Simple Ingredients: Butter, sugar, flour, eggs — the usual suspects. You probably have everything already, which means no last-minute store runs.
- Perfect for Thanksgiving: Whether it’s a classroom party, a family gathering, or just a fun afternoon with the kids, these cookies fit right in.
- Crowd-Pleaser: I’ve yet to meet a kid who turns down a sugar cookie shaped like a turkey. Adults love them too — they’re nostalgic without being fussy.
- Unbelievably Delicious: The texture is that perfect balance — crisp on the edges, soft in the middle. The royal icing dries hard enough to stack but stays sweet and creamy.
What makes this version different? It’s the technique. Most sugar cookie recipes call for chilling the dough for hours. Mine uses a quick 20-minute freezer rest that works just as well. And the royal icing? I use a slightly thicker consistency that doesn’t run off the cookie, so even beginners get clean, pretty results. I’ve tested this with my own kids, my neighbor’s kids, and a whole classroom of second-graders. It’s fail-proof. This isn’t just another sugar cookie — it’s the one you’ll come back to every November.
What Ingredients You Will Need
This recipe uses simple, wholesome ingredients to deliver that classic buttery flavor and tender crumb. Nothing fancy here — just good baking basics that work every time.
For the Sugar Cookies
- 1 cup (226g) unsalted butter, softened — I use Land O’Lakes for consistent results. Make sure it’s truly soft, not melted. (Room temperature butter creams better.)
- 1 cup (200g) granulated sugar — Standard white sugar works perfectly. No need for superfine or organic here.
- 1 large egg, room temperature — Cold eggs can seize the butter mixture. Let it sit out for 15 minutes if you forgot.
- 1 teaspoon vanilla extract — Pure vanilla, not imitation, if you can swing it. The flavor difference is noticeable.
- 2 ½ cups (312g) all-purpose flour — Spoon and level your flour. Scooping directly from the bag packs in too much and makes cookies dry.
- ½ teaspoon baking powder — Gives just enough lift without making the cookies puffy.
- ¼ teaspoon salt — Balances the sweetness. I use fine sea salt.
For the Royal Icing
- 3 cups (360g) powdered sugar, sifted — Sifting prevents lumps. Trust me on this one.
- 2 large egg whites, pasteurized — Pasteurized is safer for raw icing. You can also use meringue powder if preferred.
- 1 teaspoon vanilla extract or lemon juice — Lemon juice cuts the sweetness and helps the icing dry faster.
- Gel food coloring — I recommend Americolor or Wilton. Liquid colors thin the icing too much.
- Candy eyes or sprinkles for decoration — Those little googly eyes make the turkeys come alive. Find them at any craft store.
Substitution note: For a dairy-free version, swap the butter with a high-quality vegan butter stick. I’ve used Earth Balance with good results. The texture is slightly less tender but still delicious.
Equipment Needed
You don’t need a lot of fancy tools for these cookies. Here’s what actually matters:
- Baking sheets — Two standard half-sheet pans work well. Line them with parchment paper for easy cleanup.
- Parchment paper or silicone baking mats — Silpat mats are great, but parchment is cheaper and works just as well.
- Rolling pin — I prefer a wooden one with thickness rings for even rolling. If you don’t have rings, use two stacked popsicle sticks as guides.
- Biscuit cutter (2.5 to 3 inches) — A round cutter is all you need. No special turkey shapes required.
- Sharp knife or bench scraper — For cutting the little wedge out of the circle to form the turkey shape.
- Piping bags or squeeze bottles — For the royal icing. Squeeze bottles are easier for kids to handle.
- Cooling rack — Wire racks let air circulate so cookies cool evenly without soggy bottoms.
Budget-friendly tip: Skip the fancy piping tips. A small zip-top bag with the corner snipped off works perfectly for royal icing. I used that method for years before I bought actual piping bags.
Preparation Method
- Cream the butter and sugar. In a large mixing bowl, beat the softened butter and granulated sugar together until light and fluffy — about 2 to 3 minutes with a hand mixer. You want it pale yellow and airy. Scrape down the sides halfway through.
- Add the egg and vanilla. Crack in the room-temperature egg and pour in the vanilla extract. Beat on medium speed until fully combined, about 30 seconds. The mixture might look slightly curdled — that’s okay. It will come together when you add the flour.
- Mix the dry ingredients. In a separate bowl, whisk together the all-purpose flour, baking powder, and salt. Add this to the wet mixture in two additions, mixing on low speed after each. Stop as soon as the dough comes together. Overmixing makes tough cookies.
- Chill the dough. Divide the dough in half, flatten each into a disk, and wrap tightly in plastic wrap. Pop them in the freezer for 20 minutes. This firms the butter so the cookies hold their shape during baking. (If you prefer, refrigerate for 1 hour instead.)
- Preheat and prepare. While the dough chills, preheat your oven to 350°F (175°C). Line two baking sheets with parchment paper.
- Roll and cut. On a lightly floured surface, roll one disk of dough to about ¼-inch thickness. Use your biscuit cutter to cut rounds. Place them 2 inches apart on the prepared baking sheets. Gather the scraps, re-roll once, and cut more rounds. (Re-rolling too many times makes cookies tough, so limit to one re-roll.)
- Shape the turkeys. Here’s the trick: Using a sharp knife, cut a small wedge out of each round — about a 1-inch wide V-shape from the edge inward. Remove that wedge. The remaining shape will have a flat edge and a rounded body. The flat edge becomes the top of the turkey’s head. Press the wedge back onto the opposite side to form the tail feathers. It sounds weird, but it works beautifully.
- Bake. Bake for 8 to 10 minutes, rotating the pans halfway through. The edges should be just barely golden. The centers will look slightly underdone — that’s perfect. Let them cool on the baking sheet for 5 minutes, then transfer to a wire rack to cool completely.
- Make the royal icing. In a clean bowl, beat the egg whites until frothy. Gradually add the sifted powdered sugar, beating on low speed until combined. Add the vanilla or lemon juice and beat on medium-high for 3 to 4 minutes until the icing is thick, glossy, and holds stiff peaks. Cover with a damp paper towel to prevent drying.
- Color and decorate. Divide the icing into separate bowls. Tint with gel food coloring — orange for feathers, red for the wattle, brown for the body, and yellow for the beak. Transfer each color to a piping bag or squeeze bottle. Outline the turkey shape first, then flood the inside with thinner icing if desired. Add candy eyes while the icing is still wet. Let dry for 2 to 3 hours or overnight.
Cooking Tips & Techniques
I’ve made these cookies more times than I can count, and I’ve messed up plenty along the way. Here’s what I learned the hard way so you don’t have to.
Don’t skip the chill. I once tried to rush and rolled the dough straight from the mixer. The cookies spread into flat, shapeless blobs. That 20-minute freezer rest is non-negotiable. It firms the butter so the cookies keep their shape.
Flour your surface lightly. Too much flour makes the dough dry and crumbly. Too little and it sticks like crazy. I dust my rolling pin and counter with about a tablespoon of flour, then add more only if needed. You want the dough to release easily without absorbing extra flour.
Watch the bake time. Every oven runs differently. My old oven baked these in exactly 8 minutes. My new one takes 10. Start checking at 8 minutes — the edges should be just golden, not brown. Overbaked sugar cookies turn into crunchy hockey pucks.
Royal icing consistency matters. For outlining, you want icing that holds a peak when you lift the spatula. For flooding, thin it with a few drops of water until it flows like thick honey. If it runs off the cookie, it’s too thin. Add more powdered sugar to fix it.
Multitask smartly. While the first batch bakes, roll and cut the second batch. While the cookies cool, make the icing. This way, you’re never standing around waiting. I usually finish decorating while watching a movie — it’s oddly relaxing.
My biggest failure: I once forgot the baking powder. The cookies came out dense and flat, like little biscuits. They still tasted okay, but they weren’t the tender, buttery cookies I wanted. Double-check your ingredients before you start.
Variations & Adaptations
These cookies are forgiving. Here are some ways to make them your own.
Gluten-Free Version: Substitute the all-purpose flour with a 1:1 gluten-free baking blend. I’ve used King Arthur Measure for Measure with great results. Add an extra tablespoon of milk to the dough since gluten-free flour absorbs more moisture.
Vegan Adaptation: Replace the butter with vegan butter and use a flax egg (1 tablespoon ground flaxseed mixed with 3 tablespoons water). For the royal icing, use aquafaba (chickpea liquid) instead of egg whites. It whips up just as glossy.
Flavor Twists: Add 1 teaspoon of almond extract along with the vanilla for a nutty undertone. Or mix in ½ teaspoon of cinnamon and ¼ teaspoon of nutmeg for a warm, spiced cookie that screams fall. I tried the cinnamon version last year and it was a hit.
Different Shapes: Don’t limit yourself to turkeys. Use the same dough and technique for pumpkins, leaves, or simple round cookies. The royal icing works on any shape. My kids once made “turkey” cookies that looked more like blob monsters — we called them “abstract turkeys” and they were hilarious.
Allergen-Friendly: For nut-free, just skip any almond extract and use vanilla. For egg-free, use the flax egg mentioned above. The texture will be slightly less tender but still delicious.
Serving & Storage Suggestions
These cookies are best served at room temperature. The royal icing should be fully set — usually after 2 to 3 hours of drying. I like to arrange them on a platter with the turkey “faces” facing outward so everyone can see the cute expressions.
Complementary dishes: Serve alongside a warm cup of spiced apple cider, a mug of hot chocolate, or a scoop of vanilla ice cream for dessert. They also make a fun addition to a Thanksgiving dessert table next to pumpkin pie and pecan bars.
Storage: Store in an airtight container at room temperature for up to 5 days. Layer them between sheets of parchment paper to prevent the icing from sticking. Do not refrigerate — the cookies will absorb moisture and become soft.
Freezer instructions: You can freeze the baked, un-iced cookies for up to 3 months. Wrap them tightly in plastic wrap and then foil. When ready to decorate, thaw at room temperature, then ice as directed. The icing itself does not freeze well — make it fresh.
Reheating: These cookies don’t need reheating, but if you want that just-baked warmth, pop them in a 300°F oven for 3 minutes. Let them cool slightly before eating.
Flavor development: The cookies actually taste better the next day. The flavors meld and the texture softens just a touch. I always bake mine a day ahead and decorate the morning I plan to serve them.
Nutritional Information & Benefits
Let’s be real — these are cookies. They’re a treat, not a health food. But here’s the approximate nutritional breakdown per cookie (based on 24 cookies):
| Nutrient | Amount |
|---|---|
| Calories | 185 |
| Total Fat | 8g |
| Saturated Fat | 5g |
| Cholesterol | 25mg |
| Sodium | 70mg |
| Total Carbohydrates | 27g |
| Sugars | 18g |
| Protein | 2g |
The butter provides a small amount of vitamin A, and the egg whites in the icing offer a bit of protein. If you use the lemon juice in the icing, you get a tiny vitamin C boost. But honestly, the real benefit here is the joy of making something beautiful with your hands and sharing it with people you love. That counts for something, right?
Dietary considerations: This recipe contains gluten, dairy, and eggs. For allergen-friendly options, see the variations section above.
Conclusion
These Favorite Turkey-Shaped Sugar Cookies with Easy Royal Icing have become a November tradition in my house. They’re simple enough for a beginner, forgiving enough for a busy parent, and cute enough to impress anyone. I love that they start with a humble round biscuit cutter and turn into something that looks like it took real effort. It’s a little bit of kitchen magic, honestly.
Don’t be afraid to make them your own. Use different colors, add sprinkles, or let the kids go wild with the icing. The imperfections are what make them charming. My favorite batch was the one where my youngest gave every turkey a crooked smile — they looked so happy.
I’d love to see your creations! Leave a comment below and tell me how your turkeys turned out. Did you try a fun variation? Did your kids come up with something unexpected? Share your photos and tag me — nothing makes my day like seeing these cookies in someone else’s kitchen. Happy baking, friend!
Frequently Asked Questions
Can I make the dough ahead of time?
Absolutely. You can refrigerate the dough disks for up to 3 days or freeze them for up to 3 months. Just thaw in the refrigerator overnight before rolling and cutting.
Why did my cookies spread too much?
Most likely the dough wasn’t chilled enough. Pop the cut cookies back in the freezer for 10 minutes before baking. Also, make sure your butter was softened, not melted — melted butter causes spread.
Can I use store-bought icing instead of royal icing?
You can, but it won’t dry as hard. Store-bought icing stays soft and sticky, which makes stacking difficult. Royal icing dries firm and shiny, perfect for these cookies.
How do I get the icing to dry faster?
Add a tiny bit more powdered sugar to thicken the icing. You can also place the decorated cookies in front of a fan for 30 minutes. Just don’t put them in the fridge — condensation will ruin the finish.
Can I skip the candy eyes?
Sure! You can pipe little eyes with black icing instead. Or use mini chocolate chips. I’ve even used small black sprinkles in a pinch. Get creative with what you have.
Pin This Recipe!
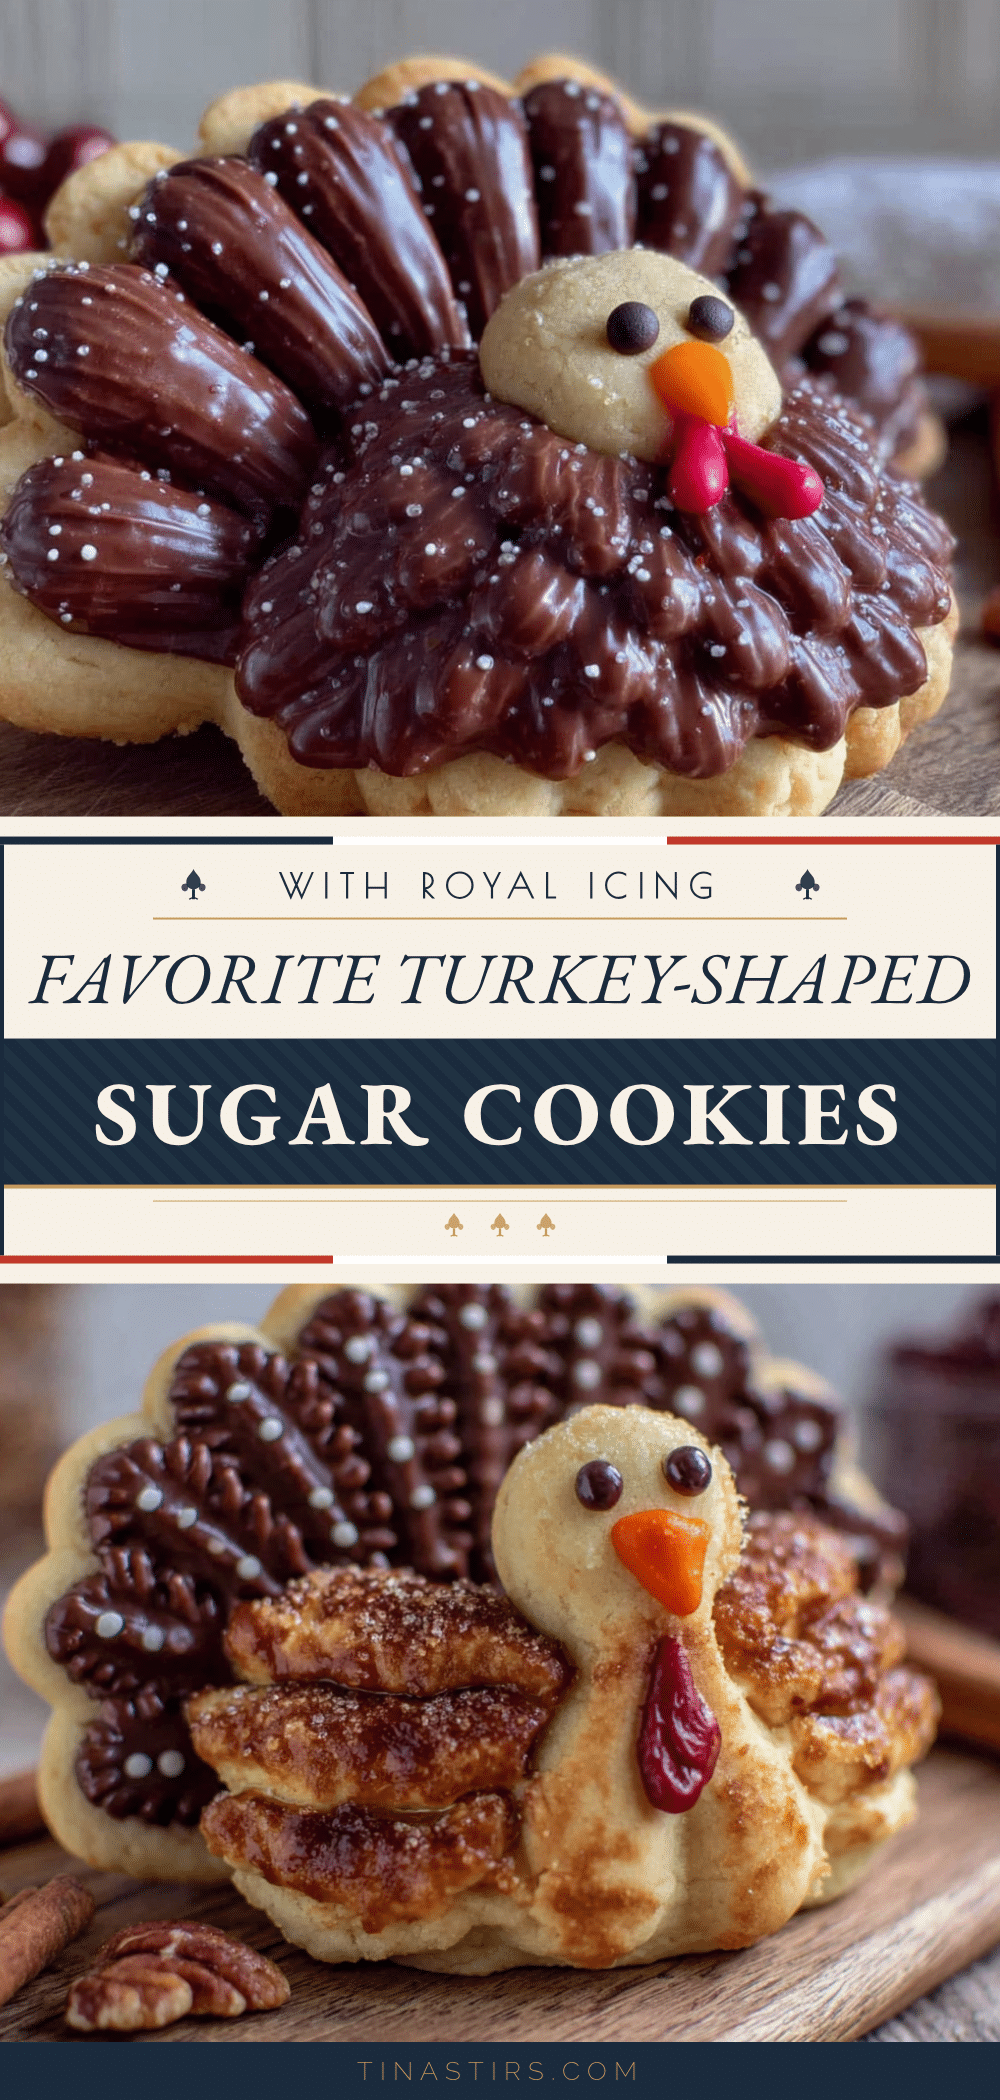
Favorite Turkey-Shaped Sugar Cookies with Easy Royal Icing

These adorable turkey-shaped sugar cookies use a simple biscuit cutter and easy royal icing for a charming, handmade look. Perfect for Thanksgiving, they’re quick to make and always a crowd-pleaser.
- Prep Time: 20 minutes
- Cook Time: 10 minutes
- Total Time: 45 minutes
- Yield: 24 servings 1x
- Category: Dessert
- Cuisine: American
Ingredients
- 1 cup (226g) unsalted butter, softened
- 1 cup (200g) granulated sugar
- 1 large egg, room temperature
- 1 teaspoon vanilla extract
- 2 ½ cups (312g) all-purpose flour
- ½ teaspoon baking powder
- ¼ teaspoon salt
- 3 cups (360g) powdered sugar, sifted
- 2 large egg whites, pasteurized
- 1 teaspoon vanilla extract or lemon juice
- Gel food coloring
- Candy eyes or sprinkles for decoration
Instructions
- Cream the butter and sugar together until light and fluffy, about 2-3 minutes.
- Add the egg and vanilla, beat until combined.
- Whisk flour, baking powder, and salt together; add to wet mixture in two additions, mixing on low until just combined.
- Divide dough in half, flatten into disks, wrap in plastic, and freeze for 20 minutes (or refrigerate for 1 hour).
- Preheat oven to 350°F (175°C) and line baking sheets with parchment paper.
- On a lightly floured surface, roll dough to ¼-inch thickness. Cut rounds with a biscuit cutter.
- Cut a small V-shaped wedge from each round to form the turkey head; press the wedge onto the opposite side for tail feathers.
- Bake for 8-10 minutes, rotating pans halfway, until edges are just golden. Cool on sheet for 5 minutes, then transfer to wire rack.
- Make royal icing: beat egg whites until frothy, gradually add powdered sugar, then vanilla/lemon juice. Beat until thick and glossy.
- Divide icing, tint with gel colors, and pipe onto cooled cookies. Add candy eyes while wet. Let dry 2-3 hours or overnight.
Notes
Chill the dough for at least 20 minutes to prevent spreading. For royal icing, use a thicker consistency for outlining and thin with water for flooding. Cookies can be stored in an airtight container at room temperature for up to 5 days.
Nutrition
- Serving Size: 1 cookie
- Calories: 185
- Sugar: 18
- Sodium: 70
- Fat: 8
- Saturated Fat: 5
- Carbohydrates: 27
- Protein: 2
Keywords: turkey cookies, sugar cookies, royal icing, Thanksgiving cookies, easy sugar cookies