Love this? Save it for later!
Share the inspiration with your friends
I was supposed to be making caramel apples. That was the plan, anyway. I had the apples washed, the caramel unwrapped, the sticks ready to go. But somewhere between melting the caramel and realizing I had zero patience for dipping, cooling, and hoping the caramel didn’t slide off in a sad puddle, I just stopped. I stood there, staring at a bowl of melted caramel and a bag of powdered sugar, and thought, “This is not going to work tonight.”
Honestly, I was this close to just handing out store-bought candy and calling it a day. But then I spotted the marshmallows. And the white chocolate chips. And a little voice in my head—probably the same one that talks me into buying kitchen gadgets I don’t need—said, “What if you just… wing it?” So I did. I grabbed the wrong chocolate (white instead of dark, which was actually perfect), melted it too fast (because I’m impatient), and dunked a marshmallow in. Then I added a little face with some melted dark chocolate. And you know what? It looked like a tiny ghost. A very cute, very edible ghost.
I made a whole batch in about five minutes. No baking, no cooling racks, no sticky caramel disasters. My neighbor, who stopped by to borrow an egg, ended up eating three of them and asking for the recipe. I mean, that’s when you know something worked. These no-bake Halloween ghost treats are now my go-to for every spooky season. They’re the kind of happy accident that makes you wonder why you ever bothered with the complicated stuff in the first place. Maybe you’ve been there—standing in your kitchen, ready to give up on a fancy project, when something simpler and better just happens. That’s this recipe.
Why You’ll Love This Recipe
Let me tell you why these little ghosts have become my favorite fall tradition. First off, they’re ridiculously easy. We’re talking five minutes, start to finish. No oven, no mixer, no fancy techniques. If you can melt chocolate and dunk a marshmallow, you’ve got this handled.
- Quick & Easy: Comes together in under 5 minutes, perfect for last-minute Halloween parties or when the kids suddenly announce they need treats for school tomorrow. I’ve been there. Trust me.
- Simple Ingredients: You likely already have everything in your kitchen. Marshmallows, white chocolate chips, and a little dark chocolate for the faces. That’s it. No weird specialty items.
- Perfect for Halloween: Great for classroom parties, trick-or-treat alternatives, or just a fun afternoon activity with the kids. They look impressive but require zero skill.
- Crowd-Pleaser: I’ve never met anyone who didn’t smile when they saw these. Kids love them, adults sneak them, and they disappear faster than any other treat on the table.
- Unbelievably Delicious: The combination of fluffy marshmallow and creamy white chocolate is next-level comfort food. It’s sweet, it’s satisfying, and it feels like a treat without being complicated.
What makes these different from other Halloween treats? It’s the texture. The marshmallow stays soft and pillowy inside, while the white chocolate shell gives it a nice snap when you bite in. Plus, the dark chocolate faces add just a tiny hint of bitterness that balances all that sweetness. I’ve tried other ghost recipes that use fondant or royal icing, and honestly, they’re just not as good. These taste like something you’d actually want to eat, not just something that looks cute on Instagram.
This recipe isn’t just good—it’s the kind that makes you close your eyes after the first bite. It’s Halloween fun reimagined: simpler, faster, but with the same soul-soothing satisfaction. Perfect for impressing guests without stress, or turning a simple afternoon into something memorable.
What Ingredients You Will Need
This recipe uses simple, wholesome ingredients to deliver maximum Halloween fun without the fuss. Most of these are pantry staples, especially if you do any baking during the fall season.
- Large marshmallows (1 bag, about 10-12 ounces) – You want the standard size, not the jumbo or mini. The regular marshmallows are the perfect ghost shape. I prefer Kraft Jet-Puffed for their consistent texture, but any brand works fine. If you can find them, the vanilla-flavored ones add a nice extra touch.
- White chocolate chips (1 cup, about 6 ounces) – This is what creates the ghostly white coating. I recommend Ghirardelli or Guittard for the smoothest melt and best flavor. Avoid white baking chips that are labeled “vanilla flavor” – they don’t melt as smoothly. Real white chocolate has cocoa butter and melts like a dream.
- Coconut oil (1 teaspoon) – This is optional but highly recommended. It thins the white chocolate just enough so it coats the marshmallows evenly without clumping. You won’t taste it at all. If you don’t have coconut oil, vegetable oil works too.
- Dark chocolate chips (¼ cup, about 1.5 ounces) – For the ghost faces. You need very little, so don’t go overboard. I use Enjoy Life dark chocolate chips because they’re dairy-free and melt beautifully, but any dark or semi-sweet chocolate works. You could also use a chocolate candy coating or even black frosting in a tube if you’re in a hurry.
- Optional toppings – You can get creative here. A sprinkle of edible glitter, a dusting of powdered sugar (for a snow effect), or even tiny candy eyes if you want a different look. I’ve also used orange sprinkles for a pumpkin-spice ghost variation.
For the dark chocolate faces, I’ve found that using a piping bag or even just a zip-top bag with the corner snipped off gives you the most control. But honestly, you can also just dip a toothpick in the melted chocolate and draw the faces freehand. It’s Halloween – imperfect ghosts are charming!
One ingredient tip: if you’re making these for a party and want to avoid any sticky fingers, look for “giant” marshmallows. They’re about twice the size of regular ones and make for a more substantial treat. Just note that you’ll need a bit more white chocolate to coat them.
Equipment Needed
You don’t need much for this recipe, which is part of the beauty. Here’s what I use:
- Microwave-safe bowl (medium size) – For melting the white chocolate. Glass or ceramic works best. I’ve used a Pyrex measuring cup in a pinch.
- Small bowl – For melting the dark chocolate. You only need a tiny amount, so a ramekin or small custard cup works perfectly.
- Parchment paper or silicone baking mat – To place the finished ghosts on while the chocolate sets. Wax paper works too, but parchment is more reliable.
- Baking sheet – To hold the parchment paper. Any flat sheet pan works.
- Fork or skewer – For dipping the marshmallows into the chocolate. A fork lets excess chocolate drip off. A wooden skewer works if you want to hold the marshmallow from the bottom.
- Piping bag or zip-top bag – For the dark chocolate faces. If you don’t have either, a toothpick works fine for drawing.
- Spatula – For scraping every last bit of melted chocolate out of the bowl. Because waste is not spooky.
If you don’t have a microwave, you can melt the chocolate using a double boiler on the stovetop. Just bring an inch of water to a simmer in a small saucepan, place a heat-safe bowl on top (making sure it doesn’t touch the water), and stir the chocolate until melted. It takes a few extra minutes but works perfectly. I’ve done it both ways, and honestly, the microwave is faster and less cleanup.
For the baking sheet, any size works. I use a half-sheet pan because that’s what I have, but a cookie sheet or even a large cutting board covered in parchment will do the job. The ghosts don’t need to be perfectly spaced – they won’t spread or move once placed.
Preparation Method
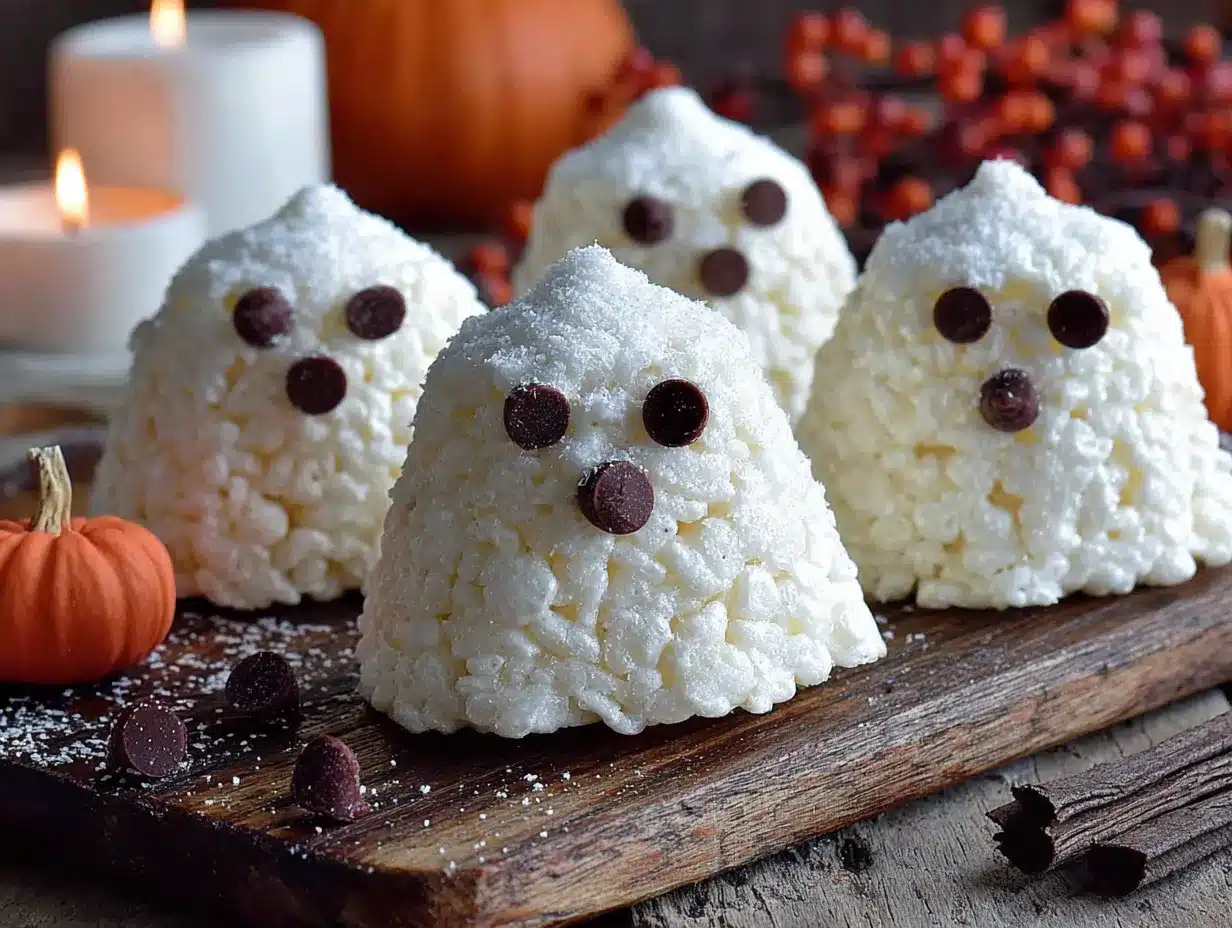
Alright, let’s make some ghosts! This is so simple you’ll probably memorize it after one batch.
- Prep your workspace. Line a baking sheet with parchment paper or a silicone baking mat. This is where your ghosts will rest while the chocolate sets. Make sure you have enough space – these little guys don’t need much room, but you don’t want them touching each other.
- Melt the white chocolate. Place the white chocolate chips and coconut oil in a microwave-safe bowl. Microwave in 30-second intervals, stirring well after each. It usually takes about 1-2 minutes total. Be careful not to overheat – white chocolate burns easily and gets grainy. Stop when most of the chips are melted and stir until smooth. The residual heat will melt the rest. If it looks thick, add another tiny splash of coconut oil.
- Dip the marshmallows. Hold a marshmallow by the top (the flat end) and dip it into the melted white chocolate. You want to coat about three-quarters of the marshmallow, leaving the top exposed. This creates the ghost’s “head.” Let any excess chocolate drip back into the bowl. You can use a fork to help coat the sides if needed.
- Place on the baking sheet. Set the dipped marshmallow on the parchment paper, chocolate side down. The exposed marshmallow top should be facing up. Don’t worry if it’s not perfectly round – ghosts are supposed to be a little wonky. Repeat with the remaining marshmallows. Work quickly so the chocolate doesn’t set in the bowl.
- Melt the dark chocolate. In a small microwave-safe bowl, melt the dark chocolate chips in 20-second intervals, stirring between each. You only need about 30-45 seconds total. Be careful – dark chocolate also burns easily. Stir until smooth.
- Pipe the faces. Transfer the melted dark chocolate to a piping bag or a small zip-top bag. Snip off a tiny corner (like, really tiny – you can always make the hole bigger). Pipe two small dots for eyes and a little oval or “O” shape for the mouth. You can make them scared, happy, or surprised – it’s your ghost, your rules. If you’re using a toothpick, dip it in the dark chocolate and draw the faces directly.
- Let them set. Allow the ghosts to sit at room temperature until the chocolate is firm. This usually takes about 10-15 minutes. If you’re in a hurry, you can pop them in the refrigerator for 5 minutes. Just don’t leave them in too long, or condensation might form when you take them out.
- Serve or store. Once the chocolate is set, your ghosts are ready to eat! Gently peel them off the parchment paper. They should release easily.
A few notes from my experience: If the white chocolate starts to thicken while you’re working, pop it back in the microwave for 10 seconds. Also, if you’re making a big batch, work in groups of 5-6 marshmallows at a time. That way the chocolate stays warm and smooth. And don’t worry if some chocolate drips down the sides – that just makes them look more ghostly!
Cooking Tips & Techniques
After making these about a dozen times (for Halloween parties, classroom treats, and just because), I’ve picked up a few tricks that make the process even smoother.
Temperature control is everything. White chocolate is finicky. If you overheat it, it seizes up and becomes a grainy mess. Always melt it slowly and stir frequently. If it does seize, don’t panic – add a teaspoon of coconut oil or vegetable shortening and stir vigorously. It won’t be perfect, but it’ll be usable. I’ve saved a few batches this way.
Keep your hands clean. The marshmallows can get sticky, especially if your hands are warm. I like to keep a small bowl of powdered sugar nearby and dust my fingers lightly before handling the marshmallows. It helps them not stick to everything. Just tap off the excess before dipping.
Make faces ahead of time. If you’re making these for a party, you can pipe the dark chocolate faces onto a piece of parchment paper and let them set. Then just peel them off and press them onto the white chocolate coating while it’s still slightly tacky. This gives you more control over the face placement and lets you make a bunch at once.
Use a cooling rack. For an even coating, place the dipped marshmallows on a wire cooling rack set over a baking sheet. The excess chocolate will drip off, giving you a cleaner look. I learned this after making a batch where the bottoms were all pooled with extra chocolate. It works great, but you’ll have to scrape the chocolate off the rack later.
Don’t skip the coconut oil. I know it seems like an extra step, but it makes a huge difference. Without it, the white chocolate can be too thick and clumpy. The coconut oil thins it just enough for a smooth, even coating. Plus, it adds a tiny bit of shine that makes the ghosts look professional.
Work in a cool room. If your kitchen is warm, the chocolate might not set properly. Try to make these on a cooler day or turn down the thermostat. If you’re in a hurry, the refrigerator is your friend, but only for 5-10 minutes.
Variations & Adaptations
One of the best things about this recipe is how easy it is to customize. Here are some variations I’ve tried and loved:
Pumpkin Spice Ghosts: Add ½ teaspoon of pumpkin pie spice to the melted white chocolate before dipping. The warm spices pair beautifully with the marshmallow. I made these for a fall-themed party and they were gone in minutes. You can also sprinkle a little cinnamon on top before the chocolate sets.
Chocolate Lovers’ Ghosts: Use milk or dark chocolate instead of white chocolate for the coating. The ghosts will be brown instead of white, but they’ll still look cute. Pipe the faces with white candy melts or white chocolate. This is a great option if you’re not a fan of white chocolate.
Vegan-Friendly Version: Use vegan marshmallows (Dandies brand works great) and dairy-free white chocolate chips. The coconut oil is already vegan, so no changes needed there. The dark chocolate for the faces is usually dairy-free, but double-check the label. I’ve made these for vegan friends and they were a hit.
Gluten-Free Ghosts: This recipe is naturally gluten-free as long as you check your marshmallow and chocolate labels. Most marshmallows are gluten-free, but some brands use wheat starch. I recommend Kraft Jet-Puffed for gluten-free assurance.
Spooky Spider Variation: Instead of ghost faces, pipe eight little legs coming out of the marshmallow to make it look like a spider. Add two candy eyes on top. This is a fun twist if you want a mix of creatures for your Halloween platter.
Colorful Ghosts: Add a drop of food coloring to the white chocolate before dipping. Purple, orange, or green ghosts are perfect for Halloween. Just use gel food coloring (not liquid) to avoid thinning the chocolate too much. I made a batch of purple ghosts for a “monster” themed party and they were adorable.
Serving & Storage Suggestions
These ghosts are best served at room temperature. The chocolate shell should be firm but not hard, and the marshmallow inside stays soft and fluffy. I like to arrange them on a platter with some orange and black sprinkles scattered around for a festive look.
For a Halloween party, I set them out on a cake stand with some fake spider webs and plastic spiders. It makes for a great centerpiece that doubles as dessert. You can also stick them on top of cupcakes or brownies for an extra spooky touch. I once put one on top of a chocolate cupcake and it looked like a ghost floating over a dirt mound – very Halloween!
Storage: Store the ghosts in an airtight container at room temperature for up to 5 days. Do not refrigerate them, as condensation can make the chocolate sticky and ruin the appearance. If you must store them in the fridge (like in a hot climate), place them in a single layer in an airtight container with a paper towel on the bottom to absorb moisture. Let them come to room temperature before serving.
Freezing: You can freeze these ghosts for up to 1 month. Place them in a single layer on a baking sheet and freeze until solid (about 1 hour), then transfer to a freezer-safe container or zip-top bag. To thaw, let them sit at room temperature for about 15 minutes. The chocolate might get a little condensation, but they’ll still taste great.
Make-Ahead Tip: These are perfect for making a day ahead. In fact, the flavors meld together nicely overnight. Just keep them in an airtight container at room temperature and they’ll be perfect for your party.
One thing I’ve noticed: these ghosts are best within the first 2-3 days. After that, the marshmallow starts to dry out slightly and the chocolate can get a bit soft if the weather is warm. But honestly, they rarely last that long in my house. They’re usually gone within 24 hours.
Nutritional Information & Benefits
Let’s be real – these are a treat, not a health food. But here’s a rough estimate for one ghost (using standard ingredients):
- Calories: ~120
- Fat: 6g
- Carbohydrates: 17g
- Sugar: 13g
- Protein: 1g
These numbers will vary depending on the brands you use and how much chocolate coating ends up on each marshmallow. If you use dairy-free chocolate, the fat content might be slightly different.
While these aren’t exactly a health food, they do have a few redeeming qualities. Marshmallows are low in fat and contain a small amount of protein from the gelatin. White chocolate contains calcium and a bit of iron. And dark chocolate (for the faces) is rich in antioxidants. So, you know, it’s not all bad!
From a dietary perspective, these are gluten-free (check labels), nut-free (if you use nut-free chocolate), and can be made vegan with simple substitutions. They’re also relatively low in calories compared to many Halloween treats, so you can enjoy a couple without feeling guilty. I like to serve them alongside some fruit or veggie platters to balance out the sugar rush.
My personal take? Everything in moderation. Halloween is one day (or one season, let’s be honest), and these treats bring so much joy that a little sugar is totally worth it. Plus, making them with kids gets them in the kitchen and excited about cooking, which is always a win.
Conclusion
These no-bake Halloween ghost treats have become a staple in my fall rotation, and I honestly can’t imagine Halloween without them now. They’re proof that sometimes the best recipes come from happy accidents – a failed caramel apple attempt turned into something even better. That’s the kind of kitchen magic I live for.
I hope you give these a try, whether you’re making them for a party, a classroom, or just a fun afternoon with your family. Don’t be afraid to customize them – make them spooky, silly, or elegant. That’s the beauty of a simple recipe. And if you come up with a variation I haven’t tried, please share it in the comments. I’m always looking for new ideas!
So go ahead, grab some marshmallows and chocolate, and make a batch of these adorable ghosts. They’ll disappear faster than you expect – and that’s the best compliment any recipe can get. Happy Halloween, friends! May your kitchen be messy, your treats be delicious, and your ghosts be perfectly imperfect.
Frequently Asked Questions
Can I use mini marshmallows instead of large ones?
You can, but they’ll be much smaller and harder to work with. The coating-to-marshmallow ratio will also be off. If you use mini marshmallows, try dipping them in groups of 2-3 to make little ghost clusters. They’ll look like ghost bubbles!
Why did my white chocolate seize up?
White chocolate seizes when it gets too hot or when a tiny bit of water gets in it. Always melt it slowly in 30-second intervals and stir well. Make sure your bowl is completely dry before adding the chocolate. If it does seize, add a teaspoon of coconut oil or vegetable shortening and stir vigorously to smooth it out.
How far in advance can I make these?
You can make them up to 5 days in advance. Store them in an airtight container at room temperature. I don’t recommend making them more than a week ahead, as the marshmallows can dry out. For best results, make them 1-2 days before your event.
Can I use candy melts instead of white chocolate?
Absolutely! Candy melts (also called candy coating or melting wafers) work perfectly and are often easier to melt. They come in white, and you can even find them in Halloween colors like orange and purple. Just follow the package directions for melting. They set up harder than white chocolate, which can be nice for transport.
My ghosts look messy. What did I do wrong?
Nothing! Messy ghosts are charming ghosts. That said, if you want cleaner ghosts, try using a fork to dip the marshmallows and let the excess chocolate drip off before placing them on the parchment. You can also use a small offset spatula to smooth the chocolate coating. But honestly, the imperfect ones are my favorite – they look more like real ghosts!
Pin This Recipe!
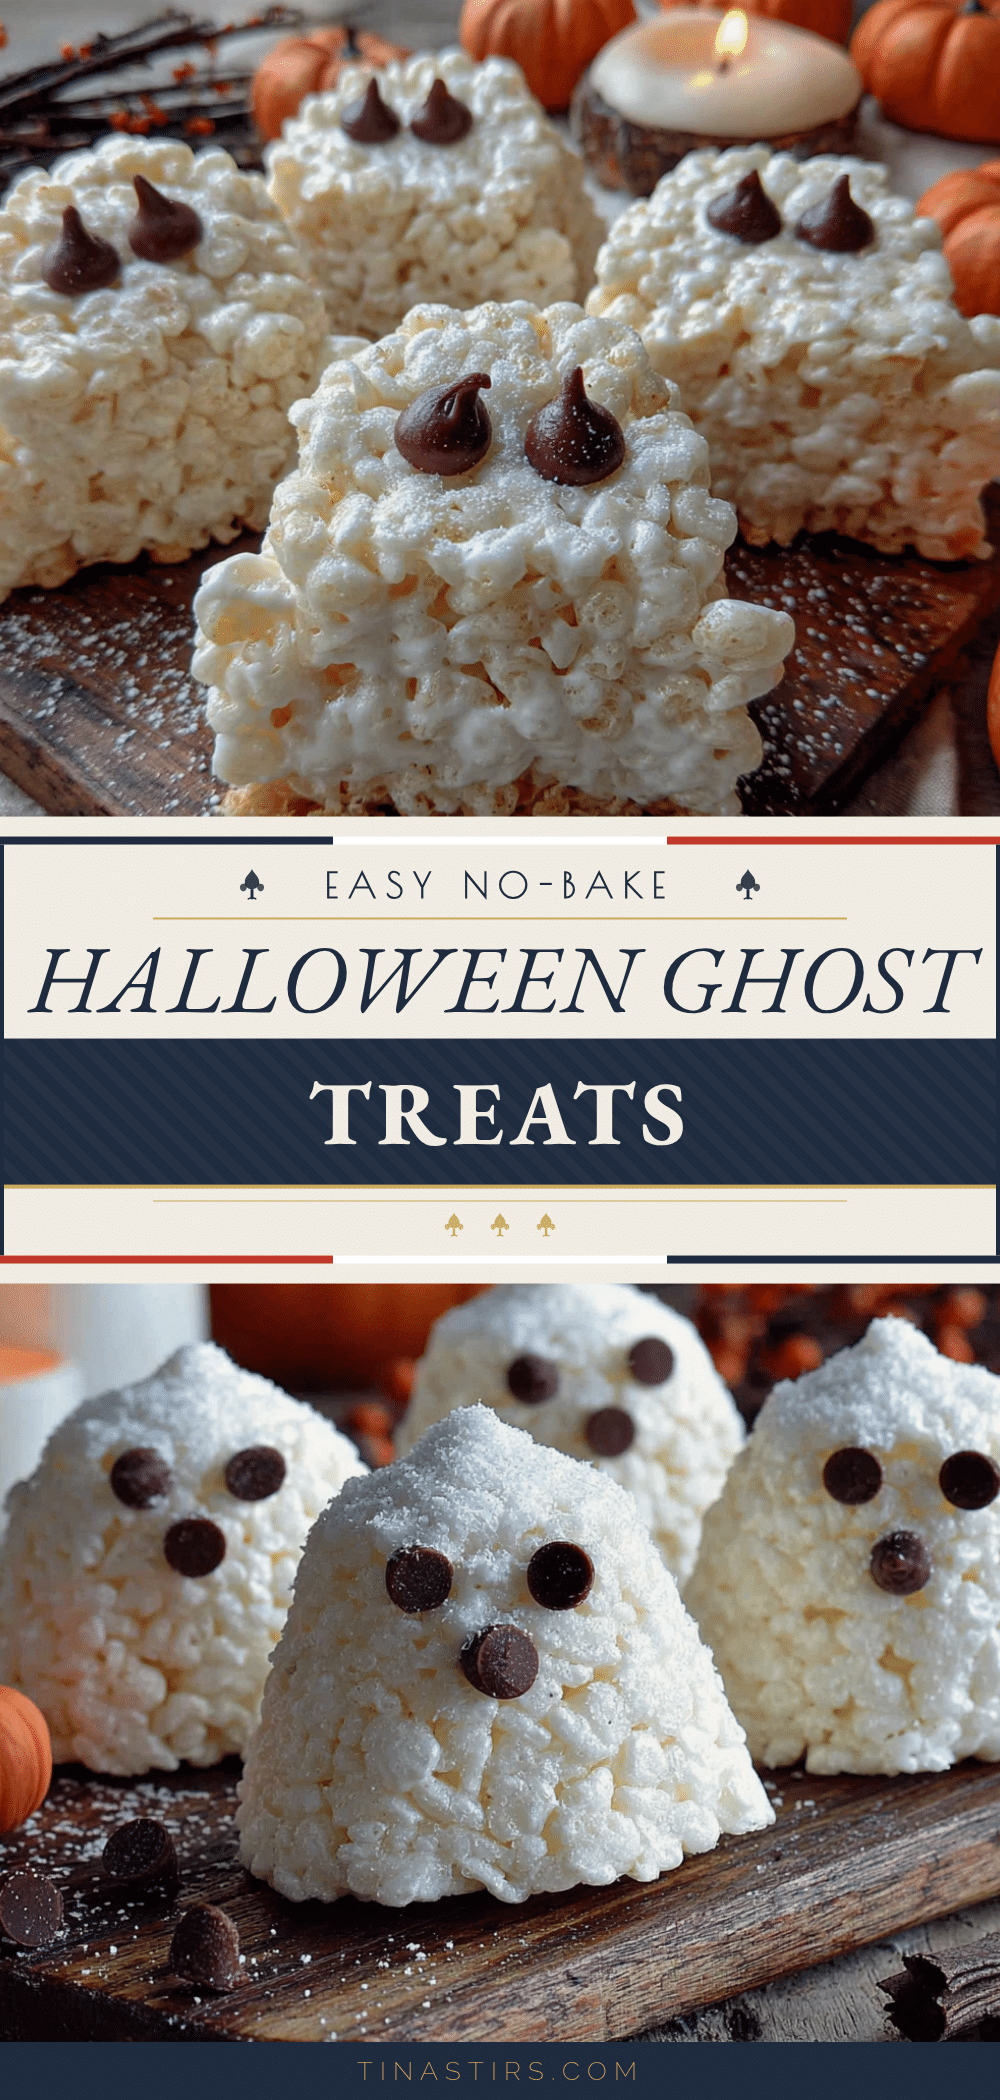
No-Bake Halloween Ghost Treats: Easy 5-Minute Recipe
These no-bake Halloween ghost treats are a quick and easy 5-minute recipe made with marshmallows, white chocolate, and dark chocolate faces. Perfect for last-minute parties, classroom treats, or a fun activity with kids.
- Prep Time: 5 minutes
- Cook Time: 0 minutes
- Total Time: 5 minutes
- Yield: 10-12 servings 1x
- Category: Dessert
- Cuisine: American
Ingredients
- 1 bag (10-12 ounces) large marshmallows (e.g., Kraft Jet-Puffed)
- 1 cup (6 ounces) white chocolate chips (e.g., Ghirardelli or Guittard)
- 1 teaspoon coconut oil (optional, for smoother coating)
- 1/4 cup (1.5 ounces) dark chocolate chips (e.g., Enjoy Life)
- Optional toppings: edible glitter, powdered sugar, candy eyes, orange sprinkles
Instructions
- Line a baking sheet with parchment paper or a silicone baking mat.
- Place white chocolate chips and coconut oil in a microwave-safe bowl. Microwave in 30-second intervals, stirring well after each, until melted and smooth (about 1-2 minutes total).
- Hold a marshmallow by the top (flat end) and dip it into the melted white chocolate, coating about three-quarters of the marshmallow. Let excess chocolate drip off.
- Place the dipped marshmallow on the prepared baking sheet, chocolate side down, with the exposed marshmallow top facing up. Repeat with remaining marshmallows.
- In a small microwave-safe bowl, melt dark chocolate chips in 20-second intervals, stirring between each, until smooth (about 30-45 seconds total).
- Transfer melted dark chocolate to a piping bag or small zip-top bag. Snip off a tiny corner. Pipe two small dots for eyes and an oval or ‘O’ shape for the mouth on each ghost.
- Let ghosts sit at room temperature until chocolate is firm, about 10-15 minutes. For faster setting, refrigerate for 5 minutes.
- Once set, gently peel ghosts off parchment paper and serve or store.
Notes
White chocolate burns easily; melt slowly in 30-second intervals. If chocolate seizes, add a teaspoon of coconut oil or vegetable shortening and stir vigorously. For cleaner ghosts, use a fork to dip and let excess drip off. Work in a cool room for best results. Ghosts can be stored in an airtight container at room temperature for up to 5 days. Freeze for up to 1 month.
Nutrition
- Serving Size: 1 ghost
- Calories: 120
- Sugar: 13
- Sodium: 20
- Fat: 6
- Saturated Fat: 3.5
- Carbohydrates: 17
- Protein: 1
Keywords: Halloween treats, no-bake, ghost treats, marshmallow ghosts, white chocolate, easy Halloween recipe, 5-minute recipe


