Love this? Save it for later!
Share the inspiration with your friends
I was standing in the produce aisle last Tuesday when a woman walked past me carrying a paper bag of Honeycrisp apples. The smell hit me — that sharp, sweet, just-bitten-into scent — and suddenly I was eight years old, sitting on my neighbor Mrs. Kowalski’s linoleum floor while her apple cake baked in the oven. She’d let me lick the cinnamon-sugar bowl clean, and I remember thinking, “This is what heaven tastes like.” I haven’t thought about Mrs. Kowalski in years. She moved away when I was twelve, and I never got her recipe. But that moment in the grocery store? It sent me straight home to figure out how to capture that exact feeling — not the cake, but the warmth of it — in a way that didn’t require a full afternoon in the kitchen or a crowd to feed. These quick small-batch apple pie bars for two are what came out of that craving. Honestly, I think I got pretty close. Maybe you’ve had that moment too — where a smell stops you cold and you spend the rest of the day trying to recreate something you can almost but not quite remember. Yeah, this is that recipe.
Why You’ll Love This Recipe
Let me tell you why these apple pie bars are about to become your new favorite weeknight dessert. I’ve tested this recipe six times — yes, six — to get the ratio of buttery crust to tender apple filling just right without any soggy bottoms or crumbly disasters. Here’s what makes them special:
- Quick & Easy : From start to oven in about 15 minutes. No rolling pin required — you press the crust right into the pan.
- Simple Ingredients : You probably have everything except the apples. No heavy cream, no specialty flours, no trips to three different stores.
- Perfect for Weeknights : Made for two people, so you’re not stuck with a whole pie that goes bad before you finish it.
- Foolproof Texture : The crust is forgiving — it doesn’t crack or shrink like traditional pie dough.
- That Real Apple Flavor : No weird fillers or corn syrup. Just apples, cinnamon, and a little butter doing their thing.
What makes these different from every other apple bar recipe out there? It’s the technique. Instead of fussing with lattice tops or double crusts, I use a simple press-in shortbread base and a crumble topping that bakes up golden and crisp. The apples get a quick stovetop head start so they’re perfectly tender without turning to mush in the oven. It’s comfort food reimagined — faster, simpler, but with the same soul-soothing satisfaction you get from a full-blown pie.
What Ingredients You Will Need
This recipe uses simple, wholesome ingredients to deliver bold apple flavor and satisfying texture without the fuss. Most of these are pantry staples, so you can probably make these bars right now without a grocery run.
For the Crust
- 1/2 cup all-purpose flour (spooned and leveled — don’t scoop directly from the bag or you’ll pack it too tight)
- 2 tablespoons granulated sugar
- 1/4 cup cold unsalted butter, cut into small cubes (keep it cold — warm butter makes a greasy crust)
- Pinch of salt (about 1/8 teaspoon)
For the Apple Filling
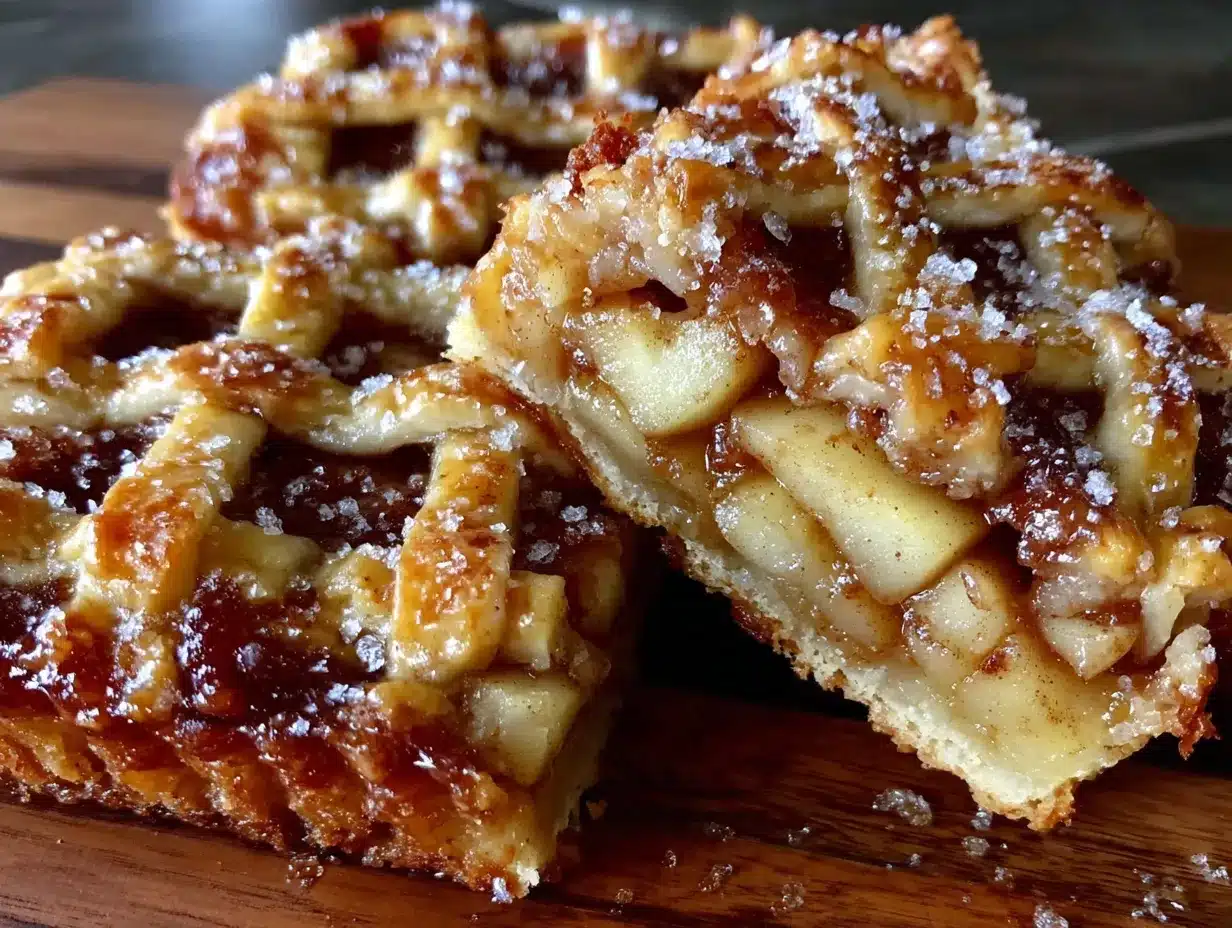
- 2 medium apples, peeled, cored, and diced into 1/2-inch pieces (I recommend Honeycrisp or Granny Smith for best texture — the first stays firm, the second gives you that tart kick)
- 2 tablespoons granulated sugar
- 1 tablespoon light brown sugar, packed
- 1 teaspoon ground cinnamon
- 1/8 teaspoon ground nutmeg (freshly grated if you have it — it makes a difference)
- 1 teaspoon lemon juice (keeps the apples from browning and brightens the flavor)
- 1 tablespoon unsalted butter
For the Crumble Topping
- 1/4 cup all-purpose flour
- 2 tablespoons rolled oats (old-fashioned, not instant)
- 2 tablespoons light brown sugar, packed
- 2 tablespoons cold unsalted butter, cut into small cubes
- 1/4 teaspoon ground cinnamon
Ingredient Tips : I use Land O’Lakes unsalted butter for consistent results, but any good-quality butter works. For the apples, avoid Red Delicious — they turn mushy and don’t hold their shape. If you only have one apple variety, go with Honeycrisp for the best balance of sweet and firm. For a gluten-free version, substitute the all-purpose flour with a 1:1 gluten-free baking flour blend — I’ve had good luck with King Arthur Measure for Measure.
Equipment Needed
You don’t need much for these bars, which is exactly how I like it on a busy Tuesday night.
- 8×4-inch loaf pan (this is the sweet spot for a small batch — a 9×5 works too, but the bars will be thinner)
- Small skillet or saucepan (for cooking the apples)
- Mixing bowls — one medium, one small
- Paring knife and cutting board
- Measuring cups and spoons
- Fork or pastry cutter (for cutting butter into flour — two forks work fine if you don’t have a pastry cutter)
- Parchment paper (makes lifting the bars out so much easier)
If you don’t have a loaf pan, you can use a 6-inch square baking dish — just keep an eye on the baking time as it might cook a few minutes faster. I learned that the hard way when I forgot my loaf pan was at my sister’s house and ended up with slightly overdone edges. Still delicious, just a little crispy.
Preparation Method
Preheat your oven to 375°F (190°C). Line your loaf pan with parchment paper, leaving some overhang on the long sides — this makes lifting the finished bars out super easy.
- Make the crust. In a medium bowl, whisk together the flour, sugar, and salt. Add the cold butter cubes. Using a fork or pastry cutter, cut the butter into the flour until the mixture looks like coarse crumbs with some pea-sized butter pieces still visible. Don’t overwork it — you want those little butter pockets for a flaky texture. Press the mixture evenly into the bottom of your prepared pan. Bake for 12 minutes, until lightly golden around the edges. Set aside to cool slightly while you make the filling.
- Cook the apples. In a small skillet over medium heat, melt 1 tablespoon of butter. Add the diced apples, both sugars, cinnamon, nutmeg, and lemon juice. Stir to coat. Cook for 5-7 minutes, stirring occasionally, until the apples are just tender and the juices have thickened slightly. You want them soft enough to pierce with a fork but not mushy — they’ll continue cooking in the oven. Remove from heat and let cool for 5 minutes. The smell at this point is ridiculous — your kitchen will smell like a fall candle factory.
- Make the crumble topping. In a small bowl, combine the flour, oats, brown sugar, and cinnamon. Add the cold butter cubes and cut them in with your fork until the mixture forms clumps. Some bigger clumps are fine — that’s where the good texture comes from.
- Assemble the bars. Spread the cooked apple mixture evenly over the pre-baked crust. Sprinkle the crumble topping over the apples, covering them completely. Don’t press it down — just let it fall naturally.
- Bake. Place the pan on the middle rack and bake for 20-25 minutes, until the topping is golden brown and you can see the apple filling bubbling around the edges. If the topping is browning too quickly after 15 minutes, tent loosely with foil.
- Cool and slice. Let the bars cool in the pan for at least 15 minutes. Then use the parchment overhang to lift them out onto a cutting board. Cut into 4 bars — or 2 generous ones if you’re not sharing. Let me tell you, the hardest part is waiting those 15 minutes. The smell is torture.
Cooking Tips & Techniques
I’ve made these bars enough times to know exactly where things can go wrong — and how to fix them.
Don’t skip the pre-bake. I know it’s tempting to just press the crust in and pile everything on top, but that 12-minute pre-bake is what keeps the bottom from turning soggy. I learned this the hard way when I got impatient and ended up with a crust that felt more like wet sand. Not my finest moment.
Cut your apples evenly. This is one of those things that sounds fussy but actually matters. If some pieces are bigger than others, they won’t cook at the same rate. You’ll end up with some mushy bits and some crunchy bits. Aim for 1/2-inch dice — about the size of your thumbnail.
Keep the butter cold. For both the crust and the crumble, cold butter is non-negotiable. If your kitchen is warm, pop the butter in the freezer for 10 minutes before you start. Warm butter melts into the flour instead of creating those flaky pockets, and you’ll end up with a dense, greasy crust.
Let them cool. I know I already said this, but I’m saying it again because it’s important. If you cut into these bars while they’re hot, the filling will slide right off the crust. Give them at least 15 minutes — 20 is better. Trust me, I’ve burned my tongue on molten apple filling more times than I care to admit.
Multitask wisely. While the crust is pre-baking, cook your apples. While the apples cool, make the crumble. This whole recipe comes together in about 35 minutes if you keep things moving.
Variations & Adaptations
These apple pie bars are forgiving, so feel free to play around.
- Gluten-Free : Use a 1:1 gluten-free flour blend in place of all-purpose flour. I’ve tested this with King Arthur Measure for Measure and it works perfectly — just make sure your oats are certified gluten-free too.
- Vegan : Substitute the butter with a good-quality vegan butter (I like Miyoko’s) and use coconut sugar instead of brown sugar. The texture will be slightly less crisp but still delicious.
- Different Fruits : This works beautifully with pears, peaches, or even plums. If using softer fruits like peaches, reduce the stovetop cooking time to 3-4 minutes. For frozen fruit, thaw and drain well first — nobody wants watery bars.
- Spice It Up : Add 1/8 teaspoon of cardamom or ginger along with the cinnamon for a more complex flavor. I tried this on a whim one rainy Sunday and now I can’t go back.
- Nutty Crumble : Swap the oats for chopped pecans or walnuts. Toast them lightly first for extra flavor. My neighbor swears by this version, and she’s a tough critic.
- Caramel Drizzle : After baking, drizzle with store-bought caramel sauce or a quick homemade one. It takes these bars from “really good” to “I can’t stop eating them.”
Serving & Storage Suggestions
These bars are best served warm — like, still-slightly-warm-from-the-oven warm. The contrast between the crisp crumble, tender apples, and buttery crust is at its peak about 20 minutes after baking.
Serving ideas: Top with a scoop of vanilla ice cream (the melty factor is real), a dollop of whipped cream, or a drizzle of warm caramel sauce. For breakfast the next morning — and yes, I’m recommending this — warm a bar in the microwave for 15 seconds and eat it with your coffee. Don’t judge until you try it.
Storage: Keep leftover bars in an airtight container at room temperature for up to 2 days, or in the refrigerator for up to 5 days. The crumble will soften slightly in the fridge, but a quick 10-second zap in the microwave brings back some of the crispness.
Freezing: These freeze beautifully. Wrap individual bars tightly in plastic wrap, then foil, and freeze for up to 3 months. Thaw at room temperature for about an hour, then warm in a 300°F oven for 10 minutes. The flavor actually gets better after freezing — the spices have time to mellow and meld together.
One thing I’ve noticed: the apple flavor becomes more pronounced on day two. So if you can resist eating them all in one sitting, you’re in for a treat.
Nutritional Information & Benefits
Here’s the approximate nutritional breakdown for one bar (based on 4 servings):
| Nutrient | Amount |
|---|---|
| Calories | 285 |
| Fat | 14g |
| Saturated Fat | 9g |
| Carbohydrates | 39g |
| Fiber | 3g |
| Sugar | 24g |
| Protein | 3g |
These bars use real, whole ingredients — butter, apples, oats — so you’re getting some fiber and vitamin C from the apples, plus a small amount of iron from the oats. Are they health food? No. But they’re made from scratch with nothing artificial, which counts for something. If you want to lighten them up, reduce the sugar in the filling to 1 tablespoon total and use a sugar substitute in the crumble. I’ve tried it with coconut sugar and it works, though the texture is slightly different.
Conclusion
These quick small-batch apple pie bars for two are exactly what a weeknight dessert should be — fast, forgiving, and deeply satisfying. They give you that warm, cinnamon-spiced feeling of a full apple pie without the fuss or the leftovers. Whether you’re making them for yourself on a quiet Tuesday or surprising someone you love, they deliver every time.
I’d love to hear how yours turn out. Did you try a variation? Add caramel? Eat them for breakfast? Drop a comment below and let me know — and if you share a photo on Pinterest, tag me so I can see your beautiful bars. Honestly, the best recipes are the ones we make our own, and I hope this one becomes yours.
Now go preheat your oven. Mrs. Kowalski would approve.
Frequently Asked Questions
Can I use a different pan size?
Yes, but adjust accordingly. A 9×5 loaf pan will give you thinner bars that bake slightly faster — check at 18 minutes. A 6-inch square pan works too, but you might need to add a couple of minutes to the bake time.
Can I make these ahead of time?
Absolutely. You can assemble the bars completely, cover, and refrigerate for up to 24 hours before baking. Add 5 minutes to the bake time if baking straight from the fridge. The crumble might lose a tiny bit of crispness, but it’s still delicious.
What if I don’t have a pastry cutter?
No problem. Use two forks in a crisscross motion, or pulse the butter and flour together in a food processor. If using a food processor, pulse just until the mixture looks like coarse meal — don’t overdo it or the crust will be tough.
Can I double this recipe?
Yes! Double all ingredients and bake in an 8×8 square pan. Increase the bake time to 30-35 minutes. Keep an eye on the crumble — if it’s browning too fast, tent with foil after 20 minutes.
Why did my crust come out soggy?
Two most common reasons: you didn’t pre-bake the crust long enough, or your apples were too wet. Make sure the crust is light golden before adding the filling, and cook the apples until the juices have thickened — they should look glossy, not watery.
Pin This Recipe!
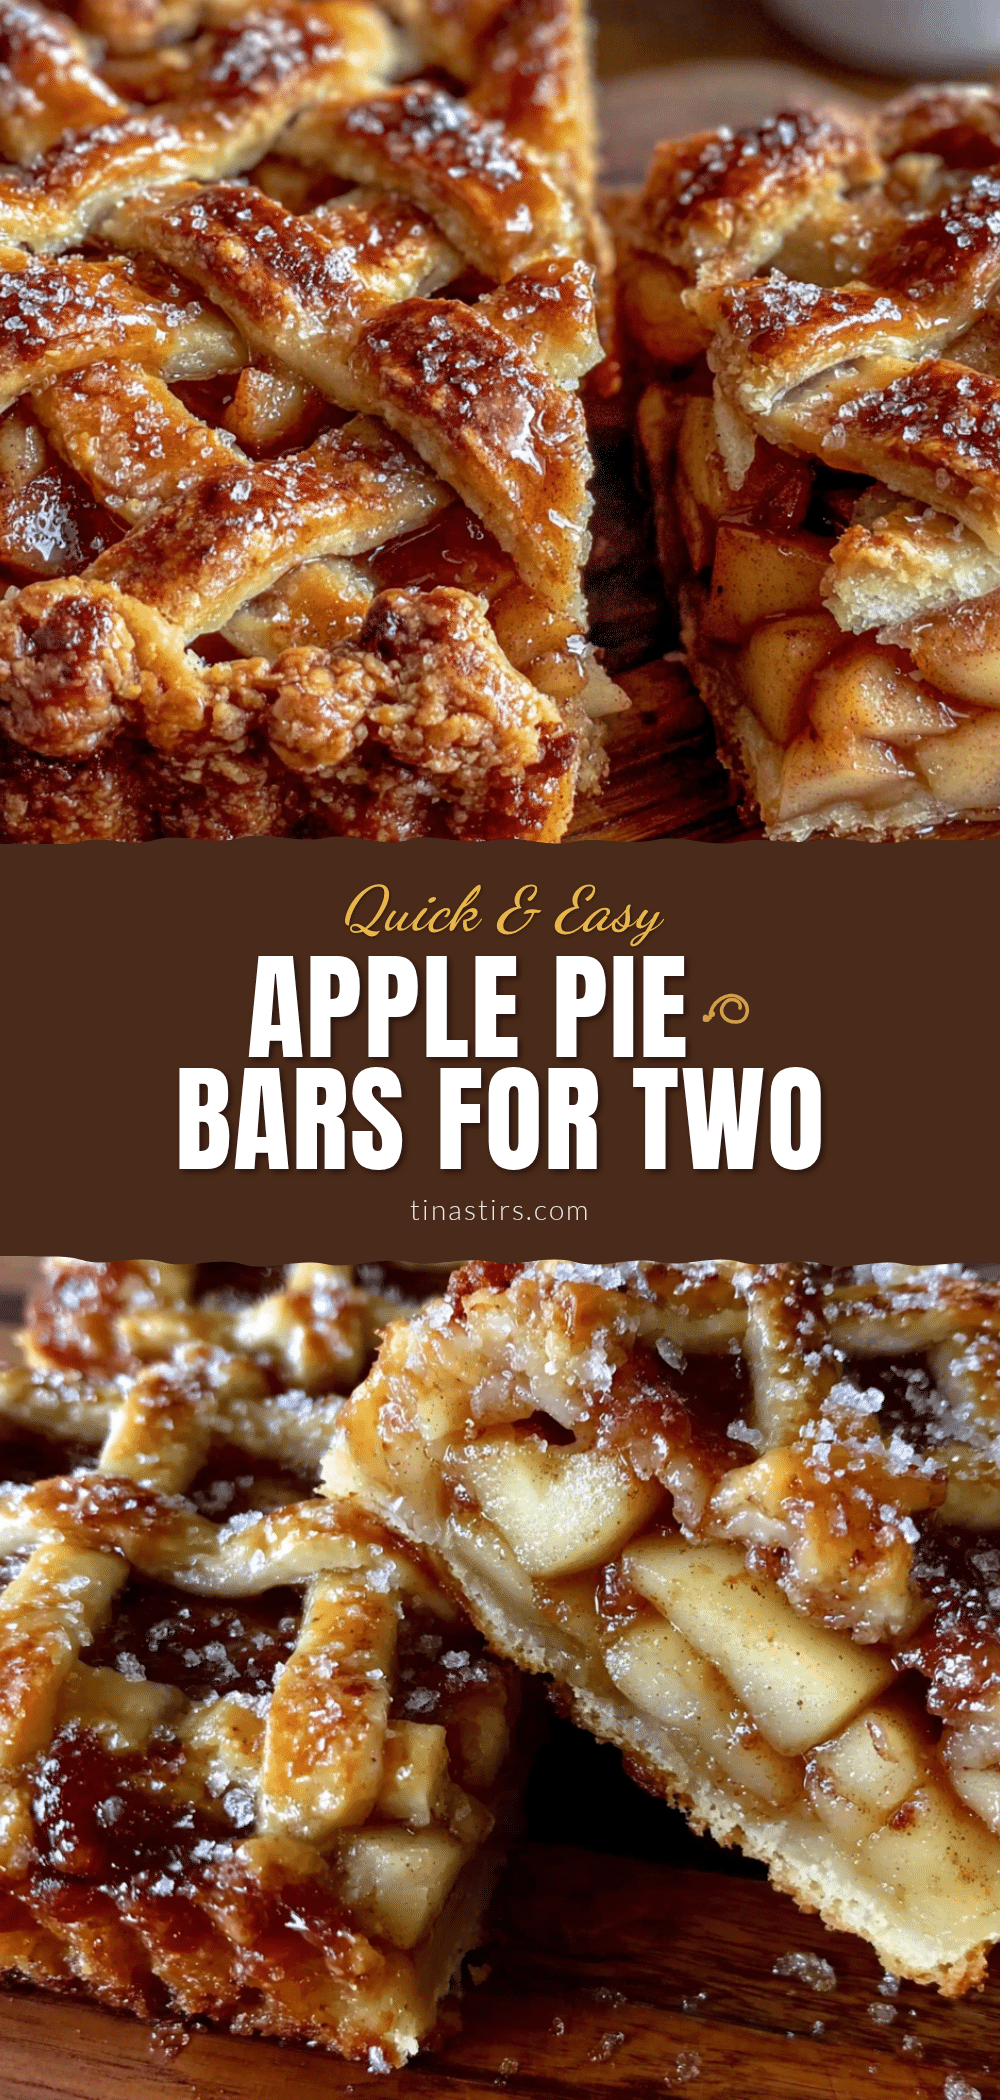
Best Small-Batch Apple Pie Bars for Two
These quick small-batch apple pie bars for two are exactly what a weeknight dessert should be — fast, forgiving, and deeply satisfying. They give you that warm, cinnamon-spiced feeling of a full apple pie without the fuss or the leftovers.
- Prep Time: 15 minutes
- Cook Time: 30 minutes
- Total Time: 45 minutes
- Yield: 4 servings 1x
- Category: Dessert
- Cuisine: American
Ingredients
- 1/2 cup all-purpose flour
- 2 tablespoons granulated sugar
- 1/4 cup cold unsalted butter, cut into small cubes
- Pinch of salt (about 1/8 teaspoon)
- 2 medium apples, peeled, cored, and diced into 1/2-inch pieces (Honeycrisp or Granny Smith recommended)
- 2 tablespoons granulated sugar
- 1 tablespoon light brown sugar, packed
- 1 teaspoon ground cinnamon
- 1/8 teaspoon ground nutmeg
- 1 teaspoon lemon juice
- 1 tablespoon unsalted butter
- 1/4 cup all-purpose flour
- 2 tablespoons rolled oats (old-fashioned)
- 2 tablespoons light brown sugar, packed
- 2 tablespoons cold unsalted butter, cut into small cubes
- 1/4 teaspoon ground cinnamon
Instructions
- Preheat oven to 375°F (190°C). Line an 8×4-inch loaf pan with parchment paper, leaving overhang on the long sides.
- Make the crust: In a medium bowl, whisk together 1/2 cup flour, 2 tablespoons sugar, and salt. Add 1/4 cup cold butter cubes. Cut butter into flour using a fork or pastry cutter until mixture resembles coarse crumbs with some pea-sized butter pieces. Press evenly into prepared pan. Bake for 12 minutes until lightly golden around edges. Set aside to cool slightly.
- Cook the apples: In a small skillet over medium heat, melt 1 tablespoon butter. Add diced apples, 2 tablespoons sugar, 1 tablespoon brown sugar, 1 teaspoon cinnamon, nutmeg, and lemon juice. Stir to coat. Cook for 5-7 minutes, stirring occasionally, until apples are just tender and juices have thickened. Remove from heat and let cool for 5 minutes.
- Make the crumble topping: In a small bowl, combine 1/4 cup flour, oats, 2 tablespoons brown sugar, and 1/4 teaspoon cinnamon. Add 2 tablespoons cold butter cubes and cut in with a fork until mixture forms clumps.
- Assemble the bars: Spread cooked apple mixture evenly over pre-baked crust. Sprinkle crumble topping over apples, covering completely. Do not press down.
- Bake on middle rack for 20-25 minutes, until topping is golden brown and apple filling bubbles around edges. If topping browns too quickly after 15 minutes, tent loosely with foil.
- Cool in pan for at least 15 minutes. Use parchment overhang to lift bars out onto a cutting board. Cut into 4 bars.
Notes
Don’t skip pre-baking the crust to avoid sogginess. Cut apples evenly (1/2-inch dice) for even cooking. Keep butter cold for flaky texture. Let bars cool at least 15 minutes before cutting to prevent filling from sliding off. For gluten-free, use a 1:1 gluten-free flour blend and certified gluten-free oats. For vegan, use vegan butter and coconut sugar. Bars can be stored at room temperature for up to 2 days or refrigerated for up to 5 days. Freeze individual bars wrapped tightly for up to 3 months.
Nutrition
- Serving Size: 1 bar
- Calories: 285
- Sugar: 24
- Sodium: 75
- Fat: 14
- Saturated Fat: 9
- Carbohydrates: 39
- Fiber: 3
- Protein: 3
Keywords: apple pie bars, small batch, for two, quick dessert, apple dessert, fall dessert, easy apple bars