Love this? Save it for later!
Share the inspiration with your friends
My neighbor wasn’t trying to impress me. I’d stopped by to borrow a cup of sugar—how cliché, right?—and the smell hit me before I even got to her screen door. It was warm, tangy, and a little bit yeasty, like the world’s most comforting bakery had somehow squeezed into her kitchen. She was standing at the counter, a flour-dusted apron tied around her waist, and she just shrugged when I asked what she was baking. “Oh, just trying out that sourdough starter I read about,” she said, like it was no big deal. Let me tell you, it was a very big deal.
That loaf she pulled out of the oven an hour later was the best bread I’d ever had. The crust was crackly, the inside was soft and full of those beautiful airy holes, and the flavor—honestly, it was something else. It had a depth and a slight tang that you just can’t get from a store-bought loaf. I begged her for the secret, and she just pointed to a jar bubbling away on her counter. “This,” she said. “It’s just flour and water. You feed it every day for a week, and boom. You’ve got a starter.” I was skeptical, I mean, really? Flour and water? But she was so nonchalant about it, I had to try it myself. Maybe you’ve been there, thinking sourdough is this mystical, complicated thing that only professional bakers can master. I thought the same thing. But her casual confidence was all the push I needed.
So, I went home, grabbed a jar, and started my own 7-day sourdough starter journey. I won’t lie, the first few days felt weird. You’re just mixing flour and water and watching it sit there. But by day three, something magical started to happen. Bubbles appeared, it started to smell a little funky (in a good way), and I felt like a mad scientist in the best possible way. This recipe—this method—stayed with me because it was so simple. It didn’t require any fancy equipment or a degree in food science. It just required a little patience and a lot of trust in the process. And honestly, that’s the kind of cooking I love. The kind that feels like a little everyday miracle.
Why You’ll Love This Recipe
After making countless starters over the past few years, I can confidently say this is the easiest, most foolproof method out there. I’ve tested it with different flours, in different climates, and even accidentally skipped a feeding day once (it was fine!). This isn’t just another internet recipe—it’s a tried-and-true, stress-free path to your very own bubbling, thriving sourdough starter.
- Incredibly Simple: You only need two ingredients—flour and water. No special “starter food” or expensive additives. It’s back-to-basics baking at its best.
- Minimal Daily Effort: Each “feeding” takes less than five minutes. You’re just stirring, covering, and letting nature do the hard work.
- Perfect for Beginners: The 7-day schedule is broken down into clear, easy-to-follow steps. You’ll see exactly what your starter should look and smell like each day, so you’ll never feel lost.
- Unbelievably Rewarding: There’s no feeling quite like baking your first loaf of bread with a starter you grew yourself. It’s a genuine accomplishment that tastes amazing.
- Budget-Friendly: A jar, some all-purpose flour, and water. That’s it. You’re saving a ton of money compared to buying a pre-made starter or a $10 loaf of artisan bread from the store.
This isn’t just about making bread. It’s about connecting with a process that’s been around for thousands of years. It’s about slowing down, being patient, and creating something alive in your own kitchen. It’s comfort food for the soul, and it starts right here.
What Ingredients You Will Need
This recipe is the definition of pantry-friendly. You likely already have everything you need, which is one of the best parts about starting a sourdough starter. Let’s break down the simple shopping list.
- Unbleached All-Purpose Flour: This is your workhorse. Unbleached flour is key because it has more natural yeast and bacteria than bleached flour, which gives your starter a better chance to get going. I personally prefer King Arthur Flour for its consistent protein content, but any good unbleached brand will work. (Pro tip: If you want a faster, more robust starter, use half all-purpose and half whole wheat flour for the first few days. The extra nutrients in whole wheat are like rocket fuel for the yeast!)
- Whole Wheat Flour or Rye Flour (Optional but Recommended): For the initial “kickstart” on Day 1, using whole wheat or rye flour is a game-changer. These flours are packed with more nutrients and natural yeasts than all-purpose flour, giving your starter a huge head start. Don’t worry, you’ll switch to all-purpose by Day 3. I always keep a small bag of dark rye flour on hand just for this purpose.
- Filtered or Non-Chlorinated Water: This is more important than you might think. Tap water contains chlorine and chloramines, which are designed to kill bacteria and yeast—the very things you’re trying to cultivate! Let your tap water sit out in an open container for 24 hours to let the chlorine evaporate, or just use filtered water from a pitcher. The water should be lukewarm (around 70-80°F / 21-27°C) to keep the yeast happy.
- A Clean Glass Jar or Container: A quart-sized (32 oz / 1 liter) mason jar is perfect. You want to see what’s happening inside, so glass is ideal. Make sure it’s clean and dry before you start. Avoid metal or plastic containers, as they can sometimes react with the fermenting starter or hold onto odors.
And that’s it! Seriously. With just these three ingredients and a jar, you’re on your way to creating a living, breathing sourdough starter that will serve you for years.
Equipment Needed
You don’t need a fancy kitchen to make a sourdough starter. In fact, you probably already own everything on this list. Here’s what you’ll need to get started.
- Digital Kitchen Scale: This is the one piece of equipment I highly recommend. Sourdough is a science, and measuring by weight (grams) is infinitely more accurate than using cups. A $10 scale from Amazon will do the trick. It makes feeding your starter a 30-second job.
- Glass Jar or Container: As mentioned, a 1-quart (1-liter) wide-mouth mason jar is my go-to. I like the wide mouth because it’s easy to stir and clean. A weck jar or any other glass container works great too. Just make sure it’s big enough to hold your starter as it doubles or triples in size.
- Wooden or Silicone Spoon: A simple spoon for stirring. I prefer a wooden spoon or a silicone spatula. Avoid metal utensils if possible, as some believe they can react with the acidic starter, though a quick stir with a metal spoon won’t ruin it.
- Kitchen Towel or Cheesecloth: You’ll need something to cover your jar that allows air to flow while keeping out dust and fruit flies. A clean, thin kitchen towel or a double layer of cheesecloth secured with a rubber band is perfect.
- Rubber Band or Marker: This is for marking the level of your starter after feeding. Stretch a rubber band around the jar at the “just fed” level. This lets you easily see how much it has risen—a key indicator of a healthy, active starter.
Preparation Method
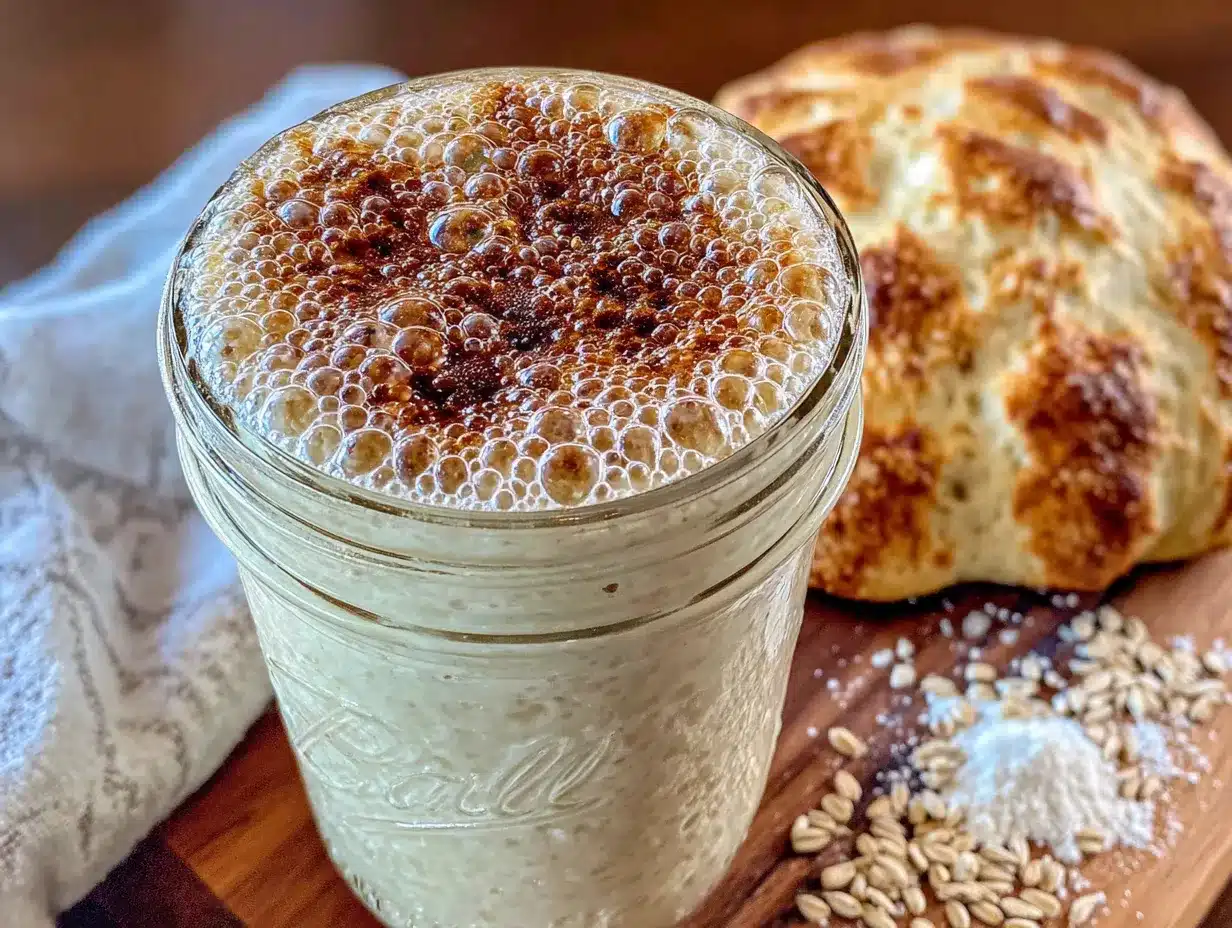
Okay, let’s get to the fun part! Here is your day-by-day guide to creating a bubbly, active sourdough starter in just 7 days. Remember, patience is your best friend here. Trust the process.
Day 1: The Beginning
- Mix: In your clean glass jar, combine 60 grams (1/2 cup) of whole wheat or rye flour and 60 grams (1/4 cup) of lukewarm filtered water. Stir vigorously with your spoon until no dry bits of flour remain. The mixture will look like a thick, lumpy paste.
- Cover and Rest: Cover the jar loosely with your kitchen towel or cheesecloth and secure it with a rubber band. Place the jar in a warm spot in your kitchen (around 70-75°F / 21-24°C is ideal). Avoid drafty areas or direct sunlight.
- Wait: That’s it for Day 1! Let it sit undisturbed for 24 hours. You might see a few tiny bubbles, or you might not. Don’t worry if you don’t see anything yet.
Day 2: The First Signs of Life
- Check: Your starter might have a few small bubbles on the surface and a slightly “funky” or “fruity” smell. This is totally normal and good! It might also have a layer of liquid (called “hooch”) on top. If it does, just stir it back in.
- Discard and Feed: You need to discard half of your starter before feeding. Don’t skip this step! Measure out 60 grams (about 1/4 cup) of your starter and throw the rest away. To the 60g of starter you kept, add 60 grams (1/2 cup) of all-purpose flour and 60 grams (1/4 cup) of lukewarm water. Stir well until combined. The texture should be like thick pancake batter.
- Mark and Rest: Place a rubber band at the level of the freshly fed starter. Cover and let it sit for another 24 hours.
Day 3: The “Stinky” Phase
- Observe: Your starter might smell a bit sharp, like acetone or nail polish remover. Don’t panic! This is the “bad” bacteria dying off and the good yeast starting to take over. You should also see more bubbles and a slight increase in volume.
- Discard and Feed: Repeat the process from Day 2. Discard all but 60 grams (1/4 cup) of starter. Feed it with 60 grams (1/2 cup) all-purpose flour and 60 grams (1/4 cup) lukewarm water. Stir, mark the level, and cover.
- Pro Tip: If your starter is very liquidy and not rising much, it might be hungry. Try feeding it twice a day (every 12 hours) for a day or two to give it a boost.
Day 4: The “Rise” Begins
- Look for Activity: By Day 4, you should see a noticeable rise. Your starter might double in size within 12 hours of feeding. It should smell more pleasant—a bit yeasty and sour, like yogurt or sourdough bread. The bubbles should be more abundant and smaller.
- Discard and Feed: Same routine! Discard all but 60 grams (1/4 cup). Feed with 60 grams (1/2 cup) all-purpose flour and 60 grams (1/4 cup) water. Stir, mark, and cover.
- Observation: If it’s rising and falling predictably, you’re on the right track. If it’s still sluggish, don’t give up! Keep feeding it once a day. Some starters take a little longer.
Day 5: The “Peak” Performance
- Check for Peak: Your starter should now be reliably doubling in size within 6-8 hours of feeding. The top should be domed with lots of tiny and large bubbles. The smell should be pleasantly sour and yeasty. This is what a healthy starter looks like!
- Discard and Feed: Continue the same feeding routine. Discard all but 60 grams (1/4 cup). Feed with 60 grams (1/2 cup) all-purpose flour and 60 grams (1/4 cup) water.
- Optional Test: Take a small spoonful of your starter and drop it into a glass of room-temperature water. If it floats, your starter is active and ready to bake with! If it sinks, give it another day or two.
Day 6: The “Float” Test
- Confirm Readiness: By Day 6, your starter should be very predictable. It should double or even triple in volume within 4-6 hours of feeding. The float test should now work perfectly. It will have a beautiful, complex sour aroma.
- Discard and Feed: You can now switch to a maintenance routine if you’re not ready to bake. Discard all but 60 grams (1/4 cup) and feed with 60 grams (1/2 cup) all-purpose flour and 60 grams (1/4 cup) water.
- Ready to Bake: You can absolutely use your starter to bake with on Day 6! It’s strong enough to leaven a loaf of bread.
Day 7: Baker’s Reward
- Celebrate! Your starter is now mature and ready to be used for all your sourdough baking adventures. It should be bubbly, active, and smell amazing.
- Final Feed: The night before you plan to bake, give your starter a final, larger feeding. Use 100 grams (3/4 cup) of all-purpose flour and 100 grams (1/3 cup + 1 tbsp) of water to a small amount of starter. Let it sit out overnight. By morning, it should be at its peak and perfect for your recipe.
- Maintenance: If you’re not baking every day, you can now store your starter in the refrigerator. Just feed it once a week. When you want to bake, take it out, feed it, and let it come to room temperature.
Cooking Tips & Techniques
I’ve made a lot of mistakes with sourdough, and I’m here to help you avoid them. Here are my best tips for a foolproof starter.
- Temperature is Everything: Your starter is alive, and like any living thing, it likes a comfortable temperature. The sweet spot is 70-75°F (21-24°C). If your kitchen is cold, your starter will be sluggish. Try putting it in your oven with the light on (but the oven off!) or on top of your refrigerator. If it’s too hot (above 85°F / 29°C), it can ferment too quickly and become acidic.
- Don’t Skip the Discard! I know it feels wasteful, but discarding is crucial. It keeps the population of yeast and bacteria in balance. If you don’t discard, you’ll end up with a huge, hungry, acidic starter that won’t rise properly. Save your discard for pancakes, waffles, or crackers!
- Use the “Peak” for Baking: For the best rise in your bread, always use your starter when it’s at its peak—when it has doubled in size and the top is domed. Using it when it’s hungry or has already fallen will result in a dense loaf.
- The “Hooch” is Your Friend: That grayish or brownish liquid on top of your starter is called “hooch.” It’s a sign your starter is hungry. You can stir it back in for a more sour flavor, or pour it off for a milder taste. Both are fine!
- Patience, Patience, Patience: Your starter might not be ready by Day 7, and that’s okay! Factors like your flour, water, and kitchen temperature all play a role. Some starters take 10-14 days to become truly strong. Don’t get discouraged. Just keep feeding it daily and trust the process.
Variations & Adaptations
Once you have a healthy starter, the possibilities are endless! Here are a few ways to customize it and use it.
- Whole Wheat Starter: For a nuttier, more robust flavor, continue feeding your starter with whole wheat flour instead of all-purpose. It will be a bit more active and have a deeper flavor profile. You’ll need to adjust the water slightly as whole wheat absorbs more liquid.
- Rye Starter: Rye flour creates a very active, tangy starter. It’s a favorite among professional bakers. The starter will be very thick and almost paste-like. Use it for classic German-style rye breads.
- Gluten-Free Starter: Yes, you can make a gluten-free starter! Use a blend of brown rice flour, sorghum flour, and buckwheat flour. The process is the same, but it will look and smell different. It’s typically a bit runnier and has a more “funky” aroma. It’s perfect for gluten-free sourdough bread.
- Sweet Starter: If you want to use your starter for pancakes, waffles, or cakes, you can create a “sweet starter.” Simply feed it with a tablespoon of sugar or honey along with your regular flour and water. This encourages a different type of fermentation that pairs well with sweet flavors.
Serving & Storage Suggestions
Once your starter is established, you need to know how to keep it alive and happy.
- Room Temperature Maintenance: If you bake every day or every other day, keep your starter on the counter. Feed it once a day at the same time. A good ratio is 1:1:1 (starter: flour: water) by weight.
- Refrigerator Storage: For weekly baking, store your starter in the fridge. Feed it once a week. Before storing, give it a good feeding and let it sit at room temperature for an hour or two before putting it in the fridge. The cold slows down the fermentation dramatically.
- Freezing Your Starter: You can also freeze a backup of your starter. Spread a thin layer of starter on a piece of parchment paper and freeze it. Once frozen, break it into pieces and store in a freezer bag. When you want to revive it, just thaw a piece and feed it as usual. It might take a few feedings to become fully active again.
- Drying Your Starter: Another long-term storage method is drying. Spread a thin layer of starter on a silicone mat or parchment paper and let it air dry completely (this takes a few days). Once dry, break it into flakes and store in an airtight jar. To revive, crumble a flake into flour and water and feed it for a few days.
- How Flavors Develop: A starter that is fed regularly and kept at a consistent temperature will develop a milder, more predictable sourness. A starter that is fed less frequently or kept at a warmer temperature will become more acidic and tangy. Experiment to find your perfect flavor!
Nutritional Information & Benefits
While a starter itself isn’t a meal, it’s the foundation for some incredibly nutritious bread. Here’s a quick look at the benefits.
- Estimated Nutritional Values (per 1/4 cup of active starter): Calories: 60, Total Fat: 0g, Sodium: 0mg, Total Carbohydrates: 12g, Dietary Fiber: 1g, Protein: 2g.
- Gut Health: Sourdough fermentation breaks down phytic acid, a compound in grains that can inhibit mineral absorption. This makes the nutrients in your bread more bioavailable. It also introduces beneficial bacteria and prebiotics to your gut.
- Lower Glycemic Index: The fermentation process in sourdough bread lowers its glycemic index compared to regular bread. This means it causes a slower, more gradual rise in blood sugar levels, making it a better choice for blood sugar management.
- Dietary Considerations: Sourdough bread is naturally low in fat and can be made with 100% whole grains for a fiber-rich option. It’s also free from added sugars and preservatives.
- Personal Wellness Perspective: For me, the biggest benefit of keeping a starter isn’t just the nutrition—it’s the mindfulness. The daily ritual of feeding it, watching it bubble, and knowing I’m creating something from scratch is incredibly grounding. It’s a small, slow act in a fast-paced world.
Conclusion
So, there you have it. Your very own 7-day sourdough starter, made from nothing but flour and water. It sounds almost too simple to be true, but I promise you, it works. This isn’t just a recipe; it’s a journey. It’s about learning to trust a process, being patient with yourself, and creating something truly special from the most humble of ingredients. I love this starter because it reminds me that the best things in life don’t have to be complicated. They just need a little time and a lot of love.
I encourage you to customize this process to fit your life. Use different flours, experiment with feeding schedules, and don’t be afraid to make mistakes. Every starter has its own personality, and yours will be unique to you and your kitchen. When you bake your first loaf of bread with this starter, I’d love to hear about it. Drop a comment below and tell me how it went! Did it double in size on Day 4? Did you try the float test? Share your successes (and your funny failures—we all have them) in the comments. And if you loved this guide, please share it with a friend who’s always wanted to try sourdough but thought it was too hard. Happy baking!
Frequently Asked Questions
- Can I use bleached all-purpose flour? You can, but it’s not ideal. Bleached flour has fewer natural yeasts and bacteria, which can make it harder for your starter to get going. Unbleached flour is always the better choice for a more reliable and active starter.
- My starter smells like acetone/vinegar. Is it ruined? Not at all! That sharp, acidic smell is completely normal, especially in the first few days. It’s a sign that the bacteria are doing their job. As your starter matures and gets on a regular feeding schedule, the smell will mellow into a pleasant, yeasty sourness.
- Why isn’t my starter rising? There are a few common reasons. Your kitchen might be too cold (try a warmer spot). Your water might have too much chlorine (use filtered water). Or, you might not be feeding it often enough. Try feeding it twice a day for a couple of days and see if that helps.
- Can I use my starter right after it’s been in the fridge? It’s best not to. A cold starter is sluggish and needs to be revived. Take it out of the fridge, give it a feeding, and let it sit at room temperature for 8-12 hours until it becomes bubbly and doubles in size before using it in a recipe.
- What do I do with all the discard? Don’t throw it away! Sourdough discard is fantastic for making pancakes, waffles, crackers, crumpets, and even pizza dough. There are hundreds of “discard recipes” online. It’s a great way to add a tangy flavor to your cooking without any waste.
Pin This Recipe!
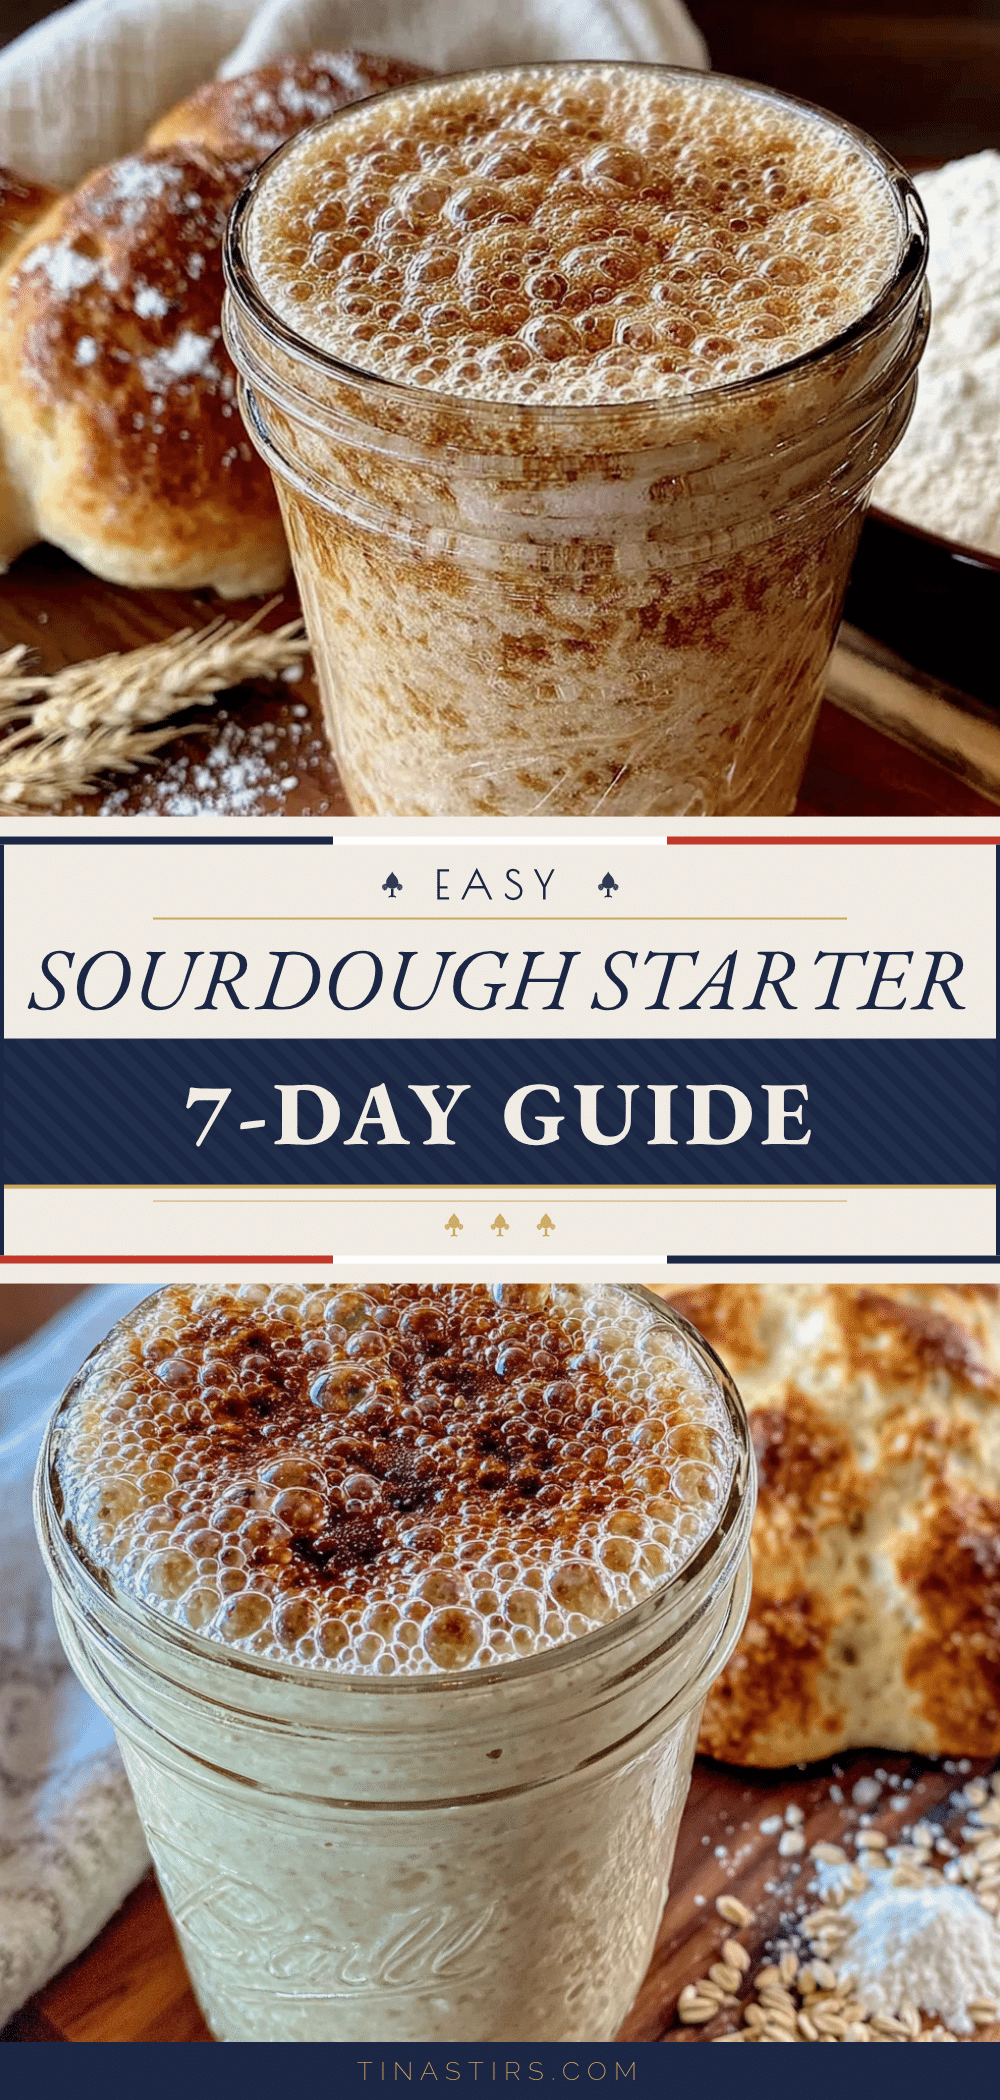
7-Day Sourdough Starter: The Easiest Way to Make It from Scratch
Learn how to make a simple, foolproof sourdough starter from scratch in just 7 days using only flour and water. This beginner-friendly guide provides a day-by-day schedule, tips, and troubleshooting to help you create a bubbly, active starter for delicious homemade bread.
- Prep Time: 5 minutes per day
- Cook Time: 0 minutes
- Total Time: 7 days
- Yield: 1 active sourdough starter 1x
- Category: Starter
- Cuisine: American
Ingredients
- 60 grams (1/2 cup) whole wheat or rye flour (for Day 1)
- 60 grams (1/2 cup) unbleached all-purpose flour (for daily feedings)
- 60 grams (1/4 cup) filtered or non-chlorinated lukewarm water (for daily feedings)
- 100 grams (3/4 cup) unbleached all-purpose flour (for final feeding before baking)
- 100 grams (1/3 cup + 1 tbsp) filtered or non-chlorinated water (for final feeding before baking)
Instructions
- Day 1: In a clean glass jar, combine 60 grams of whole wheat or rye flour and 60 grams of lukewarm filtered water. Stir vigorously until no dry bits remain. Cover loosely with a kitchen towel or cheesecloth and secure with a rubber band. Place in a warm spot (70-75°F / 21-24°C) and let sit undisturbed for 24 hours.
- Day 2: Check for small bubbles and a slightly funky smell. If there is a layer of liquid (hooch) on top, stir it back in. Discard all but 60 grams (about 1/4 cup) of the starter. Add 60 grams of all-purpose flour and 60 grams of lukewarm water. Stir well, mark the level with a rubber band, cover, and let sit for 24 hours.
- Day 3: The starter may smell sharp like acetone. Discard all but 60 grams of starter. Feed with 60 grams all-purpose flour and 60 grams lukewarm water. Stir, mark the level, and cover. If the starter is very liquidy and not rising, consider feeding twice a day (every 12 hours).
- Day 4: Look for a noticeable rise (possibly doubling in size within 12 hours) and a more pleasant, yeasty smell. Discard all but 60 grams of starter. Feed with 60 grams all-purpose flour and 60 grams water. Stir, mark, and cover.
- Day 5: The starter should reliably double in size within 6-8 hours of feeding. The top should be domed with many bubbles. Discard all but 60 grams of starter. Feed with 60 grams all-purpose flour and 60 grams water. Optional: Perform the float test by dropping a spoonful of starter into a glass of water; if it floats, it’s ready.
- Day 6: The starter should double or triple in volume within 4-6 hours of feeding. The float test should work perfectly. Discard all but 60 grams of starter. Feed with 60 grams all-purpose flour and 60 grams water. The starter is now ready to use for baking.
- Day 7: The starter is mature and ready for baking. The night before baking, give it a final larger feeding: use 100 grams of all-purpose flour and 100 grams of water to a small amount of starter. Let it sit out overnight. By morning, it should be at its peak. For maintenance, store in the refrigerator and feed once a week.
Notes
Temperature is crucial; keep starter at 70-75°F (21-24°C). Do not skip the discard step; it maintains balance. Use starter at its peak (doubled in size with a domed top) for best results. Hooch (grayish liquid) indicates hunger; stir in for more sour flavor or pour off for milder taste. Patience is key; some starters may take 10-14 days to become strong.
Nutrition
- Serving Size: 1/4 cup of active st
- Calories: 60
- Carbohydrates: 12
- Fiber: 1
- Protein: 2
Keywords: sourdough starter, homemade starter, 7-day starter, easy sourdough, beginner sourdough, fermented bread starter