Love this? Save it for later!
Share the inspiration with your friends
Introduction
“I wasn’t planning to bake anything that evening,” I admit, “but the power flickered out during a thunderstorm and I found myself digging through the pantry with nothing better to do.” What started as a casual attempt to whip up a simple cake turned into a full-on disaster — the batter was thicker than expected, the oven was mysteriously hotter on one side, and halfway through baking, my timer died. Honestly, it looked like a total mess when I pulled it out. But here’s the twist: instead of tossing it in the trash, I decided to embrace the chaos and fix it up in a way that made the cake look like it was meant to be that way, a quirky, rustic masterpiece.
Maybe you’ve been there — aiming for a flawless cake only to end up with something that looks like it survived a small explosion. The funny thing is, this “cozy nailed it cake disaster fix” became a favorite at my book club the following week. The cracks, the uneven layers, the slightly caramelized edges — all of it felt warm and genuine, like a cake with a story to tell. So, let me tell you how this happy accident turned into a recipe I keep coming back to when I want comfort food that doesn’t pretend to be perfect but still wows the crowd.
Why You’ll Love This Recipe
After countless trials, tweaks, and yes — a few more kitchen mishaps — this cozy nailed it cake disaster fix has become my go-to for times when I want something both effortless and impressive. Here’s why it’s a winner in my book:
- Quick & Easy: Comes together in under 45 minutes, making it perfect for those last-minute dessert cravings or casual get-togethers.
- Simple Ingredients: No need for specialty stores — most are pantry staples you already have on hand.
- Perfect for Cozy Occasions: Ideal for chilly evenings, casual brunches, or warming up after a long day.
- Crowd-Pleaser: Friends and family always ask for seconds — even when I confess it started as a “cake disaster.”
- Unbelievably Delicious: The texture is tender with a slightly caramelized crust, and the flavor has that cozy, nostalgic vibe that just hits the spot.
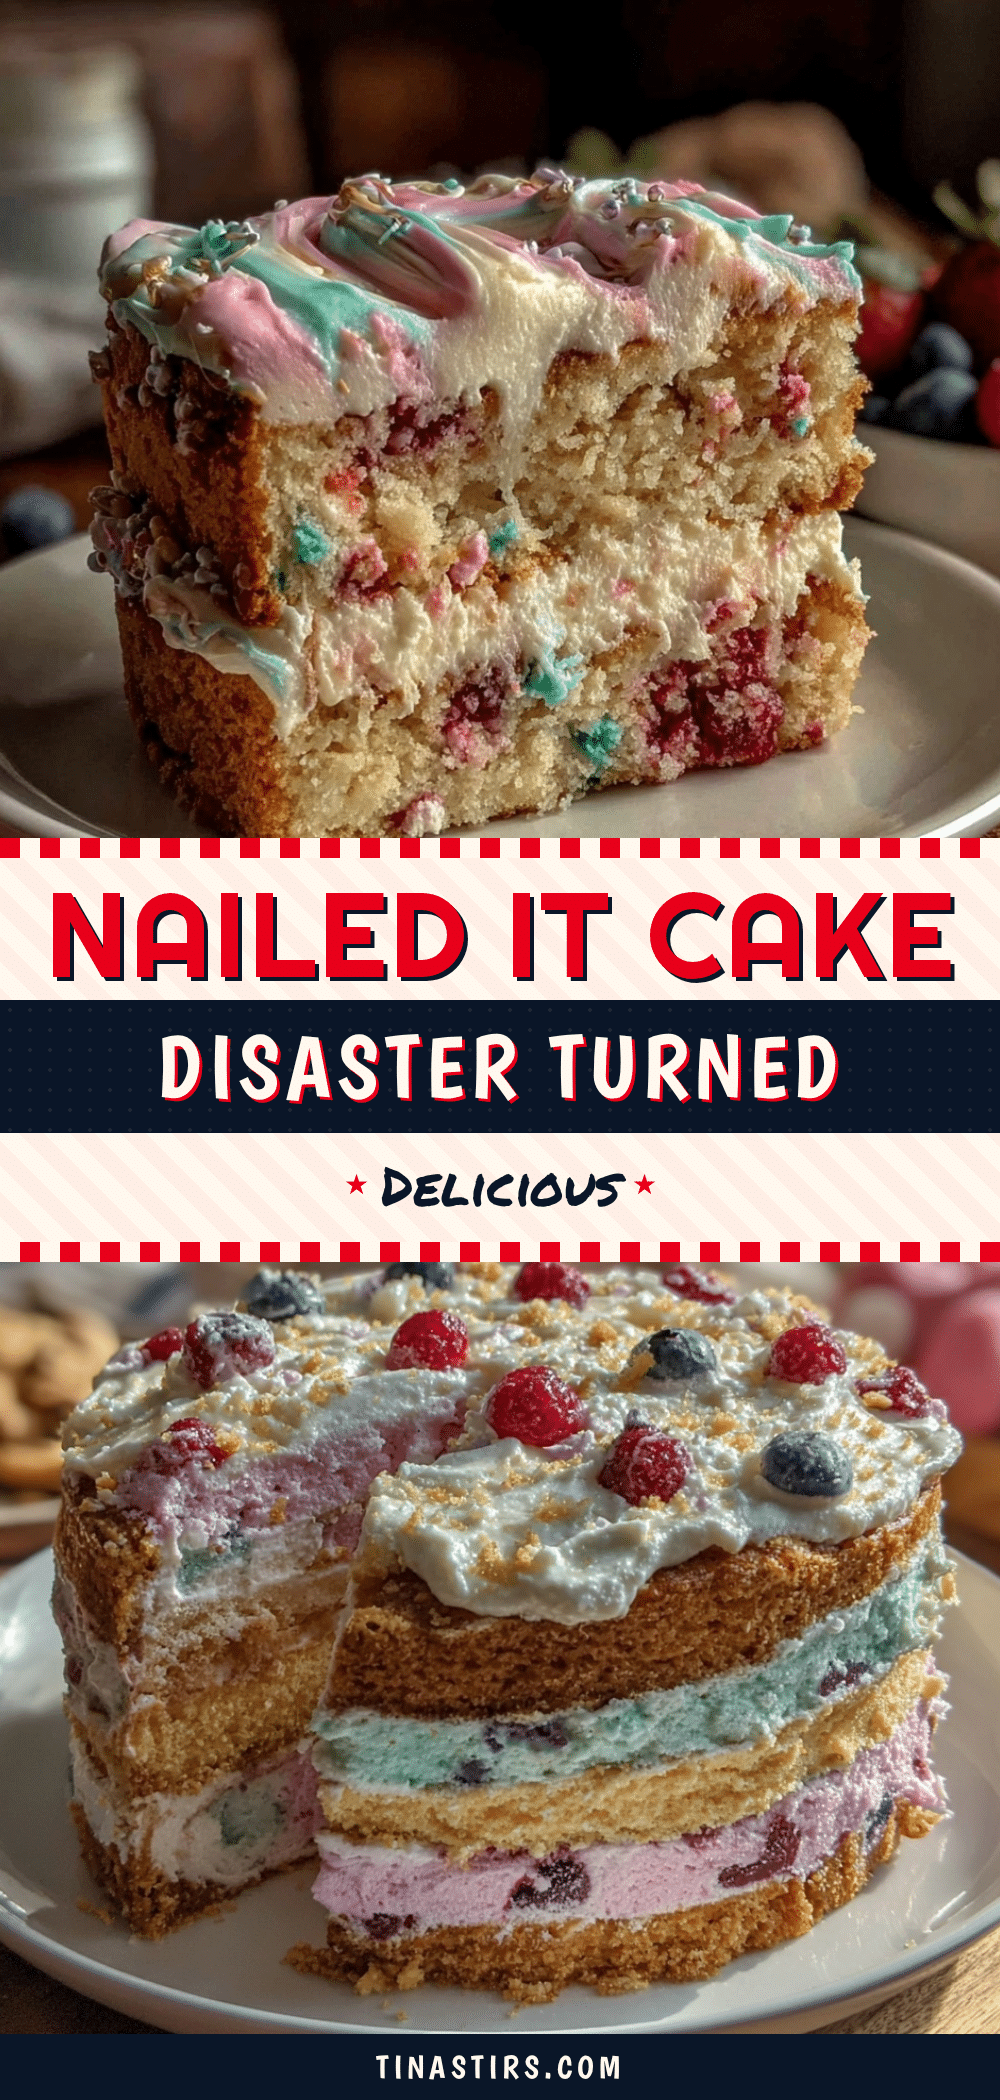
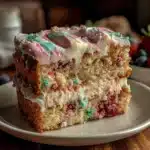
This isn’t just another cake recipe. What sets it apart is the way it turns those baking “oops” moments into charming features. For instance, by frosting the cake with a rustic, whipped cream topping and adding fresh berries, the cracks and imperfections become part of the appeal — giving you a cake that looks homemade and intentional, not like you tried too hard. I promise, if you’ve ever had a cake flop and wondered how to save it, this recipe will feel like a warm hug from the kitchen.
What Ingredients You Will Need
This recipe sticks to simple, wholesome ingredients that combine to create that tender crumb and cozy feel. The beauty is in the basics, with a few small touches that add richness and depth without fuss.
- All-purpose flour – 2 cups (240g), for the cake structure. I prefer King Arthur flour for consistent results.
- Granulated sugar – 1 cup (200g), to bring sweetness and balance.
- Baking powder – 1 ½ teaspoons, to give the cake a light rise.
- Salt – ½ teaspoon, to enhance flavors.
- Unsalted butter – ½ cup (115g), softened, which adds richness and moisture.
- Large eggs – 2, at room temperature, for structure and tenderness.
- Whole milk – ¾ cup (180ml), room temperature, for moisture and softness. You can swap with almond milk for a dairy-free option.
- Vanilla extract – 2 teaspoons, for that warm, inviting aroma.
- Optional: Fresh berries or sliced fruit for topping, or a simple whipped cream frosting to mask any imperfections.
For those looking to tweak the recipe, using cake flour instead of all-purpose will make the crumb even softer, while swapping butter for coconut oil gives it a subtle tropical note. I usually recommend sticking with real vanilla extract rather than imitation — it really makes a difference in flavor depth. You’ll notice this recipe is forgiving, so even if you don’t have everything perfectly measured, the results tend to stay cozy and delicious.
Equipment Needed

To make this cozy nailed it cake, you’ll want to have a few basic kitchen tools handy. Nothing fancy or intimidating, honestly — just what most home cooks already own.
- Mixing bowls: One large for dry ingredients and another for wet ingredients. I like glass bowls because they’re easy to clean and microwave-safe if needed.
- Electric hand mixer or stand mixer: For creaming the butter and sugar until fluffy. If you don’t have one, a sturdy whisk and some elbow grease will do.
- Measuring cups and spoons: Accurate measurements help, but the recipe is forgiving if you’re a bit off.
- 8 or 9-inch round cake pan: I prefer non-stick or greased and parchment-lined pans to prevent sticking.
- Cooling rack: Essential for letting the cake cool evenly and preventing sogginess on the bottom.
- Rubber spatula: For folding ingredients gently and scraping the batter.
If you’re on a budget, don’t sweat it — a hand whisk will work, and you can line your pans with parchment paper cut from a grocery bag. I once made this cake using a metal bowl and a wooden spoon during a camping trip, so trust me, you can make it work anywhere!
Preparation Method
- Preheat your oven to 350°F (175°C). Grease your 8 or 9-inch cake pan with butter and line the bottom with parchment paper. This prevents sticking and helps with a clean release. Set aside. (Approx. 10 minutes)
- Mix dry ingredients: In a large bowl, whisk together 2 cups (240g) all-purpose flour, 1 cup (200g) granulated sugar, 1 ½ teaspoons baking powder, and ½ teaspoon salt. This ensures even distribution of the rising agent and salt. (5 minutes)
- Cream the butter and eggs: In another bowl, beat ½ cup (115g) softened unsalted butter until creamy using a hand or stand mixer. Add 2 large eggs one at a time, beating well after each addition. This step creates an airy texture. (5-7 minutes)
- Add wet ingredients: Pour in ¾ cup (180ml) whole milk and 2 teaspoons vanilla extract. Mix until just combined — be careful not to overmix or the cake might turn dense. (2-3 minutes)
- Combine wet and dry: Gradually add the dry ingredients into the wet mixture in three additions, folding gently with a rubber spatula. Stop once everything is just combined; a few lumps are okay. Overmixing can toughen the crumb. (5 minutes)
- Pour batter into the prepared pan: Use the spatula to spread the batter evenly. The batter will be thick — that’s expected with this recipe. (2 minutes)
- Bake: Place the pan in the oven and bake for 35-40 minutes. Check doneness by inserting a toothpick in the center; it should come out with a few moist crumbs but no wet batter. (35-40 minutes)
- Cool: Let the cake cool in the pan for 10 minutes, then carefully transfer it to a cooling rack to cool completely. This prevents sogginess. (At least 30 minutes)
- Fix the “disaster”: If your cake has cracks, uneven surfaces, or looks a little rough, don’t panic! Spread a generous layer of whipped cream or frosting over the top. Add fresh berries or sliced fruit to distract and decorate. The imperfections become charming features. (10 minutes)
Quick tip: If you notice your oven runs hot or uneven, rotate the cake halfway through baking. Also, if the cake edges brown too fast, tent the pan loosely with foil. I learned this the hard way after one of my first attempts turned more “burnt” than “baked”!
Cooking Tips & Techniques
Let me share a few tricks I picked up through trial, error, and some lucky saves:
- Don’t skip room-temperature ingredients. Butter, eggs, and milk mix more evenly when not cold, preventing lumps and uneven texture.
- Creaming butter and sugar properly is key — it traps air, making your cake fluffier. If you’re rushed, at least beat until the mixture is pale and fluffy, even if not perfect.
- Folding, not stirring. When adding flour, use a gentle folding motion to avoid developing gluten, which can make the cake tough.
- Watch your oven temperature. An oven thermometer can be a baker’s best friend. My oven tends to run a bit hot, so I lower the temperature by 10°F and increase baking time slightly.
- Don’t panic if cracks appear. Those “flaws” actually give the cake a rustic, cozy charm. Covering with frosting or whipped cream turns them into a feature, not a flaw.
Years ago, I once forgot to add baking powder entirely. The cake barely rose, but with some clever frosting and fresh fruit, my guests thought it was a dense, fudgy cake — and loved it! So, honestly, this recipe’s forgiving nature makes it a great candidate for beginners and busy cooks alike.
Variations & Adaptations
This recipe is like a blank canvas for you to get creative. Here are a few ways I’ve made it my own or tailored it for different needs:
- Gluten-Free Version: Swap all-purpose flour with a gluten-free blend (like Bob’s Red Mill 1-to-1). Add 1 teaspoon xanthan gum if your blend doesn’t include it, to help with structure.
- Seasonal Fruit Twist: In summer, fold fresh blueberries or chopped peaches into the batter before baking. In winter, try diced apples with cinnamon for a cozy vibe.
- Flavor Boost: Add 1 teaspoon of cinnamon or a splash of almond extract to the wet ingredients for a subtle flavor change.
- Dairy-Free: Use coconut oil instead of butter and swap whole milk for full-fat coconut milk or your favorite plant-based milk.
- Personal Favorite: Once, I added a handful of chopped toasted pecans on top before baking — it gave the cake a delightful crunch that paired beautifully with the soft crumb.
Serving & Storage Suggestions
This cake is best enjoyed at room temperature or slightly chilled with a dollop of whipped cream or your favorite frosting. I like to serve it alongside a hot cup of tea or coffee — it’s the perfect cozy pairing for a quiet afternoon.
For storage, wrap the cake tightly with plastic wrap or place in an airtight container. It keeps well in the refrigerator for up to 4 days. If you want to freeze it, slice first, then freeze individual pieces wrapped in foil and placed in a freezer bag — they thaw quickly at room temperature or in the microwave with a quick zap.
Reheating a slice in the microwave for 15-20 seconds brings back that fresh-baked warmth. Interestingly, the flavors tend to deepen after a day or two, so if you can resist, letting it sit overnight really rewards your patience.
Nutritional Information & Benefits
This cozy cake is a modest indulgence, with an estimated 280 calories per slice (based on 8 servings). It contains moderate amounts of fat and sugar, typical for a classic cake.
Key ingredients like eggs and milk add protein and calcium, while butter contributes fat for satiety. If you add fruit toppings, you get a natural vitamin boost and fiber. For those mindful of allergens, you can swap out dairy and gluten ingredients as mentioned earlier.
From my wellness perspective, this cake strikes a nice balance — it’s comforting without being overly complicated or heavy, making it a great choice for sharing moments that matter without overindulging.
Conclusion
There you have it — a cozy nailed it cake disaster fix that actually looks intentional and tastes wonderful. This recipe is perfect if you’ve ever felt frustrated by baking fails or just want a cake that’s deliciously imperfect and full of character. I love how it embraces those little kitchen mishaps and turns them into something special.
Feel free to customize it to your taste, whether that means adding your favorite spices, swapping fruits, or trying out different frostings. I’d love to hear how your version turns out — share your stories or tips in the comments below! Baking doesn’t have to be perfect to be memorable, and this cake proves just that. So, grab your mixing bowl, and let’s make some cozy memories together.
FAQs About Cozy Nailed It Cake Disaster Fix
1. Can I use this recipe for cupcakes instead of a cake?
Absolutely! Just reduce the baking time to about 18-22 minutes and keep an eye on them. The batter works well for cupcakes and muffins.
2. How do I fix a cake that sank in the middle?
That usually means underbaking or too much leavening. You can trim the sunken part and cover it with frosting or whipped cream to disguise it, just like in this recipe.
3. What’s the best way to prevent a dry cake?
Don’t overbake, and be sure to measure ingredients carefully. Adding a bit of extra moisture like a spoonful of yogurt or applesauce can help too.
4. Can I prepare this cake batter ahead of time?
Yes, you can make the batter and refrigerate it for up to 24 hours before baking. Just give it a gentle stir before pouring into the pan.
5. What frosting pairs best with this cake?
Simple whipped cream or cream cheese frosting complements the flavors nicely, but a classic vanilla buttercream also works beautifully.
Pin This Recipe!
Cozy Nailed It Cake Disaster Fix
A forgiving and cozy cake recipe that embraces baking mishaps, resulting in a tender, rustic cake perfect for casual occasions and comforting moments.
- Prep Time: 20 minutes
- Cook Time: 35-40 minutes
- Total Time: 55-60 minutes
- Yield: 8 servings 1x
- Category: Dessert
- Cuisine: American
Ingredients
- 2 cups (240g) all-purpose flour
- 1 cup (200g) granulated sugar
- 1 ½ teaspoons baking powder
- ½ teaspoon salt
- ½ cup (115g) unsalted butter, softened
- 2 large eggs, room temperature
- ¾ cup (180ml) whole milk, room temperature (can substitute almond milk for dairy-free)
- 2 teaspoons vanilla extract
- Optional: fresh berries or sliced fruit for topping
- Optional: whipped cream frosting
Instructions
- Preheat your oven to 350°F (175°C). Grease an 8 or 9-inch cake pan with butter and line the bottom with parchment paper. Set aside.
- In a large bowl, whisk together the flour, sugar, baking powder, and salt.
- In another bowl, beat the softened butter until creamy using a mixer. Add eggs one at a time, beating well after each addition.
- Add milk and vanilla extract to the butter and egg mixture. Mix until just combined.
- Gradually add the dry ingredients to the wet mixture in three additions, folding gently with a rubber spatula until just combined. A few lumps are okay.
- Pour the thick batter evenly into the prepared pan.
- Bake for 35-40 minutes, or until a toothpick inserted in the center comes out with a few moist crumbs but no wet batter. Rotate halfway if oven is uneven.
- Let the cake cool in the pan for 10 minutes, then transfer to a cooling rack to cool completely.
- If the cake has cracks or uneven surfaces, spread a generous layer of whipped cream or frosting over the top and decorate with fresh berries or sliced fruit.
Notes
Use room-temperature ingredients for best texture. Fold dry ingredients gently to avoid tough crumb. Rotate cake halfway through baking if oven is uneven. Tent with foil if edges brown too fast. The cake is forgiving and can be customized with fruits, nuts, or spices. Batter can be refrigerated up to 24 hours before baking.
Nutrition
- Serving Size: 1 slice (1/8 of cake
- Calories: 280
- Sugar: 22
- Sodium: 210
- Fat: 12
- Saturated Fat: 7
- Carbohydrates: 38
- Fiber: 1
- Protein: 4
Keywords: cozy cake, easy cake recipe, rustic cake, cake disaster fix, simple cake, whipped cream frosting, baking tips