Love this? Save it for later!
Share the inspiration with your friends
My friend Jen swore she didn’t care about football. For years. Every Super Bowl Sunday, she’d show up at parties with a book and park herself in the corner, rolling her eyes at the screen. Then last January, I brought these chocolate football field brownie bars to a watch party she was hosting—reluctantly, on her husband’s behalf. I found her in the kitchen twenty minutes later, knife in hand, cutting herself a third piece while staring at the TV. “I’m just watching the halftime show,” she mumbled, frosting smudged on her cheek. Sure you are, Jen.
Honestly, I get it. I’ve never been the type to go wild over sports either. But there’s something about game day snacks that brings people together, you know? The dip, the wings, the little sausages in barbecue sauce—it’s all good. But when I set this pan of brownie bars down on the counter, decorated like a real football field with green frosting and white yard lines, something shifts in the room. People stop talking. They stop arguing about calls. They just start eating. And smiling. And asking for the recipe before the fourth quarter even starts.
The thing is, I didn’t set out to convert anyone. I just wanted a dessert that felt festive without requiring me to spend all day in the kitchen. These bars come together with a boxed brownie mix (yes, really), a simple buttercream frosting, and some white piping gel for the lines. No fondant. No fancy tools. Just a fun, delicious treat that looks way more impressive than it actually is. I keep making them because they work—every single time. And maybe you’ve been there, staring at a Pinterest board full of elaborate game day desserts, wondering who has the time. These bars are for you. They’re for the person who wants to show up with something special without losing their whole Saturday to the kitchen.
Why You’ll Love This Recipe
Let me tell you why these brownie bars have become my go-to for every game day gathering. I’ve tested this recipe at least a dozen times—through playoff parties, regular season games, and even a birthday party for a friend who just really loves football. Each time, the pan comes back empty. That’s not luck; that’s a solid recipe backed by some real kitchen experience.
- Quick & Easy: From start to finish, you’re looking at about 45 minutes of active time. The brownies bake for 25 minutes, and decorating takes maybe 15. That’s it. You can make these the morning of the big game and still have time to prep your dip.
- Simple Ingredients: You probably have most of this stuff already. A box of brownie mix, butter, powdered sugar, vanilla, green food coloring, and white piping gel. No weird specialty items or trips to three different stores.
- Perfect for Game Day: These bars are sturdy enough to sit out on a buffet table for hours. They don’t melt, they don’t get soggy, and they cut into neat little rectangles that people can grab and go. No plates or forks required if you’re okay with a little frosting on your fingers.
- Crowd-Pleaser: Kids love the bright green frosting and the football theme. Adults love that it tastes like a real brownie—not some dry, overly sweet mess. I’ve watched people who claim they “don’t like sweets” eat three of these.
- Unbelievably Delicious: The brownie base is fudgy and rich, with that slightly crackly top that brownie lovers dream about. The buttercream is light and fluffy, not cloying. Together, they create this perfect balance of textures and flavors that just works.
What makes this recipe different from every other football-themed dessert out there? It’s the ratio. Most field cakes have way too much frosting, so you end up with a mouthful of sugar and barely any brownie. I use just enough frosting to cover the top in a thin, even layer—enough to look like a football field, but not so much that it overwhelms the chocolate. That’s the secret. That’s why people keep coming back for more.
This recipe isn’t just good—it’s the kind that makes you close your eyes after the first bite. It’s comfort food reimagined for the big screen. Perfect for impressing guests without stress, or turning a simple Sunday into something memorable.
What Ingredients You Will Need
This recipe uses simple, everyday ingredients to create something that looks like it came from a bakery. Here’s what you’ll need, broken down by component.
For the Brownie Base
- 1 box (18 oz) brownie mix (I prefer Ghirardelli or Duncan Hines for the best fudgy texture)
- 2 large eggs (room temperature, helps the batter come together smoothly)
- 1/2 cup vegetable oil (or melted coconut oil, if that’s what you have)
- 1/4 cup water (adds moisture without making the brownies cakey)
For the Buttercream Frosting
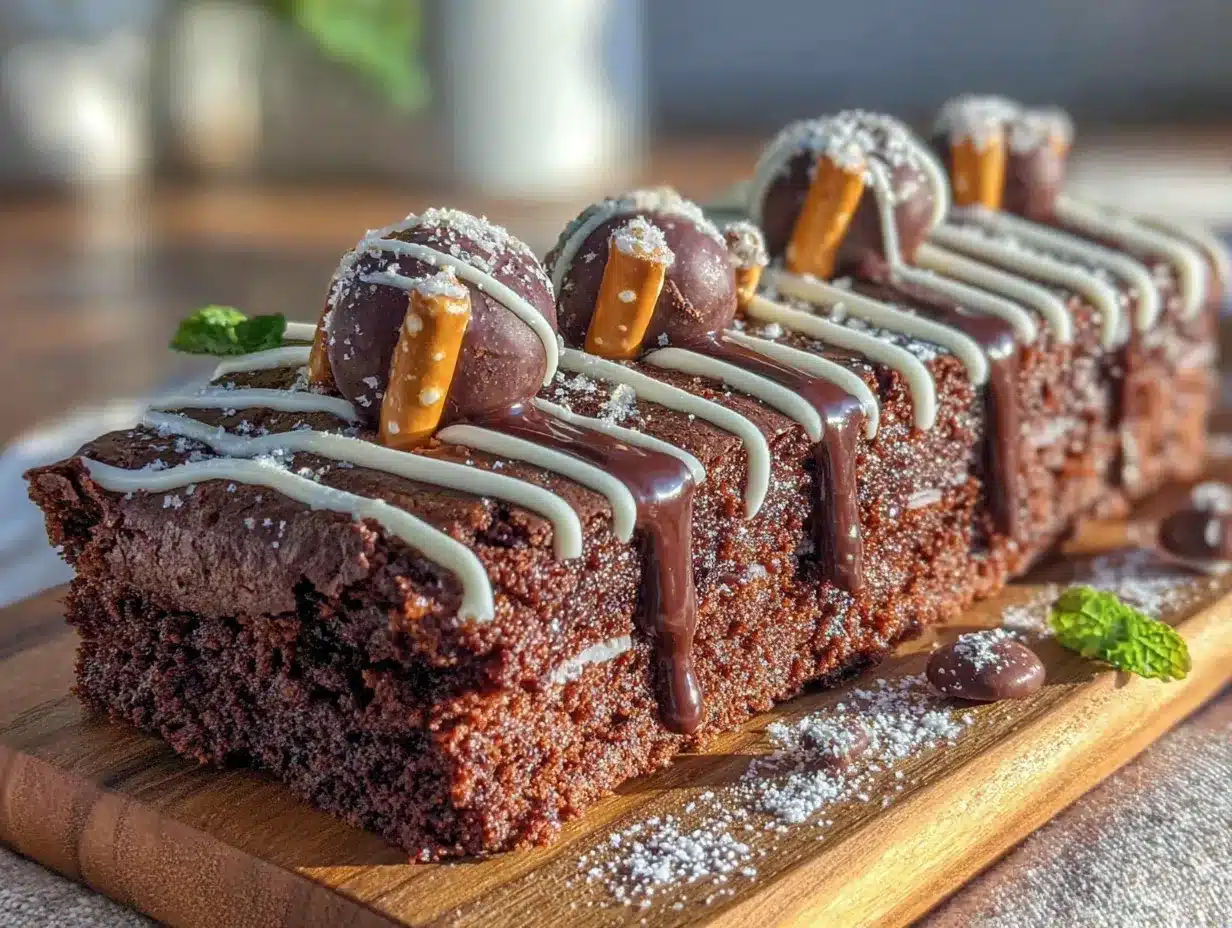
- 1/2 cup unsalted butter, softened (I use Land O’Lakes—it creams up beautifully)
- 2 cups powdered sugar (sift it if you want an extra-smooth frosting, but I rarely bother)
- 2 tablespoons milk (whole milk works best, but any kind will do)
- 1 teaspoon vanilla extract (pure, not imitation, if you can swing it)
- Green gel food coloring (start with 4-5 drops, then add more until you get that perfect grass color)
For the Football Field Decoration
- White piping gel (found in the baking aisle—it’s much easier than trying to pipe melted white chocolate)
- Mini football candies or chocolate footballs (optional, for the end zones and field goals)
- White chocolate melting wafers (optional, for making yard line markers—but piping gel is way simpler)
Ingredient selection tip: For the brownie mix, look for one that says “fudgy” on the box, not “cake-like.” The fudgy varieties hold up better under the weight of the frosting and cut into cleaner squares. I’ve tried this with a few different brands, and Ghirardelli consistently gives the best texture—dense, moist, and intensely chocolatey.
Substitution guidance: If you’re dairy-free, use plant-based butter and oat milk in the frosting. The texture will be slightly different—a bit softer—but it still works. For a gluten-free version, use a gluten-free brownie mix and double-check that your food coloring and piping gel are certified gluten-free. And if you don’t have piping gel? Melt some white chocolate chips with a teaspoon of coconut oil, let it cool slightly, and pipe that instead. Just work fast, because it sets quickly.
Equipment Needed
You don’t need a professional bakery setup for these bars. Here’s what I use every time I make them.
- 9×13-inch baking pan (metal pans give the best browning, but glass works fine—just add 5 minutes to the baking time)
- Parchment paper (non-negotiable—it makes lifting the brownies out of the pan so much easier)
- Large mixing bowl and whisk (for the brownie batter)
- Electric hand mixer or stand mixer (you can make the frosting by hand, but your arm will get tired—trust me)
- Offset spatula (for spreading the frosting evenly; a butter knife works in a pinch)
- Small piping bag or squeeze bottle (for the white yard lines; a ziplock bag with the corner snipped off does the job)
- Sharp knife (for cutting clean edges—wipe it between cuts for the best results)
I used a cheap offset spatula for years before finally upgrading to a nicer one. Honestly? The cheap one worked fine. Don’t feel like you need to buy fancy equipment. A butter knife and a steady hand are all you really need.
Preparation Method
Let’s walk through this step by step. I’ve made these bars enough times to know where things can go wrong, so I’ll point out the little tricks along the way.
- Preheat your oven to 350°F (175°C). While it’s heating, line your 9×13-inch pan with parchment paper. Leave a few inches of overhang on the long sides—that’s your handle for lifting the brownies out later. Lightly spray the parchment with nonstick spray, just to be safe.
- Make the brownie batter. In a large bowl, whisk together the brownie mix, eggs, oil, and water. Stir until just combined—about 40 strokes. Don’t overmix, or your brownies will turn out tough and cakey. A few small lumps are totally fine. The batter should look thick and glossy.
- Pour the batter into the prepared pan. Use your spatula to spread it into an even layer, making sure it reaches all four corners. Give the pan a gentle tap on the counter to release any air bubbles.
- Bake for 22-25 minutes. Start checking at 22 minutes—insert a toothpick into the center. You want it to come out with a few moist crumbs attached, not wet batter. If it comes out clean, you’ve overbaked them. Let the brownies cool in the pan on a wire rack for 15 minutes, then use the parchment to lift them out and let them cool completely. This is important—if the brownies are even slightly warm, the frosting will melt and slide right off.
- While the brownies cool, make the buttercream. In a large bowl, beat the softened butter with an electric mixer on medium speed until it’s smooth and creamy—about 2 minutes. Add the powdered sugar, one cup at a time, beating on low speed after each addition. The mixture will look dry and crumbly at first; that’s normal. Add the milk and vanilla, then increase the speed to medium-high and beat for 3-4 minutes until the frosting is light, fluffy, and spreadable. If it’s too thick, add another tablespoon of milk. Too thin? Add a little more powdered sugar.
- Add the green food coloring. Start with 4 drops of gel food coloring and mix thoroughly. Add more, one drop at a time, until you reach a shade of green that looks like a football field. I usually end up using 6-8 drops total. Gel coloring is more concentrated than liquid, so you get a vibrant color without thinning out the frosting.
- Frost the cooled brownies. Place the brownie block on a cutting board or serving platter. Use your offset spatula to spread the green frosting in a thin, even layer over the top. Don’t pile it on—you want to see the brownie through the frosting if you look closely. Smooth the top as best you can.
- Create the yard lines. Using your white piping gel and a piping bag (or ziplock bag with a tiny corner snipped off), pipe straight lines across the width of the brownie block. I make mine about 1.5 inches apart. Start at one end and work your way down, using a ruler or just your eye to keep the lines even. Don’t stress about perfection—football fields aren’t perfectly straight either.
- Add the end zones and field details. Pipe a thicker white line at each end of the field to mark the end zones. If you have mini football candies, place a few in each end zone. You can also pipe small white numbers or hash marks if you’re feeling ambitious, but honestly? The simpler version looks better.
- Let the decorated brownies set. Pop the whole thing in the refrigerator for 20-30 minutes. This helps the frosting firm up so you get clean cuts. When you’re ready to serve, use a sharp knife to trim the edges (the cook’s treat!) and cut the brownies into bars. I usually get 24 bars from one pan.
Sensory cues: When you pull the brownies from the oven, the top should be set and slightly crackly, and the edges should just start pulling away from the pan. The kitchen should smell like a bakery. When you spread the frosting, it should glide smoothly without tugging at the brownie surface. If it’s pulling, your brownies aren’t cool enough yet.
Cooking Tips & Techniques
I’ve learned a few things the hard way so you don’t have to. Here are the tricks that make these bars turn out perfectly every time.
Don’t overbake the brownies. This is the number one mistake I see. People get nervous about undercooked brownies and leave them in the oven too long. Remember: you’re going to frost these, so they don’t need to be picture-perfect on top. Pull them when the toothpick comes out with moist crumbs. They’ll continue to set as they cool.
Cool completely before frosting. I cannot stress this enough. I once tried to rush the process and frosted slightly warm brownies. The frosting melted into a green puddle, and I ended up with what looked like swamp bars. Tasted fine, but looked terrible. Give yourself at least an hour for cooling, or pop them in the fridge for 30 minutes.
Use gel food coloring, not liquid. Liquid food coloring will thin out your buttercream and make it runny. Gel coloring gives you a vibrant green without changing the consistency. You can find it at any grocery store or craft store in the baking aisle.
Pipe the yard lines while the frosting is still slightly soft. If the frosting has firmed up in the fridge, the piping gel won’t stick as well. Pipe the lines immediately after frosting, then refrigerate to set everything together.
Cut with a wet knife. Run your knife under hot water, wipe it dry, then make your cut. Repeat for each cut. This gives you clean, sharp edges instead of smeared frosting. I learned this trick from a bakery owner, and it’s a game-changer.
Variations & Adaptations
One of the best things about this recipe is how easy it is to customize. Here are a few ways I’ve changed it up over the years.
Team Colors Twist: Instead of a green football field, dye your frosting to match your favorite team’s colors. For a Kansas City Chiefs party, use red frosting with yellow yard lines. For the 49ers, go with red and gold. It’s a fun way to show team spirit, and the concept is exactly the same—just swap the food coloring.
Chocolate Football Field: If you want to double down on the chocolate, skip the green frosting and use chocolate buttercream instead. Pipe the yard lines in white, and add mini chocolate footballs. It looks less like a field and more like a chocolate dream, but nobody has ever complained about too much chocolate.
Blondie Base: For a completely different flavor profile, swap the brownie mix for a blondie mix or make a from-scratch blondie base. The butterscotch-vanilla flavor pairs beautifully with the buttercream, and the lighter color makes the green frosting pop even more.
Gluten-Free Version: I’ve made these with King Arthur’s gluten-free brownie mix, and honestly? Nobody could tell the difference. Just follow the package instructions and proceed with the rest of the recipe exactly as written.
Mini Version: Bake the brownies in a mini muffin tin for bite-sized football fields. Reduce the baking time to 12-15 minutes. Frost each mini brownie individually and pipe a tiny yard line on top. These are perfect for parties where people want to graze.
I once tried a version with cream cheese frosting instead of buttercream. It was delicious—tangy and rich—but it didn’t hold its shape as well for piping. Save that variation for a non-decorated brownie bar.
Serving & Storage Suggestions
These brownie bars are best served at room temperature, straight from the pan or arranged on a platter. The frosting is soft and creamy at room temp, and the brownies are perfectly fudgy. If you’ve refrigerated them, let them sit out for 15-20 minutes before serving to take the chill off.
Presentation tip: Arrange the bars on a large platter or cutting board with the yard lines running in the same direction, like a real football field. Scatter a few mini football candies around the platter for a festive touch. If you’re serving these at a party, put them near the dip station—people love having a sweet option next to the savory snacks.
What to serve with them: These bars pair beautifully with vanilla ice cream or a cold glass of milk. For an adult crowd, try them with a dark stout beer or a bourbon old fashioned. The rich chocolate and the boozy notes are a match made in heaven.
Storage: Store the brownie bars in an airtight container at room temperature for up to 3 days. If you stack them, place a sheet of parchment paper between layers to prevent the frosting from sticking. They also freeze beautifully—wrap individual bars in plastic wrap, then place them in a freezer bag. They’ll keep for up to 2 months. Thaw at room temperature for about 30 minutes before serving.
Flavor development: Honestly, these bars taste even better the next day. The brownies get even fudgier as they sit, and the frosting melds with the chocolate in a way that’s hard to describe. If you can resist eating them all on game day, save a few for the next morning with your coffee.
Nutritional Information & Benefits
Let’s be real—these are a treat, not a health food. But here’s the estimated nutritional breakdown for one bar (based on 24 servings):
- Calories: Approximately 220
- Fat: 12g
- Carbohydrates: 28g
- Protein: 2g
- Sugar: 20g
Is there any nutritional benefit here? Well, dark chocolate does contain antioxidants, and butter has vitamin A. But let’s not kid ourselves—you’re eating these because they’re delicious, not because they’re a superfood. And that’s okay. Life is about balance. Serve these alongside some veggie sticks and hummus, and you’ve got a well-rounded game day spread.
Dietary considerations: This recipe contains dairy, eggs, and gluten. For a dairy-free version, use plant-based butter and milk in the frosting. For gluten-free, use a certified gluten-free brownie mix. For egg-free, use a flax egg (1 tablespoon ground flaxseed mixed with 3 tablespoons water) in the brownie batter—though the texture will be slightly denser.
Conclusion
These easy chocolate football field brownie bars are everything you want in a game day dessert: simple to make, impressive to look at, and absolutely delicious to eat. They’ve converted at least one football skeptic that I know of, and they’ve made countless game day spreads just a little bit sweeter.
I love this recipe because it’s forgiving. You can mess up the frosting, pipe crooked yard lines, forget the end zones—and it still looks fun and tastes amazing. It’s not about perfection. It’s about showing up with something made with love, something that makes people smile when they see it on the table.
So go ahead and make these for your next game day gathering. Customize the colors for your team. Add extra football candies. Make them your own. And when someone asks for the recipe—and they will—just smile and tell them it’s easier than it looks.
I’d love to hear how yours turn out! Drop a comment below with your team colors or any fun variations you tried. Share a photo on Pinterest and tag me—I’m always looking for new ideas. And if you loved these bars, pin this recipe to your game day board so you can find it again next season.
Frequently Asked Questions
Can I make these brownie bars ahead of time?
Absolutely. You can bake the brownies up to 2 days in advance and store them, unfrosted, in an airtight container at room temperature. Frost and decorate them the day you plan to serve for the freshest look and taste.
Do I have to use a boxed brownie mix?
Not at all. If you have a favorite from-scratch brownie recipe, use that instead. Just make sure it’s a fudgy, dense brownie that can hold up to the frosting. A cakey brownie might crumble when you try to cut it into bars.
My frosting looks lumpy. What went wrong?
Your butter was probably too cold. Softened butter should be at room temperature—you should be able to press your finger into it and leave an indent. If it’s still firm, let it sit out for another 30 minutes before trying again. You can also try beating the frosting for an extra minute to smooth out any lumps.
Can I use a different frosting?
Sure. Cream cheese frosting, chocolate frosting, or even a thin layer of ganache would all work. Keep in mind that the texture and firmness will vary, so the yard lines might look a little different. Experiment and see what you like best.
How do I get clean cuts without smearing the frosting?
Chill the decorated brownies in the fridge for at least 30 minutes before cutting. Use a sharp knife and wipe it clean between each cut. For extra-clean cuts, run the knife under hot water, dry it, then make your cut. Repeat for each bar.
PrintEasy Chocolate Football Field Brownie Bars: Best Game Day Dessert
These easy chocolate football field brownie bars are everything you want in a game day dessert: simple to make, impressive to look at, and absolutely delicious to eat. They’ve converted at least one football skeptic and make countless game day spreads sweeter.
- Prep Time: 15 minutes
- Cook Time: 25 minutes
- Total Time: 45 minutes (plus cooling time)
- Yield: 24 servings 1x
- Category: Dessert
- Cuisine: American
Ingredients
- 1 box (18 oz) brownie mix (fudgy variety, such as Ghirardelli or Duncan Hines)
- 2 large eggs, room temperature
- 1/2 cup vegetable oil (or melted coconut oil)
- 1/4 cup water
- 1/2 cup unsalted butter, softened
- 2 cups powdered sugar
- 2 tablespoons milk (whole milk preferred)
- 1 teaspoon vanilla extract (pure)
- Green gel food coloring (4-8 drops)
- White piping gel (for yard lines)
- Mini football candies or chocolate footballs (optional, for decoration)
- White chocolate melting wafers (optional, for yard line markers)
Instructions
- Preheat oven to 350°F (175°C). Line a 9×13-inch baking pan with parchment paper, leaving overhang on the long sides. Lightly spray with nonstick spray.
- In a large bowl, whisk together brownie mix, eggs, oil, and water until just combined (about 40 strokes). Do not overmix; a few lumps are fine.
- Pour batter into prepared pan and spread evenly. Tap pan gently on counter to release air bubbles.
- Bake for 22-25 minutes. Check at 22 minutes: insert a toothpick into center; it should come out with a few moist crumbs, not wet batter. Cool in pan on wire rack for 15 minutes, then lift out using parchment and cool completely.
- While brownies cool, make buttercream: In a large bowl, beat softened butter with electric mixer on medium speed until smooth and creamy (about 2 minutes). Add powdered sugar, one cup at a time, beating on low after each addition. Add milk and vanilla, then beat on medium-high for 3-4 minutes until light and fluffy.
- Add green gel food coloring, starting with 4 drops and adding more until desired grass color is reached (usually 6-8 drops total). Mix thoroughly.
- Place cooled brownie block on a cutting board or platter. Spread green frosting in a thin, even layer over the top using an offset spatula.
- Using white piping gel in a piping bag or ziplock bag with a tiny corner snipped off, pipe straight yard lines across the width of the brownie block, about 1.5 inches apart.
- Pipe a thicker white line at each end for end zones. Optionally, place mini football candies in end zones or add small numbers/hash marks.
- Refrigerate decorated brownies for 20-30 minutes to firm up frosting. Use a sharp knife to trim edges and cut into bars (about 24 bars). Wipe knife clean between cuts for best results.
Notes
Don’t overbake brownies; pull when toothpick has moist crumbs. Cool completely before frosting to prevent melting. Use gel food coloring, not liquid, to avoid thinning frosting. Pipe yard lines immediately after frosting while still soft. Cut with a wet knife for clean edges. Store in airtight container at room temperature for up to 3 days, or freeze individually wrapped for up to 2 months. Bars taste even better the next day.
Nutrition
- Serving Size: 1 bar
- Calories: 220
- Sugar: 20
- Sodium: 150
- Fat: 12
- Saturated Fat: 4
- Carbohydrates: 28
- Fiber: 1
- Protein: 2
Keywords: football field brownies, game day dessert, chocolate brownie bars, easy brownie recipe, Super Bowl dessert, football party food, brownie bars with frosting


