Love this? Save it for later!
Share the inspiration with your friends
I was scrubbing garlic cloves at my kitchen sink last Tuesday when the smell hit me—that sharp, almost medicinal sting of raw allicin cutting through the air—and suddenly I was seven years old, sitting on a wobbly wooden stool in my neighbor Mrs. Kowalski’s tiny yellow kitchen. She had a cracked ceramic bowl filled with honey and garlic cloves that looked like little ivory pearls swimming in amber. I remember thinking she was absolutely crazy for putting them together. “This keeps the monsters away,” she’d said, winking. I didn’t know if she meant the kind under my bed or the kind that came with a runny nose, but I believed her anyway. She passed away a few years ago, and I never got her exact recipe. So for the last two winters, I’ve been trying to recreate that golden concoction from memory, taste-testing batches like some kind of folk remedy detective. Let me tell you, I’ve had some disasters—one batch fermented so aggressively it nearly popped the lid off my mason jar in the middle of the night. Not my finest moment. But this version? This homemade honey garlic immune-boosting tonic? It’s the one. It’s the one that tastes like her kitchen smelled: warm, safe, and stubbornly hopeful. Honestly, if you’ve ever found yourself staring down cold and flu season wondering what actually works, you’re going to want this in your fridge.
Why You’ll Love This Recipe
This isn’t just another wellness trend you’ll try once and forget about. This homemade honey garlic immune-boosting tonic has been a staple in my kitchen through three winters, and I’ve tested every variable—different honey varieties, garlic from different growers, even different jar shapes. It’s been taste-tested by my skeptical brother-in-law (a man who once called kombucha “rotten tea juice”) and approved by my neighbor who’s a retired nurse. So here’s why this one sticks.
- Simple Ingredients: You need exactly two main ingredients. That’s it. No trips to specialty stores, no weird powders, no spending forty dollars on a tiny bottle of something that tastes like floor cleaner.
- Quick to Make: Active prep time is under five minutes. I’m not exaggerating. You peel, you crush, you pour honey, you wait. That’s the hardest part—the waiting.
- Long Shelf Life: Properly stored, this tonic keeps for months in the fridge. It’s like having a tiny insurance policy against cold season sitting right in your refrigerator door.
- Actually Works: I can’t make medical claims, but I can tell you that I’ve gone from getting every cold that walked through my daughter’s preschool doors to maybe one mild sniffle per season. Coincidence? Maybe. But I’m not stopping to find out.
- Versatile: You can take it by the spoonful, stir it into tea, drizzle it over roasted vegetables, or use it in salad dressings. It’s a condiment and a remedy all in one.
What makes this different from every other honey garlic tonic recipe out there? It’s the resting time. Most recipes tell you to wait a day or two. I let mine sit for a full week, sometimes two, and the transformation is unreal—the garlic mellows out, the honey gets thinner and more potent, and the whole thing becomes this deeply golden, almost syrupy liquid that smells like comfort. This isn’t just another version. It’s the version I keep coming back to, the one I give as gifts in little jars with handwritten labels, the one that makes me close my eyes after the first spoonful and remember that yellow kitchen.
What Ingredients You Will Need
This recipe uses two incredibly simple, whole-food ingredients to deliver something that feels almost medicinal in the best way. The magic happens in the chemistry between them, not in a long list of exotic additions.
- Fresh Garlic Bulbs (about 3 to 4 medium bulbs, yielding roughly 30 to 40 cloves): You want firm, plump cloves with no green sprouts in the center. I prefer organic garlic from a local farmer’s market when I can get it—the flavor is sharper and more complex. If the cloves have that little green germ inside, slice it out; it can be bitter and cause digestive upset for some people. Look for garlic that feels heavy for its size and has tight, papery skin that isn’t crumbling off.
- Raw Honey (about 1 to 1.5 cups, depending on jar size): This is non-negotiable—use raw, unfiltered honey. Processed honey has been heated to the point where most of the beneficial enzymes and natural antimicrobial properties are destroyed. I recommend local honey from a nearby apiary if you can find it (bonus: it may help with seasonal allergies). My personal favorite is a dark, amber wildflower honey from a farm about thirty miles from my house—it has this almost molasses-like depth that pairs beautifully with the sharpness of the garlic. If you’re vegan, you can substitute raw agave nectar, but the flavor profile will be different and the fermentation process won’t happen the same way.
- Optional: A Pinch of Sea Salt (just a tiny pinch, maybe 1/8 teaspoon): This isn’t traditional, but I find it balances the sweetness and brings out the garlic’s natural savoriness. It’s not necessary, but I’ve never made a batch without it since I tried it the first time.
- Optional: A Small Piece of Fresh Ginger (about a 1-inch knob, thinly sliced): I add this to about half my batches. It adds a warming, slightly spicy kick that complements the honey garlic combination beautifully. Plus, ginger has its own immune-supporting properties, so it’s a win-win.
That’s it. Seriously. You don’t need lemon, cayenne, turmeric, or any of the other things you’ll see in complicated tonic recipes online. This homemade honey garlic immune-boosting tonic is proof that sometimes the simplest things are the most powerful.
Equipment Needed
You don’t need a fancy kitchen setup for this. In fact, the simpler, the better.
- A clean glass jar with a tight-fitting lid (16-ounce mason jar works perfectly): Make sure it’s thoroughly washed and dried. I run mine through the dishwasher on the sanitize cycle and then let it air dry completely. Any residual moisture can mess with the fermentation process.
- A chef’s knife and cutting board: For peeling and crushing the garlic. Nothing fancy needed.
- A garlic press or the flat side of your knife: I prefer using the flat side of my chef’s knife to give each clove a gentle smash—it breaks the cell walls without turning the garlic into a paste. A garlic press works too, but you’ll get a stronger, more pungent result.
- A small funnel (optional but helpful): For pouring honey into the jar without making a sticky mess. I’ve done it without one, and let’s just say my countertop has seen better days.
- A wooden chopstick or skewer: For poking down into the jar to release any air bubbles trapped between the garlic cloves.
I’ve made this tonic in a repurposed pickle jar and a fancy Weck jar, and honestly, it works the same either way. Just make sure whatever you use has a non-reactive lid—plastic or glass with a rubber seal is fine, metal lids can react with the honey over time.
Preparation Method
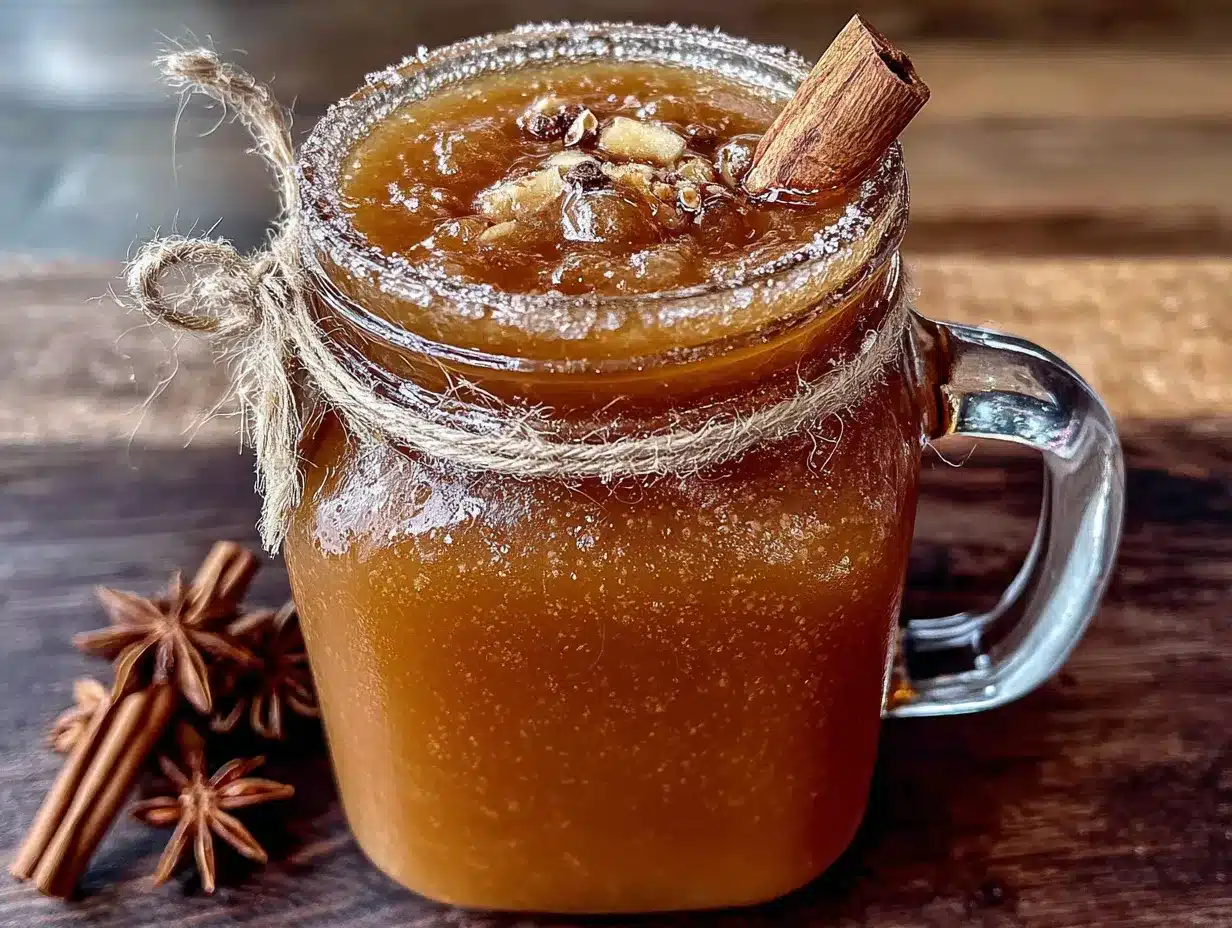
- Prepare your garlic (5 minutes): Separate the cloves from 3 to 4 bulbs of garlic. You’ll want about 30 to 40 cloves total. Peel each clove—here’s a trick I learned the hard way: put the cloves in a metal bowl, cover with another metal bowl, and shake vigorously for about 10 seconds. The skins loosen right up. If any stubborn ones remain, just peel them by hand. Once peeled, give each clove a gentle smash with the flat side of your knife. You’re not trying to obliterate them—just crack them open slightly to release the good stuff. You want some whole pieces remaining for texture and a slower release of flavor.
- Pack the jar (2 minutes): Place the smashed garlic cloves into your clean, dry glass jar. Don’t cram them in too tightly—you want the honey to be able to flow between them. If you’re using the optional ginger slices, tuck them in between the garlic cloves now. Add your tiny pinch of sea salt if using.
- Pour the honey (1 minute): Slowly pour the raw honey over the garlic cloves, filling the jar to the top. Use your wooden chopstick or skewer to gently poke around and release any trapped air bubbles. You’ll see little streams of air rising—that’s normal. Make sure all the garlic is completely submerged. If some cloves are stubbornly floating, you can weigh them down with a small clean glass ramekin or just give the jar a gentle swirl every day for the first few days.
- Seal and label (1 minute): Screw the lid on tightly. Write the date on a piece of masking tape and stick it to the jar. I know this sounds obsessive, but trust me—after you’ve made three batches in one month and can’t remember which one is which, you’ll thank me.
- The waiting game (7 to 14 days): Place the jar in a cool, dark place—your pantry or a kitchen cabinet works perfectly. Do not refrigerate it yet. For the first week, give the jar a gentle swirl once a day to redistribute the honey. You’ll notice the honey getting thinner and more liquidy as it pulls moisture from the garlic. You might also see tiny bubbles forming—that’s natural fermentation starting. It’s a good sign. After about 5 to 7 days, the garlic will have softened and the honey will have taken on a deeper, almost amber color. Some people stop here, but I prefer to let it go a full 10 to 14 days for maximum potency.
- Strain or not? (2 minutes, optional): After the resting period, you have a choice. You can leave the garlic cloves in the honey and just scoop them out as needed (this is what I do—the fermented garlic is delicious on toast or in salad dressings). Or you can strain the honey into a clean jar and discard the solids. Both methods work. If you strain it, the honey will keep even longer and be easier to drizzle.
- Refrigerate and enjoy: Once your tonic has reached the desired potency, move it to the refrigerator. It will keep for up to 6 months, though in my house, it never lasts that long.
One thing I learned the hard way: if you see any mold growing on top, throw the whole batch away. This is rare if you’ve used clean equipment and kept the garlic submerged, but it can happen. Your nose will tell you immediately if something’s off—it should smell pungent and sweet, not rotten or sour.
Cooking Tips & Techniques
I’ve made this homemade honey garlic immune-boosting tonic at least a dozen times, and I’ve collected some hard-won wisdom along the way.
Don’t skip the smash. I made my first batch with whole, uncrushed cloves, and after two weeks, the honey barely tasted like garlic. The allicin—the compound responsible for garlic’s immune-supporting properties—is only released when the cell walls are broken. A gentle crush activates it. You don’t need to mince it into a paste, but you do need to break the surface.
Watch for fermentation bubbles. The first time I saw tiny bubbles rising in my jar, I panicked and threw the batch away. Don’t be me. That’s just natural fermentation happening—raw honey contains beneficial yeasts and enzymes, and when combined with the moisture in fresh garlic, they start working. It’s safe and actually increases the bioavailability of some compounds. If the bubbles concern you, just open the jar every few days to “burp” it and release any built-up pressure.
Temperature matters. Don’t store your fermenting tonic in direct sunlight or near a heat source. A cool, dark pantry is ideal. If your kitchen runs warm (above 75°F or so), the fermentation will happen faster and you might want to move it to the fridge after just 5 to 7 days. I learned this when I left a batch on my counter during a summer heatwave and came back to a jar that smelled like garlicky wine. Not terrible, but not what I was going for.
Use the garlic too. Don’t throw away those honey-fermented garlic cloves! They’re delicious chopped up and added to salad dressings, spread on crusty bread with butter, or stirred into soups. The honey flavor mellows the garlic’s bite into something almost sweet and jammy. My favorite thing to do is chop a few cloves and mix them into softened butter for garlic bread that’ll ruin you for the regular kind.
Patience is the secret ingredient. I know it’s tempting to start using your tonic after just 24 hours, and you can—it’s safe. But the flavor won’t be nearly as complex or mellow. The real transformation happens between day 7 and day 14. The honey gets darker, the garlic softens, and the whole thing develops this almost balsamic-like depth. Trust the process.
Variations & Adaptations
One of the best things about this homemade honey garlic immune-boosting tonic is how easy it is to customize. Here are some variations I’ve tried and loved.
Spicy Ginger Kick: Add 5 to 6 thin slices of fresh ginger along with the garlic. The ginger adds warmth and an extra layer of immune support. I make this version every fall as soon as the weather turns cool. It’s especially good stirred into hot water with a squeeze of lemon.
Citrus Burst: Add the zest of one organic lemon or orange (avoid the white pith—it’s bitter) to the jar before pouring in the honey. The citrus oils infuse the honey with brightness and vitamin C. I made this version for a friend who was recovering from a cold, and she swore it helped more than any over-the-counter remedy.
Turmeric & Black Pepper: Add 1 teaspoon of grated fresh turmeric (or 1/2 teaspoon dried) and a pinch of freshly cracked black pepper. The piperine in black pepper dramatically increases the absorption of curcumin from the turmeric. This version has a gorgeous golden color and a slightly earthy, peppery flavor that works beautifully in tea.
Milder Version for Sensitive Stomachs: If raw garlic gives you digestive trouble, try roasting the garlic cloves first at 350°F for about 15 minutes until they’re soft and golden. Let them cool completely, then proceed with the recipe. The flavor will be much milder and sweeter, almost caramelized. You lose some of the raw allicin benefits, but you gain a tonic that’s gentler on the stomach and absolutely delicious drizzled over roasted vegetables.
Herbal Infusion: Add a sprig of fresh rosemary or thyme to the jar. Both herbs have antimicrobial properties and add a lovely savory note. I made a rosemary version last spring and ended up using it more as a finishing drizzle for pork chops than as a wellness tonic—it was that good.
Serving & Storage Suggestions
This tonic is incredibly versatile, and how you use it depends on what you’re looking for.
As a daily wellness boost: Take 1 teaspoon to 1 tablespoon straight from the jar each morning during cold and flu season. It’s pungent and sweet, and honestly, it wakes you up faster than coffee. If the straight shot is too intense for you, stir it into a mug of hot water or herbal tea. The heat mellows the garlic bite and makes it feel like a cozy ritual.
In the kitchen: Use this honey as a glaze for roasted chicken or pork, drizzle it over roasted root vegetables, whisk it into vinaigrettes, or brush it onto pizza crust before baking. The honey garlic flavor pairs beautifully with soy sauce, sesame oil, and rice vinegar for an Asian-inspired dressing. I’ve also used it in place of regular honey in my honey soy glazed salmon recipe with incredible results.
For sore throats: Take a spoonful straight when your throat feels scratchy. The honey coats and soothes while the garlic does its thing. I keep a small jar on my nightstand during winter for exactly this purpose.
Storage: Keep your tonic in the refrigerator after the initial fermentation period. It will last for up to 6 months, though the flavor will continue to deepen and mellow over time. If you’ve left the garlic cloves in, they’ll eventually become very soft and almost spreadable—that’s normal and delicious. If you notice the honey crystallizing in the fridge, don’t worry. Just let the jar sit at room temperature for 10 to 15 minutes, and it’ll return to a pourable consistency. Never microwave it—heat destroys the beneficial enzymes.
Freezing option: You can freeze this tonic in ice cube trays for individual portions. Pop out a cube and thaw it in the fridge overnight or drop it straight into hot tea. This is my preferred method for having a constant supply without worrying about it going bad.
Nutritional Information & Benefits
While I’m not a doctor or nutritionist (just a home cook who’s done a lot of reading), here’s what I’ve learned about the key ingredients in this tonic.
Per tablespoon (approximate): About 60 calories, 16g carbohydrates (all from natural sugars), 0g fat, 0g protein. These values will vary depending on your honey and how many garlic solids you consume.
Garlic contains allicin, a compound with antimicrobial and immune-supporting properties that’s released when cloves are crushed or chopped. It’s also rich in vitamin C, vitamin B6, and manganese. Some studies suggest regular garlic consumption may help reduce the severity and duration of common colds.
Raw honey contains natural enzymes, antioxidants, and trace amounts of pollen and propolis. It has been used for centuries as a natural cough suppressant and wound healer. Local raw honey may also help with seasonal allergies by exposing your system to local pollen in small amounts.
Dietary considerations: This tonic is naturally gluten-free, dairy-free, and paleo-friendly. It’s not suitable for vegans if using honey (though agave is an option). If you’re on a low-sugar or keto diet, use this sparingly due to the honey content. Always consult your healthcare provider before using any home remedy, especially if you’re on blood-thinning medication—garlic can interact with certain drugs.
Conclusion
Look, I’m not going to tell you this homemade honey garlic immune-boosting tonic is a miracle cure. It’s not going to prevent every cold or fix every sniffle. But what it will do is give you a simple, delicious, and incredibly satisfying way to support your immune system during the seasons when it needs the most help. It’s the kind of recipe that feels like a small act of self-care—taking five minutes to smash some garlic and pour honey over it, then waiting a week or two while nature does its thing. There’s something grounding about that. Something that connects you to generations of people who’ve done the same thing in kitchens all over the world. I hope you’ll try it, and I hope you’ll make it your own. Add ginger, skip the ginger, leave it for 10 days or a full month—there’s no wrong way to do this. If you make a batch, I’d love to hear about it. Drop a comment below and tell me how you use yours, or share a photo of your jar on Pinterest. And if you’re looking for another simple way to use up extra honey, you might love my honey lavender lemonade—it’s completely different but just as comforting in its own way. Stay well, friends.
Frequently Asked Questions
Can I use regular honey from the grocery store?
You can, but it won’t be as beneficial. Most grocery store honey is pasteurized and filtered, which destroys the natural enzymes and beneficial compounds. Raw, unfiltered honey is best for this recipe. Look for it at farmers’ markets, health food stores, or the natural foods section of your grocery store.
How long does it take for the tonic to be ready?
You can start using it after 24 hours, but the flavor will be very sharp and garlic-forward. For the best results—a mellow, complex, deeply golden honey—let it sit for at least 7 days and up to 14 days. I prefer 10 days as my sweet spot.
Do I need to refrigerate it during the fermentation period?
No! Keep it in a cool, dark place like your pantry or a kitchen cabinet for the first 7 to 14 days. Refrigeration slows down the fermentation process significantly. Only move it to the fridge once it’s reached your desired potency.
What if I see bubbles or foam on top?
That’s normal and a sign of natural fermentation. Tiny bubbles mean the beneficial yeasts in the raw honey are doing their thing. If the bubbles concern you, just open the jar every few days to release any pressure. However, if you see fuzzy mold growing on top, throw the batch away and start fresh with thoroughly cleaned equipment.
Can I eat the garlic cloves after they’ve fermented in the honey?
Absolutely! The fermented garlic cloves become soft, sweet, and almost jammy. They’re delicious spread on crusty bread, chopped into salad dressings, or stirred into soups and stews. Some people even eat them straight as a little wellness boost. Just make sure to keep them submerged in the honey in the fridge to prevent spoilage.
Pin This Recipe!
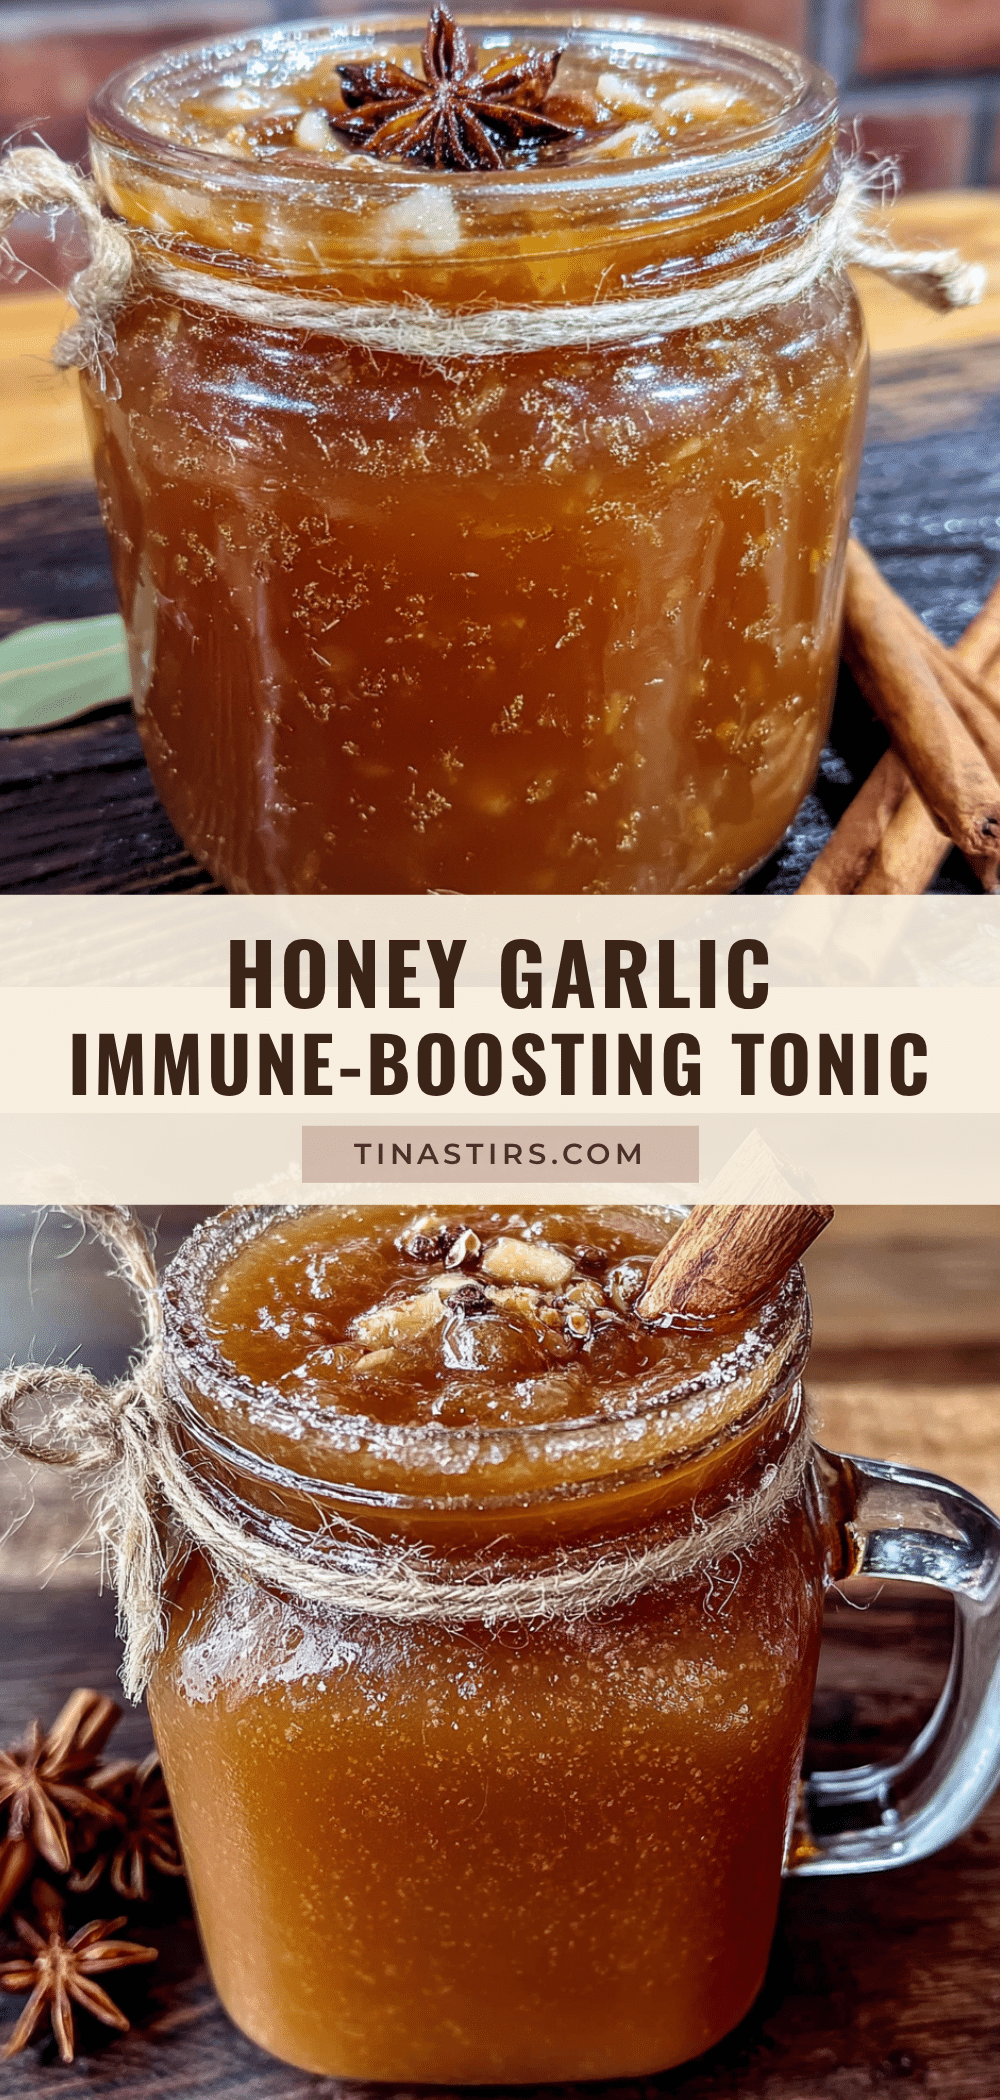
Homemade Honey Garlic Tonic: Best Immune Booster
This homemade honey garlic immune-boosting tonic is a simple, two-ingredient remedy that supports your immune system during cold and flu season. With a mellow, complex flavor developed over a week-long resting period, it’s a versatile condiment and wellness staple.
- Prep Time: 5 minutes
- Cook Time: 0 minutes
- Total Time: 7 to 14 days (fermentation) + 5 minutes active prep
- Yield: About 1 to 1.5 cups (approximately 16 to 24 servings of 1 tablespoon each) 1x
- Category: Condiment / Wellness Tonic
- Cuisine: American / Folk Remedy
Ingredients
- 3 to 4 medium fresh garlic bulbs (about 30 to 40 cloves)
- 1 to 1.5 cups raw, unfiltered honey
- 1/8 teaspoon sea salt (optional)
- 1-inch knob fresh ginger, thinly sliced (optional)
Instructions
- Prepare your garlic: Separate and peel 30 to 40 cloves from 3 to 4 bulbs. Gently smash each clove with the flat side of a knife to release the allicin.
- Pack the jar: Place smashed garlic cloves into a clean, dry 16-ounce glass jar. Add optional ginger slices and sea salt if using.
- Pour the honey: Slowly pour raw honey over the garlic, filling the jar to the top. Use a wooden chopstick or skewer to release air bubbles. Ensure all garlic is submerged.
- Seal and label: Tightly screw on the lid. Label the jar with the date.
- Ferment: Store the jar in a cool, dark place (pantry or cabinet) for 7 to 14 days. Gently swirl once daily. Tiny bubbles indicate natural fermentation.
- Strain or not (optional): After resting, either leave garlic cloves in the honey or strain into a clean jar. Both methods work.
- Refrigerate: Once desired potency is reached, move the jar to the refrigerator. It will keep for up to 6 months.
Notes
Use raw, unfiltered honey for best results. Do not refrigerate during fermentation. If mold appears, discard the batch. Fermented garlic cloves can be eaten separately. For a milder version, roast garlic before using. Store in refrigerator after fermentation.
Nutrition
- Serving Size: 1 tablespoon
- Calories: 60
- Sugar: 16
- Carbohydrates: 16
Keywords: honey garlic tonic, immune booster, homemade remedy, raw honey, garlic, cold and flu, natural wellness, fermented garlic honey


