Love this? Save it for later!
Share the inspiration with your friends
The clock read 11:45 PM on a Tuesday, and I was standing in my kitchen wearing a shirt that had seen better days. This was supposed to be a quiet night in, maybe a simple stir-fry, but the fridge had other plans. I grabbed the wrong bottle of sauce, the one I usually save for marinades, and dumped it into the pan with wings that were still slightly damp from the rinse. I was already stressed about tomorrow’s early meeting, and my brain was definitely not on autopilot. What came out was nothing like the plan — and better. The oil popped violently, sending tiny droplets of spicy, garlicky sweetness across the counter, and the smell hit me like a warm hug from a stranger. I wasn’t aiming for sticky, crunchy, spicy perfection, but that’s exactly what I got. Honestly, let me tell you, some of the best meals in life are the ones you didn’t plan for. You know that feeling when you’re just trying to survive dinner and then something clicks? That was me, scraping the bottom of the pan for every last bit of glaze.
I mean, I’ve made chicken wings for years, but they never tasted quite like this until that chaotic midnight snack turned into a weekly obsession. The skin was shattering under my teeth, and the meat was so tender it fell off the bone. It wasn’t just food; it was a moment of pure, unadulterated joy in the middle of a tired week. I kept making it because I needed that feeling again, that little victory when you mess up and still win. Maybe you’ve been there, staring into the fridge at midnight, wondering if cereal counts as a meal? Well, this is the answer. It’s not just a recipe; it’s a reminder that you don’t need a perfect day to have a perfect meal. The crispy spicy honey garlic chicken wings became my anchor, a way to turn any random night into something special. I still make them when I’m tired, when I’m happy, or when I just need a little heat to wake up my soul.
Why You’ll Love This Recipe
Let’s be real for a second. Not all chicken wings are created equal. Some are dry, some are soggy, and some just taste like old oil. This recipe is different because it solves the two biggest problems people have with homemade wings: getting them crispy without deep frying, and getting a sauce that actually sticks. I spent years testing different methods, from baking to air frying, and I finally landed on this balance. It’s not just about throwing chicken in an oven and hoping for the best. It’s about understanding how the heat interacts with the skin and the sugar in the honey.
Here is why this specific version of crispy spicy honey garlic chicken wings has earned a permanent spot in your weekly rotation:
- Quick & Easy: You can have these on the table in under 30 minutes. Yes, really. Prep takes five minutes, and the oven does the heavy lifting. It’s perfect for those busy weeknights when you’re hungry but don’t want to order takeout.
- Simple Ingredients: You probably have almost everything in your kitchen right now. You don’t need to run to three different stores for obscure spices. Just honey, garlic, hot sauce, and butter. That’s it. It’s pantry-friendly and stress-free.
- Perfect for Game Days: Whether it’s the Super Bowl, a casual Friday night, or just a Tuesday craving, these wings are the ultimate crowd-pleaser. They are messy, delicious, and impossible to eat just one of.
- Unbelievably Delicious: The texture is next-level. The skin gets incredibly crisp, almost like a chip, while the sauce adds a glossy, sticky finish. It’s a flavor combo that hits every note: sweet, spicy, garlicky, and savory.
- Healthier Twist: By baking instead of deep frying, you cut down on the oil but keep all the flavor. It’s comfort food that doesn’t leave you feeling sluggish afterward. It’s soul-soothing without the guilt.
What makes this recipe stand out from the rest is the technique. I use a little baking powder trick that changes the pH of the skin, helping it brown and crisp up beautifully. It’s a small step, but it makes a huge difference. Plus, the sauce is balanced perfectly so it doesn’t burn in the oven. It’s your best version of wings, not just another copycat attempt.
What Ingredients You Will Need
This recipe uses simple, wholesome ingredients to deliver bold flavor and satisfying texture without the fuss. The beauty of this dish lies in how common pantry staples come together to create something complex and exciting. You don’t need fancy gourmet items to make this work. In fact, keeping it simple allows the quality of each ingredient to shine through. I always recommend using fresh garlic over jarred when you can, because the flavor difference is night and day. For the wings, look for fresh, skin-on pieces rather than frozen ones if possible, as they crisp up better.
Here is what you’ll need to gather:
- Chicken Wings: 2 pounds of chicken wingettes and drumettes. I prefer fresh, never frozen, for the best texture. Pat them dry thoroughly before seasoning.
- Baking Powder: 1 tablespoon of aluminum-free baking powder. This is the secret weapon. It helps draw out moisture and crisps the skin. Make sure it’s not baking soda.
- Garlic: 4 cloves of fresh garlic, minced finely. Fresh garlic gives a bright, pungent kick that powder just can’t match. If you have a garlic press, use it.
- Honey: 1/3 cup of pure honey. I like using clover or wildflower honey for a floral note, but any clear honey works. It adds that essential stickiness.
- Soy Sauce: 2 tablespoons of low-sodium soy sauce. This adds umami and saltiness, balancing the sweetness of the honey. Kikkoman is my go-to brand.
- Hot Sauce: 2 tablespoons of Frank’s RedHot or your favorite cayenne-based sauce. This provides the heat. Adjust based on your spice tolerance.
- Butter: 2 tablespoons of unsalted butter, melted. This adds richness and helps the sauce cling to the wings. It also gives that glossy restaurant-style finish.
- Red Pepper Flakes: 1/2 teaspoon, optional. For an extra kick, add these to the sauce. I usually add this if I want to really wake up my taste buds.
- Garlic Powder: 1/2 teaspoon. A little extra garlic power for the dry rub before baking.
- Salt and Pepper: To taste. Always season well before cooking.
If you are looking for substitutions, you can swap the soy sauce for coconut aminos if you are gluten-free. For the hot sauce, sriracha works well if you prefer a garlic-chili heat. In the summer, I sometimes add a splash of lime juice to the sauce to cut through the richness, but in the winter, I stick to the classic recipe. It’s flexible, but the core elements remain the same for that perfect crispy spicy honey garlic chicken wings experience.
Equipment Needed
You don’t need a fancy kitchen to make these wings. A few basic tools will get you the best results. First, you need a large baking sheet. I prefer a rimmed baking sheet so the sauce doesn’t spill over when it bubbles. Line it with aluminum foil for easy cleanup, or use parchment paper if you want to avoid sticking completely. A wire rack placed on top of the baking sheet is optional but highly recommended. It allows air to circulate under the wings, ensuring they cook evenly and crisp up on all sides. If you don’t have a rack, just flip the wings halfway through cooking.
For mixing the sauce, you’ll need a small saucepan or a microwave-safe bowl. A small whisk is handy for emulsifying the butter into the honey and hot sauce mixture. I usually melt the butter in the microwave to save time, but doing it on the stove gives you more control. You’ll also need a large bowl for tossing the wings in the baking powder and seasonings. Tongs are essential for handling the hot wings without burning your fingers. Finally, a pair of kitchen shears can be useful if you need to trim any excess skin or fat from the wings before seasoning. Keep it simple, keep it clean, and you’ll be ready to cook in no time.
Preparation Method

Getting these wings ready is straightforward, but the details matter. Follow these steps closely for the best results.
- Prep the Wings (5 minutes): Start by patting the chicken wings completely dry with paper towels. This is crucial. Moisture is the enemy of crispiness. If they are wet, they will steam instead of bake. Place them in a large bowl and sprinkle with baking powder, garlic powder, salt, and pepper. Toss them until every piece is lightly coated. The baking powder should leave a slight dusty film on the skin.
- Arrange for Baking (2 minutes): Preheat your oven to 400°F (200°C). Line a baking sheet with foil and place a wire rack on top if you have one. Arrange the wings in a single layer on the rack, making sure they aren’t touching. This allows heat to circulate around each piece. If you don’t have a rack, place them directly on the foil, leaving space between them.
- Bake the Wings (25-30 minutes): Place the wings in the preheated oven. Bake for 25 to 30 minutes. You want the skin to be golden brown and crispy. If you are using a rack, flip the wings halfway through cooking to ensure even browning. The internal temperature should reach 165°F (74°C). The edges might curl up, and the skin should look shrunken and crisp.
- Make the Sauce (5 minutes): While the wings are baking, prepare the glaze. In a small saucepan over medium heat, combine the honey, soy sauce, hot sauce, minced garlic, and red pepper flakes. Stir constantly until the mixture comes to a gentle simmer. Let it cook for about 2 minutes to thicken slightly. Remove from heat and stir in the melted butter. The sauce should be glossy and fragrant. If it looks too thick, add a teaspoon of water.
- Toss and Serve (2 minutes): Once the wings are done, remove them from the oven. Immediately toss them in the sauce. Use tongs to coat every wing evenly. You want them sticky and shiny. Return them to the baking sheet for a minute if you want the sauce to set, or serve immediately for the crispiest skin. Garnish with sesame seeds or chopped green onions if you like.
The key here is timing. Don’t let the sauce burn, and don’t undercook the wings. The baking powder trick does the heavy lifting for the crisp, so trust the process.
Cooking Tips & Techniques
I’ve made my fair share of mistakes when cooking wings, and I’m here to help you avoid them. One common error is skipping the drying step. I once rushed this and ended up with soggy, steamed chicken. It was a disaster. Always, always pat your wings dry. Another tip is to let the wings sit in the fridge for an hour after seasoning with baking powder. This dries out the skin even more, leading to extra crispiness. It’s not mandatory, but it’s a pro move.
When making the sauce, keep the heat low. Honey burns quickly, and burnt honey tastes bitter. If you see it bubbling too aggressively, turn down the heat. Also, taste the sauce before tossing. If it’s too sweet for your liking, add a splash of vinegar or more hot sauce. Balance is everything. For the baking process, ensure your oven is fully preheated. Putting wings in a cold oven will result in greasy, limp skin. And finally, don’t overcrowd the pan. If the wings are touching, they will steam each other. Give them space to breathe and crisp up.
Variations & Adaptations
This recipe is a canvas, so feel free to paint it your way. If you want more heat, increase the hot sauce or add a diced jalapeño to the sauce. For a different flavor profile, try adding a tablespoon of gochujang (Korean chili paste) for a deep, fermented heat. If you are dairy-free, skip the butter and use a neutral oil like avocado oil in the sauce. It still works well.
For a citrus twist, add the zest of one lime to the sauce and a splash of lime juice. It cuts through the richness beautifully. If you want a smoky flavor, add a teaspoon of smoked paprika to the dry rub. You can also swap the honey for maple syrup for a different sweetness, though it will change the flavor profile slightly. For a gluten-free version, use tamari instead of soy sauce. I once tried adding peanut butter to the sauce for a satay-style wing, and it was surprisingly delicious. Don’t be afraid to experiment. The base recipe is forgiving, so you can tweak it to suit your mood.
Serving & Storage Suggestions
Serve these wings hot, right out of the oven. They are best when the skin is still crackling. Pair them with celery sticks and blue cheese dressing for the classic wing experience, or try a cool cucumber salad to balance the spice. A cold beer or a crisp lager is the perfect beverage to accompany this dish.
If you have leftovers, store them in an airtight container in the refrigerator for up to three days. Reheat them in an air fryer or a conventional oven at 350°F (175°C) for about 10 minutes to restore crispiness. Avoid the microwave, as it will make the skin soggy. The flavors actually meld together over time, so day-two wings are still tasty, though the texture will soften. You can also freeze the cooked wings without sauce for up to three months. Thaw and reheat before adding fresh sauce.
Nutritional Information & Benefits
These wings are a source of high-quality protein, which is essential for muscle repair and satiety. Chicken skin contains healthy fats, though it is calorie-dense, so moderation is key. The honey provides quick energy, while the garlic offers anti-inflammatory properties. For those watching their sodium, using low-sodium soy sauce helps keep the salt content in check. This recipe is naturally gluten-free if you use tamari, and it’s low-carb if you skip the honey or use a sugar-free alternative. It’s a satisfying meal that fuels your body without weighing you down too much.
Conclusion
Making crispy spicy honey garlic chicken wings at home is easier than you think, and the results are worth every minute. It’s a recipe that brings joy, comfort, and a little bit of chaos in the best way possible. I hope you try it and make it your own. Customize the heat, play with the sides, and enjoy the process. If you make this recipe, I’d love to hear how it turned out. Leave a comment below with your thoughts or share a photo. Tag me on social media if you do, because I love seeing your creations. Happy cooking, and remember, sometimes the best meals are the ones you didn’t plan for.
Frequently Asked Questions
Can I use frozen chicken wings?
It’s best to use fresh wings for optimal crispiness. If you must use frozen, thaw them completely and pat them very dry before seasoning. Excess moisture from freezing can prevent the skin from crisping properly.
Why are my wings not crispy?
Usually, this happens because the wings weren’t dry enough before baking, or they were overcrowded on the pan. Make sure to pat them dry and give them space to breathe. Also, check that your oven is fully preheated.
Can I make the sauce ahead of time?
Yes, you can make the sauce up to three days in advance. Store it in the refrigerator and reheat it gently before tossing with the wings. This can actually help the flavors meld together.
Is this recipe spicy?
The heat level is adjustable. I use Frank’s RedHot, which is mild to medium. If you want it hotter, add more hot sauce or include red pepper flakes. If you prefer mild, reduce the amount of hot sauce.
Can I air fry these wings?
Absolutely. Air frying is a great alternative. Cook at 380°F (190°C) for 20-25 minutes, shaking the basket halfway through. The result will be similarly crispy with less oil.
Pin This Recipe!
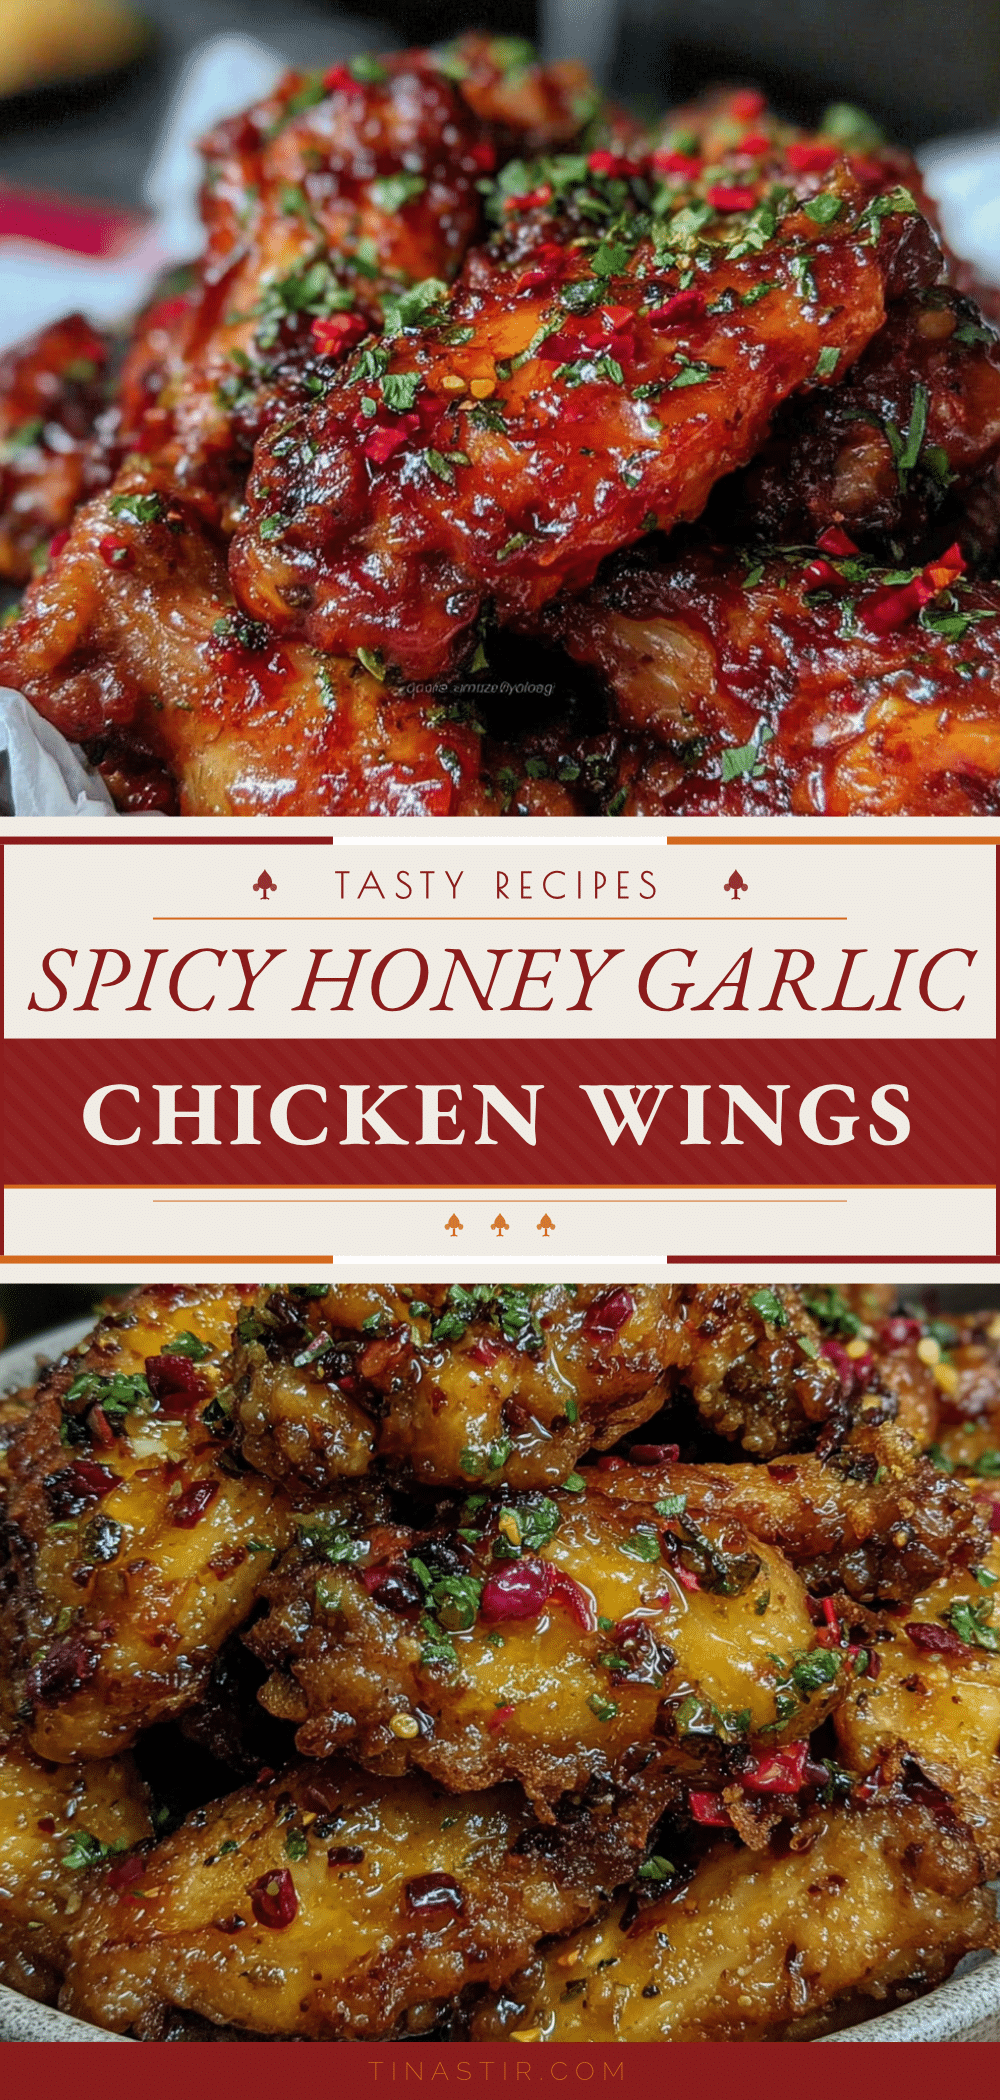
Crispy Spicy Honey Garlic Chicken Wings

These crispy spicy honey garlic chicken wings are baked to perfection using a baking powder trick for maximum crunch, then tossed in a sticky, sweet, and savory glaze. Ready in under 30 minutes, they are the perfect easy weeknight dinner or game day snack.
- Prep Time: 5 minutes
- Cook Time: 25-30 minutes
- Total Time: 30 minutes
- Yield: 4 servings 1x
- Category: Appetizer
- Cuisine: American
Ingredients
- 2 pounds chicken wingettes and drumettes
- 1 tablespoon aluminum-free baking powder
- 1/2 teaspoon garlic powder
- Salt and black pepper to taste
- 1/3 cup pure honey
- 2 tablespoons low-sodium soy sauce
- 2 tablespoons hot sauce (e.g., Frank’s RedHot)
- 4 cloves fresh garlic, minced
- 2 tablespoons unsalted butter, melted
- 1/2 teaspoon red pepper flakes (optional)
Instructions
- Preheat oven to 400°F (200°C). Line a rimmed baking sheet with foil and place a wire rack on top.
- Pat chicken wings completely dry with paper towels to ensure crispiness.
- Place wings in a large bowl and sprinkle with baking powder, garlic powder, salt, and pepper. Toss until every piece is lightly coated.
- Arrange wings in a single layer on the wire rack, ensuring they are not touching.
- Bake for 25-30 minutes, flipping halfway through, until skin is golden brown and crispy and internal temperature reaches 165°F (74°C).
- While wings bake, combine honey, soy sauce, hot sauce, minced garlic, and red pepper flakes in a small saucepan over medium heat.
- Simmer sauce for 2 minutes until slightly thickened, then remove from heat and stir in melted butter.
- Remove wings from oven and immediately toss in the sauce until evenly coated.
- Serve immediately for the crispiest texture, optionally garnished with sesame seeds or green onions.
Notes
For extra crispiness, let the seasoned wings sit in the fridge for an hour before baking. Ensure wings are patted very dry before seasoning. Do not overcrowd the pan. If using frozen wings, thaw completely and pat dry. For a gluten-free version, substitute soy sauce with tamari or coconut aminos.
Nutrition
- Serving Size: Approximately 1/4 of
- Calories: 450
- Sugar: 20
- Sodium: 650
- Fat: 28
- Saturated Fat: 8
- Carbohydrates: 22
- Protein: 25
Keywords: chicken wings, honey garlic wings, spicy wings, crispy baked wings, game day food, easy dinner, 30 minute meals


