Love this? Save it for later!
Share the inspiration with your friends
I was standing in the baking aisle of our local grocery store last October, staring at a package of candy eyeballs, when the fluorescent lights flickered and suddenly I was seven years old in my Aunt Clara’s cramped kitchen. She had this way of making everything feel like a secret—the way she’d lower her voice when explaining how much butter to use, the way she’d wink when adding an extra pinch of salt. The air in her kitchen always smelled like vanilla and something slightly burnt, which she insisted was “character.” I remember watching her pipe spider webs onto cookies with the concentration of someone defusing a bomb, her tongue poking out the corner of her mouth. She passed away three years ago, and I haven’t been able to find her recipe box anywhere. So I’ve spent the last two Halloweens trying to recreate those cookies from memory alone. Let me tell you, there were some spectacular failures—cookies that looked more like abstract art than arachnids. But this version, this dark chocolate spider web cookie, is the one that finally made me stop and close my eyes after the first bite. Because honestly, that’s what you’re after, right? That feeling of being transported somewhere warm and safe, even if just for a moment. Maybe you’ve had that experience too—chasing a taste you can barely remember but can’t let go of.
Why You’ll Love This Recipe
These dark chocolate spider web cookies aren’t just another Halloween dessert. They’re the kind of cookie that makes people stop mid-conversation and say, “Wait, you made these?” I’ve tested this recipe six times to get the texture exactly right—crispy edges, soft centers, and a dark chocolate flavor that’s rich without being overwhelming.
- Quick & Easy: From start to finish, you’re looking at about 45 minutes. The dough comes together in one bowl, and the decorating is way simpler than it looks.
- Simple Ingredients: No weird specialty items. You probably have most of this in your pantry right now, minus maybe the candy eyeballs.
- Perfect for Halloween: These are the star of any party, classroom treat, or spooky movie night. Kids love making the webs, and adults love eating them.
- Crowd-Pleaser: I brought these to a neighbor’s Halloween gathering last week, and three people asked for the recipe before I’d even taken my coat off.
- Unbelievably Delicious: The combination of dark chocolate cookies with white chocolate spider webs is next-level. It’s not just cute—it’s genuinely good.
What makes this different from other spider web cookies? Most recipes use a sugar cookie base that’s too sweet and gets lost under all that frosting. I wanted a cookie that could stand on its own—dark, slightly bitter, with a depth that complements the sweet white chocolate web. Plus, I figured out a piping technique that actually looks like a web, not a scribble. Trust me, I learned that the hard way.
This is the kind of cookie that makes you feel like a baking rockstar, even if you’re not. It’s impressive enough for a Halloween competition but simple enough for a Tuesday night craving. And honestly? It’s comfort food with a spooky twist—the best kind of comfort there is.
What Ingredients You Will Need
This recipe uses simple, wholesome ingredients to deliver that deep dark chocolate flavor and tender texture. Most of these are pantry staples, which means you can whip up a batch whenever the Halloween mood strikes.
For the Cookies
- Unsalted butter, softened (1 cup / 2 sticks) — Make sure it’s really soft, not just slightly warm. Cold butter will give you flat, sad cookies.
- Granulated sugar (1 cup / 200g) — Regular white sugar works best here. Brown sugar would change the flavor profile too much.
- Large eggs (2, room temperature) — If you forget to take them out ahead of time, pop them in a bowl of warm water for 5 minutes.
- Vanilla extract (2 teaspoons) — I prefer pure vanilla extract, not imitation. It makes a real difference in the depth of flavor.
- All-purpose flour (2 cups / 240g) — Spoon and level your flour. Scooping directly from the bag packs it down and you’ll end up with dry cookies.
- Unsweetened cocoa powder (3/4 cup / 75g) — I recommend Ghirardelli or Hershey’s Special Dark for the richest flavor.
- Baking soda (1 teaspoon) — Make sure it’s fresh. Old baking soda won’t give you that nice spread.
- Salt (1/2 teaspoon) — Don’t skip this. Salt makes chocolate taste more chocolatey.
For the Spider Web Decoration
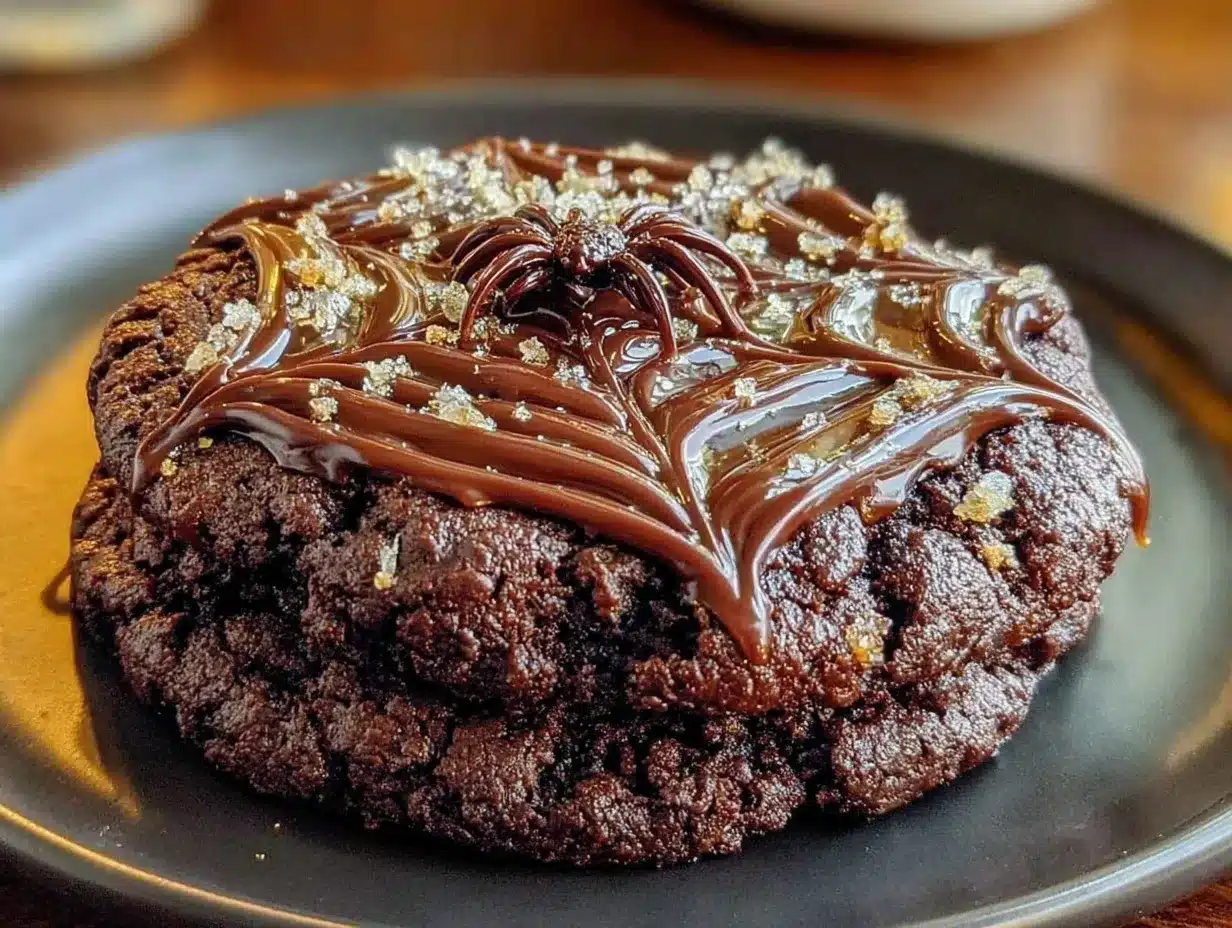
- White chocolate chips (1 cup / 175g) — Use good quality chips that melt smoothly. Cheap white chocolate can seize up and get grainy.
- Coconut oil or vegetable shortening (1 teaspoon) — This helps the white chocolate melt smoothly and pipe easily.
- Candy eyeballs (about 24-30) — You can find these at any craft store or in the baking aisle around Halloween. Wilton makes good ones.
One thing I learned the hard way: don’t use black cocoa powder for these. I tried it once thinking it would be more “Halloween-y,” but the cookies turned out dry and the flavor was almost bitter. Stick with regular unsweetened cocoa for the best texture.
If you’re dairy-free, you can substitute the butter with a good vegan butter stick (I like Earth Balance) and use dairy-free white chocolate. The texture will be slightly different, but still delicious.
Equipment Needed
You don’t need a fancy bakery setup for these cookies. Here’s what you’ll actually use:
- Mixing bowls — One large bowl for the dough, one small microwave-safe bowl for melting the white chocolate.
- Electric mixer — A hand mixer works perfectly. A stand mixer is nice but not necessary.
- Baking sheets — Two standard-sized sheets. Line them with parchment paper or silicone baking mats.
- Cookie scoop — A 1.5-tablespoon scoop gives you uniform cookies. If you don’t have one, use two spoons.
- Cooling rack — Important for letting the cookies cool completely before decorating.
- Piping bag or zip-top bag — For the spider web design. A small zip-top bag with the corner snipped off works great.
- Parchment paper — Non-negotiable for easy cleanup and preventing sticking.
I’ve made these with both a piping bag and a zip-top bag, and honestly, the zip-top bag is easier. Less mess, less fuss. Just make sure you only snip a tiny corner—you can always make the hole bigger, but you can’t make it smaller.
Preparation Method
- Preheat your oven to 350°F (175°C) and line two baking sheets with parchment paper. This is one of those steps you don’t want to skip—parchment paper makes all the difference.
- Cream the butter and sugar together in a large bowl for about 3-4 minutes until it’s light and fluffy. I know it’s tempting to rush this, but don’t. Proper creaming adds air to the dough, which gives you softer cookies. Scrape down the sides of the bowl halfway through.
- Add the eggs one at a time, beating well after each addition. Then mix in the vanilla extract. The mixture might look slightly curdled at this point—that’s totally normal. Just keep going.
- In a separate bowl, whisk together the flour, cocoa powder, baking soda, and salt. Whisking ensures everything is evenly distributed. I once skipped this step and ended up with a pocket of baking soda in one cookie. Not pleasant.
- Gradually add the dry ingredients to the wet mixture, mixing on low speed until just combined. You want to see the last streaks of flour disappear, then stop. Overmixing develops gluten and makes tough cookies.
- Chill the dough for 15 minutes in the refrigerator. This is crucial. Chilled dough spreads less and gives you thicker, chewier cookies. I know you’re excited, but trust me on this one.
- Scoop rounded tablespoons of dough onto the prepared baking sheets, spacing them about 2 inches apart. They’ll spread a bit, so give them room to breathe. I usually fit 12 per sheet.
- Bake for 8-10 minutes. The cookies should look set around the edges but still slightly soft in the center. They’ll continue cooking on the hot baking sheet after you pull them out. If you overbake, they’ll be crisp instead of chewy.
- Let the cookies cool on the baking sheet for 5 minutes, then transfer them to a cooling rack. They need to be completely cool before you decorate—warm cookies will melt your white chocolate web into a puddle.
- While the cookies cool, make the spider web glaze. Place the white chocolate chips and coconut oil in a microwave-safe bowl. Microwave in 30-second intervals, stirring between each, until smooth. Don’t overheat or the chocolate will seize.
- Transfer the melted white chocolate to a small piping bag or zip-top bag and snip a tiny corner. You want a very small opening—about the size of a pinhead.
- Pipe the spider webs: Start by piping a small dot in the center of each cookie. Then pipe concentric circles around it, spacing them about 1/4 inch apart. Finally, drag a toothpick from the center outward through all the circles, creating the web effect. Wipe the toothpick clean between each cookie for the best results.
- Immediately press two candy eyeballs onto the white chocolate while it’s still wet. You can place them anywhere on the web—some cookies look great with eyes in the center, others look better off to the side.
- Let the white chocolate set completely before stacking or storing the cookies. This takes about 20 minutes at room temperature, or you can pop them in the fridge for 10 minutes if you’re impatient.
Cooking Tips & Techniques
I’ve made a lot of mistakes with these cookies so you don’t have to. Here’s what I’ve learned:
The dough temperature is everything. If your kitchen is warm, the dough will get sticky and hard to handle. If that happens, just pop it back in the fridge for 10 minutes. I once tried to rush through this step and ended up with cookies that spread into one giant chocolate blob on the sheet. They tasted fine, but they looked like a chocolate continent, not cookies.
Don’t overmix the dough. I know I said this already, but it’s worth repeating. Mix until the flour just disappears, then stop. Overmixed cookie dough is the number one reason for tough, cakey cookies instead of soft, chewy ones.
Use a light hand with the white chocolate. The spider web design looks best when it’s delicate. You don’t need thick lines—thin, elegant lines look more professional. And if you mess up? Just eat that cookie and try again. That’s my official policy.
Work quickly with the white chocolate. It sets fast, especially if your kitchen is cool. Have your candy eyeballs ready to go before you start piping. I learned this the hard way when I had to frantically unwrap eyeballs while my white chocolate hardened into a solid web.
Practice the toothpick drag on parchment paper first. Before you go near your cookies, do a few practice webs on a piece of parchment. It takes a couple tries to get the motion right—start in the center and drag outward in one smooth motion.
Variations & Adaptations
One of the best things about this recipe is how easy it is to customize. Here are some variations I’ve tried and loved:
Gluten-Free Version: Substitute the all-purpose flour with a 1:1 gluten-free baking flour blend. I’ve used Bob’s Red Mill with great results. The cookies will be slightly more delicate, so handle them gently.
Vegan Adaptation: Use vegan butter sticks and a flax egg (1 tablespoon ground flaxseed mixed with 3 tablespoons water per egg). For the decoration, look for vegan white chocolate—Enjoy Life makes a good one. The texture is slightly different, but the flavor is still amazing.
Peanut Butter Spider Webs: Instead of white chocolate, melt together 1/2 cup peanut butter with 1/4 cup powdered sugar and a splash of milk. The peanut butter pairs beautifully with the dark chocolate cookies.
Colorful Webs: Add a drop of orange or purple food coloring to the white chocolate for a festive twist. Just be careful not to add too much liquid or the chocolate will seize.
Spider Variation: Instead of webs, pipe eight legs onto each cookie using the white chocolate, then place the candy eyeballs in the center. It’s a different look that’s equally fun.
My personal favorite variation? I add a pinch of cayenne pepper to the cookie dough. It gives the dark chocolate a subtle warmth that’s perfect for Halloween. Just don’t tell anyone until after they’ve taken a bite—the surprise is half the fun.
Serving & Storage Suggestions
These cookies are best served at room temperature, which lets the dark chocolate flavor really shine. I like to arrange them on a black or orange platter for maximum Halloween impact. A few fake spiders scattered around the plate adds to the spooky vibe.
For drinks, these pair beautifully with a cold glass of milk, a warm mug of hot chocolate, or even a dark coffee. If you’re serving adults, a glass of red wine or a dark stout beer complements the rich chocolate flavor perfectly.
Storage: Store the decorated cookies in an airtight container at room temperature for up to 5 days. Layer them between sheets of parchment paper to prevent the white chocolate from sticking together. Don’t refrigerate them—the cookies will dry out and the white chocolate can develop condensation.
Freezing: You can freeze the undecorated cookies for up to 3 months. Just bake and cool them completely, then freeze in a single layer on a baking sheet. Once frozen, transfer to a freezer bag. When you’re ready to serve, thaw at room temperature and decorate fresh. The white chocolate decorations don’t freeze well, so always add those after thawing.
One thing I’ve noticed: these cookies actually taste better the next day. The flavors meld together and the dark chocolate becomes even richer. So if you can resist eating them all immediately, you’re in for a treat.
Nutritional Information & Benefits
Let’s be real—these are cookies, not health food. But there are a few benefits worth mentioning:
- Dark chocolate is rich in antioxidants and contains less sugar than milk chocolate. It also has a satisfying richness that means one or two cookies feels like enough.
- Each cookie (based on a batch of 24) contains approximately: 180 calories, 10g fat, 22g carbohydrates, 3g protein, and 12g sugar.
- Dietary considerations: This recipe contains dairy, eggs, and gluten. For allergen-friendly options, see the variations section above.
I’m not a nutritionist, so take these numbers with a grain of salt. What I can tell you is that these cookies make people happy, and that counts for something. If you’re looking for a healthier option, try using dark chocolate with at least 70% cocoa in the dough—it reduces the sugar content and adds even more antioxidants.
Conclusion
These dark chocolate spider web cookies are everything I loved about my Aunt Clara’s kitchen—the warmth, the creativity, the feeling that something magical was happening on that baking sheet. They’re fun to make, beautiful to look at, and absolutely delicious to eat. Whether you’re making them for a Halloween party, a classroom treat, or just because it’s October and you want something spooky, these cookies deliver.
Don’t be afraid to make them your own. Add extra candy eyeballs, experiment with different web patterns, or try the peanut butter variation. The best recipes are the ones that evolve with the people who make them. And honestly? The imperfect cookies taste just as good as the perfect ones. Maybe better.
I’d love to hear how yours turn out! Drop a comment below with your spider web creations, your own variations, or just your favorite Halloween memory. And if you loved this recipe, share it with a friend who needs a little spooky sweetness in their life. Happy Halloween, friends—go make something delicious.
Frequently Asked Questions
Can I use milk chocolate instead of dark chocolate?
You can, but the cookies will be much sweeter and won’t have the same rich depth of flavor. If you do swap, reduce the sugar in the recipe by 1/4 cup to compensate.
Why did my white chocolate seize up?
White chocolate is finicky about heat. If you microwave it too long or get even a drop of water in the bowl, it will seize into a grainy mess. Always microwave in short bursts and make sure your bowl is completely dry.
Can I make the dough ahead of time?
Absolutely! The dough can be refrigerated for up to 3 days. Just wrap it tightly in plastic wrap and let it sit at room temperature for 10 minutes before scooping and baking.
How do I get the spider web design to look perfect?
Practice makes progress, not perfection. The key is using a very small piping tip and dragging the toothpick from the center outward in one smooth motion. If it doesn’t look perfect, just call it “abstract art” and move on.
Can I use royal icing instead of white chocolate?
Yes, but the texture and taste will be different. Royal icing dries hard and crunchy, while white chocolate stays slightly soft and creamy. I prefer white chocolate for the flavor, but royal icing works in a pinch.
Pin This Recipe!
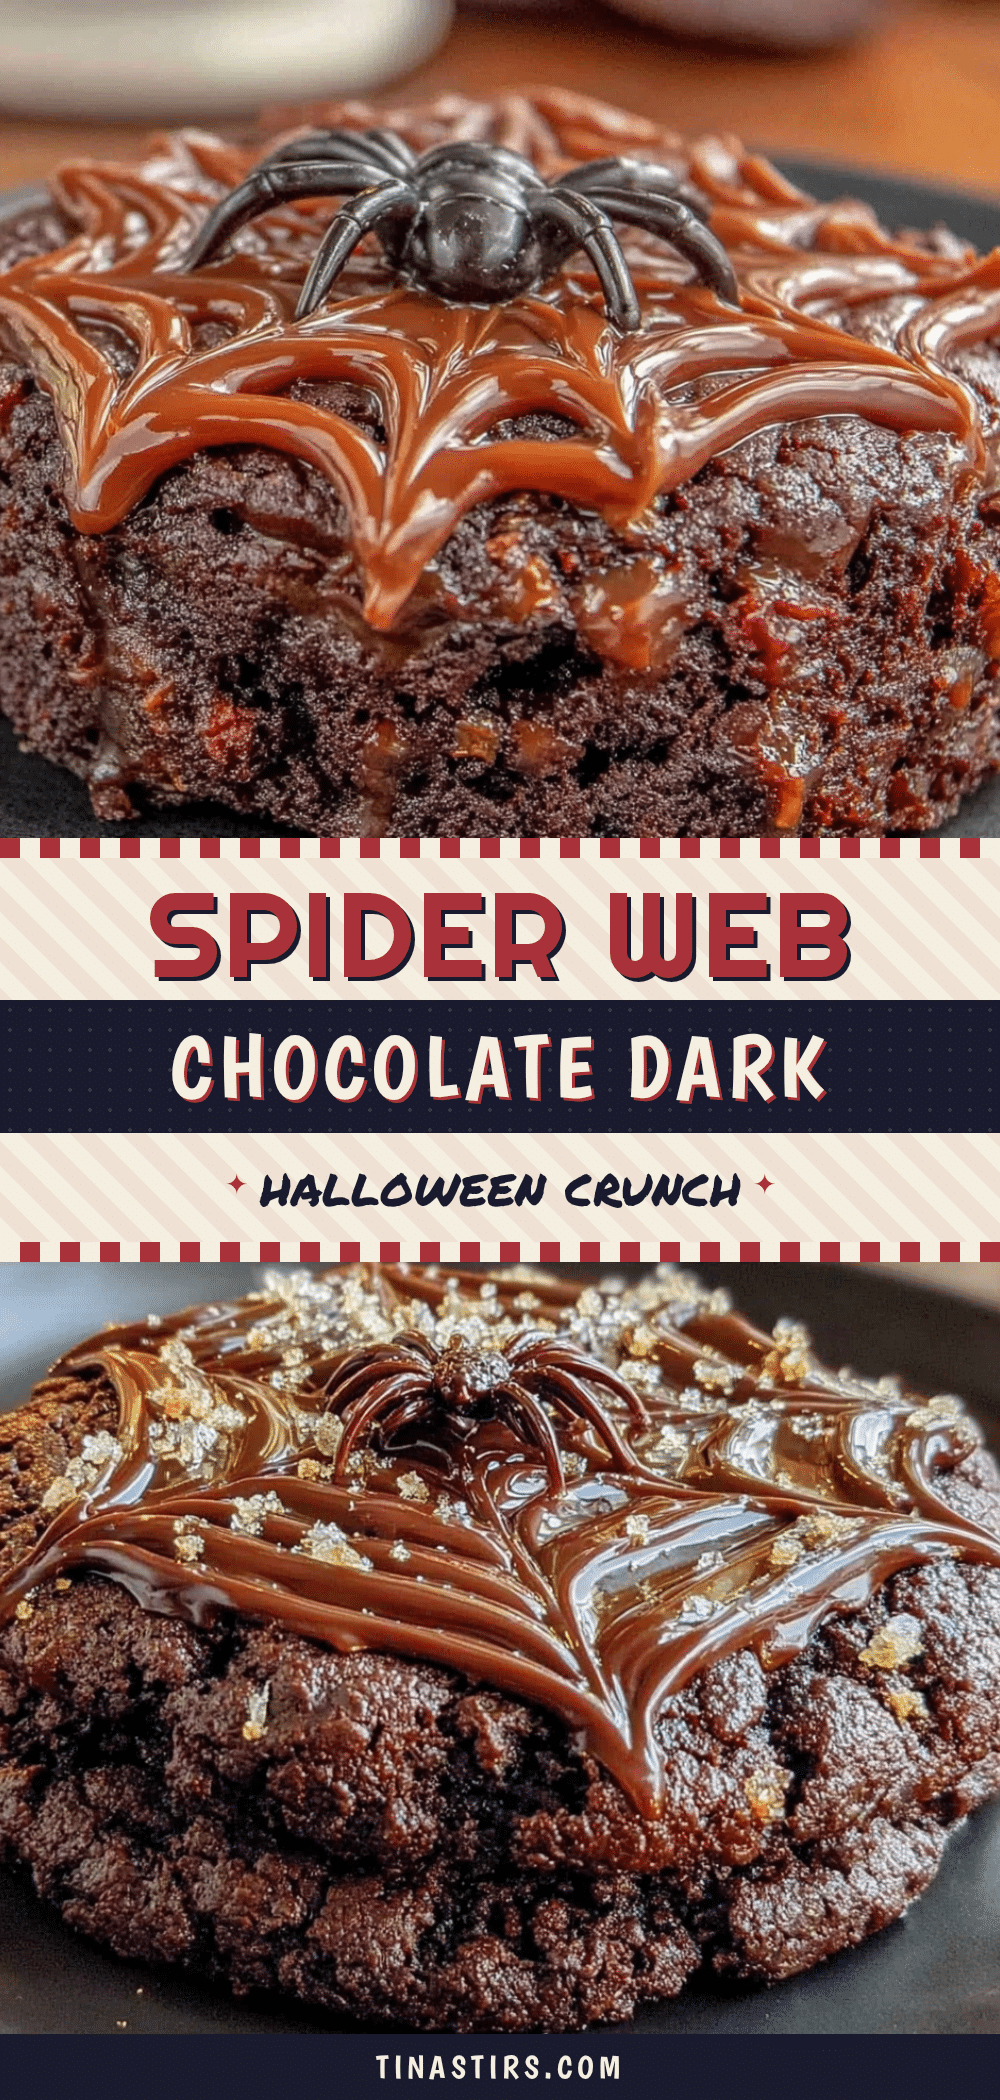
Dark Chocolate Spider Web Cookies: Easy Halloween Treat
These dark chocolate spider web cookies are a Halloween treat with crispy edges, soft centers, and a rich dark chocolate flavor. Decorated with white chocolate webs and candy eyeballs, they are quick to make and perfect for parties or spooky movie nights.
- Prep Time: 15 minutes
- Cook Time: 10 minutes
- Total Time: 45 minutes
- Yield: 24 servings 1x
- Category: Dessert
- Cuisine: American
Ingredients
- 1 cup (2 sticks) unsalted butter, softened
- 1 cup (200g) granulated sugar
- 2 large eggs, room temperature
- 2 teaspoons vanilla extract
- 2 cups (240g) all-purpose flour
- 3/4 cup (75g) unsweetened cocoa powder
- 1 teaspoon baking soda
- 1/2 teaspoon salt
- 1 cup (175g) white chocolate chips
- 1 teaspoon coconut oil or vegetable shortening
- 24–30 candy eyeballs
Instructions
- Preheat your oven to 350°F (175°C) and line two baking sheets with parchment paper.
- Cream the butter and sugar together in a large bowl for about 3-4 minutes until light and fluffy. Scrape down the sides halfway through.
- Add the eggs one at a time, beating well after each addition. Mix in the vanilla extract.
- In a separate bowl, whisk together the flour, cocoa powder, baking soda, and salt.
- Gradually add the dry ingredients to the wet mixture, mixing on low speed until just combined.
- Chill the dough for 15 minutes in the refrigerator.
- Scoop rounded tablespoons of dough onto the prepared baking sheets, spacing them about 2 inches apart.
- Bake for 8-10 minutes until edges are set but centers are still soft.
- Let the cookies cool on the baking sheet for 5 minutes, then transfer to a cooling rack to cool completely.
- While cookies cool, place white chocolate chips and coconut oil in a microwave-safe bowl. Microwave in 30-second intervals, stirring between each, until smooth.
- Transfer melted white chocolate to a small piping bag or zip-top bag and snip a tiny corner.
- Pipe spider webs: Pipe a small dot in the center of each cookie, then concentric circles around it. Drag a toothpick from the center outward through all circles to create the web effect. Wipe toothpick clean between cookies.
- Immediately press two candy eyeballs onto the white chocolate while still wet.
- Let white chocolate set completely before stacking or storing, about 20 minutes at room temperature or 10 minutes in the fridge.
Notes
Chill dough for 15 minutes to prevent spreading. Use a light hand with white chocolate for delicate webs. Work quickly as white chocolate sets fast. Practice toothpick drag on parchment first. Cookies taste better the next day. Store in airtight container at room temperature for up to 5 days. Freeze undecorated cookies for up to 3 months.
Nutrition
- Serving Size: 1 cookie
- Calories: 180
- Sugar: 12
- Sodium: 120
- Fat: 10
- Saturated Fat: 6
- Carbohydrates: 22
- Fiber: 2
- Protein: 3
Keywords: Halloween cookies, spider web cookies, dark chocolate cookies, white chocolate decoration, candy eyeballs, easy Halloween treat


