Love this? Save it for later!
Share the inspiration with your friends
Let me tell you, these aren’t just any old cookie. I’ve tested a lot of versions over the years, and this one is the keeper. It’s the one I come back to every single December. Here’s why I think you’ll fall for them, too.
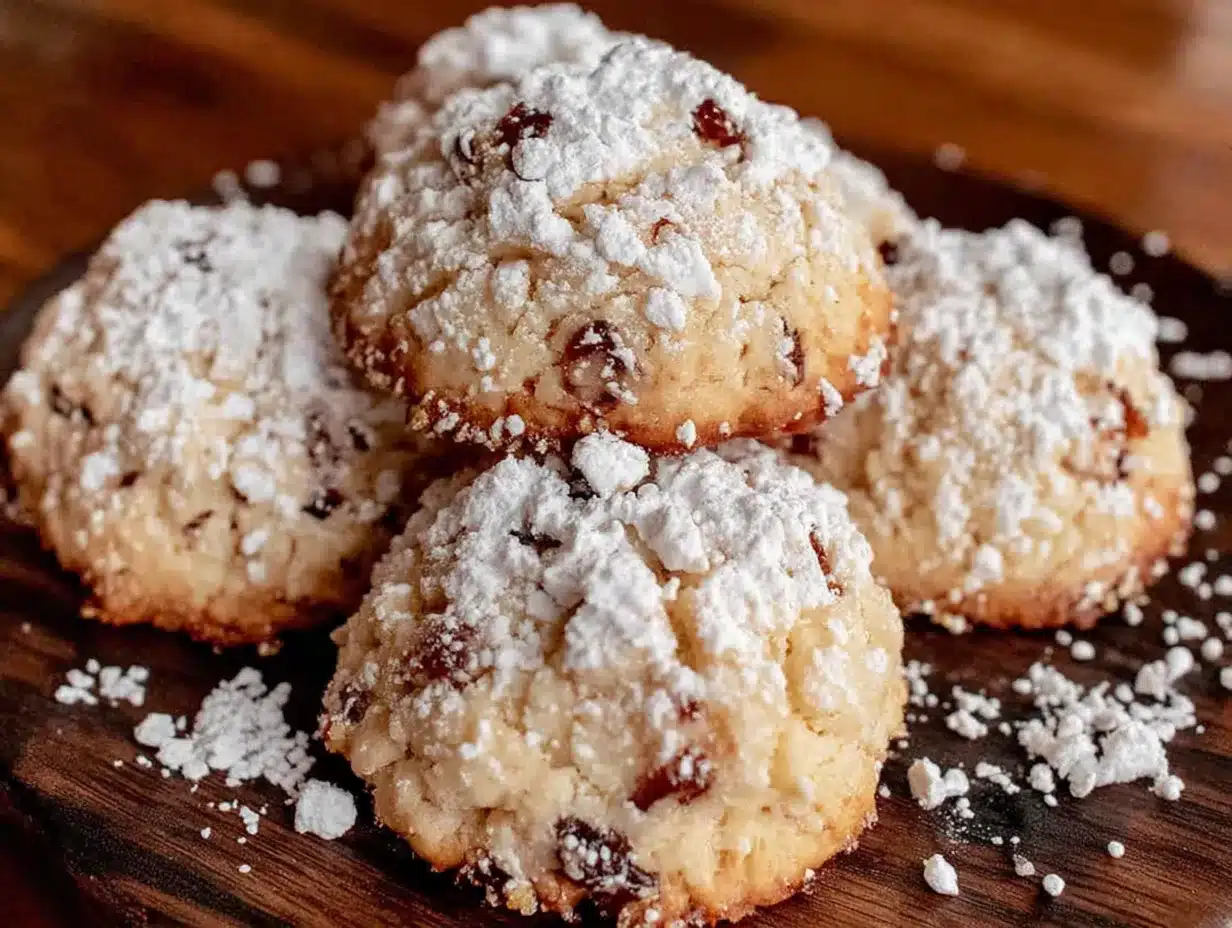
- Melt-in-Your-Mouth Texture: Honestly, the texture is the whole point. They’re tender, buttery, and that snowy coating of powdered sugar just makes them irresistible. They practically dissolve on your tongue.
- Incredibly Simple Ingredients: You probably have almost everything in your pantry right now. No fancy extracts or hard-to-find items. Just good, honest baking staples that come together into something magical.
- Perfect for Holiday Cookie Exchanges: These are the cookies that disappear first from the platter. They look elegant and festive with their dusting of snow, but they’re deceptively easy to make. Plus, they travel beautifully.
- Naturally Gluten-Free Friendly: I’ve made these for friends with gluten sensitivities by swapping the all-purpose flour with a good 1:1 gluten-free baking blend, and no one could tell the difference. It’s a win-win for holiday gatherings.
- Freezer-Friendly Champions: The dough freezes like a dream, and the baked cookies freeze perfectly, too. You can make a massive batch weeks before the holidays and just pull them out when guests arrive. It’s a lifesaver.
I remember one year, I was rushing to put together a cookie platter for a neighbor’s party. I accidentally over-baked a batch—they were a little more golden than usual. I was so annoyed. But you know what? They were still amazing. The toasty flavor actually added something. That’s the thing about this recipe—it’s forgiving. It’s not fussy. It’s just… cozy. And isn’t that what holiday baking is all about?
What Ingredients You Will Need
This recipe uses simple, wholesome ingredients to create a cookie that feels truly special. Here’s what you’ll need to gather, along with a few of my personal tips for the best results.
For the Cookie Dough
- 1 cup (226g) unsalted butter, softened: This is non-negotiable for that perfect tender crumb. I always use unsalted so I can control the salt level. Let it sit out on the counter for a good hour—you want it soft to the touch but not melted.
- ½ cup (60g) powdered sugar: This adds sweetness and helps create that delicate, shortbread-like texture. Sift it if it’s clumpy. I’ve used organic powdered sugar before, and it works fine, though it might have a slightly different sweetness level.
- 1 teaspoon vanilla extract: Go for pure vanilla extract if you have it. The flavor is noticeably richer and more aromatic than imitation vanilla. It’s a small detail that makes a big difference.
- 2 cups (250g) all-purpose flour: For the best texture, I recommend spooning the flour into your measuring cup and leveling it off with a knife. Scooping directly from the bag can pack the flour, leading to a dry, crumbly dough. I’ve had good luck with King Arthur Flour and Gold Medal.
- ¼ teaspoon salt: Just a pinch to balance the sweetness and enhance the buttery flavor. Fine sea salt or table salt both work perfectly here.
- 1 cup (120g) finely chopped pecans or walnuts: Toasting the nuts beforehand is a game-changer. Just spread them on a baking sheet and pop them in a 350°F oven for 5-7 minutes until they’re fragrant. Let them cool completely before chopping. It brings out their nutty, warm flavor that’s perfect for the holidays. I’ve used both pecans and walnuts, and honestly, pecans are my favorite—they’re a little sweeter and more buttery.
For the Coating
- 1 cup (120g) powdered sugar: You’ll need this for the classic snowy coating. Don’t skip the second coating! It’s what gives them that picture-perfect look and melt-in-your-mouth quality.
Ingredient Selection Tip: When choosing your nuts, give them a sniff. They should smell fresh and nutty, not stale or bitter. If you’re buying them in bulk, store them in the freezer to keep them fresh longer. I always keep a bag of pecans in my freezer just for this recipe.
Equipment Needed
You don’t need a ton of fancy gear for these cookies, which is part of their charm. Here’s what you’ll want to have on hand:
- Large Mixing Bowls: One for the wet ingredients and one for the dry. I love my set of glass nesting bowls—they’re sturdy and easy to clean.
- Electric Hand Mixer or Stand Mixer: While you can cream the butter and sugar by hand with a wooden spoon, a mixer makes it so much easier. A hand mixer is perfectly fine. I’ve used my trusty KitchenAid stand mixer for years, but a $20 hand mixer from the grocery store will do the job just as well.
- Baking Sheets: I recommend using light-colored, rimmed baking sheets. Dark sheets can cause the bottoms of the cookies to brown too quickly. Line them with parchment paper or a silicone baking mat for easy cleanup.
- Cooling Rack: Essential for letting the cookies cool properly before that first coating of powdered sugar. If you don’t have one, you can let them cool on the baking sheet for a few extra minutes, but a rack is better for airflow.
- Fine-Mesh Sieve or Sifter: This is for dusting the powdered sugar. You can use a regular spoon, but a sieve gives you that light, even, professional-looking coating. It’s a small tool that makes a big visual difference.
- Cookie Scoop (Optional but Helpful): A 1-tablespoon cookie scoop ensures all your cookies are the same size, so they bake evenly. I’ve used a regular teaspoon in a pinch, and it works fine—just be consistent with the amount.
Preparation Method
Alright, let’s get baking! This process is straightforward, but I’ll walk you through every step with my best tips so you get perfect cookies every time.
- Preheat and Prep: First things first, preheat your oven to 350°F (175°C). Line two baking sheets with parchment paper or silicone baking mats. This step saves you from a sticky cleanup later.
- Cream the Butter and Sugar: In a large bowl, beat the softened butter with an electric mixer on medium speed until it’s smooth and creamy—about 1 minute. Add the ½ cup of powdered sugar and beat until light and fluffy, scraping down the sides of the bowl as needed. This should take about 2 minutes. You’re looking for a pale, airy mixture.
- Add the Vanilla: Beat in the vanilla extract until it’s just combined. Don’t overmix here.
- Combine the Dry Ingredients: In a separate bowl, whisk together the all-purpose flour and salt. This ensures the salt is evenly distributed throughout the dough.
- Mix the Dough: Gradually add the flour mixture to the butter mixture, mixing on low speed until just combined. The dough will look a little crumbly at first, but it will come together. Be careful not to overmix, or the cookies will be tough.
- Fold in the Nuts: Gently fold in the finely chopped pecans (or walnuts) with a rubber spatula until they’re evenly distributed. The dough should be soft but not sticky. If it feels too sticky, you can chill it for 15-20 minutes.
- Shape the Cookies: Using a cookie scoop or your hands, roll the dough into 1-inch balls. Place them about 2 inches apart on the prepared baking sheets. They don’t spread much, so you can fit about 12 on a standard sheet.
- Bake: Bake for 10-12 minutes, or until the bottoms are lightly golden and the tops are set but not browned. The cookies should look pale. My trick is to check them at the 10-minute mark. They’re done when they feel firm to a light touch. Overbaking will make them dry.
- First Coating (While Warm): Let the cookies cool on the baking sheet for about 5 minutes. Then, while they’re still warm, gently roll each cookie in a bowl of powdered sugar. This first coat will melt slightly and create a base layer. Place the coated cookies on a wire rack to cool completely.
- Second Coating (When Cool): Once the cookies are completely cool, roll them in the powdered sugar again. This second coat gives them that iconic snowy, melt-in-your-mouth look. Don’t skip this step—it’s what makes them so beautiful.
A little note from my kitchen: The first time I made these, I was impatient and tried to roll them in sugar while they were too hot. The sugar just melted into a sticky mess. Learn from my mistake! Let them cool for a few minutes on the sheet. You want them warm, not hot.
Cooking Tips & Techniques
Over the years, I’ve learned a few tricks that make these cookies even better. Here are my top tips for success.
- Don’t Overbake! This is the number one mistake. Russian tea cakes are meant to be pale and tender. If you wait for them to turn golden brown, they’ll be dry and crumbly. Bake until the bottoms are just barely golden and the tops are set. Trust your instincts.
- Chill the Dough if Needed: If your kitchen is warm or the dough feels too soft and sticky to roll, pop it in the fridge for 15-20 minutes. This makes shaping the balls so much easier and prevents the cookies from spreading too much in the oven.
- Use a Fine-Mesh Sieve for the Final Dusting: For that really professional, bakery-style look, I like to give the cookies a final light dusting of powdered sugar through a fine-mesh sieve just before serving. It adds that extra “snowfall” effect.
- Toast Your Nuts: I mentioned this before, but it’s worth repeating. Toasting the nuts before chopping them releases their natural oils and deepens their flavor. It takes just a few minutes and makes a world of difference in the final taste.
- Make Them Uniform: Use a cookie scoop to ensure all your dough balls are the same size. This guarantees even baking. I use a 1-tablespoon scoop, and I get about 36 cookies from a single batch.
I once forgot to add the vanilla extract. I realized it halfway through baking. The cookies were still good—buttery and nutty—but they were missing that little something. Don’t be like me. Double-check your ingredients before you start mixing!
Variations & Adaptations
This recipe is wonderfully versatile. Here are a few ways I’ve adapted it over the years.
- Chocolate Lover’s Version: Swap ¼ cup of the all-purpose flour with ¼ cup of unsweetened cocoa powder. Add ½ cup of mini chocolate chips along with the nuts. You get a rich, chocolatey cookie that’s still perfectly tender.
- Gluten-Free Adaptation: Use a high-quality 1:1 gluten-free baking blend (I like Bob’s Red Mill or King Arthur’s). The texture will be slightly more delicate, but they’re still absolutely delicious. Just be sure not to overmix the dough.
- Spiced Holiday Version: Add ½ teaspoon of ground cinnamon, ¼ teaspoon of ground nutmeg, and a pinch of ground cloves to the flour mixture. This gives the cookies a warm, chai-like flavor that’s perfect for Christmas.
- Citrus Twist: Add 1 tablespoon of finely grated orange or lemon zest to the butter mixture. The bright citrus flavor cuts through the richness beautifully. I made a batch with orange zest last year, and they were a huge hit at a brunch.
- Different Nuts: Feel free to experiment with other nuts. Almonds, hazelnuts, or even pistachios would be wonderful. If you’re using hazelnuts, you could even add a teaspoon of Frangelico liqueur for a grown-up twist.
Serving & Storage Suggestions
These cookies are as versatile in serving as they are in making. Here’s how to enjoy them at their best.
Serving: Serve these cookies at room temperature. They’re perfect on a holiday cookie platter alongside gingerbread, shortbread, and peppermint bark. I love to arrange them on a simple white plate with a few sprigs of fresh rosemary or cranberries for a festive touch. They’re also wonderful with a cup of hot coffee, a mug of spiced tea, or a glass of cold milk.
Storage: Store the baked cookies in an airtight container at room temperature for up to two weeks. I like to layer them between sheets of wax paper to prevent the powdered sugar from rubbing off. The flavor actually improves after a day or two as the cookies soften slightly.
Freezing: These cookies freeze beautifully. You have two options. First, you can freeze the unbaked dough balls on a baking sheet until solid, then transfer them to a freezer bag. Bake them straight from frozen, adding an extra minute or two to the baking time. Second, you can freeze the fully baked and coated cookies. Place them in a single layer in a freezer-safe container, with wax paper between layers. They’ll keep for up to three months. When you’re ready to serve, just let them thaw at room temperature. You might want to give them a fresh dusting of powdered sugar after thawing.
A quick note on flavor development: Honestly, these cookies are even better the next day. The flavors meld together, and the texture becomes even more tender. So don’t be afraid to make them a day or two ahead of your holiday gathering.
Nutritional Information & Benefits
While these are certainly a treat, here’s a look at what’s in each cookie. Please note that these values are estimates and can vary based on specific ingredients and portion sizes.
Per Cookie (based on 36 cookies):
- Calories: 110
- Fat: 7g
- Saturated Fat: 3.5g
- Carbohydrates: 11g
- Sugar: 6g
- Fiber: 0.5g
- Protein: 1g
Health Highlights: Pecans are a good source of healthy fats, fiber, and antioxidants. They’ve been linked to heart health and reducing inflammation. So while these cookies are an indulgence, you’re getting a little nutritional boost from the nuts. This recipe is also naturally low in sodium and can be made gluten-free with a simple swap. If you’re watching your sugar intake, you could try using a powdered sugar alternative for the coating, though the texture will be slightly different.
Allergen Note: This recipe contains dairy (butter), gluten (flour), and tree nuts (pecans or walnuts). If you need to avoid dairy, you can try using a high-quality vegan butter substitute. I’ve had success with Miyoko’s brand, but the texture will be a bit more delicate.
I love that these cookies feel special without being overly complicated. They’re a treat you can feel good about sharing—and eating yourself!
Conclusion
So there you have it—my go-to recipe for cozy Russian tea cake cookies. They’re buttery, nutty, and perfectly sweet, with that iconic snowy coating that makes them feel so festive. Honestly, every time I make them, I’m transported back to that chilly December afternoon at my neighbor’s house. The smell, the warmth, the casual generosity of it all. That’s the magic of a really good recipe.
I hope you give these a try. Don’t be afraid to make them your own—add some spices, swap in your favorite nuts, or double the batch because trust me, they’ll disappear fast. I’d love to hear how they turn out for you. Did you try a variation? Did you have any happy accidents in the kitchen? Share your stories in the comments below. Happy baking, friends!
Frequently Asked Questions
Can I use margarine instead of butter?
I really don’t recommend it. Butter is key to the flavor and texture of these cookies. Margarine has a higher water content, which can make the cookies spread more and become tough. Stick with real butter for the best results.
Why did my cookies turn out dry?
This usually happens for one of two reasons: overbaking or too much flour. Make sure you’re measuring your flour correctly by spooning it into the cup and leveling it off. And take the cookies out of the oven when they’re just set—they should still be pale.
Can I make the dough ahead of time?
Absolutely! You can refrigerate the dough for up to 3 days. Just wrap it tightly in plastic wrap. When you’re ready to bake, let it sit at room temperature for about 10 minutes so it’s soft enough to scoop.
How do I prevent the powdered sugar from melting?
The key is to let the cookies cool completely before the second coating. The first coating goes on while they’re still warm, and it will melt slightly—that’s normal. The second coating should only be applied to completely cool cookies.
Can I make these without nuts?
Yes, you can! The cookies will still be delicious, just a little different in texture. You might want to add an extra ¼ cup of flour to compensate for the missing volume from the nuts. They’ll be more like a classic shortbread cookie.
Pin This Recipe!
Cozy Russian Tea Cake Cookies: Best Holiday Baking Recipe
These buttery, nutty, melt-in-your-mouth cookies are a holiday classic. With a snowy coating of powdered sugar and simple ingredients, they’re perfect for cookie exchanges and festive gatherings.
- Prep Time: 15 minutes
- Cook Time: 12 minutes
- Total Time: 27 minutes
- Yield: 36 cookies 1x
- Category: Dessert
- Cuisine: Russian
Ingredients
- 1 cup (226g) unsalted butter, softened
- ½ cup (60g) powdered sugar
- 1 teaspoon vanilla extract
- 2 cups (250g) all-purpose flour
- ¼ teaspoon salt
- 1 cup (120g) finely chopped pecans or walnuts
- 1 cup (120g) powdered sugar (for coating)
Instructions
- Preheat oven to 350°F (175°C). Line two baking sheets with parchment paper or silicone baking mats.
- In a large bowl, beat the softened butter with an electric mixer on medium speed until smooth and creamy, about 1 minute.
- Add ½ cup powdered sugar and beat until light and fluffy, about 2 minutes, scraping down the sides as needed.
- Beat in the vanilla extract until just combined.
- In a separate bowl, whisk together the all-purpose flour and salt.
- Gradually add the flour mixture to the butter mixture, mixing on low speed until just combined. The dough will be crumbly but will come together.
- Gently fold in the finely chopped nuts with a rubber spatula until evenly distributed.
- Using a cookie scoop or your hands, roll the dough into 1-inch balls. Place them about 2 inches apart on the prepared baking sheets.
- Bake for 10-12 minutes, until the bottoms are lightly golden and the tops are set but not browned.
- Let the cookies cool on the baking sheet for about 5 minutes. While still warm, gently roll each cookie in a bowl of powdered sugar (first coating). Place on a wire rack to cool completely.
- Once completely cool, roll the cookies in powdered sugar again (second coating).
Notes
Don’t overbake; cookies should be pale. Chill dough if too sticky. Toast nuts for deeper flavor. Use a fine-mesh sieve for final dusting. Cookies improve after a day.
Nutrition
- Serving Size: 1 cookie
- Calories: 110
- Sugar: 6
- Sodium: 25
- Fat: 7
- Saturated Fat: 3.5
- Carbohydrates: 11
- Fiber: 0.5
- Protein: 1
Keywords: Russian tea cake, snowball cookies, holiday cookies, Christmas cookies, pecan cookies, butter cookies, powdered sugar cookies


