Love this? Save it for later!
Share the inspiration with your friends
The woman at the community garden stand watched me staring at her basket of strawberries. She didn’t say anything at first. Then she pushed the basket toward me and said, “You look like someone who needs a shortcut today.” She was right, honestly. It was a Tuesday in early December, and I had completely forgotten about the holiday potluck at my daughter’s school the next morning. I was standing there holding a bag of sad-looking apples and feeling like the worst parent on the block. She laughed, not meanly, and told me about this thing she makes when she wants to show up with something festive but has zero time. A brownie dip shaped like a Christmas tree. I mean, I almost hugged her right there in the parking lot. She scribbled the idea on a napkin, and I’ve been making it every holiday season since. It’s not fancy, and it’s not complicated, but it saves me every single time. Maybe you’ve been there, staring at your calendar and realizing you need a miracle in twenty minutes. This is that miracle.
Let me tell you, the first time I tried to make it, I used the wrong pan and ended up with a brownie puddle instead of a tree shape. My kitchen looked like a crime scene of chocolate. But you know what? I scooped it into a bowl, stuck some pretzel sticks in it, and called it a “rustic forest dip.” Nobody complained. That’s the beauty of this recipe, honestly. It forgives your mistakes. It doesn’t care if your tree is a little lopsided or if you forgot to buy mint leaves for the star on top. It just tastes good and looks cute, and that’s all anyone wants at a holiday party. The woman from the garden stand, her name was Rosa, she told me her grandmother used to make something similar for family gatherings in Puerto Rico, but with a cream cheese base instead of brownies. I adapted it because my family would riot if I showed up without chocolate. But I kept her spirit of making something special out of whatever you have. That’s the real recipe here, honestly.
Why You’ll Love This Recipe
Let’s be real. The holidays are chaos. You’ve got gifts to wrap, cookies to bake, and somehow you need to show up at three different parties this weekend with something that doesn’t look like you bought it at the gas station. This dip is your secret weapon. It takes about twenty minutes of actual work, and the rest is just chilling in the fridge. I’ve tested this recipe at four different holiday gatherings now, including one where I forgot the vanilla extract and had to use almond extract instead. It still worked. That’s the kind of forgiving recipe we all need in December.
- Quick & Easy: From start to fridge, you’re looking at about 25 minutes. Most of that is just waiting for the brownies to cool. I’m not kidding when I say you can make this while your kid is taking a bath.
- Simple Ingredients: You probably have most of this in your pantry right now. Brownie mix, cream cheese, powdered sugar, and whatever fruit looks good at the store. No weird specialty items that you’ll use once and forget about.
- Perfect for Holiday Parties: It’s a showstopper on the dessert table without requiring you to stand there piping frosting for an hour. Kids love it, adults love it, and it’s naturally portion-controlled because people just dip and go.
- Crowd-Pleaser: I’ve brought this to work parties, school events, and family gatherings. Every single time, someone asks for the recipe. It’s that good.
- Unbelievably Delicious: The combo of warm fudgy brownie with cold creamy dip and fresh fruit is honestly next-level. It hits that sweet and tangy spot that makes you close your eyes for a second.
What makes this different from every other brownie dip out there? It’s the texture. Most brownie dips are either too runny or too stiff. I spent three batches figuring out the exact ratio of cream cheese to brownie to get that perfect scoopable consistency. Not too thick that you break your pretzel stick, not too thin that it drips everywhere. Plus, shaping it like a Christmas tree makes it feel special without requiring any artistic talent. I promise you, if I can make a tree that doesn’t look like a deformed triangle, anyone can.
This is the recipe that makes you feel like you’ve got it together, even when you absolutely don’t. It’s comfort food disguised as effort, and honestly, that’s the best kind of holiday cooking.
What Ingredients You Will Need
This recipe uses simple, mostly pantry-staple ingredients to deliver that rich, fudgy flavor and creamy texture without any fuss. I’ve tested this with both homemade brownies and box mixes, and honestly, the box mix works perfectly here. Don’t let anyone tell you different. The cream cheese layer is where the magic happens, so focus your energy there.
For the Brownie Base
- 1 box (18.3 ounces / 520 grams) fudge brownie mix – I prefer Ghirardelli or Duncan Hines for the best fudgy texture. The ones with the little chocolate syrup packet are my favorite.
- 2 large eggs – Room temperature if you remember, but straight from the fridge works too. I’ve done both.
- 1/2 cup (120 ml) vegetable oil – You can use melted coconut oil if that’s what you have, but vegetable oil gives the softest texture.
- 1/4 cup (60 ml) water – Tap water is fine. Don’t overthink this.
For the Cream Cheese Dip
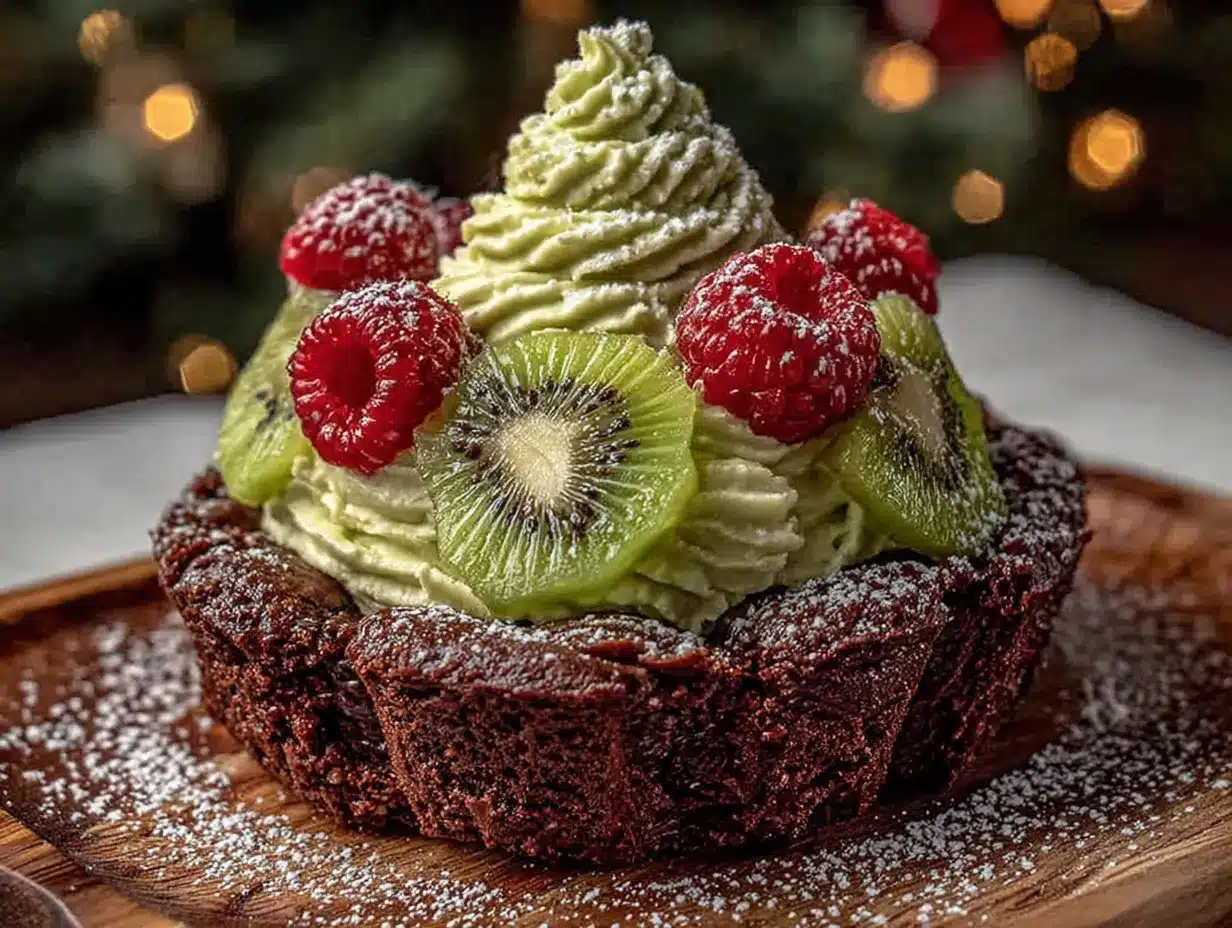
- 8 ounces (226 grams) cream cheese – Full fat, softened. I recommend Philadelphia because it’s consistently creamy. Low-fat works but the texture is slightly less luxurious.
- 1/2 cup (60 grams) powdered sugar – Sifted if you’re feeling fancy, but I’ve skipped sifting plenty of times and it was fine. Just whisk well.
- 1 teaspoon (5 ml) vanilla extract – Pure vanilla if you have it, imitation works in a pinch. That almond extract substitution I mentioned? Totally fine, just different.
- 1 cup (240 ml) heavy cream – Cold. This is non-negotiable if you want the dip to be fluffy. Whipped cream from a can? I won’t tell anyone, but it’s not the same.
- 2 tablespoons (30 grams) granulated sugar – For sweetening the whipped cream. You can skip this if you’re using sweetened whipped cream.
For the Tree Shape and Decorations
- Fresh strawberries – About 1 pound (450 grams), hulled and sliced. Look for bright red, firm berries. They’re the “ornaments” on your tree.
- Fresh blueberries – About 1 cup (150 grams). They look like little blue lights. My kids fight over who gets to place them.
- Green grapes – About 1 cup (150 grams), sliced in half lengthwise. They add that tree-like green color and a nice crunch.
- Kiwi – 2 to 3 kiwis, peeled and sliced into half-moons. The green is perfect for filling gaps.
- Pineapple chunks – About 1 cup (200 grams), fresh or canned. Adds a tropical sweetness that cuts through the chocolate.
- Mint leaves – A few sprigs for the star on top. If you don’t have mint, use a star-shaped cookie cutter on a slice of pineapple. I’ve done both.
- Pretzel sticks – About 10 to 12 sticks for the tree trunk. The salted ones are best because that salty-sweet combo is incredible.
Substitution Notes
If you’re gluten-free, use a gluten-free brownie mix. I’ve tried King Arthur Flour’s gluten-free mix and it works beautifully. For a dairy-free version, use dairy-free cream cheese (Kite Hill is my go-to) and coconut cream instead of heavy cream. The texture will be slightly different, but still delicious. If you don’t have fresh fruit, frozen berries work if you thaw and drain them first. Just don’t use canned fruit in heavy syrup, it gets too mushy.
Equipment Needed
You don’t need a fancy kitchen for this. I’ve made it in a borrowed apartment with a whisk and a cereal bowl. That said, a few tools make life easier.
- 9×13 inch (23×33 cm) baking pan – For baking the brownies. Glass or metal both work, just adjust baking time slightly for glass.
- Large serving platter or cutting board – White looks best for contrast, but any light-colored surface works. I use a wooden board sometimes and it looks rustic and cute.
- Electric hand mixer or stand mixer – You can whip the cream by hand if you’re determined, but your arm will hate you. I’ve done it. It’s not worth it.
- Mixing bowls – One large, one medium. Nothing fancy.
- Spatula – For spreading the brownie and shaping the tree. A rubber spatula is ideal.
- Piping bag or zip-top bag – For piping the cream cheese dip. If you don’t have a piping bag, just cut a small corner off a zip-top bag. Works like a charm.
- Knife and cutting board – For slicing fruit. A sharp knife makes clean cuts that look prettier.
- Parchment paper – Lining the pan makes cleanup so much easier. I learned this the hard way after scrubbing a pan for twenty minutes.
Preparation Method
Let’s get into the actual making of this thing. I’ll walk you through it step by step, including the little mistakes I’ve made so you don’t have to repeat them.
- Preheat your oven to 350°F (175°C). Line your 9×13 pan with parchment paper, leaving some overhang on two sides. This makes lifting the brownie out so much easier later. I forgot the parchment once and ended up chiseling brownie out of the pan. Don’t be me.
- Make the brownie batter. In a large bowl, combine the brownie mix, eggs, oil, and water. Stir until just combined. Don’t overmix, or the brownies will be tough. A few lumps are totally fine. Pour the batter into the prepared pan and spread it evenly. Bake for 20 to 22 minutes, or until a toothpick inserted in the center comes out with a few moist crumbs. Not clean, but not wet batter. You want them slightly underdone for that fudgy texture.
- Cool the brownies completely. This is the hardest part, honestly. You need them to be room temperature before you shape them, or the cream cheese dip will melt into a puddle. I usually pop the pan in the fridge for about 20 minutes to speed things up. While they’re cooling, move on to the dip.
- Make the whipped cream. In a medium bowl, pour the cold heavy cream and add the 2 tablespoons of granulated sugar. Using your hand mixer, whip on medium-high speed until stiff peaks form. This takes about 3 to 4 minutes. You’re looking for peaks that hold their shape when you lift the beaters. Don’t overwhip, or you’ll end up with butter. I’ve done that. It’s sad.
- Make the cream cheese layer. In a separate large bowl, beat the softened cream cheese with the powdered sugar and vanilla extract until smooth and creamy. This takes about 2 minutes. Scrape down the sides halfway through. Now, gently fold in the whipped cream using a spatula. Fold, don’t stir. You want to keep that fluffy texture. The mixture should be smooth, thick, and spreadable.
- Shape the tree. Once the brownies are cool, lift them out of the pan using the parchment paper. Place the whole brownie slab on your serving platter. Using a sharp knife, cut the brownie into a Christmas tree shape. Don’t stress about perfection. Start with a triangle and then round the bottom slightly. I usually cut off the edges and snack on them while I work. It’s my chef’s privilege. You’ll have scraps, and that’s okay. Save them for a brownie sundae later.
- Pipe the dip. Spoon the cream cheese mixture into a piping bag or a zip-top bag with the corner snipped off. Pipe the dip onto the brownie tree in a zigzag pattern, starting from the top and working your way down. You want to cover the brownie completely, but it doesn’t have to be perfectly smooth. The fruit will cover any imperfections. If you don’t have a piping bag, just spread the dip with a spatula. It’ll look more rustic, which is honestly charming.
- Decorate with fruit. Now the fun part. Start at the top of the tree and work your way down. Place a mint leaf or a star-shaped pineapple piece at the very top. Then arrange your fruit like ornaments. I like to do rows: strawberries first, then blueberries, then kiwi slices, then grapes. Alternate colors so it looks balanced. Press the fruit gently into the dip so it stays put. Don’t overcrowd, but don’t leave big empty spaces either. You want it to look full and festive.
- Add the trunk. At the bottom of the tree, arrange the pretzel sticks in a fan shape to look like a trunk. Press them into the dip slightly. If you want, you can add a little extra dip at the base to hold them. I sometimes add a few extra pretzels around the bottom for people to scoop with.
- Chill and serve. Pop the whole platter in the fridge for at least 30 minutes before serving. This helps everything set and makes it easier to dip. When you’re ready to serve, bring it out and watch people lose their minds. Serve with extra pretzels, graham crackers, or more fruit on the side.
Cooking Tips & Techniques
I’ve made this recipe about a dozen times now, and I’ve learned a few things the hard way. Let me save you some trouble.
Don’t overbake the brownies. I cannot stress this enough. You want them fudgy, not cakey. Underbaked brownies are soft and scoopable. Overbaked brownies are crumbly and hard to shape. If your brownies come out too dry, you can brush them with a little milk or coffee before adding the dip to add moisture back. I’ve done this and it works surprisingly well.
Soften your cream cheese properly. Cold cream cheese creates lumps that are impossible to get out. Leave it on the counter for about 30 minutes before you start. If you forget, microwave it in 10-second bursts until it’s soft but not hot. Hot cream cheese will melt your whipped cream, and then you’ve got soup.
Use a serrated knife for cutting the tree shape. A straight knife tends to drag and tear the brownie. A serrated knife gives you clean edges. I use my bread knife for this and it works perfectly. Also, don’t try to cut the tree shape while the brownie is still warm. It will fall apart. Trust me on this one.
Work in batches if you’re making this for a crowd. This recipe serves about 8 to 10 people as is. If you need more, make two separate trees rather than one giant one. The dip doesn’t hold up as well on a huge surface, and it’s harder to transport. I learned this when I tried to make a “mega tree” for a party and it collapsed in the car. Not my finest moment.
Let the dip set before adding fruit. If you pipe the dip and then immediately add fruit, everything slides around. Let it chill in the fridge for about 15 minutes first. The dip firms up and holds the fruit in place. This is especially important if you’re transporting it somewhere.
Use a variety of fruit textures. Soft fruits like strawberries and kiwi contrast nicely with firm fruits like grapes and pineapple. If you use only soft fruits, the dip gets mushy. If you use only firm fruits, it’s hard to scoop. A mix gives you the best experience.
Variations & Adaptations
One of the best things about this recipe is how flexible it is. Here are a few ways I’ve adapted it over the years.
Chocolate Peppermint Tree
Add 1/2 teaspoon of peppermint extract to the cream cheese dip and crush up some candy canes to sprinkle on top. The minty freshness pairs beautifully with the chocolate. I made this for a cookie exchange last year and it disappeared in ten minutes. Just be careful not to add too much peppermint extract, a little goes a long way. Start with 1/4 teaspoon and taste.
Vegan Brownie Tree
Use a vegan brownie mix (I like the one from Bob’s Red Mill) and substitute the eggs with flax eggs (1 tablespoon ground flaxseed mixed with 3 tablespoons water per egg). For the dip, use dairy-free cream cheese and coconut cream instead of heavy cream. The texture is slightly different, but the flavor is still rich and satisfying. My vegan friend requested this for her holiday party and nobody even noticed the difference.
Nutella Swirl Tree
Before piping the cream cheese dip, warm up about 1/4 cup of Nutella in the microwave for 15 seconds. Drizzle it over the brownie base, then pipe the dip on top. Use a toothpick to swirl the Nutella into the dip for a marbled effect. This is my personal favorite variation because, well, Nutella. It adds an extra layer of hazelnut richness that’s absolutely decadent.
Low-Sugar Option
Use a sugar-free brownie mix and replace the powdered sugar in the dip with a sugar-free alternative like Swerve or monk fruit sweetener. The whipped cream can be sweetened with a few drops of stevia instead of granulated sugar. This version is great for anyone watching their sugar intake during the holidays. I made it for my aunt who’s diabetic and she was thrilled.
Grilled Fruit Version
If you’re making this for a summer gathering or an outdoor party, try grilling the fruit before adding it. Slice the pineapple, peaches, and even the strawberries, then grill them for about 2 minutes per side. The caramelized edges add a smoky sweetness that’s incredible with the chocolate. I discovered this accidentally when I had leftover grilled fruit from a barbecue and decided to use it up. Now it’s my go-to for summer holidays.
Serving & Storage Suggestions
This dip is best served chilled, right out of the fridge. The contrast between the cold creamy dip and the room-temperature fruit is part of what makes it so good. I like to set it out about 10 minutes before guests arrive so it softens slightly, but not much longer than that. If it sits out for more than an hour, the dip starts to soften too much and the fruit can get watery.
For dipping, I recommend pretzel sticks, graham crackers, vanilla wafers, or even just spoons. Honestly, I’ve seen people eat it with their fingers. No judgment here. If you want to keep it healthier, extra fruit slices work great as dippers. Apple slices and pear slices are particularly good because they’re sturdy enough to scoop without breaking.
Storage: Cover the platter tightly with plastic wrap and store in the refrigerator for up to 2 days. The brownie base stays moist, but the fruit will start to release juices after about 24 hours. If you’re making this ahead for a party, I recommend assembling the brownie and dip the day before, then adding the fresh fruit just before serving. This keeps everything looking fresh and beautiful.
Freezing: You can freeze the brownie base (without the dip and fruit) for up to 3 months. Wrap it tightly in plastic wrap and then foil. When you’re ready to use it, thaw it in the refrigerator overnight, then proceed with the dip and decorations. The dip itself doesn’t freeze well because the cream cheese and whipped cream separate when thawed. So just freeze the brownie part and make the dip fresh.
Leftover dip: If you have leftover cream cheese dip (which rarely happens in my house), you can use it as a spread for toast, a topping for pancakes, or a dip for cookies. It’s also delicious on cinnamon rolls. I’ve been known to eat it straight from the bowl with a spoon. No regrets.
Nutritional Information & Benefits
Let’s be honest, this is a treat. It’s not health food, and that’s okay. The holidays are about indulgence and joy. That said, there are a few redeeming qualities worth mentioning.
Each serving (based on 10 servings) contains approximately:
– Calories: 380
– Fat: 22g
– Carbohydrates: 44g
– Protein: 5g
– Sugar: 30g
– Fiber: 3g
The fresh fruit adds fiber, vitamins, and antioxidants. Strawberries are packed with vitamin C, blueberries are full of antioxidants, and kiwi provides more vitamin C than an orange. So you’re getting some nutritional benefits along with your chocolate fix. The cream cheese provides calcium and protein, while the brownie provides, well, happiness.
For those with dietary concerns, this recipe contains gluten, dairy, and eggs. I’ve included substitution notes above for gluten-free and dairy-free versions. It’s also relatively low in sodium compared to many holiday appetizers, which is a small win.
My personal philosophy is this: enjoy the treat, savor every bite, and don’t stress about the numbers. The holidays are short, and this dip is worth every calorie. Pair it with a salad for lunch the next day and call it balanced.
Conclusion
This Easy Christmas Tree Brownie Dip with Fresh Fruit is the kind of recipe that makes you look like a holiday hero without actually working like one. It’s festive, delicious, and forgiving. You can mess up the shape, swap out the fruit, forget an ingredient, and it still comes out looking beautiful and tasting amazing. I’ve done all of those things, and nobody ever complained.
What I love most about this recipe is how it brings people together. There’s something about a shared dip that makes a party feel more like a gathering. People stand around it, chatting, dipping, laughing. It’s not fussy or pretentious. It’s just good food that makes people happy. And honestly, that’s what the holidays should be about.
I’d love to hear how yours turns out. Did you use different fruit? Did you try the Nutella swirl? Did your tree come out perfectly symmetrical or beautifully lopsided? Drop a comment below and let me know. Share your photos on Pinterest and tag me so I can see your creations. And if you’re feeling generous, share this recipe with a friend who needs a holiday shortcut. We all need one sometimes.
Now go make that dip. Your party guests are waiting.
Frequently Asked Questions
Can I make this recipe ahead of time?
Yes, absolutely. You can bake the brownie base and make the cream cheese dip up to 2 days in advance. Store them separately in the refrigerator. Assemble the tree shape and add the fresh fruit no more than a few hours before serving for the best presentation.
Can I use homemade brownies instead of a box mix?
Of course. Use your favorite homemade brownie recipe, just make sure it’s a fudgy style rather than a cakey one. You want it dense enough to hold its shape when cut into a tree. My favorite homemade version uses melted butter and cocoa powder for that rich, fudgy texture.
What if I don’t have a piping bag?
No problem at all. You can use a zip-top bag with a small corner snipped off, or simply spread the cream cheese dip with a spatula. A rustic, spread-on look is actually very charming and fits the holiday theme perfectly. Just make sure to spread it evenly so every bite has some dip.
How do I transport this to a party?
Assemble the entire tree on a flat platter or cutting board. Cover it loosely with plastic wrap, making sure the wrap doesn’t touch the fruit. Place it on the floor of your car (not the seat) where it won’t slide around. If you’re worried about movement, put a non-slip mat under the platter. I’ve transported this over an hour away with no issues.
Can I use other fruits besides what’s listed?
Absolutely. Raspberries, blackberries, sliced mango, starfruit, or even small chunks of melon all work beautifully. Just avoid fruits that brown quickly like apples and pears, or toss them in a little lemon juice first. The key is using fruits that are sturdy enough to hold up to dipping and colorful enough to look festive.
Pin This Recipe!
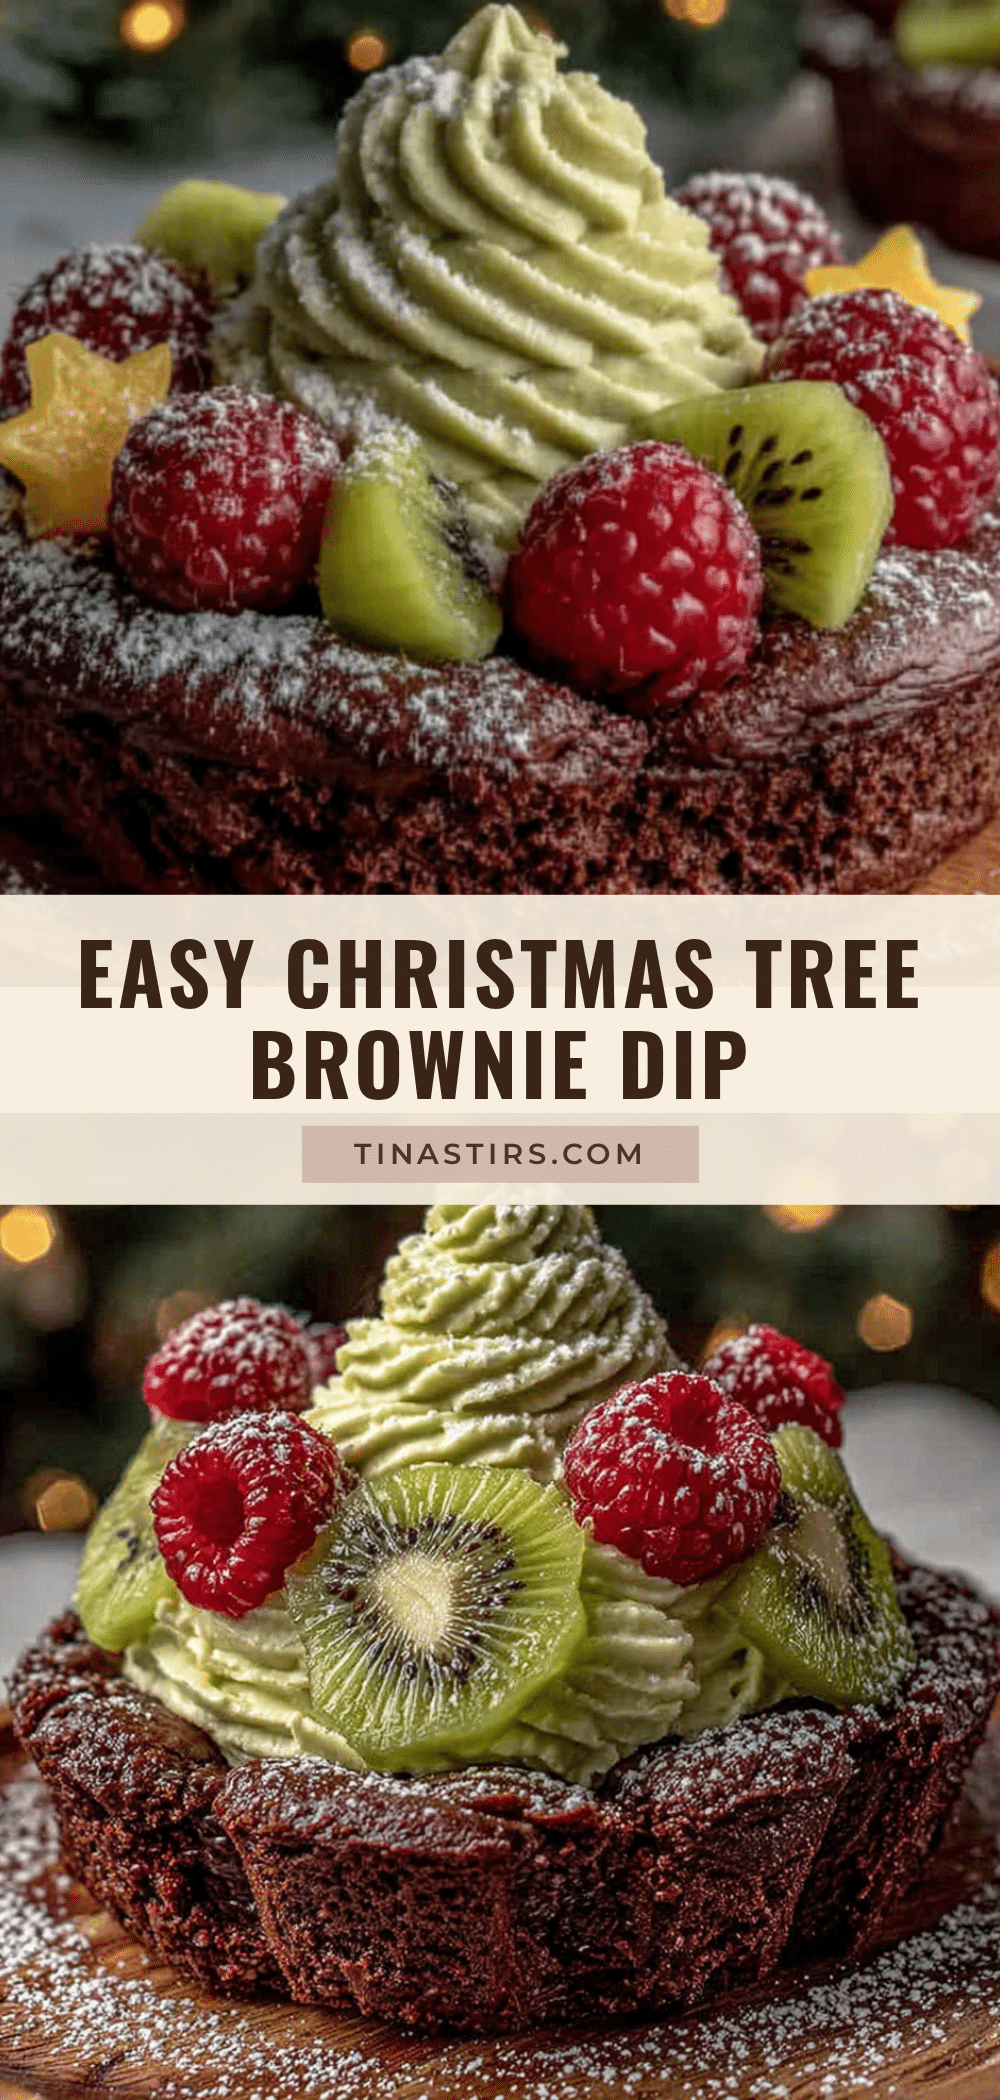
Easy Christmas Tree Brownie Dip with Fresh Fruit
A festive and forgiving holiday dessert featuring a fudgy brownie base shaped like a Christmas tree, topped with a creamy dip and fresh fruit. Perfect for last-minute parties and potlucks.
- Prep Time: 25 minutes
- Cook Time: 22 minutes
- Total Time: 47 minutes (plus chilling time)
- Yield: 8 to 10 servings 1x
- Category: Dessert
- Cuisine: American
Ingredients
- 1 box (18.3 ounces / 520 grams) fudge brownie mix
- 2 large eggs
- 1/2 cup (120 ml) vegetable oil
- 1/4 cup (60 ml) water
- 8 ounces (226 grams) cream cheese, softened
- 1/2 cup (60 grams) powdered sugar
- 1 teaspoon (5 ml) vanilla extract
- 1 cup (240 ml) heavy cream, cold
- 2 tablespoons (30 grams) granulated sugar
- 1 pound (450 grams) fresh strawberries, hulled and sliced
- 1 cup (150 grams) fresh blueberries
- 1 cup (150 grams) green grapes, halved lengthwise
- 2 to 3 kiwis, peeled and sliced into half-moons
- 1 cup (200 grams) pineapple chunks
- A few sprigs mint leaves (for star on top)
- 10 to 12 pretzel sticks (for tree trunk)
Instructions
- Preheat oven to 350°F (175°C). Line a 9×13-inch baking pan with parchment paper, leaving overhang on two sides.
- In a large bowl, combine brownie mix, eggs, oil, and water. Stir until just combined. Pour into prepared pan and spread evenly. Bake for 20 to 22 minutes, until a toothpick inserted in center comes out with moist crumbs. Cool completely (refrigerate for 20 minutes to speed up).
- In a medium bowl, whip cold heavy cream and granulated sugar with a hand mixer on medium-high until stiff peaks form, about 3 to 4 minutes.
- In a separate large bowl, beat softened cream cheese with powdered sugar and vanilla extract until smooth, about 2 minutes. Gently fold in whipped cream with a spatula until smooth and fluffy.
- Lift cooled brownie from pan using parchment. Place on serving platter. Cut into a Christmas tree shape (triangle with slightly rounded bottom). Save scraps for another use.
- Spoon cream cheese mixture into a piping bag or zip-top bag with corner snipped. Pipe onto brownie tree in a zigzag pattern, covering completely. Alternatively, spread with a spatula.
- Decorate with fruit: place a mint leaf or star-shaped pineapple piece at top. Arrange strawberries, blueberries, kiwi slices, and grapes in rows like ornaments, pressing gently into dip.
- At bottom, arrange pretzel sticks in a fan shape for the trunk, pressing into dip.
- Chill platter in refrigerator for at least 30 minutes before serving. Serve with extra pretzels, graham crackers, or fruit on the side.
Notes
Don’t overbake brownies; they should be fudgy. Soften cream cheese properly to avoid lumps. Use a serrated knife for clean tree shape. Let dip set for 15 minutes before adding fruit for better hold. For best presentation, add fresh fruit just before serving.
Nutrition
- Serving Size: 1 serving (based on
- Calories: 380
- Sugar: 30
- Sodium: 200
- Fat: 22
- Saturated Fat: 10
- Carbohydrates: 44
- Fiber: 3
- Protein: 5
Keywords: Christmas tree brownie dip, holiday dessert, easy brownie dip, fruit dip, party dip, no-bake dessert, Christmas recipe


