Love this? Save it for later!
Share the inspiration with your friends
There used to be a tiny bakery on a side street in my old neighborhood—a place called The Velvet Crumb—that made the most incredible black velvet cake I’ve ever tasted. When they closed their doors three years ago, I genuinely grieved. I mean, I stood outside that locked door like a fool, peering through the window at the empty display cases. That cake was my go-to for every birthday, every celebration, every Tuesday that felt like it needed a little magic. After twelve tries—twelve, let me tell you, with some real disasters involving gray batter and one memorable attempt that looked like charcoal briquettes—I finally cracked the code. These Best Black Velvet Halloween Cupcakes are the result of that obsession, and honestly, they taste even better than I remember.
The first time I made a successful batch, my kitchen looked like a crime scene. Black cocoa powder everywhere, a splatter of dark batter on the ceiling (don’t ask), and me standing there holding a cupcake like it was made of gold. My youngest walked in and said, “Mom, are you crying?” And I was. A little. Because that first bite took me right back to The Velvet Crumb. The deep, rich chocolate flavor. The impossibly tender crumb. The way the cream cheese frosting cuts through the darkness. It was all there.
Now, I know what you’re thinking—black cupcakes for Halloween that are actually good? That don’t taste like food coloring and regret? Yes. These are it. They’re the kind of cupcake that makes people close their eyes when they take a bite, even at a chaotic Halloween party with kids running everywhere. And the best part? They’re made with budget-friendly ingredients you probably already have in your pantry. No fancy extracts, no specialty flours, just good honest baking that happens to look like it came from a gothic bakery. Maybe you’ve been there—looking for that one recipe that delivers both on flavor and on presentation without breaking the bank. These are those cupcakes.
Why You’ll Love This Recipe
I’ve tested this recipe more times than I care to admit, and I mean that in the best way. Each batch taught me something new. The first few were too dry. Then they were too dense. Then they were perfect but the color was off. Finally, I landed on this version—and it’s the one I’ll make forever. Here’s why it works for real families on real budgets.
- Kid-Approved Flavor: Black velvet is basically chocolate cake with a mysterious edge. Kids love the color, but they stay for the taste. My own kids have declared these “the best cupcakes ever,” and they’re picky eaters who would survive on air if given the chance.
- Budget-Friendly Ingredients: No expensive black cocoa powder required. I use a mix of regular cocoa and a little black food coloring. You can find everything at your regular grocery store for under ten dollars total. I’ve done the math.
- Perfect for Halloween Parties: These cupcakes look dramatic and spooky without any fancy decorating skills. A swirl of cream cheese frosting and maybe a few sprinkles, and you’re done. They’re impressive without being stressful.
- Make-Ahead Friendly: You can bake the cupcakes a day ahead and frost them the day of. They actually taste better the next day—the flavors mellow and deepen overnight. That’s a win for busy parents.
- Crowd-Pleaser: I’ve brought these to school parties, neighborhood gatherings, and family dinners. Every single time, they disappear. Adults love them as much as kids do. There’s something about that deep black color and creamy white frosting that just works.
What makes this recipe different from all the other black velvet recipes out there? It’s the texture. I spent a long time figuring out how to keep the crumb tender while still getting that dramatic black color. The secret is in the ratio of oil to butter and a splash of vinegar that reacts with the baking soda to create a light, airy crumb. It’s not just another version—it’s the version that works every single time, no matter your skill level.
This recipe isn’t just good for Halloween. It’s the kind of cupcake that makes you feel like a superhero in your own kitchen. When you pull a tray of these out of the oven, black and beautiful and smelling like chocolate heaven, you’ll know exactly what I mean. It’s comfort food with a spooky twist—budget-friendly, family-approved, and absolutely unforgettable.
What Ingredients You Will Need
This recipe uses simple, wholesome ingredients to deliver bold flavor and satisfying texture without the fuss. Most of these are pantry staples, which means you probably already have everything you need except maybe the black food coloring. Let’s break it down.
For the Cupcakes
- All-purpose flour, 1 ½ cups (180g) – Standard flour works perfectly here. No need for cake flour or anything fancy. Just scoop and level for accuracy.
- Granulated sugar, 1 cup (200g) – Regular white sugar gives the cupcakes structure and sweetness. Don’t substitute with brown sugar here—it will affect the color.
- Unsweetened cocoa powder, ¼ cup (20g) – I use Hershey’s Special Dark cocoa for a deeper color, but regular unsweetened cocoa works fine. The black food coloring does the heavy lifting.
- Baking soda, 1 teaspoon – This reacts with the vinegar to give the cupcakes lift. Make sure it’s fresh—test it by dropping a little in vinegar; it should fizz immediately.
- Salt, ½ teaspoon – Balances the sweetness and enhances the chocolate flavor. I use fine sea salt for even distribution.
- Vegetable oil, ½ cup (120ml) – Oil keeps the cupcakes moist for days. I prefer canola or avocado oil for their neutral flavor. Don’t use olive oil—it’s too strong.
- Buttermilk, 1 cup (240ml) – Buttermilk adds tanginess and tenderness. If you don’t have it, make a quick version: add 1 tablespoon of lemon juice or white vinegar to a cup of regular milk and let it sit for 5 minutes.
- Large eggs, 2 – Room temperature eggs incorporate better into the batter. Take them out of the fridge 30 minutes before baking.
- White vinegar, 1 teaspoon – This activates the baking soda and helps create that light texture. Don’t skip it—it’s a key player.
- Vanilla extract, 1 teaspoon – Real vanilla makes a difference. I use Nielsen-Massey when I’m feeling fancy, but store brand works just fine.
- Black gel food coloring, 1-2 teaspoons – Gel coloring is much more concentrated than liquid drops. I use Americolor Super Black. Start with 1 teaspoon and add more if needed. Liquid food coloring won’t give you the same deep black color.
For the Cream Cheese Frosting
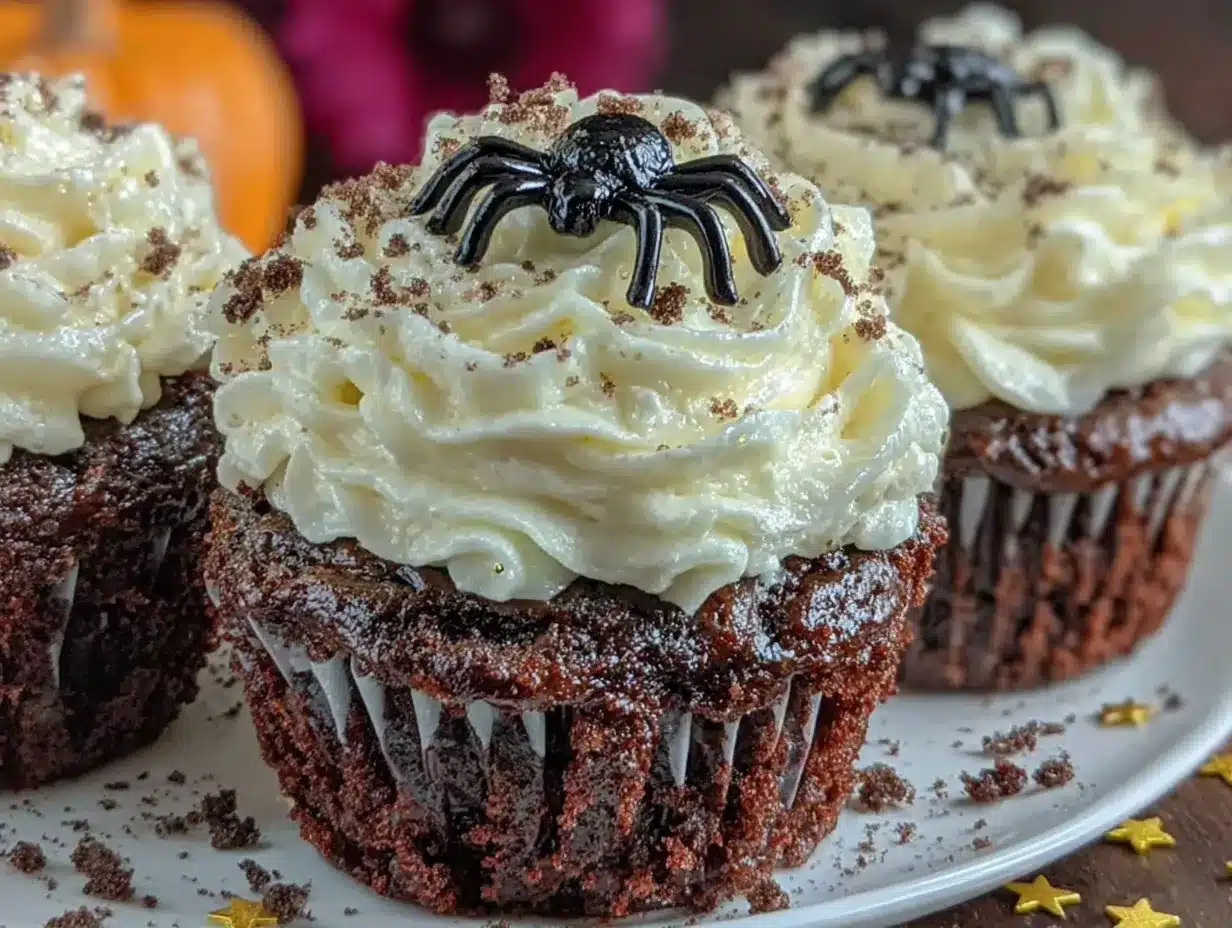
- Cream cheese, 8 oz (226g) – Full-fat cream cheese gives the best flavor and texture. Let it soften to room temperature for smooth mixing. I use Philadelphia brand—it’s consistent.
- Unsalted butter, ½ cup (113g) – Softened butter adds richness and structure to the frosting. Salted butter will make the frosting too salty, so stick with unsalted.
- Powdered sugar, 3-4 cups (360g-480g) – Start with 3 cups and add more for a stiffer frosting. Sift it first to avoid lumps. Trust me on this one—lumpy cream cheese frosting is sad.
- Vanilla extract, 1 teaspoon – Again, real vanilla. It brightens the whole frosting.
- Pinch of salt – Just a tiny pinch to balance the sweetness. Don’t skip it.
For Decoration (Optional but Fun)
- Halloween sprinkles – Any spooky shapes work. I like the little pumpkins and ghosts from Wilton.
- Edible glitter or sanding sugar – Adds a little sparkle. My kids love this part.
- Mini candy eyeballs – These are always a hit with the under-ten crowd.
Equipment Needed
You don’t need a professional bakery setup for these cupcakes. Here’s what you’ll actually use:
- Standard 12-cup muffin tin – I use a dark metal one because it conducts heat well. If yours is light-colored, you might need an extra minute or two of baking time.
- Paper cupcake liners – Black and orange liners are fun for Halloween, but white works too. I like the foil-lined ones because they peel off cleanly.
- Two mixing bowls – One medium, one large. Glass or metal is fine. Avoid plastic bowls for the wet ingredients—they can hold onto odors.
- Whisk and rubber spatula – A whisk for the dry ingredients and a spatula for folding the batter together. A wooden spoon works too, but a spatula is easier.
- Electric hand mixer or stand mixer – For the frosting. You can mix it by hand with a wooden spoon, but your arm will get tired. I use my KitchenAid stand mixer for the frosting and honestly, it’s worth the counter space.
- Cooling rack – Essential for cooling cupcakes evenly. If you don’t have one, a wire oven rack works in a pinch.
- Piping bag and tip – For fancy frosting swirls. I use a Wilton 1M tip for that classic look. If you don’t have a piping bag, a zip-top bag with the corner snipped off works perfectly.
- Measuring cups and spoons – Accurate measurements matter in baking. I use metal measuring cups for dry ingredients and glass ones for liquids.
I’ve made these cupcakes with just a bowl and a whisk before, and they turned out fine. The frosting was a little lumpy, but nobody complained. So don’t stress about equipment—use what you have.
Preparation Method
Let’s get baking. This recipe comes together in about 40 minutes total, and most of that is hands-off oven time. Here’s exactly how I do it.
Step 1: Preheat and Prep
Preheat your oven to 350°F (175°C). Line your muffin tin with 12 paper liners. I like to give the liners a quick spray of non-stick cooking spray on the inside—it helps the cupcakes release cleanly. This is a trick I learned after losing half a cupcake to a stubborn liner.
Step 2: Mix Dry Ingredients
In a medium bowl, whisk together the flour, sugar, cocoa powder, baking soda, and salt. Whisk for about 30 seconds to aerate everything and break up any lumps. Yes, even the cocoa powder can have lumps. I’ve found little cocoa clumps in my batter before, and it’s not the end of the world, but whisking prevents it.
Step 3: Mix Wet Ingredients
In a large bowl, whisk together the vegetable oil, buttermilk, eggs, vinegar, and vanilla extract. Whisk until everything is smooth and combined. The mixture will look a little thin—that’s normal. Now add the black gel food coloring. Start with 1 teaspoon and whisk it in. The batter will turn a dark gray color. If you want a deeper black, add another ½ teaspoon at a time until you’re happy. I usually use about 1 ½ teaspoons for a true black. Remember, the color will darken slightly as the cupcakes bake.
Step 4: Combine Wet and Dry
Pour the dry ingredients into the wet ingredients. Fold gently with a rubber spatula until just combined. Do not overmix—this is where cupcakes go from tender to tough. You want to see a few streaks of flour remaining, then stop. The batter will be thick but pourable.
Step 5: Fill the Liners
Divide the batter evenly among the 12 liners. I use a large cookie scoop for this—it gives me exactly the same amount in each cup. Fill each liner about ⅔ to ¾ full. If you overfill, the cupcakes will dome too much and might spill over. Trust me, I’ve cleaned enough burnt batter off the bottom of my oven to know.
Step 6: Bake
Bake for 18-22 minutes, or until a toothpick inserted into the center comes out clean or with a few moist crumbs. The cupcakes should spring back when lightly touched. My oven runs hot, so I check at 18 minutes. Rotate the pan halfway through if your oven has hot spots. Let the cupcakes cool in the pan for 5 minutes, then transfer them to a wire rack to cool completely. Do not frost warm cupcakes—your frosting will melt into a sad puddle.
Step 7: Make the Frosting
While the cupcakes cool, make the cream cheese frosting. In a large bowl, beat the softened cream cheese and butter together until smooth and creamy, about 2 minutes. Scrape down the sides of the bowl. Add the powdered sugar, one cup at a time, beating on low speed until incorporated. Add the vanilla and salt, then increase speed to medium and beat for 2 minutes until light and fluffy. If the frosting is too soft, refrigerate it for 15 minutes before piping.
Step 8: Frost and Decorate
Once the cupcakes are completely cool, frost them however you like. I use a piping bag with a star tip for those dramatic swirls. Start from the outside and work your way in, then pull up for a peak. Add sprinkles, candy eyes, or edible glitter immediately after frosting, before it sets. These little details make the cupcakes look professional without much effort.
Cooking Tips & Techniques
I’ve made every mistake possible with these cupcakes, so you don’t have to. Here’s what I’ve learned the hard way.
Don’t skip the vinegar. I know it sounds weird in chocolate cake, but the vinegar reacts with the baking soda to create carbon dioxide bubbles that make the cupcakes light and fluffy. Without it, your cupcakes will be dense and flat. I once forgot to add it and ended up with hockey pucks. Never again.
Use gel food coloring, not liquid. Liquid food coloring will thin out your batter and give you a grayish, muddy color instead of a deep black. Gel coloring is concentrated, so a little goes a long way. I buy mine online or at craft stores, and one bottle lasts for months. If you can’t find black gel coloring, you can use a combination of red, blue, and green liquid colors, but it’s trickier to get right.
Room temperature ingredients matter. Cold eggs and cold buttermilk will make your batter lumpy and your cupcakes dense. Take everything out of the fridge 30 minutes before you start. If you forget, place the eggs in a bowl of warm water for 5 minutes and microwave the buttermilk for 10 seconds.
Measure flour correctly. Scooping flour directly from the bag compacts it and can add an extra 20% more flour than you need. Instead, fluff the flour with a spoon, then spoon it into your measuring cup and level it off with a knife. This simple step prevents dry cupcakes.
Cool completely before frosting. I cannot stress this enough. Warm cupcakes will turn your beautiful cream cheese frosting into a greasy mess. If you’re in a hurry, pop the cooled cupcakes in the fridge for 15 minutes to speed things up.
Make ahead strategy. Bake the cupcakes a day ahead and store them in an airtight container at room temperature. Frost them the day you plan to serve them. The unfrosted cupcakes freeze beautifully for up to a month—just thaw them at room temperature before frosting.
Variations & Adaptations
One of the best things about this recipe is how adaptable it is. Here are some ways I’ve customized it over the years.
Gluten-Free Version: Substitute the all-purpose flour with a 1:1 gluten-free baking flour blend. I use Bob’s Red Mill Gluten-Free 1-to-1 Baking Flour. The texture is slightly more delicate, but the flavor is spot on. Add an extra tablespoon of buttermilk to compensate for the drier gluten-free flour.
Dairy-Free Version: Replace the buttermilk with 1 cup of unsweetened almond milk mixed with 1 tablespoon of lemon juice. Use dairy-free cream cheese for the frosting—I like Kite Hill or Violife brands. The texture will be slightly different, but still delicious.
Extra Chocolatey Version: Add ½ cup of mini chocolate chips to the batter before baking. They sink to the bottom a little, creating a fudgy layer. My kids go crazy for this version.
Spider Web Decoration: Pipe a spiral of white frosting on top of each cupcake, then drag a toothpick from the center outward to create a web pattern. It looks complicated but takes about 10 seconds per cupcake. I did this for my daughter’s Halloween party and everyone thought I was a professional baker.
Mini Cupcakes Version: Use a mini muffin tin and bake for 10-12 minutes. This yields about 36 mini cupcakes. Perfect for classroom parties where you need to feed a crowd without going overboard.
Black Velvet Cake Version: Pour the batter into two 8-inch round cake pans and bake for 25-30 minutes. Double the frosting recipe for a layer cake. This makes an impressive Halloween birthday cake.
Serving & Storage Suggestions
These cupcakes are best served at room temperature, which lets the cream cheese frosting soften to that perfect creamy consistency. If you’ve refrigerated them, take them out 30 minutes before serving.
For Halloween parties, arrange them on a black cake stand or a platter lined with orange napkins. Add some fake spider webs or plastic spiders around the base for extra spooky vibes. I once served them on a wooden board with a few mini pumpkins scattered around, and it looked like something from a magazine.
These cupcakes pair beautifully with a cold glass of milk for the kids or a hot cup of coffee for the adults. The bitterness of coffee really brings out the chocolate notes. For a Halloween party, serve them alongside apple cider or a spooky punch made with ginger ale and orange juice.
Storage: Store frosted cupcakes in an airtight container in the refrigerator for up to 5 days. The cream cheese frosting needs refrigeration, but the cupcakes themselves stay moist. If you’re storing unfrosted cupcakes, keep them at room temperature in an airtight container for up to 3 days.
Freezing: Unfrosted cupcakes freeze beautifully. Wrap each one individually in plastic wrap, then place them in a freezer bag. They’ll keep for up to 3 months. Thaw at room temperature for about an hour before frosting. Frosted cupcakes can also be frozen, but the frosting might lose some of its texture. I prefer to freeze unfrosted and frost fresh.
Reheating: If you want that just-baked warmth, pop an unfrosted cupcake in the microwave for 10 seconds. It’s not quite the same as fresh from the oven, but it’s close enough for a quick treat.
Nutritional Information & Benefits
Let’s be real—these are cupcakes, not health food. But I believe in balance, and knowing what’s in your food is part of that. Here’s the estimated nutritional breakdown per cupcake (with frosting):
- Calories: 380-420
- Fat: 18-22g
- Carbohydrates: 50-55g
- Protein: 4-6g
- Sugar: 35-40g
- Sodium: 250-300mg
These numbers will vary based on your specific ingredients and how much frosting you use. I always use full-fat cream cheese because it gives the best flavor, but you can use reduced-fat if you prefer. The texture won’t be quite as rich, but it still works.
On the plus side, these cupcakes contain calcium from the buttermilk and cream cheese, and a small amount of iron from the cocoa powder. The cocoa also contains antioxidants called flavonoids, which are good for heart health. So there’s that.
If you’re watching your sugar intake, you can reduce the sugar in the cupcake batter by ¼ cup without affecting the texture too much. The frosting is harder to adjust because powdered sugar is what gives it structure. A little sprinkle of flaky sea salt on top can help balance the sweetness.
These cupcakes are vegetarian but not vegan. They contain dairy and eggs. For allergen information, they contain wheat, dairy, and eggs. If you need nut-free, check your cocoa powder and food coloring labels—most are nut-free, but it’s always worth verifying.
Conclusion
These Best Black Velvet Halloween Cupcakes are everything I wanted them to be. They’re dramatic enough for a Halloween party, simple enough for a Tuesday afternoon, and budget-friendly enough that you don’t feel guilty making a second batch. The deep black crumb, the creamy white frosting, the way they disappear from the plate in minutes—it’s all worth the effort.
I love these cupcakes because they remind me that good food doesn’t have to be complicated or expensive. A few basic ingredients, a little patience, and you can create something that feels truly special. Whether you’re making them for a school party, a family gathering, or just because it’s October and you want to eat something spooky, these cupcakes deliver.
I’d love to hear how yours turn out. Did you try any of the variations? Did your kids help decorate? Drop a comment below and let me know. And if you’re looking for more budget-friendly Halloween treats, check out our spider web dip recipe or these mummy hot dogs that are always a hit with the little ones. Happy baking, and remember—the darker the cupcake, the sweeter the treat.
Frequently Asked Questions
Can I make these cupcakes without black food coloring?
Yes, but they won’t be black. Without the coloring, you’ll get a dark chocolate cupcake that’s more of a deep brown. The flavor will still be excellent, but the visual drama won’t be there. If you want a naturally black cupcake, you can try using black cocoa powder, which is darker than regular cocoa. It’s more expensive, but it gives a true black color without artificial coloring.
Why did my cupcakes turn out gray instead of black?
This usually happens when you use liquid food coloring instead of gel, or when you don’t use enough coloring. Liquid coloring is too diluted to achieve a true black. Also, the type of cocoa powder matters—natural cocoa is lighter than Dutch-processed or black cocoa. If your batter looks gray before baking, it will look gray after baking. Add more gel coloring until it’s a deep, dark gray, almost black.
Can I use this recipe to make a cake instead of cupcakes?
Absolutely. Pour the batter into two greased and floured 8-inch round cake pans. Bake at 350°F for 25-30 minutes, or until a toothpick comes out clean. Let the cakes cool in the pans for 10 minutes, then turn them out onto a wire rack to cool completely. Double the frosting recipe for a layer cake. This makes an amazing Halloween birthday cake.
How do I get my cream cheese frosting to be thick and pipeable?
Make sure your cream cheese and butter are fully softened but not melted. Beat them together until they’re light and fluffy before adding the powdered sugar. If the frosting is too soft, refrigerate it for 15-20 minutes before piping. You can also add an extra ½ cup of powdered sugar to stiffen it up. Just be careful not to make it too sweet.
Can I freeze these cupcakes with the frosting on?
You can, but the texture of the frosting might change slightly. Place the frosted cupcakes on a baking sheet and freeze until solid, about 1 hour. Then wrap each one individually in plastic wrap and store in a freezer bag for up to 3 months. Thaw in the refrigerator overnight and bring to room temperature before serving. I prefer to freeze unfrosted cupcakes and make fresh frosting when I’m ready to serve them.
Pin This Recipe!
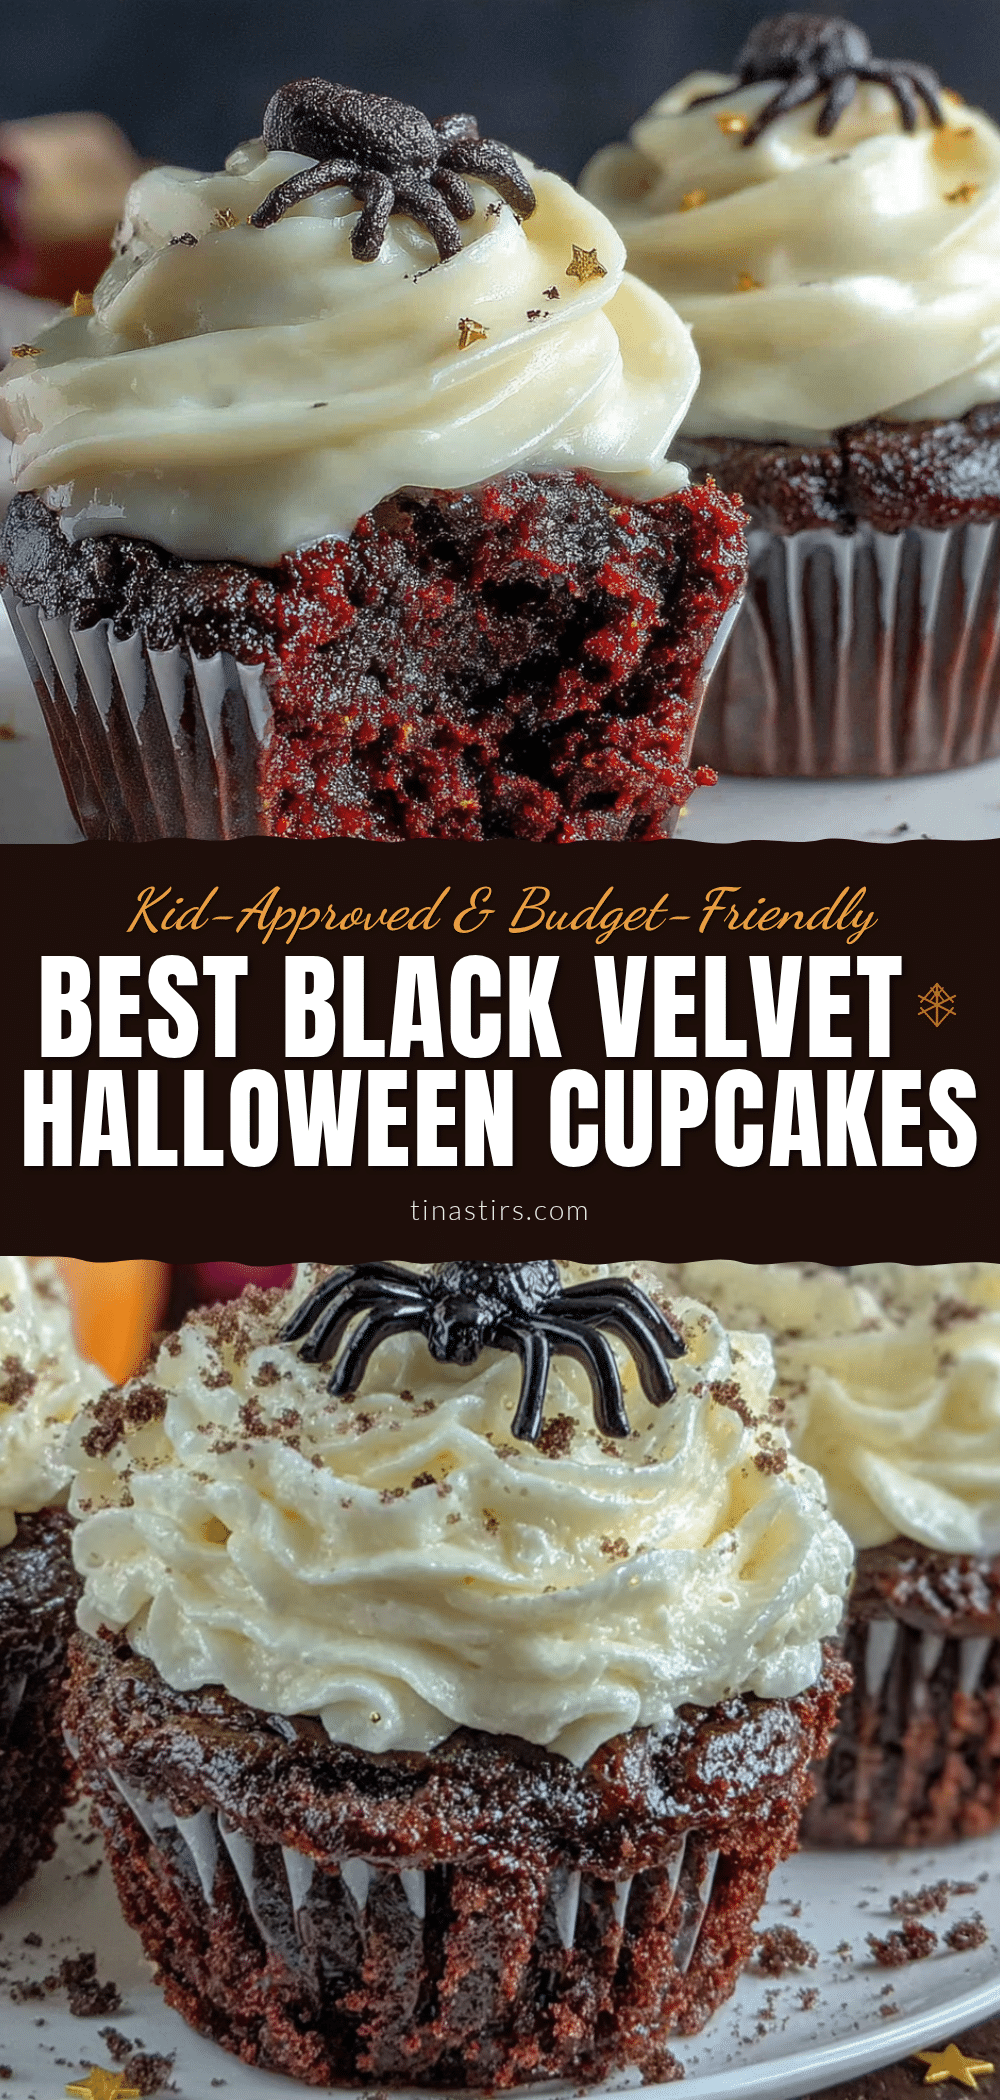
Best Black Velvet Halloween Cupcakes: Easy Budget Recipe
These Best Black Velvet Halloween Cupcakes are dramatic enough for a Halloween party, simple enough for a Tuesday afternoon, and budget-friendly enough that you don’t feel guilty making a second batch. The deep black crumb, the creamy white frosting, and the way they disappear from the plate in minutes make them unforgettable.
- Prep Time: 15 minutes
- Cook Time: 20 minutes
- Total Time: 35 minutes
- Yield: 12 servings
- Category: Dessert
- Cuisine: American
Ingredients
- All-purpose flour, 1 ½ cups (180g)
- Granulated sugar, 1 cup (200g)
- Unsweetened cocoa powder, ¼ cup (20g)
- Baking soda, 1 teaspoon
- Salt, ½ teaspoon
- Vegetable oil, ½ cup (120ml)
- Buttermilk, 1 cup (240ml)
- Large eggs, 2
- White vinegar, 1 teaspoon
- Vanilla extract, 1 teaspoon
- Black gel food coloring, 1-2 teaspoons
- Cream cheese, 8 oz (226g)
- Unsalted butter, ½ cup (113g)
- Powdered sugar, 3-4 cups (360g-480g)
- Vanilla extract, 1 teaspoon (for frosting)
- Pinch of salt (for frosting)
- Halloween sprinkles (optional)
- Edible glitter or sanding sugar (optional)
- Mini candy eyeballs (optional)
Instructions
- Preheat your oven to 350°F (175°C). Line your muffin tin with 12 paper liners. Optionally, spray the inside of the liners with non-stick cooking spray.
- In a medium bowl, whisk together the flour, sugar, cocoa powder, baking soda, and salt for about 30 seconds to aerate and break up lumps.
- In a large bowl, whisk together the vegetable oil, buttermilk, eggs, vinegar, and vanilla extract until smooth. Add black gel food coloring, starting with 1 teaspoon, and whisk until the batter is a dark gray color. Add more coloring if desired (up to 1 ½ teaspoons for true black).
- Pour the dry ingredients into the wet ingredients. Fold gently with a rubber spatula until just combined. Do not overmix; a few streaks of flour may remain.
- Divide the batter evenly among the 12 liners, filling each about ⅔ to ¾ full.
- Bake for 18-22 minutes, or until a toothpick inserted into the center comes out clean or with a few moist crumbs. Rotate the pan halfway through if needed. Let cool in the pan for 5 minutes, then transfer to a wire rack to cool completely.
- While the cupcakes cool, make the cream cheese frosting: In a large bowl, beat the softened cream cheese and butter together until smooth and creamy, about 2 minutes. Add powdered sugar, one cup at a time, beating on low speed. Add vanilla and a pinch of salt, then beat on medium speed for 2 minutes until light and fluffy. If too soft, refrigerate for 15 minutes before piping.
- Once cupcakes are completely cool, frost them using a piping bag with a star tip or a zip-top bag with the corner snipped off. Add sprinkles, candy eyes, or edible glitter immediately after frosting.
Notes
Don’t skip the vinegar; it reacts with baking soda for a light texture. Use gel food coloring, not liquid, for a deep black color. Room temperature ingredients ensure a smooth batter. Measure flour correctly by spooning and leveling. Cool cupcakes completely before frosting to prevent melting. Make ahead: bake cupcakes a day ahead and store in an airtight container at room temperature; frost the day of serving. Unfrosted cupcakes freeze well for up to 3 months.
Nutrition
- Serving Size: 1 cupcake
- Calories: 400
- Sugar: 38
- Sodium: 275
- Fat: 20
- Saturated Fat: 8
- Carbohydrates: 52
- Fiber: 2
- Protein: 5
Keywords: black velvet cupcakes, Halloween cupcakes, budget recipe, cream cheese frosting, easy cupcakes, spooky desserts


