Love this? Save it for later!
Share the inspiration with your friends
This was supposed to be a simple, rustic sourdough bread. I had the starter bubbling away on the counter, the flour measured, and a whole afternoon stretched out in front of me. But somewhere between feeding the starter and realizing I was out of all-purpose flour—honestly, who does that?—the plan fell apart. I grabbed the whole wheat flour, the kitchen scale decided to die, and I was already running late for a phone call with my sister. What came out of the oven was a dense, flat, slightly burnt disc that looked nothing like the beautiful boule I had in my head. I was so annoyed I almost tossed it in the compost bin.
But then I got a whiff of that nutty, toasty smell. It wasn’t the bread I wanted, but the aroma was incredible. I let it cool, cut off the burnt bottom, and tasted a piece. It was chewy, deeply flavorful, and absolutely perfect for something else. I shoved it in a bag and stuck it in the freezer, muttering about “future experiments.”
A few weeks later, Thanksgiving planning was in full swing, and I was staring at my freezer, wondering what to do with that sad, dense loaf. The classic stuffing recipe felt too predictable. The idea of brown butter and sage popped into my head—maybe you’ve been there, just staring at ingredients until a lightbulb goes off. I grabbed the sourdough, browned a whole stick of butter, and started pulling leaves off the sage plant on my windowsill. That first bite of the finished stuffing was a total shock. The nutty bread, the rich, caramelized butter, the earthy sage—it was better than anything I had planned. That failed loaf of bread became my favorite thing. Now, I make this best brown butter sage sourdough stuffing on purpose, and it’s the one dish my family asks for all year long.
Why You’ll Love This Recipe
Let me tell you, this isn’t just another stuffing recipe you’ll find online. I’ve tested this one about six times, tweaking the liquid ratio and the amount of sage until it was just right. It’s the kind of recipe that makes you feel like a total pro, even if you’ve never made stuffing from scratch before.
- Rich, Nutty Flavor: The brown butter is the real star here. It adds a deep, almost caramel-like flavor that you just can’t get from regular melted butter. It’s a game-changer for a simple side dish.
- Perfect Texture Every Time: Using sourdough gives you a sturdy bread that doesn’t turn into a mushy mess. The crusty edges stay a little chewy, while the inside soaks up all that savory broth and becomes incredibly tender.
- Simple Ingredients, Big Impact: You don’t need a laundry list of weird ingredients. Onion, celery, fresh sage, good stock, and that glorious brown butter are all it takes. You probably have most of this in your kitchen right now.
- Make-Ahead Friendly: This is a lifesaver for holidays. You can assemble the whole dish the day before and just pop it in the oven when you’re ready. It actually gets better as the flavors meld overnight.
- Crowd-Pleaser: I’ve brought this to Friendsgivings and family dinners, and it’s always the first dish to disappear. People who “don’t like stuffing” ask for the recipe. It’s that good.
This isn’t just another version of a classic—it’s the version. The combination of that tangy sourdough with the sweet, nutty brown butter and the earthy sage is a flavor profile that feels both familiar and totally new. It’s comfort food, but it’s comfort food that’s been reimagined to be just a little bit more special. It’s the kind of dish that makes you close your eyes after the first bite, and honestly, that’s the best compliment a recipe can get.
What Ingredients You Will Need
This best brown butter sage sourdough stuffing uses simple, wholesome ingredients to deliver that bold, savory flavor and satisfying texture. I’ve kept the list short on purpose, because when you let a few good ingredients shine, you don’t need a lot of fuss.
- For the Bread:
- 1 large loaf (about 1 lb / 450g) sourdough bread, cut into 1-inch cubes: A day-old or slightly stale loaf is perfect. It holds its shape better than fresh, soft bread. If your bread is super fresh, just spread the cubes on a baking sheet and let them dry out for a few hours. I prefer a rustic, crusty loaf from a local bakery for the best chew.
- 3 tablespoons (42g) unsalted butter, melted: This helps the bread cubes toast up beautifully in the oven, giving them that golden, crunchy edge.
- For the Brown Butter and Aromatics:
- 1/2 cup (113g / 1 stick) unsalted butter: This is for the brown butter. Use a good quality butter here, as it’s the main flavor driver. I like Kerrygold for its richness, but any unsalted butter works.
- 1 large yellow onion (about 300g), finely chopped: The onion provides a savory, sweet base. Don’t rush the cooking; you want it soft and translucent, not browned.
- 3-4 celery ribs (about 150g), finely chopped: Celery adds that classic stuffing crunch and fresh, vegetal flavor. Make sure to chop it into small, even pieces.
- 1/4 cup (about 10g) fresh sage leaves, finely chopped: Fresh sage is non-negotiable here. Dried sage is a completely different, more medicinal flavor. You want that fragrant, earthy punch that only fresh leaves can give. I usually buy a whole bunch and use the rest to garnish the dish.
- 2 cloves garlic, minced: Just a little garlic adds depth without overpowering the sage and brown butter.
- For the Liquid and Binding:
- 2 1/2 cups (590ml) low-sodium chicken or vegetable stock: The liquid is what makes the stuffing moist and tender. I recommend using a good quality stock, as the flavor really comes through. Low-sodium is key so you can control the salt level.
- 1 large egg, lightly beaten: The egg acts as a binder, helping the stuffing hold together in a beautiful, sliceable dish. If you’re vegan, you can use a flax egg (1 tbsp ground flaxseed mixed with 3 tbsp water).
- Salt and freshly ground black pepper, to taste: Don’t be shy with the seasoning! I usually start with 1 teaspoon of salt and 1/2 teaspoon of pepper, then adjust at the end.
Ingredient Selection Tip: For the best texture, look for a sourdough loaf that is firm and has a good crust. Avoid soft, airy supermarket sourdough, as it can become gummy. If you can’t find fresh sage, you can substitute 1 tablespoon of dried sage, but the flavor will be less bright.
Equipment Needed
You don’t need a fancy kitchen to pull off this best brown butter sage sourdough stuffing. Here’s what you’ll need to get the job done.
- Large Baking Sheet: For toasting the bread cubes. A rimmed baking sheet is best to prevent them from rolling off.
- Large Skillet or Sauté Pan: For browning the butter and cooking the aromatics. A light-colored pan (like stainless steel) is actually better for browning butter because you can see the color change easily. I learned that after burning a batch in my dark non-stick pan!
- 9×13-inch Baking Dish: This is the perfect size for this recipe. A 3-quart casserole dish works too.
- Large Mixing Bowl: To combine all the ingredients together.
- Whisk: For beating the egg and mixing the stock.
- Sharp Knife and Cutting Board: For prepping all your vegetables and bread.
If you don’t have a light-colored pan for the brown butter, just keep a very close eye on it. The butter will go from perfectly browned to burnt in about 30 seconds. A good tip is to swirl the pan constantly and smell the butter—it should smell nutty and toasty, not acrid.
Preparation Method
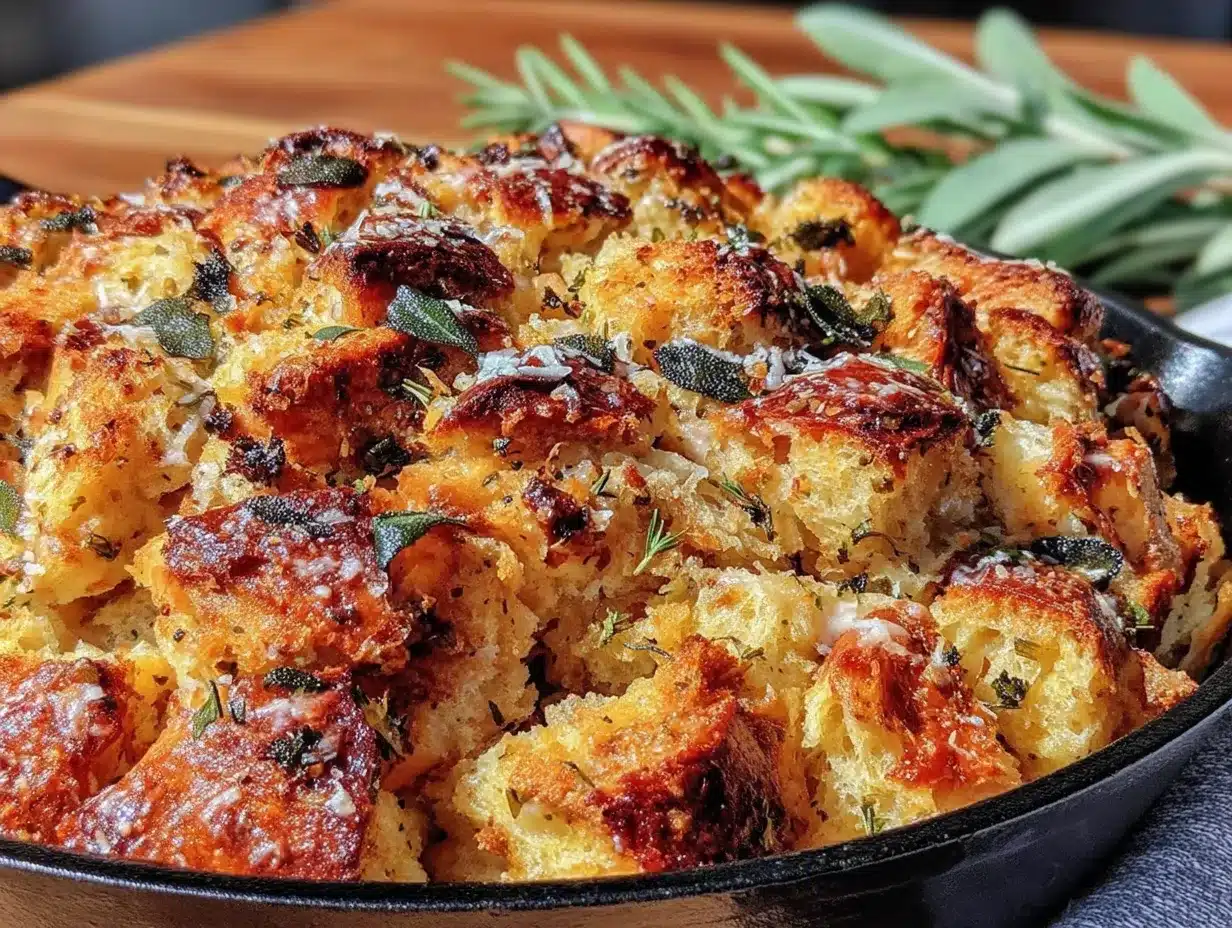
Making this best brown butter sage sourdough stuffing is a straightforward process, but a few key steps make all the difference. Let’s break it down step-by-step.
-
Preheat and Prep the Bread: Preheat your oven to 375°F (190°C). While it’s heating, cut your sourdough loaf into 1-inch cubes. You should have about 10-12 cups of cubes. Place them on a large baking sheet. Drizzle with the 3 tablespoons of melted butter and a pinch of salt. Toss to coat evenly. Bake for 15-20 minutes, stirring halfway through, until the cubes are dry, lightly golden, and feel slightly crunchy on the outside. They will continue to dry out as they cool. This step is crucial to prevent mushy stuffing!
-
Make the Brown Butter: In a large skillet (remember, light-colored is best!), melt the 1/2 cup of butter over medium heat. Once melted, the butter will start to foam and sputter. Keep swirling the pan gently and constantly. After 3-5 minutes, the foaming will subside, and you’ll see little brown specks forming at the bottom of the pan. The butter will smell intensely nutty and toasty. As soon as it turns a light amber color and smells amazing, remove it from the heat immediately. Pour it into a heat-safe bowl to stop the cooking process. Don’t walk away from this! I burned my first batch while answering a text message.
-
Sauté the Aromatics: In the same skillet (no need to wash it), add a tablespoon of olive oil or a pat of fresh butter over medium heat. Add the chopped onion and celery. Cook for 7-8 minutes, stirring occasionally, until the vegetables are soft and translucent. Add the minced garlic and cook for another minute until fragrant. Stir in the chopped fresh sage and cook for 30 seconds, just until it becomes fragrant. Remove from heat.
-
Combine the Base: In your large mixing bowl, whisk together the chicken stock, the beaten egg, 1 teaspoon of salt, and 1/2 teaspoon of black pepper. Pour in the reserved brown butter and whisk again. Add the toasted bread cubes and the cooked onion-celery-sage mixture to the bowl.
-
Gently Combine: Using a large spatula or your clean hands (I find hands work best!), gently fold everything together. Be careful not to crush the bread cubes. You want every piece of bread to be evenly coated in the liquid mixture. Let the mixture sit for 10-15 minutes. This allows the bread to absorb all that delicious liquid. You should see that the liquid is mostly absorbed and the mixture looks moist but not soupy.
-
Bake the Stuffing: Preheat your oven to 375°F (190°C) again if it’s not already. Transfer the stuffing mixture to your greased 9×13-inch baking dish. Spread it into an even layer. If you like a crispier top (and who doesn’t?), dot the top with a few small pats of butter. Cover the dish tightly with aluminum foil. Bake for 25 minutes. Then, remove the foil and bake for another 20-25 minutes, until the top is golden brown and crispy, and the stuffing is heated through. Let it rest for 5-10 minutes before serving. This helps it set and makes it easier to serve.
Cooking Tips & Techniques
After making this best brown butter sage sourdough stuffing more times than I can count, I’ve picked up a few tricks that make the process smoother and the final dish even better. Let’s talk about some of them.
The Secret to Perfect Brown Butter: The biggest mistake people make is rushing the brown butter. You want to use medium heat, not high. And you must, must, must watch it. Once you see those little brown specks appear, it’s done in seconds. I like to swirl the pan and sniff it—the nutty aroma is your signal. If you’re unsure, it’s better to take it off the heat a little early. Burnt brown butter tastes bitter and will ruin the dish.
Don’t Over-Soak the Bread: It’s tempting to pour all the liquid over the bread and mix it right away. But letting it sit for 10-15 minutes after mixing is the real trick. This gives the bread time to absorb the liquid without getting crushed. If you stir it too aggressively while it’s wet, you’ll end up with a paste. Gentle is the word of the day.
Toasting the Bread is Non-Negotiable: I know it’s an extra step, but please don’t skip it. Toasting the bread cubes dries them out, which means they can absorb more of that flavorful stock and brown butter without turning into mush. It also gives the final stuffing a much better texture—crunchy on top and soft inside. Trust me on this one.
Make it Ahead of Time: This is my favorite tip for holiday cooking. You can assemble the stuffing completely (steps 1-5), but instead of baking it, cover it and store it in the fridge for up to 24 hours. When you’re ready to bake, you might need to add 10-15 minutes to the covered baking time since it’s starting from cold. The flavors actually meld together beautifully overnight!
Variations & Adaptations
One of the best things about this best brown butter sage sourdough stuffing is how easily it adapts to different tastes and dietary needs. Here are a few of my favorite ways to change it up.
- Make it Vegetarian/Vegan: It’s super easy! Just use a good quality vegetable stock instead of chicken stock. For a vegan version, skip the egg and use a flax egg (1 tablespoon ground flaxseed mixed with 3 tablespoons water, let it sit for 5 minutes to gel). Use vegan butter for the brown butter and for toasting the bread. It works perfectly.
- Add Some Meat: If you want a heartier stuffing, cook 1/2 pound of Italian sausage (casings removed) or chopped bacon in the skillet before you cook the onions. Remove the cooked meat, leaving the fat in the pan, and then sauté your aromatics. Crumble the meat back in when you combine everything. It adds a wonderful savory depth.
- Change the Herbs: Not a fan of sage? No problem! You can swap the sage for fresh thyme, rosemary, or a mix of both. I’ve made a version with fresh thyme and a little lemon zest, and it was fantastic with roast chicken. You can also add a handful of dried cranberries or chopped dried apricots for a sweet and savory twist.
- Add Some Crunch: For a little extra texture, fold in 1/2 cup of toasted chopped pecans or walnuts when you combine the ingredients. The nuttiness pairs beautifully with the brown butter and sage. Just make sure to toast the nuts first to bring out their flavor.
- Make it Gluten-Free: This is a fantastic recipe for gluten-free diets. Simply use a good quality gluten-free sourdough bread. I’ve found that a crusty, artisan-style gluten-free loaf works best. The rest of the recipe remains the same—just make sure your stock is certified gluten-free if needed.
Serving & Storage Suggestions
This best brown butter sage sourdough stuffing is best served warm, right after that final golden-brown bake. Let it rest for about 5-10 minutes after it comes out of the oven. This helps it set, making it easier to scoop out perfect, neat portions. I love serving it alongside a roast turkey or chicken, but honestly, it’s so good it can stand alone as a main course with a simple green salad on the side.
For a beautiful presentation, garnish the top with a few fresh sage leaves and a sprinkle of flaky sea salt right before serving. The salt adds a lovely little crunch and enhances all the other flavors. It also pairs wonderfully with a dollop of cranberry sauce or a drizzle of turkey gravy.
Storing Leftovers: If you have any leftovers (which is rare in my house!), let the stuffing cool completely. Then, transfer it to an airtight container and store it in the refrigerator for up to 4 days. The flavors actually get even better as they meld together overnight.
Reheating: The best way to reheat stuffing is in the oven. Preheat your oven to 350°F (175°C). Place the stuffing in an oven-safe dish, add a splash of chicken stock or water to moisten it, and cover with foil. Bake for 15-20 minutes, or until heated through. You can also reheat it in the microwave in 30-second bursts, but it won’t be as crispy. I actually love eating cold stuffing straight from the fridge the next day—don’t judge me.
Freezing: This stuffing freezes beautifully! You can freeze it either before or after baking. To freeze unbaked, assemble the stuffing, but don’t bake it. Transfer it to a freezer-safe dish, wrap it tightly in plastic wrap and then a layer of foil, and freeze for up to 3 months. To bake from frozen, thaw it in the refrigerator overnight, then bake as directed. If you’re freezing baked leftovers, let them cool completely, then store them in a freezer-safe bag or container. Reheat from frozen in the oven.
Nutritional Information & Benefits
While this best brown butter sage sourdough stuffing is definitely a comfort food, it does have some redeeming qualities! The nutritional information below is an estimate for one serving (about 1 cup) and will vary based on the specific ingredients you use.
| Nutrient | Amount Per Serving (approx.) |
|---|---|
| Calories | 320-380 |
| Total Fat | 18-22g |
| Saturated Fat | 10-12g |
| Carbohydrates | 35-40g |
| Fiber | 2-4g |
| Protein | 8-10g |
| Sodium | 500-700mg (varies with stock) |
The sourdough bread is a great source of complex carbohydrates and provides a little bit of fiber, especially if you use a whole wheat version. The butter and olive oil provide healthy fats, and the onions and celery offer a small amount of vitamins and antioxidants. The fresh sage is not just for flavor; it’s a good source of Vitamin K and has anti-inflammatory properties. It’s a treat, not a health food, but it’s made with real, whole ingredients. I feel good about serving this to my family because I know exactly what’s in it—no weird preservatives or mystery additives.
Conclusion
This best brown butter sage sourdough stuffing is more than just a side dish—it’s the kind of recipe that turns a simple meal into a memorable one. It started as a happy accident born from a failed loaf of bread, and now it’s a staple on my holiday table and a go-to for cozy Sunday dinners. The nutty brown butter, the earthy sage, and that perfect sourdough chew come together in a way that feels both rustic and special.
I really hope you give this recipe a try. Don’t be afraid to make it your own—add some sausage, throw in some cranberries, or keep it simple and classic. That’s the beauty of a good stuffing recipe. It’s forgiving, it’s delicious, and it always brings people together.
If you make it, I’d love to hear how it turned out! Leave a comment below and tell me about your own happy accidents in the kitchen. And if you loved it, please share this post with a friend who needs a new stuffing recipe in their life. Happy cooking!
Frequently Asked Questions
Can I use regular bread instead of sourdough?
Absolutely! While sourdough gives the stuffing a wonderful tangy flavor and a sturdy texture that holds up well, you can definitely use a good quality rustic white bread or a French boule. Just make sure it’s a day or two old and has a firm crust. Avoid using soft sandwich bread, as it will turn into a mushy paste.
How do I know when the brown butter is ready?
This is the most common question I get. Watch for the butter to stop foaming and start forming little brown specks at the bottom of the pan. The color will change from a bright yellow to a warm, golden amber. The most important clue is the smell—it should smell intensely nutty and toasty, almost like toasted hazelnuts. The second you smell that and see the brown specks, pull it off the heat.
Can I make this stuffing ahead of time?
Yes, and I highly recommend it! You can assemble the entire stuffing (up to the point of baking) and store it in the refrigerator for up to 24 hours. Just make sure it’s in a tightly covered dish. When you’re ready to bake, you may need to add an extra 10-15 minutes to the covered baking time, as the dish will be cold.
How do I keep my stuffing from getting too dry or too soggy?
The key is the bread-to-liquid ratio and the toasting step. Toasting the bread cubes dries them out so they can absorb the liquid without getting mushy. The recipe calls for 2 1/2 cups of stock, which is a good starting point. If you prefer a drier stuffing, use 2 cups. If you like it really moist, use 3 cups. Always let the mixture sit for 10-15 minutes after combining to let the bread absorb the liquid before baking.
Can I freeze this stuffing?
Yes, you can freeze it either before or after baking. To freeze unbaked, assemble the stuffing in a freezer-safe dish, wrap it tightly in plastic wrap and foil, and freeze for up to 3 months. Thaw in the fridge overnight before baking. To freeze baked leftovers, let them cool completely, then store them in a freezer bag or airtight container for up to 3 months. Reheat from frozen in the oven at 350°F until warmed through.
Pin This Recipe!
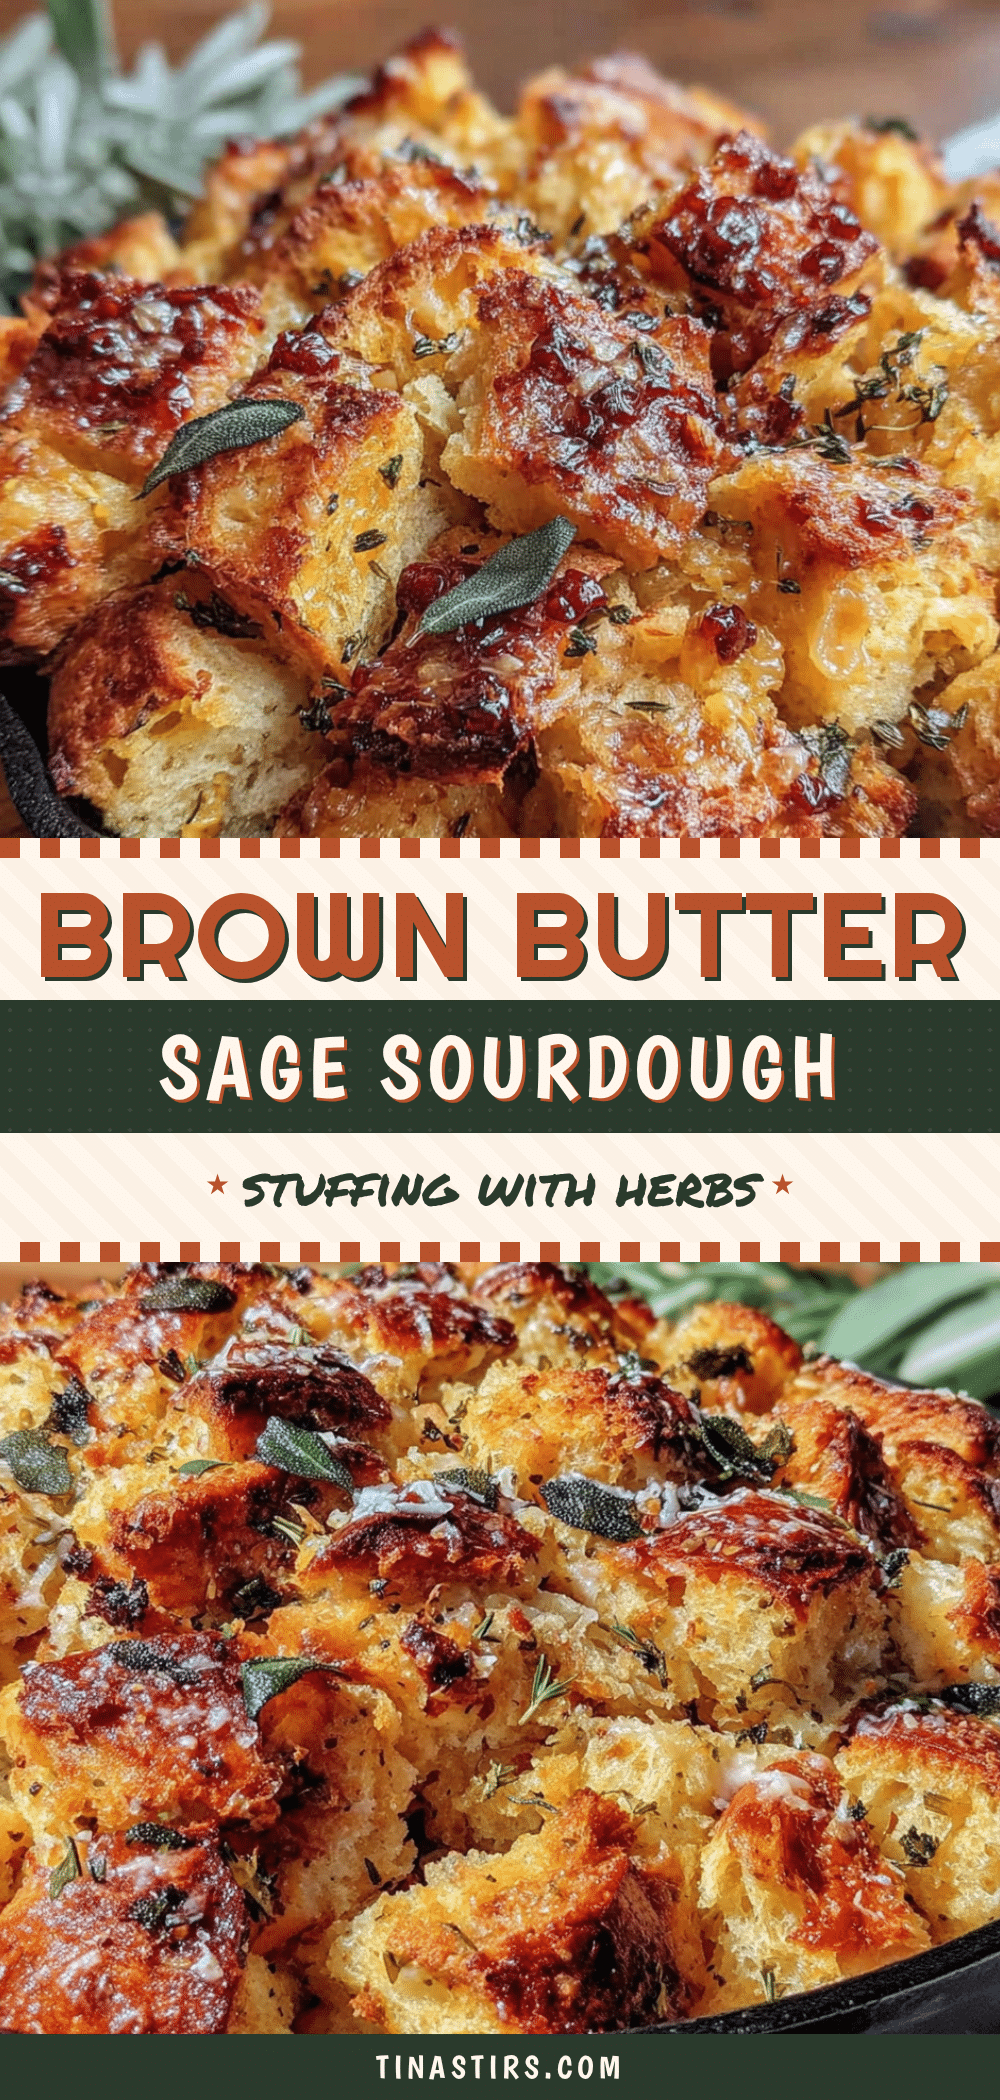
Best Brown Butter Sage Stuffing: Easy Homemade Recipe

This brown butter sage sourdough stuffing is a game-changer for your holiday table. Nutty brown butter, earthy fresh sage, and tangy sourdough come together for the most flavorful, perfectly textured stuffing you’ll ever make.
- Prep Time: 20 minutes
- Cook Time: 45 minutes
- Total Time: 1 hour 5 minutes
- Yield: 8 servings 1x
- Category: Side Dish
- Cuisine: American
Ingredients
- 1 large loaf (about 1 lb / 450g) sourdough bread, cut into 1-inch cubes
- 3 tablespoons (42g) unsalted butter, melted
- 1/2 cup (113g / 1 stick) unsalted butter
- 1 large yellow onion (about 300g), finely chopped
- 3–4 celery ribs (about 150g), finely chopped
- 1/4 cup (about 10g) fresh sage leaves, finely chopped
- 2 cloves garlic, minced
- 2 1/2 cups (590ml) low-sodium chicken or vegetable stock
- 1 large egg, lightly beaten
- Salt and freshly ground black pepper, to taste
Instructions
- Preheat oven to 375°F (190°C). Cut sourdough into 1-inch cubes (about 10-12 cups). Place on a large baking sheet, drizzle with 3 tablespoons melted butter and a pinch of salt. Toss to coat. Bake for 15-20 minutes, stirring halfway, until dry and lightly golden.
- In a large skillet (preferably light-colored), melt 1/2 cup butter over medium heat. Swirl constantly. After 3-5 minutes, the butter will foam, then subside, and brown specks will form. When it turns light amber and smells nutty, remove from heat immediately and pour into a heat-safe bowl.
- In the same skillet, add a tablespoon of olive oil or butter over medium heat. Add chopped onion and celery. Cook 7-8 minutes until soft and translucent. Add minced garlic and cook 1 minute. Stir in chopped fresh sage and cook 30 seconds until fragrant. Remove from heat.
- In a large mixing bowl, whisk together chicken stock, beaten egg, 1 teaspoon salt, and 1/2 teaspoon black pepper. Pour in reserved brown butter and whisk again.
- Add toasted bread cubes and cooked onion-celery-sage mixture to the bowl. Gently fold together with a spatula or clean hands until evenly coated. Let sit for 10-15 minutes to allow bread to absorb liquid.
- Preheat oven to 375°F (190°C). Transfer stuffing to a greased 9×13-inch baking dish. Spread evenly. Dot top with small pats of butter if desired. Cover tightly with foil. Bake for 25 minutes. Remove foil and bake another 20-25 minutes until top is golden brown and crispy. Let rest 5-10 minutes before serving.
Notes
For best texture, use day-old or slightly stale sourdough. Toasting the bread cubes is essential to prevent mushy stuffing. Watch brown butter carefully—it can burn in seconds. The stuffing can be assembled up to 24 hours ahead and refrigerated; add 10-15 minutes to covered baking time if starting from cold. For a vegan version, use vegetable stock, a flax egg (1 tbsp ground flaxseed + 3 tbsp water), and vegan butter.
Nutrition
- Serving Size: 1 cup
- Calories: 320380
- Sugar: 35
- Sodium: 500700
- Fat: 1822
- Saturated Fat: 1012
- Carbohydrates: 3540
- Fiber: 24
- Protein: 810
Keywords: brown butter sage stuffing, sourdough stuffing, Thanksgiving stuffing, homemade stuffing, best stuffing recipe, holiday side dish


