Love this? Save it for later!
Share the inspiration with your friends
The power went out halfway through my daughter’s third birthday party prep. I’m not kidding. There I was, standing in a suddenly dark kitchen with a half-baked cake, a bowl of buttercream that was starting to slide, and fourteen preschoolers due to arrive in about an hour. The backup plan? Something I threw together in a panic using ingredients I could grab without opening the refrigerator too many times. Those little cups I made that day—layers of crushed cookies, creamy filling, and rainbow sprinkles—became the hit of the party. Every parent asked for the recipe, and honestly, I couldn’t even remember exactly what I had done.
Over the next few months, I kept making versions of those treat cups for school parties, playdates, and neighborhood gatherings. The problem was, every time I tried to write the recipe down, it changed. One batch would be too sweet. Another would fall apart. And then I realized the real magic was keeping it simple—and keeping it safe. So many birthday treats are loaded with nuts, and I have friends whose kids can’t even sit at the same table as a peanut butter cookie. That’s when these Easy Nut-Free Funfetti Birthday Treat Cups really came together.
After maybe a dozen tries—some messy, some delicious, a few that ended up in the trash—I finally got it. These little cups are everything a birthday treat should be: colorful, creamy, crunchy, and completely nut-free. They come together in about twenty minutes, and you don’t even need to turn on the oven. I mean, who knew a power outage could lead to something this good? If you’ve ever needed a last-minute birthday dessert that everyone can actually eat, you know that feeling when you find the one. This is it.
Why You’ll Love This Recipe
Let me tell you why these treat cups have become my go-to for every celebration. First off, they are ridiculously easy. We are talking about twenty minutes of active work, and then you just let the fridge do its thing. No baking, no complicated techniques, no fancy equipment. Just mix, layer, and chill.
- Quick & Easy: Comes together in under 25 minutes, perfect for those “I forgot it was my turn to bring treats” moments. We’ve all been there.
- Simple Ingredients: You can find everything at any grocery store. No specialty shops, no weird online orders. Just basic baking staples.
- Perfect for Parties: These are great for birthday parties, classroom celebrations, potlucks, or holiday gatherings. They travel well and look impressive without any effort.
- Crowd-Pleaser: Kids absolutely go crazy for them, and adults sneak extras when nobody is looking. I’ve seen it happen.
- Completely Nut-Free: Every single ingredient is safe for nut-free households. No hidden cross-contamination, no label-checking stress. Just peace of mind.
- Unbelievably Delicious: The combination of crunchy cookie base, creamy filling, and those happy little sprinkles is pure comfort food. It’s the kind of dessert that makes you close your eyes after the first bite.
What makes this recipe different from every other funfetti dessert out there? It’s the texture. Most funfetti treats are either all cake or all frosting. These cups have layers—a sturdy base, a silky middle, and a crunchy top. Each bite gives you something different. Plus, I tested this recipe with six different brands of cream cheese to find the one that gives the smoothest, most stable filling. That’s the kind of nerdery I bring to the table.
Honestly, this recipe is comfort food reimagined. It is faster, safer, and somehow even more satisfying than the complicated birthday desserts we all grew up with. Perfect for impressing other parents without stressing yourself out.
What Ingredients You Will Need
This recipe uses simple, wholesome ingredients to deliver that birthday-party flavor without any of the fuss. Most of these are probably in your kitchen right now, which is exactly how I like it.
- Golden Oreos (or any nut-free vanilla sandwich cookies): You will need about 24 cookies. I prefer Golden Oreos because they are certified nut-free and give that classic vanilla flavor. The regular chocolate ones work too, but they change the color of the base. Crush them finely for the crust layer, and leave a few chunkier pieces for the topping.
- Unsalted butter, melted: Three tablespoons of melted butter binds the cookie crumbs together. Use unsalted so you can control the salt level. If you only have salted butter, just skip adding any extra salt to the recipe.
- Cream cheese, softened: One 8-ounce block of full-fat cream cheese is the key to that luscious, stable filling. I recommend Philadelphia brand for the smoothest results. Let it sit on the counter for about 30 minutes before you start—cold cream cheese makes lumpy filling, and nobody wants that.
- Powdered sugar: One cup gives the filling just the right sweetness without being grainy. Sift it if you are feeling fancy, but honestly, I rarely bother and it turns out fine.
- Vanilla extract: Two teaspoons of pure vanilla extract, not the imitation stuff. The flavor difference is noticeable, and since this recipe has so few ingredients, you want each one to shine.
- Heavy cream: Two tablespoons of heavy cream lighten the filling and make it scoopable. You can use whole milk in a pinch, but heavy cream gives that extra richness.
- Rainbow sprinkles (jimmies, not nonpareils): Half a cup of sprinkles folded into the filling, plus more for topping. Jimmies are the long, cylindrical sprinkles that hold their color better. Nonpareils (the tiny round ones) tend to bleed and turn your filling gray. Learn from my mistakes on this one.
- Whipped topping (optional but recommended): One cup of thawed whipped topping for the top layer. I use Cool Whip because it is stable and nut-free. If you want to make your own whipped cream, go for it, just know it won’t hold up as long in the fridge.
- Mini muffin liners: These are not technically an ingredient, but you need them. The foil ones work best because they hold their shape. I learned this after a batch of paper liners completely collapsed.
One ingredient selection tip: always check the label on your sprinkles. Some brands are processed in facilities that also handle nuts. I use Betty Crocker or Wilton sprinkles because they clearly label their nut-free status. It takes two seconds to check and saves a world of worry.
Equipment Needed
You do not need a professional kitchen for these treat cups. In fact, you probably own everything already.
- Mixing bowls: One medium bowl for the crust, one large bowl for the filling. Glass or stainless steel works best.
- Electric hand mixer or stand mixer: You can mix the filling by hand if you have strong arms, but a mixer makes it silky smooth in about two minutes. I use my hand mixer because it is easier to clean.
- Rolling pin or food processor: For crushing the cookies. A rolling pin and a zip-top bag work perfectly. A food processor is faster but creates more even crumbs. I have used both, and honestly, the rolling pin method is more satisfying—there is something therapeutic about smashing cookies.
- Mini muffin pan: This holds the liners in place while you assemble. If you do not have one, you can use a regular muffin pan or even small ramekins.
- Small cookie scoop or spoon: For evenly distributing the crust and filling. A #60 cookie scoop (about one tablespoon) is perfect for these cups.
- Spatula: A rubber spatula for folding in the sprinkles without crushing them.
- Refrigerator: This is the most important piece of equipment. The cups need at least two hours to set, and overnight is even better.
Budget-friendly option: skip the food processor and use the rolling pin method. Skip the cookie scoop and use a regular spoon. The cups will still taste exactly the same.
Preparation Method
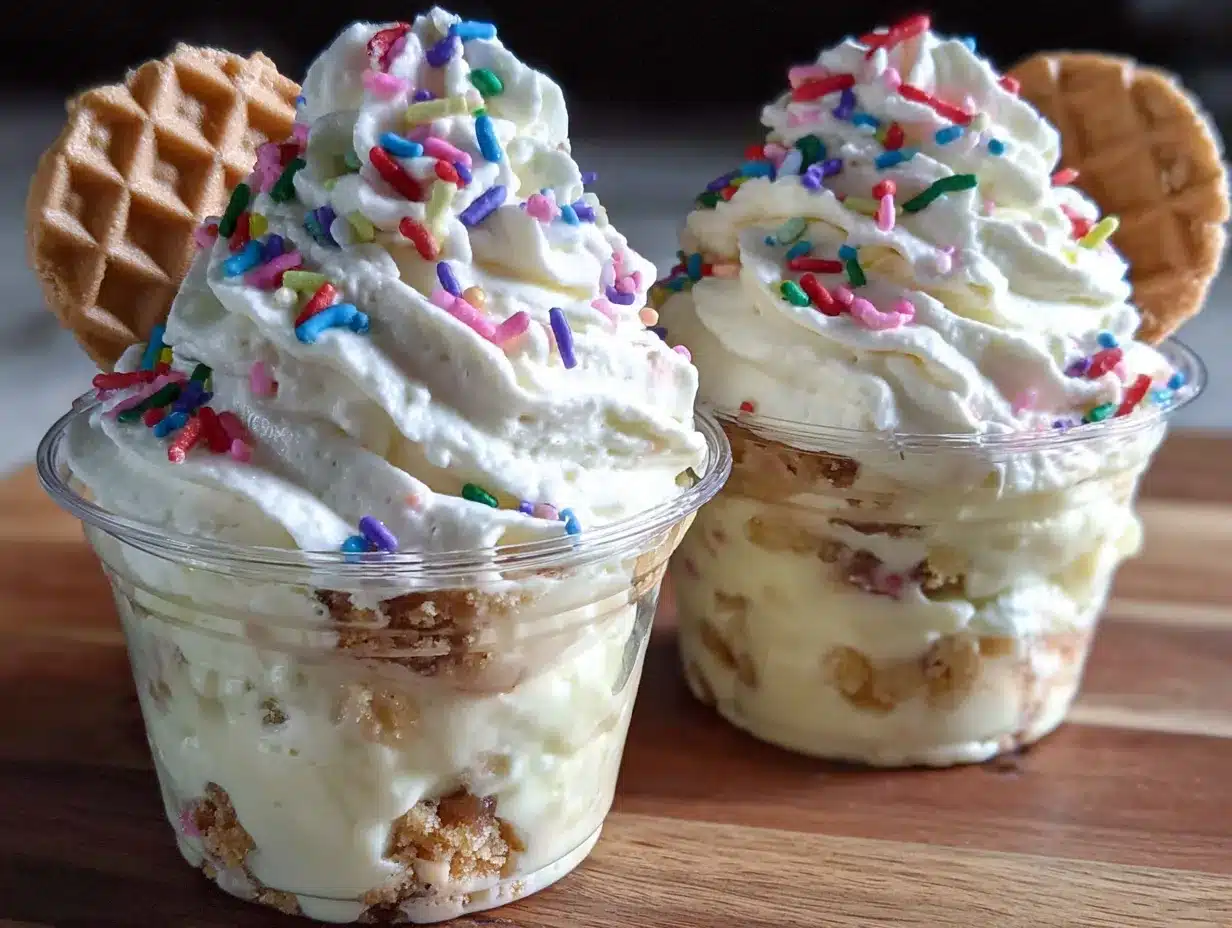
Let me walk you through this step by step. I have made these cups more times than I can count, so trust me when I say these details matter.
- Prepare your pan and liners. Line a mini muffin pan with 24 foil liners. If you are using paper liners, double them up so they hold their shape. Set the pan aside. This takes about two minutes and saves you from wrestling with floppy liners later.
- Crush the cookies. Place 20 of the Golden Oreos in a zip-top bag. Seal it, then crush them with a rolling pin until you have fine crumbs with a few slightly larger pieces. You want the texture of wet sand with some tiny pebbles. Transfer the crumbs to a medium bowl. Take the remaining 4 cookies and crush them more coarsely—these will go on top. Set those aside separately.
- Make the crust. Pour the melted butter over the fine cookie crumbs. Stir with a fork until every crumb is coated. The mixture should hold together when you press it between your fingers. If it seems dry, add another teaspoon of melted butter. If it seems greasy, you are fine—the excess will absorb as it chills.
- Press the crust. Spoon about one tablespoon of the crust mixture into each liner. Press it down firmly with the back of a small spoon or a shot glass. I use a shot glass—it fits perfectly into the mini muffin liners and makes the crust evenly flat. This step is important: if the crust is too loose, it will fall apart when you eat the cups. Press it like you mean it.
- Chill the crusts. Place the pan in the refrigerator for 10 minutes while you make the filling. This helps the butter set and keeps the crust from mixing into the cream cheese layer. I learned this trick after my first batch turned into a muddy mess.
- Make the filling. In a large bowl, beat the softened cream cheese with an electric mixer on medium speed until smooth and fluffy, about 2 minutes. Scrape down the sides of the bowl. Add the powdered sugar and vanilla extract, then beat on low until combined, then on medium for another minute. The mixture should be silky with no lumps.
- Add the heavy cream. Pour in the heavy cream and beat on medium-high for about 30 seconds. The filling will become lighter and fluffier. If it looks too soft, add one more tablespoon of powdered sugar. If it looks too stiff, add a splash more cream. You want it to be spreadable but not runny.
- Fold in the sprinkles. Gently fold in 1/3 cup of rainbow jimmies using a rubber spatula. Fold just until evenly distributed—overmixing will cause the colors to bleed. Trust me, I have made gray filling before and it is sad.
- Fill the cups. Remove the pan from the refrigerator. Spoon about one tablespoon of the cream cheese filling into each cup, on top of the crust. Smooth the tops with the back of the spoon or a small offset spatula. The filling should come almost to the top of the liner.
- Add the whipped topping. If you are using whipped topping, spoon about one teaspoon onto each cup and spread it gently. This layer is optional, but it adds that light, airy finish that makes these cups feel extra special. I always include it for birthdays.
- Top with sprinkles and cookie pieces. Sprinkle the reserved coarse cookie pieces and remaining sprinkles over the tops. Press them in very gently so they stick. This is the fun part—make them look festive and colorful.
- Chill for at least 2 hours. Place the pan back in the refrigerator. The cups need at least 2 hours to set properly. Overnight is even better. The filling firms up, the flavors meld, and the crust holds together perfectly. Do not skip this step.
- Serve cold. Remove the cups from the pan and peel off the liners just before serving. They should pop out easily. If they are sticking, let them sit at room temperature for 5 minutes.
Sensory cue: when you bite into a properly set cup, you should hear a slight crunch from the crust, feel the creamy filling give way, and then get that pop of sweetness from the sprinkles. The texture contrast is everything.
Cooking Tips & Techniques
I have made every mistake in the book with these cups so you do not have to. Here is what I learned the hard way.
Room temperature ingredients matter. Cold cream cheese creates lumps that no amount of mixing will fully smooth out. Let it sit on the counter for 30 minutes before you start. Same goes for the butter—melt it, then let it cool slightly so it doesn’t melt the cookie crumbs into a greasy paste.
Press the crust firmly. This is the most common mistake I see. If you just sprinkle the crumbs in and barely pat them down, the crust will crumble the moment you try to eat the cup. Use a shot glass or a small measuring cup to really compact the crust. You want it to feel like a solid cookie base.
Do not overmix the sprinkles. I cannot stress this enough. The jimmies will bleed their color into the filling if you stir them too aggressively. Fold them in gently with a spatula, just until they are evenly distributed. A few streaks of color in the filling are actually kind of pretty.
Chill time is non-negotiable. I know it is tempting to rush this step, especially if you are making these for a party that starts in an hour. But the cups really need that full 2 hours to set. The filling needs to firm up, and the crust needs time to absorb moisture from the cream cheese layer. If you skip the chill, you will end up with a mess.
Make ahead for better flavor. These cups actually taste better the next day. The flavors meld together, the texture becomes more cohesive, and the sprinkles soften just slightly. I always make them the night before a party. It saves me stress and the cups are better for it.
Double the recipe for a crowd. These disappear fast. If you are bringing them to a party, make at least 48. I learned this lesson at a school bake sale where I brought 24 and they were gone in ten minutes. People grabbed two and three at a time.
Variations & Adaptations
One of the best things about this recipe is how easy it is to change up. Here are some variations I have tried and loved.
Chocolate version: Swap the Golden Oreos for chocolate sandwich cookies. Use chocolate sprinkles instead of rainbow. The filling stays the same, but the whole thing tastes like a chocolate birthday party. My nephew requests this version for every family gathering.
Strawberry shortcake version: Add 1/4 cup of freeze-dried strawberry powder to the cream cheese filling. Top with a fresh strawberry slice and white sprinkles. This is my personal favorite for spring and summer parties.
Lemon funfetti version: Add one tablespoon of lemon zest and one teaspoon of lemon extract to the filling. Use yellow sprinkles and top with a tiny lemon twist. The citrus cuts through the sweetness beautifully.
Dairy-free adaptation: Use dairy-free cream cheese (I like Kite Hill), coconut cream instead of heavy cream, and a vegan whipped topping. The cookies need to be checked too—some Oreo varieties are accidentally vegan. This version works surprisingly well, though the filling is slightly softer.
Gluten-free version: Use gluten-free vanilla sandwich cookies. Many brands make them now, and they work exactly the same way. Just make sure to check the label for nut-free status if that is also a concern.
Holiday theme: Change the sprinkles to match any holiday. Red and green for Christmas, pastels for Easter, orange and black for Halloween. The base recipe stays the same, but the look changes completely. I keep a stash of holiday sprinkles in my pantry just for this.
Mini version: Use a mini muffin pan with very small liners to make bite-sized cups. These are perfect for toddler parties or dessert platters. Reduce the filling slightly and adjust the chill time to 1 hour.
Serving & Storage Suggestions
These treat cups are best served cold, straight from the refrigerator. The contrast between the firm crust and the creamy filling is at its peak when they are properly chilled. If you let them sit out too long, the crust can soften and the filling can become too loose.
For presentation, arrange the cups on a platter or cake stand. They look beautiful grouped together, all those colorful sprinkles catching the light. I like to add a few extra sprinkles scattered around the platter for that festive, party vibe. If you are serving them at a birthday party, stick a tiny candle in one of the cups for a photo-worthy moment.
These cups pair wonderfully with fresh fruit—strawberries, raspberries, or sliced mango. The tartness of the fruit balances the sweetness of the dessert. A cup of coffee or a glass of cold milk is the perfect beverage companion.
Storage instructions: Keep the cups in an airtight container in the refrigerator for up to 5 days. Layer them between sheets of parchment paper so the toppings do not stick together. Do not freeze these cups—the cream cheese filling becomes grainy and the crust gets soggy when thawed. I learned this the hard way when I tried to make a batch two weeks ahead of a party.
Flavor development note: these cups actually improve after 24 hours in the fridge. The crust softens just slightly, the filling firms up perfectly, and the flavors blend together. If you can plan ahead, make them the day before you need them.
Nutritional Information & Benefits
Let me be real with you—these are a treat, not a health food. But knowing what is in them helps you enjoy them mindfully. Here is the approximate nutritional breakdown for one treat cup (based on 24 servings):
| Nutrient | Amount per cup |
|---|---|
| Calories | 145 |
| Total Fat | 9g |
| Saturated Fat | 5g |
| Carbohydrates | 16g |
| Sugar | 11g |
| Protein | 2g |
| Sodium | 95mg |
The cream cheese in this recipe provides a small amount of calcium and protein. The butter adds vitamin A. And honestly, the sprinkles add joy—which has to count for something, right?
These cups are completely nut-free, which makes them a safe option for school parties and events where allergies are a concern. They are also vegetarian. If you use gluten-free cookies, they become gluten-free as well.
From a wellness perspective, I love that these cups are portion-controlled. Each one is small enough to satisfy a sweet craving without going overboard. You can enjoy one (or two) and feel perfectly content. That is the kind of balance I appreciate in a dessert.
Conclusion
These Easy Nut-Free Funfetti Birthday Treat Cups are the kind of recipe that becomes a tradition. They are simple enough for a last-minute school party, special enough for a birthday celebration, and safe enough for every single person at the table. No stress, no complicated techniques, no worrying about who can eat what.
I love that this recipe came from a moment of panic and turned into something I genuinely look forward to making. That is the thing about cooking—sometimes the best recipes come from the most unexpected places. A power outage, a half-baked cake, and a desperate parent turned into a dessert that has brought joy to dozens of birthday parties since.
Now I want to hear from you. What is your go-to last-minute birthday treat? Have you tried these cups yet? Leave a comment below and let me know how they turned out. Did you add your own twist? Did the kids love them? I read every comment and I love hearing your stories. And if you found this recipe helpful, share it with a friend who needs a nut-free dessert option. Let us make birthday celebrations delicious and safe for everyone.
Happy celebrating, friends. Go make something colorful.
Frequently Asked Questions
Can I make these treat cups ahead of time?
Yes, absolutely. In fact, they taste better when made a day ahead. Store them in an airtight container in the refrigerator for up to 5 days. Make sure they are fully chilled before covering them to prevent condensation from making the tops soggy.
Are these really safe for nut-free households?
Yes, as long as you check the labels on every ingredient. I recommend Golden Oreos, Philadelphia cream cheese, and Betty Crocker sprinkles, all of which are certified nut-free. Always double-check the labels yourself, as manufacturing processes can change.
Can I use a different type of cookie for the crust?
Absolutely. Vanilla wafers, shortbread cookies, or graham crackers all work well. Just make sure they are nut-free if that is a concern. The texture might vary slightly, so you may need to adjust the amount of melted butter to get the right consistency.
Why did my filling turn gray?
This happens when the sprinkles bleed into the cream cheese mixture. It usually means you overmixed the sprinkles or used nonpareils instead of jimmies. Next time, fold the sprinkles in gently with a spatula and use rainbow jimmies, which hold their color better.
Can I freeze these treat cups?
I do not recommend freezing them. The cream cheese filling becomes grainy and watery when thawed, and the crust loses its crunch. These are best made fresh and stored in the refrigerator. If you need to make them further ahead, prepare the crust and filling separately, then assemble the day before serving.
Pin This Recipe!
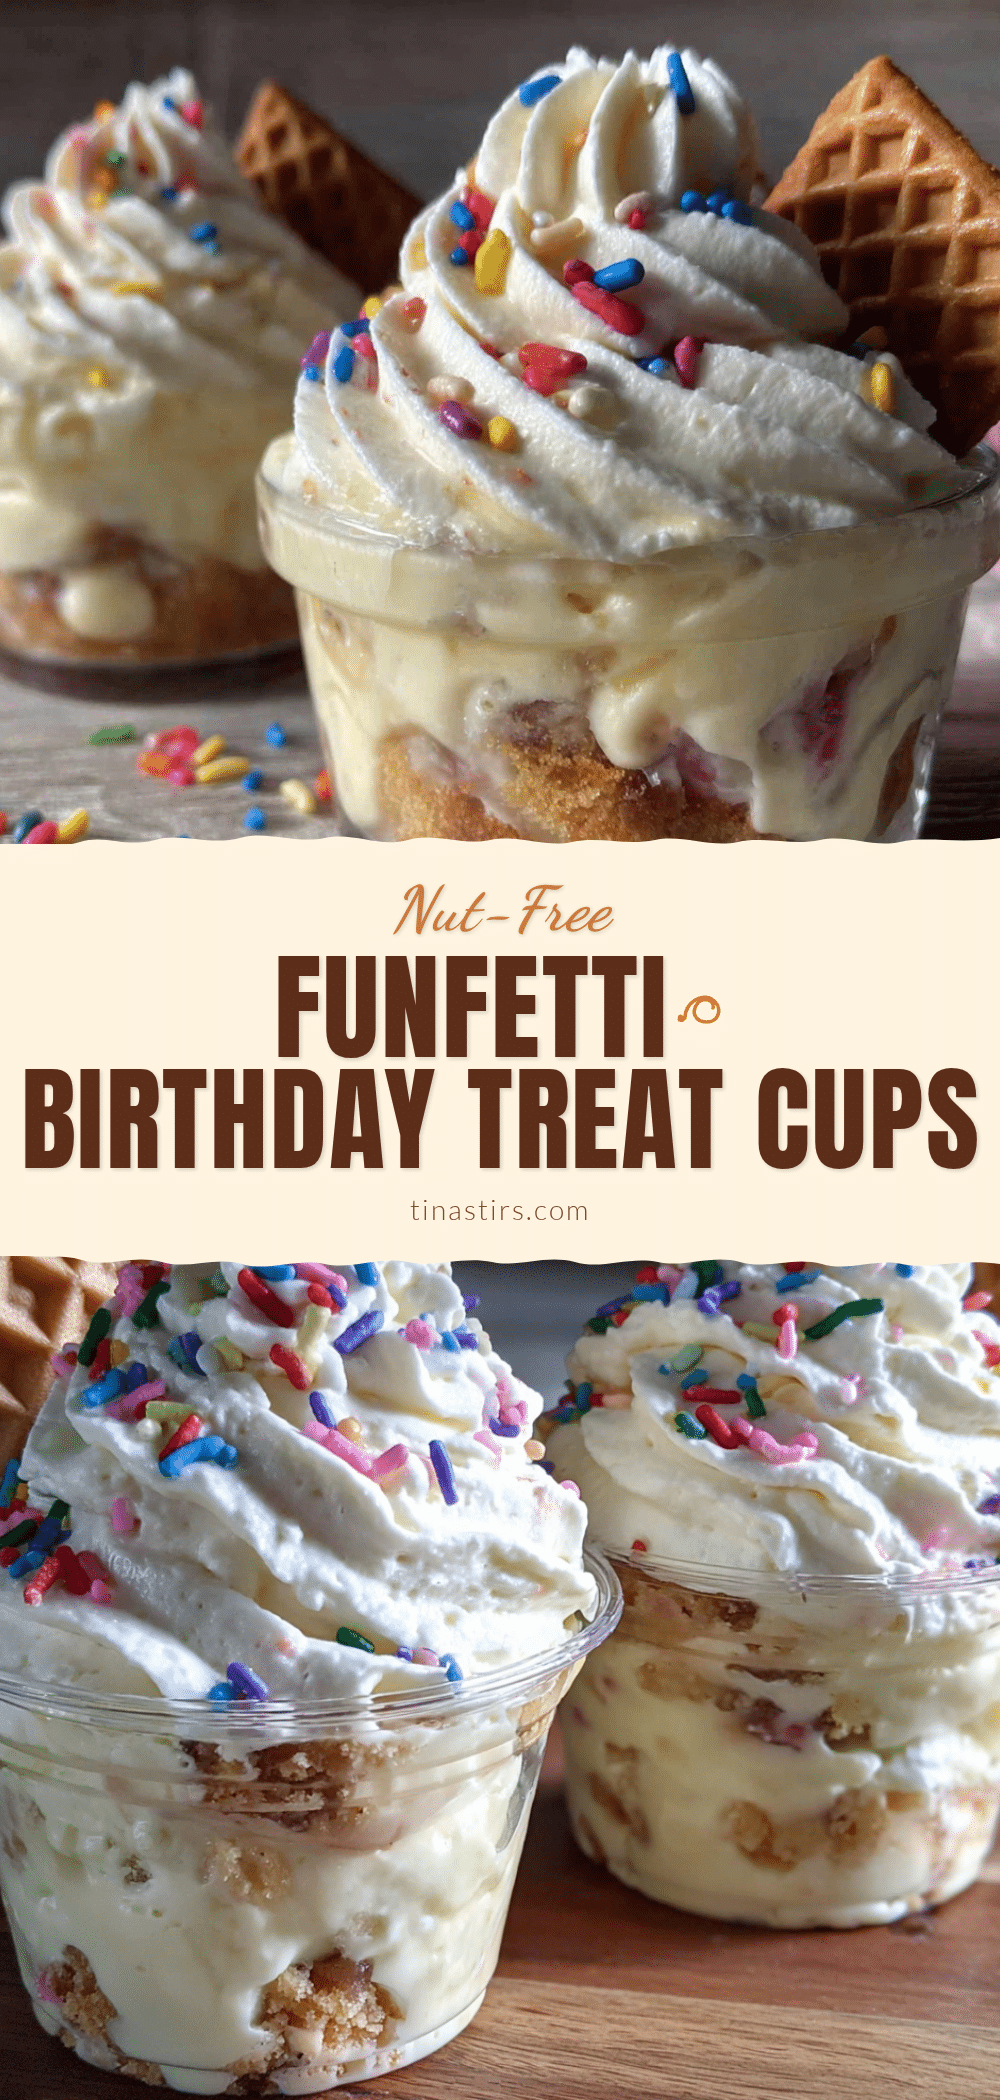
Best Easy Nut-Free Funfetti Birthday Treat Cups Recipe

These Easy Nut-Free Funfetti Birthday Treat Cups are a quick, no-bake dessert perfect for parties. Layers of crushed cookies, creamy filling, and rainbow sprinkles come together in about 20 minutes for a nut-free treat everyone can enjoy.
- Prep Time: 20 minutes
- Cook Time: 0 minutes
- Total Time: 2 hours 20 minutes (includes chilling)
- Yield: 24 servings 1x
- Category: Dessert
- Cuisine: American
Ingredients
- 24 Golden Oreos (or any nut-free vanilla sandwich cookies)
- 3 tablespoons unsalted butter, melted
- 1 (8-ounce) block cream cheese, softened
- 1 cup powdered sugar
- 2 teaspoons vanilla extract
- 2 tablespoons heavy cream
- 1/2 cup rainbow sprinkles (jimmies, not nonpareils), divided
- 1 cup whipped topping (optional, e.g., Cool Whip)
- 24 mini muffin liners (foil preferred)
Instructions
- Line a mini muffin pan with 24 foil liners. Set aside.
- Place 20 of the Golden Oreos in a zip-top bag and crush with a rolling pin until you have fine crumbs with a few slightly larger pieces. Transfer to a medium bowl. Coarsely crush the remaining 4 cookies and set aside separately for topping.
- Pour the melted butter over the fine cookie crumbs and stir with a fork until every crumb is coated. The mixture should hold together when pressed.
- Spoon about 1 tablespoon of the crust mixture into each liner. Press down firmly with the back of a small spoon or a shot glass to create an even, compact crust.
- Place the pan in the refrigerator for 10 minutes to set the crust.
- In a large bowl, beat the softened cream cheese with an electric mixer on medium speed until smooth and fluffy, about 2 minutes. Scrape down the sides of the bowl.
- Add the powdered sugar and vanilla extract. Beat on low until combined, then on medium for 1 minute until silky and smooth.
- Add the heavy cream and beat on medium-high for about 30 seconds until the filling is lighter and fluffier. Adjust consistency if needed (add more powdered sugar if too soft, more cream if too stiff).
- Gently fold in 1/3 cup of the rainbow jimmies using a rubber spatula. Fold just until evenly distributed to avoid color bleeding.
- Remove the pan from the refrigerator. Spoon about 1 tablespoon of the cream cheese filling into each cup on top of the crust. Smooth the tops.
- If using, spoon about 1 teaspoon of whipped topping onto each cup and spread gently.
- Sprinkle the reserved coarse cookie pieces and remaining sprinkles over the tops. Press in very gently so they stick.
- Place the pan back in the refrigerator and chill for at least 2 hours, or overnight for best results.
- Serve cold. Remove cups from the pan and peel off liners just before serving.
Notes
For best results, use room temperature cream cheese. Press the crust firmly to prevent crumbling. Do not overmix sprinkles to avoid gray filling. Chill time is essential for proper set. These cups taste even better the next day. Store in an airtight container in the refrigerator for up to 5 days. Do not freeze.
Nutrition
- Serving Size: 1 treat cup
- Calories: 145
- Sugar: 11
- Sodium: 95
- Fat: 9
- Saturated Fat: 5
- Carbohydrates: 16
- Protein: 2
Keywords: nut-free, funfetti, birthday treat cups, no-bake, easy dessert, party dessert, cream cheese, sprinkles


