Love this? Save it for later!
Share the inspiration with your friends
My neighbor across the hall, a retired baker named Leo, caught me one Tuesday morning scraping a jar of sourdough discard into the trash. He didn’t say anything at first—just stood there in his doorway with a mug of coffee, watching me with that look bakers get when they see good ingredients being wasted. Then he shook his head slowly and said, “You’re throwing away flavor, you know.” I laughed it off, but he disappeared into his apartment and came back with a crumpled piece of paper covered in floury fingerprints. “Try this,” he said. “It’s my granddaughter’s recipe. She figured out something I never did.”
Honestly, I almost didn’t try it. I mean, sourdough in cookies? It sounded like one of those internet trends that looks good on camera but falls flat in real life. But Leo’s been baking since the 1970s, and when a man like that hands you a recipe, you bake it. So I did. And let me tell you—that first batch changed how I think about cookie dough forever.
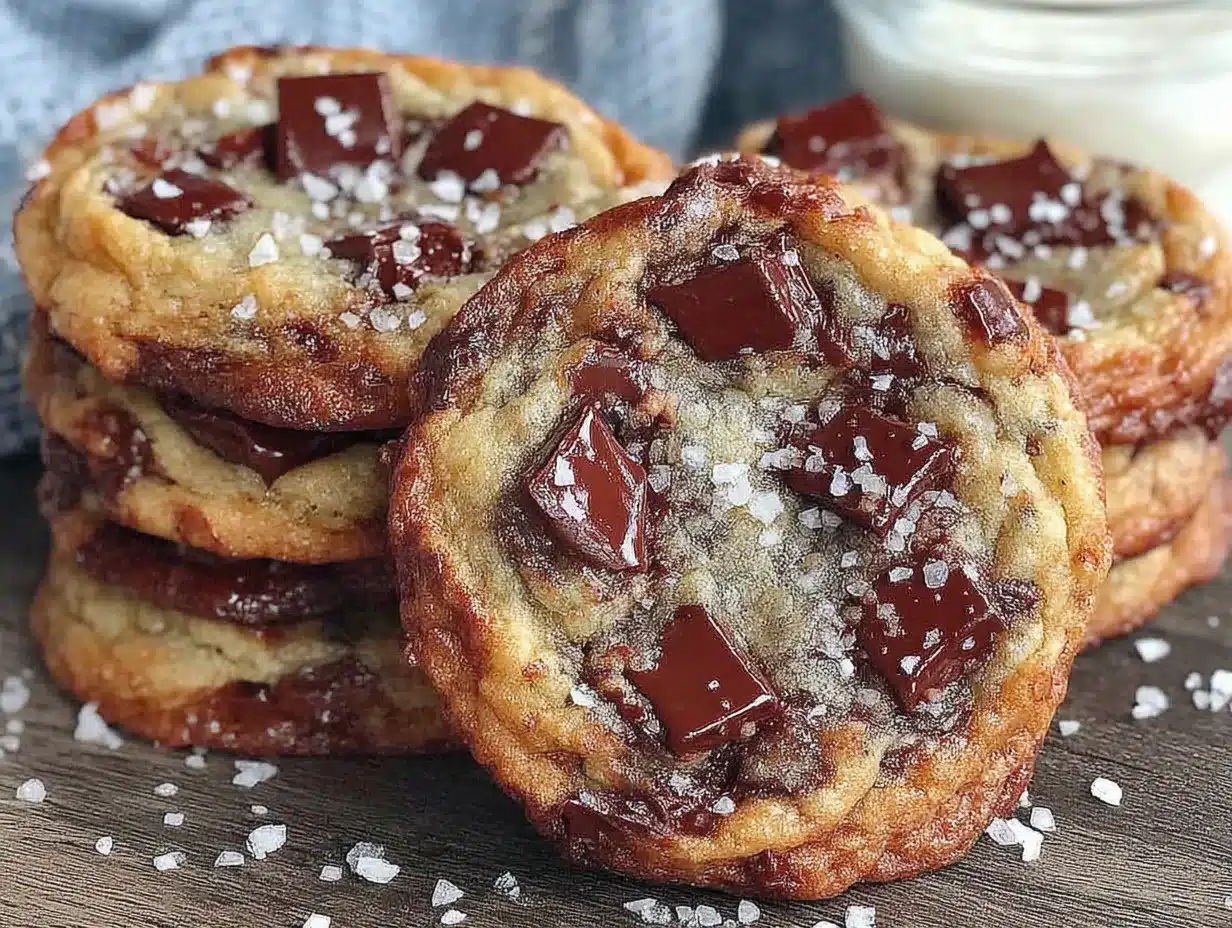
The cookies came out of the oven looking like regular chocolate chip cookies, all golden and craggy on top. But the first bite had this unexpected chewiness, a depth of flavor that regular cookies just don’t have. The sourdough doesn’t make them taste sour—it adds this subtle complexity, like the difference between a good conversation and a great one. Maybe you’ve been there, staring at a jar of discard in your fridge, wondering if there’s something better to do with it than pancakes. There is. These cookies are it.
Three batches later, I finally got the texture exactly right. I’ve been making them every other week since, and I keep making them because they solve two problems at once: using up sourdough discard and satisfying that late-afternoon cookie craving without any fuss. Leo’s granddaughter never knew her recipe would travel across the hall, but I’m glad it did.
Why You’ll Love This Recipe
These are not your average chocolate chip cookies. The sourdough discard changes everything—in the best possible way. Here’s why this recipe stands out from the dozens of cookie recipes you’ve probably tried before:
- Quick & Easy: Comes together in under 30 minutes with no stand mixer required. Perfect for those moments when a cookie craving hits and you need results fast.
- Simple Ingredients: You likely have everything in your kitchen right now. No fancy grocery trips, no obscure ingredients—just butter, sugar, flour, chocolate, and that jar of discard you’ve been wondering what to do with.
- Perfect for Sourdough Bakers: If you maintain a sourdough starter, you know the struggle of accumulating discard. This recipe uses a full cup of it, making a real dent in your stash.
- Crowd-Pleaser: I’ve brought these to three different gatherings and watched people go back for seconds without even asking what’s in them. When I finally tell them about the sourdough, they’re always surprised.
- Unbelievably Delicious: The texture is what gets everyone—crispy edges, soft centers, and that signature chew that regular cookies just can’t replicate. The tang from the sourdough balances the sweetness perfectly, making these dangerously easy to eat.
What makes this recipe different from the rest is the technique. Most sourdough discard cookies turn out flat or cakey because the extra liquid throws off the fat-to-flour ratio. I spent weeks testing ratios, chilling times, and baking temperatures to get that perfect balance. The result is a cookie that looks classic but tastes like something entirely new.
This recipe isn’t just good—it is the kind that makes you close your eyes after the first bite. It’s comfort food reimagined, using something you’d normally throw away to create something genuinely special. Perfect for using up discard without stress, or turning a simple Tuesday afternoon into something memorable.
What Ingredients You Will Need
This recipe uses simple, wholesome ingredients to deliver that perfect cookie texture without any fuss. Most of these are pantry staples, which makes this an easy last-minute baking project.
For the Cookie Dough
- 1 cup (226g) unsalted butter, softened to room temperature (I use Kerrygold for the best flavor, but any good-quality butter works)
- 1 cup (200g) packed brown sugar (light or dark—dark gives a deeper molasses flavor that pairs beautifully with the sourdough tang)
- 1/2 cup (100g) granulated sugar
- 2 large eggs, room temperature (cold eggs will seize the butter and make the dough lumpy)
- 1 teaspoon vanilla extract (pure, not imitation—it makes a real difference here)
- 1 cup (240g) sourdough discard, unfed and at room temperature (straight from the fridge works too, just let it sit for 10 minutes)
- 2 1/2 cups (312g) all-purpose flour (I’ve tested this with bread flour too—slightly chewier results, also delicious)
- 1 teaspoon baking soda
- 1/2 teaspoon baking powder (this extra lift keeps them from going flat)
- 1 teaspoon salt (use flaky sea salt if you have it—Maldon is my go-to)
- 2 cups (340g) chocolate chips or chunks (I use a mix of semi-sweet and dark for complexity; Guittard or Ghirardelli are both excellent)
Ingredient Selection Tips
The sourdough discard should be unfed—meaning you haven’t fed it in the last 12 hours. The tang is milder in unfed discard, which gives the cookies that subtle complexity without overwhelming the chocolate. If your discard has been sitting in the fridge for weeks and has a layer of dark liquid on top, just stir it back in. That liquid is full of flavor.
For the chocolate, I recommend chopping a high-quality chocolate bar into irregular chunks rather than using pre-made chips. The varying sizes create pools of melted chocolate throughout the cookie, which is honestly a game-changer. But if you only have chips, that works too—no judgment here.
If you’re out of brown sugar, you can make your own by mixing 1 cup of granulated sugar with 2 tablespoons of molasses. It’s not exactly the same, but it works in a pinch. And if you’re dairy-free, swap the butter for a high-quality vegan butter stick—I’ve had good results with Miyoko’s.
Equipment Needed
- Large mixing bowl (stainless steel or glass—avoid plastic as it can retain odors)
- Hand mixer or stand mixer (a hand mixer works perfectly; I actually prefer it because there’s less to clean)
- Rubber spatula (for scraping down the bowl and folding in chocolate chips)
- Baking sheets (two if you have them, so you can bake one batch while the other chills)
- Parchment paper or silicone baking mats (parchment gives slightly crisper bottoms; silicone mats are reusable and more eco-friendly)
- Cookie scoop or tablespoon (a #40 scoop makes perfectly uniform cookies—about 1.5 tablespoons each)
- Cooling rack (wire rack for even cooling—don’t skip this or the bottoms get soggy)
- Plastic wrap (for chilling the dough—this step is non-negotiable for the best texture)
If you don’t have a cookie scoop, just use two spoons to portion the dough. It’s messier but works fine. And if you’re using dark baking sheets, watch the cookies closely—they conduct heat faster and can over-brown the bottoms.
Preparation Method
- Cream the butter and sugars (5 minutes). In a large mixing bowl, beat the softened butter, brown sugar, and granulated sugar together until light and fluffy. This takes about 3-5 minutes with a hand mixer on medium speed. You’re looking for a pale, airy texture—scrape down the sides of the bowl halfway through. Don’t rush this step; proper creaming creates air pockets that give the cookies their structure.
- Add the wet ingredients (2 minutes). Beat in the eggs one at a time, mixing well after each addition. Add the vanilla extract and the sourdough discard, then mix on low speed until just combined. The mixture might look slightly curdled at this point—that’s normal. The sourdough discard adds extra liquid, so don’t panic if it looks looser than regular cookie dough.
- Combine the dry ingredients (1 minute). In a separate bowl, whisk together the all-purpose flour, baking soda, baking powder, and salt. Make sure the baking soda and powder are fresh—if they’ve been sitting in your pantry for more than six months, replace them. Stale leavening agents are the number one reason cookies turn out flat.
- Mix the dry into the wet (2 minutes). Gradually add the dry ingredients to the wet mixture, mixing on low speed until just combined. Stop as soon as the flour disappears—overmixing develops gluten and makes the cookies tough. You should see a few streaks of flour remaining; those will disappear when you fold in the chocolate.
- Fold in the chocolate chips (1 minute). Using a rubber spatula, gently fold the chocolate chips into the dough until evenly distributed. If you’re using chocolate chunks, save a handful to press into the tops of the cookies later—it makes them look bakery-style.
- Chill the dough (30 minutes minimum, 24 hours maximum). Cover the bowl with plastic wrap and refrigerate for at least 30 minutes. This is the most important step. Chilling solidifies the butter, which prevents the cookies from spreading too thin in the oven. It also gives the sourdough discard time to work its magic, developing deeper flavor. I’ve tested these with a 24-hour chill, and they were noticeably better—chewier, more complex, with better browning.
- Preheat the oven (10 minutes before baking). Set your oven to 350°F (175°C). Line two baking sheets with parchment paper or silicone mats. If you only have one baking sheet, let it cool completely between batches—putting dough on a hot sheet will melt the butter before the cookies even hit the oven.
- Portion the dough (5 minutes). Using a cookie scoop or tablespoon, portion the dough into balls about 1.5 tablespoons each (roughly 30g). Place them 2 inches apart on the prepared baking sheets. If you saved some chocolate chunks, press a few into the tops of each dough ball—this gives that professional look.
- Bake (10-12 minutes). Bake one sheet at a time in the center of the oven. The cookies are done when the edges are golden brown and the centers look slightly underdone and puffy. They should be just set around the edges but still soft in the middle. A good test: gently touch the edge—if it springs back, they’re done. If it feels soft and leaves a dent, give them another minute.
- Cool on the baking sheet (5 minutes). Let the cookies rest on the hot baking sheet for 5 minutes. This allows the carryover cooking to finish setting the centers. The cookies will continue to spread slightly as they cool. After 5 minutes, transfer them to a wire rack to cool completely.
One thing I learned the hard way: if you bake these straight from the fridge without letting the dough sit at room temperature for 10 minutes, they’ll spread less and be thicker. That’s actually a good thing if you prefer chunky cookies. Experiment with your first batch and see what texture you like best.
Cooking Tips & Techniques
I’ve made these cookies at least twenty times now, and I’ve made every mistake you can imagine. Here’s what I’ve learned so you don’t have to repeat my failures.
Don’t skip the chill time. I know, I know—you want cookies now, not in an hour. But the first time I made these, I was impatient and baked a few right away. They spread into flat, greasy discs. The chilled ones? Perfectly round, thick, and chewy. The cold butter takes longer to melt in the oven, which gives the cookies structure before they spread too much.
Use a kitchen scale for the flour. This is the single best tip I can give you. Scooping flour with a measuring cup can give you anywhere from 120g to 150g per cup, depending on how you pack it. That 30g difference is enough to turn chewy cookies into dry, crumbly ones. If you don’t have a scale, fluff your flour with a spoon, then lightly scoop it into the measuring cup and level it off with a knife.
Watch the oven temperature. Ovens run hot or cold—mine runs about 25°F too hot, so I set it to 325°F instead of 350°F. If your cookies are browning too fast on the bottom but staying pale on top, your oven is too hot. If they’re taking longer than 14 minutes to brown, it’s too cool. An oven thermometer costs five dollars and saves a lot of heartache.
Bake one sheet at a time. I know it’s tempting to cram both sheets in the oven to save time, but the uneven heat distribution will give you inconsistent results. The top sheet will brown faster, the bottom sheet will be pale. Bake them one at a time in the center rack—it adds 10 minutes but makes a noticeable difference.
Rotate the baking sheet halfway through. At the 6-minute mark, spin the baking sheet 180 degrees. This compensates for hot spots in your oven and gives you evenly browned cookies. I forgot to do this once and ended up with cookies that were dark on one side and blond on the other.
Variations & Adaptations
This recipe is forgiving enough to handle plenty of tweaks. Here are some variations I’ve tested and loved:
Gluten-Free Version: Substitute the all-purpose flour with a 1:1 gluten-free baking flour blend (I use King Arthur Measure for Measure). Add an extra tablespoon of milk or water because gluten-free flours absorb more liquid. The texture will be slightly more tender and less chewy, but still delicious.
Dark Chocolate Sea Salt: Use dark chocolate chips (60-70% cacao) and sprinkle flaky sea salt on top of each cookie right after they come out of the oven. The salt cuts through the sweetness and enhances the sourdough tang. This is my personal favorite variation—I make it at least every other batch.
Add-In Variations: Swap half the chocolate chips for toasted pecans or walnuts. Add 1/2 cup of shredded coconut for a tropical twist. Or fold in 1/2 cup of dried cherries along with the chocolate—the tartness plays beautifully with the sourdough.
Vegan Adaptation: Use vegan butter sticks (not tub margarine, which has too much water) and replace each egg with a flax egg (1 tablespoon ground flaxseed mixed with 3 tablespoons water, let sit for 5 minutes). The texture will be slightly less tender, but the flavor is still spot-on.
Brown Butter Version: Brown the butter before using it—melt it in a saucepan over medium heat, swirling occasionally, until it turns golden brown and smells nutty (about 5-7 minutes). Let it cool completely before creaming with the sugars. This adds an incredible depth of flavor that pairs beautifully with the sourdough.
I tried the brown butter version for a holiday cookie exchange and it got more compliments than anything else on the table. Just be aware that browning the butter removes some moisture, so the dough will be slightly stiffer—add a tablespoon of milk if it seems too dry.
Serving & Storage Suggestions
These cookies are best served slightly warm, when the chocolate is still melty and the edges are crisp. Let them cool on the baking sheet for 5 minutes, then transfer to a wire rack. If you can wait that long—I usually can’t and end up burning my tongue on the first one.
For serving, I like to arrange them on a wooden board with a small bowl of flaky sea salt on the side. They pair beautifully with a cold glass of milk, a hot cup of coffee, or a strong black tea. For dessert, serve them with a scoop of vanilla ice cream and a drizzle of caramel sauce—it’s over-the-top but worth every calorie.
Storage instructions: Store baked cookies in an airtight container at room temperature for up to 5 days. Place a slice of bread in the container to keep them soft—the bread absorbs excess moisture and the cookies stay chewy. Replace the bread slice every two days.
Freezing instructions: These freeze beautifully. Freeze the baked cookies in a single layer on a baking sheet, then transfer to a freezer bag for up to 3 months. To thaw, let them sit at room temperature for 15 minutes or pop them in a 300°F oven for 5 minutes. You can also freeze the raw dough balls—just portion them, freeze on a baking sheet, then transfer to a bag. Bake from frozen, adding 2-3 minutes to the baking time.
The flavor actually improves after a day or two in the fridge. Something about the sourdough discard continuing to develop—it’s subtle, but noticeable. I’ve made a batch on Sunday and found them even better on Tuesday.
Nutritional Information & Benefits
Per cookie (based on 24 cookies per batch): approximately 220 calories, 11g fat, 29g carbohydrates, 3g protein, 2g fiber, 16g sugar. These are estimates and will vary based on your specific ingredients and portion sizes.
The sourdough discard adds more than just flavor. The fermentation process breaks down some of the phytic acid in the flour, which can make the minerals more bioavailable. It also introduces beneficial bacteria and yeasts, though most of these are killed during baking. Still, there’s something satisfying about knowing you’re using an ingredient that would otherwise go to waste.
The chocolate chips provide antioxidants, particularly flavonoids from the cocoa. Dark chocolate has higher levels than milk chocolate, so if you’re looking for a health boost, go with at least 60% cacao. The brown sugar and butter are less nutritionally exciting, but hey—these are cookies, not health food. Everything in moderation, right?
If you’re watching your sugar intake, you can reduce the granulated sugar to 1/4 cup without significantly affecting the texture. The cookies will be slightly less sweet but still delicious. I’ve also tested them with coconut sugar in place of brown sugar—it works, but the cookies are darker and have a slightly different flavor profile.
Conclusion
These sourdough discard chocolate chip cookies have become my go-to recipe for using up discard, and honestly, they’ve ruined me for regular cookies. The texture is that perfect balance of crispy and chewy, the flavor has this subtle complexity that keeps you reaching for another one, and the best part is you’re using something you’d normally throw away.
I love that this recipe came from a neighbor who saw me about to waste something good. It reminds me that the best recipes often come from unexpected places—a crumpled piece of paper, a conversation across a hallway, someone who knew something you didn’t. Leo and I still talk about these cookies whenever I see him. He says his granddaughter would be thrilled to know her recipe made it into the world.
I’d love to hear how these turn out for you. Did you try a variation? Did you burn your tongue on the first one like I always do? Drop a comment below and let me know—I read every single one. And if you share these on social media, tag me so I can see your beautiful cookies. Happy baking, friends.
Frequently Asked Questions
Can I use active sourdough starter instead of discard?
Yes, you can, but the cookies will have a milder tang because active starter has been recently fed and is less sour. The texture should be similar, though you may need to adjust the flour slightly if your starter is very bubbly and thin.
Why did my cookies turn out flat?
Flat cookies usually mean the butter was too warm, the dough wasn’t chilled long enough, or the leavening agents are old. Make sure your butter is softened but not melted, chill the dough for at least 30 minutes, and check that your baking soda and powder are fresh (less than 6 months old).
Can I make these cookies without a mixer?
Absolutely. You can cream the butter and sugar by hand with a wooden spoon—it just takes a bit more elbow grease. Make sure the butter is very soft (almost room temperature) to make the mixing easier. The rest of the steps are the same.
How long does the dough keep in the fridge?
The dough can be refrigerated for up to 3 days in an airtight container. The flavor actually improves over the first 24-48 hours as the sourdough continues to develop. If the dough becomes too firm to scoop, let it sit at room temperature for 15 minutes before portioning.
Can I double this recipe?
Yes, the recipe doubles beautifully. Just make sure your mixing bowl is large enough to handle the extra volume. If you’re using a hand mixer, you may need to mix the dry ingredients in batches. The baking time remains the same, but you’ll need to bake in multiple batches to avoid overcrowding the oven.
Pin This Recipe!

Best Easy Sourdough Discard Chocolate Chip Cookies Recipe

These sourdough discard chocolate chip cookies are quick, easy, and use up your discard stash. They have crispy edges, soft centers, and a subtle tang that balances the sweetness perfectly.
- Prep Time: 15 minutes
- Cook Time: 12 minutes
- Total Time: 27 minutes
- Yield: 24 servings 1x
- Category: Dessert
- Cuisine: American
Ingredients
- 1 cup (226g) unsalted butter, softened to room temperature
- 1 cup (200g) packed brown sugar (light or dark)
- 1/2 cup (100g) granulated sugar
- 2 large eggs, room temperature
- 1 teaspoon vanilla extract (pure)
- 1 cup (240g) sourdough discard, unfed and at room temperature
- 2 1/2 cups (312g) all-purpose flour
- 1 teaspoon baking soda
- 1/2 teaspoon baking powder
- 1 teaspoon salt (flaky sea salt preferred)
- 2 cups (340g) chocolate chips or chunks (mix of semi-sweet and dark)
Instructions
- Cream the butter and sugars (5 minutes). In a large mixing bowl, beat the softened butter, brown sugar, and granulated sugar together until light and fluffy, about 3-5 minutes with a hand mixer on medium speed. Scrape down the sides halfway through.
- Add the wet ingredients (2 minutes). Beat in the eggs one at a time, mixing well after each addition. Add the vanilla extract and sourdough discard, then mix on low speed until just combined. The mixture may look slightly curdled.
- Combine the dry ingredients (1 minute). In a separate bowl, whisk together the all-purpose flour, baking soda, baking powder, and salt.
- Mix the dry into the wet (2 minutes). Gradually add the dry ingredients to the wet mixture, mixing on low speed until just combined. Stop as soon as the flour disappears; a few streaks of flour may remain.
- Fold in the chocolate chips (1 minute). Using a rubber spatula, gently fold the chocolate chips into the dough until evenly distributed. Save a handful to press into the tops of the cookies later for a bakery-style look.
- Chill the dough (30 minutes minimum, 24 hours maximum). Cover the bowl with plastic wrap and refrigerate for at least 30 minutes. This prevents spreading and develops flavor.
- Preheat the oven (10 minutes before baking). Set oven to 350°F (175°C). Line two baking sheets with parchment paper or silicone mats.
- Portion the dough (5 minutes). Using a cookie scoop or tablespoon, portion the dough into balls about 1.5 tablespoons each (roughly 30g). Place them 2 inches apart on the prepared baking sheets. Press reserved chocolate chunks into the tops.
- Bake (10-12 minutes). Bake one sheet at a time in the center of the oven. Cookies are done when edges are golden brown and centers look slightly underdone and puffy.
- Cool on the baking sheet (5 minutes). Let cookies rest on the hot baking sheet for 5 minutes, then transfer to a wire rack to cool completely.
Notes
Chilling the dough is non-negotiable for best texture. Use a kitchen scale for flour accuracy. Bake one sheet at a time for even results. Rotate the baking sheet halfway through baking. For thicker cookies, bake straight from the fridge without letting dough sit at room temperature.
Nutrition
- Serving Size: 1 cookie
- Calories: 220
- Sugar: 16
- Sodium: 180
- Fat: 11
- Saturated Fat: 7
- Carbohydrates: 29
- Fiber: 2
- Protein: 3
Keywords: sourdough discard, chocolate chip cookies, easy cookies, sourdough cookies, discard recipe


