Love this? Save it for later!
Share the inspiration with your friends
My brother-in-law Dave had claimed to hate pot pies for about thirty-seven years. That’s a long time to hold a grudge against a perfectly good comfort food, but Dave is stubborn like that. He’d make a face whenever anyone mentioned them at family dinners, muttering something about “soggy bottoms” and “weird, gelatinous filling.” Honestly, it became a bit of a running joke. Then, last Friendsgiving, I made these mini turkey pot pies mostly because I had leftover turkey and a desperate need to impress our very food-critical friend, Jenna. I didn’t even tell Dave what they were. I just set the little cast iron skillets on the table, all golden and bubbling, and watched him grab one. He took a bite, closed his eyes, and said, “What the heck is this? It’s incredible.” I just smiled and said, “Oh, just a little something with leftover turkey.” He ate three. The man who hates pot pies ate three mini turkey pot pies. I caught him sneaking a fourth into his coat pocket on the way out. I mean, you know that feeling when you’ve accidentally proven someone completely wrong without even trying? It’s a quiet little victory. That’s the magic of these things—they don’t just taste good, they change minds.
Why You’ll Love This Recipe
These aren’t your grandma’s heavy, gloppy pot pies. These are individual, golden-crusted parcels of pure, savory comfort, designed specifically to make you look like a hosting genius. They’re the perfect centerpiece for a Friendsgiving or any casual gathering where you want to impress without spending the whole day in the kitchen.
- Perfect for a Crowd: Individual servings mean no fighting over the last piece of crust. Everyone gets their own perfectly portioned, bubbling-hot pie. It just feels special, you know?
- Make-Ahead Magic: You can assemble these bad boys a day ahead of time. Just pop them in the oven when your guests arrive, and the whole house fills with the most incredible, welcoming aroma. It’s a hosting power move.
- Leftover Hero: This is the absolute best way to use up leftover Thanksgiving turkey. It transforms dry, sad leftovers into something people will actually crave. I’ve even bought a rotisserie chicken just to make these in the middle of July.
- Foolproof, Flaky Crust: We’re using a shortcut that delivers a perfectly golden, buttery, and flaky top crust every single time. No soggy bottoms here, Dave would approve.
- Unbelievably Delicious Filling: The filling is creamy, savory, and packed with tender turkey, vegetables, and a secret flavor boost that makes people ask for the recipe every single time. It’s comfort food at its absolute finest.
This recipe isn’t just good—it is the kind that makes you close your eyes after the first bite. It’s the dish that gets texted to friends the next day. It’s perfect for impressing a crowd without the stress, turning a simple Friendsgiving into a memorable, cozy feast.
What Ingredients You Will Need
This recipe uses simple, wholesome ingredients to deliver that deep, soul-satisfying flavor. Most of these are pantry staples, especially if you’ve just hosted a big holiday meal. The key is in the quality of a few key players.
- For the Filling:
- 3 tablespoons unsalted butter (adds richness and helps build the roux)
- 1 medium yellow onion, finely chopped (about 1 cup, for the savory base)
- 2 medium carrots, peeled and diced (about 1 cup, for sweetness and color)
- 2 celery stalks, diced (about 1/2 cup, for that classic aromatic flavor)
- 3 cloves garlic, minced (because everything is better with garlic)
- 1/3 cup all-purpose flour (this thickens the sauce to the perfect consistency)
- 2 cups low-sodium chicken or turkey broth (I prefer Swanson for its clean flavor)
- 1 cup whole milk or heavy cream (for ultimate creaminess; half-and-half works in a pinch)
- 3 cups cooked turkey, shredded or diced (leftover dark and white meat mixed is best)
- 1 cup frozen peas (no need to thaw, they add a pop of sweetness and color)
- 1 teaspoon fresh thyme leaves (or 1/2 teaspoon dried, for an earthy, aromatic note)
- 1/2 teaspoon poultry seasoning (this is the secret weapon for that “Thanksgiving” flavor)
- Salt and freshly ground black pepper (to taste)
- For the Crust:
- 1 package (14.1 ounces) refrigerated pie crusts (like Pillsbury, or use your favorite homemade recipe. This is the shortcut that saves time without sacrificing flavor!)
- 1 large egg, beaten with 1 tablespoon water (for a beautiful, glossy egg wash)
- Flaky sea salt, for sprinkling (optional, but it adds a wonderful little crunch on top)
Ingredient Tips: For the best texture, make sure your turkey is not too wet. Pat it dry with a paper towel if it seems moist. If you’re using a rotisserie chicken, remove the skin before dicing. For a dairy-free version, you can use a good quality plant-based butter and unsweetened oat milk, though the sauce will be slightly less rich. I’ve tried this with coconut milk, and it just doesn’t work—stick with oat or a creamy cashew milk.
Equipment Needed
You don’t need a fancy kitchen to pull these off, but a few specific tools make the process a breeze. I’ve learned the hard way that using the wrong pan can lead to a sad, stuck-on mess.
- 4 (7-inch) mini cast iron skillets or 4 (10-ounce) oven-safe ramekins: These are the star of the show. Mini skillets look incredible on the table and keep the pies hot. Ramekins work perfectly too. You can also use a standard 9-inch pie dish for one large pot pie, just adjust the baking time.
- Large skillet or Dutch oven: For cooking the filling. A heavy-bottomed pot is best to prevent the roux from burning.
- Whisk: Essential for a lump-free roux and creamy sauce. A silicone whisk is my favorite because it won’t scratch your pans.
- Sharp knife and cutting board: For prepping your veggies and turkey.
- Baking sheet: Place the mini skillets on a baking sheet to catch any drips while they bake. Trust me on this one.
- Pastry brush: For applying the egg wash. A silicone brush is easy to clean.
- 2-inch and 3-inch round cookie cutters (optional): For cutting cute decorative shapes from the crust scraps. It adds a nice touch.
I’ve used cheap ramekins from the dollar store before, and they work fine, but they don’t hold the heat the way cast iron does. If you’re investing, a set of mini skillets is a game-changer for hosting. They’re also great for serving dips and brownies!
Preparation Method
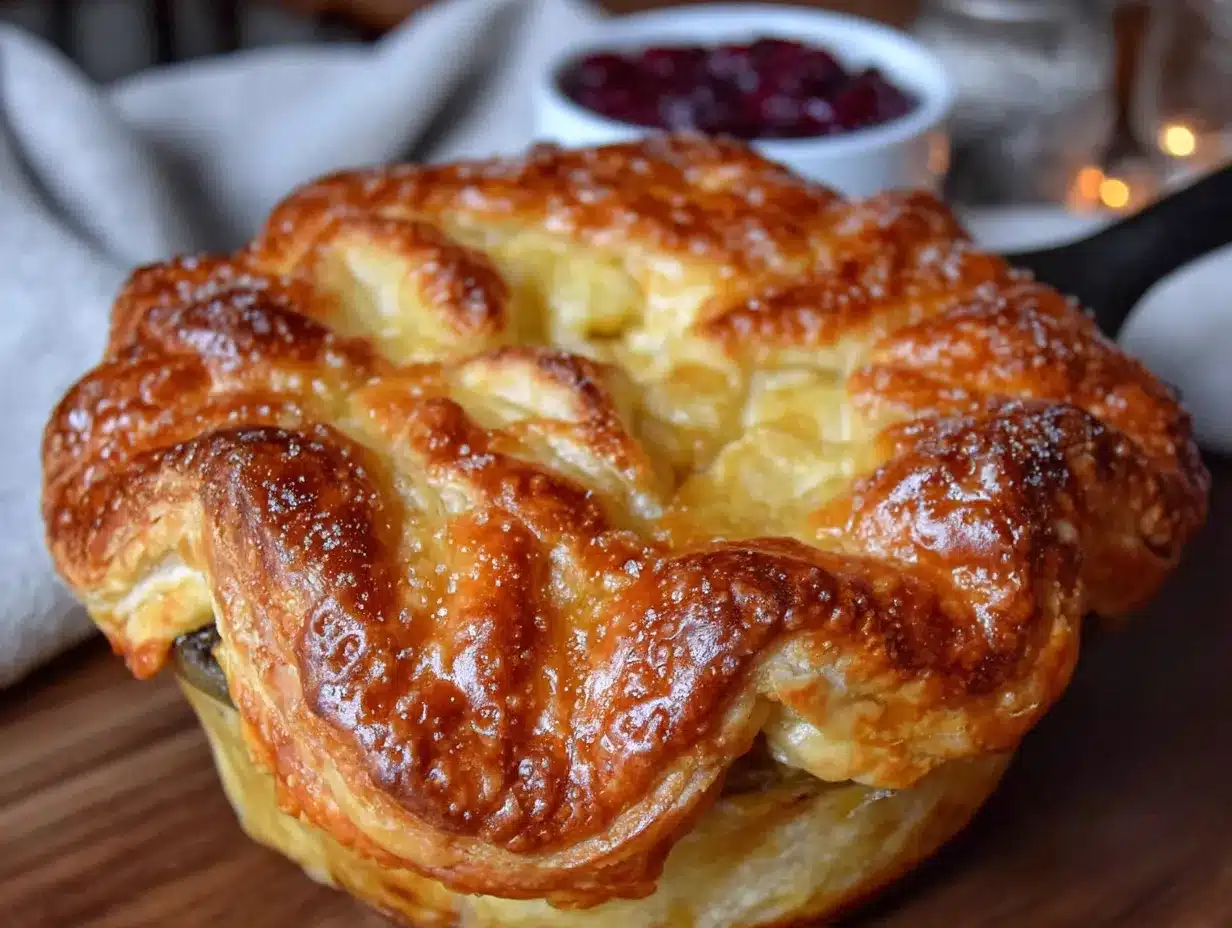
Alright, let’s get cooking. This process is straightforward, but paying attention to a few key steps makes all the difference between a good pot pie and a legendary one.
- Preheat and Prep: Preheat your oven to 400°F (200°C). Place your 4 mini skillets or ramekins on a large baking sheet. This makes them easier to handle and catches any filling that might bubble over.
- Sauté the Aromatics: In your large skillet or Dutch oven, melt the 3 tablespoons of butter over medium heat. Once it’s foaming, add the chopped onion, carrots, and celery. Cook, stirring occasionally, for about 6-8 minutes, until the vegetables have softened and the onion is translucent. Don’t rush this step—it builds the flavor foundation. Add the minced garlic and cook for just one more minute until it’s fragrant. I once burnt the garlic here, and the whole batch tasted bitter. Learn from my mistake!
- Build the Roux: Sprinkle the 1/3 cup of flour over the cooked vegetables. Stir constantly with your whisk for about 1-2 minutes. This cooks the raw flour taste out. The mixture will look like a thick, clumpy paste—that’s perfect. It should smell a little nutty.
- Create the Sauce: Slowly pour in the 2 cups of chicken broth while whisking vigorously. Keep whisking until the mixture is smooth and starts to thicken, about 2 minutes. Then, pour in the 1 cup of milk or cream, still whisking. Bring the sauce to a gentle simmer—you’ll see small bubbles around the edges. It should be thick enough to coat the back of a spoon. If it’s too thick, add a splash more broth. Too thin? Let it simmer a minute longer.
- Add the Turkey and Seasonings: Turn off the heat. Stir in the 3 cups of cooked turkey, the frozen peas, the fresh thyme, and the poultry seasoning. Add salt and pepper to taste. Remember, the crust will add a little saltiness, so go easy. The filling should be incredibly savory and creamy. Let it cool for about 10 minutes. This is important—if the filling is too hot, it will make your bottom crust soggy.
- Assemble the Pies: While the filling cools, unroll your pie crusts onto a lightly floured surface. Using your mini skillets as a guide, cut out 4 circles of dough that are about 1 inch larger than the top of your skillets. You’ll probably need to re-roll the scraps to get all four. Divide the filling evenly among the 4 skillets. Place a dough circle on top of each, letting the excess hang over the edge. Crimp the edges with your fingers or a fork to seal. Cut 3 or 4 small slits in the top of each crust to let steam escape. This is non-negotiable—otherwise, you’ll have a crust explosion in your oven.
- Egg Wash and Bake: Brush the tops of the crusts with the beaten egg wash. Sprinkle with a little flaky sea salt if you’re using it. Bake for 20-25 minutes, or until the crust is a deep, gorgeous golden brown and the filling is bubbling up through the slits. Let them cool on the baking sheet for at least 5-10 minutes before serving. The filling is molten lava hot straight out of the oven!
Cooking Tips & Techniques
I’ve made these mini pot pies more times than I can count, and I’ve definitely had my share of mishaps. Here are the lessons I’ve learned the hard way so you don’t have to.
- Don’t Skip the Roux Cooking: That initial 1-2 minutes of cooking the flour and butter is crucial. If you don’t cook it long enough, your sauce will taste like raw flour, and nobody wants that. You want it to look like wet sand and smell a bit toasty.
- Cool the Filling: I know you’re eager to get them in the oven, but letting the filling cool for 10 minutes is a pro tip. A piping hot filling will start to melt the fat in the raw pie crust, leading to a soggy bottom. A warm, not hot, filling gives you that perfectly flaky crust all the way through.
- The Crust Seal: Make sure you press the crust firmly onto the rim of the skillet or ramekin. If there’s a gap, the filling will bubble out and make a mess on your baking sheet. A good crimp is your best defense against a leaky pie.
- Steam Vents are Essential: I once forgot to cut slits in the top crust. The steam built up so much pressure that the crust literally blew off the top of the pie and landed on the bottom of the oven. It was a smoky, sad disaster. Always, always cut those slits.
- Multitasking Strategy: While the filling is cooling, use that time to cut your crusts and prep your egg wash. This keeps the workflow smooth and prevents that last-minute scramble. I like to have everything ready to go before I even start cooking the filling.
Variations & Adaptations
This recipe is a fantastic base, and it’s incredibly forgiving. Don’t be afraid to make it your own based on what you have on hand or who you’re feeding.
- Chicken Pot Pie: This is the most obvious swap. Use leftover rotisserie chicken or poached chicken breasts instead of turkey. Everything else stays the same, and it’s just as delicious.
- Vegetarian Mushroom & Leek Pot Pie: Sauté 8 ounces of sliced cremini mushrooms with the onions and carrots. Swap the turkey for 1 can of drained and rinsed chickpeas or 2 cups of diced, roasted butternut squash. Use vegetable broth instead of chicken broth. It’s earthy, hearty, and completely satisfying.
- Herb & Cheese Crust: Before rolling out your pie crust, sprinkle 1/4 cup of finely grated Parmesan cheese and 1 teaspoon of dried rosemary or sage onto the dough. Fold it over and roll it out. It adds an incredible savory, cheesy flavor to the crust that pairs perfectly with the creamy filling.
- Add a Potato Top: For a twist, skip the top crust and top the filling with mashed potatoes. Just dollop the potatoes on and bake until the edges are bubbly and the potatoes are golden. It’s like a shepherd’s pie and a pot pie had a delicious baby.
- Spicy Kick: Add 1/4 teaspoon of cayenne pepper or a pinch of red pepper flakes to the filling along with the seasonings. It adds a subtle warmth that cuts through the richness beautifully.
I once made a batch with leftover smoked turkey from a barbecue, and it was mind-blowingly good. Don’t be afraid to experiment with different proteins or leftover roasts!
Serving & Storage Suggestions
These mini pot pies are a meal in themselves, but the right accompaniments can turn them into a feast. Presentation is key, especially when you’re hosting.
Serving: Serve the pies directly in their mini skillets or ramekins. Place each one on a small plate or a folded cloth napkin to protect your table from the hot cast iron. They’re perfect as the main event. For a complete Friendsgiving spread, pair them with a simple cranberry sauce with orange zest for a tart contrast, a bright and tangy green salad with a vinaigrette, or some garlic herb roasted green beans. A glass of crisp white wine or a spiced apple cider is the perfect drink pairing.
Storage: Baked pot pies will keep in the refrigerator for up to 3 days. Let them cool completely, then cover tightly with foil or plastic wrap. The crust will lose some of its crispness, but the flavor will still be amazing.
Reheating: The best way to reheat them is in the oven. Place them on a baking sheet and warm them at 350°F (175°C) for about 15-20 minutes, or until the filling is hot and bubbly again. You can use the microwave in a pinch, but the crust will be soft, not flaky.
Freezing: These freeze beautifully, either baked or unbaked. For unbaked pies, assemble them completely but don’t add the egg wash. Wrap them tightly in plastic wrap and then in foil. Freeze for up to 3 months. To bake from frozen, add the egg wash and bake at 400°F for 30-35 minutes. For baked pies, thaw in the fridge overnight and reheat as directed. The flavors actually get better after a day or two!
Nutritional Information & Benefits
While these are definitely a comfort food indulgence, they do offer some nutritional perks, especially if you use leftover turkey. It’s all about balance, right?
Estimated Nutritional Values (per mini pie):
- Calories: ~550-650
- Fat: 32g
- Carbohydrates: 45g
- Protein: 28g
Turkey is a fantastic source of lean protein, which is great for muscle repair and keeping you full. The carrots and peas add a dose of fiber and essential vitamins like Vitamin A and C. The celery even provides a little bit of Vitamin K. Of course, the butter and pie crust contribute to the fat and calorie count, but that’s what makes it so satisfying. This recipe can be made gluten-free by using a gluten-free all-purpose flour blend for the roux and a gluten-free pie crust. For a lower-carb option, you can skip the top crust and just bake the filling with a cheesy, low-carb topping like crushed pork rinds or almond flour biscuits. As I always say, food is about joy and connection first, and this dish delivers on both fronts.
Conclusion
These Guest-Favorite Mini Turkey Pot Pies are more than just a recipe; they’re a hosting secret weapon. They take the humble pot pie and turn it into a show-stopping, individual serving that screams “I care” without screaming “I slaved all day.” They’re the perfect way to use up leftovers, impress your friends, and create that warm, cozy feeling that makes Friendsgiving so special. I love this recipe because it’s the one that made my pot-pie-hating brother-in-law a believer. It reminds me that sometimes, the best dishes are the ones that quietly prove everyone wrong. So go ahead, make a batch for your next gathering. Watch the faces of your guests light up. And don’t be surprised if someone tries to sneak one into their coat pocket. I’d love to hear how yours turn out! Leave a comment below and tell me about your own pot pie conversion stories, or share a photo of your beautiful creations. Happy cooking!
Frequently Asked Questions
Can I make these in a regular muffin tin for even smaller portions?
Absolutely! For adorable, bite-sized pot pies, use a standard 12-cup muffin tin. Line each cup with a circle of pie crust, fill with the prepared filling, and top with a smaller crust round. Bake for about 15-18 minutes at 400°F. They’re perfect for parties or as appetizers.
My filling always turns out too thin or too thick. How can I fix it?
If your filling is too thin, let it simmer for a few extra minutes while whisking. The starch in the flour will continue to thicken it. If it’s too thick, simply whisk in a splash more broth or milk until it reaches your desired consistency. Remember, it should be thick but still pourable.
Can I use a homemade pie crust instead of the refrigerated one?
Yes, definitely! A homemade all-butter crust will take these to the next level. Use your favorite recipe for a double crust. Just make sure to roll it out to about 1/8-inch thickness and chill it well before using to prevent shrinkage in the oven.
Can I add other vegetables to the filling?
Of course! This is a great way to use up what you have. Diced potatoes (parboiled first), corn, green beans, chopped mushrooms, or even small broccoli florets all work wonderfully. Just make sure any hard vegetables are cooked through before adding the turkey.
How far in advance can I assemble the pies before baking?
You can assemble the unbaked pies (without the egg wash) up to 24 hours in advance. Cover them tightly with plastic wrap and store them in the refrigerator. Add the egg wash just before baking. You may need to add 5 extra minutes to the baking time since the filling will be cold.
Pin This Recipe!
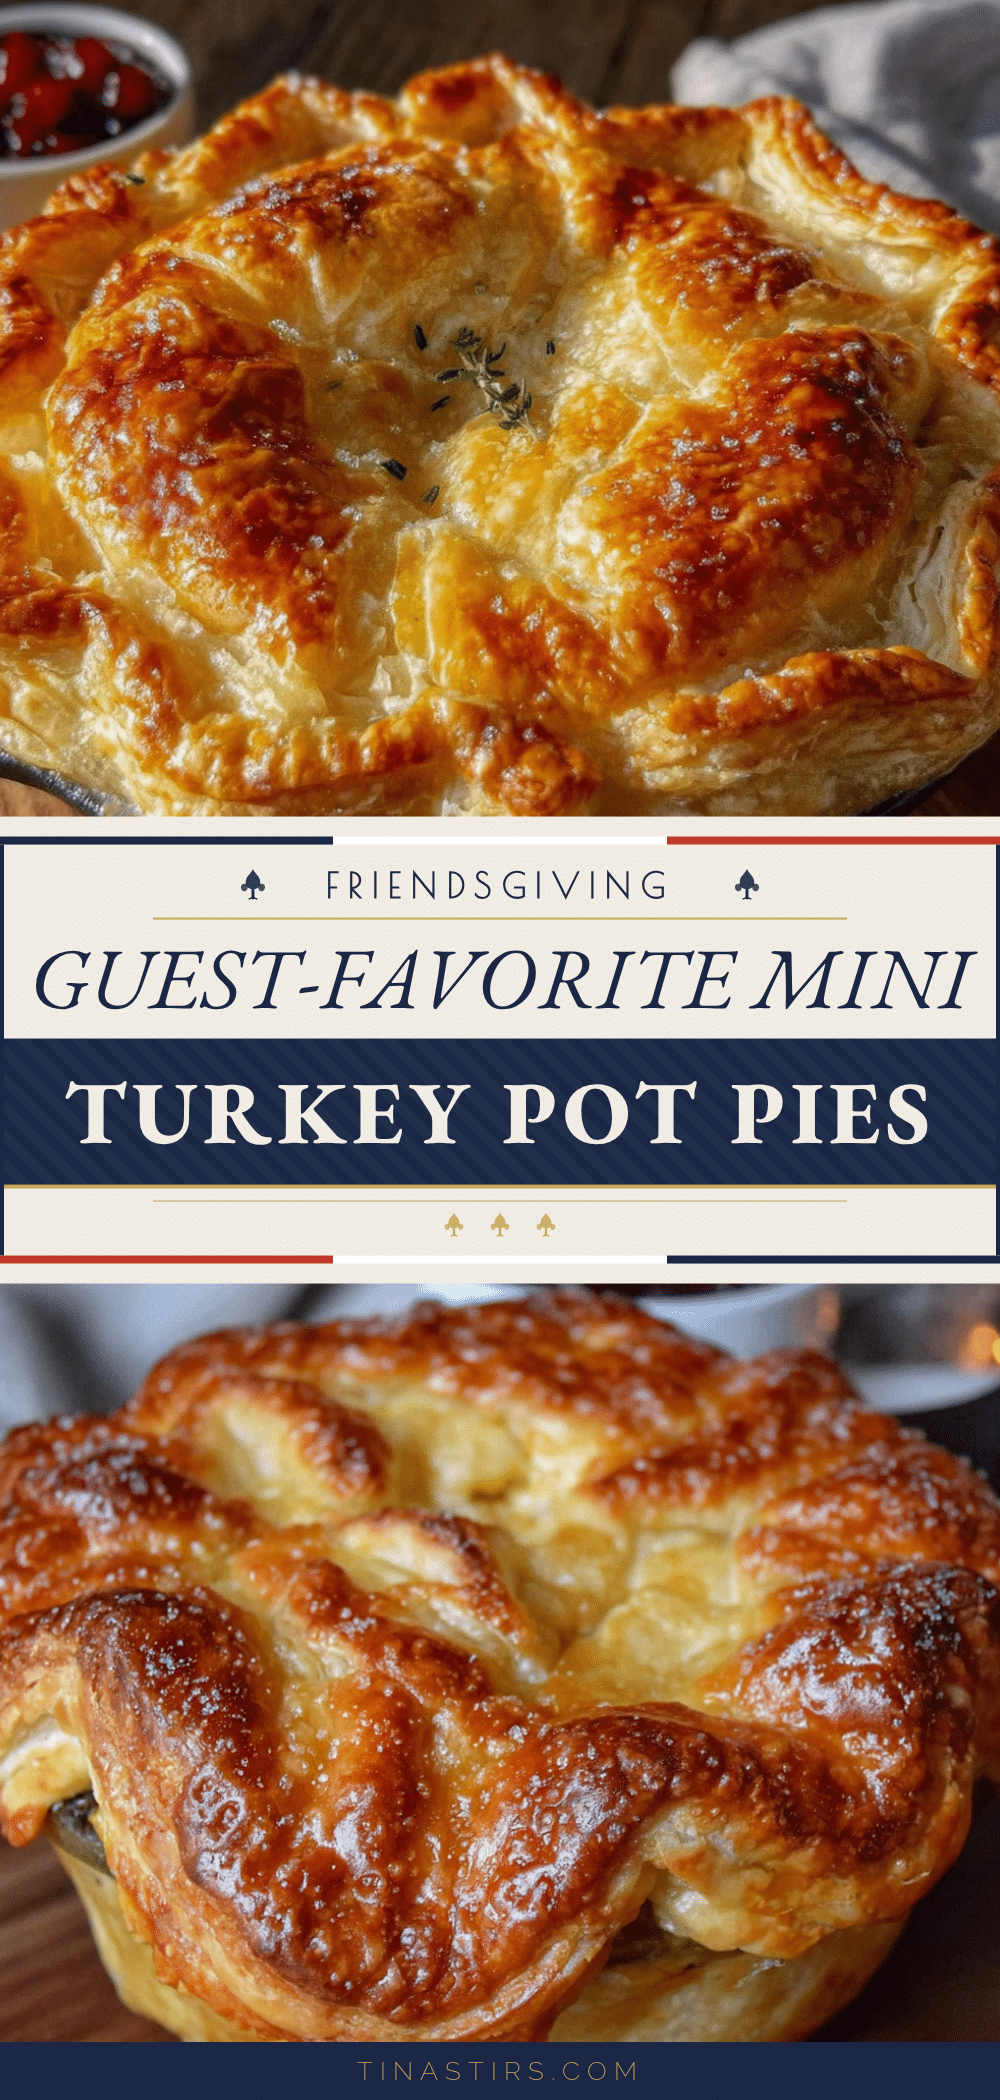
Best Mini Turkey Pot Pies for Friendsgiving

These individual, golden-crusted mini turkey pot pies are the perfect centerpiece for Friendsgiving. They transform leftover turkey into a creamy, savory comfort food that will change minds and impress any crowd.
- Prep Time: 20 minutes
- Cook Time: 25 minutes
- Total Time: 45 minutes
- Yield: 4 servings 1x
- Category: Main Course
- Cuisine: American
Ingredients
- 3 tablespoons unsalted butter
- 1 medium yellow onion, finely chopped (about 1 cup)
- 2 medium carrots, peeled and diced (about 1 cup)
- 2 celery stalks, diced (about 1/2 cup)
- 3 cloves garlic, minced
- 1/3 cup all-purpose flour
- 2 cups low-sodium chicken or turkey broth
- 1 cup whole milk or heavy cream
- 3 cups cooked turkey, shredded or diced
- 1 cup frozen peas
- 1 teaspoon fresh thyme leaves (or 1/2 teaspoon dried)
- 1/2 teaspoon poultry seasoning
- Salt and freshly ground black pepper to taste
- 1 package (14.1 ounces) refrigerated pie crusts (like Pillsbury)
- 1 large egg, beaten with 1 tablespoon water
- Flaky sea salt for sprinkling (optional)
Instructions
- Preheat your oven to 400°F (200°C). Place 4 mini skillets or ramekins on a large baking sheet.
- In a large skillet or Dutch oven, melt 3 tablespoons of butter over medium heat. Add chopped onion, carrots, and celery. Cook for 6-8 minutes until softened and onion is translucent. Add minced garlic and cook for 1 more minute until fragrant.
- Sprinkle 1/3 cup of flour over the cooked vegetables. Stir constantly with a whisk for 1-2 minutes to cook out the raw flour taste.
- Slowly pour in 2 cups of chicken broth while whisking vigorously. Continue whisking until smooth and thickened, about 2 minutes. Then pour in 1 cup of milk or cream, still whisking. Bring to a gentle simmer until sauce coats the back of a spoon.
- Turn off the heat. Stir in 3 cups of cooked turkey, 1 cup of frozen peas, 1 teaspoon of fresh thyme, and 1/2 teaspoon of poultry seasoning. Add salt and pepper to taste. Let the filling cool for about 10 minutes.
- While filling cools, unroll pie crusts onto a lightly floured surface. Using mini skillets as a guide, cut out 4 circles of dough about 1 inch larger than the top of your skillets. Divide filling evenly among the 4 skillets. Place a dough circle on top of each, letting excess hang over the edge. Crimp edges with fingers or a fork to seal. Cut 3-4 small slits in the top of each crust for steam vents.
- Brush tops of crusts with beaten egg wash. Sprinkle with flaky sea salt if desired. Bake for 20-25 minutes until crust is deep golden brown and filling is bubbling. Let cool on baking sheet for 5-10 minutes before serving.
Notes
Let filling cool for 10 minutes before assembling to prevent soggy bottom crust. Always cut steam vents in the top crust to prevent explosions. For best results, use a mix of dark and white meat turkey. Can be assembled up to 24 hours in advance (without egg wash) and refrigerated. Freezes beautifully for up to 3 months.
Nutrition
- Serving Size: 1 mini pie
- Calories: 600
- Sugar: 6
- Sodium: 680
- Fat: 32
- Saturated Fat: 12
- Carbohydrates: 45
- Fiber: 4
- Protein: 28
Keywords: mini turkey pot pie, Friendsgiving, leftover turkey, comfort food, individual pot pie, cast iron skillet pot pie


