Love this? Save it for later!
Share the inspiration with your friends
It was 11:47 PM on a rainy Tuesday in early December, and I had a ridiculous, almost desperate craving for something creamy and spiced. My brain was screaming for a slice of rich cheesecake, but my fridge was in a sorry state. I had a carton of eggnog left over from a party I didn’t even want to go to, a block of cream cheese, and a package of ginger snaps that were starting to go soft. The idea just arrived, fully formed, like a weird little Christmas miracle. I didn’t have graham crackers for a traditional crust, and I certainly wasn’t about to run to the store in my pajamas. So, I crushed those sad ginger snaps, mixed them with melted butter, and prayed to the dessert gods. Honestly, I thought I was making a mess. I spilled nutmeg all over the counter, and I forgot to set a timer for the first ten minutes. But when I pulled those bars out of the oven, the whole kitchen smelled like a holiday hug. That first bite—silky, tangy, with that warm kick of nutmeg—was the kind of accidental genius that only happens when you stop trying so hard. Maybe you’ve been there, staring into the fridge at midnight, convinced you can make something magical out of nothing. This is that recipe, the one that turned a quiet, rainy Tuesday into a cozy little memory.
Why You’ll Love This Recipe
Let me tell you, these Cozy Eggnog Cheesecake Bars with Nutmeg aren’t just another holiday dessert. They’re a game-changer for anyone who wants that classic cheesecake feel without the fuss of a water bath or a springform pan. I’ve tested this version about four times now—once with low-fat cream cheese (don’t do it), once with store-bought crust (too sweet), and twice with my own tweaks—and this is the one that won my heart. Here’s why you’ll fall for them too:
- Quick & Easy: From start to finish, you’re looking at about 45 minutes of active time. The oven does the rest. Perfect for a busy holiday week.
- Simple Ingredients: You probably have most of this in your kitchen right now. Eggnog, cream cheese, eggs, sugar, and a few spices. No weird extracts or hard-to-find items.
- Perfect for Holiday Gatherings: These bars are a hit at cookie swaps, potlucks, or just for a quiet night by the fire. They travel well and slice cleanly.
- Crowd-Pleaser: I brought a batch to my neighbor Carol, who claims she “doesn’t like eggnog,” and she ate three pieces. Three.
- Unbelievably Delicious: The texture is this perfect middle ground—dense but creamy, with a crumbly ginger snap crust that adds just the right amount of snap. The nutmeg isn’t overpowering; it’s like a warm whisper of holiday cheer.
What makes this recipe different from every other eggnog cheesecake out there? It’s the crust, honestly. Using ginger snaps instead of graham crackers gives it a deeper, spicier flavor that plays beautifully with the creamy filling. Plus, the method of pre-baking the crust for just a few minutes keeps it from getting soggy. This isn’t just another version—it’s my best version, and I’m not sorry about being proud of it.
What Ingredients You Will Need
This recipe uses simple, wholesome ingredients that come together to deliver a bold, comforting flavor. Most of these are pantry staples during the holiday season, which makes these bars an easy last-minute treat. Let’s break it down.
- For the Crust:
- 1 ½ cups (180g) ginger snap crumbs (about 25-30 cookies, crushed finely) – I prefer Nabisco for a consistent crunch, but any brand works. The ginger and molasses notes are key here.
- ¼ cup (50g) granulated sugar – Just enough to sweeten the crust without making it candy-like.
- 6 tablespoons (85g) unsalted butter, melted – Use real butter, not margarine. It makes the crust hold together better.
- Pinch of salt – Balances the sweetness.
- For the Cheesecake Filling:
- 16 ounces (450g) full-fat cream cheese, softened – Philadelphia is my go-to. Low-fat will make the texture grainy, so stick with the good stuff.
- ½ cup (100g) granulated sugar – Not too much; the eggnog adds sweetness too.
- 2 large eggs, room temperature – Cold eggs can seize the batter. Leave them out for 30 minutes before starting.
- 1 cup (240ml) full-fat eggnog – Use the real, thick, creamy kind. Light eggnog has too much water and will make the bars runny.
- 1 teaspoon vanilla extract – Pure vanilla, not imitation. It rounds out the spices.
- ½ teaspoon ground nutmeg, plus more for garnish – Freshly grated if you have it, but pre-ground works fine. I use McCormick for consistency.
- ¼ teaspoon ground cinnamon – A subtle warmth that complements the nutmeg.
- 2 tablespoons all-purpose flour – Helps stabilize the filling and prevent cracking.
- For the Topping (Optional but Recommended):
- ½ cup (120ml) heavy cream – For a simple whipped cream topping.
- 1 tablespoon powdered sugar – Just enough to sweeten the cream.
- Extra grated nutmeg for dusting – Because more is more.
Ingredient Tips & Substitutions:
- If you can’t find ginger snaps, use shortbread cookies or vanilla wafers. The flavor will be different but still delicious.
- For a gluten-free version, use gluten-free ginger snaps or almond flour for the crust. The filling is naturally gluten-free, but double-check your eggnog.
- If you’re out of eggnog (heresy, I know), you can substitute with a mix of ¾ cup whole milk, 2 tablespoons heavy cream, 1 tablespoon sugar, and ¼ teaspoon each of nutmeg and cinnamon. It’s not the same, but it works in a pinch.
Equipment Needed
You don’t need a lot of fancy gear for these bars, which is part of their charm. Here’s what you’ll want to have on hand:
- 9×9-inch baking pan – This is the sweet spot for bar thickness. An 8×8 works too, but the bars will be slightly taller and may need an extra 5 minutes of baking time.
- Parchment paper – Line the pan with two overlapping strips, leaving overhang on all sides. This makes lifting the bars out a breeze. Trust me, don’t skip this.
- Food processor or zip-top bag – For crushing the ginger snaps. A food processor gives you a fine, even crumb. A rolling pin over a bag gives you a workout and a few uneven bits, which I actually like.
- Electric hand mixer or stand mixer – Cream cheese needs to be whipped until smooth. A whisk and some elbow grease will work, but your arm will hate you.
- Mixing bowls – One medium, one large. Nothing fancy.
- Rubber spatula – For scraping every last bit of filling into the pan. Waste not, want not.
- Cooling rack – Essential for even cooling. Letting the bars cool in the pan on a rack prevents a soggy bottom.
Budget-Friendly Tip: If you don’t have a food processor, place the cookies in a sturdy zip-top bag and smash them with a heavy skillet or rolling pin. It’s oddly satisfying and costs nothing extra.
Preparation Method
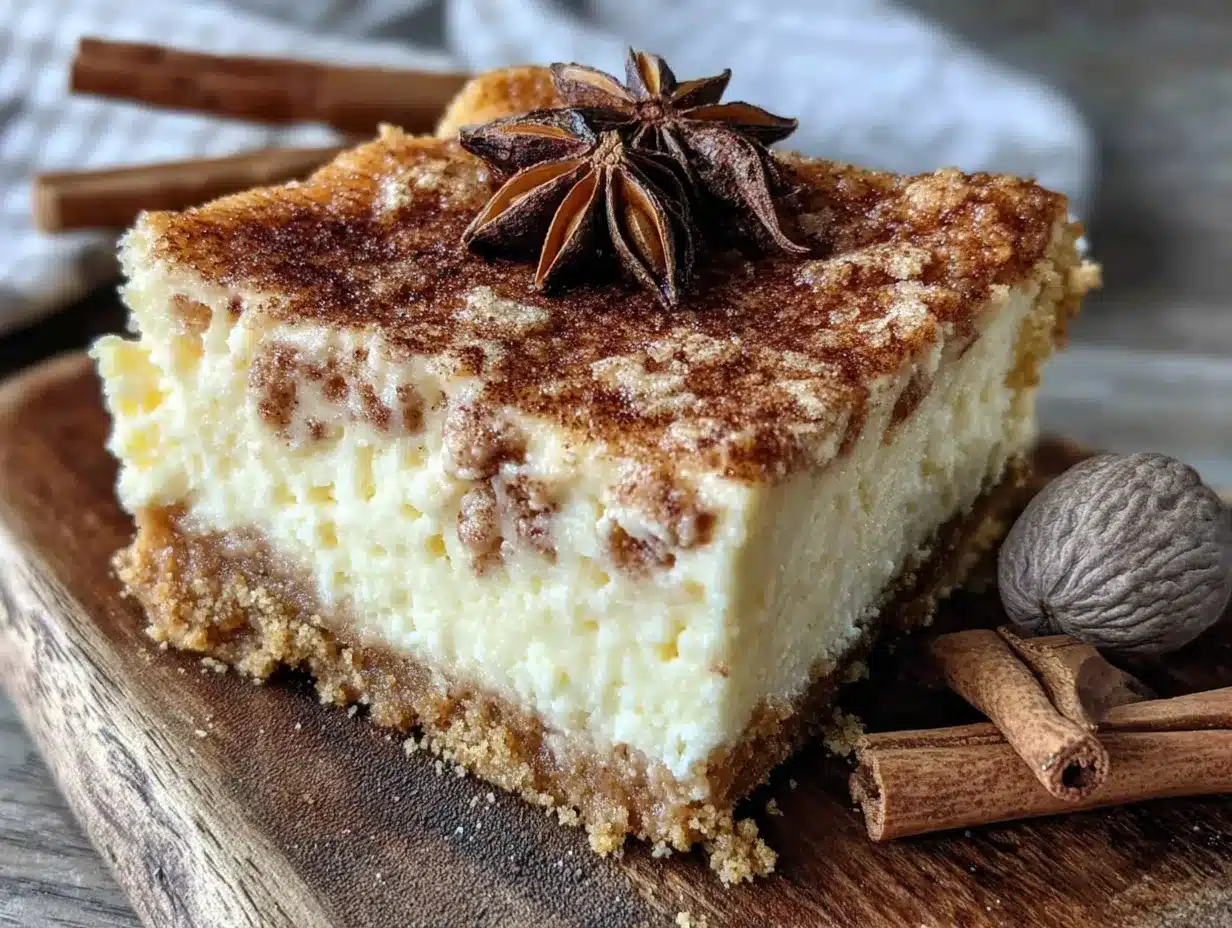
Alright, let’s get to the fun part. I’ve broken this down into clear steps, but don’t stress—this recipe is forgiving. Even if you over-mix or under-bake a little, these bars are still going to be amazing.
- Preheat and Prep: Preheat your oven to 325°F (160°C). Line your 9×9 pan with parchment paper, leaving a 2-inch overhang on two opposite sides. This will be your “handle” to lift the bars out later.
- Make the Crust: In a food processor, pulse the ginger snaps until they turn into fine crumbs. You should have about 1 ½ cups. Transfer to a medium bowl, add the sugar and salt, and pour in the melted butter. Stir with a fork until the mixture looks like wet sand. Press this firmly into the bottom of your prepared pan. Use the bottom of a measuring cup to get it even and compact. Pre-bake the crust for 10 minutes. This step is non-negotiable—it keeps the crust from turning into a sad, soggy mess. Let it cool slightly while you make the filling.
- Beat the Cream Cheese: In a large bowl, beat the softened cream cheese with an electric mixer on medium speed until smooth and creamy—about 2 minutes. Scrape down the sides and the bottom of the bowl. Add the sugar and beat for another minute until fluffy.
- Add the Eggs: Crack the eggs into a small bowl first (just in case of shells), then add them one at a time to the cream cheese mixture, beating on low after each addition until just combined. Over-mixing at this stage can incorporate too much air, which leads to cracks.
- Incorporate the Wet Ingredients: Pour in the eggnog and vanilla extract. Beat on low until smooth, about 30 seconds. The batter will look a little thin, but that’s normal.
- Add the Dry Ingredients: Sprinkle the flour, nutmeg, and cinnamon over the batter. Mix on low until just combined. You don’t want to see any flour streaks, but don’t keep mixing once it’s smooth. Give it one final stir with a rubber spatula to catch any hidden pockets.
- Assemble: Pour the filling over the pre-baked crust. Gently spread it into an even layer with your spatula. Tap the pan on the counter a few times to release any air bubbles.
- Bake: Place the pan in the oven and bake for 35-40 minutes. The edges should look set, but the center will still jiggle slightly when you gently shake the pan. That’s your cue. Don’t wait for the center to be completely firm—it will continue to set as it cools. Over-baking leads to a dry, cracked texture.
- Cooling: Transfer the pan to a wire rack and let it cool completely at room temperature, about 1 hour. Then, cover the pan with plastic wrap and refrigerate for at least 4 hours, but overnight is better. Patience is hard, I know, but this step is crucial for clean slices and the best texture.
- Slice and Serve: Once fully chilled, use the parchment overhang to lift the entire block out of the pan. Place it on a cutting board and use a sharp knife to slice into 16 squares. Wipe the knife clean between cuts for neat edges. Dust with a little extra nutmeg just before serving.
Cooking Tips & Techniques
After a few failed batches (including one where I forgot the sugar entirely—don’t ask), I’ve learned a thing or two. Here are my best tips for nailing these bars every time.
- Room Temperature is Your Friend: Cream cheese and eggs need to be at room temperature. If you’re in a hurry, place the cream cheese (still wrapped) in a bowl of warm water for 10 minutes. For the eggs, submerge them in a cup of warm water for 5 minutes. Cold ingredients create a lumpy batter that bakes unevenly.
- Don’t Over-Bake: This is the most common mistake. The center should still wobble when you pull it out. If you wait until it’s fully set, it’s already too late. A slightly jiggly center means a creamy, silky texture.
- Prevent Cracks: Cracks happen when the cheesecake bakes too fast or cools too quickly. Baking at 325°F instead of 350°F helps. Also, don’t open the oven door during baking—the sudden temperature change can cause cracking. Let the bars cool gradually in the pan on a wire rack.
- Clean Slices: For those picture-perfect slices, use a long, sharp knife. Run it under hot water, wipe it dry, then make your cut. Repeat for each slice. A warm knife glides through the cheesecake without dragging the filling.
- Timing & Multitasking: While the crust is pre-baking, you can beat the cream cheese. While the bars are baking, you can wash dishes or make the whipped cream. It all comes together in under an hour of active time.
Variations & Adaptations
One of the best things about these bars is how easy they are to tweak. Here are a few ways I’ve played with the recipe.
- Boozy Eggnog Version: Add 2 tablespoons of dark rum or bourbon to the filling along with the eggnog. The alcohol burns off during baking, leaving behind a warm, complex flavor. I tried this for a Christmas Eve party, and it was a hit.
- Chocolate Swirl: Melt ½ cup of semisweet chocolate chips and drizzle it into the batter before baking. Use a knife to swirl it gently. The chocolate and nutmeg combo is surprisingly good—like a fancy holiday candy bar.
- Gluten-Free Adaptation: Use gluten-free ginger snaps for the crust. The filling is naturally gluten-free, but double-check your eggnog brand. I’ve used Kinnikinnick cookies with great results.
- Vegan Version: Substitute the cream cheese with a high-quality vegan cream cheese (like Miyoko’s), use a flax egg (1 tablespoon ground flax + 3 tablespoons water per egg), and swap the eggnog for a plant-based version. The texture will be slightly softer, but the flavor is still spot-on.
- Spiced Variation: Add ¼ teaspoon of ground cloves or cardamom to the filling for a more complex spice profile. I did this once when I ran out of cinnamon, and it was a happy accident.
Serving & Storage Suggestions
These bars are best served cold, straight from the fridge. The texture is firm and creamy, like a classic cheesecake but in a more portable form. Here’s how to serve and store them.
- Serving: Let the bars sit at room temperature for about 5-10 minutes before serving. This takes the chill off without making them soft. Top with a dollop of lightly sweetened whipped cream and a dusting of nutmeg. For a festive touch, add a few pomegranate arils or a sprig of mint.
- Pairings: These bars are wonderful with a cup of hot coffee, a mug of spiced tea, or a glass of cold milk. For an adult pairing, try them with a small glass of bourbon or a dark rum. The richness of the cheesecake stands up beautifully to strong flavors.
- Storage: Store the bars in an airtight container in the refrigerator for up to 5 days. Layer them with parchment paper between slices to prevent sticking. The flavor actually improves after a day or two as the spices meld.
- Freezing: These freeze like a dream. Wrap individual slices tightly in plastic wrap, then place them in a freezer-safe bag or container. Freeze for up to 3 months. To thaw, move a slice to the refrigerator overnight. Do not thaw at room temperature, or the texture will become watery.
- Reheating: Honestly, I don’t recommend reheating these. They’re designed to be served cold. But if you must, a quick 10-second zap in the microwave will take the edge off. Just don’t expect the same creamy texture.
Nutritional Information & Benefits
Let’s be real—this is a holiday treat, not a health food. But it’s made with real ingredients, and that counts for something. Here’s a rough estimate per bar (based on 16 servings):
- Calories: ~280
- Fat: 18g
- Carbohydrates: 24g
- Protein: 5g
- Sugar: 16g
Health Benefits: Eggnog is made with milk and eggs, so it provides a small amount of calcium and protein. Nutmeg has been used in traditional medicine for its anti-inflammatory properties (though you’d need to eat a lot to get a real benefit). The ginger in the crust can aid digestion. Look, I’m not saying these bars are a superfood, but they’re made with love and real ingredients, which is more than you can say for a lot of store-bought desserts. Enjoy them in moderation, and don’t feel guilty about it.
Dietary Considerations: This recipe contains dairy, gluten, and eggs. For gluten-free and vegan adaptations, see the Variations section above.
Conclusion
Honestly, these Cozy Eggnog Cheesecake Bars with Nutmeg are the kind of dessert that makes the holidays feel a little more special. They’re not fussy or pretentious—they’re just really, really good. The combination of the spicy ginger snap crust, the creamy eggnog filling, and that final dusting of nutmeg is pure comfort in a bite. Whether you’re making them for a party or just for yourself on a quiet night (no judgment here), I promise they’ll hit the spot. I love this recipe because it’s a reminder that you don’t need a dozen fancy ingredients or hours of free time to create something memorable. Sometimes the best things come from a late-night craving and a little bit of faith. So go ahead, give these a try. Let me know how they turn out in the comments—I’d love to hear about your own happy accidents. And if you tweak them, tell me about that too. Happy baking, my friend.
Frequently Asked Questions
Can I use low-fat cream cheese or eggnog?
I wouldn’t recommend it. Full-fat cream cheese and eggnog give these bars their signature creamy, dense texture. Low-fat versions have more water content, which can make the filling runny or grainy. If you must, use a block-style Neufchâtel cheese, but expect a slightly less rich result.
Why did my cheesecake bars crack?
Cracks usually happen from over-baking or a sudden temperature change. Make sure you pull the bars out when the center is still slightly jiggly. Also, let them cool gradually on a wire rack before refrigerating. Avoid opening the oven door during baking.
Can I make these bars ahead of time?
Absolutely! In fact, they taste better after a day in the fridge. You can make them up to 3 days in advance. Store them covered in the refrigerator, and add the whipped cream and nutmeg garnish just before serving.
How do I get clean, neat slices?
Use a long, sharp knife and run it under hot water before each cut. Wipe the blade dry with a clean towel, then slice. The heat helps the knife glide through the cheesecake without dragging the filling. Repeat for each cut.
Can I freeze these bars?
Yes! Wrap individual slices tightly in plastic wrap, then place them in a freezer-safe bag or container. Freeze for up to 3 months. Thaw overnight in the refrigerator. Do not thaw at room temperature, as the texture can become watery.
Pin This Recipe!
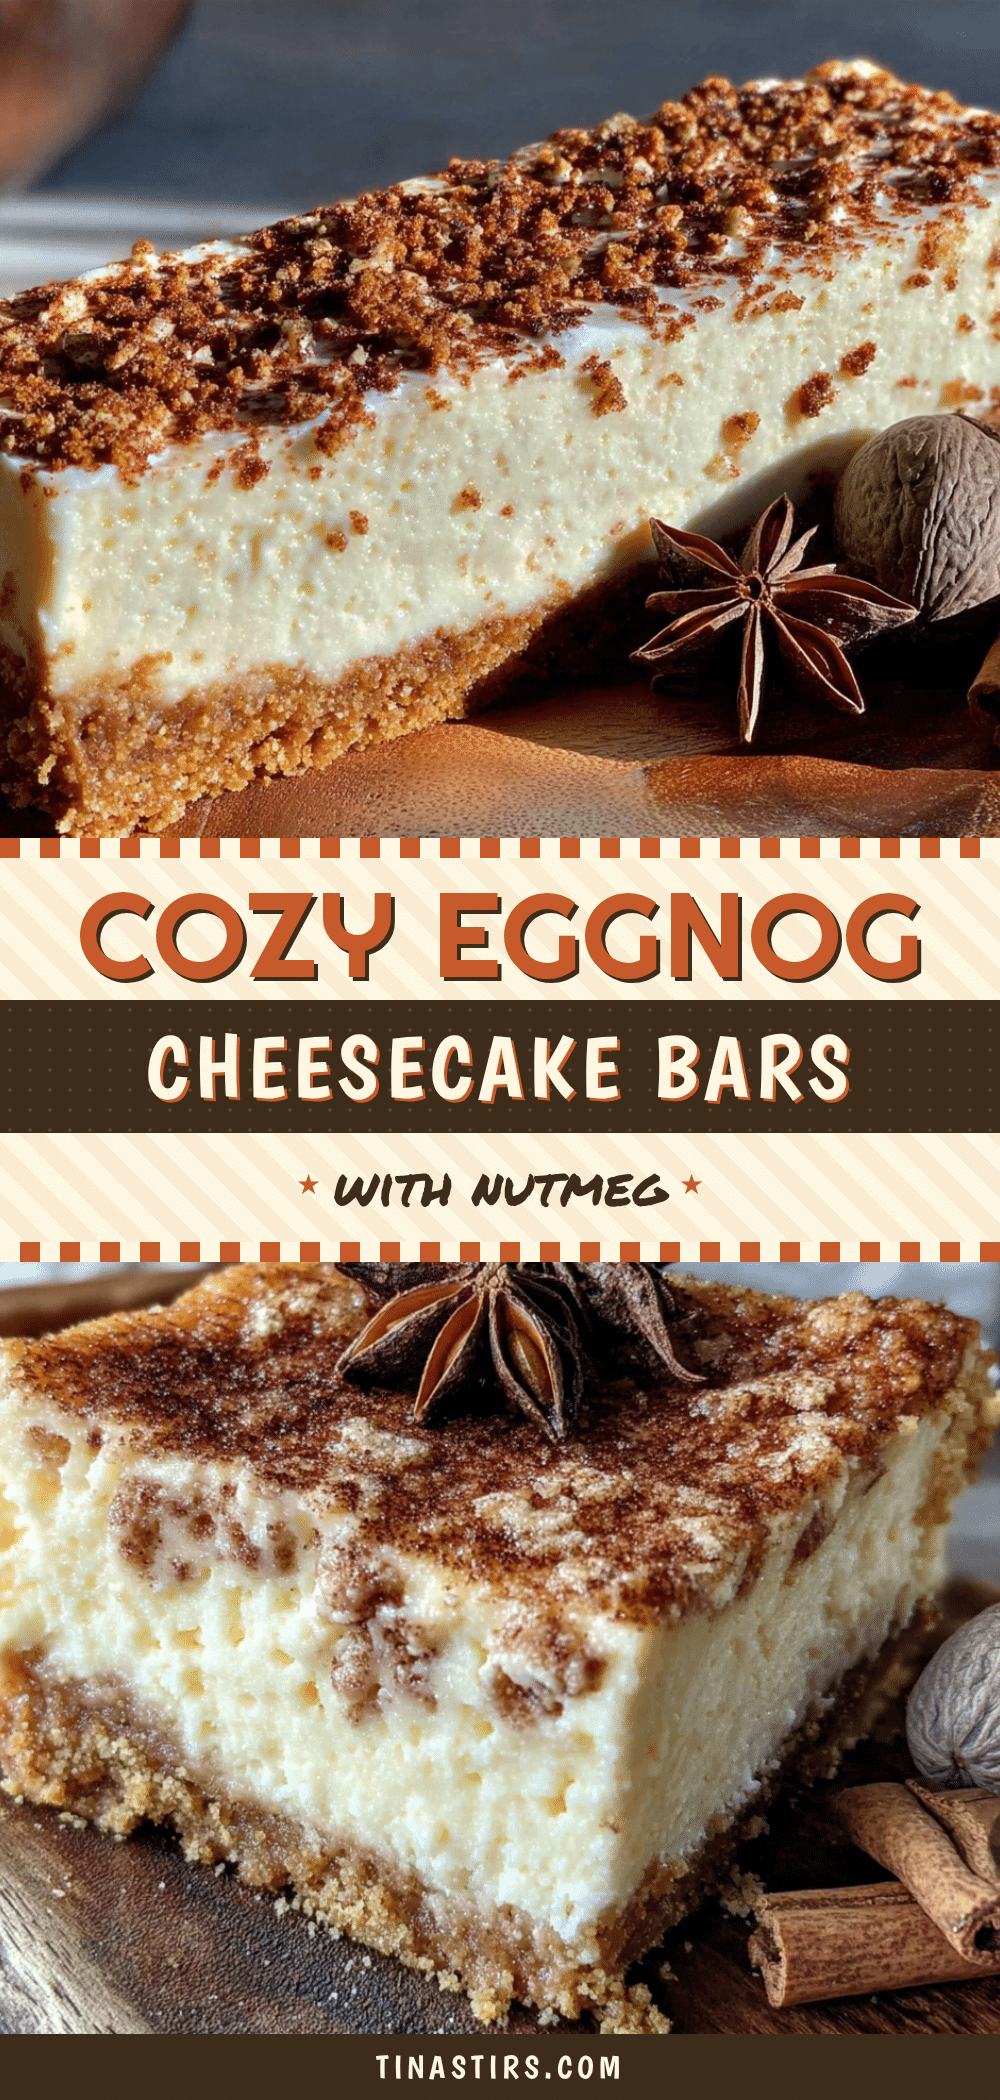
Cozy Eggnog Cheesecake Bars with Nutmeg – Easy Holiday Dessert
These creamy, spiced eggnog cheesecake bars feature a crunchy ginger snap crust and a silky filling, perfect for holiday gatherings or a cozy night in.
- Prep Time: 15 minutes
- Cook Time: 40 minutes
- Total Time: 4 hours 55 minutes (includes chilling)
- Yield: 16 servings 1x
- Category: Dessert
- Cuisine: American
Ingredients
- 1 ½ cups (180g) ginger snap crumbs (about 25–30 cookies, crushed finely)
- ¼ cup (50g) granulated sugar
- 6 tablespoons (85g) unsalted butter, melted
- Pinch of salt
- 16 ounces (450g) full-fat cream cheese, softened
- ½ cup (100g) granulated sugar
- 2 large eggs, room temperature
- 1 cup (240ml) full-fat eggnog
- 1 teaspoon vanilla extract
- ½ teaspoon ground nutmeg, plus more for garnish
- ¼ teaspoon ground cinnamon
- 2 tablespoons all-purpose flour
- ½ cup (120ml) heavy cream (for topping, optional)
- 1 tablespoon powdered sugar (for topping, optional)
- Extra grated nutmeg for dusting (for topping, optional)
Instructions
- Preheat your oven to 325°F (160°C). Line a 9×9-inch baking pan with parchment paper, leaving a 2-inch overhang on two opposite sides.
- In a food processor, pulse the ginger snaps until fine crumbs form. Transfer to a medium bowl, add ¼ cup sugar and a pinch of salt, then pour in the melted butter. Stir until the mixture looks like wet sand. Press firmly into the bottom of the prepared pan. Pre-bake the crust for 10 minutes. Let cool slightly.
- In a large bowl, beat the softened cream cheese with an electric mixer on medium speed until smooth and creamy, about 2 minutes. Add ½ cup sugar and beat for another minute until fluffy.
- Add the eggs one at a time, beating on low after each addition until just combined.
- Pour in the eggnog and vanilla extract. Beat on low until smooth, about 30 seconds.
- Sprinkle the flour, nutmeg, and cinnamon over the batter. Mix on low until just combined. Give one final stir with a rubber spatula.
- Pour the filling over the pre-baked crust and spread into an even layer. Tap the pan on the counter a few times to release air bubbles.
- Bake for 35-40 minutes, until the edges are set but the center still jiggles slightly. Transfer to a wire rack and cool completely at room temperature, about 1 hour.
- Cover the pan with plastic wrap and refrigerate for at least 4 hours, preferably overnight.
- Use the parchment overhang to lift the bars out of the pan. Slice into 16 squares with a sharp knife, wiping the blade clean between cuts. Dust with extra nutmeg before serving. Optionally, top with whipped cream made from heavy cream and powdered sugar.
Notes
For best results, use full-fat cream cheese and eggnog. Room temperature ingredients prevent lumps. Do not over-bake; the center should still jiggle. Chill overnight for clean slices. For a boozy version, add 2 tablespoons dark rum or bourbon to the filling.
Nutrition
- Serving Size: 1 bar
- Calories: 280
- Sugar: 16
- Sodium: 200
- Fat: 18
- Saturated Fat: 10
- Carbohydrates: 24
- Protein: 5
Keywords: eggnog cheesecake bars, holiday dessert, ginger snap crust, nutmeg, easy cheesecake bars