Love this? Save it for later!
Share the inspiration with your friends
It was 11:47 PM on a particularly drizzly Tuesday in October, and I had a craving for something deeply, soul-warmingly orange. I didn’t have the fancy heirloom squash the food magazines always insisted on, but I had a net of those funny little honeynut squashes from the farmers’ market that looked like miniature butternuts and a stick of butter that was begging to be pushed past its melting point. The idea arrived fully formed, like a gift from a sleepy culinary muse: brown the butter first. Let it get nutty and dark. Then build the whole soup on that toasty foundation. I wasn’t thinking about a blog post or impressing anyone. I was just a woman, a cutting board, and a very specific need for warmth.
Honestly, that late-night experiment turned into a recipe I now make on repeat every single fall. There’s something about the small window when honeynut squashes are in season—they’re sweeter and denser than butternut, with a skin so thin you don’t even have to peel it. That was the other secret I stumbled upon at 11 PM: no peeling. Just chop, roast, and blend. Maybe you’ve been there, standing in your kitchen at a weird hour, too tired for a complicated recipe but too hungry to settle for a sad bowl of cereal. This soup is the answer to that specific kind of hunger. It became my go-to for quiet nights when the world felt too loud, and I needed a bowl of something that tasted like a hug.
Why You’ll Love This Recipe
I’ve tested this soup more times than I can count, tweaking the ratio of squash to broth, the exact moment to pull the brown butter off the heat, and the perfect pinch of spice to make it sing. It’s chef-tested (by me, in my tiny kitchen) and family-approved (my picky nephew asked for seconds, which is basically a culinary Nobel Prize). Here’s why this version is the one you’ll want to bookmark.
- Quick & Easy: Comes together in under 45 minutes, with only 10 minutes of active prep. Perfect for a weeknight when you need comfort fast.
- Simple Ingredients: No fancy grocery trips. Honeynut squash, butter, onion, garlic, broth, and a few pantry spices are all you need.
- Perfect for Cozy Nights: This is the soup you make when the wind is howling outside and you want something that warms you from the inside out.
- Crowd-Pleaser: It’s creamy without heavy cream, sweet without added sugar, and savory enough to satisfy even the most dedicated carnivore.
- Unbelievably Delicious: The brown butter takes this from a simple squash soup to something deeply nutty, almost caramelized, and completely addictive.
What makes this recipe different is the technique. Roasting the squash with a touch of maple syrup until it’s caramelized, then swirling in that nutty brown butter at the very end. It’s not just another squash soup. It’s the one that makes you close your eyes after the first bite. It’s comfort food reimagined—faster, simpler, but with the same soul-soothing satisfaction that makes you want to curl up on the couch with a big bowl and a good book.
What Ingredients You Will Need
This recipe relies on a handful of humble ingredients that work together to create something magical. The star is the honeynut squash, but each component plays a crucial role in building that deep, cozy flavor.
- Honeynut Squash (3-4 medium, about 2 lbs total): These little guys are the unsung heroes of fall. They’re sweeter and more concentrated in flavor than butternut, with a thin, edible skin that saves you peeling time. If you can’t find them, you can substitute butternut squash, but you’ll need to peel it.
- Unsalted Butter (4 tablespoons, 1/2 stick): This is for the brown butter magic. I use unsalted to control the salt level. Kerrygold is my go-to for its rich, grassy flavor that browns beautifully.
- Yellow Onion (1 medium, diced): Adds a savory backbone. I prefer yellow over sweet or red for its balanced flavor that doesn’t overpower the squash.
- Garlic (3 cloves, smashed): Don’t mince it too fine; smashed cloves will infuse the soup without becoming bitter.
- Vegetable Broth (3 cups, low-sodium): Use a good-quality broth here. I like homemade vegetable broth when I have it, but store-bought works fine. Low-sodium is key so you can control the seasoning.
- Maple Syrup (1 tablespoon, plus more for drizzling): Real maple syrup, not pancake syrup. It enhances the natural sweetness of the squash and helps with caramelization during roasting.
- Fresh Thyme (4 sprigs): Adds an earthy, slightly floral note that pairs perfectly with brown butter. Dried thyme works in a pinch (use 1 teaspoon), but fresh is better.
- Ground Cinnamon (1/2 teaspoon): A whisper of warmth that makes the soup feel like a fall afternoon.
- Ground Nutmeg (1/4 teaspoon, freshly grated if possible): Just a hint. It brightens the other flavors without dominating.
- Salt and Black Pepper (to taste): Essential for balancing the sweetness. I use kosher salt for its clean flavor.
- Heavy Cream or Full-Fat Coconut Milk (1/4 cup, optional): For an extra-luxurious finish. I often skip it when I want a lighter soup, but it’s a lovely addition for special occasions.
Ingredient Selection Tips: Look for honeynut squashes that feel heavy for their size and have a deep orange color. Avoid any with soft spots or blemishes. For the butter, don’t use margarine or plant-based butter—they won’t brown the same way and the flavor won’t be as rich.
Equipment Needed
You don’t need a professional kitchen to make this soup. Here’s what I use, along with some budget-friendly alternatives.
- Baking Sheet (half-sheet pan): For roasting the squash. A rimmed sheet pan is ideal to catch any juices. I’ve used a cheap one from the grocery store for years—it works perfectly.
- Large Pot or Dutch Oven: I love my enameled cast iron Dutch oven for its even heat distribution, but any heavy-bottomed pot will work. A stockpot is fine too.
- Immersion Blender: This is my favorite tool for creamy soups. It’s easier to clean than a countertop blender and lets you blend right in the pot. If you don’t have one, a regular blender works—just work in batches and be careful with the hot liquid.
- Chef’s Knife and Cutting Board: A sharp knife makes quick work of the squash. I use a 8-inch chef’s knife, and I keep it sharpened for safety.
- Wooden Spoon or Silicone Spatula: For stirring the brown butter and soup. Silicone is great because it won’t scratch your pot.
- Measuring Spoons and Cups: For accuracy. I’ve learned the hard way that eyeballing the salt can ruin a good soup.
Maintenance Tip: If you use an immersion blender, clean it immediately after use by blending a little warm soapy water in a cup. It’s the easiest way to prevent food from drying on the blade.
Preparation Method

Let’s make some soup. I’ll walk you through every step, including what to look for and how to fix common hiccups.
- Preheat the Oven to 400°F (200°C). Line a baking sheet with parchment paper for easy cleanup. While the oven heats, prep the squash.
- Prepare the Honeynut Squash. Cut each squash in half lengthwise. Scoop out the seeds and stringy bits with a spoon. No need to peel—the skin is thin and will soften during roasting. Cut the halves into 1-inch chunks. Toss them on the baking sheet with 1 tablespoon of olive oil, 1 tablespoon of maple syrup, and a generous pinch of salt. Spread in a single layer. Roast for 25-30 minutes, flipping halfway, until the squash is tender and caramelized at the edges. The flesh should be easily pierced with a fork. Warning: Don’t overcrowd the pan, or the squash will steam instead of caramelize.
- Start the Brown Butter. While the squash roasts, melt the butter in a large pot over medium heat. Swirl the pot occasionally. The butter will foam, then the milk solids will start to turn golden. Watch closely—it can go from perfect to burnt in seconds. When you see brown specks forming and smell a nutty aroma (about 4-5 minutes), immediately remove the pot from the heat. Pour the brown butter into a heatproof bowl, leaving the browned bits behind in the pot. Sensory cue: It should smell like toasted hazelnuts and look like liquid gold with tiny dark flecks.
- Sauté the Aromatics. Return the pot to medium heat. Add a drizzle of olive oil, then the diced onion. Cook for 5-6 minutes, stirring occasionally, until translucent and starting to brown. Add the smashed garlic cloves and cook for 1 minute more, until fragrant. Tip: If the garlic starts to stick, add a splash of broth to deglaze the pan.
- Combine and Simmer. Add the roasted squash (including any caramelized bits from the baking sheet) to the pot. Pour in the vegetable broth, add the fresh thyme sprigs, cinnamon, and nutmeg. Stir to combine. Bring to a gentle boil, then reduce the heat to low and simmer for 10 minutes. This allows the flavors to meld. Personal note: I once forgot the cinnamon and added it at the end—it didn’t meld as well. Trust the simmer.
- Blend Until Silky. Remove the thyme sprigs (the leaves will have fallen off, but the stems are woody). Use an immersion blender to puree the soup until completely smooth. If using a countertop blender, work in batches and remove the center cap from the lid to allow steam to escape. Cover with a kitchen towel to avoid splatters. Safety note: Hot liquid expands in a blender. Never fill it more than halfway.
- Finish with Brown Butter. Return the soup to low heat. Stir in 3 tablespoons of the reserved brown butter (save the rest for drizzling). Add the heavy cream or coconut milk if using. Taste and adjust seasoning with salt and pepper. If the soup is too thick, add a splash more broth or water until it reaches your desired consistency.
- Serve and Garnish. Ladle the soup into bowls. Drizzle with the remaining brown butter and a swirl of maple syrup. Add a few cracks of black pepper and a sprinkle of flaky sea salt. For extra crunch, top with roasted pumpkin seeds or crispy sage leaves.
Cooking Tips & Techniques
I’ve made this soup more times than I can count, and I’ve learned a few things the hard way. Here are my best tips for getting it perfect every time.
- Don’t walk away from the brown butter. I learned this lesson when I had to scrape burnt butter off the bottom of my pot and start over. The line between perfect brown butter and burnt butter is about 15 seconds. Watch for the foam to subside and the color to turn amber. The moment you see brown specks, pull it off the heat.
- Roast the squash until it’s truly caramelized. The edges should be dark and sticky. That caramelization is where the deep, sweet flavor comes from. If you under-roast, the soup will taste flat. I once rushed this step and ended up with a soup that needed an extra tablespoon of maple syrup to compensate.
- Use an immersion blender for the silkiest texture. Countertop blenders can be finicky with hot liquids, and you lose some of the soup to transfer. An immersion blender lets you control the consistency and creates a velvety texture with less effort. If you use a countertop blender, let the soup cool for 5 minutes first.
- Season in layers. Add a pinch of salt at every stage—when roasting the squash, sautéing the onion, and finishing the soup. This builds a more complex, well-rounded flavor than adding all the salt at the end.
- Make it ahead for deeper flavor. Like most soups, this one tastes even better the next day. The flavors meld and deepen overnight. I often make a double batch on Sunday and enjoy it for lunches all week.
Variations & Adaptations
This soup is wonderfully flexible. Here are some ways to make it your own.
- Dairy-Free/Vegan: Use coconut oil instead of butter for browning (it won’t brown the same way, but it will add richness), and use full-fat coconut milk instead of heavy cream. The flavor will be slightly different but still delicious.
- Spicy Kick: Add 1/2 teaspoon of red pepper flakes or a diced jalapeño when sautéing the onion. The heat balances the sweetness beautifully.
- Roasted Garlic Version: Roast a head of garlic alongside the squash. Squeeze the soft cloves into the pot before blending for a mellow, sweet garlic flavor that’s less sharp than raw garlic.
- Different Squash: If you can’t find honeynut, use butternut (peeled and cubed) or even sugar pumpkin. Adjust roasting time as needed—butternut may take 5-10 minutes longer.
- Add Protein: Stir in a can of drained white beans (like cannellini) before blending for a heartier soup with added protein and fiber. It also makes the soup extra creamy.
- My Favorite Variation: I once added a tablespoon of white miso paste at the end, and it was a game-changer. The miso adds a savory umami depth that makes the soup even more satisfying. Just stir it in after blending and don’t let it boil.
Serving & Storage Suggestions
This soup is a meal in itself, but it pairs beautifully with a few simple sides.
Serving: Serve hot, with a drizzle of brown butter and a sprinkle of flaky sea salt. I love it with a side of crusty sourdough bread for dipping, or a simple arugula salad with lemon vinaigrette to cut through the richness. For a heartier meal, pair it with a cozy grilled cheese sandwich for the ultimate comfort food combo.
Storage: Let the soup cool completely before storing. Transfer to an airtight container and refrigerate for up to 5 days. The flavor actually improves after a day or two. For longer storage, freeze the soup in individual portions in freezer-safe containers or zip-top bags. It will keep for up to 3 months. Thaw overnight in the refrigerator before reheating.
Reheating: Reheat gently on the stovetop over medium-low heat, stirring occasionally. Add a splash of broth or water if the soup has thickened. You can also reheat individual portions in the microwave—just cover the bowl and heat in 30-second intervals, stirring between each. Note: The brown butter drizzle may separate upon reheating; just stir it back in.
Flavor Development: This soup is one of those rare dishes that tastes even better the next day. The spices meld, the sweetness deepens, and the brown butter flavor becomes more pronounced. I actually prefer it on day two.
Nutritional Information & Benefits
This soup is as nourishing as it is delicious. Here’s a rough estimate per serving (based on 4 servings, without optional cream).
| Nutrient | Amount per Serving |
|---|---|
| Calories | 220 |
| Total Fat | 12g |
| Saturated Fat | 7g |
| Carbohydrates | 28g |
| Fiber | 5g |
| Sugar | 10g (naturally occurring) |
| Protein | 3g |
| Vitamin A | 350% DV |
| Vitamin C | 25% DV |
Pin This Recipe!
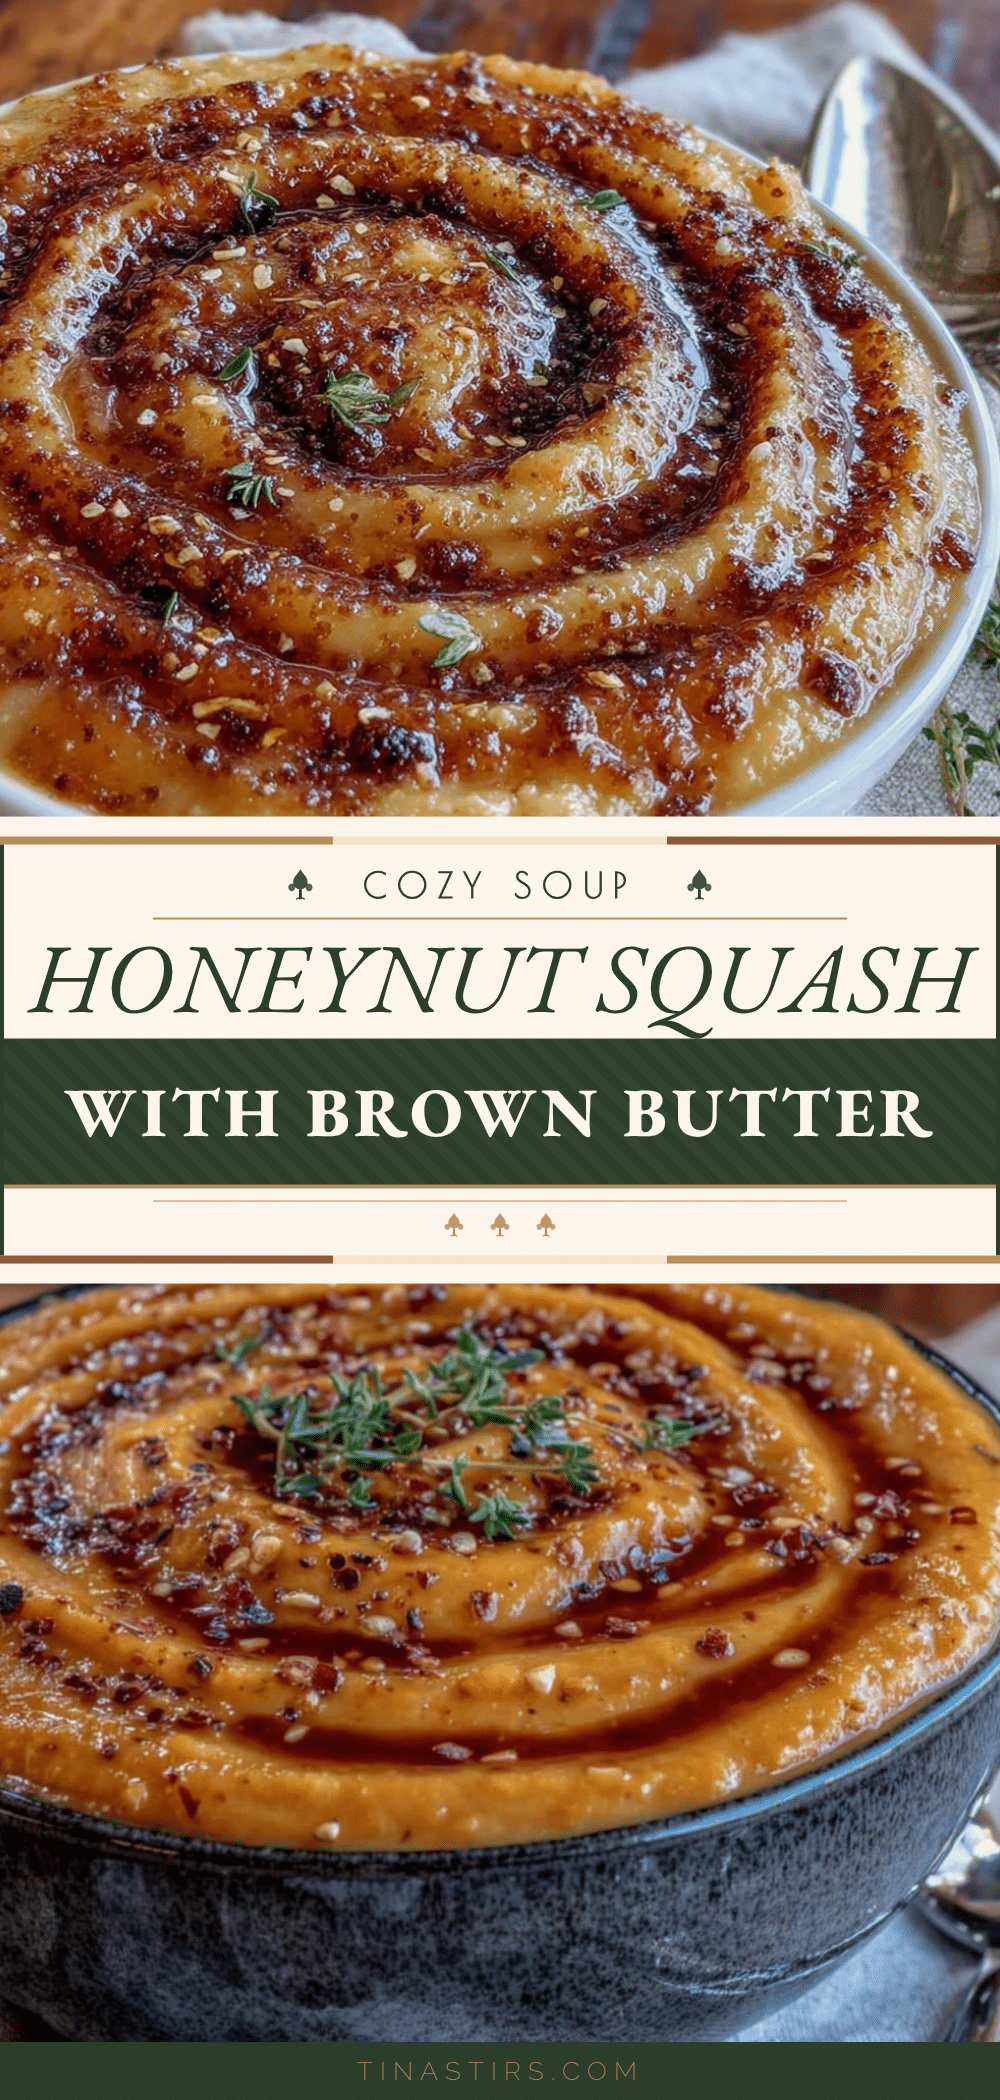
Cozy Honeynut Squash Soup with Brown Butter: Easy Fall Recipe

This creamy, nutty soup is made with roasted honeynut squash and brown butter, creating a deeply comforting fall dish that comes together in under 45 minutes. It’s perfect for cozy nights and is naturally gluten-free.
- Prep Time: 10 minutes
- Cook Time: 30 minutes
- Total Time: 40 minutes
- Yield: 4 servings 1x
- Category: Soup
- Cuisine: American
Ingredients
- 3–4 medium honeynut squashes (about 2 lbs total)
- 4 tablespoons unsalted butter (1/2 stick)
- 1 medium yellow onion, diced
- 3 cloves garlic, smashed
- 3 cups low-sodium vegetable broth
- 1 tablespoon maple syrup, plus more for drizzling
- 4 sprigs fresh thyme
- 1/2 teaspoon ground cinnamon
- 1/4 teaspoon ground nutmeg (freshly grated if possible)
- Salt and black pepper to taste
- 1/4 cup heavy cream or full-fat coconut milk (optional)
Instructions
- Preheat the oven to 400°F (200°C). Line a baking sheet with parchment paper.
- Cut each honeynut squash in half lengthwise. Scoop out seeds and stringy bits. Cut into 1-inch chunks. Toss with 1 tablespoon olive oil, 1 tablespoon maple syrup, and a generous pinch of salt. Spread in a single layer on the baking sheet. Roast for 25-30 minutes, flipping halfway, until tender and caramelized.
- While squash roasts, melt butter in a large pot over medium heat. Swirl occasionally. When butter foams and milk solids turn golden with a nutty aroma (about 4-5 minutes), remove from heat immediately. Pour brown butter into a heatproof bowl, leaving browned bits in the pot.
- Return pot to medium heat. Add a drizzle of olive oil, then diced onion. Cook 5-6 minutes until translucent. Add smashed garlic and cook 1 minute more.
- Add roasted squash, vegetable broth, thyme sprigs, cinnamon, and nutmeg. Stir. Bring to a gentle boil, then reduce heat to low and simmer for 10 minutes.
- Remove thyme sprigs. Use an immersion blender to puree soup until smooth. (If using a countertop blender, work in batches and let steam escape.)
- Return soup to low heat. Stir in 3 tablespoons reserved brown butter and optional cream/coconut milk. Season with salt and pepper. Add more broth if too thick.
- Ladle into bowls. Drizzle with remaining brown butter and maple syrup. Garnish with black pepper and flaky sea salt.
Notes
Don’t walk away from the brown butter; it can burn in seconds. Roast squash until truly caramelized for best flavor. Season in layers for depth. Soup tastes even better the next day.
Nutrition
- Serving Size: 1 bowl (about 1.5 cu
- Calories: 220
- Sugar: 10
- Sodium: 480
- Fat: 12
- Saturated Fat: 7
- Carbohydrates: 28
- Fiber: 5
- Protein: 3
Keywords: honeynut squash soup, brown butter soup, fall soup, easy soup, gluten-free soup, vegetarian soup


