Love this? Save it for later!
Share the inspiration with your friends
I was standing at the checkout counter at a hardware store—of all places—when the woman behind me started talking about queso. Not just any queso, mind you. She was describing a dip so creamy, so perfectly spiced, that I almost forgot I was holding a bag of mulch. Her name was Linda, and she was a retired schoolteacher with a garden full of tomatoes and a deep, almost spiritual connection to Hatch chiles. “You can’t get the good ones just anywhere,” she said, nodding at my mulch. “But if you do find them, you make this dip. It’ll change your life.”
Honestly, I thought she was exaggerating. I mean, I’ve had queso. I’ve had good queso and bad queso and the kind that comes from a jar that you pretend not to judge. But Linda wasn’t exaggerating. That first batch I made—sweating over the stove, blending the roasted chiles into a velvety cheese sauce—was genuinely different. It had this subtle smoky heat that didn’t overpower, just hung around in the background, making you take another chip before you even finished chewing. The toasted tortilla chips, which I almost skipped because I was impatient, turned out to be the non-negotiable crunch that held everything together.
Maybe you’ve been there—standing in some random place, overhearing a recipe that sounds too good to be true. Well, this is the one that actually delivered. Every time I make this creamy Hatch chile queso dip, I think of Linda and her hardware store wisdom. It’s the kind of recipe that makes you believe in kitchen serendipity. And honestly? It’s the best 15-minute appetizer I’ve ever made.
Why You’ll Love This Recipe
Let me tell you straight up—this isn’t your average queso. This creamy Hatch chile queso dip has a depth of flavor that comes from real ingredients and a little bit of patience (okay, 15 minutes of patience). I’ve tested this recipe at least a dozen times, tweaking the cheese ratio, the spice level, and even the type of milk until it hit that perfect pourable-but-thick consistency. And the toasted tortilla chips? They’re not just a sidekick—they’re the sturdy, salty vehicle that makes every bite count.
- Quick & Easy: Ready in under 15 minutes, which means you can whip it up when guests show up early or when a queso craving hits at 9 PM on a Tuesday.
- Simple Ingredients: No weird processed cheese blocks or canned soups. Just real cheese, fresh chiles (or jarred, no judgment), and pantry staples you probably already have.
- Perfect for Game Day or Taco Night: This dip disappears fast at parties, but it’s also amazing drizzled over nachos or even spooned into a breakfast burrito.
- Crowd-Pleaser: I’ve served it to kids, spice-wimps, and hardcore chile heads, and every single person went back for seconds. It’s that balanced.
- Unbelievably Delicious: The texture is silky without being gluey, and the Hatch chiles bring a fruity, earthy heat that’s nothing like generic green chiles.
What makes this recipe different from the rest is the technique—blooming the spices in butter before adding the liquid, and using a combination of Monterey Jack and sharp cheddar for that perfect melt. It’s not just another queso recipe; it’s the one you’ll text your friends about. The kind that makes you close your eyes after the first bite and go, “Oh, that’s good.”
What Ingredients You Will Need
This creamy Hatch chile queso dip relies on a handful of simple, whole ingredients that come together to create something genuinely special. Most of these are pantry staples, but the star—the Hatch chiles—might require a little hunting. Trust me, it’s worth it.
- Unsalted butter (2 tablespoons) – This is your flavor foundation. Don’t substitute margarine; the butter adds richness that helps carry the spices.
- All-purpose flour (2 tablespoons) – Just enough to thicken the queso without making it pasty. It creates a smooth, stable base.
- Whole milk (1 ½ cups) – Whole milk gives the best creamy texture. You can use 2%, but avoid skim—it gets watery. For a richer dip, swap half the milk for half-and-half.
- Monterey Jack cheese (8 ounces, freshly shredded) – This is your melt champion. Pre-shredded cheese has anti-caking agents that make queso grainy, so shred it yourself. I recommend Tillamook or a local block from the deli.
- Sharp cheddar cheese (4 ounces, freshly shredded) – Adds that classic cheesy punch and a little color. White cheddar works too if you want a milder flavor.
- Roasted Hatch chiles (½ cup, chopped) – The heart of the recipe. If you can find fresh Hatch chiles in season (usually late summer), roast and peel them yourself. Otherwise, jarred Hatch chiles from brands like Bueno or 505 Southwestern are excellent. Avoid canned green chiles that aren’t specifically Hatch—they lack the signature fruity heat.
- Jalapeño (1 small, seeded and finely diced) – For a fresh, grassy heat that cuts through the richness. Remove the seeds and membranes if you’re sensitive to spice.
- Garlic (2 cloves, minced) – Because everything is better with garlic. Use fresh, not the jarred stuff.
- Ground cumin (½ teaspoon) – This adds a warm, earthy note that ties the chiles and cheese together. Toast it in the butter for extra depth.
- Chili powder (½ teaspoon) – Use a mild chili powder like ancho for color and a gentle smokiness. Don’t use cayenne unless you want serious heat.
- Salt (¼ teaspoon, or to taste) – Cheese is salty, so go easy at first. You can always add more at the end.
- Fresh cilantro (2 tablespoons, chopped, for garnish) – Optional but highly recommended. It adds a pop of freshness and color.
- Toasted tortilla chips (for serving) – Recipe follows below. Homemade toasted chips are a game-changer, but good-quality store-bought chips work too.
Substitution note: If you can’t find Hatch chiles, use Anaheim chiles for a similar mild heat, or add a pinch of smoked paprika to mimic the smokiness. For a dairy-free version, use plant-based butter, oat milk (unsweetened), and vegan cheddar shreds—though the texture won’t be quite as silky.
Equipment Needed
You don’t need a fancy kitchen to make this creamy Hatch chile queso dip. Most of these tools are basics, but a few specific items will make the process smoother.
- Medium saucepan – A heavy-bottomed saucepan (like a 2-quart) distributes heat evenly and prevents scorching. I use my trusty stainless steel one, but nonstick works too.
- Wooden spoon or silicone spatula – For stirring the roux and cheese sauce. Silicone is great because it won’t scratch your pan and gets into the corners.
- Cheese grater – A box grater or a Microplane for shredding cheese. Please don’t buy pre-shredded—it’s the number one cause of grainy queso.
- Cutting board and knife – For dicing the jalapeño and mincing garlic. A sharp chef’s knife makes quick work of it.
- Measuring cups and spoons – Accuracy matters, especially with the flour and milk ratios.
- Baking sheet – If you’re making toasted tortilla chips, you’ll need a rimmed baking sheet. Line it with parchment for easy cleanup.
- Pastry brush – For brushing oil onto tortillas before baking. A silicone brush is easiest to clean.
- Pizza cutter or sharp knife – For cutting tortillas into chip-sized triangles. A pizza cutter makes it faster and more even.
Budget-friendly tip: Don’t have a pastry brush? Use a paper towel dipped in oil and rub it over the tortillas. Not elegant, but it works.
Preparation Method
- Preheat your oven to 375°F (190°C). This is for the toasted tortilla chips. If you’re using store-bought chips, skip to step 5.
- Make the toasted tortilla chips: Stack 8-10 corn tortillas and cut them into wedges (like a pizza, 6 wedges per tortilla). Arrange them in a single layer on a baking sheet. Brush lightly with vegetable or avocado oil, then sprinkle with a pinch of salt. Bake for 8-10 minutes, flipping halfway, until golden and crisp. They’ll continue to crisp as they cool. Set aside.
- While the chips bake, start the queso base: In a medium saucepan over medium heat, melt the 2 tablespoons of butter. Once it’s foamy (about 1 minute), add the minced garlic and diced jalapeño. Sauté for 1 minute until fragrant—your kitchen will smell amazing.
- Bloom the spices: Add the ground cumin and chili powder to the pan. Stir constantly for 30 seconds. This step wakes up the spices and deepens their flavor. Don’t skip it, or the queso will taste flat.
- Make the roux: Sprinkle the 2 tablespoons of flour over the butter mixture. Whisk continuously for 1-2 minutes until the flour is fully incorporated and turns a light golden color. This cooks out the raw flour taste.
- Add the milk slowly: Pour in the 1 ½ cups of whole milk in a steady stream, whisking constantly to prevent lumps. Keep whisking until the mixture thickens slightly, about 3-4 minutes. It should coat the back of a spoon.
- Lower the heat to low. Now add the shredded Monterey Jack and sharp cheddar cheese, a handful at a time, stirring gently after each addition. Let the cheese melt completely before adding the next handful. This gradual process ensures a silky, smooth queso. If you dump it all in at once, you risk a clumpy mess.
- Stir in the Hatch chiles. Add the ½ cup of chopped roasted Hatch chiles and mix until evenly distributed. Taste the queso and add salt as needed—remember, the cheese is already salty, so start with ¼ teaspoon and go from there.
- Simmer gently for 2 minutes. Let the queso bubble softly (not a rolling boil) to meld the flavors. Stir occasionally to prevent the bottom from scorching.
- Remove from heat. The queso will thicken as it cools. If it gets too thick, stir in a splash of warm milk to loosen it.
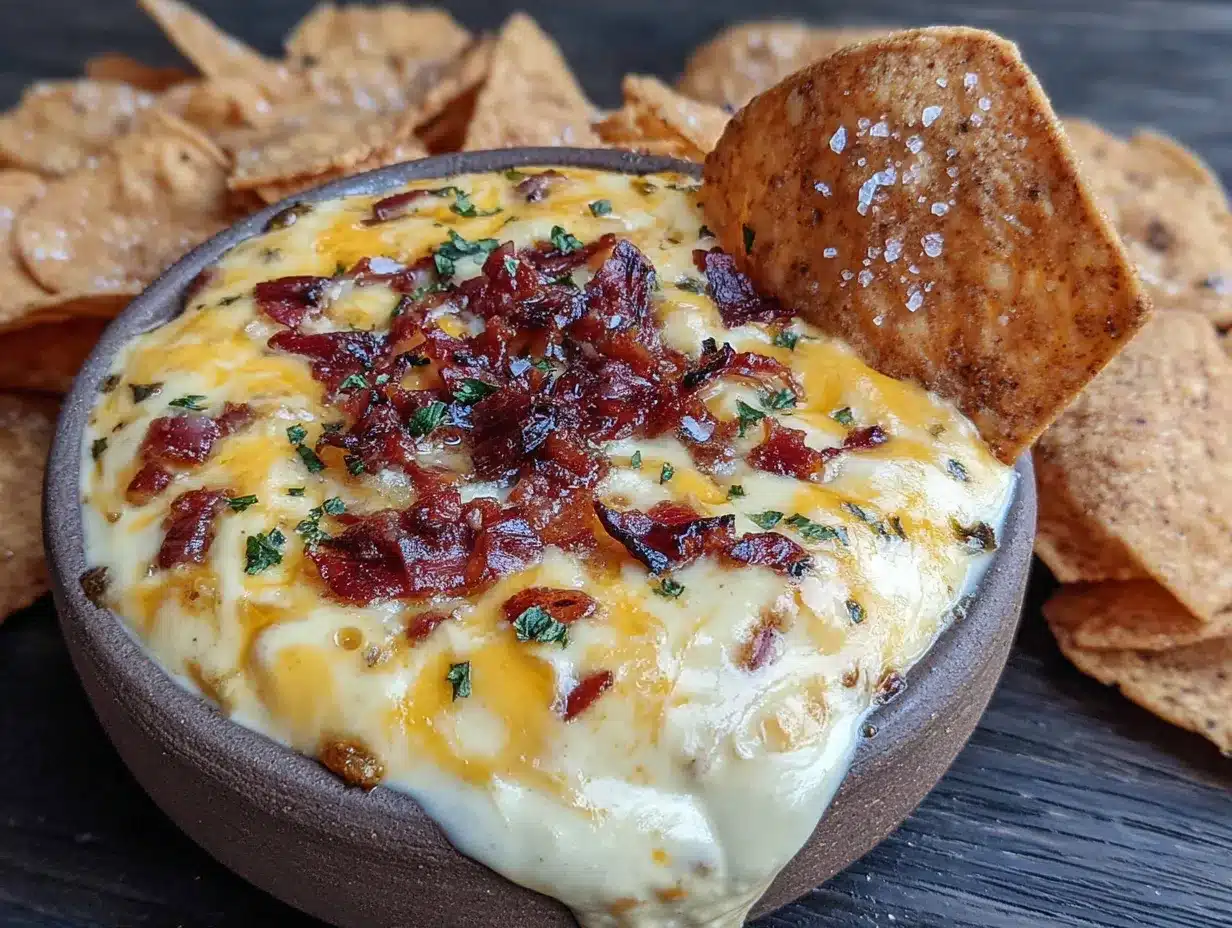
- Garnish and serve: Pour the queso into a serving bowl, sprinkle with fresh cilantro, and serve immediately with the toasted tortilla chips (or store-bought). The dip stays warm for about 20 minutes in the bowl, so if you’re serving a crowd, keep it in a small slow cooker on the “warm” setting.
Sensory cue: At step 6, the milk mixture should look like a thin gravy—smooth and slightly glossy. When you add the cheese in step 7, the queso will go from pale yellow to a rich, golden cream color. The smell? Buttery, slightly smoky from the cumin, with a fresh kick from the jalapeño.
Personal tip: I once forgot to whisk the milk in slowly and ended up with a lumpy mess that looked like curdled cheese. If that happens to you, don’t panic—strain the queso through a fine-mesh sieve into a clean pot and whisk in a tablespoon of warm milk. It won’t be perfect, but it’ll be edible. Learn from my mistake and go slow!
Cooking Tips & Techniques
After making this creamy Hatch chile queso dip more times than I can count, I’ve collected a few hard-won lessons. Here’s what I wish someone had told me the first time.
Low and slow is the rule. High heat is the enemy of smooth queso. If your heat is too high, the milk proteins will seize up, and you’ll get a grainy, separated mess. Keep the burner on medium for the roux, then drop to low when you add the cheese. Patience, my friend.
Shred your own cheese. I know it’s tempting to buy the bag of pre-shredded, but those anti-caking agents (cellulose, potato starch) are queso-killers. They prevent the cheese from melting smoothly. I learned this the hard way when I made queso for a Super Bowl party and ended up with a weird, gritty texture. Never again.
Toast your spices. Blooming the cumin and chili powder in butter for 30 seconds transforms them from dusty to fragrant. It’s a tiny step that makes a huge difference. If you skip it, the queso tastes one-dimensional.
Don’t over-stir the cheese. Once the cheese is added, stir gently and just enough to incorporate it. Aggressive stirring can break the emulsion and make the queso oily. Think of it like folding egg whites—gentle and deliberate.
Plan your timing. The queso is best served immediately, but the chips can be made ahead. I often toast the tortilla chips in the morning and store them in an airtight container. Then, when guests arrive, I just make the queso in 10 minutes flat. Multitasking at its finest.
Variations & Adaptations
One of the best things about this creamy Hatch chile queso dip is how easily it adapts to different tastes and dietary needs. Here are a few variations I’ve tried and loved.
Spicy Chorizo Queso: Brown ½ pound of Mexican chorizo in a skillet, drain the excess fat, and stir it into the finished queso. The spicy, savory sausage adds a meaty depth that’s incredible with the smoky Hatch chiles. I made this for a taco night and it was gone in five minutes.
Vegan Hatch Chile Queso: Swap the butter for vegan butter, use unsweetened oat milk, and replace the cheese with a high-quality vegan cheddar shred (like Violife or Follow Your Heart). Add 2 tablespoons of nutritional yeast for a cheesy flavor. The texture won’t be as stretchy, but it’s still creamy and delicious. My vegan friend approved.
Smoky Bacon Queso: Cook 4 slices of bacon until crispy, crumble them, and stir half into the queso. Sprinkle the rest on top as a garnish. The smoky, salty bacon pairs beautifully with the chiles. Just be careful not to add extra salt—the bacon brings plenty.
Milder Version for Kids: Omit the jalapeño entirely and use only mild Hatch chiles (look for “mild” on the jar). You can also swap the sharp cheddar for extra Monterey Jack. My niece, who thinks black pepper is spicy, ate this version without complaint.
Extra Heat: If you’re a spice lover like me, add a diced serrano pepper along with the jalapeño, or stir in a teaspoon of hot sauce (like Cholula) at the end. You can also use hot Hatch chiles instead of mild—they’re labeled “hot” or “medium” on the jar.
Serving & Storage Suggestions
This creamy Hatch chile queso dip is at its absolute best fresh and warm, straight from the pot. But let’s be real—sometimes you have leftovers (or you want to make it ahead). Here’s how to handle both situations.
Serving temperature: Serve the queso warm, not piping hot. If it’s too hot, the cheese can feel greasy in your mouth. Let it rest for 2-3 minutes off the heat before serving. The ideal consistency is pourable but thick enough to coat a chip without dripping everywhere.
Presentation ideas: Pour the queso into a small cast-iron skillet or a colorful ceramic bowl. Sprinkle with cilantro, a few extra chopped Hatch chiles, and a pinch of smoked paprika for color. Serve the toasted tortilla chips in a separate basket lined with a napkin—it looks rustic and inviting.
What to serve with it: Beyond tortilla chips, this queso is amazing over nachos (with beans, guacamole, and salsa), drizzled on tacos, or even spooned over grilled chicken or roasted vegetables. For a drink pairing, a cold Mexican lager like Modelo or a spicy margarita cuts through the richness perfectly.
Storage: Leftover queso can be stored in an airtight container in the refrigerator for up to 3 days. The texture will thicken significantly when cold. To reheat, transfer it to a saucepan and warm over low heat, stirring frequently. Add a splash of milk (1-2 tablespoons) to loosen it back to its original consistency. Avoid the microwave—it heats unevenly and can make the queso separate.
Freezing: I don’t recommend freezing this queso. Dairy-based sauces tend to separate and become grainy after thawing. If you must freeze it, do so before adding the cheese (freeze the milk-roux base), then thaw and add fresh cheese when reheating.
Flavor development: Honestly, the queso tastes even better the next day. The flavors meld overnight, and the chile heat becomes more integrated. Just be prepared for a slightly thicker dip—add a little milk when reheating and it’s good as new.
Nutritional Information & Benefits
Let’s be honest—queso isn’t health food. But this version uses real ingredients, and there are a few surprising benefits tucked into that creamy bowl.
Estimated nutritional values per serving (¼ cup queso, without chips):
| Nutrient | Amount |
|---|---|
| Calories | 180 |
| Total Fat | 14g |
| Saturated Fat | 9g |
| Cholesterol | 40mg |
| Sodium | 320mg |
| Carbohydrates | 5g |
| Protein | 9g |
| Calcium | 250mg (20% DV) |
Health benefits of key ingredients: Hatch chiles are rich in vitamin C and capsaicin, which may boost metabolism and reduce inflammation. Cheese provides calcium and protein, which are great for bone health and muscle repair. The jalapeño adds a dose of antioxidants. And the garlic? It’s a natural immune booster.
Dietary considerations: This recipe is vegetarian (if you use vegetable-based rennet in the cheese, which most store-bought cheeses use). It’s not gluten-free due to the flour, but you can substitute a gluten-free all-purpose flour blend (like Bob’s Red Mill) for a gluten-free version. It contains dairy, so it’s not suitable for vegans unless you use the adaptations above.
Potential allergens: Milk and wheat (gluten). Always check your cheese labels if you have sensitivities.
Personal wellness perspective: I believe in balance. This queso isn’t an everyday thing, but when you do make it, you’re using real food—not processed cheese products. That counts for something. Pair it with a big salad or some veggie sticks, and you’ve got a meal that feels indulgent but isn’t terrible for you.
Conclusion
This creamy Hatch chile queso dip with toasted tortilla chips is one of those recipes that proves simple ingredients, treated with care, can produce something extraordinary. It’s quick enough for a weeknight craving, impressive enough for a party, and flexible enough to adapt to whatever you have on hand. Whether you’re a seasoned cook or a beginner, you can make this—and you should.
I love this recipe because it reminds me that good food often comes from unexpected places. A hardware store. A retired teacher. A bag of mulch. It’s a little funny, a little messy, and completely delicious. The smoky heat of the Hatch chiles, the silky melt of the cheese, the satisfying crunch of homemade chips—it’s a combination that never gets old.
Now it’s your turn. Make this dip, tweak it to your liking, and then come back and tell me how it went. Did you add bacon? Go extra spicy? Serve it over nachos? I’d love to hear your version. Drop a comment below or tag me in your photos—I’m genuinely excited to see what you create. Happy cooking!
Frequently Asked Questions
Can I use pre-shredded cheese for this queso?
You can, but I really don’t recommend it. Pre-shredded cheese is coated with anti-caking agents that prevent it from melting smoothly, which can make your queso grainy. If you’re in a pinch, look for “bagged” cheese that’s labeled as “fine shred” or “melting blend”—they sometimes have fewer additives. But honestly, shredding a block of cheese takes two minutes and makes a world of difference.
Where can I find Hatch chiles if they’re not in season?
Jarred Hatch chiles are widely available year-round in the Mexican food aisle of most grocery stores. Brands like Bueno, 505 Southwestern, and Hatch Chile Company are reliable. You can also order them online from specialty retailers. Just make sure the label says “Hatch” chiles—regular green chiles won’t have the same fruity, smoky flavor.
Can I make this queso in a slow cooker?
Yes, but with a few adjustments. Make the roux and milk base on the stovetop first (steps 3-6), then transfer it to a slow cooker set to low. Add the cheese and chiles, stir, and let it melt for about 30 minutes, stirring occasionally. This method is great for parties because the slow cooker keeps the queso warm without scorching. Just don’t leave it on “warm” for more than 2 hours, or the texture may start to break down.
How do I fix queso that’s too thick or too thin?
If your queso is too thick, stir in a splash of warm milk (or even water) until it reaches your desired consistency. Add it a tablespoon at a time. If it’s too thin, mix 1 teaspoon of cornstarch with 2 teaspoons of cold water to make a slurry, then stir it into the simmering queso. Cook for another 1-2 minutes until it thickens. Always adjust gradually—you can’t undo a change once it’s made.
Can I double this recipe for a crowd?
Absolutely. Just double all the ingredients and use a larger pot (a 4-quart saucepan works well). The cooking time will be slightly longer—add an extra 2-3 minutes to the milk-thickening step. If you’re serving a big group, keep the queso warm in a small slow cooker on the “warm” setting and stir it every 15-20 minutes to prevent a skin from forming on top.
Pin This Recipe!

Creamy Hatch Chile Queso Dip – Best 15-Minute Easy Appetizer

This creamy Hatch chile queso dip is a quick and easy appetizer ready in under 15 minutes. Made with real cheese, roasted Hatch chiles, and simple pantry staples, it’s perfect for game day, taco night, or any gathering.
- Prep Time: 5 minutes
- Cook Time: 10 minutes
- Total Time: 15 minutes
- Yield: 8 servings 1x
- Category: Appetizer
- Cuisine: Mexican
Ingredients
- 2 tablespoons unsalted butter
- 2 tablespoons all-purpose flour
- 1 ½ cups whole milk
- 8 ounces Monterey Jack cheese, freshly shredded
- 4 ounces sharp cheddar cheese, freshly shredded
- ½ cup roasted Hatch chiles, chopped
- 1 small jalapeño, seeded and finely diced
- 2 cloves garlic, minced
- ½ teaspoon ground cumin
- ½ teaspoon chili powder
- ¼ teaspoon salt, or to taste
- 2 tablespoons fresh cilantro, chopped (for garnish)
- Toasted tortilla chips (for serving)
Instructions
- Preheat your oven to 375°F (190°C) for the toasted tortilla chips. If using store-bought chips, skip to step 5.
- Make the toasted tortilla chips: Stack 8-10 corn tortillas and cut them into wedges (6 wedges per tortilla). Arrange in a single layer on a baking sheet. Brush lightly with vegetable or avocado oil and sprinkle with a pinch of salt. Bake for 8-10 minutes, flipping halfway, until golden and crisp. Set aside.
- While the chips bake, start the queso base: In a medium saucepan over medium heat, melt the 2 tablespoons of butter. Once foamy (about 1 minute), add the minced garlic and diced jalapeño. Sauté for 1 minute until fragrant.
- Bloom the spices: Add the ground cumin and chili powder to the pan. Stir constantly for 30 seconds.
- Make the roux: Sprinkle the 2 tablespoons of flour over the butter mixture. Whisk continuously for 1-2 minutes until the flour is fully incorporated and turns a light golden color.
- Add the milk slowly: Pour in the 1 ½ cups of whole milk in a steady stream, whisking constantly to prevent lumps. Keep whisking until the mixture thickens slightly, about 3-4 minutes. It should coat the back of a spoon.
- Lower the heat to low. Add the shredded Monterey Jack and sharp cheddar cheese, a handful at a time, stirring gently after each addition. Let the cheese melt completely before adding the next handful.
- Stir in the Hatch chiles: Add the ½ cup of chopped roasted Hatch chiles and mix until evenly distributed. Taste and add salt as needed (start with ¼ teaspoon).
- Simmer gently for 2 minutes, stirring occasionally, to meld the flavors.
- Remove from heat. The queso will thicken as it cools. If it gets too thick, stir in a splash of warm milk to loosen it.
- Garnish and serve: Pour the queso into a serving bowl, sprinkle with fresh cilantro, and serve immediately with the toasted tortilla chips.
Notes
Shred your own cheese for the smoothest texture; pre-shredded cheese contains anti-caking agents that can make queso grainy. If you can’t find Hatch chiles, use Anaheim chiles or add a pinch of smoked paprika. For a dairy-free version, use plant-based butter, oat milk, and vegan cheddar shreds. Leftover queso can be stored in an airtight container in the refrigerator for up to 3 days; reheat gently on the stovetop with a splash of milk.
Nutrition
- Serving Size: ¼ cup queso (without
- Calories: 180
- Sugar: 2
- Sodium: 320
- Fat: 14
- Saturated Fat: 9
- Carbohydrates: 5
- Protein: 9
Keywords: Hatch chile queso, creamy queso dip, easy appetizer, game day dip, Mexican cheese dip, 15-minute recipe


