Love this? Save it for later!
Share the inspiration with your friends
I was standing in the spice aisle of our local grocery store last November when a woman walked past me, and her coat smelled exactly like my neighbor Mrs. Chen’s kitchen on a Saturday afternoon in 1997. The scent was warm and a little smoky, with a whisper of cumin and something sweet underneath. And suddenly I was nine years old, sitting cross-legged on her linoleum floor while she stirred a giant pot on the stove, telling me stories about the chili her mother made back in Taiwan. I couldn’t tell you what we were talking about that day, but I remember the way the steam fogged up her glasses and how she let me taste the broth from a tiny spoon. She passed away three years ago, and I haven’t thought about that afternoon in forever. But that smell in the grocery store hit me like a truck, you know? I stood there in the spice aisle holding a bag of dried beans, trying not to cry over a stranger’s winter coat. That’s when I knew I had to figure out how to make that chili myself. I mean, honestly, I’ve made a hundred pots of chili since then, but none of them ever tasted quite right. Not until this version. This Friendsgiving Turkey Chili is my attempt to capture that exact feeling — the warmth, the comfort, the way a good bowl of chili makes everyone at the table slow down and actually talk to each other. Maybe you’ve been there, chasing a taste from your past that you can almost but not quite hold onto. This one’s for those nights.
Why You’ll Love This Recipe
Let me tell you, I tested this chili for six straight weekends before I got it right. My friends started calling it “the chili project.” But every single batch got eaten, even the ones I thought were failures. That’s when I knew this recipe was something special.
- Made for a Crowd : This recipe makes a generous 12 servings, perfect for your Friendsgiving gathering. No one leaves hungry, and you’ll probably have leftovers for the next day.
- Simple Ingredients : Everything comes from a regular grocery store. No specialty shops, no weird spice blends you’ll never use again.
- Stress-Free Hosting : You can make this entirely ahead of time. In fact, it tastes better the next day. That means you can actually enjoy your own party instead of being stuck in the kitchen.
- Budget-Friendly : Ground turkey is affordable, and beans are dirt cheap. Feeding a crowd doesn’t have to break the bank.
- Always a Hit : I’ve brought this to three different Friendsgivings now, and every time, someone asks for the recipe before they even finish their first bowl.
What makes this chili different from all the other recipes out there? It’s the little tricks I picked up from Mrs. Chen’s kitchen and from my own trial and error. The secret is browning the turkey until it’s deeply caramelized, not just gray and cooked through. And I add a splash of fish sauce — trust me on this one — that gives the whole pot this savory depth that makes people go “what’s in this?” without being able to name it. It’s comfort food that makes you feel like a rockstar host without all the stress.
What Ingredients You Will Need
This recipe uses simple, honest ingredients that come together to create something much bigger than the sum of their parts. Most of these are probably already in your pantry, which is exactly how a good Friendsgiving recipe should be.
For the Chili Base
- 2 tablespoons olive oil (use a good one, it matters for flavor)
- 2 pounds ground turkey (I prefer 93% lean — not too dry, not too greasy)
- 1 large yellow onion, diced (about 2 cups)
- 1 red bell pepper, diced
- 1 green bell pepper, diced
- 4 cloves garlic, minced (I use a microplane for this, gets it super fine)
- 2 jalapeños, seeded and minced (leave the seeds in if you want more heat)
The Spice Blend
- 3 tablespoons chili powder (I like McCormick, but use your favorite)
- 1 tablespoon ground cumin
- 1 teaspoon smoked paprika
- 1 teaspoon dried oregano
- 1/2 teaspoon cayenne pepper (optional, add more for extra kick)
- 1 teaspoon salt (plus more to taste)
- 1/2 teaspoon black pepper
The Liquid and Beans
- 1 can (28 ounces) crushed tomatoes (San Marzano if you can find them)
- 1 can (14.5 ounces) diced tomatoes, undrained
- 2 cans (15 ounces each) kidney beans, drained and rinsed
- 1 can (15 ounces) black beans, drained and rinsed
- 2 cups low-sodium chicken broth
- 1 tablespoon fish sauce (this is my secret weapon — Red Boat is my go-to)
- 1 tablespoon brown sugar (helps balance the acidity)
For Serving
- Shredded cheddar cheese
- Sour cream or Greek yogurt
- Fresh cilantro, chopped
- Diced red onion
- Corn chips or crusty bread
I know fish sauce sounds weird in chili, but honestly, it’s the same trick that makes good Italian red sauce taste so deep and rich. It doesn’t taste fishy at all, I promise. If you’re really opposed, you can leave it out, but you’ll miss that little something special.
Equipment Needed
You don’t need a fancy kitchen to make this chili. Here’s what you’ll need:
- Large Dutch oven or heavy-bottomed pot (at least 6 quarts) — I use my trusty Le Creuset that I found at a garage sale for twenty bucks. Best investment ever. If you don’t have one, any large pot with a thick bottom will work fine.
- Sharp chef’s knife — You’ll be chopping a lot of vegetables, so a good knife makes a world of difference.
- Cutting board — Preferably a big one so you don’t have to work in batches.
- Wooden spoon or spatula — For scraping up all those delicious browned bits from the bottom of the pot.
- Measuring spoons — For the spices. I’ve learned the hard way that eyeballing chili powder can go wrong fast.
- Can opener — Obvious, but don’t be like me and forget you need one until your hands are covered in raw turkey.
A few notes: If you’re cooking for a really big crowd, you can easily double this recipe. Just make sure your pot is big enough. I once made a triple batch in my biggest pot and spent the whole afternoon stirring and praying it wouldn’t overflow. It didn’t, but I wouldn’t recommend cutting it that close.
Preparation Method
This chili comes together in about an hour and a half, but most of that time is just letting it simmer. The active work is only about 20 minutes. Perfect for when you’re hosting and have a million other things to do.
- Start by prepping everything. Dice your onion and bell peppers, mince the garlic and jalapeños, drain and rinse your beans. I like to measure out all my spices into a small bowl too. Trust me, once you start cooking, you won’t want to be hunting for the cumin while the turkey is burning.
- Heat the olive oil in your Dutch oven over medium-high heat. Wait until it shimmers — that’s about 30 seconds to a minute. Add the ground turkey and let it cook without moving it for about 4 minutes. I know it’s tempting to stir, but resist. You want a deep brown crust on the meat. It should look almost caramelized in spots. Break it up with your spoon and cook for another 3-4 minutes until it’s browned all over. Transfer the turkey to a bowl with a slotted spoon, leaving the fat and browned bits in the pot.
- Add the onion and both bell peppers to the pot. Cook over medium heat for about 5 minutes, scraping up all those browned bits from the bottom of the pot. The vegetables should be softened but not mushy. Add the garlic and jalapeños and cook for one more minute until fragrant. Your kitchen should smell amazing right about now.
- Add all your spices to the pot. Stir them into the vegetables and let them toast for about 30 seconds. This step wakes up the flavors in a way that just throwing dry spices into liquid never can. You’ll smell the cumin and chili powder bloom — it’s a beautiful thing.
- Return the browned turkey to the pot. Add the crushed tomatoes, diced tomatoes, chicken broth, fish sauce, and brown sugar. Stir everything together, making sure to scrape up any last bits from the bottom. Bring the chili to a boil, then reduce the heat to low.
- Add the beans and let it simmer. Stir in the kidney beans and black beans. Let the chili simmer uncovered for at least 45 minutes, stirring occasionally. The longer it simmers, the better it gets. I usually aim for an hour. The chili should thicken nicely and the flavors will meld together. If it gets too thick, add a splash more broth or water.
- Taste and adjust. After 45 minutes, taste your chili. Add more salt if needed — this makes a huge difference. I usually end up adding another half teaspoon. If it tastes a little flat, add another splash of fish sauce or a squeeze of lime juice. If it’s too spicy, a dollop of sour cream when serving will balance it out.
- Let it rest. Turn off the heat and let the chili sit for 10 minutes before serving. This lets the flavors settle and makes it easier to serve without splashing everywhere.
A quick note: If you’re making this ahead for your Friendsgiving, let the chili cool completely, then refrigerate it overnight. Reheat it gently on the stove the next day, adding a little broth to thin it out if needed. The flavor will be even better, I promise.
Cooking Tips & Techniques
After six weekends of chili testing, I learned a few things the hard way. Let me save you some trouble.
Don’t skip the browning step. I know it’s tempting to just dump the turkey in the pot and break it up, but that gray, steamed meat makes for sad chili. Take the extra five minutes to get a good sear. The browned bits on the bottom of the pot are pure flavor. That’s called fond, and it’s your best friend.
Toast your spices. This is a game-changer. Dry spices need heat to unlock their full potential. Thirty seconds in the hot oil and vegetables makes them taste like they’ve been simmering for hours. I learned this after making a batch that tasted weirdly raw and dusty. Never again.
Watch your salt. Canned beans and tomatoes already have salt in them, even the low-sodium versions. I always season lightly at the beginning and adjust at the end. You can always add more salt, but you can’t take it out. That’s a lesson I learned the hard way with a batch that was basically brine.
Let it rest. Chili is one of those dishes that genuinely improves with time. The flavors need to get to know each other. If you can, make this a day ahead. But even just letting it sit for 10 minutes off the heat makes a difference. I once served it immediately because people were hungry, and it was fine, but not as good as the batch I let rest.
Don’t be afraid of the fish sauce. I know, I know. But hear me out. Fish sauce adds umami — that savory, meaty flavor that makes you go “mmm” without knowing why. It doesn’t taste like fish. It tastes like depth. I’ve fed this chili to people who swore they hated fish sauce, and they loved it. Just don’t tell them until after they’ve had seconds.
Variations & Adaptations
This chili is incredibly flexible. Here are some ways to make it your own.
Make it vegetarian. Skip the turkey and add an extra can of beans — try pinto beans or chickpeas for variety. Use vegetable broth instead of chicken broth. Add a diced sweet potato for texture and sweetness. I made this version for my vegetarian friend Sarah last year, and she asked for the recipe before she finished her bowl.
Turn up the heat. If you’re cooking for spice lovers like my brother-in-law, add another jalapeño with the seeds, or throw in a diced serrano pepper. You can also add a teaspoon of chipotle powder for a smoky heat that builds slowly. Just be careful — you can always add more heat, but you can’t take it away.
Slow cooker version. Brown the turkey and sauté the vegetables on the stovetop first, then transfer everything to a slow cooker. Cook on low for 6-8 hours or on high for 3-4 hours. Add the beans in the last 30 minutes so they don’t get mushy. This is perfect for when you’re hosting and want to set it and forget it.
White chili variation. Swap the tomatoes for an extra cup of chicken broth, use white beans instead of kidney and black beans, and add a can of diced green chiles. Use ground chicken instead of turkey. Top with avocado and lime. It’s a completely different dish but just as crowd-pleasing.
I once made a version with leftover Thanksgiving turkey instead of ground turkey. It was actually amazing — the shredded dark meat added this rich texture that ground meat just can’t match. Just add the cooked turkey at the end and simmer for 10 minutes to heat through.
Serving & Storage Suggestions
This chili is made for a party. Here’s how to serve it like a pro.
Set up a chili bar. This is my favorite hosting trick. Lay out small bowls of toppings — shredded cheese, sour cream, diced red onion, fresh cilantro, sliced jalapeños, lime wedges, and crushed tortilla chips. Let your guests build their own bowls. It looks impressive and takes almost no effort on your part.
What to serve alongside. Cornbread is the classic choice, and for good reason. The sweet, crumbly bread is perfect for soaking up the chili. A simple green salad with a tangy vinaigrette cuts through the richness. And if you’re feeling fancy, a tray of roasted sweet potatoes with cinnamon and chili powder makes an unexpected but delicious side.
Drink pairings. A cold beer is hard to beat — something crisp like a lager or a pale ale. For wine drinkers, a fruity Zinfandel or a light red like Beaujolais works beautifully. And for non-alcoholic options, a spicy ginger beer or a tart apple cider are both fantastic.
Storage. This chili keeps beautifully in the refrigerator for up to 5 days. Store it in an airtight container. The flavors actually get better over the first couple of days. For longer storage, freeze it for up to 3 months. I like to freeze individual portions in zip-top bags for easy lunches. Just lay the bags flat in the freezer so they stack easily.
Reheating. The best way to reheat chili is on the stovetop over medium-low heat, stirring occasionally. Add a splash of broth or water if it’s too thick. In a pinch, the microwave works fine — just heat it in 30-second bursts, stirring in between. Don’t reheat it more than once, though. Only warm up what you’re going to eat.
One more thing — this chili freezes like a dream. I always make a double batch and stash half for a rainy day. There’s nothing better than finding a container of homemade chili in the freezer on a cold Tuesday night.
Nutritional Information & Benefits
This chili is surprisingly good for you, considering how indulgent it tastes. Here’s the breakdown per serving (based on 12 servings, without toppings):
- Calories: 285
- Protein: 28g
- Fat: 9g
- Carbohydrates: 24g
- Fiber: 8g
- Sugar: 8g
- Sodium: 680mg
Ground turkey is a lean protein source that’s lower in saturated fat than beef. The beans are packed with fiber and plant-based protein, which helps keep you full and supports digestive health. Tomatoes provide lycopene, a powerful antioxidant. And the bell peppers are loaded with vitamin C — more than an orange, actually.
This recipe is naturally gluten-free and can be made dairy-free by skipping the cheese and sour cream toppings. It’s also relatively low in carbs compared to many comfort foods, thanks to all the protein and fiber. If you’re watching your sodium, use no-salt-added canned tomatoes and beans, and go easy on the salt at the end.
I’m not a nutritionist, but I do know that a bowl of this chili makes me feel good — full and satisfied without being weighed down. That’s the kind of comfort food I can feel good about serving to people I love.
Conclusion
This Friendsgiving Turkey Chili is more than just a recipe to me. It’s the taste of a Saturday afternoon in Mrs. Chen’s kitchen, the smell of a stranger’s coat in a grocery store aisle, and the feeling of bringing people together around a warm pot of something good. It’s the dish I make when I want to show up for the people I care about without spending all day in the kitchen.
I hope you make this chili for your next Friendsgiving, or for a cozy Sunday dinner, or just because you’re craving something warm and comforting. Play with the toppings, adjust the spice level, make it your own. That’s what cooking is all about, honestly.
When you make it — and I really hope you do — come back and let me know how it turned out. Did you add something unexpected? Did your guests go back for thirds? I want to hear about it. Drop a comment below or tag me in your photos. And if you loved it, share it with a friend who needs a good chili recipe in their life. Happy cooking, friend.
Frequently Asked Questions
Can I use ground beef instead of turkey?
Absolutely. Ground beef works perfectly in this recipe. I’d recommend 85% lean for the best flavor. Just drain off any excess fat after browning, since beef has more fat than turkey.
How can I make this chili less spicy?
Skip the cayenne pepper and use only one jalapeño, making sure to remove all the seeds and membranes. You can also serve it with extra sour cream or Greek yogurt, which helps cool things down. The chili powder itself has some heat, but most brands are pretty mild.
Can I make this in an Instant Pot?
Yes! Use the sauté function to brown the turkey and cook the vegetables. Then add the remaining ingredients, secure the lid, and cook on high pressure for 15 minutes. Let the pressure release naturally for 10 minutes, then quick release the rest. Stir in the beans after cooking so they stay intact.
How far ahead can I make this chili?
You can make this chili up to 3 days in advance and keep it in the refrigerator. It actually tastes better the next day. You can also freeze it for up to 3 months. Just thaw it overnight in the fridge before reheating.
What’s the best way to thicken chili?
If your chili is too thin, let it simmer uncovered for another 15-20 minutes. The liquid will reduce and the chili will thicken naturally. You can also mash some of the beans against the side of the pot with a spoon — the starch from the beans acts as a natural thickener. Avoid adding flour or cornstarch unless you really need to; it can change the texture.
Pin This Recipe!

Easy Friendsgiving Turkey Chili Recipe – Best Crowd Pleaser

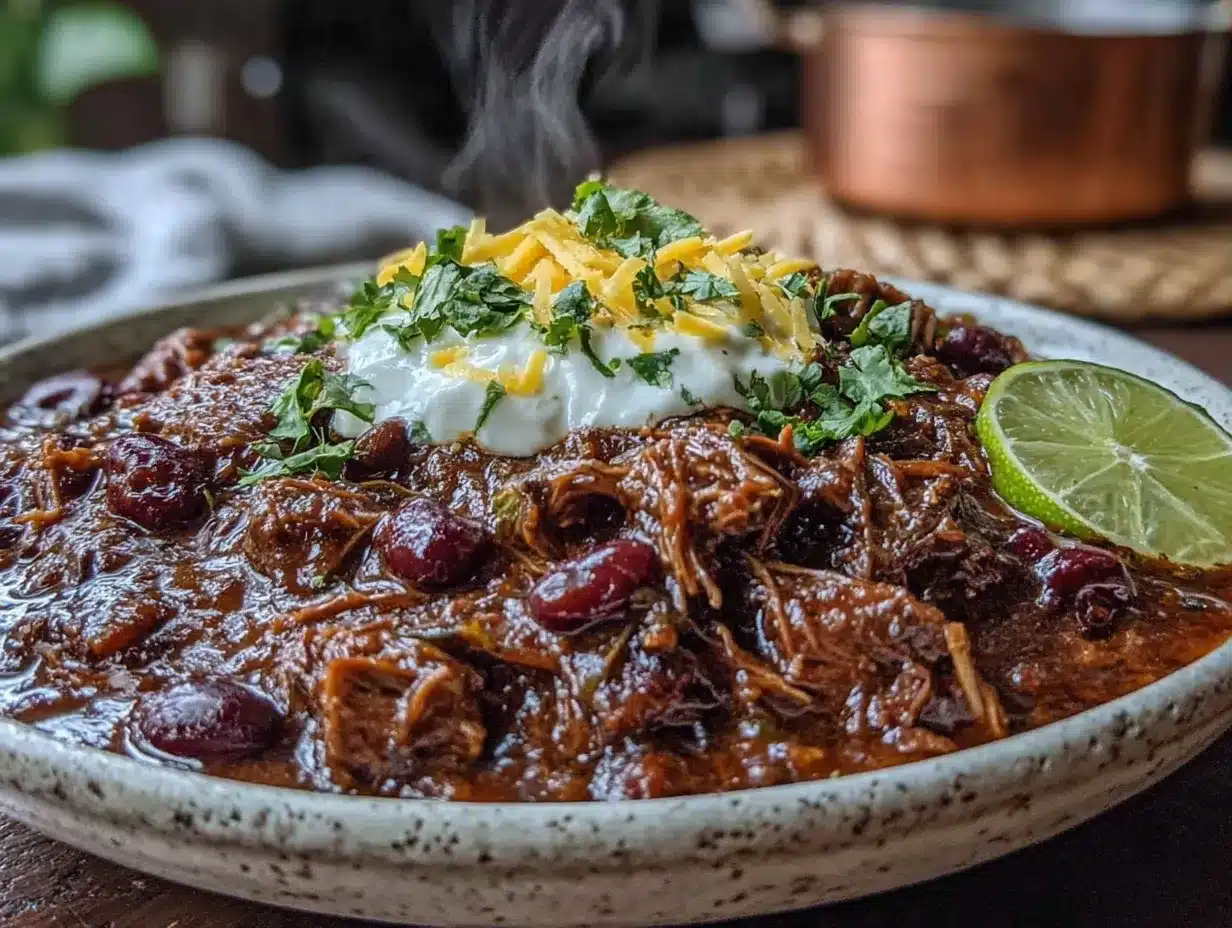
This Friendsgiving Turkey Chili is a warm, comforting crowd-pleaser made with ground turkey, beans, and a secret splash of fish sauce for savory depth. Perfect for feeding a crowd, it’s budget-friendly, stress-free, and tastes even better the next day.
- Prep Time: 20 minutes
- Cook Time: 1 hour 10 minutes
- Total Time: 1 hour 30 minutes
- Yield: 12 servings 1x
- Category: Main Course
- Cuisine: American
Ingredients
- 2 tablespoons olive oil
- 2 pounds ground turkey (93% lean)
- 1 large yellow onion, diced (about 2 cups)
- 1 red bell pepper, diced
- 1 green bell pepper, diced
- 4 cloves garlic, minced
- 2 jalapeños, seeded and minced
- 3 tablespoons chili powder
- 1 tablespoon ground cumin
- 1 teaspoon smoked paprika
- 1 teaspoon dried oregano
- 1/2 teaspoon cayenne pepper (optional)
- 1 teaspoon salt (plus more to taste)
- 1/2 teaspoon black pepper
- 1 can (28 ounces) crushed tomatoes
- 1 can (14.5 ounces) diced tomatoes, undrained
- 2 cans (15 ounces each) kidney beans, drained and rinsed
- 1 can (15 ounces) black beans, drained and rinsed
- 2 cups low-sodium chicken broth
- 1 tablespoon fish sauce
- 1 tablespoon brown sugar
- Shredded cheddar cheese (for serving)
- Sour cream or Greek yogurt (for serving)
- Fresh cilantro, chopped (for serving)
- Diced red onion (for serving)
- Corn chips or crusty bread (for serving)
Instructions
- Start by prepping everything. Dice your onion and bell peppers, mince the garlic and jalapeños, drain and rinse your beans. Measure out all your spices into a small bowl.
- Heat the olive oil in your Dutch oven over medium-high heat until shimmering. Add the ground turkey and let it cook without moving it for about 4 minutes to develop a deep brown crust. Break it up and cook for another 3-4 minutes until browned all over. Transfer the turkey to a bowl with a slotted spoon, leaving the fat and browned bits in the pot.
- Add the onion and both bell peppers to the pot. Cook over medium heat for about 5 minutes, scraping up the browned bits from the bottom. Add the garlic and jalapeños and cook for one more minute until fragrant.
- Add all your spices to the pot. Stir them into the vegetables and let them toast for about 30 seconds.
- Return the browned turkey to the pot. Add the crushed tomatoes, diced tomatoes, chicken broth, fish sauce, and brown sugar. Stir everything together, scraping up any last bits from the bottom. Bring to a boil, then reduce the heat to low.
- Stir in the kidney beans and black beans. Let the chili simmer uncovered for at least 45 minutes, stirring occasionally. If it gets too thick, add a splash more broth or water.
- After 45 minutes, taste your chili. Add more salt if needed. If it tastes flat, add another splash of fish sauce or a squeeze of lime juice.
- Turn off the heat and let the chili rest for 10 minutes before serving. Serve with desired toppings.
Notes
For best flavor, make the chili a day ahead and refrigerate overnight. Reheat gently on the stove, adding a little broth to thin if needed. The fish sauce adds umami without a fishy taste; don’t skip it. To thicken chili, let it simmer uncovered longer or mash some beans against the pot. For a vegetarian version, omit turkey, add an extra can of beans, and use vegetable broth.
Nutrition
- Serving Size: 1 serving (about 1.5
- Calories: 285
- Sugar: 8
- Sodium: 680
- Fat: 9
- Saturated Fat: 2
- Carbohydrates: 24
- Fiber: 8
- Protein: 28
Keywords: Friendsgiving, turkey chili, chili recipe, crowd pleaser, comfort food, easy chili, ground turkey chili


