Love this? Save it for later!
Share the inspiration with your friends
This was supposed to be a batch of oatmeal raisin cookies. I had the oats measured, the raisins plumped in hot water, the butter browning on the stove. Then my three-year-old walked into the kitchen, took one look at the raisins, and announced, “Those are yucky grapes, Mama.” I was already running late for a playdate, the butter was starting to smoke, and honestly? I just didn’t have the energy to argue with a tiny dictator about dried fruit. So I tossed the raisins in the trash, grabbed a bag of chocolate chips from the pantry, and crossed my fingers that the rest of the recipe would work. What came out of the oven was nothing like my plan — and way, way better.
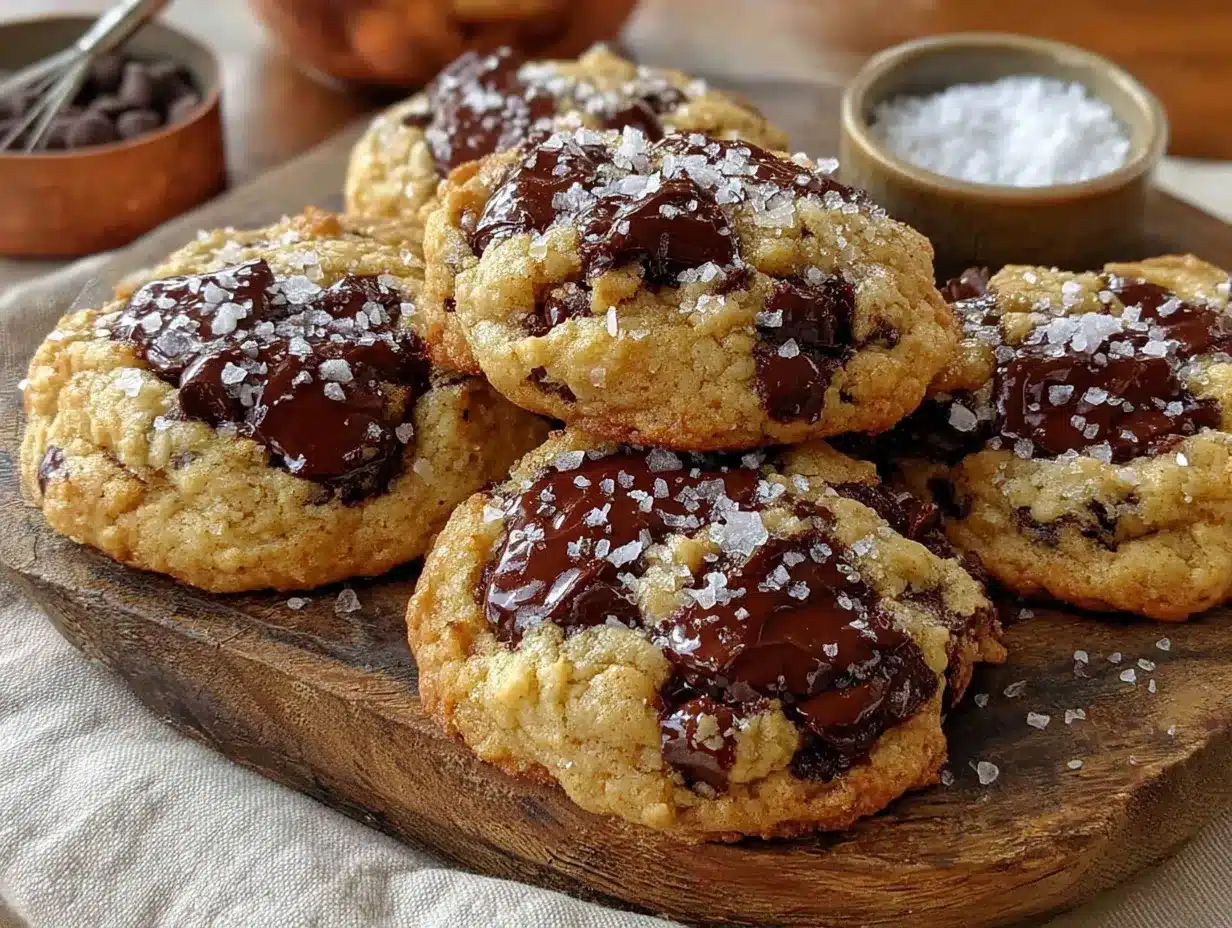
The cookies were perfect. Chewy centers, crisp edges, just the right amount of chocolate in every bite. My kid devoured three before I could even get one for myself. I mean, I stood there holding a hot cookie, watching him grin with chocolate all over his face, and I knew I had stumbled onto something special. Maybe you’ve been there — a recipe goes sideways, you panic, and somehow the accident turns into a new favorite. That’s exactly what happened here.
I kept making these cookies, tweaking the ratios until they were just right. I scaled them down so you get exactly six perfect cookies — no more, no less. No leftover dough calling your name from the fridge at midnight. Just a small batch of the best chocolate chip cookies you’ll ever make, and they happen to be completely kid-approved. Honestly, I don’t think I’ll ever make a full batch again. This little recipe is all we need.
Why You’ll Love This Recipe
These easy small-batch chocolate chip cookies are the kind of recipe that makes you feel like a hero in the kitchen. I’ve tested this one at least a dozen times — tweaking the butter temperature, the resting time, the chip-to-dough ratio — and this version wins every single time. Here’s why it works so well for real families:
- Quick & Easy : From start to finish, these cookies come together in under 30 minutes. That’s faster than a trip to the store for a packaged treat.
- Simple Ingredients : You probably have everything in your pantry right now. Butter, sugar, an egg, flour, chocolate chips — that’s it.
- Perfect for Small Families : This recipe makes exactly six cookies. No waste, no temptation to eat a dozen, just the right amount for a cozy afternoon snack or a lunchbox surprise.
- Kid-Approved : My own kids gave these a standing ovation. And I’ve made them for neighbor kids, classroom parties, and picky little cousins — they all disappear fast.
- Unbelievably Delicious : The texture is spot-on — soft in the middle, slightly crisp around the edges, with melty chocolate in every bite. It’s comfort in cookie form.
What makes this recipe different from the rest? It’s the resting time. I know, I know — waiting is hard. But letting the dough sit for just 10 minutes before baking lets the flour hydrate and the flavors meld. It makes a noticeable difference in texture. Plus, the ratio of butter to sugar is dialed in so you get that perfect spread without flat, greasy cookies. This isn’t just another small-batch recipe — it’s the best version I’ve ever made.
These cookies are the kind that make you close your eyes after the first bite. They’re simple, fast, and exactly what you need when a cookie craving hits. And honestly? Watching a kid’s face light up over a warm, homemade cookie is one of the best feelings in the world.
What Ingredients You Will Need
This recipe uses simple, pantry-friendly ingredients to deliver that classic chocolate chip cookie flavor without any fuss. No weird specialty items — just the basics done right.
For the Cookies
- 4 tablespoons unsalted butter, softened (I use Land O’Lakes — it has consistent fat content for reliable baking)
- ¼ cup granulated sugar (adds sweetness and helps with spreading)
- ¼ cup packed light brown sugar (gives that chewy texture and deeper flavor)
- 1 large egg yolk (the yolk adds richness; save the white for scrambled eggs tomorrow)
- ½ teaspoon vanilla extract (pure vanilla is best, but imitation works in a pinch)
- ¾ cup all-purpose flour (spoon and level it — don’t scoop straight from the bag)
- ¼ teaspoon baking soda (helps the cookies spread just right)
- ¼ teaspoon salt (balances the sweetness — don’t skip it)
- ½ cup semi-sweet chocolate chips (I prefer Ghirardelli for that rich, melty center)
Ingredient Tips & Swaps
- Butter : Make sure it’s truly softened — not melted, not rock hard. Leave it on the counter for about 30 minutes. If you’re in a rush, cut it into small cubes and let it sit for 10 minutes.
- Brown Sugar : Light or dark brown sugar both work. Dark brown sugar will give a slightly more caramel-like flavor.
- Egg Yolk : Using just the yolk keeps these cookies tender and rich. If you want to use a whole egg, the cookies will be slightly cakier — still good, just different.
- Flour : For a gluten-free option, use a 1:1 gluten-free baking flour blend. I’ve tested this with King Arthur Measure for Measure, and it works great.
- Chocolate Chips : Milk chocolate chips make these sweeter and extra kid-friendly. Dark chocolate chips are great for a more grown-up version. Or use a mix!
- Add-ins : Toss in ¼ cup of chopped walnuts or pecans for some crunch. Or swap half the chocolate chips for white chocolate chips and dried cranberries.
Equipment Needed
You don’t need fancy gadgets to make these cookies — just a few basic tools you probably already own.
- Mixing bowls : One medium bowl for the wet ingredients, one small bowl for the dry ingredients. I use glass or ceramic bowls because they don’t hold onto smells.
- Electric hand mixer or wooden spoon : A hand mixer makes creaming the butter and sugar effortless, but a sturdy wooden spoon works perfectly too. I’ve made these with both, and the cookies turn out the same.
- Measuring cups and spoons : Accurate measurements matter in baking. Use dry measuring cups for flour and sugar, and a liquid measuring cup if you ever scale this up.
- Baking sheet : A standard half-sheet pan works great. No need to grease it — the butter in the dough prevents sticking.
- Parchment paper or silicone baking mat : Parchment paper makes cleanup a breeze and helps the cookies bake evenly. Silicone mats are reusable and also work well.
- Cookie scoop or tablespoon : A #40 cookie scoop (about 1.5 tablespoons) gives you perfectly uniform cookies. If you don’t have one, just use a regular tablespoon.
- Cooling rack : Letting the cookies cool on a rack prevents soggy bottoms. If you don’t have one, transfer them to a plate after 5 minutes on the sheet.
Budget-friendly tip: You can skip the hand mixer entirely. Creaming butter and sugar by hand takes about 2 minutes of vigorous stirring — it’s a great arm workout and saves you from washing extra attachments.
Preparation Method
Follow these steps carefully, and you’ll have perfect cookies every time. The key is not rushing — especially the resting step.
- Preheat your oven to 350°F (175°C). Line a baking sheet with parchment paper or a silicone mat. This ensures even baking and easy cleanup.
- Cream the butter and sugars. In a medium mixing bowl, combine 4 tablespoons softened unsalted butter, ¼ cup granulated sugar, and ¼ cup packed light brown sugar. Beat with an electric hand mixer on medium speed for about 2 minutes, until light and fluffy. Scrape down the sides of the bowl once. If you’re using a wooden spoon, stir vigorously for about 3 minutes — you’ll notice the mixture becomes paler and airy.
- Add the egg yolk and vanilla. Drop in 1 large egg yolk and ½ teaspoon vanilla extract. Mix on low speed until just combined — about 15 seconds. Don’t overmix here, or the cookies can become tough.
- Combine the dry ingredients. In a small bowl, whisk together ¾ cup all-purpose flour, ¼ teaspoon baking soda, and ¼ teaspoon salt. Whisking ensures the baking soda and salt are evenly distributed throughout the flour.
- Add the dry ingredients to the wet ingredients. Pour the flour mixture into the butter mixture. Mix on low speed (or stir with a wooden spoon) until just barely combined. You should still see a few streaks of flour. This is important — overmixing develops gluten and makes cookies tough.
- Fold in the chocolate chips. Add ½ cup semi-sweet chocolate chips. Use a spatula to fold them in gently until evenly distributed. The dough will be thick and slightly sticky — that’s perfect.
- Let the dough rest. Cover the bowl with plastic wrap or a clean kitchen towel and let it sit at room temperature for 10 minutes. I know it’s tempting to skip this, but trust me — it makes the cookies chewier and more flavorful. The flour absorbs moisture, and the flavors meld together.
- Scoop the cookies. Use a #40 cookie scoop or a tablespoon to portion the dough into 6 equal balls, each about 1.5 tablespoons. Place them on the prepared baking sheet, spacing them about 3 inches apart. They’ll spread as they bake, so give them room.
- Bake for 10-12 minutes. Bake at 350°F (175°C) for 10 minutes for soft, chewy cookies, or 12 minutes for slightly crispier edges. The cookies will look puffy and slightly underdone in the center when you take them out — that’s exactly what you want. They’ll continue to set as they cool.
- Cool on the baking sheet for 5 minutes. This is crucial. The cookies need this time to firm up so they don’t fall apart when you move them. After 5 minutes, transfer them to a wire rack to cool completely. Or, let’s be honest — eat one warm right away. That’s the cook’s privilege.
Pro tip for even cookies: If you want picture-perfect round cookies, place a round cookie cutter or a glass slightly larger than the cookie over each one immediately after baking and gently swirl it in a circular motion for about 10 seconds. This rounds out the edges and makes them look bakery-style.
Cooking Tips & Techniques
Over the years, I’ve made more batches of cookies than I can count — and I’ve made every mistake in the book. Here’s what I’ve learned so you don’t have to repeat my failures.
Don’t overmix the dough. This is the number one mistake I see. When you overmix, you develop too much gluten, and your cookies turn out tough and cakey instead of tender and chewy. Mix until the flour just disappears, then stop. A few streaks of flour are fine — they’ll incorporate when you fold in the chips.
Use room-temperature ingredients. Cold butter doesn’t cream properly with sugar, and cold egg yolk can seize the butter. If you forgot to take the butter out, cut it into small cubes and microwave it in 5-second bursts until it’s soft but not melted. For the egg yolk, place the whole egg in a bowl of warm water for 5 minutes before separating.
Chill the dough if you have time. I know the recipe says 10 minutes, but if you can wait 30 minutes or even an hour, the cookies will be even better. Chilling solidifies the butter, which means the cookies spread less and have a chewier texture. I’ve left this dough in the fridge for up to 3 days, and the cookies were fantastic every time.
Watch the baking time closely. Ovens vary wildly. My old oven ran hot and burned cookies in 9 minutes. My current oven needs the full 12. Start checking at 9 minutes — the edges should be golden brown, and the centers should still look soft and slightly puffy. Remember, they continue baking on the hot sheet after you pull them out.
Use a cookie scoop for uniform size. This isn’t just about looks — uniform cookies bake evenly. If you make some bigger and some smaller, the small ones will burn before the big ones are done. A #40 scoop is my favorite for medium cookies.
One more thing — I once forgot the baking soda entirely. The cookies came out flat and dense, like little hockey pucks. It was a sad day. So double-check your ingredients before you start mixing. It sounds obvious, but when you’re juggling a toddler and a phone call, it’s easy to miss.
Variations & Adaptations
This recipe is super flexible — I’ve tried quite a few variations myself, and most of them turned out great. Here are some of my favorites:
Double Chocolate Chip Cookies
Replace 2 tablespoons of the all-purpose flour with 2 tablespoons of unsweetened cocoa powder. Use milk chocolate chips instead of semi-sweet for a sweeter, extra-chocolatey cookie. My kids call these “brownie cookies.”
Gluten-Free Version
Swap the all-purpose flour with a 1:1 gluten-free baking flour blend that contains xanthan gum. I’ve used Bob’s Red Mill and King Arthur — both work well. The texture is slightly more delicate, so handle the dough gently. Let it rest for 15 minutes instead of 10 to help the flour absorb moisture.
Vegan Adaptation
Use vegan butter sticks (like Earth Balance) in place of regular butter. Replace the egg yolk with 1 tablespoon of aquafaba (the liquid from a can of chickpeas) mixed with 1 teaspoon of cornstarch. The cookies will be slightly less rich but still delicious. Use dairy-free chocolate chips to keep it fully vegan.
Peanut Butter Swirl
After scooping the dough onto the baking sheet, drop a small teaspoon of creamy peanut butter on top of each cookie. Use a toothpick to swirl it into the dough. Bake as directed. The peanut butter gets slightly caramelized and adds a salty contrast to the sweet chocolate.
Brown Butter Version
Brown the 4 tablespoons of butter in a small saucepan over medium heat until it turns golden brown and smells nutty — about 3-4 minutes. Let it cool completely before using (pop it in the fridge for 10 minutes if you’re impatient). Brown butter adds a deep, toffee-like flavor that takes these cookies to another level.
Serving & Storage Suggestions
These cookies are best served warm, when the chocolate chips are still melty and the edges are crisp. I like to let them cool on the baking sheet for exactly 5 minutes — that’s the sweet spot where the center is still soft but the cookie holds together. Serve them with a cold glass of milk for the ultimate after-school treat.
For a fun dessert, sandwich two cookies with a scoop of vanilla ice cream. Roll the edges in mini chocolate chips or sprinkles for an extra festive touch. My kids love this for birthday parties.
Storing leftovers (if there are any): Place cooled cookies in an airtight container at room temperature. They’ll stay fresh for up to 3 days. To keep them soft, add a slice of bread to the container — the cookies will absorb the moisture from the bread and stay chewy.
Freezing instructions: You can freeze the baked cookies for up to 3 months. Wrap each cookie individually in plastic wrap, then place them in a freezer bag. Thaw at room temperature for about 15 minutes, or pop one in the microwave for 10 seconds for that fresh-from-the-oven taste. You can also freeze the unbaked dough balls — just scoop them onto a baking sheet, freeze until solid, then transfer to a freezer bag. Bake from frozen, adding 2-3 minutes to the baking time.
One thing I love about these cookies is that the flavors actually improve after a day. The brown sugar deepens, the chocolate mellows — they’re fantastic on day two. Not that they usually last that long around here.
Nutritional Information & Benefits
Here’s the estimated nutritional breakdown for one cookie (based on 6 cookies per batch):
| Nutrient | Amount |
|---|---|
| Calories | 245 |
| Total Fat | 13g |
| Saturated Fat | 8g |
| Cholesterol | 45mg |
| Sodium | 135mg |
| Total Carbohydrates | 30g |
| Dietary Fiber | 1g |
| Sugars | 19g |
| Protein | 3g |
These cookies are a treat, not a health food — but they do have a few redeeming qualities. The butter provides a small amount of vitamin A, and the dark chocolate chips contain antioxidants and a little iron. Using semi-sweet chocolate instead of milk chocolate reduces the sugar content slightly.
For a slightly lighter version, you can reduce the sugar to 3 tablespoons of each type — the cookies will be less sweet but still delicious. Or use dark chocolate chips with at least 70% cocoa for more antioxidants and less sugar.
These cookies are vegetarian and can easily be made gluten-free or vegan (see variations above). They contain dairy, eggs, and gluten in the standard version. If you’re baking for someone with allergies, the vegan and gluten-free adaptations work beautifully.
Conclusion
These easy small-batch chocolate chip cookies have become a staple in my kitchen for good reason. They’re quick, they use ingredients I always have on hand, and they make exactly the right amount for a small family. No more staring at a plate of two dozen cookies wondering what to do with them all. Just six perfect cookies, every single time.
I love that this recipe started as a mistake — a failed oatmeal raisin cookie that turned into something way better. It reminds me that some of the best things in the kitchen happen when you stop following the plan and start trusting your instincts. And honestly? Watching my kids fight over the last cookie is a pretty great feeling.
I’d love to hear how these turn out for you. Did you make any fun variations? Did your kids approve? Drop a comment below and let me know — I read every single one. And if you share a photo on social media, tag me so I can see your beautiful cookies. Happy baking, friend!
Frequently Asked Questions
Can I double this recipe?
Absolutely! Just double all the ingredients. The baking time stays the same, but you’ll need to bake in batches unless you have a second oven. The dough also freezes well if you want to make a double batch and save half for later.
Why did my cookies turn out flat?
Flat cookies usually mean the butter was too soft or melted, or the dough wasn’t chilled long enough. Make sure your butter is softened but not greasy, and don’t skip the 10-minute rest. Also, check that your baking soda is fresh — old baking soda loses its leavening power.
Can I use margarine instead of butter?
You can, but the texture will be different. Margarine has more water and less fat than butter, so cookies spread more and can be slightly greasy. For best results, stick with real butter. If you need a dairy-free option, use vegan butter sticks (not tub margarine).
How do I make these cookies softer?
For softer cookies, bake them for 9-10 minutes instead of 11-12. Pull them out when the centers still look slightly underdone. Also, try using all brown sugar instead of the white-brown sugar mix — brown sugar adds moisture and keeps cookies softer longer.
Can I make the dough ahead of time?
Yes! The dough can be refrigerated for up to 3 days. Wrap it tightly in plastic wrap to prevent it from drying out. When you’re ready to bake, let it sit at room temperature for 10 minutes to soften slightly, then scoop and bake as directed. You may need to add 1-2 minutes to the baking time if the dough is still cold.
Pin This Recipe!

Easy Small-Batch Chocolate Chip Cookies: Best Kid-Approved Recipe

These easy small-batch chocolate chip cookies are quick, use simple ingredients, and make exactly six perfect cookies. They have chewy centers, crisp edges, and are completely kid-approved.
- Prep Time: 15 minutes
- Cook Time: 10-12 minutes
- Total Time: 25-27 minutes
- Yield: 6 cookies 1x
- Category: Dessert
- Cuisine: American
Ingredients
- 4 tablespoons unsalted butter, softened
- ¼ cup granulated sugar
- ¼ cup packed light brown sugar
- 1 large egg yolk
- ½ teaspoon vanilla extract
- ¾ cup all-purpose flour
- ¼ teaspoon baking soda
- ¼ teaspoon salt
- ½ cup semi-sweet chocolate chips
Instructions
- Preheat your oven to 350°F (175°C). Line a baking sheet with parchment paper or a silicone mat.
- In a medium mixing bowl, cream together 4 tablespoons softened unsalted butter, ¼ cup granulated sugar, and ¼ cup packed light brown sugar with an electric hand mixer on medium speed for about 2 minutes until light and fluffy. Scrape down the sides once.
- Add 1 large egg yolk and ½ teaspoon vanilla extract. Mix on low speed until just combined, about 15 seconds.
- In a small bowl, whisk together ¾ cup all-purpose flour, ¼ teaspoon baking soda, and ¼ teaspoon salt.
- Pour the flour mixture into the butter mixture. Mix on low speed or stir with a wooden spoon until just barely combined, with a few streaks of flour remaining.
- Fold in ½ cup semi-sweet chocolate chips with a spatula until evenly distributed. The dough will be thick and slightly sticky.
- Cover the bowl with plastic wrap or a clean kitchen towel and let the dough rest at room temperature for 10 minutes.
- Use a #40 cookie scoop or a tablespoon to portion the dough into 6 equal balls, each about 1.5 tablespoons. Place them on the prepared baking sheet, spacing them about 3 inches apart.
- Bake for 10-12 minutes at 350°F (175°C). For soft, chewy cookies, bake for 10 minutes; for slightly crispier edges, bake for 12 minutes. The cookies will look puffy and slightly underdone in the center.
- Cool on the baking sheet for 5 minutes, then transfer to a wire rack to cool completely.
Notes
Let the dough rest for 10 minutes before baking for chewier cookies. For even cookies, use a cookie scoop. For bakery-style round cookies, place a round cookie cutter or glass over each cookie immediately after baking and gently swirl for 10 seconds.
Nutrition
- Serving Size: 1 cookie
- Calories: 245
- Sugar: 19
- Sodium: 135
- Fat: 13
- Saturated Fat: 8
- Carbohydrates: 30
- Fiber: 1
- Protein: 3
Keywords: small-batch chocolate chip cookies, easy chocolate chip cookies, kid-approved cookies, quick cookies, 6 cookies


