Love this? Save it for later!
Share the inspiration with your friends
I was digging through my pantry last October, three days before Halloween, when a half-open bag of white chocolate chips fell out and hit me square on the toe. And honestly? That little sting was exactly the wake-up call I needed. Because standing there, surrounded by half-eaten bags of candy corn and that one lollipop no one ever claims, I realized I had completely forgotten to plan anything fun for the holiday. No spooky treats. No creepy snacks. Just me, a sore toe, and a bag of white chocolate chips that looked way too plain to celebrate anything.
But then I spotted the dark chocolate bars my neighbor had given me last week—she always buys too many, bless her heart—and something clicked. I mean, you know that feeling when two random ingredients suddenly make perfect sense together? That was my moment. I grabbed a few candy eyeballs from the baking drawer and started experimenting right there on my counter, still wearing my slippers. The power flickered once—classic October storm—and I just kept stirring.
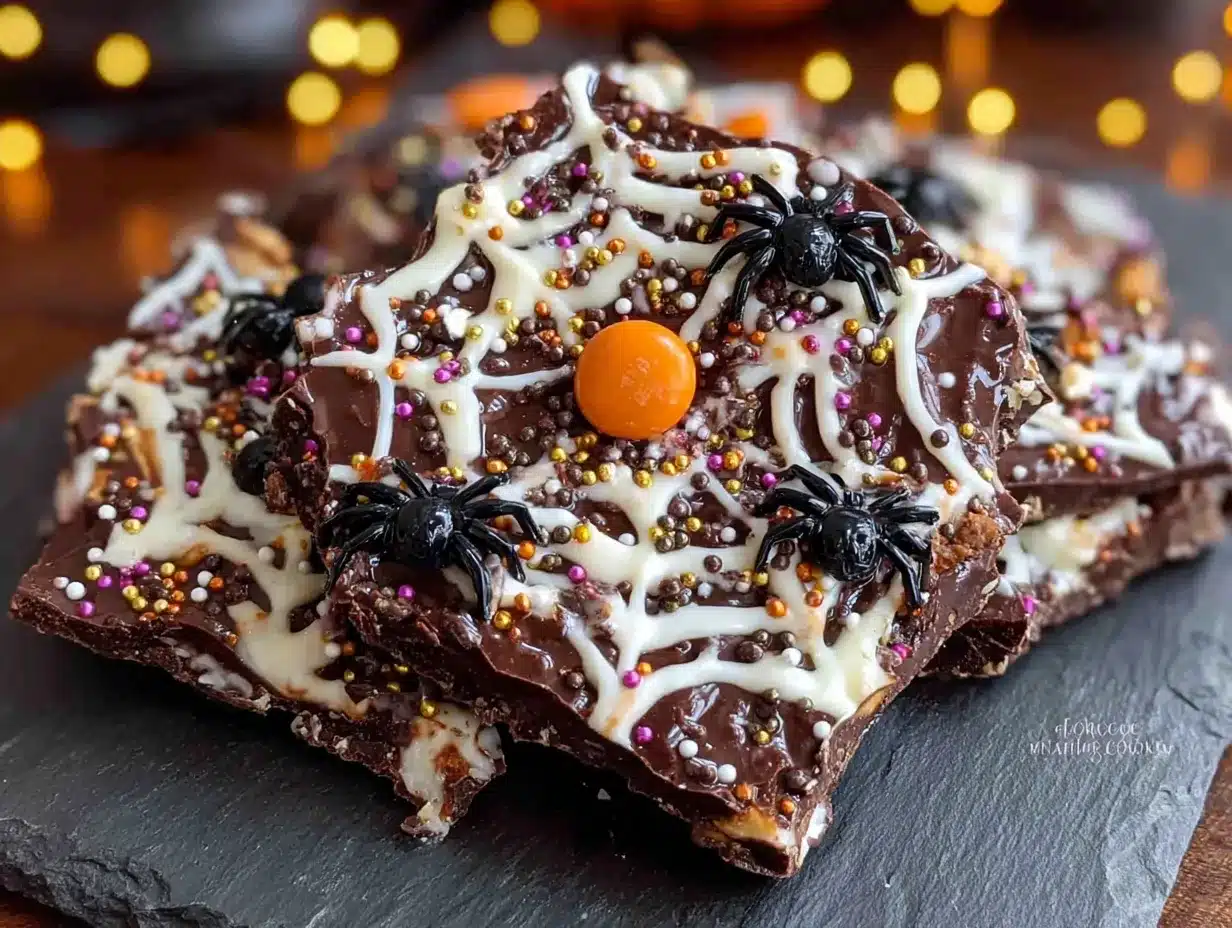
What came out of that messy, slightly chaotic afternoon was this Easy Spiderweb Chocolate Halloween Bark. It is crunchy, creamy, and honestly looks way fancier than the fifteen minutes it takes to make. The spiderweb effect is so simple I almost laughed when I figured it out. And now I make it every single year, because sometimes the best traditions start with a toe injury and a desperate need for something chocolatey.
Why You’ll Love This Recipe
Let me tell you why this bark has earned a permanent spot in my Halloween rotation. I have tested this recipe at least seven times over three different Octobers, and it never disappoints. Here is what makes it special:
- Super Quick & Easy: You can make this in under 20 minutes total. No baking, no fuss, no complicated techniques. Perfect for last-minute Halloween prep or when the kids suddenly announce they need treats for tomorrow’s class party.
- Simple Ingredients: You probably already have most of these in your pantry right now. No fancy grocery store trips required. Dark chocolate, white chocolate, and a few candy decorations—that is literally it.
- Perfect for Halloween Parties: This bark looks like something from a fancy bakery, but you made it in your kitchen. It is great for potlucks, classroom treats, or just snacking while watching Hocus Pocus for the twelfth time.
- Crowd-Pleaser: Kids love the candy eyeballs and spiderweb design. Adults love the rich chocolate flavor. Everyone wins.
- Unbelievably Delicious: The combination of dark and white chocolate creates this perfect contrast—rich and slightly bitter against sweet and creamy. Plus the crunch from the bark itself is so satisfying.
What makes this recipe different from all the other chocolate bark recipes out there? It is the spiderweb technique. Most recipes just drizzle white chocolate randomly and call it a day. But I figured out that using a toothpick to drag the white chocolate through the dark chocolate creates those perfect web-like lines every single time. No special tools, no artistic talent required.
This recipe is the kind that makes you close your eyes after the first bite. It is Halloween comfort food—spooky looking but deeply satisfying. Perfect for impressing guests without any stress, or turning a simple October evening into something memorable.
What Ingredients You Will Need
This recipe uses simple, pantry-friendly ingredients to create something that looks like it took hours. Here is everything you need, with a few notes from my own trials:
For the Chocolate Base
- 12 ounces dark chocolate chips or bars (I prefer Ghirardelli 60% cacao for that perfect balance—not too bitter, not too sweet. Chop bars into small pieces if using bars instead of chips.)
- 1 cup white chocolate chips (Guittard makes a really smooth melting white chocolate. Do not use white chocolate morsels labeled “baking chips”—they contain less cocoa butter and don’t melt as smoothly.)
- 1 teaspoon coconut oil or vegetable shortening, divided (This is optional but helps both chocolates melt more smoothly and gives the bark a nice snap when you break it.)
For the Spiderweb Decoration
- 2 tablespoons reserved white chocolate (for the web design)
- Candy eyeballs (about 12-15, or however many spiders you want. I found a big bag at Michaels for three dollars.)
- Optional: black sanding sugar or black sprinkles (for extra spooky effect. I use these sometimes, but honestly the plain web looks great too.)
- Optional: pretzel sticks (broken into small pieces to look like spider legs. My nephew insisted on this last year, and it was actually genius.)
Ingredient Selection Tips: Look for dark chocolate with at least 60% cacao content for the best flavor. Cheap chocolate chips often contain stabilizers that make them harder to melt smoothly. If you can find high-quality chocolate bars on sale, grab them—they melt more evenly and taste noticeably better.
Substitution Guidance: Use dairy-free dark chocolate and vegan white chocolate chips if needed. Coconut oil works perfectly as a dairy-free alternative. For a nut-free version, skip the pretzel sticks and use only candy decorations. You can also use milk chocolate instead of dark if your family prefers it sweeter—just know the web design will be less visible.
Equipment Needed
You do not need anything fancy for this recipe. Here is what I use:
- Baking sheet (standard half-sheet size works great. Line it with parchment paper—do not skip this step or you will be scraping chocolate off metal for an hour.)
- Parchment paper (essential for easy removal. Wax paper will melt. Trust me on this one.)
- Small microwave-safe bowls (two separate bowls for dark and white chocolate. Glass or ceramic works best.)
- Rubber spatula (for spreading the chocolate evenly. A silicone spatula is ideal because it won’t scratch your bowls.)
- Toothpick or wooden skewer (for creating the spiderweb design. A toothpick gives thinner lines, a skewer gives thicker ones. I prefer toothpicks for more delicate webs.)
- Piping bag or small zip-top bag (for drizzling the white chocolate. A zip-top bag with a tiny corner snipped off works perfectly and saves you three dollars.)
- Sharp knife (for breaking the finished bark into pieces. A chef’s knife works best, but any sharp knife will do.)
Budget-Friendly Tip: If you don’t have a piping bag, a sandwich bag works just fine. And if you don’t have a baking sheet, a large cutting board covered in parchment paper works in a pinch—just make sure it is completely flat.
Preparation Method
Okay, let’s make some Halloween magic. Here is exactly how I do it, including all the little tricks I learned the hard way:
- Prepare your baking sheet. Line it with parchment paper, making sure the paper extends slightly over the edges. This makes lifting the bark out later so much easier. Press the parchment flat so there are no wrinkles—wrinkles will show up in your chocolate.
- Melt the dark chocolate. Place 12 ounces of dark chocolate chips in a microwave-safe bowl. Microwave in 30-second intervals at 50% power, stirring thoroughly after each interval. This usually takes about 2 minutes total. Do not rush this step—high power will burn the chocolate and ruin the texture. I learned this the hard way my first time, and the smell of burnt chocolate is surprisingly sad. Stir until completely smooth. If the chocolate looks grainy, add 1/2 teaspoon coconut oil and stir until glossy.
- Spread the dark chocolate. Pour the melted dark chocolate onto your prepared baking sheet. Use a rubber spatula to spread it into an even rectangle, about 1/4 inch thick. Do not make it too thin or the bark will be fragile. Aim for roughly a 9×12 inch rectangle—it doesn’t need to be perfect. Imperfect edges look more natural anyway. Let it sit for 2 minutes to cool slightly.
- Melt the white chocolate. In a separate microwave-safe bowl, melt 1 cup of white chocolate chips using the same method—30-second intervals at 50% power, stirring each time. White chocolate is more delicate than dark chocolate, so be extra careful not to overheat it. If it seizes up (gets clumpy and stiff), you overheated it. Toss it and start over with fresh chips. Stir in 1/2 teaspoon coconut oil if needed for smoothness.
- Reserve white chocolate for the web. Spoon about 2 tablespoons of the melted white chocolate into a small piping bag or zip-top bag. Set it aside—you will use this for the spiderweb design.
- Create the base drizzle. With the remaining white chocolate, use a spoon to drizzle it randomly over the dark chocolate layer. Do not cover the whole surface—you want streaks and patches of white against dark. Think of it like a Jackson Pollock painting, but Halloween themed.
- Make the spiderweb. Here is the fun part. Take a toothpick and drag it through the white chocolate in long, sweeping curves. Start from the center of a white chocolate patch and drag outward in a spiral motion. Then drag lines from the center to the edges like spokes on a wheel. The white chocolate will spread into thin web-like lines. Repeat this in several spots across the bark. Do not overwork it—three or four webs are plenty. If you mess up, just smooth the chocolate gently and try again. I messed up my first web and it still looked fantastic.
- Add the spiders. While the chocolate is still wet, place candy eyeballs in clusters of two or three near the spiderwebs. If you are using pretzel sticks for spider legs, gently press four small pieces around each eyeball cluster. Work quickly—the chocolate sets fast.
- Add optional sprinkles. If using black sanding sugar, sprinkle it lightly over the whole bark now. Do not oversaturate—you still want to see the web design.
- Set the bark. Place the baking sheet in the refrigerator for 15-20 minutes, or until the chocolate is completely firm and no longer shiny. Do not leave it longer than 30 minutes or condensation may form. If you are in a hurry, the freezer works in 10 minutes flat.
- Break into pieces. Once firm, lift the parchment paper off the baking sheet. Use your hands to break the bark into irregular pieces—rustic shapes look more authentic than perfect squares. If you prefer cleaner edges, use a sharp knife to cut it, but honestly, the broken pieces look better on a serving platter.
Sensory Cue: When the chocolate is ready to break, it should feel firm to the touch and make a clean snapping sound when you break it. If it bends instead of snaps, it needs more time in the fridge.
Cooking Tips & Techniques
After making this recipe more times than I care to count, here are the things I wish someone had told me:
Temperature is everything. Chocolate that is too hot will not hold its shape. Chocolate that is too cold will crack unevenly. Let your melted chocolate cool for about 2 minutes before spreading it. You want it spreadable but not runny. If it starts looking dull or streaky, it is too cold—pop it back in the microwave for 10 seconds.
Do not skip the parchment paper. I know it seems obvious, but I once thought I could get away with wax paper. The wax melted into the chocolate. It was not pretty. Parchment paper is non-negotiable here.
The toothpick trick works every time. The spiderweb design looks complicated, but it is honestly foolproof. The key is dragging the toothpick through the white chocolate while it is still wet. If the white chocolate has started to set, the web lines will be clumpy instead of smooth. Work in small sections and do not overthink it.
Common mistake: overmixing. I did this my second time—I kept dragging the toothpick back and forth until the white and dark chocolate blended into a muddy mess. Stop after three or four drags. Less is more with spiderwebs.
Multitasking strategy. While the dark chocolate is melting, prep your candy eyeballs and pretzel pieces. While the bark is setting in the fridge, clean up your workspace. This recipe is so quick that cleanup takes almost as long as the cooking itself.
Consistency tip: If your kitchen is warm (above 75°F), the chocolate may not set properly at room temperature. Go straight to the refrigerator. If your kitchen is cold (below 65°F), the chocolate may set too fast—work quickly and keep your bowls near a warm spot.
Variations & Adaptations
This recipe is endlessly adaptable. Here are some versions I have tried and loved:
Peanut Butter Spiderweb Bark
Swirl in 3 tablespoons of melted peanut butter along with the white chocolate. The salty peanut butter pairs beautifully with the dark chocolate. Just be careful not to over-swirl or you will lose the web effect.
Vegan Halloween Bark
Use dairy-free dark chocolate (most dark chocolate is naturally vegan) and vegan white chocolate chips. I like Enjoy Life brand for this. Skip the candy eyeballs if they contain gelatin, or find vegan-friendly ones online. The rest of the recipe stays exactly the same.
Mint Chocolate Spiderweb Bark
Add 1/2 teaspoon peppermint extract to the dark chocolate before spreading. The mint flavor makes it taste like a fancy holiday treat. My sister-in-law requests this version every year and refuses to eat the regular kind now.
Gluten-Free Option
This recipe is naturally gluten-free if you use certified gluten-free chocolate chips and skip the pretzel sticks. Most dark and white chocolate chips are gluten-free, but always check the label to be safe.
Halloween Candy Bark
Press chopped Halloween candy (Reese’s cups, Kit Kats, or candy corn) into the top of the bark before it sets. This makes it extra indulgent and perfect for using up leftover candy. I did this last November with all the candy my kids didn’t eat, and it was honestly better than the original.
Serving & Storage Suggestions
This bark is best served at room temperature. The chocolate has the best snap and flavor when it is not straight from the fridge. Let it sit out for about 10 minutes before serving.
Presentation Ideas: Arrange the broken pieces on a black or orange platter for maximum Halloween effect. I like to scatter a few extra candy eyeballs around the plate for decoration. For parties, place the bark in a clear cellophane bag tied with orange ribbon—it makes a great hostess gift.
Complementary Pairings: Serve alongside spooky Halloween popcorn mix for a sweet-and-salty snack board. A glass of cold milk or a hot cup of coffee balances the richness beautifully. For adult gatherings, a dark stout beer or a glass of red wine pairs surprisingly well.
Storage Instructions: Store in an airtight container at room temperature for up to 1 week. Do not refrigerate after the initial setting—the chocolate may develop condensation and lose its snap. If your kitchen is very warm, store in a cool, dark place.
Freezer Instructions: This bark freezes beautifully for up to 3 months. Layer pieces between sheets of parchment paper in an airtight container. Thaw at room temperature for 15 minutes before serving. The texture stays perfect—I have tested this multiple times.
Flavor Development: Honestly, this bark tastes best on day two. The flavors meld together overnight, and the chocolate develops a deeper, more complex taste. If you can resist eating it all on day one, you will be rewarded.
Nutritional Information & Benefits
Here is the estimated nutritional breakdown per serving (about 2 ounces of bark):
| Nutrient | Amount |
|---|---|
| Calories | 210 |
| Total Fat | 14g |
| Saturated Fat | 8g |
| Carbohydrates | 22g |
| Sugar | 18g |
| Protein | 3g |
| Fiber | 2g |
Dark chocolate is actually good for you in moderation—it contains antioxidants called flavonoids that support heart health. The cocoa in dark chocolate also contains magnesium and iron. White chocolate is more of a treat, but it makes this recipe feel special.
Dietary Considerations: This recipe is vegetarian. For vegan, dairy-free, or gluten-free options, see the variations section above. The main allergens are dairy and soy (in some chocolate chips). Always check labels if you are serving someone with allergies.
I personally love that this recipe lets me enjoy a Halloween treat without feeling like I am eating pure sugar. The dark chocolate gives it some nutritional redemption, and a small piece is incredibly satisfying.
Conclusion
This Easy Spiderweb Chocolate Halloween Bark has become my go-to Halloween recipe for a reason. It is quick enough for a weekday, impressive enough for a party, and flexible enough to adapt to whatever ingredients you have on hand. The spiderweb design looks like magic but takes almost no skill—which is exactly my kind of recipe.
I love that this bark brings people together. Every time I bring it to a gathering, someone asks for the recipe. Kids get excited about the candy eyeballs. Adults appreciate the rich chocolate flavor. And I get to enjoy a treat that took me fifteen minutes to make but looks like I spent hours.
I encourage you to make this recipe your own. Add your favorite Halloween candy. Experiment with different chocolate ratios. Make it spooky or make it cute. The beauty of this bark is that there is no wrong way to do it.
If you try this recipe, I would love to hear about it. Drop a comment below and tell me how your spiderwebs turned out. Did you add any fun decorations? Did your kids help? Share your photos and tag me—I cannot wait to see your Halloween creations!
Frequently Asked Questions
Can I use milk chocolate instead of dark chocolate?
Absolutely. Milk chocolate will make a sweeter, creamier bark. Just keep in mind that the spiderweb design will be less visible because milk chocolate is lighter in color. If using milk chocolate, consider adding a few drops of black food coloring to the white chocolate for better contrast.
Why did my white chocolate seize up?
White chocolate is sensitive to heat and moisture. If it gets too hot (above 110°F) or if any water gets into the bowl, it will seize into a grainy, clumpy mess. Always use completely dry bowls and utensils. Microwave at 50% power and stir frequently. If it does seize, unfortunately you have to start over with fresh chocolate.
How far in advance can I make this bark?
You can make this bark up to 1 week ahead if stored properly in an airtight container at room temperature. It also freezes beautifully for up to 3 months. I often make a double batch in early October and save one for Halloween week.
Can I make this without a microwave?
Yes. Use a double boiler instead. Fill a small saucepan with an inch of water and bring to a simmer. Place your chocolate in a heatproof bowl that fits over the saucepan without touching the water. Stir until melted. This method takes a few minutes longer but gives you more control over the temperature.
How do I make the spiderweb design more prominent?
Use more white chocolate in your drizzle and drag the toothpick more slowly. The slower you drag, the more white chocolate gets pulled into web lines. You can also use a wooden skewer instead of a toothpick for thicker, more visible lines. Practice on a small test area first if you are nervous.
Pin This Recipe!
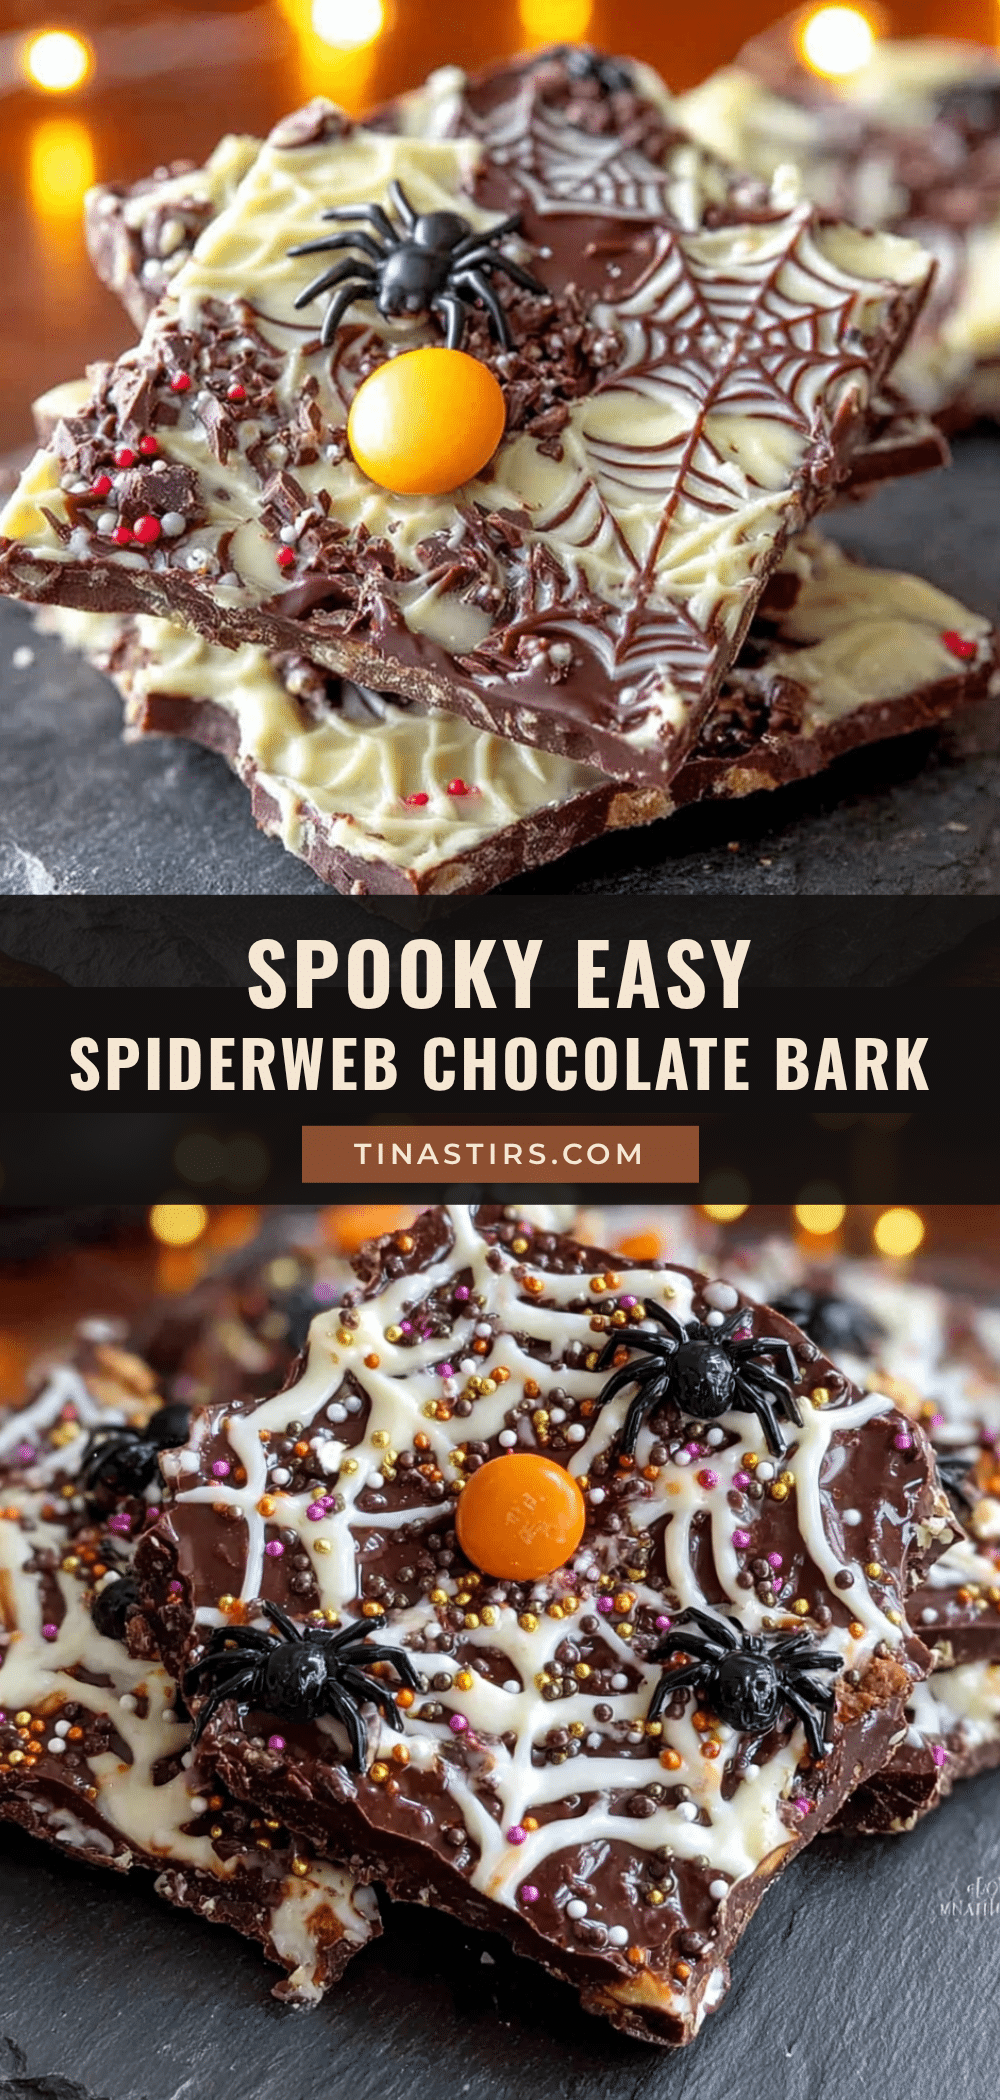
Easy Spiderweb Chocolate Bark: Best Halloween Treat
This Easy Spiderweb Chocolate Halloween Bark is crunchy, creamy, and looks way fancier than the fifteen minutes it takes to make. The spiderweb effect is simple and perfect for last-minute Halloween prep or impressing guests.
- Prep Time: 15 minutes
- Cook Time: 5 minutes
- Total Time: 20 minutes
- Yield: 8 servings 1x
- Category: Dessert
- Cuisine: American
Ingredients
- 12 ounces dark chocolate chips or bars (60% cacao recommended)
- 1 cup white chocolate chips
- 1 teaspoon coconut oil or vegetable shortening, divided
- 2 tablespoons reserved white chocolate (for web design)
- Candy eyeballs (about 12-15)
- Optional: black sanding sugar or black sprinkles
- Optional: pretzel sticks (broken into small pieces)
Instructions
- Line a baking sheet with parchment paper, extending slightly over edges. Press flat to avoid wrinkles.
- Melt dark chocolate in a microwave-safe bowl in 30-second intervals at 50% power, stirring after each, until smooth (about 2 minutes). Add 1/2 teaspoon coconut oil if needed.
- Pour melted dark chocolate onto prepared baking sheet and spread into an even rectangle about 1/4 inch thick (roughly 9×12 inches). Let cool for 2 minutes.
- Melt white chocolate chips in a separate bowl using the same method (30-second intervals at 50% power). Stir in 1/2 teaspoon coconut oil if needed.
- Reserve about 2 tablespoons of melted white chocolate in a piping bag or zip-top bag for the web design.
- Drizzle remaining white chocolate randomly over the dark chocolate layer using a spoon.
- Use a toothpick to drag through the white chocolate in long, sweeping curves to create spiderweb patterns. Start from the center of a white chocolate patch and drag outward in a spiral, then add spokes from center to edges. Repeat in 3-4 spots.
- While chocolate is still wet, place candy eyeballs in clusters near the spiderwebs. If using pretzel sticks, gently press 4 small pieces around each eyeball cluster for spider legs.
- If using black sanding sugar, sprinkle lightly over the bark.
- Refrigerate for 15-20 minutes until completely firm (or 10 minutes in the freezer).
- Lift parchment paper off baking sheet and break bark into irregular pieces with your hands or cut with a sharp knife.
Notes
Temperature is key: let melted chocolate cool for 2 minutes before spreading. Do not overmix the spiderweb design—stop after 3-4 drags. Store in an airtight container at room temperature for up to 1 week. Freezes well for up to 3 months. Best served at room temperature.
Nutrition
- Serving Size: 2 ounces
- Calories: 210
- Sugar: 18
- Fat: 14
- Saturated Fat: 8
- Carbohydrates: 22
- Fiber: 2
- Protein: 3
Keywords: Halloween bark, spiderweb chocolate, easy Halloween treat, chocolate bark, spooky dessert


