Love this? Save it for later!
Share the inspiration with your friends
This was supposed to be a proper, sit-down dinner. I had a plan—turkey and cheddar paninis with a side of roasted tomato soup, the kind of meal that feels like a hug on a plate. But then Monday happened. The kind of Monday where the workday bled into evening, the kids needed help with a last-minute school project, and I realized I’d forgotten to thaw the bread. The paninis were off the table. I stood there, staring at the cooked turkey and shredded cheddar, feeling that familiar wave of kitchen defeat. I mean, honestly, maybe you’ve been there—staring at ingredients that no longer fit the plan, wondering what on earth to do.
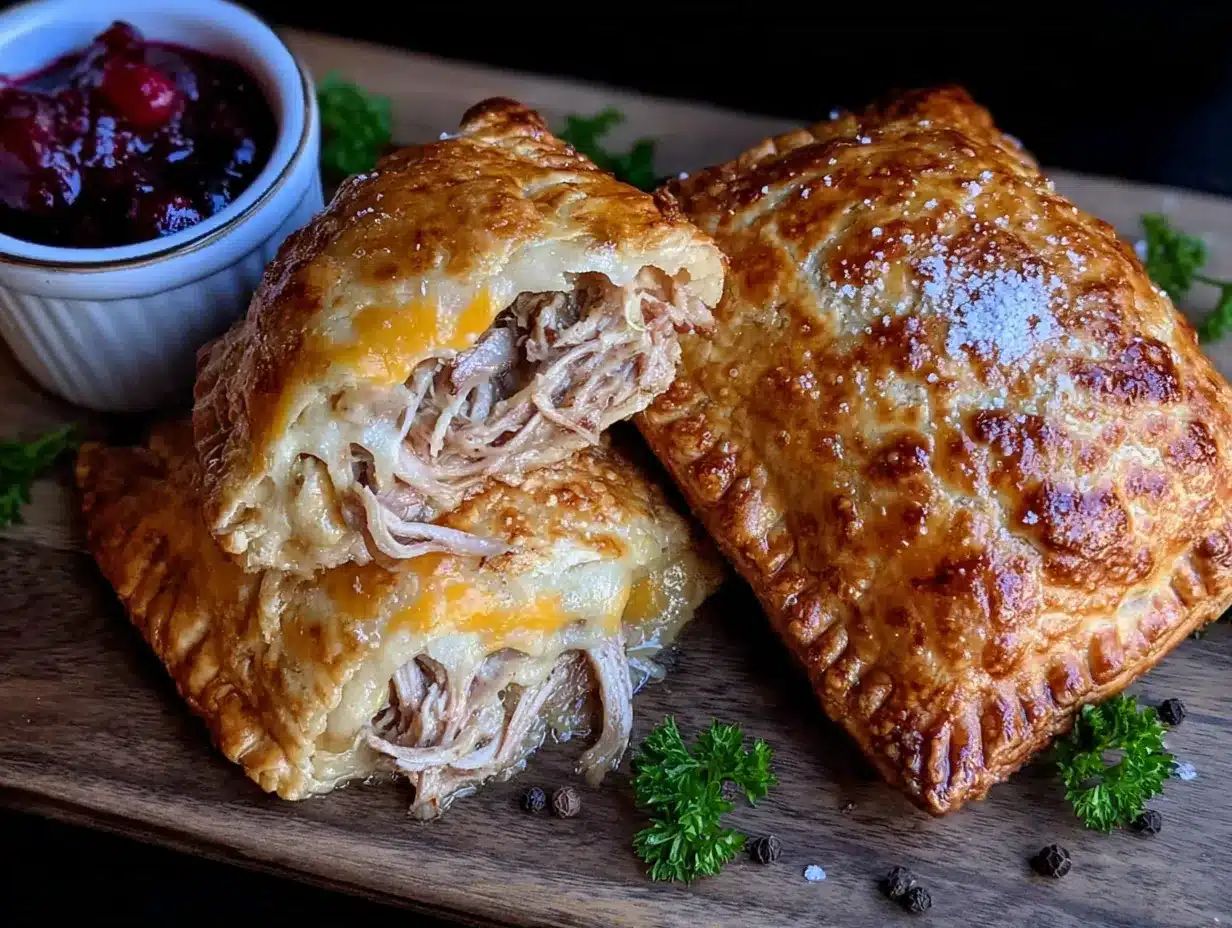
So I grabbed the wrong thing. Instead of the panini press, I pulled out a batch of leftover pie dough from the freezer. Instead of slicing bread, I started rolling. I stuffed the turkey and cheddar into the dough, folded it over, and crimped the edges like I was making empanadas. I brushed them with egg wash, threw them in the oven, and figured—worst case, dinner is a weird, messy experiment. What came out was nothing like the plan. They were golden, flaky, and oozing with melted cheddar. My kid took one bite and said, “Can you make these for my lunch?”
That’s how these Easy Turkey Cheddar Freezer Lunch Pockets were born—not from a moment of brilliance, but from a moment of “I give up, let’s try something.” And honestly? That’s the best kind of recipe. It’s the one that saves you when you’re out of time, out of ideas, and just need something that works. I’ve been making them ever since, and they’ve become a staple in my freezer rotation. They’re the reason I look forward to packing lunch.
Why You’ll Love This Recipe
These lunch pockets are the kind of recipe that makes you feel like you’ve hacked the system. They’re not just another frozen meal—they’re a homemade solution that’s faster than takeout and way more satisfying. Let me break down why you’re going to want these in your life.
- Quick & Easy: From start to finish, these come together in about 30 minutes. Once they’re assembled and baked, you can freeze a batch for the whole month. Perfect for those mornings when you’re running late and need to grab something from the freezer.
- Simple Ingredients: You probably already have everything in your kitchen right now. Turkey, cheddar, some kind of dough, and a few pantry staples. No fancy grocery trips, no obscure ingredients—just real food.
- Perfect for Lunchboxes: These are a game-changer for school lunches, work lunches, or even a quick dinner when you’re too tired to cook. They reheat beautifully and stay crispy, not soggy.
- Crowd-Pleaser: I’ve served these to kids, picky eaters, and adults who claim they don’t like “cold sandwiches.” Everyone loves them. The flaky crust and melty cheese are a universal language.
- Unbelievably Delicious: The texture is what gets me every time. The outside is golden and crisp, the inside is warm and gooey. It’s comfort food that feels like a treat, not a compromise.
What makes this recipe different from the rest is the technique. Instead of using a heavy bread dough, I use a simple pastry or biscuit dough that stays light and flaky even after freezing and reheating. The trick is to avoid overfilling and to seal the edges well—this keeps the filling inside and the crust perfect. I’ve tested this with store-bought dough, homemade dough, and even gluten-free options, and every version works. This isn’t just another pocket recipe—it’s your best version, because it’s forgiving, flexible, and foolproof.
These pockets are the kind of food that makes you close your eyes after the first bite. It’s comfort food reimagined—healthier than a fast-food hot pocket, faster than a homemade pot pie, and with the same soul-soothing satisfaction. Perfect for impressing your lunch-packing self without stress, or turning a simple Tuesday into something memorable.
What Ingredients You Will Need
This recipe uses simple, wholesome ingredients to deliver big flavor and satisfying texture without the fuss. Most of these are pantry staples or easy to find at any grocery store. Here’s what you’ll need:
- For the Filling:
- 2 cups cooked turkey, shredded or diced (leftover roast turkey works great, or use deli turkey in a pinch)
- 1 ½ cups sharp cheddar cheese, shredded (I recommend Tillamook or Cabot for the best melt)
- ¼ cup cream cheese, softened (adds richness and helps bind the filling)
- 2 tablespoons Dijon mustard (for a little tang—don’t skip this, it balances the richness)
- ¼ cup finely chopped onion (yellow or white, sautéed until soft)
- 1 clove garlic, minced
- Salt and black pepper to taste
- Optional: 1 tablespoon fresh parsley or chives, chopped (for color and freshness)
- For the Dough:
- 2 cups all-purpose flour (or use a 1:1 gluten-free baking blend if needed)
- 1 tablespoon baking powder
- ½ teaspoon salt
- ½ cup cold unsalted butter, cubed (Kerrygold is my go-to for flaky pastry)
- ¾ cup cold buttermilk (or use regular milk mixed with 1 teaspoon lemon juice)
- 1 large egg, beaten (for egg wash)
Ingredient Selection Tips: For the best texture, use cold butter and cold buttermilk. This creates steam pockets in the dough as it bakes, giving you that flaky, layered crust. If you’re using leftover turkey, make sure it’s not too dry—add a splash of chicken broth if needed. For the cheese, pre-shredded cheese often contains anti-caking agents that prevent smooth melting, so shred your own if you can. It makes a noticeable difference.
Substitution Guidance: No turkey? Use rotisserie chicken or even canned chicken in a pinch. Need a dairy-free option? Use vegan cheddar and a plant-based cream cheese, and swap the butter for a vegan butter stick. For a gluten-free version, use a cup-for-cup gluten-free flour blend and add an extra tablespoon of buttermilk to keep the dough from drying out. I’ve tested all these swaps, and they work—just don’t overwork the dough.
Equipment Needed
You don’t need a fancy kitchen to make these pockets. Here’s what you’ll need:
- Baking Sheet: A standard half-sheet pan works perfectly. Line it with parchment paper for easy cleanup.
- Rolling Pin: For rolling out the dough. No rolling pin? A clean wine bottle works in a pinch—I’ve done it.
- Pastry Cutter or Fork: For cutting the butter into the flour. A pastry cutter is faster, but two forks or your fingertips work just as well.
- Mixing Bowls: One large bowl for the dough, one medium bowl for the filling.
- Bench Scraper or Knife: For cutting the dough into squares or circles. A pizza cutter makes it even easier.
- Pastry Brush: For the egg wash. A silicone brush is my favorite—it doesn’t shed bristles.
- Cooling Rack: Optional, but helps the pockets cool evenly before freezing.
Budget-Friendly Options: If you don’t have a pastry cutter, use two knives in a scissor motion. If you don’t have a rolling pin, a smooth water bottle works. The key is to keep everything cold—so if your hands are warm, run them under cold water before handling the dough.
Preparation Method
Let’s get these pockets made. I’ve broken it down step-by-step so you can follow along easily. Take your time, and don’t rush the chilling steps—they’re what make the crust flaky.
- Make the Filling (5 minutes): In a medium bowl, combine the cooked turkey, shredded cheddar, softened cream cheese, Dijon mustard, sautéed onion, and minced garlic. Mix until everything is evenly distributed. Season with salt and pepper. Taste a small spoonful—it should be savory and a little tangy. If it seems dry, add a tablespoon of chicken broth or extra cream cheese. Set aside.
- Make the Dough (10 minutes): In a large bowl, whisk together the flour, baking powder, and salt. Add the cold, cubed butter. Using a pastry cutter or your fingertips, work the butter into the flour until the mixture looks like coarse sand with some pea-sized butter pieces remaining. This is important—those little butter bits create flaky layers. Pour in the cold buttermilk and stir with a fork until the dough just comes together. It will be shaggy. Turn it out onto a lightly floured surface and gently knead 2-3 times until it forms a cohesive ball. Do not over-knead. Wrap in plastic wrap and refrigerate for 15 minutes.
- Preheat and Prep (5 minutes): Preheat your oven to 400°F (200°C). Line a baking sheet with parchment paper.
- Roll and Cut (10 minutes): On a floured surface, roll the dough out to about ¼-inch thickness. Use a bench scraper or knife to cut the dough into 6 rectangles (about 5×4 inches each). You can also cut circles using a large cookie cutter or a bowl. Gather the scraps, re-roll, and cut again—you should get 6-8 pockets total.
- Assemble the Pockets (10 minutes): Place about ⅓ cup of the turkey filling in the center of each dough piece. Be generous, but leave a ½-inch border around the edges. Brush the edges with a little water or beaten egg—this helps seal them. Fold the dough over the filling to create a half-moon or rectangle shape. Press the edges firmly with your fingers, then crimp with a fork to seal completely. Place the pockets on the prepared baking sheet, leaving about 2 inches between each.
- Egg Wash and Vent (5 minutes): Brush the tops of the pockets with the beaten egg. This gives them that gorgeous golden color. Cut 2-3 small slits on top of each pocket with a sharp knife—this lets steam escape and prevents them from bursting open in the oven.
- Bake (18-22 minutes): Bake the pockets in the preheated oven for 18-22 minutes, until they are deep golden brown and the filling is bubbly. If you see any cheese oozing out, that’s a good sign—it means they’re perfectly cooked. Let them cool on the baking sheet for 5 minutes, then transfer to a cooling rack.
- Cool Completely (20 minutes): This step is crucial if you’re freezing them. Let the pockets cool completely on the rack. If you freeze them while warm, they’ll get soggy. Patience here pays off.
- Freeze (for future meals): Once cool, place the pockets on a baking sheet in a single layer and freeze for 1-2 hours until solid. Transfer to a freezer-safe bag or container. They’ll keep for up to 3 months.
Sensory Cues: When you’re mixing the dough, it should feel soft and slightly tacky, but not sticky. When you roll it out, you should see small streaks of butter in the dough—that’s a good sign. When the pockets are done, the bottom should be golden and crisp, and the top should be a deep, shiny brown. If you tap the top, it should sound hollow.
Cooking Tips & Techniques
I’ve made these pockets more times than I can count, and I’ve learned a few things the hard way. Here are my best tips for getting them perfect every time:
- Keep Everything Cold: Cold butter and cold buttermilk are non-negotiable for flaky dough. If your kitchen is warm, pop the dough back in the fridge for 10 minutes between rolling and assembling. It makes a huge difference.
- Don’t Overfill: It’s tempting to stuff these pockets to the brim, but too much filling will cause them to burst open. Stick to about ⅓ cup per pocket. Trust me—I learned this the messy way.
- Seal the Edges Well: Use a fork to crimp the edges firmly. If the seal isn’t tight, the filling will leak out during baking. I’ve had pockets that turned into flat, cheesy discs because I got lazy with the crimping.
- Freeze Before Baking: If you’re making a big batch, freeze the assembled, unbaked pockets on a baking sheet, then transfer to a bag. When you’re ready to eat, bake them straight from frozen—just add 5-7 minutes to the baking time. This gives you the freshest result.
- Reheat in the Oven or Air Fryer: Microwave works in a pinch, but the crust will be soft. For a crispy exterior, reheat in a 350°F oven for 10-12 minutes, or in an air fryer at 350°F for 6-8 minutes. The air fryer is my secret weapon—it brings back that just-baked texture.
Common Mistake to Avoid: Overworking the dough. I did this once while chatting on the phone, and the pockets came out tough as shoe leather. Mix until just combined, and handle the dough as little as possible. It’s okay if it looks a little rough—that’s what makes it tender.
Variations & Adaptations
One of the best things about this recipe is how flexible it is. Here are some ways to switch it up based on what you have or what you’re craving:
- Turkey and Swiss: Swap the cheddar for Swiss cheese and add a tablespoon of whole-grain mustard. The nutty flavor of Swiss pairs beautifully with turkey.
- Southwest Style: Add ¼ cup of black beans, 2 tablespoons of corn, and a pinch of cumin and chili powder to the filling. Use pepper jack cheese instead of cheddar for a spicy kick.
- Vegetarian Version: Skip the turkey and use a mix of sautéed mushrooms, spinach, and ricotta cheese. Add a little grated Parmesan for extra flavor. This version freezes just as well.
- Gluten-Free Adaptation: Use a 1:1 gluten-free flour blend and add an extra tablespoon of buttermilk. The dough will be a bit more delicate, so handle it gently. I’ve used King Arthur’s Measure for Measure blend with great results.
- Breakfast Pockets: Fill the dough with scrambled eggs, crumbled breakfast sausage, and cheddar. Bake and freeze for an easy grab-and-go breakfast. This is my husband’s favorite variation.
Personal Variation: I once made a batch with leftover Thanksgiving turkey, cranberry sauce, and brie cheese. It was absurdly good—the sweet and savory combo was perfect. If you have leftover cranberry sauce, give it a try. Just don’t add too much, or the pockets will get soggy.
Serving & Storage Suggestions
These pockets are best served warm, straight from the oven or reheated. Here’s how to make the most of them:
Serving Temperature and Presentation: Serve the pockets warm, with the cheese still melty. I like to cut them in half on the diagonal to show off the filling. Pair them with a simple side salad, some raw veggie sticks, or a cup of tomato soup for dipping. For lunchboxes, pack them in a thermos to keep them warm, or serve them at room temperature—they’re still delicious.
Storage Instructions: Store baked and cooled pockets in an airtight container in the refrigerator for up to 4 days. For longer storage, freeze them as described above. To freeze unbaked pockets, assemble them on a baking sheet, freeze until solid, then transfer to a freezer bag. Label with the date—they’ll keep for 3 months.
Reheating Methods: For the best texture, reheat in a 350°F oven or toaster oven for 10-12 minutes. If you’re in a hurry, the microwave works in 30-second bursts, but the crust will be softer. My favorite method is the air fryer at 350°F for 6-8 minutes—the crust gets incredibly crispy.
Flavor Development: These pockets actually taste better the next day. The flavors meld together as they sit, and the crust softens slightly, making them even more comforting. If you’re meal-prepping, make them a day ahead and reheat for lunch—you won’t be disappointed.
Nutritional Information & Benefits
Here’s an approximate nutritional breakdown per pocket (based on 8 pockets using the standard recipe):
| Nutrient | Amount |
|---|---|
| Calories | 320 |
| Protein | 22g |
| Fat | 18g |
| Saturated Fat | 10g |
| Carbohydrates | 22g |
| Fiber | 1g |
| Sugar | 3g |
| Sodium | 480mg |
Health Benefits: Turkey is a lean source of protein, which keeps you full and supports muscle health. Cheddar provides calcium for strong bones, and the buttermilk in the dough adds a touch of probiotics. If you use whole-wheat flour, you’ll get extra fiber. These pockets are a balanced meal in a portable form—perfect for busy days when you need sustained energy.
Dietary Considerations: This recipe can be made gluten-free or dairy-free with the substitutions listed above. It’s naturally nut-free. If you’re watching sodium, use low-sodium turkey and skip the added salt in the dough.
Personal Wellness Perspective: I love that these pockets let me control what goes into my food. No preservatives, no mystery ingredients—just real food that I made myself. It’s a small act of self-care that pays off all week long.
Conclusion
These Easy Turkey Cheddar Freezer Lunch Pockets are the kind of recipe that makes your life easier without sacrificing flavor. They’re born from a moment of kitchen chaos, perfected through trial and error, and now they’re a staple I can’t live without. Whether you’re packing lunches for the week, looking for a quick dinner solution, or just want something comforting to pull from the freezer, these pockets deliver.
I hope you’ll make them your own—add your favorite fillings, adjust the spices, or try a new dough variation. That’s the beauty of a recipe like this: it’s a template for your creativity. When you make them, I’d love to hear how they turned out. Leave a comment below, share your twist, or tag me in your photos. Let’s make lunchtime something to look forward to.
Happy cooking, and remember—sometimes the best recipes come from the biggest messes.
Frequently Asked Questions
Can I use store-bought dough instead of making it from scratch?
Absolutely! Store-bought pie crust, puff pastry, or even refrigerated biscuit dough works great. Just follow the same assembly and baking instructions. Puff pastry will give you an extra-flaky result, while biscuit dough makes them heartier.
How do I prevent the pockets from getting soggy in the freezer?
The key is to cool them completely before freezing. If you freeze them while warm, condensation will form and make the crust soggy. Also, make sure they’re sealed tightly in a freezer bag with as much air removed as possible.
Can I bake these from frozen?
Yes! If you froze them unbaked, bake straight from frozen at 400°F for 25-30 minutes, until golden and bubbly. If they’re already baked, reheat from frozen in the oven or air fryer as directed above.
What other meats can I use instead of turkey?
Cooked chicken, ham, or even shredded pork work beautifully. For a vegetarian option, try a mix of black beans, corn, and cheese, or sautéed mushrooms and spinach with ricotta.
How long do these keep in the refrigerator?
Baked pockets will keep in the fridge for up to 4 days. Reheat them in the oven or air fryer for the best texture. I don’t recommend keeping them longer than that, as the crust can become dry.
Pin This Recipe!

Easy Turkey Cheddar Lunch Pockets: Best Freezer Meal

These golden, flaky pockets are filled with turkey and melted cheddar, perfect for lunchboxes or a quick dinner. They freeze beautifully and reheat to crispy perfection.
- Prep Time: 15 minutes
- Cook Time: 20 minutes
- Total Time: 35 minutes
- Yield: 6-8 pockets 1x
- Category: Main Course
- Cuisine: American
Ingredients
- 2 cups cooked turkey, shredded or diced
- 1 ½ cups sharp cheddar cheese, shredded
- ¼ cup cream cheese, softened
- 2 tablespoons Dijon mustard
- ¼ cup finely chopped onion, sautéed until soft
- 1 clove garlic, minced
- Salt and black pepper to taste
- 1 tablespoon fresh parsley or chives, chopped (optional)
- 2 cups all-purpose flour
- 1 tablespoon baking powder
- ½ teaspoon salt
- ½ cup cold unsalted butter, cubed
- ¾ cup cold buttermilk
- 1 large egg, beaten (for egg wash)
Instructions
- Make the filling: In a medium bowl, combine cooked turkey, shredded cheddar, softened cream cheese, Dijon mustard, sautéed onion, and minced garlic. Mix until evenly distributed. Season with salt and pepper. Set aside.
- Make the dough: In a large bowl, whisk together flour, baking powder, and salt. Add cold cubed butter. Using a pastry cutter or fingertips, work butter into flour until mixture resembles coarse sand with some pea-sized butter pieces. Pour in cold buttermilk and stir with a fork until dough just comes together. Turn onto a floured surface and gently knead 2-3 times until it forms a ball. Wrap in plastic wrap and refrigerate for 15 minutes.
- Preheat oven to 400°F (200°C). Line a baking sheet with parchment paper.
- On a floured surface, roll dough to ¼-inch thickness. Cut into 6 rectangles (about 5×4 inches each). Gather scraps, re-roll, and cut again to get 6-8 pockets total.
- Place about ⅓ cup turkey filling in the center of each dough piece, leaving a ½-inch border. Brush edges with water or beaten egg. Fold dough over filling to create a half-moon or rectangle shape. Press edges firmly with fingers, then crimp with a fork to seal.
- Place pockets on prepared baking sheet, leaving 2 inches between each. Brush tops with beaten egg. Cut 2-3 small slits on top of each pocket with a sharp knife.
- Bake for 18-22 minutes until deep golden brown and filling is bubbly. Let cool on baking sheet for 5 minutes, then transfer to a cooling rack.
- Cool completely before freezing. Once cool, place pockets on a baking sheet in a single layer and freeze for 1-2 hours until solid. Transfer to a freezer-safe bag or container. They keep for up to 3 months.
Notes
Keep all ingredients cold for flaky dough. Do not overfill pockets to prevent bursting. For best results, freeze unbaked pockets and bake from frozen, adding 5-7 minutes to baking time. Reheat in oven or air fryer for crispy crust.
Nutrition
- Serving Size: 1 pocket
- Calories: 320
- Sugar: 3
- Sodium: 480
- Fat: 18
- Saturated Fat: 10
- Carbohydrates: 22
- Fiber: 1
- Protein: 22
Keywords: turkey cheddar lunch pockets, freezer meal, lunchbox recipe, easy turkey pockets, make-ahead lunch


