Love this? Save it for later!
Share the inspiration with your friends
My sister-in-law, Jenna, had sworn off granola bars for years. Three years, actually. Store-bought ones were either too crumbly, too sticky, or tasted like sweetened cardboard. She’d packed them in her kids’ lunches exactly twice before declaring them “the enemy of a happy midday.” Then I brought a batch of these to a family picnic “just for myself,” honestly, because I was testing a new recipe and needed guinea pigs. I found her standing by the cooler, halfway through her third bar, caught red-handed. “These don’t count,” she said, crumbs falling from her chin. “These are actual food.” That moment—that quiet, stolen conversion—is exactly what this recipe is about. It’s the snack that changes minds without even trying. You know that feeling when something is so good it feels like cheating? That’s these bars. They’re packed with oats, honey, and just enough chocolate to make you forget they’re good for you. Let me tell you, I’ve made a batch every single week since that picnic, and I keep making them because they solve a real problem: what to pack when you want something quick, healthy, and actually delicious.
Why You’ll Love This Recipe
I’ve tested this recipe more times than I care to admit—some batches were crumbly disasters, others were sticky messes. But this version? It’s the one that finally worked, and here’s why you’ll feel the same way.
- Quick & Easy: These come together in under 15 minutes of active prep. No oven required, which is a lifesaver during the summer or when you’re juggling a busy afternoon.
- Simple Ingredients: You probably have most of these in your pantry right now. Oats, peanut butter, honey, and a few mix-ins. No fancy health food store trips necessary.
- Perfect for Lunchboxes: They hold up beautifully—no crumbling, no melting, no sad mess at the bottom of a bag. Kids actually eat them, and parents feel good about packing them.
- Crowd-Pleaser: I’ve brought these to playdates, office meetings, and road trips. They disappear fast. Even the pickiest eaters ask for seconds.
- Unbelievably Delicious: The texture is perfectly chewy with just the right amount of crunch from the oats and nuts. It’s the kind of snack that makes you close your eyes after the first bite—I mean it.
What makes this recipe different from the rest? It’s the ratio. After a dozen test batches, I landed on the perfect balance of wet-to-dry ingredients that gives you a bar that holds together without being overly sticky or hard as a rock. Plus, using creamy peanut butter (not the natural kind that separates) makes all the difference in texture. This isn’t just another granola bar recipe—it’s the one you’ll come back to week after week.
What Ingredients You Will Need
This recipe uses simple, wholesome ingredients that come together to create a bar that’s both satisfying and nourishing. Most of these are pantry staples, which makes this recipe perfect for those weeks when you need a quick snack solution.
- 2 cups rolled oats (use certified gluten-free if needed; old-fashioned oats work best, not quick oats)
- 1 cup crispy rice cereal (adds that light, airy crunch—I prefer the generic store brand for this)
- 1/2 cup creamy peanut butter (natural peanut butter can be used but may make the bars more crumbly; I recommend Skippy or Jif for best texture)
- 1/2 cup honey (or maple syrup for a vegan option; honey gives a slightly better hold)
- 1/4 cup coconut oil (adds richness and helps the bars set firmly; use refined for no coconut flavor)
- 1/2 cup mini chocolate chips (dark chocolate chips add antioxidants; milk chocolate works too)
- 1/4 cup chopped almonds (or any nut you prefer; pecans or walnuts are great)
- 1/4 cup dried cranberries (or raisins, chopped dates, or dried cherries)
- 1 teaspoon vanilla extract (pure vanilla extract makes a difference in flavor)
- 1/4 teaspoon salt (enhances all the flavors and balances the sweetness)
For substitutions: You can swap the peanut butter for almond butter or sunflower seed butter for a nut-free version. The crispy rice cereal can be replaced with puffed quinoa or crushed cornflakes. In summer, I sometimes use freeze-dried strawberries instead of dried cranberries for a fruity twist. Look for creamy, well-stirred nut butters for the best consistency—separation can lead to oily bars that don’t set properly.
Equipment Needed
You don’t need much for this recipe, which is part of its charm. Here’s what I use every single time.
- 8×8-inch baking pan (a 9×9 works too, but the bars will be slightly thinner)
- Parchment paper (non-negotiable—it makes lifting the bars out so much easier)
- Medium saucepan (for melting the wet ingredients together)
- Large mixing bowl (for combining dry ingredients)
- Rubber spatula (for pressing the mixture firmly into the pan)
- Measuring cups and spoons (accuracy matters here for the right texture)
If you don’t have an 8×8 pan, a loaf pan works in a pinch—just press the mixture thinner. I once used a glass pie dish, and honestly, it was a mess. Stick with a square pan for the best results. A good rubber spatula is worth investing in; I’ve broken cheap ones pressing these bars down. Also, let the bars cool completely before cutting—I learned that the hard way after a few crumbly batches.
Preparation Method
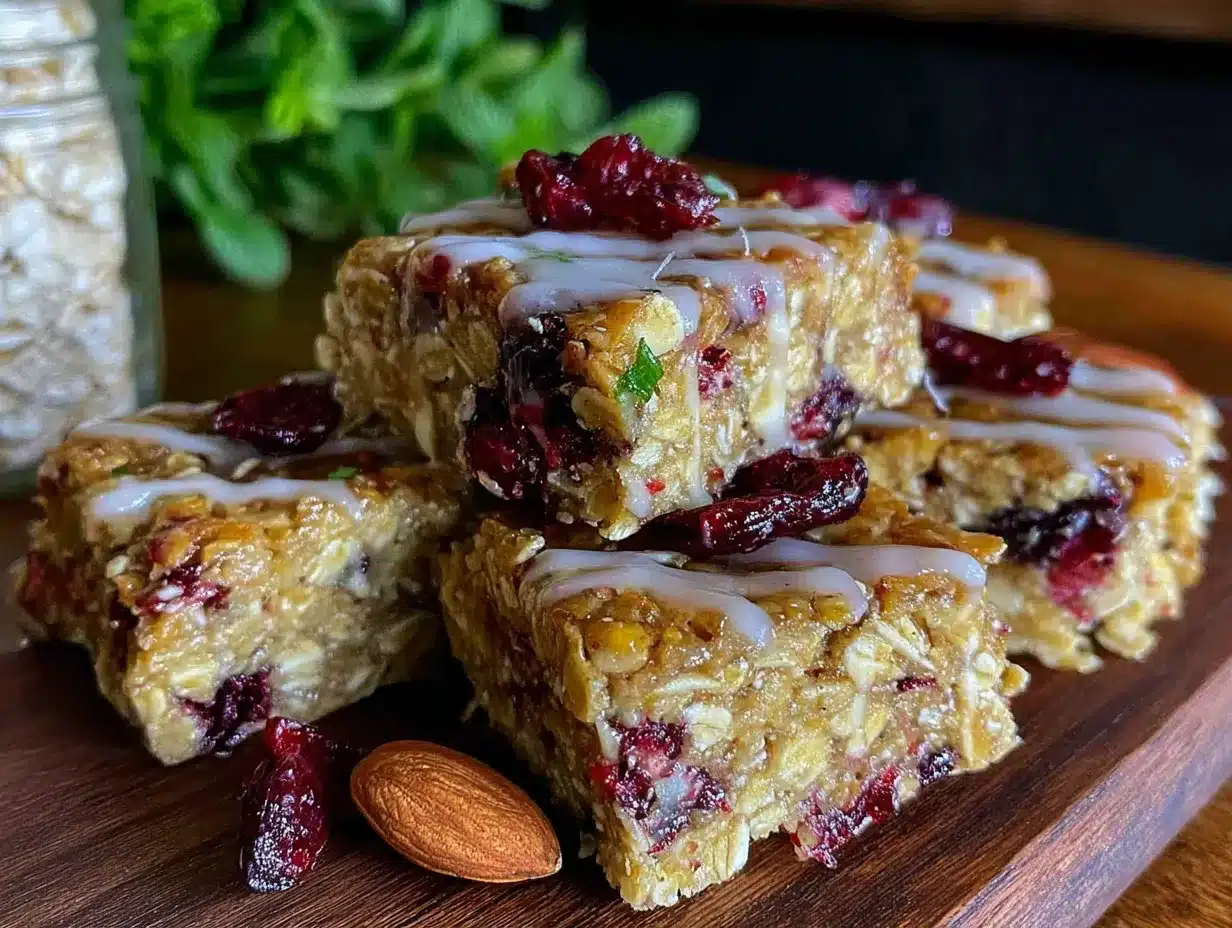
Follow these steps carefully, and you’ll have perfect bars every time. I’ve included all the little details that took me multiple batches to figure out.
- Line your 8×8 pan with parchment paper. Leave some overhang on two opposite sides—this creates handles for lifting the bars out later. Trust me on this one. It makes life so much easier.
- Combine the dry ingredients. In a large mixing bowl, stir together 2 cups rolled oats, 1 cup crispy rice cereal, 1/2 cup mini chocolate chips, 1/4 cup chopped almonds, and 1/4 cup dried cranberries. Set aside. Make sure the oats and cereal are evenly distributed—nobody wants a bar with all oats and no crunch.
- Melt the wet ingredients. In a medium saucepan over low heat, combine 1/2 cup creamy peanut butter, 1/2 cup honey, and 1/4 cup coconut oil. Stir constantly until everything is melted and smooth—about 2-3 minutes. Don’t walk away here; the honey can burn if you’re not paying attention. I’ve done it, and it’s not fun.
- Add vanilla and salt. Remove the saucepan from heat and stir in 1 teaspoon vanilla extract and 1/4 teaspoon salt. The mixture should be glossy and smell amazing. If it looks separated, whisk it vigorously until it comes together.
- Combine wet and dry. Pour the warm peanut butter mixture over the dry ingredients. Use your rubber spatula to fold everything together until all the oats and cereal are coated. This takes a bit of muscle—don’t be shy. The mixture should look evenly moist, not dry in spots.
- Press into the pan. Transfer the mixture to your lined pan. Here’s the trick: use the back of your rubber spatula (lightly oiled if needed) to press the mixture down firmly and evenly. Press hard—really hard. The tighter you pack it, the better the bars will hold together. I press for a full minute, making sure the corners are filled.
- Chill to set. Place the pan in the refrigerator for at least 2 hours, or until firm. I usually leave it overnight for the best results. The bars need this time to set properly—rushing this step leads to crumbly bars.
- Cut and serve. Once firm, use the parchment handles to lift the block out of the pan. Place it on a cutting board and use a sharp knife to cut into 12 even bars. Wipe the knife clean between cuts for neat edges. Store in an airtight container in the fridge.
Cooking Tips & Techniques
After making these bars more times than I can count, I’ve picked up a few tricks that make a real difference.
Don’t Overheat the Wet Ingredients. Low heat is your friend here. If the mixture gets too hot, the honey can caramelize and make the bars hard. I keep the heat on low and stir constantly. The moment everything is smooth, I pull it off the burner. One time I got distracted and let it simmer—the bars came out like hockey pucks. Learn from my mistake.
Press with Purpose. This is the most important step. If you don’t press the mixture firmly enough, the bars will fall apart. I use the back of a measuring cup to really pack it down. You want it so compact that it feels almost like a solid block. It takes a little arm work, but it’s worth it.
Chill Completely. Two hours is the minimum, but overnight is better. Patience pays off here. I’ve cut into bars after just an hour, and they were a crumbly mess. The coconut oil and honey need time to fully set and bind everything together. Plan ahead for this.
Use a Sharp Knife. A dull knife will drag through the bars and create jagged edges. I use a chef’s knife and wipe it clean between cuts. For cleanest results, run the knife under hot water before each cut. This gives you those beautiful, bakery-style edges.
Let Them Come to Room Temp. If you store these in the fridge (which I recommend), let them sit out for 5 minutes before eating. They soften slightly and become perfectly chewy. Straight from the fridge, they’re a bit too firm for my taste.
Variations & Adaptations
One of the best things about this recipe is how flexible it is. Here are some variations I’ve tried and loved.
Nut-Free Version: Swap the peanut butter for sunflower seed butter and skip the almonds. Add an extra 1/4 cup of sunflower seeds or pumpkin seeds for crunch. This works great for school lunchboxes with nut-free policies. Just note that sunflower seed butter can turn green when combined with baking soda (not an issue here since there’s no baking soda, but good to know).
Vegan Option: Use maple syrup instead of honey and make sure your chocolate chips are dairy-free. I’ve used this version for vegan friends, and they disappear just as fast. The maple syrup gives a slightly different flavor—more caramel-like—which is lovely.
Tropical Twist: Replace the almonds with shredded coconut and the cranberries with dried mango or pineapple. Add 1/4 cup macadamia nuts if you’re feeling fancy. This version reminds me of a tropical granola I had on vacation once. It’s a fun change for summer.
Protein Boost: Add 2 tablespoons of your favorite protein powder (vanilla or chocolate works best) to the dry ingredients. You may need to add an extra tablespoon of honey to keep the texture right. This turns the bars into a more substantial snack for active kids or post-workout fuel.
Lower Sugar: Reduce the honey to 1/3 cup and use unsweetened dried fruit. The bars will be slightly less sweet but still delicious. I’ve done this for my own breakfast bars, and they’re perfect with a cup of coffee.
I once tried a savory version with rosemary and sea salt—it was interesting but not something I’d pack in a lunchbox. Stick with the sweet variations for this one.
Serving & Storage Suggestions
These bars are best served chilled or at room temperature. I personally love them straight from the fridge on a warm day—they’re so satisfyingly cold and chewy. For lunchboxes, I wrap each bar individually in parchment paper or plastic wrap so they’re grab-and-go ready.
They pair beautifully with a thermos of cold milk, a piece of fresh fruit, or even crumbled over yogurt for a quick breakfast parfait. For a fun after-school snack, I sometimes serve them with a side of apple slices and a drizzle of extra peanut butter.
Storage Instructions: Keep these bars in an airtight container in the refrigerator for up to 2 weeks. They actually get better after a day or two as the flavors meld together. You can also freeze them for up to 3 months—just layer them between sheets of parchment paper in a freezer-safe container. To thaw, let them sit in the fridge overnight or at room temperature for about 30 minutes.
For Lunchboxes: Pack the bar directly from the fridge. By lunchtime, it will have softened to the perfect chewy texture. I’ve never had one melt or get soggy, even on hot days. The chocolate chips stay put, which is a small miracle.
I’ve noticed that the bars tend to soften slightly after a few days at room temperature, so I always recommend fridge storage. If you’re taking them on a picnic, pack them in a cooler. Trust me on this—warm granola bars are not the same experience.
Nutritional Information & Benefits
Here’s a rough estimate per bar (based on 12 servings):
- Calories: 245
- Protein: 6g
- Fat: 12g (mostly healthy fats from peanut butter and coconut oil)
- Carbohydrates: 30g
- Fiber: 3g
- Sugar: 16g (from honey and chocolate chips)
The rolled oats provide complex carbohydrates for sustained energy—perfect for active kids. The peanut butter adds protein and healthy fats that keep little tummies full until lunchtime. Almonds are a great source of vitamin E and magnesium, while dried cranberries offer antioxidants. Coconut oil contains medium-chain triglycerides (MCTs) that are easily metabolized for quick energy.
These bars are naturally dairy-free (if you use dairy-free chocolate chips) and can easily be made gluten-free with certified oats. They contain nuts (peanuts and almonds) unless you use the nut-free variation. The sugar content is moderate and comes from natural sources like honey and fruit, making this a much better choice than most store-bought granola bars that are loaded with processed sugars and preservatives.
From a wellness perspective, I love that these bars give me control over what goes into my family’s snacks. No weird ingredients, no artificial flavors—just real food that tastes amazing.
FAQs
Can I use quick oats instead of rolled oats?
Quick oats will work, but the texture will be softer and less chewy. The bars might also be slightly more crumbly. Rolled oats give the best structure and that satisfying, hearty bite. If you only have quick oats, reduce the honey by a tablespoon to compensate for the faster absorption.
Why did my bars turn out crumbly?
This usually happens for two reasons: not pressing the mixture firmly enough into the pan, or not chilling them long enough. Next time, really pack it down with the back of a spatula or measuring cup, and let it chill for at least 2 hours—overnight is even better. Also, make sure your peanut butter is creamy and well-stirred; separated peanut butter can cause issues.
Can I make these without a saucepan?
Absolutely. You can melt the peanut butter, honey, and coconut oil in the microwave. Heat in 30-second intervals, stirring between each, until smooth. Just be careful not to overheat—the mixture can bubble up and make a mess. I’ve done this many times when I didn’t want to dirty a pan.
How long do these stay fresh in the fridge?
They’ll keep for up to 2 weeks in an airtight container in the refrigerator. I’ve also frozen them for up to 3 months with no loss of quality. Just make sure they’re tightly wrapped to prevent freezer burn. They thaw quickly at room temperature.
Can I add other mix-ins like chia seeds or flax seeds?
Yes! Add up to 2 tablespoons of chia seeds, flax seeds, or hemp hearts to the dry ingredients. You might need to add an extra tablespoon of honey to keep the bars from being too dry. I’ve added chia seeds before, and they add a nice little nutritional boost without changing the flavor much.
Conclusion
These healthy no-bake granola bars are the kind of recipe that quietly becomes a staple in your kitchen—the one you make without even thinking about it. They’re quick, they’re forgiving, and they solve the eternal question of what to pack for snacks and lunchboxes. Whether you’re a busy parent, a meal-prepper, or just someone who loves a good homemade snack, these bars deliver every single time.
I love that this recipe is a blank canvas for your creativity. Swap in your favorite nuts, try different dried fruits, or add a pinch of cinnamon for warmth. The base is so reliable that you can play around without fear of failure. And honestly, there’s something deeply satisfying about pulling a pan of homemade bars out of the fridge, knowing exactly what’s in them.
I’d love to hear how these turn out for you. Did you try a fun variation? Did your kids devour them? Drop a comment below and share your experience—I read every single one. And if you found this recipe helpful, please share it with a friend who’s looking for better lunchbox ideas. Happy snacking, friends!
Pin This Recipe!
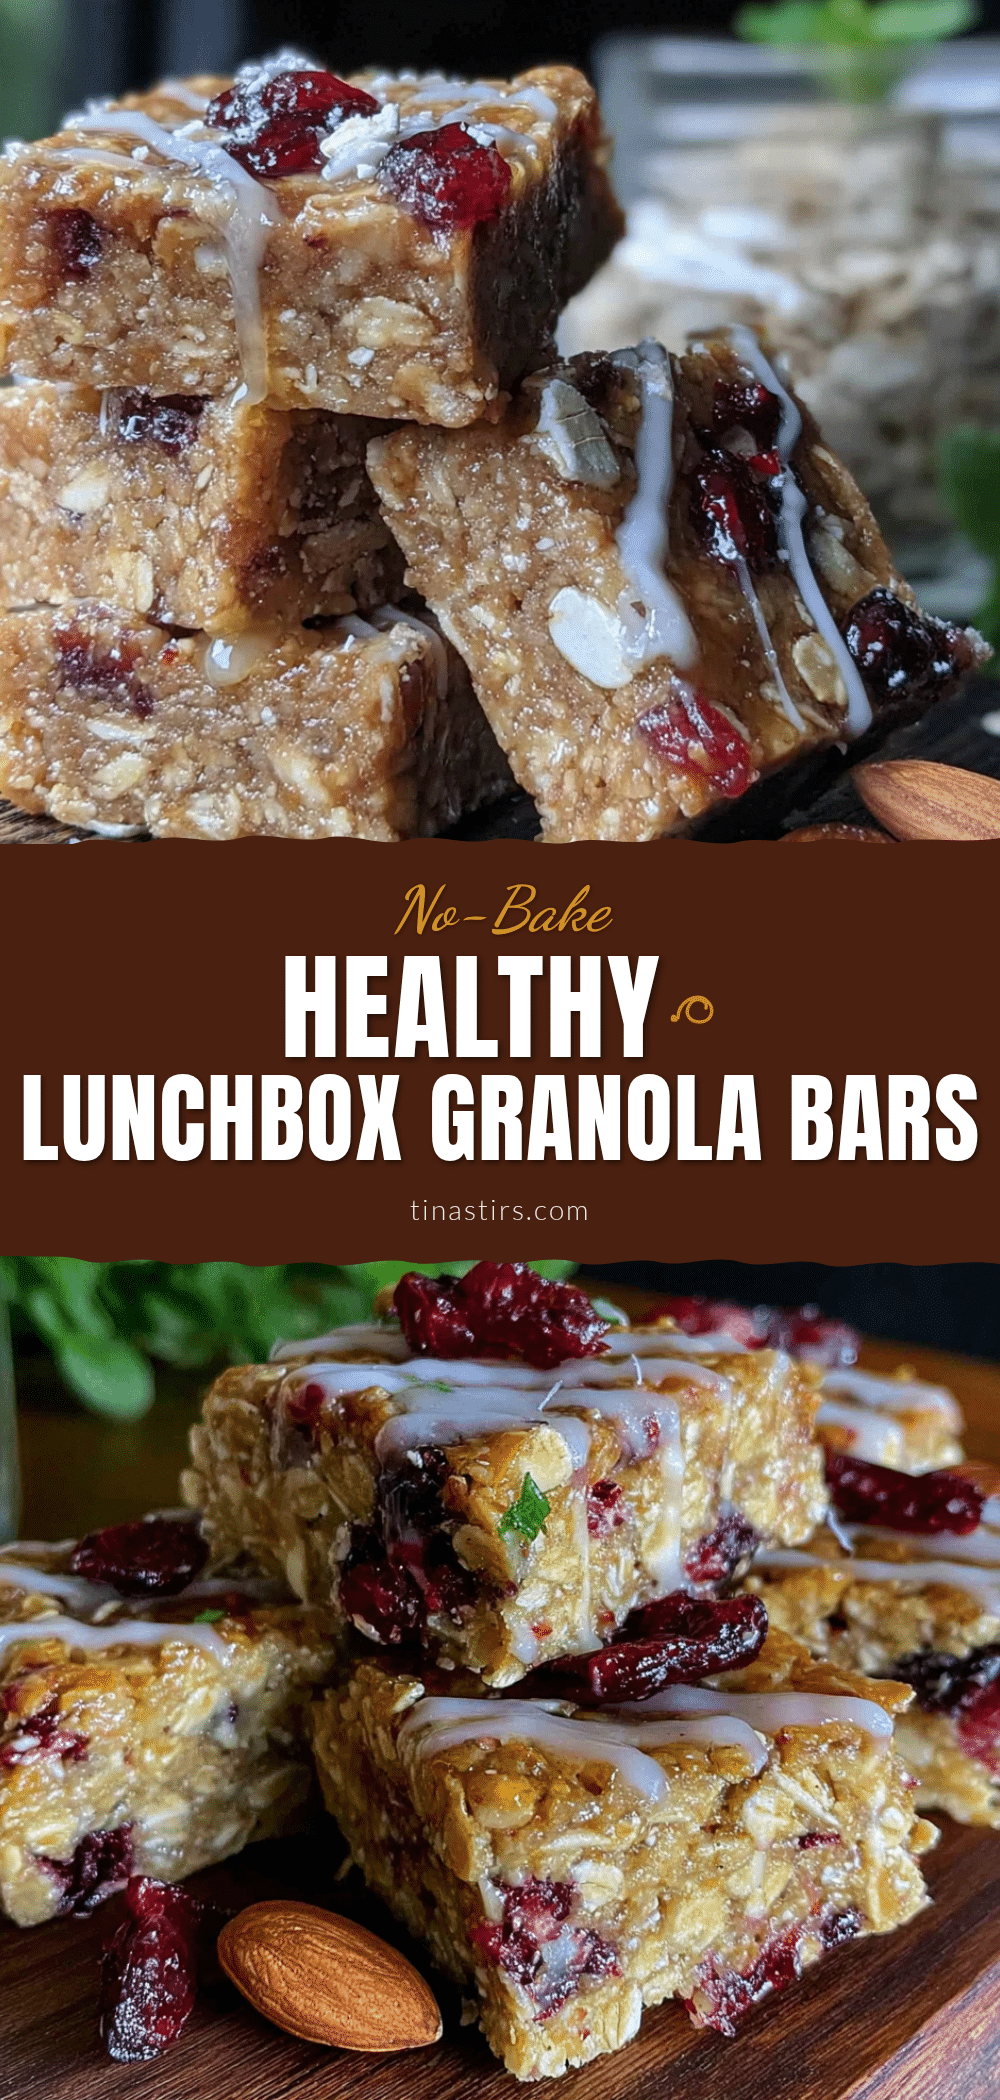
Healthy No-Bake Granola Bars: Perfect Lunchbox Snacks
These no-bake granola bars are packed with oats, honey, and just enough chocolate to make you forget they’re good for you. They’re quick, easy, and perfect for lunchboxes, with a perfectly chewy texture that holds together beautifully.
- Prep Time: 15 minutes
- Cook Time: 0 minutes
- Total Time: 2 hours 15 minutes (includes chilling time)
- Yield: 12 servings 1x
- Category: Snack
- Cuisine: American
Ingredients
- 2 cups rolled oats
- 1 cup crispy rice cereal
- 1/2 cup creamy peanut butter
- 1/2 cup honey
- 1/4 cup coconut oil
- 1/2 cup mini chocolate chips
- 1/4 cup chopped almonds
- 1/4 cup dried cranberries
- 1 teaspoon vanilla extract
- 1/4 teaspoon salt
Instructions
- Line your 8×8 pan with parchment paper, leaving overhang on two opposite sides for handles.
- In a large mixing bowl, combine 2 cups rolled oats, 1 cup crispy rice cereal, 1/2 cup mini chocolate chips, 1/4 cup chopped almonds, and 1/4 cup dried cranberries. Set aside.
- In a medium saucepan over low heat, combine 1/2 cup creamy peanut butter, 1/2 cup honey, and 1/4 cup coconut oil. Stir constantly until melted and smooth, about 2-3 minutes.
- Remove saucepan from heat and stir in 1 teaspoon vanilla extract and 1/4 teaspoon salt until glossy.
- Pour the warm peanut butter mixture over the dry ingredients. Fold together with a rubber spatula until all oats and cereal are evenly coated.
- Transfer mixture to the lined pan. Press down firmly and evenly with the back of a rubber spatula (lightly oiled if needed) for about a minute, ensuring corners are filled.
- Place pan in the refrigerator for at least 2 hours, or until firm (overnight is best).
- Once firm, use parchment handles to lift the block out of the pan. Place on a cutting board and cut into 12 even bars with a sharp knife, wiping clean between cuts. Store in an airtight container in the fridge.
Notes
Press the mixture firmly into the pan to prevent crumbling. Chill for at least 2 hours, preferably overnight. For clean cuts, run the knife under hot water between cuts. Let bars sit at room temperature for 5 minutes before eating for best texture. Store in the refrigerator for up to 2 weeks or freeze for up to 3 months.
Nutrition
- Serving Size: 1 bar
- Calories: 245
- Sugar: 16
- Sodium: 95
- Fat: 12
- Saturated Fat: 5
- Carbohydrates: 30
- Fiber: 3
- Protein: 6
Keywords: no-bake granola bars, healthy granola bars, lunchbox snacks, homemade granola bars, easy granola bars


