Love this? Save it for later!
Share the inspiration with your friends
It was 11:47 PM on a random Thursday, and I was staring into the fridge like it held the secrets to the universe. A very specific craving had hit me—something warm, buttery, and sweet, but not quite caramel and not quite vanilla. I wanted that deep, cooked-sugar flavor that reminds you of your grandma’s kitchen, even if your grandma never actually made it. The problem? I didn’t have heavy cream, which every “real” butterscotch recipe demands, but I had whole milk, a half-stick of butter, and this stubborn idea that just wouldn’t leave me alone.
Honestly, I was too tired to overthink it. I grabbed the brown sugar, found a vanilla bean that was probably past its prime, and just started cooking. The first batch? Let’s just say I learned that butterscotch burns fast when you get distracted by a cat video. But that second batch—the one I actually paid attention to—came out so silky, so perfectly rich, that I ate it straight from the saucepan with a wooden spoon. Maybe you’ve been there, standing in your kitchen at midnight, eating something you’re not sure you should be eating, but it tastes like pure victory.
These Homemade Old-Fashioned Butterscotch Pudding Cups were born from that late-night experiment. No fancy techniques, no hard-to-find ingredients. Just a simple, honest pudding that tastes like you spent hours on it when really, it’s just you and a pot and about fifteen minutes of your time. I keep making it because it’s the kind of dessert that doesn’t need an occasion—it just needs a spoon and a quiet moment.
Why You’ll Love This Recipe
I’ve tested this butterscotch pudding recipe more times than I care to admit. I burned it, I undercooked it, I tried it with different kinds of sugar, and I even attempted a dairy-free version that I will not be sharing (some experiments are best left forgotten). What I landed on is the version I’m giving you today—and let me tell you, it’s the one.
- Quick & Easy : From start to finish, you’re looking at about 15 minutes of active cooking time. The hardest part is just stirring, and honestly, you can do that while thinking about your grocery list or listening to a podcast.
- Simple Ingredients : Butter, brown sugar, milk, egg yolks, vanilla, salt, and cornstarch. That’s it. If you don’t have cornstarch, you can use arrowroot powder, but I prefer the texture cornstarch gives.
- Perfect for Cozy Nights : This is the kind of dessert you make when you want something warm and comforting but don’t want to turn on the oven. Rainy Sundays, snowy evenings, or just a Tuesday that needs a little sweetness.
- Crowd-Pleaser : I’ve served these pudding cups at dinner parties, and people who “don’t really like pudding” suddenly become pudding people. It’s the butterscotch—it has this way of winning everyone over.
- Unbelievably Delicious : The texture is what gets me every time. It’s thick enough to hold its shape but still soft and luscious on the tongue. And the flavor? Deep, buttery, with just a hint of salt to balance the sweetness.
What makes this recipe different from the boxed stuff or even other homemade versions is the technique. I cook the butter and brown sugar together first until it’s bubbly and smells like heaven—this step is non-negotiable if you want that real old-fashioned flavor. It’s not just another pudding; it’s the pudding that makes you close your eyes after the first bite.
This is comfort food at its simplest. No stress, no fuss, just a bowl of something that feels like a hug in dessert form.
What Ingredients You Will Need
This recipe uses simple, everyday ingredients to create something that tastes anything but ordinary. You probably have most of these in your pantry right now, which is exactly how a good butterscotch pudding recipe should be.
- Unsalted butter, 4 tablespoons (1/2 stick or 57g) — I use Land O’Lakes or Kerrygold for the best flavor. The butter is the star here, so use a good one.
- Light brown sugar, 1 cup packed (200g) — Pack it firmly into your measuring cup. Dark brown sugar works too, but it’ll give a deeper, almost molasses-like flavor. Both are delicious, just different.
- Whole milk, 2 cups (480ml) — Don’t use skim or low-fat here. The fat content is what makes the pudding creamy. If you absolutely must, 2% will work, but the texture won’t be as luxurious.
- Large egg yolks, 3 — Save the whites for an omelet or meringue. The yolks add richness and help thicken the pudding.
- Cornstarch, 3 tablespoons (24g) — This is your thickening agent. Make sure it’s fresh—old cornstarch won’t thicken as well. I’ve used Bob’s Red Mill with great results.
- Vanilla extract, 2 teaspoons (10ml) — Pure vanilla extract, please. Imitation vanilla has its place, but not here. You can also scrape a vanilla bean if you’re feeling fancy.
- Fine sea salt, 1/2 teaspoon (3g) — Salt is crucial in butterscotch. It balances the sweetness and brings out the buttery notes. I use Morton’s fine sea salt.
- Optional: Heavy cream, 1/4 cup (60ml) — If you want an extra-decadent version, swap 1/4 cup of the milk for heavy cream. It’s not necessary, but it’s lovely.
Ingredient Selection Tips: For the brown sugar, make sure it’s soft and not rock-hard. If it’s hard, pop it in the microwave with a damp paper towel for 20 seconds. For the egg yolks, room temperature is best—they’ll whisk into the cornstarch more smoothly. If you forget to take them out ahead of time, place them in a bowl of warm water for 5 minutes.
Substitution Guidance: Need this dairy-free? Use a high-quality vegan butter and oat milk. The texture won’t be exactly the same, but it’s still good. For a gluten-free option, this recipe is naturally gluten-free as long as your cornstarch is certified gluten-free (some brands process it in facilities that also handle wheat).
Equipment Needed
You don’t need a fancy kitchen to make these pudding cups. In fact, you probably already own everything you need.
- Medium saucepan (2-3 quart) — A heavy-bottomed saucepan is ideal because it distributes heat evenly and reduces the risk of burning. I use a stainless steel Cuisinart, but any non-reactive pan works.
- Whisk — A good whisk is your best friend here. A silicone-coated one is nice because it won’t scratch your pan, but a standard metal whisk works just fine.
- Mixing bowls — You’ll need one medium bowl for the egg yolks and cornstarch, and another for the milk mixture if you’re straining it.
- Fine-mesh strainer — This is optional but highly recommended. Straining the pudding removes any lumps and gives you that silky-smooth texture. I bought mine for $8 at Target and it’s lasted years.
- Measuring cups and spoons — Accurate measurements matter in pudding. Use dry measuring cups for the brown sugar and liquid measuring cups for the milk.
- Rubber spatula — For scraping every last bit of pudding out of the pan. Don’t waste a drop.
- 4 to 6 small serving cups or ramekins — I use 4-ounce Weck jars because they’re cute and seal well for storage. Any small glass or ceramic dish works.
Budget-Friendly Tip: Don’t have a fine-mesh strainer? You can skip the straining step and just whisk vigorously. The pudding might have a few tiny lumps, but it’ll still taste amazing. I’ve done it both ways, and honestly, sometimes I’m too lazy to strain it.
Preparation Method
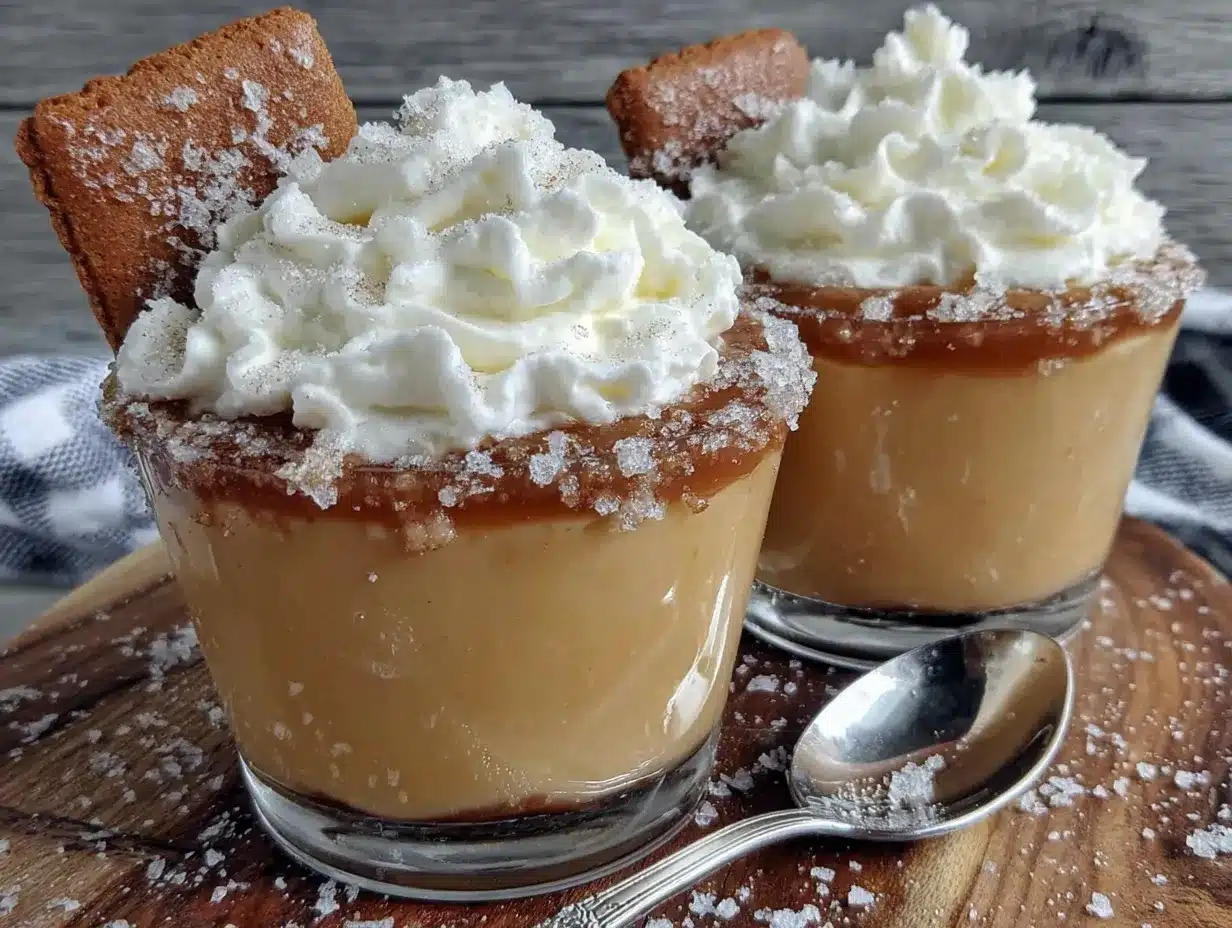
Alright, let’s make some pudding. Take a deep breath—this is easier than you think.
- Melt the butter and brown sugar together. Place your saucepan over medium heat and add the butter and packed brown sugar. Stir constantly with your whisk until the butter is melted and the mixture is bubbling. This takes about 2-3 minutes. You’ll smell it before you see it—that deep, caramel-like aroma is your cue. Let it bubble for exactly 1 minute while whisking. Don’t walk away during this step. Burnt butterscotch is sad butterscotch.
- Slowly whisk in the milk. Reduce the heat to medium-low. Pour the milk in a slow, steady stream while whisking continuously. The mixture will seize up and look grainy at first—don’t panic, this is normal. Keep whisking, and it will smooth out into a beautiful, golden liquid. Continue whisking until the mixture is steaming and small bubbles appear around the edges, about 3-4 minutes. Do not let it boil yet.
- Prepare the egg yolk mixture. While the milk mixture is heating, whisk the egg yolks and cornstarch together in a separate medium bowl until smooth and pale yellow. It should look like a thick paste. Make sure there are no lumps of cornstarch hiding at the bottom—run your finger along the bottom of the bowl to check.
- Temper the egg yolks. This is the step that scares people, but I promise it’s simple. Slowly drizzle about 1/2 cup of the hot milk mixture into the egg yolk mixture while whisking constantly. This gradually warms the yolks so they don’t scramble when you add them to the pot. Once that’s incorporated, pour the egg mixture back into the saucepan, whisking all the while.
- Cook until thickened. Increase the heat to medium and whisk constantly. The pudding will start to thicken after about 2-3 minutes. You’re looking for it to reach a consistency where it coats the back of a spoon and holds a line when you run your finger through it. This usually takes about 4-5 minutes total from when you add the eggs. If you see any lumps, whisk faster—they’ll smooth out.
- Remove from heat and add vanilla and salt. Take the pan off the burner immediately. Whisk in the vanilla extract and salt. Taste it—yes, it’s hot, but blow on it and try a tiny bit. Adjust the salt if needed. I usually add an extra pinch because I love that salty-sweet thing.
- Strain the pudding (optional but recommended). Place your fine-mesh strainer over a clean bowl. Pour the pudding through the strainer, using your rubber spatula to push it through. This catches any tiny lumps or bits of cooked egg. You’ll be left with the silkiest pudding you’ve ever seen.
- Divide into serving cups. Pour the pudding evenly into your serving cups or ramekins. Tap each cup gently on the counter to release any air bubbles. Let them cool at room temperature for about 15 minutes, then cover with plastic wrap, pressing the wrap directly onto the surface of the pudding to prevent a skin from forming.
- Chill for at least 2 hours. Refrigerate the pudding cups for at least 2 hours, or overnight for the best texture. The pudding will continue to set as it chills. Patience, my friend—it’s worth the wait.
Sensory Cue: When it’s done, the pudding should look glossy and feel heavy in the cup. If you tilt the cup gently, the pudding should hold its shape but jiggle slightly. That’s the sweet spot.
Cooking Tips & Techniques
I’ve made this recipe more times than I can count, and I’ve learned a few things the hard way. Let me save you some trouble.
Don’t rush the butter-sugar stage. The first time I made this, I got impatient and only cooked the butter and sugar for about 30 seconds. The pudding was fine, but it didn’t have that deep, almost nutty flavor that makes old-fashioned butterscotch special. Let it bubble for the full minute. Your patience will be rewarded.
Whisk like you mean it. This isn’t the time for lazy stirring. Constant whisking prevents lumps and scorching. I usually set a timer on my phone and just zone out while whisking. It’s almost meditative once you get into the rhythm.
Watch the heat. Medium heat is your friend. High heat will scorch the milk and give you a burnt flavor that no amount of vanilla can fix. If you see the mixture starting to steam aggressively, turn the heat down a notch. Low and slow wins the pudding race.
My biggest failure: I once tried to double this recipe and use a larger pot. Bad idea. The pudding took forever to thicken, and by the time it did, the butter had separated and left greasy spots on top. Stick to the single batch in a medium saucepan. If you need more, make two batches.
Timing tip: Make the pudding the day before you plan to serve it. It needs at least 2 hours to set, but overnight is better. The flavors meld and deepen, and the texture becomes almost cheesecake-like in its creaminess. Plus, it’s one less thing to worry about on serving day.
Consistency trick: If your pudding doesn’t thicken after 5 minutes of cooking, don’t panic. Mix 1 teaspoon of cornstarch with 2 teaspoons of cold water to make a slurry, then whisk it in. Cook for another minute, and it should thicken right up. This has saved me more than once.
Variations & Adaptations
This butterscotch pudding is perfect as-is, but it’s also a great base for experimentation. Here are some variations I’ve tried and loved.
Salty-Sweet Pretzel Crunch: Crush some salted pretzels and sprinkle them on top of the pudding before serving. The salty crunch against the smooth, sweet pudding is addictive. I did this for a party once, and people went crazy for it.
Boozy Butterscotch: Add 2 tablespoons of bourbon or dark rum along with the vanilla. The alcohol cooks off, leaving behind a warm, complex flavor that pairs beautifully with the butterscotch. This is my go-to for adult dinner parties.
Vegan Version: Use vegan butter (I like Miyoko’s) and full-fat oat milk. The texture won’t be quite as thick, so add an extra tablespoon of cornstarch. It’s not identical to the original, but it’s still delicious. My vegan friend Devin gave it two thumbs up.
Chocolate-Butterscotch Swirl: After pouring the pudding into cups, drizzle in some melted dark chocolate and swirl it with a knife. The bitterness of the chocolate cuts through the sweetness of the butterscotch. I tried this on a whim and now I can’t decide which version I like better.
Spiced Butterscotch: Add 1/2 teaspoon of cinnamon and a pinch of nutmeg along with the vanilla. It gives the pudding a cozy, almost chai-like warmth. Perfect for fall or winter evenings.
Individual Pie Crusts: Pour the pudding into pre-baked mini graham cracker or shortbread crusts. Chill until set, then top with whipped cream. You’ve just made no-bake butterscotch pies, and they’re adorable.
Serving & Storage Suggestions
These pudding cups are versatile enough for any occasion. Here’s how to serve and store them like a pro.
Serving Temperature: Serve them cold, straight from the fridge. The texture is at its best when fully chilled. If you prefer a softer pudding, let them sit at room temperature for about 10 minutes before serving.
Presentation Ideas: Top each cup with a dollop of lightly sweetened whipped cream and a sprinkle of flaky sea salt. A few fresh berries or a dusting of cinnamon add a pop of color. For a retro touch, add a maraschino cherry on top—it’s kitschy but charming.
Complementary Dishes: These pudding cups pair beautifully with a cup of strong coffee or a glass of cold milk. If you’re serving them as part of a dessert spread, they go well with classic shortbread cookies for dipping or a slice of simple vanilla pound cake on the side.
Storage Instructions: Store the pudding cups covered in the refrigerator for up to 4 days. Keep the plastic wrap pressed directly onto the surface to prevent a skin from forming. If a skin does form, just stir it back in—it’s still perfectly good to eat.
Freezing: You can freeze these pudding cups for up to 1 month. Thaw them overnight in the refrigerator. The texture might be slightly less creamy after freezing, but it’s still delicious. I don’t recommend freezing them if you’ve added whipped cream or toppings.
Flavor Development: Here’s a secret: the pudding actually tastes better on day two. The flavors have time to meld and deepen. So if you can resist eating them all on day one, you’re in for a treat.
Nutritional Information & Benefits
Let’s be real—this is dessert, not a health food. But knowing what’s in it helps you enjoy it mindfully.
Estimated Nutritional Values (per serving, based on 4 servings):
| Nutrient | Amount |
|---|---|
| Calories | 380 |
| Total Fat | 18g |
| Saturated Fat | 11g |
| Cholesterol | 185mg |
| Sodium | 320mg |
| Total Carbohydrates | 52g |
| Sugars | 44g |
| Protein | 5g |
Health Benefits: The egg yolks provide choline, which supports brain health. Milk offers calcium and vitamin D for bone health. The butter contains butyrate, a fatty acid that supports gut health in small amounts. And the brown sugar? Well, it makes you happy, and that counts for something.
Dietary Considerations: This recipe is naturally gluten-free and nut-free. It contains dairy and eggs, so it’s not suitable for vegans or those with allergies to those ingredients. For a lower-sugar option, you can reduce the brown sugar to 3/4 cup, but the texture will be slightly less creamy.
Personal Wellness Perspective: I believe in balance. This pudding is a treat, not an everyday thing. But when you do have it, savor every spoonful. Food is meant to nourish both body and soul, and this recipe definitely nourishes the soul.
Conclusion
These Homemade Old-Fashioned Butterscotch Pudding Cups are proof that simple ingredients, when treated with care, can become something truly special. They’re not complicated or fancy—they’re just honest, comforting, and absolutely delicious.
I love this recipe because it reminds me that you don’t need a pastry degree or expensive equipment to make something that tastes like it came from a fancy bakery. All you need is a little patience, a good whisk, and the willingness to stand at the stove for a few minutes stirring. That’s it.
I hope you give these pudding cups a try. Make them for yourself on a quiet evening, or share them with people you love. Add your own twist—maybe extra salt on top, or a splash of bourbon, or a pile of crushed pretzels. Make them yours. And when you do, come back and tell me how it went. I’d love to hear about your butterscotch adventures.
Now go make some pudding. Your spoon is waiting.
Frequently Asked Questions
Can I use dark brown sugar instead of light brown sugar?
Absolutely. Dark brown sugar has more molasses, which gives the pudding a deeper, richer flavor. It’s still delicious, just slightly different. I’ve used both and honestly can’t pick a favorite—it depends on my mood.
Why did my pudding turn out lumpy?
Lumpy pudding usually happens when the egg yolks aren’t tempered properly or when the heat is too high. Make sure you whisk the hot milk into the yolks slowly, and keep the heat at medium. If lumps do form, you can strain them out with a fine-mesh strainer.
Can I make this recipe without eggs?
Eggs are key for the rich texture, but you can try using 3 tablespoons of additional cornstarch mixed with 3 tablespoons of water as a substitute. The texture will be different—more like a cornstarch pudding—but it will still taste good. I’ve done it for friends with egg allergies, and it worked well enough.
How long does butterscotch pudding last in the fridge?
Properly stored with plastic wrap pressed onto the surface, it will keep for up to 4 days. The flavor actually improves after a day or two. Just don’t leave it at room temperature for more than 2 hours.
Can I use this pudding as a pie filling?
Yes, and it’s fantastic. Pour the warm pudding into a pre-baked pie crust and chill for at least 4 hours. Top with whipped cream and you’ve got a no-bake butterscotch pie. I’ve done this for Thanksgiving and it was a huge hit—almost as popular as the pumpkin pie.
Pin This Recipe!
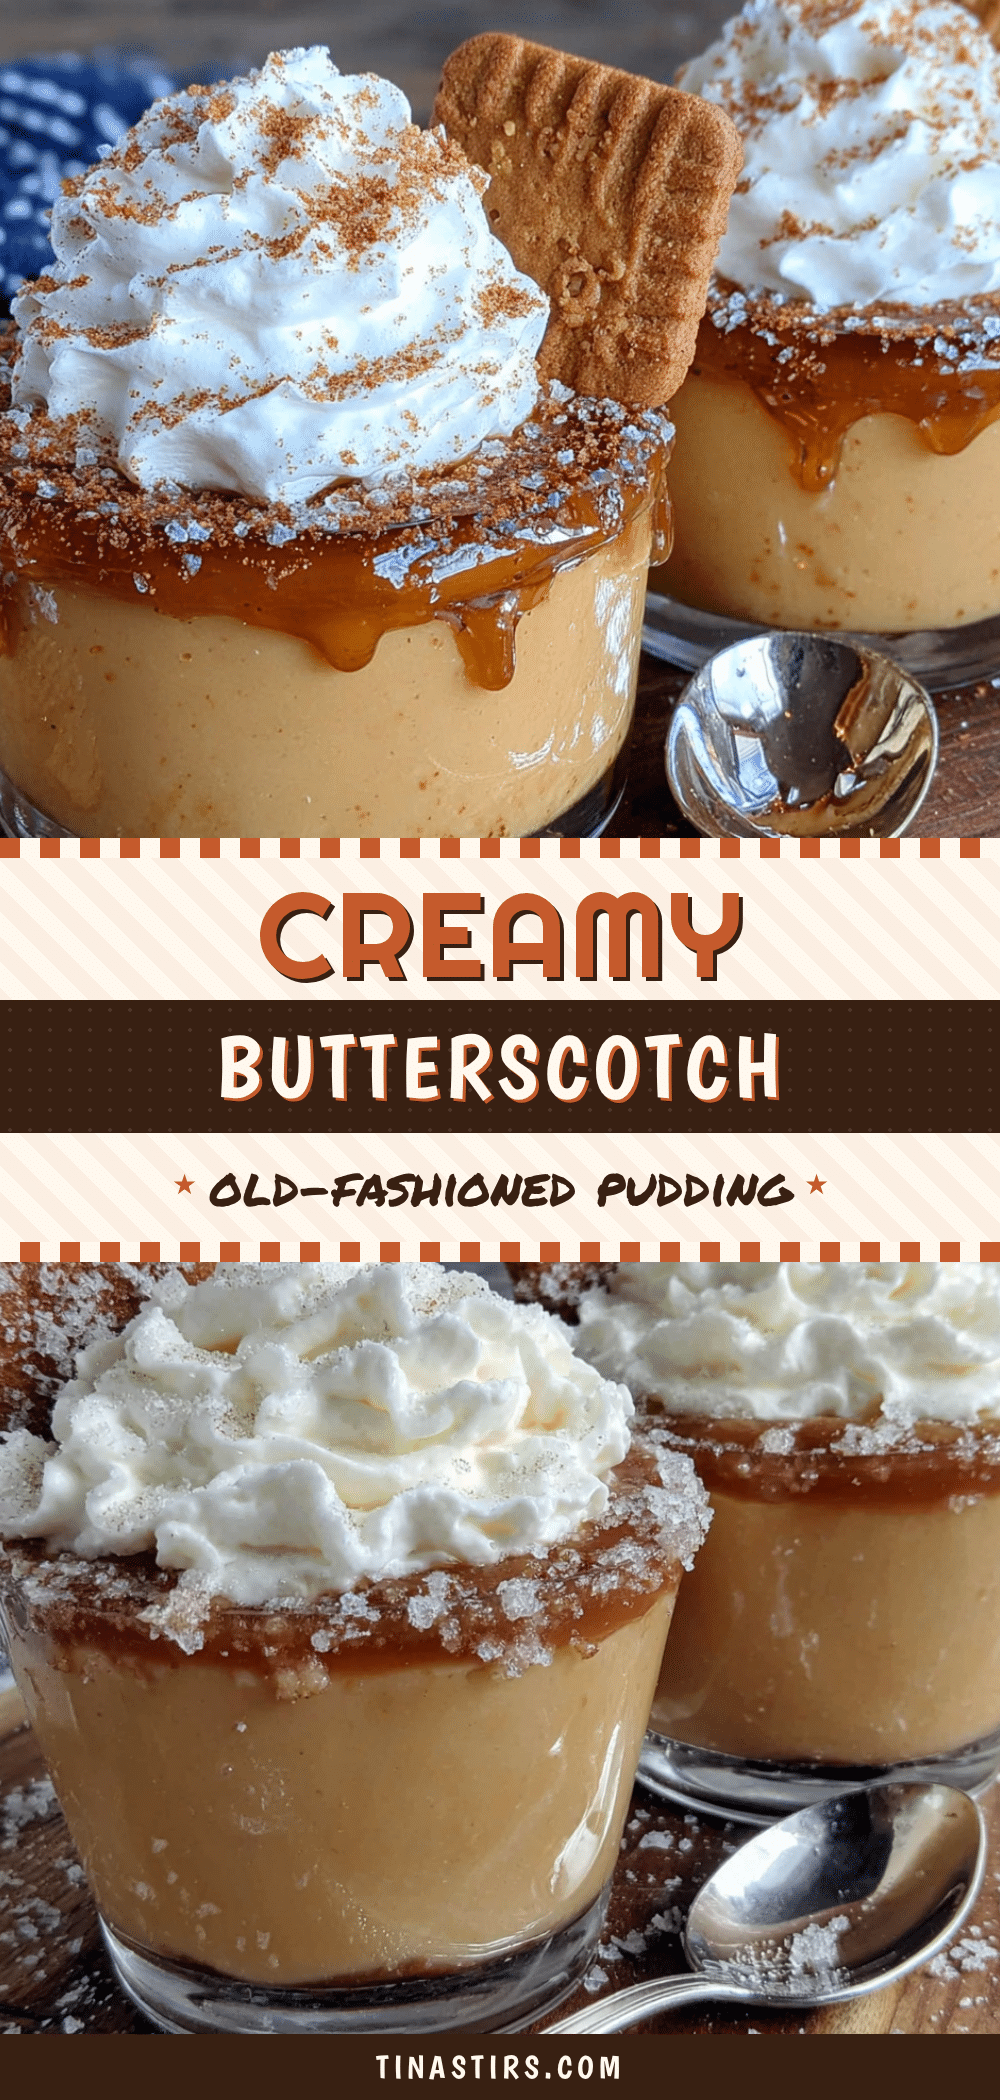
Homemade Old-Fashioned Butterscotch Pudding Cups (Easy Recipe)
These Homemade Old-Fashioned Butterscotch Pudding Cups are a simple, comforting dessert made with butter, brown sugar, milk, and egg yolks. Quick to prepare and perfect for cozy nights, they deliver a deep, buttery flavor with a silky-smooth texture.
- Prep Time: 15 minutes
- Cook Time: 15 minutes
- Total Time: 2 hours 30 minutes (includes chilling)
- Yield: 4 servings 1x
- Category: Dessert
- Cuisine: American
Ingredients
- 4 tablespoons unsalted butter (1/2 stick or 57g)
- 1 cup packed light brown sugar (200g)
- 2 cups whole milk (480ml)
- 3 large egg yolks
- 3 tablespoons cornstarch (24g)
- 2 teaspoons vanilla extract (10ml)
- 1/2 teaspoon fine sea salt (3g)
- Optional: 1/4 cup heavy cream (60ml) for extra decadence
Instructions
- Melt the butter and brown sugar together in a medium saucepan over medium heat, stirring constantly with a whisk until bubbling, about 2-3 minutes. Let it bubble for exactly 1 minute while whisking.
- Reduce heat to medium-low. Slowly whisk in the milk in a steady stream. Continue whisking until the mixture is steaming and small bubbles appear around the edges, about 3-4 minutes. Do not let it boil.
- In a separate medium bowl, whisk the egg yolks and cornstarch together until smooth and pale yellow, forming a thick paste.
- Temper the egg yolks by slowly drizzling about 1/2 cup of the hot milk mixture into the egg yolk mixture while whisking constantly. Then pour the egg mixture back into the saucepan, whisking continuously.
- Increase heat to medium and whisk constantly until the pudding thickens and coats the back of a spoon, about 4-5 minutes.
- Remove from heat and whisk in the vanilla extract and salt. Taste and adjust salt if needed.
- Optional: Strain the pudding through a fine-mesh strainer into a clean bowl for a silky texture.
- Divide the pudding evenly into 4 to 6 serving cups or ramekins. Tap gently to release air bubbles. Let cool at room temperature for 15 minutes, then cover with plastic wrap pressed directly onto the surface.
- Refrigerate for at least 2 hours, or overnight for best texture.
Notes
For best flavor, cook the butter and sugar together for a full minute until bubbly. Whisk constantly to prevent lumps and scorching. The pudding thickens as it chills; overnight chilling yields the best texture. If pudding doesn’t thicken after 5 minutes, mix 1 teaspoon cornstarch with 2 teaspoons cold water and whisk in, cooking for another minute.
Nutrition
- Serving Size: 1 serving (about 1/2
- Calories: 380
- Sugar: 44
- Sodium: 320
- Fat: 18
- Saturated Fat: 11
- Carbohydrates: 52
- Protein: 5
Keywords: butterscotch pudding, homemade pudding, old-fashioned dessert, easy dessert, comfort food, gluten-free dessert


