Love this? Save it for later!
Share the inspiration with your friends
The man at the community garden plot next to mine watched me staring at a pile of slightly bruised apples I’d just picked up from the discount bin at the farmers’ market. He didn’t say anything at first. Then he just shook his head, laughed a little, and said, “You’re overthinking those apples, neighbor. They don’t need to be perfect. They need to be cooked.” He reached into his own basket and handed me a cinnamon stick wrapped in a napkin. “Trust me on this one.”
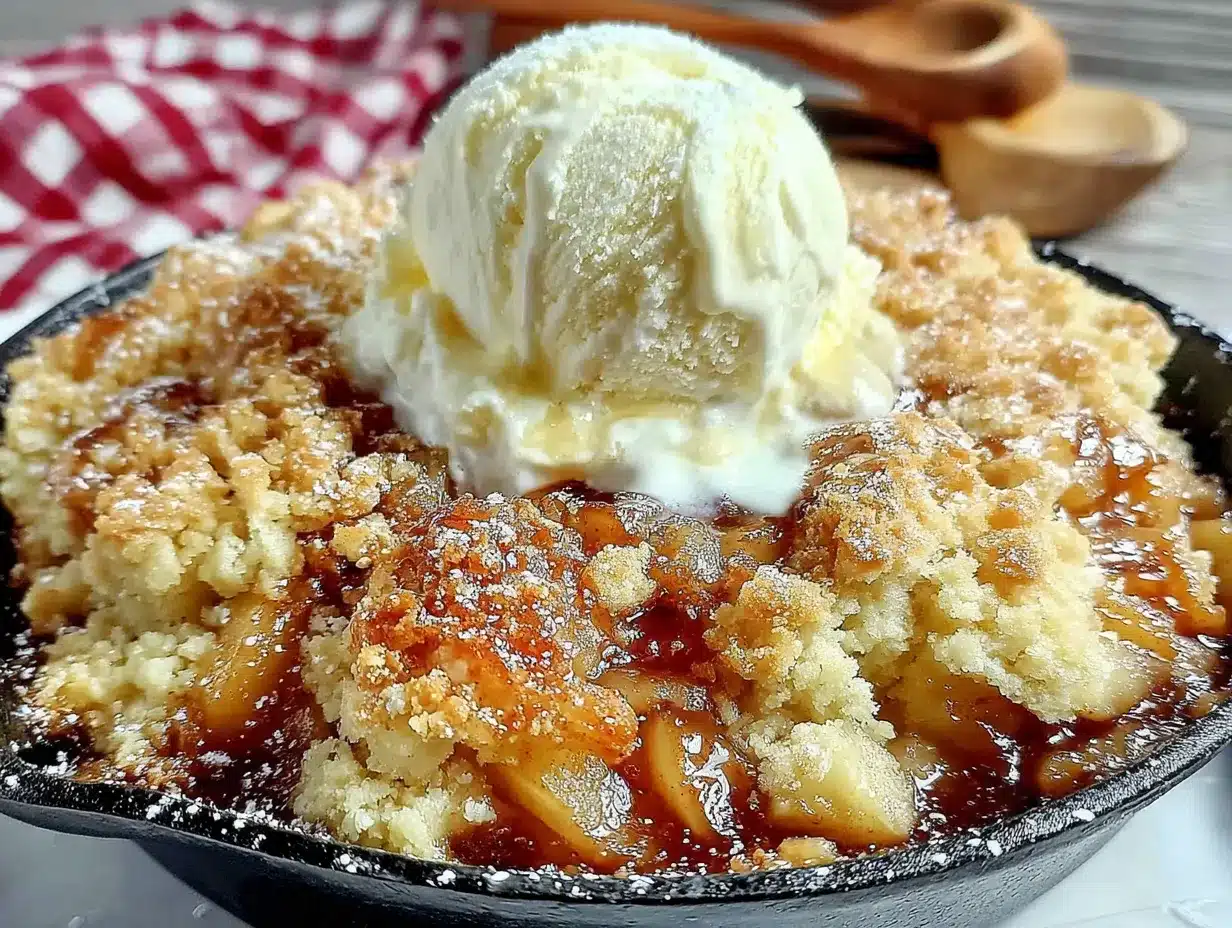
That was three autumns ago, and honestly, I haven’t looked at a perfect apple the same way since. I mean, we get so caught up in wanting everything to look pristine, right? But the best apple desserts I’ve ever made came from the lumpy ones, the ones with a small bruise or a weird shape. That day, I went home, grabbed my trusty cast iron skillet, and started experimenting with what would eventually become my go-to Homemade Skillet Apple Cobbler with Buttery Biscuit Topping.
Let me tell you, the first attempt was a mess. I forgot to add the sugar to the biscuit topping, and it came out tasting like salty clouds on top of sweet apples. My kitchen looked like a flour bomb had gone off. But you know that feeling when something is so close to being perfect that you can taste it? That was this cobbler. I tweaked it, burned my tongue testing it straight from the skillet (worth it), and finally landed on a version that makes people close their eyes when they take the first bite. This recipe stayed with me because it’s forgiving. It doesn’t demand perfection from you or from the apples. It just asks for a little patience and a hot oven.
Why You’ll Love This Recipe
This isn’t just another apple dessert. This is the one that will make you the hero of every fall gathering, potluck, or quiet Tuesday night when you need something warm and comforting. I’ve tested this recipe more times than I can count, and every single time, it delivers that perfect balance of tender, spiced fruit and golden, flaky biscuit topping.
- Quick & Easy: From start to finish, this comes together in about an hour. Most of that time is hands-off baking, so you can get the rest of dinner ready or just pour yourself a cup of coffee and enjoy the smell filling your kitchen.
- Simple Ingredients: You probably have most of these in your pantry right now. Apples, butter, sugar, flour, a few warm spices. No fancy grocery trips required.
- Perfect for Any Occasion: This works for a casual family dessert, a Thanksgiving alternative to pie, or a weekend brunch showstopper. It’s versatile like that.
- Crowd-Pleaser: I’ve served this to kids who claimed they didn’t like cooked fruit and adults who ate three servings. It’s magic, I swear.
- Unbelievably Delicious: The texture is what gets everyone. The apples break down into this jammy, luscious filling while the biscuit topping stays tender on the inside and gets all golden and slightly crisp on the edges.
What makes this different from other cobblers is the technique. Instead of just dropping raw biscuit dough on top of the filling, I par-bake the biscuits separately for a few minutes before adding them to the skillet. It sounds fussy, but trust me, it’s the secret to getting that perfect, fully-cooked biscuit that soaks up just the right amount of apple juice without turning into a soggy mess. This is comfort food at its finest—honest, warm, and made to share.
What Ingredients You Will Need
This recipe uses simple, wholesome ingredients that work together to create something truly special. Most of these are pantry staples, which makes this an easy last-minute dessert when company shows up unexpectedly.
For the Apple Filling
- 6 cups peeled and sliced apples (about 6 medium apples) – I recommend a mix of Granny Smith for tartness and Honeycrisp or Fuji for sweetness. The combination gives you a more complex flavor.
- 1/2 cup granulated sugar (100g) – Adjust based on how sweet your apples are. If you’re using mostly sweet apples, you can cut this back to 1/3 cup.
- 1/4 cup packed brown sugar (50g) – This adds depth and a hint of molasses flavor that pairs beautifully with the spices.
- 2 tablespoons all-purpose flour (16g) – This helps thicken the apple juices as they cook, creating that perfect jammy consistency.
- 1 tablespoon lemon juice (15ml) – Fresh is best here. It brightens the apples and prevents them from browning too much.
- 1 teaspoon ground cinnamon – The backbone of any good apple dessert. I use Ceylon cinnamon when I have it for a milder, more floral note.
- 1/4 teaspoon ground nutmeg – Freshly grated if you can. It makes a noticeable difference.
- 1/4 teaspoon ground allspice – This adds that warm, almost peppery note that makes the filling taste like it’s been simmering for hours.
- Pinch of salt – Don’t skip this. Salt makes everything taste more like itself.
- 2 tablespoons unsalted butter (28g), cut into small pieces – Dotting this over the filling before baking adds richness and helps create that silky texture.
For the Buttery Biscuit Topping
- 1 1/2 cups all-purpose flour (190g) – I use unbleached all-purpose flour for the best texture.
- 1/4 cup granulated sugar (50g) – Just enough sweetness to complement the filling without making the biscuits taste like cookies.
- 2 teaspoons baking powder (8g) – Make sure it’s fresh. Old baking powder will give you flat, dense biscuits.
- 1/2 teaspoon baking soda (3g) – This helps with browning and adds a little extra lift.
- 1/2 teaspoon salt – Essential for balancing the sweetness.
- 6 tablespoons cold unsalted butter (85g), cut into small cubes – This is the key to flaky biscuits. The butter needs to be really cold, almost frozen.
- 3/4 cup cold buttermilk (180ml) – If you don’t have buttermilk, you can make a quick substitute by adding 1 tablespoon of lemon juice or vinegar to 3/4 cup of regular milk and letting it sit for 5 minutes.
- 1 teaspoon vanilla extract (5ml) – A little vanilla in the biscuits makes them taste extra special.
- 1 tablespoon coarse sugar (like turbinado or demerara) for sprinkling – This gives the tops a lovely crunch and sparkle.
Equipment Needed
You don’t need a lot of fancy equipment for this recipe, which is part of why I love it so much. The star of the show is definitely the skillet.
- 10-inch cast iron skillet – This is non-negotiable for the best results. Cast iron heats evenly and retains heat beautifully, which helps the apples cook down perfectly and the biscuits get that gorgeous golden bottom. If you don’t have one, you can use a 10-inch oven-safe stainless steel or enameled skillet, but the heat distribution won’t be quite as even.
- Large mixing bowl – For tossing the apples with the sugar and spices.
- Medium mixing bowl – For making the biscuit dough.
- Pastry cutter or two forks – For cutting the cold butter into the flour mixture. You can also use your fingertips, but work quickly so the butter doesn’t warm up.
- Sharp knife and cutting board – For peeling and slicing the apples.
- Measuring cups and spoons – Accurate measurements matter in baking, even for a rustic dessert like this.
- Small cookie scoop or two spoons – For dropping the biscuit dough onto the filling.
- Cooling rack – For letting the cobbler cool slightly before serving. This helps the filling set up.
I’ve made this with a regular 9×13 baking dish when my skillet was otherwise occupied, and it worked fine. The biscuits didn’t get quite as crispy on the bottom, but it was still delicious. So don’t let the skillet requirement stop you if you don’t have one. Just know that the cast iron version is the one that’ll make you a believer.
Preparation Method
Alright, let’s get to the good part. Here’s how to make this Homemade Skillet Apple Cobbler with Buttery Biscuit Topping step by step. I’ve included all the little details I wish someone had told me the first time I made this.
- Preheat your oven to 400°F (200°C). Place your cast iron skillet in the oven while it preheats. This is a little trick I picked up from an old cookbook—heating the skillet first helps the bottom of the cobbler get nice and caramelized.
- Prepare the apples. Peel, core, and slice your apples into roughly 1/4-inch thick slices. Don’t stress about making them perfectly uniform, but try to keep them close to the same size so they cook evenly. You should end up with about 6 cups of sliced apples.
- Make the filling. In a large bowl, combine the sliced apples, granulated sugar, brown sugar, flour, lemon juice, cinnamon, nutmeg, allspice, and a pinch of salt. Toss everything together with your hands or a spatula until the apples are evenly coated. Let this sit for about 10 minutes while you make the biscuit dough. This gives the apples time to release some of their juices, which will create that lovely syrupy filling.
- Start the biscuit topping. In a medium bowl, whisk together the flour, 1/4 cup granulated sugar, baking powder, baking soda, and salt. Add the cold butter cubes to the flour mixture. Using a pastry cutter or two forks, cut the butter into the flour until the mixture resembles coarse meal with some pea-sized butter pieces still visible. You want those little chunks of butter—they’ll create steam pockets as they melt, giving you flaky, tender biscuits.
- Add the wet ingredients to the biscuits. Make a well in the center of the flour mixture and pour in the cold buttermilk and vanilla extract. Stir with a fork just until the dough comes together. It will be sticky and a little shaggy. Don’t overmix, or your biscuits will be tough. A few streaks of flour are totally fine.
- Par-bake the biscuits. This is the step that makes all the difference. Line a small baking sheet with parchment paper. Using a small cookie scoop or two spoons, drop 8 to 10 mounds of biscuit dough onto the prepared baking sheet, spacing them about an inch apart. Bake for 8 minutes. You want them to be just starting to set and puff up slightly, but not fully cooked or browned. This little head start ensures your biscuits will be fully cooked through by the time the cobbler is done, without you having to overbake the filling.
- Assemble the cobbler. Carefully remove the hot skillet from the oven (use oven mitts, obviously). Add the 2 tablespoons of butter to the hot skillet and let it melt, swirling it around to coat the bottom. Pour the apple mixture into the skillet and spread it into an even layer. It will sizzle and smell amazing.
- Top with the biscuits. Carefully arrange the par-baked biscuit mounds on top of the apple filling. They’ll be a little delicate, so handle them gently. Sprinkle the tops of the biscuits with the coarse sugar for that beautiful sparkly finish.
- Bake the cobbler. Place the skillet back in the oven and bake for 25 to 30 minutes, until the filling is bubbly and thickened and the biscuits are deep golden brown. If the biscuits are browning too quickly, loosely tent the skillet with foil for the last 10 minutes of baking.
- Cool slightly before serving. Remove the skillet from the oven and place it on a cooling rack. Let it cool for at least 15 to 20 minutes. I know it’s hard to wait, but this resting time allows the filling to set up so you don’t end up with a soupy mess on your plate. The cobbler will still be plenty warm.
Cooking Tips & Techniques
I’ve made this cobbler more times than I can count, and I’ve learned a few things along the way. Some of these came from happy accidents, others from outright failures. Here’s what I wish I’d known from the start.
Use a mix of apple varieties. I cannot stress this enough. Using all Granny Smith apples will give you a very tart filling that needs extra sugar. Using all Honeycrisp will give you something that’s almost too sweet and can turn mushy. A 50/50 mix gives you the perfect balance of flavor and texture. My favorite combination is three Granny Smith and three Fuji apples.
Don’t skip the par-baking step. I know it adds an extra step and dirties another pan. I tried skipping it once, thinking I could just bake the cobbler longer to cook the biscuits through. The result was a burnt biscuit exterior and a raw dough interior, plus the apples had cooked into oblivion. The 8-minute par-bake is worth the extra effort.
Keep your butter cold. This is the golden rule of biscuit making. If your butter warms up and gets incorporated into the flour, you’ll end up with dense, tough biscuits instead of light, flaky ones. I like to cut my butter into cubes and pop it in the freezer for 10 minutes before I start making the dough. It makes a noticeable difference.
Let the apples macerate. That 10-minute rest after tossing the apples with sugar and spices isn’t just for show. It draws out the natural juices from the apples, which then mix with the sugar and flour to create a syrupy base. This is what gives you that luscious, jammy filling instead of dry, sad apples.
Watch your oven. Every oven runs differently. My oven runs a little hot, so I usually check the cobbler at the 22-minute mark. You’re looking for bubbly, thickened filling and biscuits that are a deep golden brown. If the biscuits look done but the filling isn’t bubbling yet, cover the skillet with foil and bake for another 5 minutes.
Variations & Adaptations
One of the best things about this recipe is how adaptable it is. Here are some of my favorite variations, all of which I’ve tested and loved.
Gluten-Free Version: Substitute the all-purpose flour in both the filling and the biscuits with a good quality 1-to-1 gluten-free flour blend. I’ve had great results with the King Arthur Measure for Measure blend. The biscuits will be a little more delicate, so handle them gently when transferring to the skillet. Everything else stays the same.
Spiced Pear and Apple Cobbler: Swap half of the apples for firm, ripe pears (Bosc or Anjou work well). Add an extra 1/4 teaspoon of ground ginger and a pinch of cardamom to the filling. The pears add a lovely, almost honey-like sweetness that pairs beautifully with the apples. This is my go-to version in late fall when pears are at their peak.
Dairy-Free Adaptation: Use a high-quality vegan butter stick (not the spreadable kind) in place of the regular butter. For the buttermilk, add 1 tablespoon of lemon juice to 3/4 cup of unsweetened oat milk or almond milk and let it sit for 5 minutes. The biscuits won’t be quite as flaky, but they’ll still be tender and delicious. I’ve made this for dairy-free friends multiple times, and it always gets the thumbs up.
Bourbon-Apple Cobbler: For an adult version, add 2 tablespoons of bourbon to the apple mixture along with the lemon juice. The alcohol mostly cooks off, leaving behind a warm, oaky depth that’s incredible with the caramelized apples. I like to serve this version with a scoop of brown sugar ice cream for maximum indulgence.
Individual Ramekin Cobblers: Divide the apple filling among 6 to 8 oven-safe ramekins (about 8-ounce size). Top each with a single par-baked biscuit and bake for 18 to 22 minutes. These are perfect for dinner parties when you want to serve something that feels special and individual.
Serving & Storage Suggestions
This cobbler is best served warm, straight from the skillet, with something cold and creamy to balance all that warm, spiced goodness. My personal favorite is a generous scoop of vanilla bean ice cream that melts into the apple filling. But honestly, a drizzle of heavy cream or a dollop of lightly sweetened whipped cream works beautifully too.
For a brunch spread, I’ve served this with a side of plain Greek yogurt and a drizzle of honey. The tanginess of the yogurt cuts through the sweetness of the cobbler perfectly. It’s also wonderful with a cup of strong black coffee or a chai latte.
Storage: If you have leftovers (which is rare in my house, but it happens), cover the skillet tightly with foil or transfer the cobbler to an airtight container. It will keep in the refrigerator for up to 4 days. The biscuits will soften over time as they absorb moisture from the filling, but it’s still delicious.
Reheating: The best way to reheat this is in a 350°F (175°C) oven for about 10 to 15 minutes, until warmed through. You can also reheat individual portions in the microwave for about 30 seconds, but the biscuits won’t be as crisp. If you’re reheating the whole skillet, cover it with foil for the first 10 minutes to prevent the biscuits from burning, then uncover for the last 5 minutes to crisp them up.
Freezing: You can freeze the assembled, unbaked cobbler (without the par-baked biscuits on top). Wrap the skillet tightly in plastic wrap, then foil, and freeze for up to 3 months. To bake, thaw in the refrigerator overnight, then proceed with the par-baking and assembly steps as directed. You can also freeze the baked cobbler, but the texture of the biscuits will suffer a bit. I prefer to freeze the components separately and assemble fresh.
Nutritional Information & Benefits
Let’s be real—this is a dessert, and it’s meant to be enjoyed. But there are some redeeming qualities worth mentioning. Apples are a good source of fiber and vitamin C, and they contain antioxidants that support overall health. The cinnamon and other spices have anti-inflammatory properties, which is a nice bonus.
Here’s an approximate nutritional breakdown per serving (based on 8 servings):
- Calories: 385
- Total Fat: 16g
- Saturated Fat: 10g
- Carbohydrates: 58g
- Fiber: 4g
- Sugar: 38g
- Protein: 4g
For those with dietary restrictions, this recipe contains gluten and dairy. The gluten-free and dairy-free variations I mentioned earlier work well if you need to adapt it. It’s also naturally vegetarian. If you’re watching your sugar intake, you can reduce the sugar in the filling by up to a quarter without significantly affecting the texture, though the filling will be less syrupy.
I personally believe that food should nourish both the body and the soul. This cobbler might not be a health food, but it feeds something deeper—the need for comfort, connection, and a moment of sweetness in a busy day. And that has its own kind of nutritional value.
Conclusion
This Homemade Skillet Apple Cobbler with Buttery Biscuit Topping is more than just a recipe. It’s the kind of dessert that makes you slow down and appreciate the simple things. The smell of apples and cinnamon filling your kitchen. The satisfying sizzle when the filling hits the hot skillet. The first spoonful that hits that perfect balance of tender fruit and flaky biscuit.
I’ve made this for quiet nights at home, for Thanksgiving dinners, for last-minute potlucks, and for neighbors who needed a little sweetness in their day. Every single time, it delivers. It’s forgiving enough for a beginner baker and impressive enough for someone who’s been making desserts for decades. The best part? You can make it your own. Swap in your favorite apple varieties, add a pinch of cardamom if that’s your thing, or go all in with that bourbon version. This recipe is a starting point, not a rulebook.
I’d love to hear how yours turns out. Did you try a fun variation? Did your family fight over the last spoonful? Drop a comment below and let me know. And if you snap a photo, tag me—I always love seeing your creations. Now go preheat that oven. Your skillet is waiting.
Frequently Asked Questions
Can I use a different type of pan if I don’t have a cast iron skillet?
Absolutely. A 10-inch oven-safe stainless steel or enameled skillet works well. You can also use a 9×9 inch baking dish or a 9-inch round cake pan. Just note that the bottom of the cobbler won’t get quite as caramelized without the cast iron’s heat retention. You might need to add 5 minutes to the baking time if using a glass or ceramic dish.
Can I use pre-sliced frozen apples?
You can, but I don’t recommend it. Frozen apples release a lot of water as they thaw, which can make your filling watery and thin. If you’re in a pinch, thaw the apples completely, drain off the excess liquid, and pat them dry with paper towels before tossing them with the sugar and spices. You may also want to add an extra tablespoon of flour to help thicken the filling.
Why did my biscuits turn out dense and heavy?
This usually happens for one of two reasons. Either you overmixed the dough (which develops too much gluten) or your butter wasn’t cold enough when you cut it into the flour. Next time, try mixing just until the dough comes together—a few lumps are totally fine. And pop your butter in the freezer for 10 minutes before you start. It makes a world of difference.
Can I make the biscuit dough ahead of time?
You can, but with a caveat. The biscuit dough is best made fresh because the baking powder starts reacting as soon as it hits the buttermilk. If you need to prep ahead, mix the dry ingredients and have the butter cubed and chilled. Then combine the wet and dry ingredients just before you’re ready to par-bake the biscuits. The apple filling can be prepared a day ahead and stored in the refrigerator.
How do I know when the cobbler is done baking?
Look for these signs: the apple filling should be bubbling visibly around the edges of the skillet, the biscuits should be a deep golden brown on top, and the filling should look thickened rather than watery. If you’re unsure, insert a toothpick into the center of a biscuit—it should come out clean or with just a few moist crumbs. If it’s still doughy, give the cobbler another 5 minutes.
Pin This Recipe!
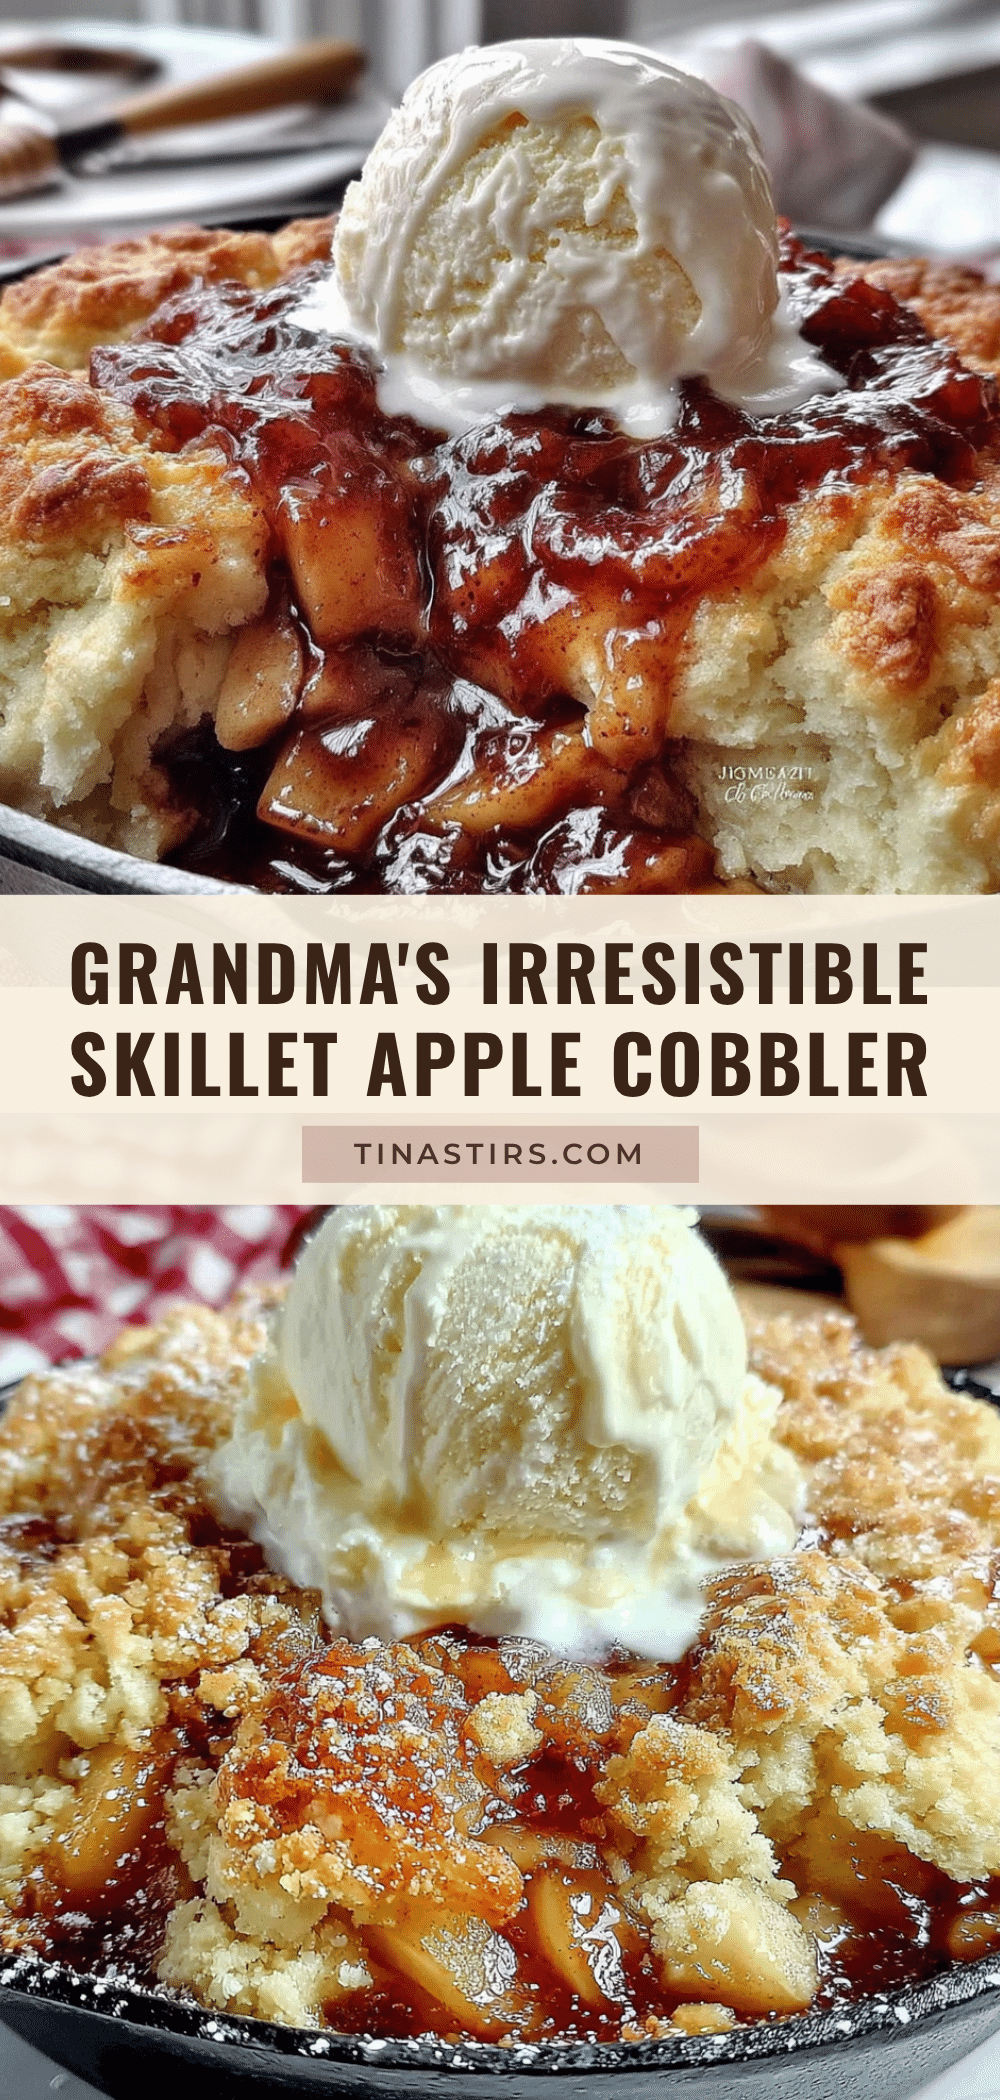
Homemade Skillet Apple Cobbler with Buttery Biscuit Topping
This Homemade Skillet Apple Cobbler features tender, spiced apples topped with golden, flaky buttermilk biscuits. It’s a forgiving, crowd-pleasing dessert that comes together in about an hour and is perfect for fall gatherings or cozy nights in.
- Prep Time: 15 minutes
- Cook Time: 30 minutes
- Total Time: 45 minutes
- Yield: 8 servings 1x
- Category: Dessert
- Cuisine: American
Ingredients
- 6 cups peeled and sliced apples (about 6 medium apples, mix of Granny Smith and Honeycrisp or Fuji)
- 1/2 cup granulated sugar (100g)
- 1/4 cup packed brown sugar (50g)
- 2 tablespoons all-purpose flour (16g)
- 1 tablespoon lemon juice (15ml)
- 1 teaspoon ground cinnamon
- 1/4 teaspoon ground nutmeg
- 1/4 teaspoon ground allspice
- Pinch of salt
- 2 tablespoons unsalted butter (28g), cut into small pieces
- 1 1/2 cups all-purpose flour (190g)
- 1/4 cup granulated sugar (50g)
- 2 teaspoons baking powder (8g)
- 1/2 teaspoon baking soda (3g)
- 1/2 teaspoon salt
- 6 tablespoons cold unsalted butter (85g), cut into small cubes
- 3/4 cup cold buttermilk (180ml)
- 1 teaspoon vanilla extract (5ml)
- 1 tablespoon coarse sugar (like turbinado or demerara) for sprinkling
Instructions
- Preheat your oven to 400°F (200°C). Place your cast iron skillet in the oven while it preheats.
- Peel, core, and slice your apples into roughly 1/4-inch thick slices. You should end up with about 6 cups of sliced apples.
- In a large bowl, combine the sliced apples, granulated sugar, brown sugar, flour, lemon juice, cinnamon, nutmeg, allspice, and a pinch of salt. Toss everything together until the apples are evenly coated. Let this sit for about 10 minutes while you make the biscuit dough.
- In a medium bowl, whisk together the flour, 1/4 cup granulated sugar, baking powder, baking soda, and salt. Add the cold butter cubes to the flour mixture. Using a pastry cutter or two forks, cut the butter into the flour until the mixture resembles coarse meal with some pea-sized butter pieces still visible.
- Make a well in the center of the flour mixture and pour in the cold buttermilk and vanilla extract. Stir with a fork just until the dough comes together. It will be sticky and a little shaggy. Don’t overmix.
- Line a small baking sheet with parchment paper. Using a small cookie scoop or two spoons, drop 8 to 10 mounds of biscuit dough onto the prepared baking sheet, spacing them about an inch apart. Bake for 8 minutes. You want them to be just starting to set and puff up slightly, but not fully cooked or browned.
- Carefully remove the hot skillet from the oven. Add the 2 tablespoons of butter to the hot skillet and let it melt, swirling it around to coat the bottom. Pour the apple mixture into the skillet and spread it into an even layer.
- Carefully arrange the par-baked biscuit mounds on top of the apple filling. Sprinkle the tops of the biscuits with the coarse sugar.
- Place the skillet back in the oven and bake for 25 to 30 minutes, until the filling is bubbly and thickened and the biscuits are deep golden brown. If the biscuits are browning too quickly, loosely tent the skillet with foil for the last 10 minutes of baking.
- Remove the skillet from the oven and place it on a cooling rack. Let it cool for at least 15 to 20 minutes before serving.
Notes
Use a mix of apple varieties for best flavor. Don’t skip the par-baking step for the biscuits. Keep butter cold for flaky biscuits. Let apples macerate for 10 minutes to create syrupy base. Watch your oven as baking times may vary.
Nutrition
- Serving Size: 1 serving
- Calories: 385
- Sugar: 38
- Fat: 16
- Saturated Fat: 10
- Carbohydrates: 58
- Fiber: 4
- Protein: 4
Keywords: apple cobbler, skillet cobbler, buttermilk biscuits, fall dessert, apple dessert, cast iron skillet, comfort food


