Love this? Save it for later!
Share the inspiration with your friends
My niece looked up from the bag of Oreos she was crushing with her bare hands and asked, “Auntie, why can’t you just skip the baking and put the pudding straight in the cup?” I started to explain why that wouldn’t work — something about texture and setting time and proper dessert construction. Then I stopped. Honestly? I had no good reason. I was just used to doing things the complicated way.
She was eight years old, covered in cookie dust, and absolutely right. That moment in my messy kitchen on a random Tuesday afternoon changed how I think about Halloween desserts forever. I mean, here I was, this self-proclaimed recipe expert, and a second-grader had just outsmarted me with a bag of Oreos and instant pudding mix. The dirt cups we made that day — layers of crushed cookies, creamy chocolate pudding, and those wiggly gummy worms — disappeared faster than any elaborate cake I’d ever baked. Her mom texted me later: “She told everyone at school she’s a better cook than you.” And you know what? She kind of is.
These Kid-Approved Halloween Oreo Dirt Cups with Gummy Worms are the dessert that taught me to get out of my own way. No oven required. No fancy techniques. Just pure, ridiculous, crowd-pleasing fun that comes together in about five minutes flat. If you’ve ever spent three hours on a Halloween treat only to watch your kids eat the candy instead, maybe you’ve been there too. This one’s for us.
Why You’ll Love This Recipe
Let me tell you why these little cups of chocolatey goodness have become my secret weapon for every Halloween party, school event, and “I need a dessert right now” emergency.
- Truly 5 Minutes: I timed myself last week. From opening the pudding box to sticking in the last gummy worm, it took me four minutes and thirty-seven seconds. That’s faster than finding your car keys.
- No Oven Required: During October, when the kitchen is already chaos central, not having to preheat anything feels like a genuine victory. Your counters stay clean, your kids stay entertained, and you stay sane.
- Budget-Friendly Magic: A box of pudding, a pack of Oreos, some gummy worms, and milk. That’s it. For under ten dollars, you can make a dozen of these — try doing that with a bakery cake.
- Picky Eater Approved: My nephew refuses to eat anything that looks like it came from the ground. He devours these. Something about the “dirt” and “worms” concept makes it feel like a game instead of a snack.
- Make-Ahead Friendly: You can assemble these the morning of your party, or even the night before. The cookies soften slightly into something that tastes like a real crust, and the flavors just get better.
What makes these dirt cups different from every other version floating around the internet? It’s the texture. Most recipes leave the Oreo crumbs too fine, and you end up with something that tastes like dusty pudding. I leave some chunks — small pebbles, if you will — so every bite has that satisfying crunch against the silky pudding. Plus, I use whole milk instead of skim, because let’s face it, Halloween is not the time to be counting calories. This is comfort food at its most honest: chocolate pudding that tastes like childhood, cookies that crumble just right, and gummy worms that wiggle their way into everyone’s heart.
What Ingredients You Will Need
This recipe uses the simplest ingredients you can imagine. I mean, you might already have everything except the gummy worms sitting in your pantry right now. Here’s what you’ll need and why each one matters.
For the Pudding Base:
- 1 box (3.9 oz) instant chocolate pudding mix — I use Jell-O brand because it sets up reliably every time. The instant kind is crucial here; cook-and-serve pudding won’t work because it needs to cool completely before layering.
- 2 cups cold whole milk — Whole milk gives you that rich, creamy texture that reminds you of school cafeteria pudding but way better. You can use 2% in a pinch, but skim will leave you with a thinner, less satisfying result.
For the “Dirt”:
- 1 family-size package (about 20 cookies) Oreo cookies — Regular Oreos work best. Double Stuf is fine too, but you’ll need to scrape off some of the cream filling before crushing them, or your “dirt” will be too greasy. Golden Oreos make a fun variation for sandy-looking dirt.
- Optional: 2 tablespoons melted butter — This is totally optional, but if you mix a little melted butter into your crushed Oreos, it helps the cookie layer hold together more like a traditional crust. I skip it half the time honestly.
For the Decoration:
- 1 bag gummy worms (about 20-24 worms) — Get the sour ones if you want a tangy contrast to the sweet pudding. My kids prefer the regular ones. Trolli brand has the best texture — they stay chewy without getting rock hard in the fridge.
- Optional: Halloween sprinkles, candy eyeballs, or crushed candy corn — These are pure fun. I add candy eyeballs to make the worms look like they’re peeking out of the dirt. My niece calls them “surveillance worms.”
Ingredient Tips from My Kitchen:
I learned the hard way that not all Oreos are created equal. The generic chocolate sandwich cookies? They don’t crush the same way. They turn into a weird paste instead of a crumbly dirt texture. Stick with name-brand Oreos for this one — it makes a real difference in the final texture. Also, check your pudding mix expiration date. I once grabbed a box that was six months past date, and the pudding never set. We had chocolate soup with worms floating in it. Not my finest moment.
For the milk, let it come to room temperature for about ten minutes before mixing. Cold milk straight from the fridge can make the pudding clumpy. I know that sounds counterintuitive since the box says cold milk, but trust me on this one. Room temperature milk blends smoother and sets up faster.
Equipment Needed
You don’t need a fancy kitchen for these dirt cups. Here’s what you’ll actually use:
- 6-8 small clear cups or jars — Clear is key here. The whole point is seeing those layers of dark “dirt” and the worms poking through. I use 8-ounce plastic cups from the party supply store, but mason jars work beautifully too. My favorite are those little glass dessert cups from IKEA — they cost like a dollar each and make everything look fancy.
- A zip-top bag and rolling pin (or food processor) — For crushing the Oreos. I prefer the bag method because it’s more fun and lets the kids help. Plus, you can control the texture better. If you use a food processor, pulse it — don’t let it run, or you’ll end up with Oreo dust.
- A medium mixing bowl and whisk — For the pudding. A whisk works better than a spoon because it breaks up any lumps instantly.
- A small spoon or piping bag — For layering. A piping bag makes it look neat, but honestly, a spoon works just fine. We’re going for spooky, not perfect.
- A measuring cup — For the milk. Use a liquid measuring cup with a spout for easier pouring.
I bought a set of reusable plastic cups with Halloween lids from Target last year, and they’ve paid for themselves already. They’re dishwasher safe, and the lids mean I can stack them in the fridge without worrying about anything spilling. If you’re making these for a classroom party, those little 5-ounce paper cups work great too — just don’t fill them all the way to the top.
Preparation Method
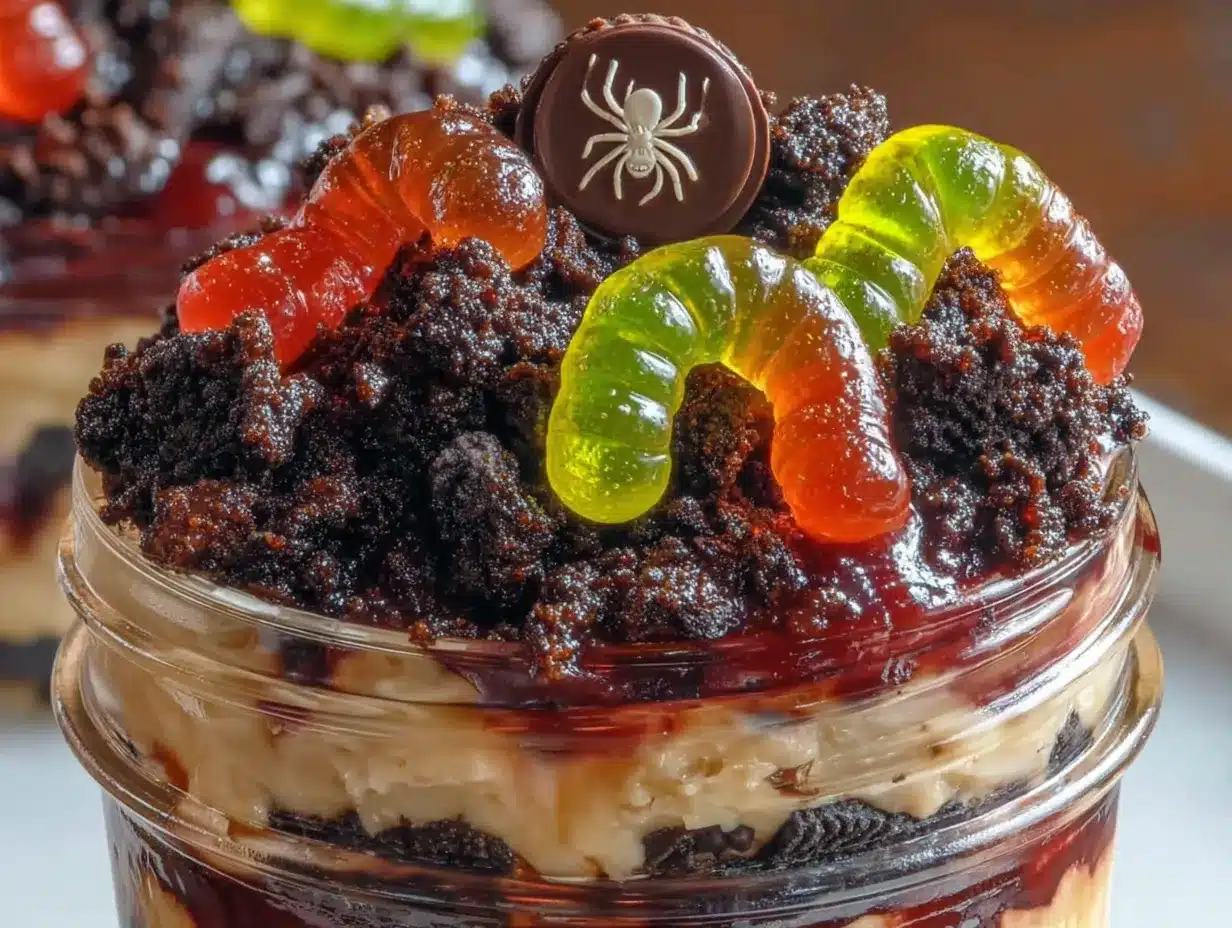
Alright, let’s make some dirt cups. I’ll walk you through every step, including the little tricks I’ve picked up from making these about fifty times.
Step 1: Crush the Oreos (2 minutes)
Place your Oreos in a large zip-top bag. Seal it, squeezing out as much air as possible. Now go to town with a rolling pin — or your hands, or a heavy pan, whatever feels right. You want a mix of fine crumbs and small pebbles. Think of actual garden soil: some parts are dusty, some parts are chunky. If you’re using a food processor, pulse about 8-10 times, then check the texture. Transfer your “dirt” to a shallow bowl.
My tip: Set aside about 2 tablespoons of the finer crumbs for the very top layer. It makes the final presentation look more like real dirt.
Step 2: Make the Pudding (3 minutes)
Pour the pudding mix into your mixing bowl. Add the 2 cups of milk. Whisk vigorously for about 2 minutes — set a timer if you need to. The mixture will start out lumpy, then smooth out, then thicken. You’ll know it’s ready when it holds a ribbon shape when you lift the whisk. Let it sit for 5 minutes to fully set. This is important: don’t skip the resting time, or your layers will bleed together.
Warning: If your pudding doesn’t thicken after 5 minutes, your milk might be too cold, or your pudding mix might be expired. I’ve been there. Just add another tablespoon of mix and whisk again.
Step 3: Layer the Cups (3 minutes)
Spoon about 2 tablespoons of crushed Oreos into the bottom of each cup. Press down lightly with the back of your spoon — this creates a stable base. Next, add a layer of pudding. Fill each cup about halfway. If you’re using a piping bag, snip the tip and pipe the pudding in a spiral to keep it even. If you’re using a spoon, just dollop it in and tap the cup on the counter to settle it.
Sensory cue: The pudding should be thick enough that it doesn’t immediately run down the sides of the cup. If it’s too runny, your layers will look muddy instead of distinct.
Step 4: Add the Worms (1 minute)
Take 2-3 gummy worms and press them into the pudding layer so they’re standing up, like they’re crawling out of the dirt. Let the top halves stick out. This is where you can get creative — have some worms fully submerged, some peeking out, some draped over the edge of the cup.
My personal touch: I cut one worm in half and press the pieces into the sides of the cup so it looks like they’re tunneling through the dirt.
Step 5: Top with More Dirt (1 minute)
Spoon another layer of crushed Oreos over the pudding, covering the worms’ bodies but leaving their heads poking out. Use that reserved fine crumb for the very top to create a smooth, soil-like finish. If you’re adding candy eyeballs or sprinkles, now’s the time. Press them gently into the cookie crumbs so they stay put.
Step 6: Chill and Serve (optional, 30 minutes)
You can serve these immediately if you want — they’re delicious right away. But if you refrigerate them for 30 minutes, something magical happens. The Oreo crumbs absorb a tiny bit of moisture from the pudding and soften into something that tastes like a real cookie crust. The flavors meld together. The worms get a little firmer. It’s worth the wait.
Pro tip: If you’re making these for a party, assemble them in the morning and keep them in the fridge. The texture is perfect after 4-6 hours, and they’ll hold up beautifully for up to 24 hours.
Cooking Tips & Techniques
I’ve made these dirt cups at least thirty times — for Halloween parties, classroom celebrations, birthday sleepovers, and even a “just because” Tuesday. Here’s everything I’ve learned the hard way so you don’t have to.
The Oreo Crushing Method Matters:
I used to crush Oreos in a food processor until they were basically powder. Big mistake. The pudding turned into gray mud, and the texture was one-note and boring. Now I use the bag method and leave some chunks. You want pieces that are about the size of small peas mixed with finer crumbs. That contrast between smooth pudding and crunchy cookie is what makes these cups addictive.
Don’t Overmix the Pudding:
I know the box says whisk for 2 minutes, but I’ve found that 90 seconds of vigorous whisking followed by a 5-minute rest works better. Overmixing incorporates too much air, and your pudding ends up with bubbles that look weird when you layer it. Plus, the bubbles can cause the cookie crumbs to sink in unevenly.
The Temperature Trick:
Cold pudding straight from the fridge is too stiff to layer neatly. Warm pudding is too runny. The sweet spot is room temperature pudding that’s been set for about 10 minutes. It should be thick enough to hold its shape when spooned but soft enough to spread easily. If your pudding is too cold, let it sit on the counter for 15 minutes before assembling.
Keep the Worms Happy:
Gummy worms get hard and chewy if they sit in the fridge for too long. If you’re making these more than 6 hours ahead, store the worms separately and add them just before serving. I learned this the hard way when I made cups the night before a party, and the worms turned into gummy rocks. Nobody wants to bite into a rock-hard worm.
The Mess Factor:
These are messy to eat. That’s part of the fun. But if you’re serving them at a party where people are wearing nice clothes, consider using cups with lids or serving them with a small spoon and a napkin. I once watched a kid try to eat one with a fork and end up with chocolate pudding all over his white shirt. His mom was not amused.
Variations & Adaptations
Once you master the basic dirt cup, the possibilities are endless. Here are some variations I’ve tried and loved.
Dairy-Free Version:
Use almond milk or oat milk instead of whole milk. The texture will be slightly thinner, so add an extra tablespoon of pudding mix to help it set. For the Oreos, check the label — original Oreos are actually dairy-free, which surprised me when I first found out. Use dairy-free whipped topping if you want that extra layer.
Peanut Butter Dirt Cups:
Add a tablespoon of creamy peanut butter to the pudding mix before whisking. It dissolves into the milk and creates a Reese’s-like flavor that pairs beautifully with the chocolate. My nephew calls these “peanut butter mud cups.” Just make sure no one has peanut allergies before serving.
Spooky Spider Version:
Instead of gummy worms, use candy eyeballs and black licorice strings to create spiders crawling out of the dirt. Press four licorice strings into each cup for legs, then place a candy eyeball in the center. My kids went absolutely wild for these last Halloween.
Pumpkin Patch Dirt Cups:
Use orange-colored pudding (butterscotch or vanilla with orange food coloring) and green gummy worms. Top with a small candy pumpkin. It looks like a tiny pumpkin patch in a cup. I made these for a fall harvest party, and they were gone in ten minutes.
Gluten-Free Option:
Use gluten-free chocolate sandwich cookies — there are several good brands now. The texture is slightly different, but the flavor is almost identical. Just make sure your pudding mix is also gluten-free; most are, but always check the label.
My Personal Favorite Variation:
I layer in some chocolate mousse between the pudding and the cookie crumbs. It adds a lighter, airier texture that contrasts with the dense pudding. It’s a little extra work, but for a Halloween party where I want to impress, it’s totally worth it. Just fold some melted chocolate into whipped cream and layer it in. Divine.
Serving & Storage Suggestions
These dirt cups are at their best when served cold, straight from the fridge. The contrast between the cool, creamy pudding and the crunchy cookie crumbs is absolutely perfect. Here’s how to serve and store them like a pro.
Serving Temperature:
Pull them out of the fridge about 10 minutes before serving. This takes the chill off just enough that the pudding softens slightly and the flavors open up. If you serve them ice-cold, the pudding can taste a bit muted. Room temperature pudding is where the chocolate really shines.
Presentation Ideas:
Arrange the cups on a black platter or a tray lined with fake spiderwebs. Scatter a few extra gummy worms around the base of the cups for a creepy-crawly effect. If you’re feeling extra festive, add a small plastic spider to each cup. My kids fight over who gets the spider with the biggest eyes.
What to Serve With Them:
These are rich enough to stand alone, but they pair beautifully with a glass of cold milk or a scoop of vanilla ice cream on the side. For a Halloween party spread, serve them alongside other no-bake treats like rice krispie treats shaped like pumpkins or simple sugar cookies decorated with orange icing.
Storage Instructions:
Cover each cup with plastic wrap or a lid and store in the refrigerator for up to 3 days. The texture changes over time — the cookies get softer, the pudding firms up — but the flavor stays great. I actually prefer them on day two, when everything has melded together into a cohesive, almost cheesecake-like texture.
Freezer Note:
I don’t recommend freezing these. The pudding gets icy and grainy, and the gummy worms turn into rock-hard candy. If you need to make them way ahead, prepare the components separately — crush the Oreos, make the pudding, store the worms — and assemble the day you plan to serve them.
Reheating (If You Must):
Let them sit at room temperature for 15-20 minutes. Don’t microwave them — the pudding will separate and the worms will melt into a sticky mess. Trust me, I tried it once. It was not pretty.
Nutritional Information & Benefits
Let’s be real: these dirt cups are a treat, not a health food. But I believe in knowing what you’re eating so you can enjoy it without guilt. Here’s the breakdown per serving (based on 8 servings).
| Nutrient | Amount Per Serving |
|---|---|
| Calories | 285 |
| Total Fat | 12g |
| Saturated Fat | 5g |
| Cholesterol | 15mg |
| Sodium | 320mg |
| Total Carbohydrates | 42g |
| Dietary Fiber | 2g |
| Sugars | 28g |
| Protein | 5g |
| Calcium | 120mg |
Health Highlights:
The milk provides a decent amount of calcium and vitamin D, which is good for bone health. The Oreos contain a small amount of iron from the enriched flour. The gummy worms? Well, they’re made from gelatin, which is a source of protein — but let’s not pretend we’re eating them for the protein.
Dietary Considerations:
This recipe contains dairy (milk) and gluten (Oreos). It can be made dairy-free with plant-based milk and gluten-free with alternative cookies. It’s not suitable for vegans due to the milk and gelatin in the gummy worms, though vegan alternatives exist for both.
My Wellness Perspective:
Halloween is one day of the year. I say enjoy the dirt cups, savor every bite, and don’t stress about the sugar content. Life is about balance, and sometimes balance means eating chocolate pudding with gummy worms for dessert. Your kids will remember the fun, not the calories.
Conclusion
These Kid-Approved Halloween Oreo Dirt Cups with Gummy Worms are more than just a dessert — they’re a memory in the making. I still think about that afternoon with my niece, covered in cookie dust, laughing at how simple something so delicious could be. She was right all along. Sometimes the best recipes are the ones that don’t try to be anything fancy.
I encourage you to make these your own. Swap the worms for spiders. Use different pudding flavors. Let your kids go wild with the decorations. The beauty of this recipe is that it’s impossible to mess up — and even if you do, it’s still chocolate pudding and cookies, which is always a win.
I’d love to hear how your dirt cups turn out. Drop a comment below and tell me what variations you tried. Did your kids love them? Did you add something unexpected? Share a photo on social media and tag me — I want to see your creepy-crawly creations. Happy Halloween, and happy eating!
Frequently Asked Questions
Can I make these dirt cups ahead of time for a party?
Absolutely! You can assemble them up to 24 hours in advance. Just wait to add the gummy worms until about an hour before serving, or they’ll get too hard. The cookie crumbs soften nicely overnight, which actually improves the texture.
Can I use homemade pudding instead of instant?
You can, but it changes the texture significantly. Homemade pudding is thinner and takes longer to set. If you go that route, cook it until it’s very thick, then chill it completely before layering. I’ve done it, and it’s good — just not as quick and easy.
How many servings does this recipe make?
This recipe makes 6 to 8 servings, depending on the size of your cups. I use 8-ounce cups and get exactly 8 servings. If you’re using smaller cups, you might get 10 or 12. For a crowd, just double the recipe — it scales perfectly.
Can I use low-fat milk or non-dairy milk?
Yes, but the texture will be thinner. Low-fat milk works fine, just expect a slightly less creamy result. For non-dairy milk, oat milk is my top pick because it’s thickest. Almond milk works but gives a thinner pudding. Add an extra tablespoon of pudding mix to help it set.
How do I keep the gummy worms from sinking?
Press them into the pudding layer after it’s had a few minutes to set. If the pudding is too runny, the worms will sink to the bottom. Let the pudding rest for 5 minutes after mixing, then layer it and add the worms immediately. The slight set will hold them in place.
Pin This Recipe!
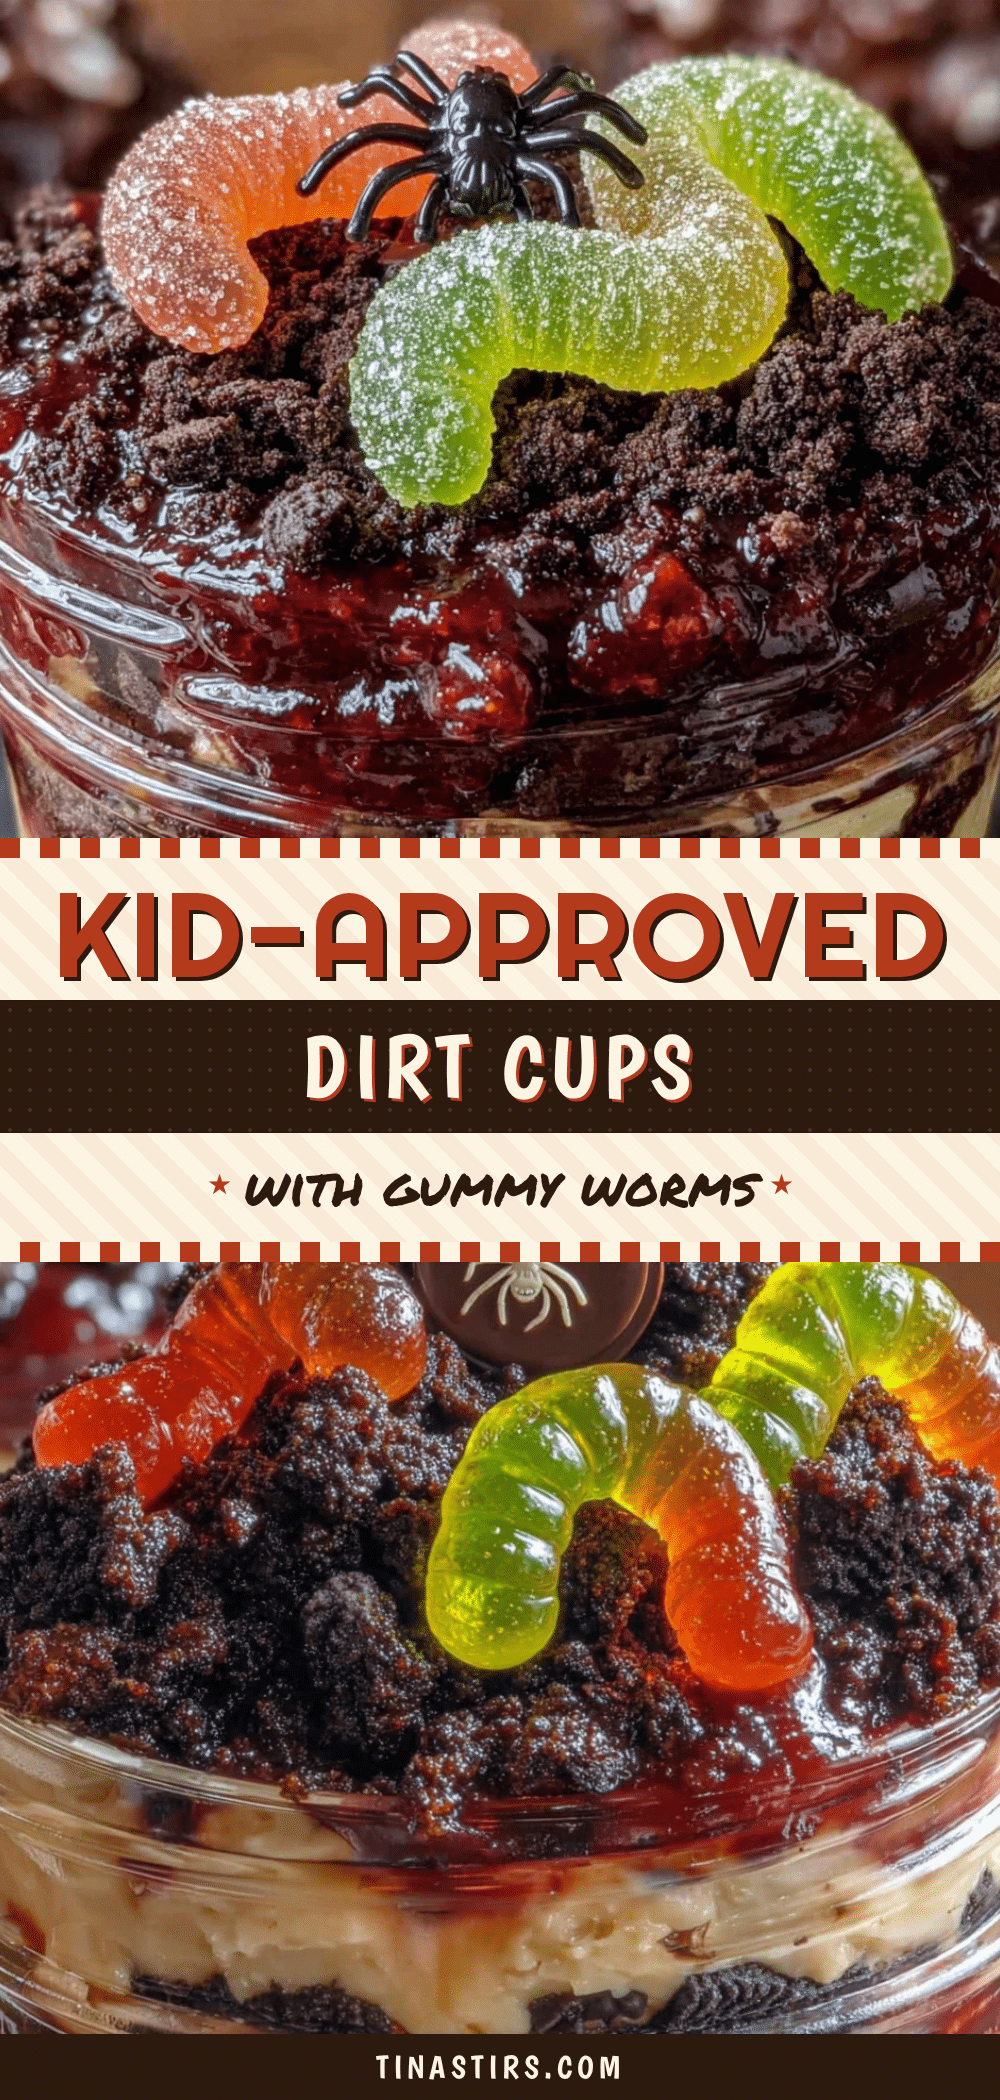
Kid-Approved Halloween Oreo Dirt Cups: Easy 5-Minute Dessert
These no-bake Halloween Oreo Dirt Cups with Gummy Worms come together in just 5 minutes. Layers of creamy chocolate pudding, crushed Oreo ‘dirt,’ and wiggly gummy worms make a fun, crowd-pleasing treat that kids love to help make.
- Prep Time: 5 minutes
- Cook Time: 0 minutes
- Total Time: 5 minutes
- Yield: 8 servings 1x
- Category: Dessert
- Cuisine: American
Ingredients
- 1 box (3.9 oz) instant chocolate pudding mix
- 2 cups cold whole milk
- 1 family-size package (about 20 cookies) Oreo cookies
- 2 tablespoons melted butter (optional)
- 1 bag gummy worms (about 20–24 worms)
- Halloween sprinkles, candy eyeballs, or crushed candy corn (optional)
Instructions
- Crush the Oreos: Place Oreos in a large zip-top bag, seal, and crush with a rolling pin until you have a mix of fine crumbs and small pebbles. Set aside 2 tablespoons of fine crumbs for the top.
- Make the pudding: In a medium bowl, whisk together pudding mix and milk for about 2 minutes until thickened. Let rest for 5 minutes to fully set.
- Layer the cups: Spoon about 2 tablespoons of crushed Oreos into the bottom of each cup. Press down lightly. Add a layer of pudding, filling each cup about halfway.
- Add the worms: Press 2-3 gummy worms into the pudding layer so they stand up, with the top halves sticking out.
- Top with more dirt: Spoon another layer of crushed Oreos over the pudding, covering the worms’ bodies but leaving their heads exposed. Sprinkle reserved fine crumbs on top. Add candy eyeballs or sprinkles if desired.
- Chill and serve: Serve immediately or refrigerate for 30 minutes to allow the flavors to meld. For best texture, refrigerate for 4-6 hours or up to 24 hours.
Notes
For best texture, use whole milk and let it come to room temperature for 10 minutes before mixing. If pudding doesn’t thicken, add an extra tablespoon of mix. Store worms separately if making more than 6 hours ahead to prevent them from hardening. These cups can be assembled up to 24 hours in advance.
Nutrition
- Serving Size: 1 cup
- Calories: 285
- Sugar: 28
- Sodium: 320
- Fat: 12
- Saturated Fat: 5
- Carbohydrates: 42
- Fiber: 2
- Protein: 5
Keywords: Halloween dessert, dirt cups, Oreo dirt cups, no-bake dessert, kid-friendly dessert, easy Halloween treat, gummy worms, chocolate pudding


